


BigRiverLeather
-
Content Count
320 -
Joined
-
Last visited
Posts posted by BigRiverLeather
-
-
Well they do make nice holsters, but a little pricey. Some of their add content is reminisent of the old Herter's catalogs.
Agreed, they do make a quality product, but to use terms like "hate" and saying that proven designs "just don't work" is not very savy. For instance, to claim that anyone that uses leather strips for their sight cnnels is using a poor design because the slide will rub on the thread and wear it out. He should know better. Any reputable maker is going to put a stitching groove in those strips. Ahh, whatever. It just seemed tacky. I've been in sales for 20 years and my philosophy is brag up your product, show the benefits and let the customer make his decisions.
Sorry I blew up :D
-
At first I said "No way am I contributing to this thread". Ah what the heck, I'll play.
From about this time last year -
A tuckable for my P220 carry with an aggressive cant, before finish.

I finished this one up for a customer's P228 this weekend. This is the plain one of the two he ordered, the other is the same but for his 1911, Mahogany with Elephant trim, his BBQ rig

-
Wow. Suddenly I've lost some respect for High Noon.
-
It's actually quite simple once you realize what to do. If you don't have kydex yet, you can get it from www.knifekits .com. .125 is the thickness you want. Cut your strips 3/4" - 1" wide, depending on how thick you wnat them. Thicker will give more strength. I cut most of mine 5 1/2" long. Get a heat gun or toaster oven, I use a heat gun as you can continue to heat it and work on one section at a time. place your already edge smoothed kydex strip on the edge of a table, so it sticks out just enought to make an 1/8" bend on the end to go around the bottom of your belt. Move the heat gun back and forth for about 30 seconds (just over the end of the strip) and bend it 90 degrees over the edge of the table. Then measure up 1 5/8" (you will want enough to clear the top of your pants and get down below the bottom edge of the belt) and that is where your next bend WILL START. Use a piece of 1.5" wide wood, like a piece of lathe or something, to make your bend around. Move the heat gun across this area until you can bend it all the way around the piece of lathe, making sure the two edges line up and it is folded square. It might help to have your first small bend covered with a piece of cloth or something to prevent the heat gun from heating this up again. If it does, it will straighten back out. You should be good to go now, just drill your holes.
If you are going to make several of these, it will pay to make a jig for these bends.
To secure them to the holster, use #6 T posts available at any hardware store. sandwich it between the two layers of leather before gluing, or you can go all the way through, but that is not as clean. If sandwiching the Tpost, use 3/8" button head cap screws through a # 6 finish washer to secure the clip. Or, use a 1/2" screw and make a smwll leather washer to put between the clip and the leather to leave a small gap making it easier to tuck your shirt in if you plan to do that. Of course going all the way through from the backside you will need longer screws.
-
OK! Did the smart thing. Ordered direct from Rings. Nice people no hassesl. Have them in six days.
Good Move. I only order direct from John. I'll gladly pay the extra few dollars for service and knowing it is coming straight from them in a timely fashion. Their shipping can be higher too, but in the long run, it turns out to be insignificant.
Duncans outdoor is my other go to place for harder to find items, or if I'm looking to combine shipping and they have an oddball item.
-
That looks very nice! I held some small hornback the other day that I might get 2 holsters out of plus some trim, but at $100 a crack I talked myself into waiting.
What weight did you use underneath?
Did you hand bone the details or put it in a press?
-
.090 thickness of kydex is too thin for clips. You need to use the .125.
My personal experiences with Garret Industries clips were less than stellar. His clips had a failure rate of 30-35%. Too high in my opinion.
We now make our own, using the same basic design that we had GI making, and have had a zero failure rate. The radius of the bend at the top of the clip is critical towards the durability of the clip. We've made over 500 sets in the last 6 months. We have the basic shape cut from the sheet of kydex by cnc machine, to include the holes for screw placement. We then clean the edges up and bend them with a heat gun on a custom jig I had made. I've saved over $2500 in costs for those 500+ sets in comparison to what I was paying GI.
Thanks for that info. What was the typical time frame for failure on the GI clips?
-
Very nice holster. It's a shame that it has to stay concealed! Wish we had C.C. here in Wisconsin! Maybe when we get rid of our present governor...
Thanks! Yeah, it's my little secret

I'm glad to see Doyle go down the road. CC has been close a couple of times, but when he veto'd it, they came up short of an override by one stinkin vote. CC would be good for business for me here in WI :D
-
Very nice. Does the elephant trim add any stiffness to the holster opening or is it purely decorative? I do like the texture it has.
The elephant is pretty stout, but I don't know if it actually holds any form by itself. This on was backed with 4-5 oz veg that I skived and sanded the edges down to make the elephant thinner where it meets up with the holster. To answer your question, yes, the opening is stiffer for sure.
The holster was made from 7-8oz. From now on I will use 8-9 oz on the back side and 7-8 on the top to help hold the form on the back as well. It formed well, but flexes more than I would like, but I'm VERY picky.
-
I used to make my own and still do on occasion if I need something special, but for my production holsters I've recently been getting mine from Garrett Industries.
-
It hit 80 degrees yesterday here in the Twin Cities. No more sweathirts and jackets to cover my CCW in the office. I'm back to button down shirts and polo shirts for the most part and have to tuck them in.
I haven't made myself a nice carry rig in quite a while as busy as I've been with all the orders so I figured I needed a nice new tuckable and I chose My P220 Carry SAO to be the lucky recipient.
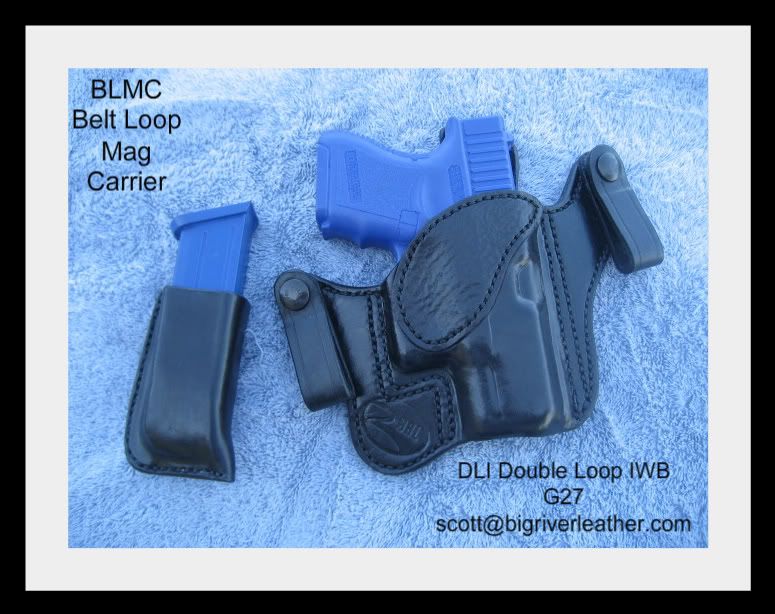
I just got it done last night except I still need to make up some new Velcro clips for my velcro lined belt from The Beltman but the standard clips will do for today.
Comment, questions and suggestions are welcome.


She's already broke in to a very comfortable fit after only a couple of hours this morning. If only I wasn't so self concious about the standard clips. My V-Clips have me spoiled!
-
Thanks Denster. Yeah, I wish I would have done that too. This was a free upgrade for an LEO. I already had the loops made up and I wanted to ship it ASAP.
-
Nice work!
If I may, how do mark your stitching holes when working with that type of trim?
I used a stitching groover and I had planned to just mark them with a 4 prong (and single) diamond punch from Tandy. I thought that the 4 prong punch might make to big of holes for the shark but it actually worked very well. I did the same with some elephant but that was much tougher.
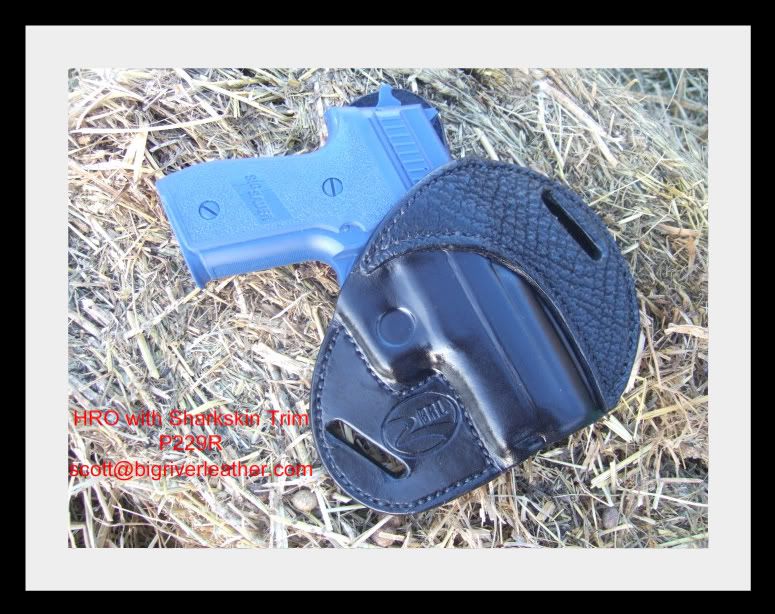
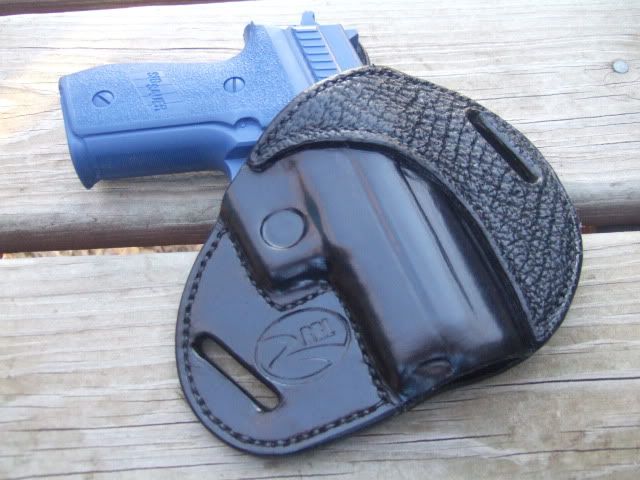
Looks good. Check out the fresh-water shark that ostrich market has (they refer to it as smooth shark). I have 5 holsters requested with it - all from the same person... I'm thinking of making a belt for my daughter with it as well. Nothing wrong with a 4-year-old having a $100+ belt, right?
That sounds interesting. Do you have any pictures of the freshwater shark, on a holster maybe?
Here is my latest with shark, an IWB I did for a customer. I want one! This was really really comfortable too.
-
too many newcomers are moving in and the overall humidity is climbing slowly.Whiskey Tang Foxtrot???
Yeah, heat scares me. I've used my oven a vew times. It's minimum is 170 like Lobo said. I put it in cool, let the oven warm up then shut it off when it gets to temp, usually about 25 minutes total. Frankly, I've seen little difference when doing this so I don't think it is worth the risk should I get side tracked by an old episode of Baywatch :D
I like the heat box idea, but I can't say I'm that amitious yet.
-
Does Crossbreed sell clips? Who does sell IWB type clips?
SkipJ
I used to make my own, but I've decided to get them from Garret industries. He'll give you a good discount if you by in quantity (I bought a little better than a dozen and a paddle) They list for $8 less his discount.
-
Those are awesome! That is a nice grain on that elephant too. your stitching is nice and close to the edge.
What weight leather did you use underneath?
-
+1 on the dowel. I've even been using square stock, groove cut for the front sight. With wide packaging tape I tape it down in the front and rear. I've yet to have one move on me.
-
I'm not sure what a Glock has to do with it
I'll take that to mean you have not made a conceal carry holster for a Glock. Their blocky shap and thinckness just seems to throw everything off whe you try to use a tried and true pattern that works for a 1911 or Sig or any other "normal" gun :D
If you have made the for a Glock, please don't take any offense, I just saw an opportunity to belittle the asthetics of a Glock again
-
Just finished this one up tonight. Learned a few things, like I need one for myself!
-
i'm hoping someone can help me. i am trying to find the plastic/nylon rivet type protectors that go into the back side of the line 24 or dot snaps on the holster thumb breaks. it acts as a protectant keeping the metal of the snap from rubbing against the gun then snapped. anyone know what these are called and where i can find some? thanksTonyI've been told that you can get them at auto part stores. They are the rivets that are used for interior panels on cars, you know, the ones that always break when I try to pop off the door panel
You have to trim the post on them to get them to fit I guess. I've not yet tried it, but another holster maker told me that.
-
SOAB! There you go raising the bar again. That is super sharp!
-
Congrats on the new shop Lobo. You are a brave man starting an apprentice. I'm to much of a control freak for that I think.
I know what you mean about driving the wife nuts. Last night she was grilling me about the black dye splatter that was on the dining room table, her cook book, the cat's bed, the mail etc. I had a brush flip out of the dye the other day and left a splatter trail like on CSI Miami across the dining room table. I reminded her that it was her idea for me to work at the dining room table, gotta take the good with the bad

-
That was not me who started the "When I try new things I always use a Glock" so I can't help you on your finish questions etc. That is a good rule of thumb though. I have some more Glock holsters coming up and my pile of "Damnit, well I can use that cutout pattern on some smaller gun in the future" leather is getting larger than I care to admit.
The line i was referring to was the line just above the trigger guard (the one that you line crossed over the stitching groove
). I use a press so it molds it pretty good in that area, but before I had the press and even still with it I use the back end of my stitching groover I use from Tandy to bone that type of stuff in. It is soft plastic and does not leave a groove or much of an impression. Then again, That's just me, it's not like it is a problem area.

Yeah, the more I look at it the more I like the hook on the corner. I'm doing an IWB that has a similar shape and had that same type of corner. the one I just finsished has always had a sharp corner like that and on this last one I rounded it off a bit just so it would not dig in. I did not know if that was an issue or if yours would ever do that, but that is why I do it, just in case. I'll post pics of that when I'm all done, hopefull tonight I'll have my kydex clips I ordered.
Regarding the molding, I agree, get it wet enough. That does not mean soak it, but it does mean hit it with more than a sponge. I run mine under water for about a 2 count (hot water), then let it case for a good 1/2 hour, put it in the press or do the major hand boning, then another 1/2 hour or so later I'll case the lines with a detailer. I just bout a molding tool from Tandy and my boning lines, like around the dust cover etc have improved greatly.
-
Very nice. The Glocks gave me a ew fits when I first made holsters for them too. Their Block frame and large trigger guard made my first holsters for them come up short.
It is hard to improve on that one, but since you asked, if it were mine -
Just to improve the flow of the very nice lines you have created, I would round off the edge of the holster under the grip where it turns downward rather than having a squared off edge. But, maybe this is the look you are going for.
The other thing I would do is with your black airbrushed edging I think it would blend better or look more finished if your edging was done in black so it would fade from the edge.
Just my .02, but again, that is some quality work.
EDIT: One more thing, I would loose the boning line just over the trigger
First Holster
in Gun Holsters, Rifle Slings and Knife Sheathes
Posted · Report reply
That is excellent work! Take a look at the "first and last hoslter" thread and you will feel pretty good about your work.
No pistols, that sucks!