Chris of WV
-
Posts
78 -
Joined
-
Last visited
Content Type
Profiles
Forums
Events
Blogs
Gallery
Store
Everything posted by Chris of WV
-
I'm still pretty new to leather myself, but I'm pretty sure you're talking about the quality of the hides... From the look of your chart, the percentage is the "useable" amount of the hide (which is not marred by scratches, scars, or brands) as well as the quality of the hide itself. Here in the USA, the only designations I've seen are A, B, and very rarely C. As for the TR, that normally stands for tannery run, which is a mixture of grade #1 and #2 (A and B, respectively), and it's kind of a "luck of the draw" type of thing. As for which is better, A is better than B, and B is better than C, and so on... Also 1 is better than 2, and 2 is better than 3. Basically it comes down to "you get what you pay for"... Hope I was able to help a little. Best Regards, Chris
-

How about Pictures of Your Workshops
Chris of WV replied to Jordan's topic in Leatherwork Conversation
Wow... I am in awe of some of the workbenches/spaces that I've seen in this thread thus far... I'm suddenly having dreams of building my own building and outfitting it with all the stuff I could ever use (and a bunch of stuff I never would)... But that's ok. For now, I'll just stick with the kitchen bar, since it's been working pretty well for me... Full Workspace - 1/2" Thick UHMW Cutting/Pounding Surface, Granite Slab for Carving/Stamping Bits and pieces container... Buckles, Thread, Needles, etc... Custom Skiving Knife, Strap Cutter, Custom Micarta Mallet, Tools Holder (UHMW), Stamps and more Stamps... My current stamp collection (which is steadily growing... I love finding the old steel craftool stamps on eBay, instead of the plated Taiwan stuff) Dyes, FInishes, Miscellany, Sharkskin, Snakeskin, etc... Under the table storage for leather scraps and pieces... Plus, I've got a dining room table that holds my rolled leather and other odds and ends... Too messy to take a pic of it though, lol... -Chris of WV -
Well, I will definitely have to give this a try... Thanks to both you and katsass for the information!
-
Hey TwinOaks, Do you mean Mop-n-Glo, like the regular floor cleaner? What can it do, and how do I apply it and finish it? Thanks, Chris
-
Hey Guys, Well, I used a toothbrush, and it definitely did remove some of the excess junk... Not all, mind you, but some. So, I'm going to get an actual shoe shine brush (or a stiffer toothbrush) and go to town on it... I also found some glycerin soap (which I had for another project) and used it to reburnish the edge, which made it a lot more smooth... Still not the prettiest, but it'll work, since it's just a personal belt for me... I did remember one thing I did differently this time... I cleaned the belt with some saddle soap (which may have been a mistake, come to think of it), and I'm wondering if that's what the majority of the residue is from... The more I use that stuff the less I want to, lol... But, I just found out today that I'm getting a little bonus on my paycheck this week, so that means I'll be able to afford some stuff... I know I'm going to order some Gum Tragacanth from Springfield, as well as some Leather Balm and Leather Sheen... Anything else you guys might reccomend?

-
Duh... Why didn't I think of that? I use a toothbrush to apply the Kiwi (when I'm using it to stain/polish), so why couldn't i use it to remove extra polish/get into small cracks? Thanks particle! Hey ferg, Actually, it's cheaper to buy from my buddy, who is three doors down from where I work, than to pay the $10+ shipping it costs to ship liquids... I may pay an extra dollar or two compared to somewhere like Springfield (where I actually have an annual gold membership) or Tandy, but I ultimately save on the shipping costs, since I can walk right over there. Plus, he's a small business (literally a little storefront on the corner) and I like giving him all the business I can... Unfortunately, the nearest Tandy store is 300 miles away... Not much help to me I'm afraid (although I may be visiting both the stores in Houston, TX next month when my girlfriend's family and I go there to sing at a campmeeting)... Best Regards to you Both, Chris of WV
-
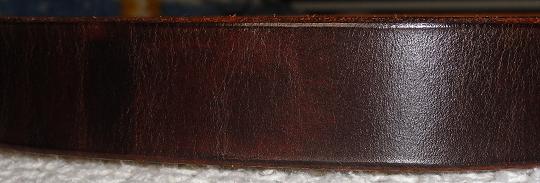
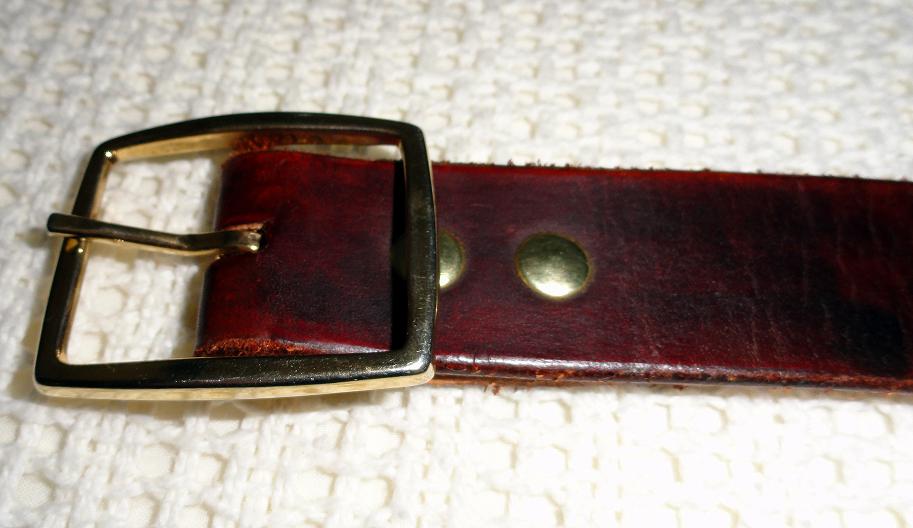
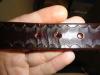
For starters, I understand the meaning of not having the "where with all" to buy more "stuff". What you need to understand is this. "You cannot make a silk purse from a sows ear". My advice probably won't help you much right now but I believe it would have been better if you simply left the belt unfinished, I have done that and am wearing an every day belt that I never finished. The leather isn't as pretty but it develops a patina that only unfinished leather has. Your treatment of the edges is all wrong. I again understand the problem. The edges would be better if simply left alone. Shoe polish has it's place, a belt is not it. You will be wearing the polish on your clothes. Until you are able to buy some of the correct supplies just consider what you have available, what it or they can do. Consider all possibilities and move on from there. ferg @ferg: I realize that I'm not going to be able to put out "awesome" leather products right now... Firstly, because I'm still a beginner; and secondly, because I don't have all the right materials... However, I do desire to learn how to do things better and in a way that is more professional and pleasing to the eyes... I have no problem leaving a belt "unfinished"... My mentor is actually wearing a belt that he made as an everyday belt and it's unfinished, and to be honest, I kind of like the coloring it has taken on. However, I'm trying to put more time into learning how to actually dye and finish the belts. As I mentioned, the dye looks fine, to be honest, and did until I put the belt on my body. The spaces in between the stamps are still decent as well, there's just a lot of residue around the stamp lines themselves. As an example, here are a couple pics of a belt without stamps that I made using the exact same method just two days ago: Sure, it's not perfect, but definitely a bit better than the one from last night... As for the shoe polish, the Kelly's (according to the shoe repairman who sold it to me, who's been in business for 30 years) does not have enough dye in it to stain. I tried it on a naked piece of leather, and while it did polish it, it did not stain it, other than to give it the appearance of baby-butt... However, it does give it a polish, and I used it on a belt I sold to another another customer (who I work with) and I have checked back with him over the last couple weeks and he says there has yet to be any rub-off onto his clothing. So, that's not a problem (thus far) in this instance... So, thanks for your advice ferg, but my first question has yet to be answered... So, I'll go ahead and ask, what's the best way to give a belt a glossy finish? Maybe I can get the shoe repair guy to add some of the fiebing's stuff to his next order for me, or see if he can get me any of the other stuff at a decent price...


-
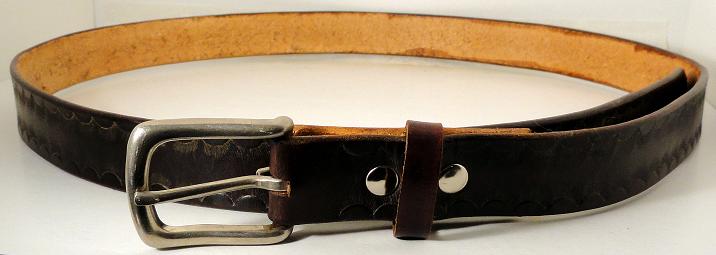
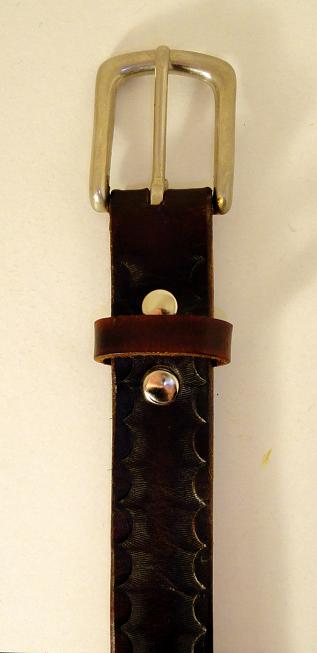
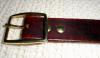
Well, here I am again, with another newbie question... I'm trying to finish up a stamped belt (made for myself) and I'm having a slight issue. Now, before I tell you the problem, I want to make you aware of one simple fact... I CANNOT AFFORD TO BUY ANYTHING ELSE AT THE MOMENT... Every time I've asked for help before, I've been told that I need to buy this that and the other, and while I truly do value the opinion of those who offered the advice, I just can't afford to purchase anything else at this time... So, maybe you guys can help me make do with what I've got? Ok, so here's the problem... I cut the strap, cased it, stamped it, let it dry, and then dyed it with Fiebing's Oil Dye (Dark Brown) applied with a sponge brush (because that's what I've got at the moment). I then finished the edges with water and a slicker (no, I don't have any trycanth gum, paraffin, or anything else right now). After letting it dry, I applied a coat of Kelly's polish and then buffed it off, burnishing the full-length belt at the same time. I then applied another coat of polish and buffed it out again, and the belt was almost shining. So, I tried it on. And this is what happened: So, I tried buffing it out (since I assumed, and am pretty sure, that it is just polish residue in the stamp cracks), and nothing happened... Some of it was removed, but definitely not as much as I had hoped for. If I keep buffing it (or buff it any harder), I'm afraid I'll start damaging the stamping. So, my questions are: 1.) How do I remove the residue without damaging the belt 2.) How do I prevent this from happening in the future (with the supplies I have on hand). Current Finishing Supplies: 1.) Kiwi Saddle Soap 2.) Kiwi Brown Shoe Polish/Dye 3.) Kelly's Brown Shoe Polish 4.) Fiebing's Dye, Medium Brown Thanks Guys! Best Regards, Chris of WV

-
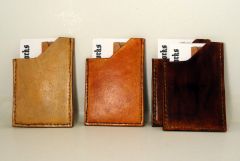
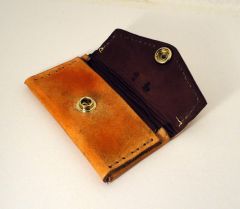
From the album: Davis Leatherworks
What do you do with small pieces of "junk" leather? Make small business card cases, of course! No, these aren't perfect. In fact, almost all of them have some sort of blemish, be it a scratch, or an un-tanned spot (at least I think that's what they are, might be scars too). Still, turned out ok.© © Davis Leatherworks, 2011
-
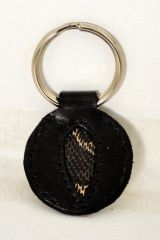
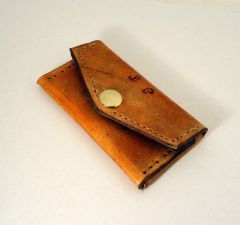
From the album: Davis Leatherworks
Simple black keyfob with a watersnake inlay... Not quite sure what happened with the dye, but some of it rubbed off... More practice is on the drawing board for the near future, lol...© © Davis Leatherworks, 2011
-
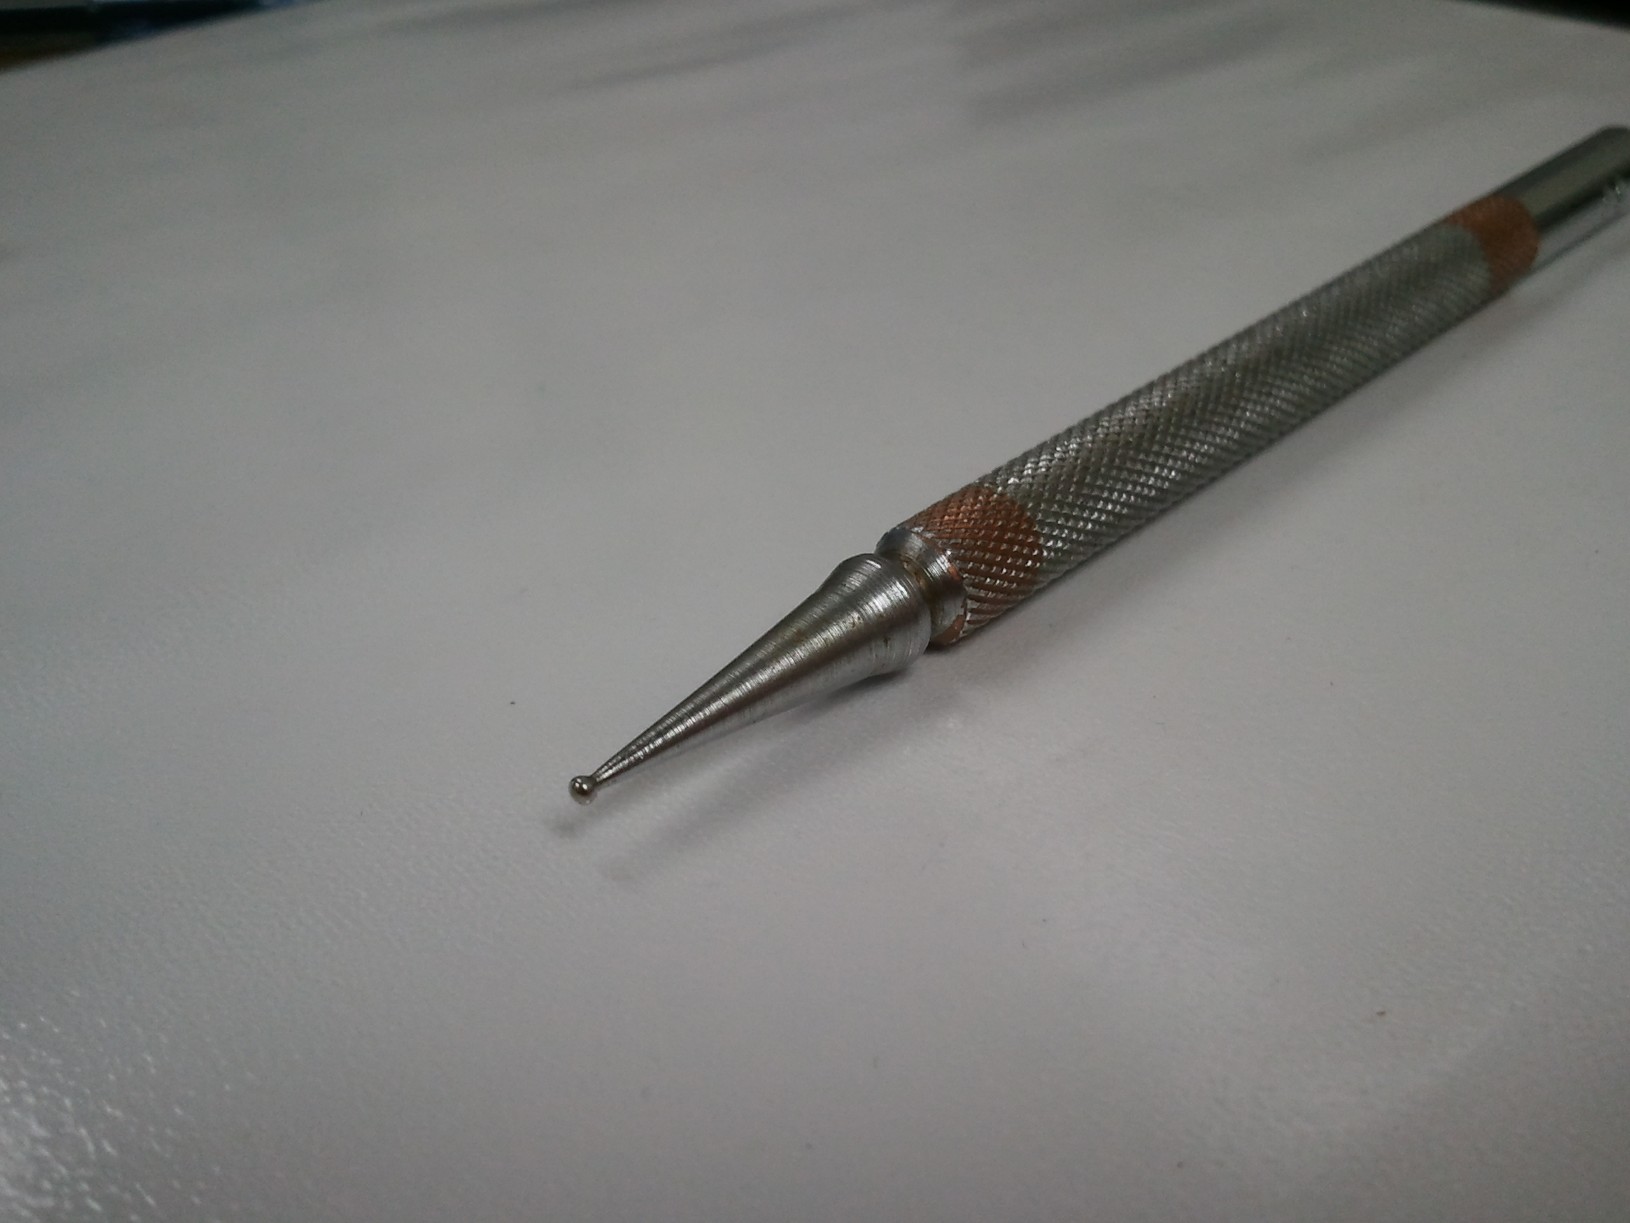
Makers Stamp (Sort-of)
Chris of WV commented on Chris of WV's gallery image in Our Leatherwork Galleries
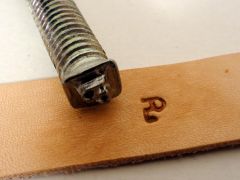 Not really... I used a dremel tool and several carving bits and made the stamp itself out of a domed bolt by cutting off the domed portion. In the leather tools section of the forum there is a humongous post on making custom tools, so you might check there for some ideas... Just remember to do anything like this IN REVERSE, lol...
 -
Thanks WyomingSlick! I am actually using your craftool "guide" as I purchase my stamps from eBay, in order to make sure I don't get too many duplicates, lol... I think I'm up to fifty-something now. Glad you like the profile pic too... I play the accordion, guitar, piano, banjo, and tin whistles with a celtic/bluegrass gospel group here in WV... Tons of fun! ^_^
-
Hmm, ok... Thanks a lot TigerPal and whinewine! I was looking at WyomingSlick's craftool stamp pages (which are awesome by the way) and the first number he had was a 60... I was thinking about buying a stylus, but I must admit that I like the look of this one enough to just use it! Something about it just "looks" sturdy...
-
Well, you could burnish them with a piece of canvas or other rough cloth, or you might be able to use one of the multi-sized slickers like the ones they sell at Tandy (http://www.tandyleatherfactory.com/en-usd/search/searchresults/8121-00.aspx)... Worked for me so far...
-
Leather Sheath For Bushcraf Knife
Chris of WV replied to mkleathers's topic in Gun Holsters, Rifle Slings and Knife Sheathes
Beautiful work! I must say that I'm insanely jealous of your skill, lol... -
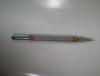
Anyone want to tell me what this stamp is for? I bought it on eBay, and it was listed as a discontinued Craftool 59 stamp. While I"m sure it's Craftool (early, since there's no letter designation), I'm almost thinking it's a stylus and not a stamp... Any ideas or suggestions?
-
Belts At An Outdoor Show
Chris of WV replied to JoelR's topic in Purses, Wallets, Belts and Miscellaneous Pocket Items
Maybe leave the tongue instead and make it to their size? Might be shorter than having to stitch and finish the buckle end. Then, you wouldn't need the electricity, just your punches and maybe some dye/ a burnisher to finish it off... -
Getting Leather Dye Off Hands?
Chris of WV replied to Chris of WV's topic in Leatherwork Conversation
Thanks guys! No denatured alcohol around or nail polish remover, but I know there's GoJo out in the shop... If it really won't come off, I might try a minute amount of methyl ethyl ketone (since it works on everything else, lol). Thanks again! -
I was just curious if any of you guys knew a good way to get Fiebing's SPirit Leather dyes off your hands? I was cleaning a bottle off (I had accidentally left it in the car and it somehow spilled/evaporated out/something or other) and got some on my hands... Any ideas or am I just out of luck? Edit: Btw, I do know that it will eventually wear off my hands, I was just wondering if there was a quicker way?
-
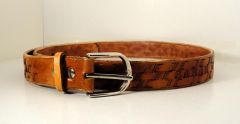
From the album: Davis Leatherworks
© © leatherworker.net
-
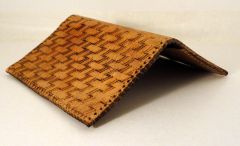
From the album: Davis Leatherworks
© © leatherworker.net
-
From the album: Davis Leatherworks
© © leatherworker.net
-

From the album: Davis Leatherworks
© © leatherworker.net
-
From the album: Davis Leatherworks
Well, this was originally supposed to be my initials (CD), but, being the dummy I am, I forgot to make it in reverse... Luckily, it works as a make-shift makers stamp, since the backwards impression is DL...© © leatherworker.net
-
From the album: Davis Leatherworks
© © leatherworker.net