PEU
-
Posts
24 -
Joined
-
Last visited
Content Type
Profiles
Forums
Events
Blogs
Gallery
Store
Everything posted by PEU
-
Today was stitching day and this problem drove me crazy, 40 sheaths and at least 10 when finishing the stitch, the needle broke the previous pass, a royal PITA. I can use some help Maybe if I dull the edges of the needle? Pablo
-
I'm using 200/25 with N.10/270 thread, I usually stitch three times toward the start of the sheath, invert and then go al the way around doing the same at the end. This is actually a good idea since I come from manual stitching with these needles. Will try the technique for sure, will need to wax the thread so its not a royal PITA to make it thru the needle eye LOL Pablo
-
To what detail I should pay attention? I'm nowhere near those speeds, as I'm stitching knife sheaths. Tried round needles but they leave an ugly hole, not as nice as the tripoint needles. Pablo
-
Hi, Im using Groz-Beckert 794D DYX3D TRI Point needles with N.10/270 thread and every now and then when backstitching to start or end a job the needle rips the stitch that was there in the new reentry to the same hole. Is there a way to avoid this? Thanks!
-
Help me find parts (Adler 204/Cobra Class 7 lookalike)
PEU replied to PEU's topic in Leather Sewing Machines
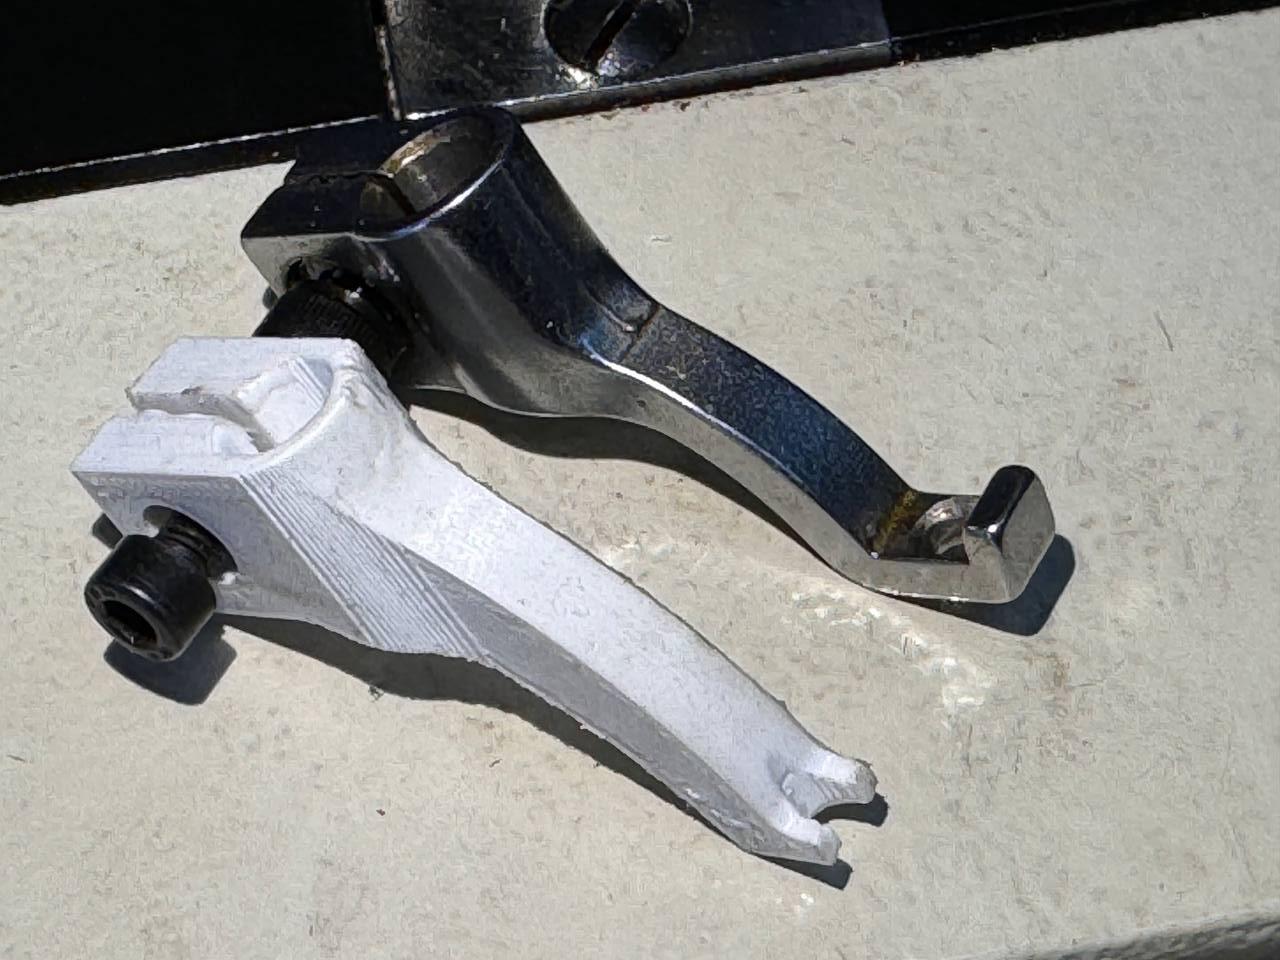
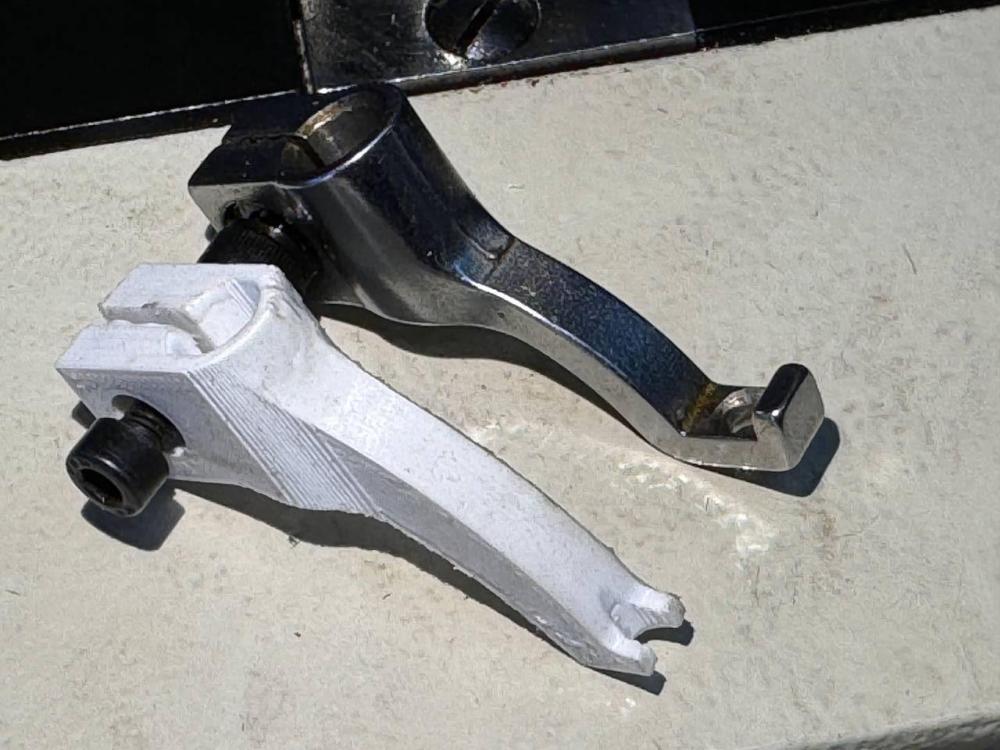
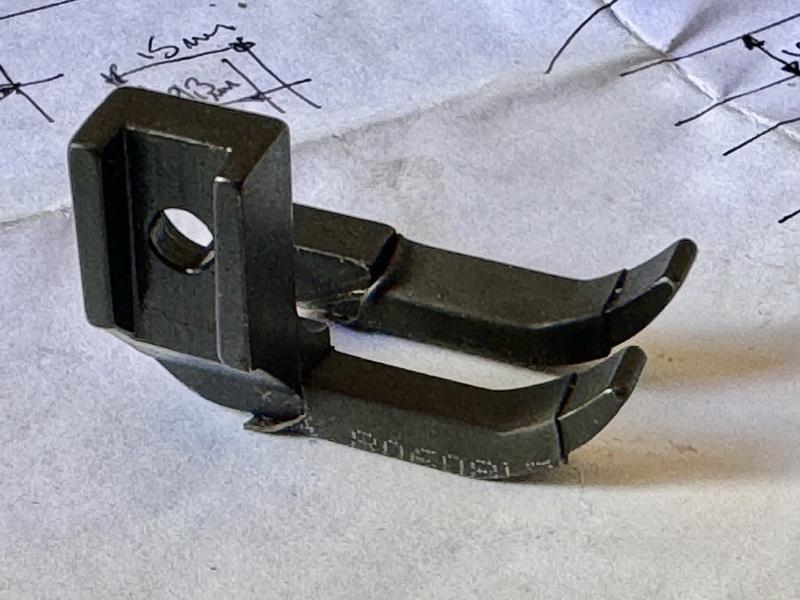
The magic of 3D print is that you can design a feature that with regular machining would be a nightmare. The arm has an inside hole 0.2mm wider than the 3mm rod I used. CA glued it and slide it in with a toothpick Pablo
-
Help me find parts (Adler 204/Cobra Class 7 lookalike)
PEU replied to PEU's topic in Leather Sewing Machines
Update: Could not find the part, so I made it! Inside the arm is a 3mm stainless rod to give it strength, its sewing fine! Now I need to make the open toe, pretty sure 3D print will not work due to is geometry. But at least now I can see what I'm sewing and without touching the OEM part. Pablo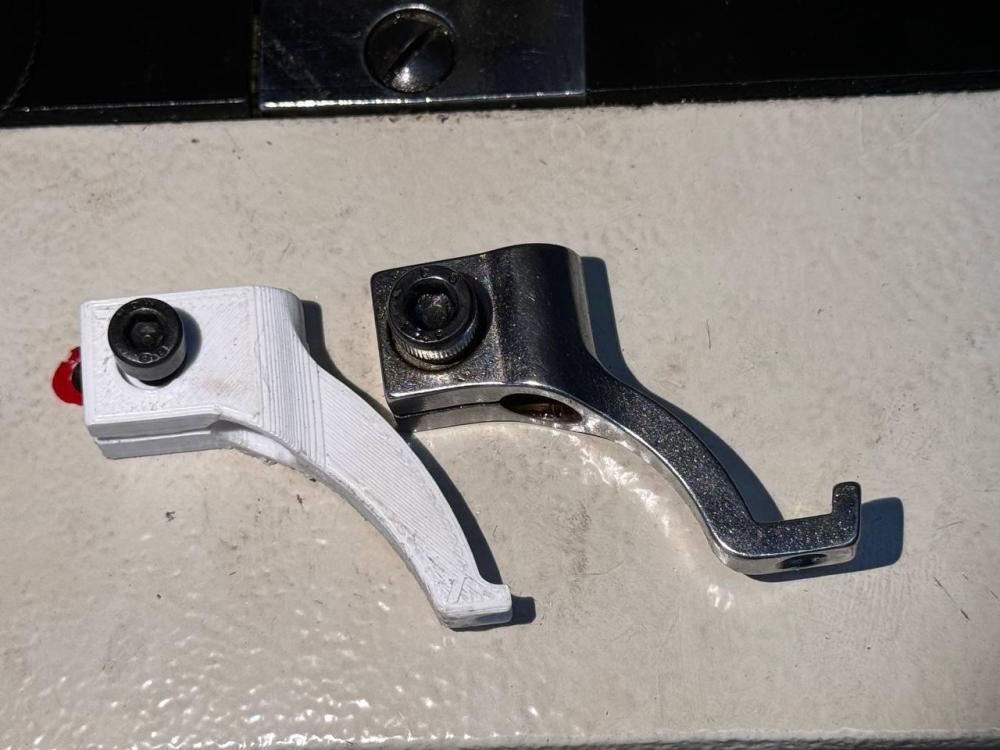

-
No offense taken!!! Today I was thinking that maybe a good idea is to setup an old cellphone and record all my stitching until the error happens again, this may take time, but since this is so sporadic I can't imagine other option to spot this problem. If somebody has ideas on how to improve the thread tension from the 1st post video I'm willing to try them.
-
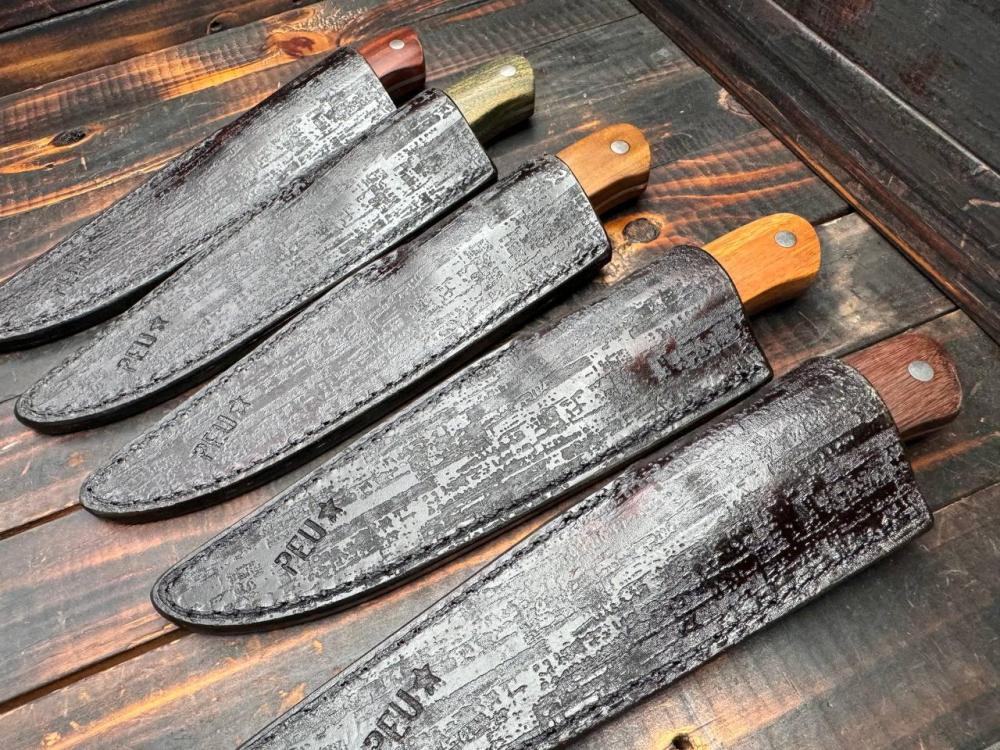
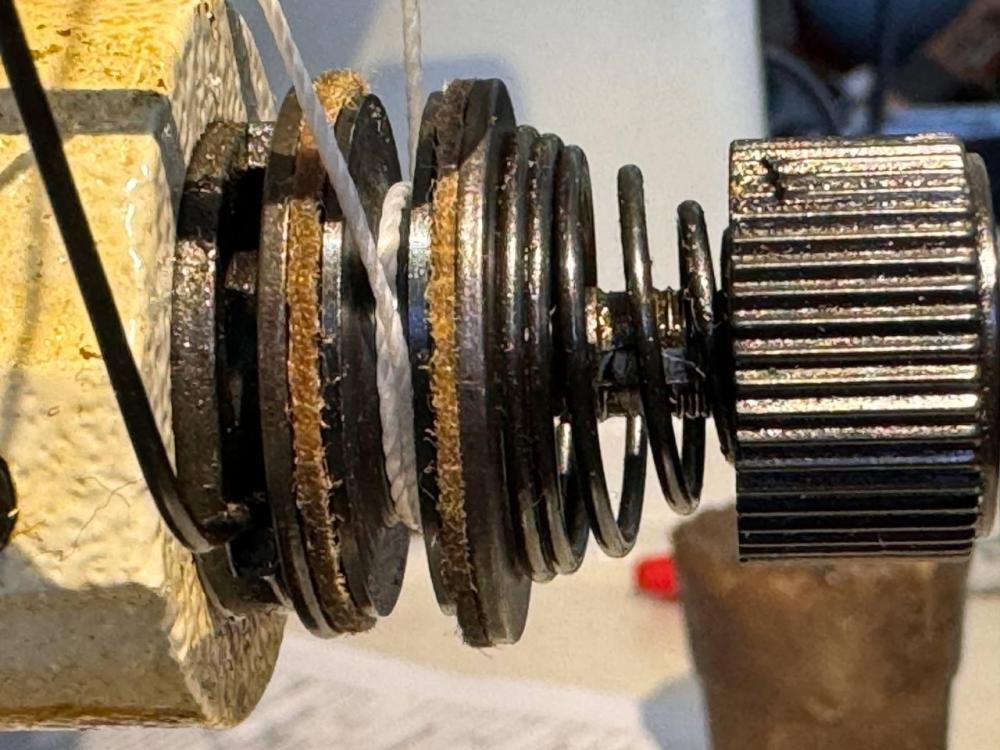
Thats what I thought when I was trying to solve my tension issues, this week I will put better quality felt and if that doesn't solve the unspooling at that tensioner I will try replacing it with one like you mention I 3d printed this piece when I was trying to solve the problem I described, my rationale was: If I help the thread arrive at the needle in the position it will enter the leather this will be better than it coming from the last thread guide in diagonal. I think it helped, in any case, it didn't make things worse. I only use N.10 thread (270/277 per US standards) and don't plan to change in the near future, do you think is a good idea replacing this tensioner? Thanks to all! PS: some of the sheaths I successfully stitched, photo shows the back side of them.
-
LOL In my case it does have reverse, but still didn't figured out how to properly do it and not ruin the stitch, will have to practice more, but in the meantime its 180 turns...!
-
Yes I do, practiced this to get the best results and I think I finally nailed on the tension of the first 3 stitches. Also I don't use the lever to change motion direction, I just turn the sheaths 180 deg, I found this way was better for keeping the stitch tension. Thanks
-
Help me find parts (Adler 204/Cobra Class 7 lookalike)
PEU replied to PEU's topic in Leather Sewing Machines
Thanks Uwe -
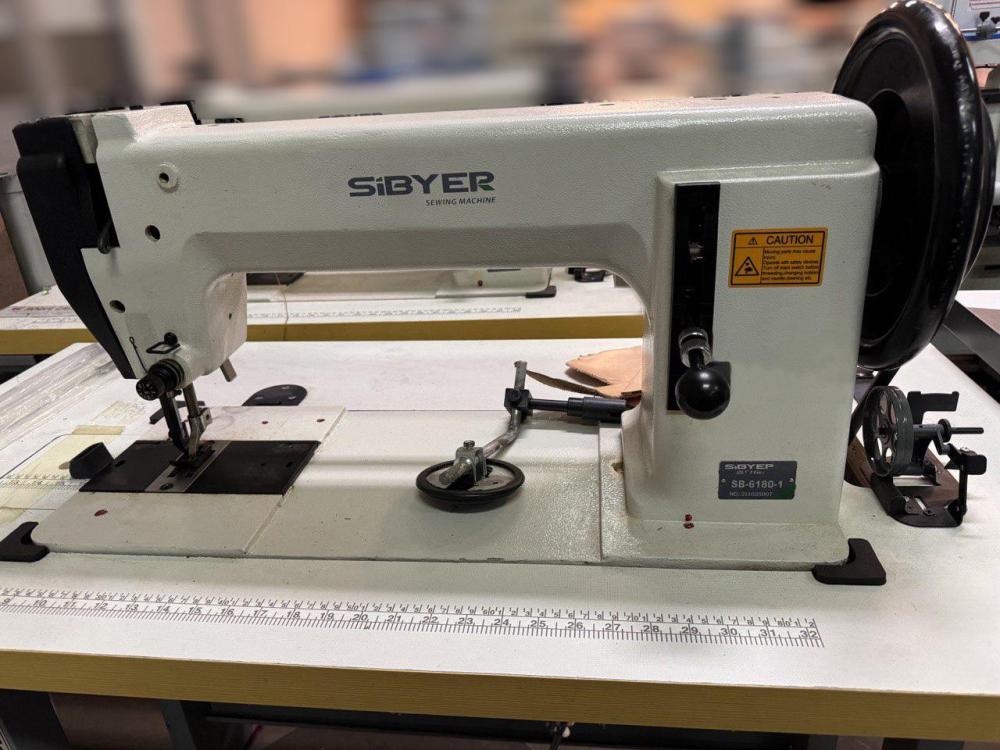
Machine is Sibyer sb-6180-1 extra heavy duty. Using 270 bonded thread on top/bottom and 794 25/200 diamond needle. Here is a video I made for a local friend (I speak Spanish in it) it was made before the modification I wrote above, but the path is the same: https://www.youtube.com/watch?v=18aE_q1exxw Thanks!!
-
I'm new to leather sewing, been practicing for the whole last week and still have some doubts. There are two types of tensioners in my machine, and I guess this is the same for all machines. One squeezes the thread and the other is a wheel with felt on the sides, I mean, this one: I tried one loop, and two loops as seen in the photo, more and less tension, and every now and then, the thread unspools and get stuck on the tensioning spring. Here is a YouTube video of the machine slowly stitching: https://www.youtube.com/shorts/4s-va_6a7Ok Maybe its low quality felt, or maybe is something else you can teach me, because I'm lost on how to prevent this unspooling. If you watch the video you can see that I modified the the thread guide into this knob by separating the incoming thread from the outgoing one (OEM part was a big loop with each one going its way without constraints) Today I stitched 6 sheaths successfully, but yesterday while practicing, it got stuck twice breaking the thread. Thanks in advance!!

-
Help me find parts (Adler 204/Cobra Class 7 lookalike)
PEU replied to PEU's topic in Leather Sewing Machines
Been using imgur for ages and photos are still up, but just in case per your suggestion here they are. Thanks!! Thanks! they looks similar indeed, thanks for the detective work!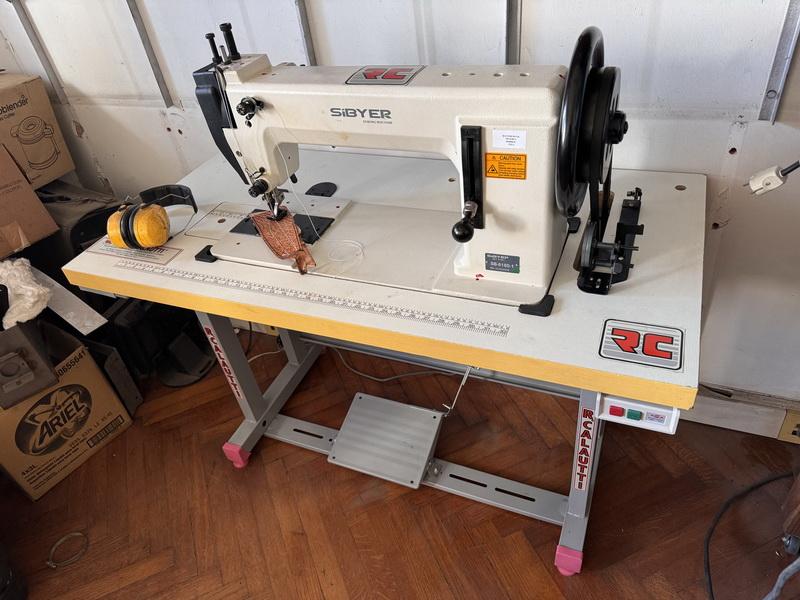


-
Help me find parts (Adler 204/Cobra Class 7 lookalike)
PEU posted a topic in Leather Sewing Machines
Hi, purchased this machine a couple of weeks ago, and I want to modify the presser foot and alternating foot, but just in case I mess up, I would like to have replacement parts at hand, can you help me find part numbers for similarly sized parts? Thanks! -
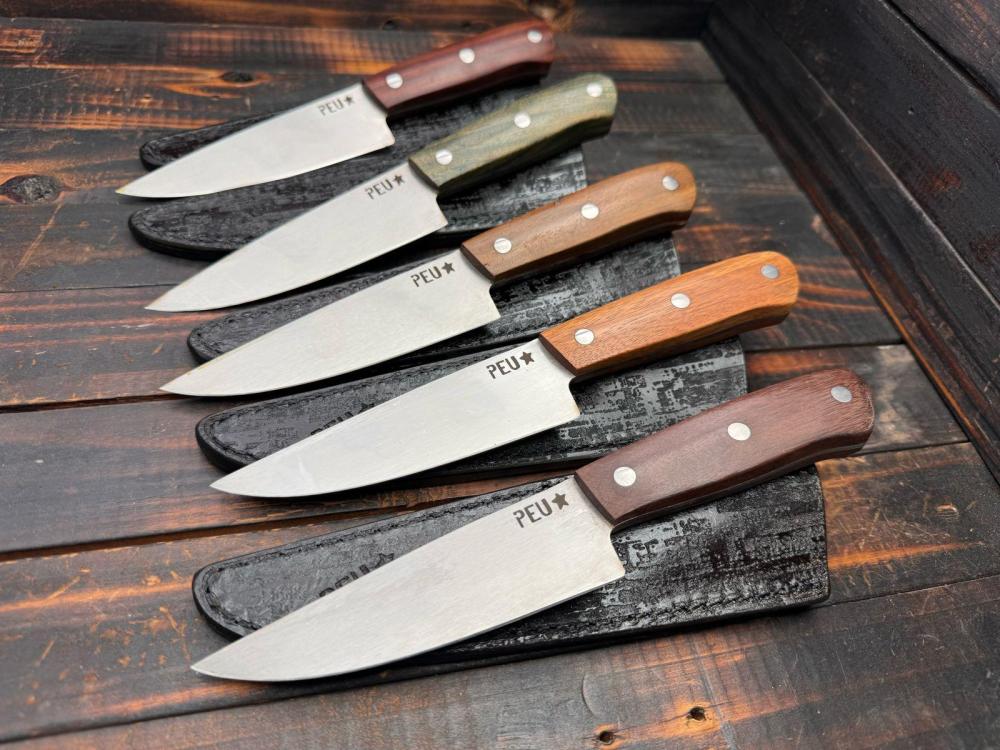
What do you guys think of this machine, brand new at $1100, its a tank, really heavy duty, double the size of a typical 0303 for example, I asked if it can be slowed down changing a pulley from 80mm to 40 and they said it can be done, Im sewing 3/8"- 1/2" knife sheaths. Not big runs, I'm just tired of hand stitching. Thanks!
-
Excellent detective work, I was unable to find their home page, well now I know the origin at least LOL. Still think it looks pretty similar to the smaller Adler 204 Thanks!!
-
And resembles an Adler 204 now that I looked to the link in the previous post. [edit] there are many 204 models it seems, this one looks like the slimmer one 204-64 but with walking foot.
-
Looks kinda similar to this one: http://www.japsew.com/product/default1_e.php?id=283&classid=34
-
Did the same, got a singer brillance home machine with the same number, then I posted here Thanks Will
-
Hi guys, ages of not posting, can you help me identify this machine, and if you know it tell me something about it? It's single needle walking foot for extra heavy-duty leatherworking, this machine is built like a tractor, super heavy yet uses the same table as half sized machines. Googled the brand but I only get a factory in China. I'm sure is being sold by other names too or is a clone of a known brand. Thanks in advance!!
-
I use my DIY CNC router for sheats every now and then: Pablo
-
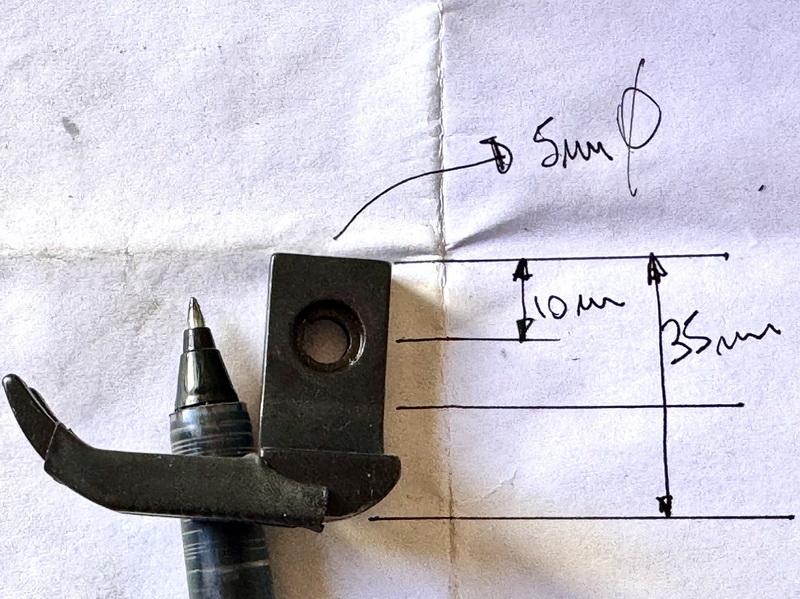
Hello guys, Im a long time lurker that started posting these days. A friend of mine asked me if I can design a leather splitter and maybe manufacture a couple for us. So I started looking at videos and photos to understand how they work, once I grasped what I think its the way they work (never saw one in person) I started designing. All the machines share the same design so I guess I'm not infringing any copyright here. Here are the first images: Anyway, after drawing almost all the parts I have many doubts: 1) There are two sets of springs, lower and upper, lower is stronger and its adjusted by a nut on top of it (not drawn) If the lower roller can be adjusted up and down by this nut, what should be the default position of the cutting blade which is fixed to the structure and unable to move up and down? 2) how does the thickness selector works? (I haven't drawn top part yet) What I grasped from photos there is a bar with a taper on both ends that rides on top of the blue rod of the top bushing, but Im not sure how it works exactly. There are more doubts, but no point listing them all, there is time for that Can you guys help me with photos or explanations? Thanks Pablo
-
Hi, sorry for resurrecting this old thread, is there a place where I can see the dissasembly and reassembly of one of these machines (or similar) I want to understand how they work, Im planning on making one for me and a friend. We do knife sheats. Thanks a lot in advance! Pablo