-
terrahyd's Blog
-
Johanna's Blog
-
joet's Blog
-
CitizenKate's Blog
-
Badlands Leather Art
-
broncobuster's Blog
-
That boys not right.
-
Cow Camp Saddlery
-
3DArcher's Blog
-
rdb's Bench Notes
-
nopension's Blog
-
leatherman1457's Blog
-
Wizs' Leather Work and Sewing Machine Blog
-
Bob Stelmack's Blog
-
dawn's leather Blog
-
Dusty chap Leather Blog
-
Jbird's Blog
-
Tom Banwell
-
KnotHead's Blog
-
Fewments and Observations
-
rodeomic's Blog
-
joet's Blog
-
bvb knives' Blog
-
DAVID W's Blog
-
*
-
WyomingSlick's Tools and Tricks Blog
-
elkdog555's Blog
-
Leather Masks
-
elkdog555's Blog
-
Leatherimages' Blog
-
Leatherimages' Blog
-
WarEagle Leather Works' Blog
-
Cursos de salsa en Malaga
-
billio8's Blog
-
DJ1935's Blog
-
Heather R Nord's Blog
-
Heather R Nord's Blog
-
katsass' Blog
-
CarolinaTackMan's Blog
-
CarolinaTackMan's Blog
-
DGum's Blog
-
MaddCelt's Maddness
-
Chained Lightning's Blog
-
Chained Lightning's Blog
-
AnAce's Blog
-
AnAce's Blog
-
Information and Communication
-
kleefan's Blog
-
bentley's Blog
-
Painting Cow Studio Blog
-
Brent S. Tubre Custom Saddles
-
rambo's Blog
-
rambo's Blog
-
Fellowsgarden's Blog
-
Fellowsgarden's Blog
-
hacken94's Blog
-
MasterLeatherCraftsman's Blog
-
?
-
marine mp's Blog
-
marine mp's Blog
-
starving artist's Blog
-
drkuhn's Leather Blog
-
Roy Cook's Blog
-
Roy Cook's Blog
-
Roy Cook's Blog
-
Roy Cook's Blog
-
Roy Cook's Blog
-
GChordLeathers' Blog
-
8ball's Blog
-
Airship 67 Leather
-
DJordan's Blog
-
Chiwit Design Blog
-
chiwitdesign's Blog
-
diamondbleather's Blog
-
John Wayne's Blog
-
The Flying Ostrich's Blog
-
The Flying Ostrich's Blog
-
The Flying Ostrich's Blog
-
John D Dennehy's Blog
-
Damn Eskimo's Blog
-
Hollywood's Blog
-
darak's Blog
-
cottoncreek's Blog
-
Charlie K's Blog
-
Diane B's Blog
-
Kellog's Blog
-
landy's Blog
-
landy's Blog
-
OrchidNoir's Blog
-
withsilverbells stitch o' rama
-
Balto Joe's Blog
-
Davis Leatherworks
-
capsterdog's Blog
-
henry's Blog
-
john mattingly's Blog
-
hass' Blog
-
hass' Blog camo print
-
1911 Jerry's Blog
-
DWHarrelson's Blog
-
Zilla's Blog
-
Crazy K's Creations
-
flstenner's Blog
-
flstenner's Blog
-
cchichueng's Blog
-
aeinaleather's Blog
-
alagar's Blog
-
Cg Leather's Blog
-
Cg Leather's Blog
-
smileha's Blog
-
Salazar Leather's Blog
-
Salazar Leather's Blog
-
Jxtime blog
-
Freeze
-
Maverick Leather Company's Blog
-
Legacy Leathercraft's Blog
-
Legacy Leathercraft's Blog
-
leezza2's Blog
-
redsolara's Blog
-
fashiang's Blog
-
Tinneal's Leather Work Portfolio
-
Tinneal's Blog
-
sunnyfel's Blog
-
Quanr's Blog
-
Greybeard's Blog
-
bobocat's Blog
-
Cubezombie's Place
-
theprestigeshop's Blog
-
Colombian Leather Products
-
CJ leather Blog
-
Blackey Cole's Blog
-
TomWI's Blog
-
ayn's Blog
-
Jessica S' Blog
-
ayn's Blog
-
Leathercraft
-
Art's Blog
-
Armor boy's Blog
-
Armor boy's Blog
-
Ebay Blog
-
El Paso's Blog
-
El Paso's Blog
-
DoubleC's Blog
-
Tod Schertzer's Blog
-
Loot's Blog
-
eLw's Blog
-
MadMorbius' Blog
-
MadMorbius' Blog
-
Square Bear's Blog
-
Square Bear's Blog
-
WinterBear's Blog
-
shedhunter's Blog
-
mariobin's Blog
-
chipp's Blog
-
chipp's Blog
-
Miller02
-
Jimbob's Blog
-
Jimbob's Blog
-
gene l's Blog
-
gene l's Blog
-
tackmantoo's Blog
-
bluesman1951's Blog
-
bluesman1951's Blog
-
TMCARDS' Blog
-
TMCARDS' Blog
-
A Journey in Leather
-
SandSquid's Blog
-
maury sewing machinex's Blog
-
buckeroo1's Blog
-
terry and joanne's Blog
-
MirandaDee's Blog
-
leathersculptor's Blog
-
BILL FORBES' Blog
-
White Gate Leather LLC's Blog
-
White Gate Leather LLC's Blog
-
CicadaLeatherCompany's Blog
-
CicadaLeatherDesigns' Blog
-
metaljoe57's Blog
-
missdaisy2006's Blog
-
missdaisy2006's Blog
-
webothfarms' Blog
-
Wyldflower's Blog
-
wyldflower's Blog
-
Ryan Mitchell's Custom Leather Works Blog
-
BLUEGUN Store's Blog
-
stitchnwizard's Blog
-
Teja's Blog
-
vintage clothing lover's Blog
-
Ezio's Blog
-
Second Hand Cowboy Leather's Blog
-
jimmyo's Blog
-
jimmyo's Blog
-
jimmyo's Blog
-
hunio's Blog
-
Brooktx's Blog
-
Kurtman's Blog
-
boodle's Blog
-
EthosCustomBrands' Blog
-
flathead5's Blog
-
StLouis Falconer's Blog
-
Zelikovitz Leathercraft's Blog
-
hotrod's Blog
-
hotrod's Blog
-
Westernartist
-
ted 777's Blog
-
BorisVanJr's Blog
-
Dan Markell's Blog
-
wlg190861's Blog
-
limbs' Blog
-
limbs' Blog
-
daniel yepez's Blog
-
Gainesvilleman's Blog
-
Robert Hulshizer's Blog
-
waterwizzard's Blog
-
RaeNae's Blog
-
weavrdan's Blog
-
POOLCOWBOY's Blog
-
bokehz's Blog
-
Christian Louboutin Belle
-
trikerd1952's Blog
-
Fowlingpiece's Blog- James Rogers
-
srb008's Blog
-
summeryang000's Blog
-
lena4570's Blog
-
lena4570's Blog
-
gainesvilleman's Blog
-
pijushroy1000's Blog
-
pijushroy1000's Blog
-
dana13's Blog
-
cliffordsaddler's Blog
-
boma's Blog
-
jinggu's Blog
-
HandBag Designer
-
DenHar's Blog
-
christianleather's Blog
-
leathertailor's Blog
-
Lisheen's Blog
-
probiotics' Blog
-
Newbie News
-
Learning Leather
-
Leftovers Inc.
-
charles canillas' Blog
-
charles canillas' Blog
-
Woodentop's Blog
-
rexberger's Blog
-
rexberger's Blog
-
hunio's Blog
-
Smokey Allen's Blog
-
darksdeebar's Blog
-
Weazer's Blog
-
Keable Leather Blog
-
crisp2's Blog
-
Keable Leather Local Blog
-
schmara's Blog
-
schmara's Blog
-
schmara's Blog
-
Confused's Blog
-
jimmyb96's Blog
-
bigred85's Blog
-
gypsy1980's Blog
-
gypsy1980's Blog
-
mdntnmtgmy's Blog
-
BeltFctry's Blog
-
rkeron's Blog
-
Lym's Blog
-
borlinoleather's Blog
-
Atif Anwar's Blog
-
Atif Anwar's Blog
-
S R C's Blog
-
S R C's Blog
-
LoriLee11011's Blog
-
LoriLee11011's Blog
-
cowboygear1's Blog
-
Gemini1950's Blog
-
sierrasaddle's Blog
-
sierrasaddle's Blog
-
woodman58777's Blog
-
papadan4's Blog
-
MrV's Blog
-
How do i create a chestplate
-
manny60's Blog
-
Johnny Giles' Blog
-
Johnny Giles' Blog
-
himanshiets02's Blog
-
mene's Blog
-
komaletrade's Blog
-
ranjeet14's Blog
-
etskamlesh123's Blog
-
Nedingham's Blog
-
Nedingham's Blog
-
tom offner's Blog
-
quartercircleoveruleather's Blog
-
artisan1's Blog
-
artisan1's Blog
-
stangman645's Blog
-
manny60's Blog
-
Silverylight's Blog
-
Best Custom Essay
-
skae's Blog
-
Second Saddle Project
-
wintek's Blog
-
Keestarsew's Blog
-
Keestarsew's Blog
-
ElConquistador's Blog
-
ElConquistador's Blog
-
Cowboyhap's Blog
-
Cowboyhap's Blog
-
bigwill23's Blog
-
Illusion Lane's Blog
-
Bookbinders Bench
-
wtf's Blog
-
kenneth gituro's Blog
-
bcflyguy's Blog
-
gunnerdoc's Blog
-
Craftsman Made's Blog
-
Craftsman Made's Blog
-
Torito's Blog
-
EternalHeritage's Blog
-
MaggieS' Blog
-
smokerofstars' Blog
-
Michael Z's Blog
-
Amateur Saddle Maker
-
GD Frippery's Blog
-
Carroll Leather's Blog
-
stropping's Blog
-
Leather bags store first sale
-
Spadacini530's Blog
-
kamerzell730's Blog
-
jshill's Projects
-
jshill's Projects
-
cjcolbyjack's Blog
-
RD Ranch Leather's Blog
-
evaeyeth's Blog
-
New to this! And new to leather work!
-
jennytaylor's Blog
-
ruthleather's Blog
-
Mill Iron J's Blog
-
campingpitter's Blog
-
campingpitter's Blog
-
campingpitter's Blog
-
Francesca Jones' Blog
-
Eben's Blog
-
abbysimpson's Blog
-
cowboyedout's Blog
-
cmenca's Blog
-
Jwsedberry's Blog
-
Jwsedberry's Blog
-
Help Identify My Saddle
-
Tony W's Blog
-
Fischer Workshops Blog
-
taokai's Blog
-
taokai's Blog
-
Fireflyidaho's Blog
-
Flora on Fauna
-
Patsy's Blog
-
Patsy's Blog
-
Daneo's Blog
-
Morningdove's Blog
-
Morningdove's Blog
-
Bohemian Sandals' Blog
-
william friend's Blog
-
Deb Brink 15's Blog
-
Tromek's Blog
-
Tromek's Blog
-
kanadakeith's Blog
-
Colourful Mannequins' Blog
-
Buttons' Blog
-
mustangsmith's Blog
-
jmkjmk2's Leather Tools
-
Leather and Mildly Leather-Related Stuff
-
rnuo2011's Blog
-
evsleather's Blog
-
Skiving machines
-
Freeman15's Blog
-
Professionals dealing with amateurs
-
KristenLeigh333's Blog
-
penguineer's Blog
-
rnuo2011's Blog
-
ewayne53's Blog
-
RafterD4's Blog
-
beyondcomfort's Blog
-
HumanToughDesign's Blog
-
Merianny's Blog
-
fconnection's Blog
-
Ensz saddlery's Blog
-
horsewisperer's Blog
-
Sewing Machine
-
thunter9's Blog
-
fjohnson's Blog
-
fjohnson's Blog
-
Amyb32's Blog
-
Chief31794's Blog
-
Johnboy Richter's Blog
-
Quality Saddles
-
bravefifa's Blog
-
Kieth's Blog
-
Handmade Leather By Rick Blog
-
raminlaghiyev's Blog
-
Nouventi's Blog
-
thePassenger's Blog
-
fat face's Blog
-
jesippel's Blog
-
yourfifagames11's Blog
-
onathread's Blog
-
Tio's Tips
-
Tlhines
-
Looking for SELF
-
Gritty Rustic Leather
-
Ponderosa
-
laser cutting different materials
-
Leather - Billfold's - ( Hand - Tool'ed ) - Specialist - Want'ed . . .
-
Hannahrain
-
Leather Hides
-
Barbed Wire Leather
-
Phoneman916
-
zazzle.com/santoshadh
-
Leather Jackets & Gloves
-
Danno90's Blog
-
Safety Gloves
-
rockingmooreranchllc
-
Cutting Table Opening for a Walking Foot Machine
-
Jano
-
Kaitlynpage
-
Rhale
-
Do You Ever Tried Any Fun Builds In Path Of Exile 3.2?
-
Matthew Wilson
-
High Quality Leather Lace - Hand Tools
-
BrotherRon
-
Don
-
teemack
-
Colin.
-
Football at the end of the evening
-
Madden 20 is designed to simulate
-
Highlight plays look fantastic and crucially
-
TECHSEW SP-20 vs cobra class 14 leather splitters
-
Sports opinion
-
luxury swiss watch
-
Patterns
-
Hannah
-
ew
-
The Versatility of Leather in Fashion: From Jackets to Handbags
-
Unleashing the Fashion Potential of Leather: From Handbags to Jackets
-
Tudor Black Bay Master Chronometer
-
Cork Leather
-
RHC
-
George
-
Designer Watches
-
My Journey into Leather Crafting: Exploring the Art of Leather Molds
-
The Leather Tanning Process
-
The Influence of Control System on Fiber Laser Cutting Machine
-
P2Pah WoTLK:You will be able to acquire an excellent set of gear
-
Mix and match!
-
The Influence of Control System on Fiber Laser Cutting Machine
-
How Does a Hot Foil Stamping Machine Work?
-
Handmade Leather Apron
-
Introducing Shkira – A Ukrainian Family-Run Leather Workshop
-
Which site will be good for buying OSRS gold?
-
Exploring Medical Marijuana Seeds on Amazon
-
How to Get Ember Lily Seed in Grow a Garden


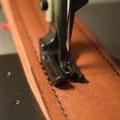 I wanted to re-mount my Consew 226 walking foot sewing machine in a better table, and I had access to a replacement top. The new top didn’t have the required recess to mount the head unit, so I needed to rout one out. I started with a full-sized template of the shape I needed. Building the Template The corner diameter of the template needed to be 1-3/8”, and since I didn’t have a router bit that large, I used a Forstner bit to cut the holes. The template is made from 1/2" MDF. Then I completed the opening of the template with a router and spiral bit. A clamp-on straightedge guides the router in a straight path. Next I made removable corner inserts for the template. I’ll explain the reasoning for these little triangular pieces in a minute. They are easily made my marking the curve on some scrap, and sanding to the line. Then I cut them loose at the miter saw. These small pieces were 1-1/4” on the smaller sides, and 1-3/4” on the hypotenuse. Milling the Main Opening Then I used the template to pencil the shape of the opening on the sewing table top, and roughed it out with a jigsaw. At this point I was ready to clamp the full-sized template to the table top. The corner blocks were carpet taped in place, and I routed the opening flush with the template using a 2” long bearing-guided template bit (rout clockwise when inside a frame). Here you can see how the corner blocks protect the corners, which will eventually support the weight of the sewing machine head. Routing the Ledge Next I switched to a 3/4” long bearing-guided template bit and removed the corner blocks. Then I was able to follow the template’s radiused corners to mill a small ledge. This cut was 5/8” deep, which allows 3/8” for the lip of the sewing machine, and 1/4” for the rubber bumpers that I’ll install later. The 226 is a top loader, so I am shooting for a flush fit here. If you have a side loader like the 206rb, you might want to make the ledge slightly shallower so the bobbin access plate clears the table. Bumpers and Hinges The rubber bumpers are just some rubber mat that you can buy in bulk at the hardware store. They are tacked in place, one at each corner. Then I drilled holes in a scrap of MDF with a 1-1/2” Forstner bit. I then used that as a template to rout holes for the hinges. I could have simply used the Forstner bit to drill out the hinges, but I find the router cuts to a more consistent depth. Then excavate a little spot for the hinge mechanism. This is easily accomplished with a trim router and 1/4” spiral bit. Final Fitting The fit looks good, and the router bits cut the laminate cleanly. It took me most of a Saturday to accomplish, but it sure looks nicer than the old table. If anyone is contemplating a sewing machine table build, I found this full-sized template method with corner blocks worked quite well. I'll hang on to the template, and if I need to do it again it'll be a snap.