-
Posts
26 -
Joined
-
Last visited
Content Type
Profiles
Forums
Events
Blogs
Gallery
Store
Everything posted by shinelightshine
-
Thanks Feraud! Thanks guys! And ya, I should have paid more attention to my edges on those. I'm finding that I'm liking gum trag less and less. I find that I don't get the results I want and that it ends up make the the edge too crusty/hard. I'm going to start experimenting with saddle soap and beeswax. Do either of you have any suggestions? Also, Basically Bob! I see you're from Simcoe! I was in Simcoe a year or two ago attending the Gentlemen of the Road Festival (the tour with Mumford & Sons and Old Crow Medicine Show) at the Norfolk Fairgrounds. It's a beautiful little town.
-

Ipad Case
shinelightshine replied to shinelightshine's topic in Purses, Wallets, Belts and Miscellaneous Pocket Items
Thanks a lot Thanks Bob! Like I said, it was a piece of not so great scrap lying around that had just naturally developed some colour from age/the sun. It had dried out pretty good and was fairly stiff so I hit it pretty hard with some neatsfoot oil. That's the only finish on it. -
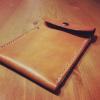
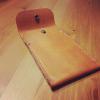
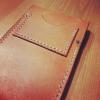
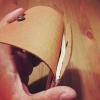
Hey guys! I had some not so great scrap leather hanging around that wasn't quit good enough to use for something I'd sell, so I thought I'd prototype something new. It's a case for an iPad mini. It has one main compartment with a belt with a buckle that goes around the whole case. On the back, a notebook or papers could be stored under the strap. For the hardware, I just used an a buckle from an old belt my wife doesn't use anymore. Anyway, have a look and let me know what you think. -Nick
-

Classic English Briefcase
shinelightshine replied to AndersenLeather's topic in Satchels, Luggage and Briefcases
You did an incredible job on this. It's a beautiful bag! I would love to see some more process photos if you have any and are willing to post them! -
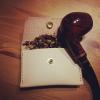
Thanks VonTannin! That's a great idea, I'll definitely give that a shot. Thanks a lot! it's about 4oz I think, a little thicker in some pieces. The side that all these are made from was 4-5oz. Yes, you're absolutely right. The tobacco does indeed flake out a little bit. I made another tobacco pouch for a friend that used a tuck closure instead and that worked much better (didn't leak at all). Another idea I had was to extend the front panel of the pouch up a bit, so that you could tuck it in and sort of cover the tobacco before snapping it shut.
-

Making Boston Bag
shinelightshine replied to hunio's topic in Purses, Wallets, Belts and Miscellaneous Pocket Items
Such great work! -
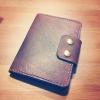
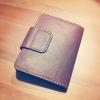
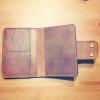
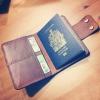
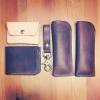
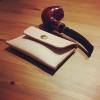
Hey guys! It's been a while since I've posted, so I thought I'd show you all what I've been working on. Recently I've finished a passport wallet, a couple glasses sleeves, a wallet, a key lanyard, a coin pouch, and a small tobacco pouch. Attached are some pics of the completed projects. Thanks for checking it out! -Nick
-
A carpenter friend of mine asked me to make him a wallet for his hand scrapers similar to this. He needed the wallet to hold 4 large scrapers, and one small one. I drew up the template, and cut out the pieces from a piece of veg tan, and dyed it with Fiebing's Saddle Tan oil dye. While that was drying, I made 3 separator sleeves to go inside the wallet, to protect the individual scrapers from scratching against each other. I made the sleeves from canvas. Once everything was dry, I finished the edges, installed all the hardware, stitched on the small rear pocket for the small scraper, and stitched the sleeves in/wallet together.
-
Horween makes Chromexcel leather which apparently the original pull up leather. I have a wallet made from Horween oxblood chromexcel and it is beautiful. It doesn't stain my pants, and has a different feel than tandy's oil tanned leather. This is the wallet: http://www.teranishibrand.com/collections/frontpage/products/minimalist-bifold it feels, smells, and has aged amazingly. You can see the slight pull-up along the stitch line. It looks really good when it's full of cards etc. The different tones along the edges of the cards make it look really rich.
-

Tobacco Pouch
shinelightshine replied to shinelightshine's topic in Purses, Wallets, Belts and Miscellaneous Pocket Items
I'm actually seeing hime today (we're going to the tobacco shop), so I'll let you know! -

Credit Card Holder
shinelightshine replied to PcCowboy's topic in Purses, Wallets, Belts and Miscellaneous Pocket Items
I really like the functionality of this. The double fold makes the case versatile. The bottom pocket can be used for cards, and you could even use the top strap to store bills under. Nice one! Dig it! -

Tobacco Pouch
shinelightshine replied to shinelightshine's topic in Purses, Wallets, Belts and Miscellaneous Pocket Items
Thanks a lot guys! It was a fun little project. -
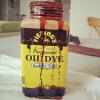
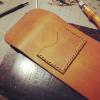
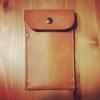
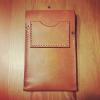
My good friend's birthday is in a couple days, and he's a pipe enthusiast. I decided to make him a simple tobacco pouch that he can keep in an inner jacket or pant pocket. It holds about 2-3 pipe's worth of tobacco. My original intention was to dye the leather a dark, rich brown, but I ended up deciding to leave it natural veg tan. The only dye I have on hand right now is Fiebings dark brown oil dye which smells pretty harsh. I didn't want the chemical smell to interfere with any tobacco my friend put in the pouch, so I opted to leave it natural. Besides, it will develop a really nice patina over time. I put a little pocket on the back to hold matched, or a pipe tool, or a lighter. It was a fun little project! -Nick
-

Laptop Sleeve
shinelightshine replied to shinelightshine's topic in Purses, Wallets, Belts and Miscellaneous Pocket Items
Thanks! I really like a minimal aesthetic.- 6 replies
-
- laptop sleeve
- laptop
-
(and 1 more)
Tagged with:
-
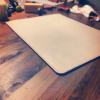
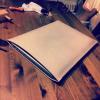
Just finished a simple laptop sleeve for my 15" Macbook pro. Fits like a glove! Let me know what you think. Sorry about the crappy pictures. I took them on my phone. -Nick
- 6 replies
-
- laptop sleeve
- laptop
-
(and 1 more)
Tagged with:
-
It definitely has an odor, but I wouldn't say that it was overwhelming. I did the dying in my living room. It wasn't too bad at all.
-

Waist Pack
shinelightshine replied to hunio's topic in Purses, Wallets, Belts and Miscellaneous Pocket Items
This is really great! Would you be able to tell me how do get edges like that? -
Thanks!! To be honest I haven't begun to think about that just yet. I want to practise a little bit more and get a bit more consistant before I start selling them. I'll definitely make a post here when I decide to start selling. Thanks for the interest .
-
I have 5, 6, and 7 stitch per inch wheels. I THINK I used the 6. I'll check and give you the exact one I used when I get home from the in-laws. The thing is, on the first wallet (the brown one) I marked out the stitches with the wheel, but didn't actually use marks. I decided to just use my pricking iron instead. I used the 1/8" 4-prong angled iron that I got from Tandy. On the second wallet (the natural veg tan one) I went straight to the pricking iron and bypassed the wheel altogether. I hope that helps! Thanks Andy! I'm super excited to finally dive into the craft. I've been doing tons of research over the past year and have been watching tutorial after tutorial, and checking out different makers on etsy and other places (you were actually one that I scoped out). I finally bit the bullet and bought a bunch of tools and leather. Thanks for the tip on the rounded corners, I'll most definitely try that out on my next wallet. Another question I had was regarding the weight of leather to use for a project like this. I found that what I used was a little too stiff/thick. I don't want anything too light as I want it to be fairly rugged, but I want it to stay closed when it's just sitting out on a table. As of right now they both sort of spring open a little bit.
-
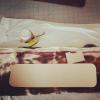
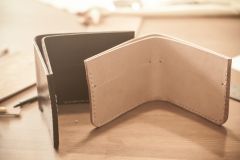
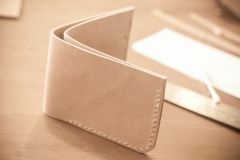
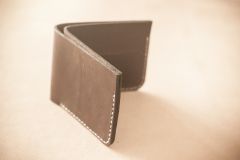
Hi all! I'm brand new here and new to leather work. I've started by making some simple bi-fold wallets as a starting point to learn some basic techniques. I think what I found most challenging about making the wallet was cutting the rounded corners, and also, believe it or not, burnishing the edges NEATLY. I found that while using an edge slicker, it was really easy to mark the face of the leather while slicking the edges. I've posted a couple picture here, and I've also posted a couple entries on my blog of some pictures my wife took of my learning process. You can check those out HERE (PART 1) and HERE (PART 2). The dark brown wallet is my first one, and the natural veg tan one is my second (it turned out way neater). If you have an comments/critique/tips for anything I've done, please share. I'm hungry to learn! Thanks! -Nick
-
From the album: My First Project - Minimalist Bi-Fold Wallets
-
From the album: My First Project - Minimalist Bi-Fold Wallets
This is the second wallet that I made. -
From the album: My First Project - Minimalist Bi-Fold Wallets
This is the very first wallet that I made-
- wallet
- minimalist
-
(and 1 more)
Tagged with:


