vaalpens
-
Posts
147 -
Joined
-
Last visited
Content Type
Profiles
Forums
Events
Blogs
Gallery
Store
Everything posted by vaalpens
-

Resoline Finish "cracking"
vaalpens replied to CDMatherne's topic in Gun Holsters, Rifle Slings and Knife Sheathes
My preference is neatsfoot oil and then leather balm with atom wax. I like the results but I'm not sure about the durability since I have just started working with leather a few months ago. You say you went to oil and wax, can you perhaps share what type of oil and wax you use to finish your projects? Thanks. -
George Lawrence Inspired Holster
vaalpens replied to vaalpens's topic in Gun Holsters, Rifle Slings and Knife Sheathes
Thanks for the nice comments. I used Fiebings Mahogany and found it was a bit too red to my liking. After two treatments of neatsfoot oil I got it to the color that I liked. -
George Lawrence Inspired Holster
vaalpens replied to vaalpens's topic in Gun Holsters, Rifle Slings and Knife Sheathes
Well, I knew somebody was going to catch that. I think what caught me out was the thickness of the two 5oz layers of leather. I use some 4mm foam to help with my design and compensate for the thickness of the leather, but the lined leather was a bit thicker than expected. I also had some pen marks on the top layer instead of the bottom layer, which I had to trim. I knew there were going to be some lessons learned with my first lined holster, but luckily I kept the mistakes to a minimum. Thanks again for the time you took to review my work and provide the positive feedback. -
George Lawrence Inspired Holster
vaalpens replied to vaalpens's topic in Gun Holsters, Rifle Slings and Knife Sheathes
Moving the strap down was one design ideas I was thinking about, but i then decided to keep it a bit higher to get the belt loop as close as possible to my 1.75" belt width. Moving it down would have added about 1.5" to the belt opening. Thanks for the response and suggestion. -
George Lawrence Inspired Holster
vaalpens replied to vaalpens's topic in Gun Holsters, Rifle Slings and Knife Sheathes
Thanks Camano!. Yes, I can see some improvement and it is not just because I am doing a better job, but also because of the excellent advise I have received from the members on this forum. This is my third holster. Here is my first: And second: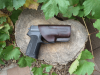
-
George Lawrence Inspired Holster
vaalpens replied to vaalpens's topic in Gun Holsters, Rifle Slings and Knife Sheathes
Jack, thanks for the nice comments. It means a lot coming from you, especially with the quality holsters you are making. -
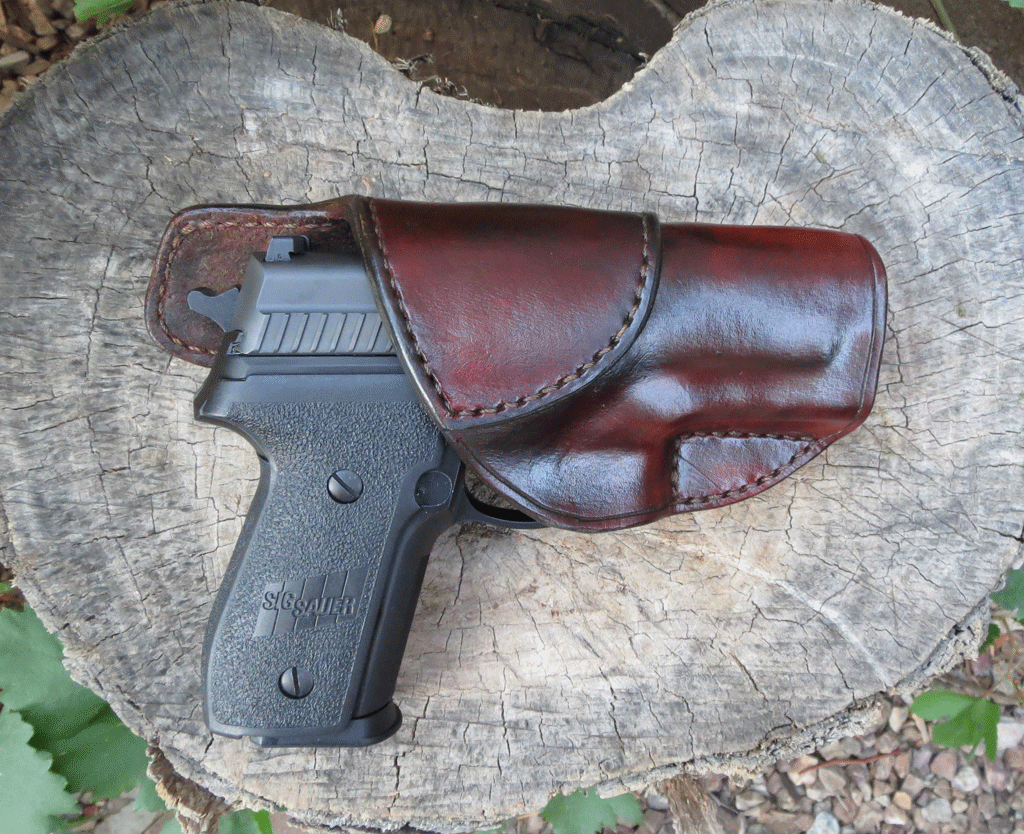
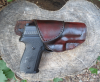
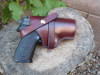
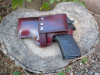
I just finished my latest holster which I designed based on some George Lawrence holsters. The idea with this project was to try a few new things out and also have an old school design. The holster is lined and made from 2x5oz pieces of leather, except for the strap and band around the holster body which is 8/9oz. The dye is Fiebings Mahogany with neatsfoot oil applied after the dye. Wet forming was done after the dye process, but I did not try and get any detail in the forming since it is old school. I just tried to show the beautiful shape/curves of the P229. The finish I applied was leather balm with atom wax. The belt loop has been attached to the band with chicago screws which was a compromise. I really wanted to use copper rivets, but just could not make it happen. Next time, with better planning and using the advise from forum members, I will definitely include the copper rivets. Here are some pictures. Any comments, suggestions or critique will be appreciated.
-
Mike, sorry if it sounded like I did not appreciate the advise about the book, but that is not true. I do appreciate it and I think it is great advise. I just probably tried with my clumsy use of the english language to say that the book will be great (I have it on my wishlist), but I also think the advise I get from the forum members is on par with what I will get out of the book. It is probably one of those times where I wanted to say something, but what I actually typed in the response was not exactly the way it came across. English is my second language and I sometimes miss all the finer nuances of the language. Thanks again for taking the time to respond.
-
Mike, thanks again for the great suggestion. I have not bought the book yet, but is on my wishlist for Christmas. Books are great to find answers, but normally you only get one answer per question. The great thing about this forum is that most of the times you get different answers on how to solve a problem, with all of them a valid way to solve the problem. This let me learn multiple ways to do one thing, and also let me choose a solution that fits my skill-set and tool-set. You have given my great advise over the last few months and it would have been difficult to pick up all that experience from books alone. This last project I did was a direct result of how you described how you do a lined holster with 2x5oz pieces of leather. To me that made sense for what I wanted to accomplish and I then decide to make a lined holster with my next project. Thanks again for all the effort you put into answering some of my questions.
-
Camano, this was the first lined holster for me and it seems that the 2x5oz leather was less pliable than a single 8/9oz piece. At the time when I was posing the question the holster was already stitched, dyed, received some neatsfoot oil and formed. I just did not want to put it back in the bath again. This is not a big deal and it is one of those lessons learned. Part of holster making is adapting when things doesn't work out exactly the way they should. The chicago screws was my C plan, and still worked out great. The great thing about the chicago screws was that I was able to assemble everything before finishing it. I disassemble it and then finished it with some leather balm atom wax. I really like how the lined holster cam out. Everything is so much smoother and looks better finished. Thanks again for the great advise.
-
Josh and Camano, thanks for the directions regarding getting the loop around the holster. I have learned a lesson that it should be attached before I do any forming. I think the problem this time was that I did not have a pattern, and had to fit and adjust as I went on. So at this time the forming is done, and with the lining (2x5oz leather), it will be difficult to dunk it again and try and get the loop around it. This time I will just go with the Chicago screws, which at least leave me the flexibility to replace the band with a wider band if I want to adjust for another belt. I will definitely make another holster like this, but this time it will be non-lined. The non-lined holster will then be much softer holster during the forming process, and then I will be able to loop the band around the holster. These holsters are for me and part of the process is to learn new methods of doing things. Thanks again for the excellent advise!
-
I think you are correct, the rivets are not attached to the holster, but they are attached to the band and belt loop. I am just planning on attaching the the band to the belt loop. The problem I have is that the band will be a tight fit around the holster body, so I don't see a way to be able to set copper rivets, since the side where I need to use the rivet setter will be between the holster body and band. I was thinking of straightening the belt loop, attach the band with the rivets, then try and pull the band over the body. I also don't think that will work since I have a lined holster with a very stiff belt loop. Thanks for responding to my question.
-
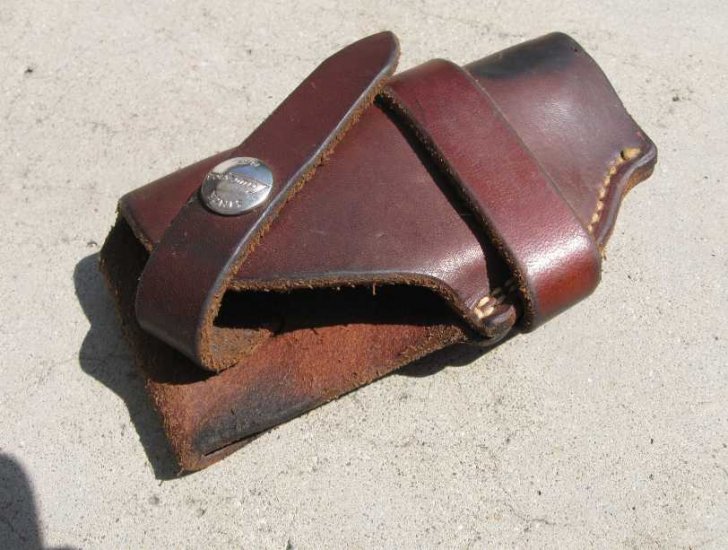
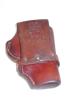
I was thinking of posting this question under the "How To" board, but decided that it is probably a question specific to holster making. I am in the process of making a holster loosely based on a George Lawrence design. The design utilizes a strap/band around the body of the holster, attached to the belt loop. What I am trying to do is make use of copper rivets, since I want to try it out, it is old school, and it will look great with the color of the holster. My questions is: How do I set the rivets with a design like the attached image? There is no space to set a copper rivet, unless there is a special way to do it. The only alternative I have is to use chicago screws, or maybe put a snap or buckle in the front that can be closed after the rivet has been set. The snap or buckle will make the front look a bit busy, so I would prefer to have the strap solid in the front. For now I am probably going to go with a chicago screw to allow me to replace the strap with a different strap depending on the width of the belt. Thanks in advance for any suggestions.
-
Sheriff's Dept Order Complete
vaalpens replied to jackd942's topic in Gun Holsters, Rifle Slings and Knife Sheathes
Jack, sorry for all these follow-up questions, but I have a final question regarding the size 2 harness needles you are using. I normally buy from Springfield or Tandy, and I have only seen sizes 0, 00, and 000. Where do you get the size 2 needles from? I have seen some size 2 and 4 John James harness needles on ebay at around $10 for 25. Seems like a reasonable price. Thanks again for all this additional information you are sharing. -
Sheriff's Dept Order Complete
vaalpens replied to jackd942's topic in Gun Holsters, Rifle Slings and Knife Sheathes
Jack, thanks for the thread information. I also use the Tandy waxed nylon, but find it difficult to get it through the eye of a "0" needle. It has its place but definitely looks like nylon. I have not tried the Tejas waxed thread yet. What size needle do you use with the Tejas thread? I have two other types I use from Springfield Leather. The one is a linen waxed thread which is nice to work with, but you need to be careful since it can break easily at the needle when you pull it through the hole. The other one is a waxed nyltex thread. This one is thicker and I still need to find the right hole spacing to use it. I would also like to try out the barbour's 7 cord linen one day, but it would be nice to find a smaller quantity to first try it out. You can probably go out and order the 1lb tube since you at least are making some money selling your holsters. -
Sheriff's Dept Order Complete
vaalpens replied to jackd942's topic in Gun Holsters, Rifle Slings and Knife Sheathes
Beautiful pieces of art! I like the forming on the pouch, it is perfect. I see the pouch thread color is different than the holster; are the holster and pouch a matching pieces or just pictured together. The thread on the holsters fill the channel very well and lays down nicely. What type of thread are you using? -
What Color Is This?
vaalpens replied to vaalpens's topic in Dyes, Antiques, Stains, Glues, Waxes, Finishes and Conditioners.
Thanks for the advise and especially where to start with a dye. I will just have to play with the color until I get to something I like. Yes, I have realized that these colors could be all over the map depending on how I apply it, the oil I use, how much oil, did I dye before wet forming or after wet forming. I have learned the hard way to test smaller pieces out first before using it for my project. -
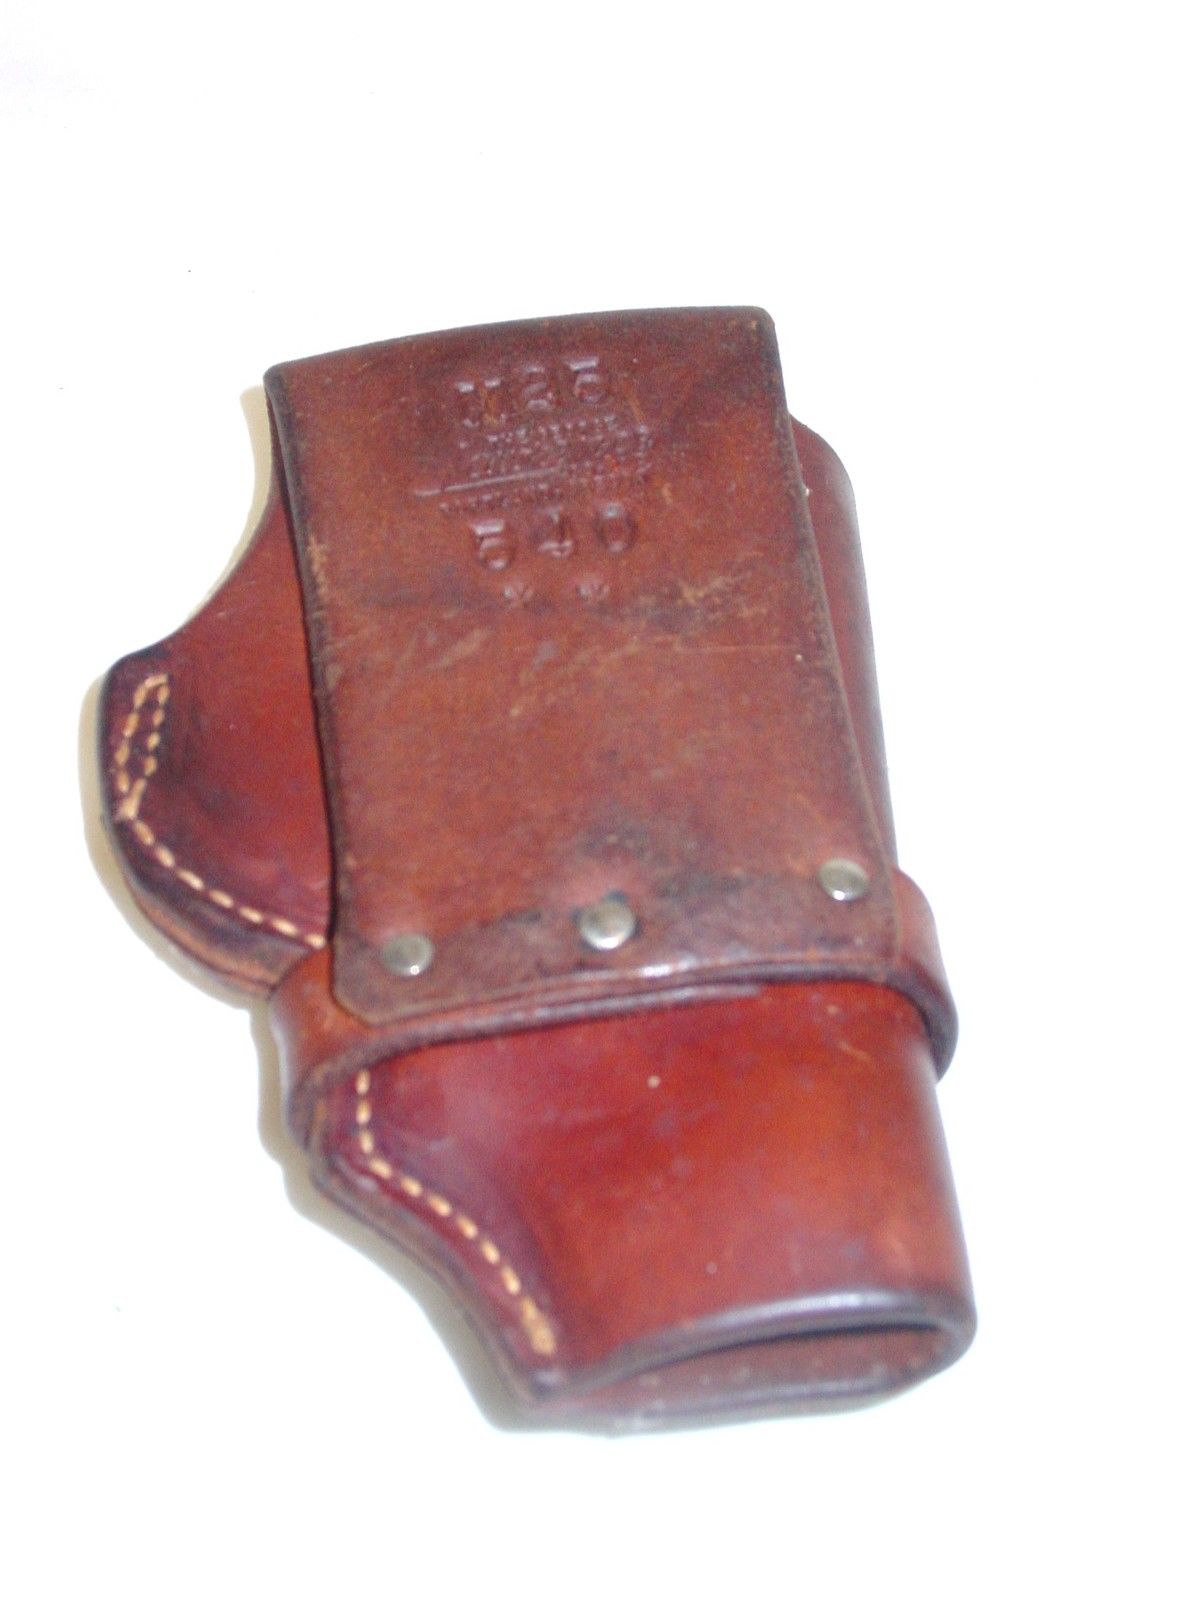
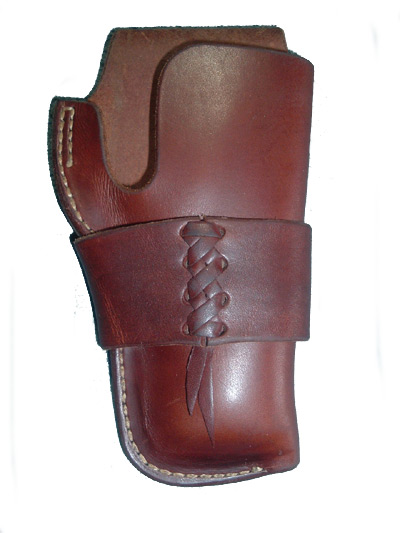
I have seen a few threads about some old school holsters, and most of them have about the same color. The one example listed was a George Lawrence holster. I know these holsters show some wear and the color changes over the years, but can anybody tell me what color to use use to duplicate some of the old school holsters. I was thinking of making a flap holster or just something more old school and would at least try and get the color correct for the period. Here are some examples I am trying to duplicate. Thanks again in advance for any information that can help.


-
Dwight, thanks for clearing it up. I'm not sure when the leather seems dryer than normal since it always seems dry to me. I did test a few more pieces and on one piece just applied a very light coat. The result seemed uneven a first, but after i left it for a a while the oil evened out and the end result was not as dark as the first piece I did. I properly overdid it the first time in an attempt to get an even finish. Moderation and patience is the key. Thanks. Sound like there is a consensus.
-
The reason why I switched to the oil based dye is because my pieces came out very hard when I used the regular dye. I have read somewhere that the oil based dye will not harden the leather as much so I decide to give it a try. I only put oil on the grain side. Maybe I should just put it on the flesh side if I know it will darken the color on the grain side. Without any dye I use the oil to darken the leather so the grain side is probably the correct side to apply it. If I only want to put some oil back into the leather and don't want to make it any darker, then maybe applying it to the flesh side is the way to go. Just another way for me to try out. Thanks for mentioning both, I never thought of only applying it to the flesh side.
-
I think I need to try to have damp leather before I apply the oil to allow light coats. I think with the dry leather I have found that if you apply it lightly then it is blotchy, where the damp leather will maybe help to apply just a light coat and still have an even darkening of the leather. Thanks for the advise!
-
Mike, thanks for the moderation advise. I will definitely apply it to the use of neatsfoot oil. I would probably always apply some oil, but will have to make sure I test it out first to see how much it will darken the piece.
-
Dwight, Thanks again for the advise. Interesting that the leather would hold up after all this time. I probably prefer to put some oil back, so I just need to make sure to keep it to a minimum especially when I use the oil dye. What solvent do you use to cut the Fiebings oil dye?
-
Matt, thanks for the information about diluting it with alcohol. What kind of alcohol should be used to cut it? This piece actually sat for a few days before I applied the neatsfoot oil.
-
Everybody must be getting tired of all my questions, but at the moment I am a bit stumped regarding how to use an oil based dye. I have basically been using one of three dye/coloring methods on my sheaths and holsters. My preferred method is to just use neatsfoot oil and a bit of time in the sun until I get the correct color. It looks natural and improves with age. Another method is to use the Fiebing regular dye. Since I work with vegetable tan, research showed I need to put some oil back into the leather, so I put some neatsfoot on the piece after the dye. This darkens the color a little bit, but not that much. Still acceptable and I have a good idea what the end color will be. Now since I have been doing leather work for a few months I decided to start using the Fiebings oil based dye, since it sounds like the more professional dye to use. So I bought the saddle tan and applied it to one of my pieces. The color came out great, very close to the color of using just neatsfoot oil, but with maybe a darker tint towards the ends of the leather. All so good this far. The next step that I always do after the dye dried, is to apply some neatsfoot oil. This is where it all went wrong. The color didn't just darken a bit like when applied after the alcohol based dye, it darken to a point where it was nearly a dark brown. So my question is; should I even apply neatsfoot oil after using an oil based dye, or is it not necessary. If I still need to apply some neatsfoot oil after dying with an oil based dye, when do you apply it so that it does not darken as much, but more in a controlled manner. As always, all comments or suggestions will be highly appreciated.