


Timothy
-
Posts
76 -
Joined
-
Last visited
Content Type
Profiles
Forums
Events
Blogs
Gallery
Store
Posts posted by Timothy
-
-
Carr52,
Looks good. Much better than the Turk's heads I started with, or was tying just a year ago.
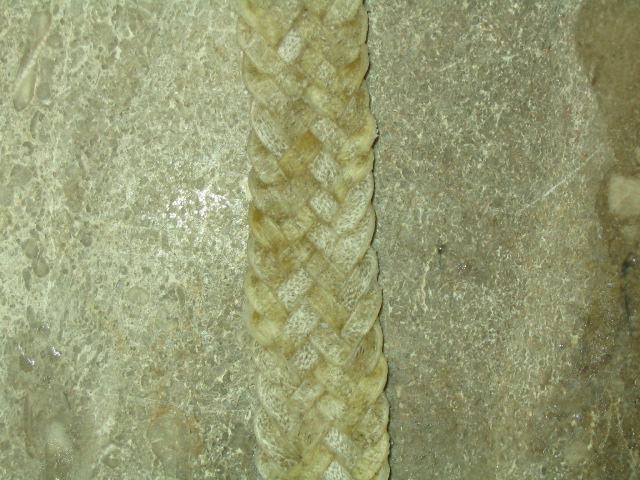
Not to critisize, but I'll point out something I wish I knew when I started. You can see that there are gaps in between the strings, even though the knot is tight to the core. This happens with basket weave (over 1, under 1) knots. This is where you would need to add an interweave to fill the gaps. I still haven't figured out how to consistently do more than one interweave in a knot, but I'm much happier with my round turks heads now.
Keep tying,
Timothy
-
Glad this helped.
Carr52,
For length of lacing I use the finished length I want times 1.5. This usually gives plenty of leftover for terminal turks heads leaving tassels hanging, etc. For simple braids I usually wind up cutting off several inches, but I'd rather have too much than not enough. I'd be interested to see how others figure this too.
Timothy
-
Thank you Rob.
I'm going to build one and try to find a hide locally.
Timothy
-
Thank you Rob,
I've been wanting to try this, and the pictures really help.
I do have a couple of questions.
About what size is your frame?
Just out of curiosity, was the big circle the butt? I haven't worked with many large pieces so I can' tell.
Timothy
-
Entiendo,
Welcome to the forum. Your work looks great.
I'll let someone with more experience answerr your leather questions.
Timothy
-
Thank you,
Timothy
-
If he's not interested, I am.
I've been wanting to learn the crocodile ridge braid. It is not in any of the books I have.
Timothy
-
The stampede strings with cotter pins work great.
I work in a western store and have put in a lot of both kinds. Most Western stores will install them for a couple of dollars. We have a special punch used to cut eyelet holes in hats and a eyelet setter that looks like a pop rivet gun. A small drive punch ought to do just as good for a one time thing. The eyelets we use have about a 3/16" hole diameter and are about the same length. You can set them by hand with the proper size snap punch. Just a tip if you set them yourself: put the hat on and mark the location according to your ear. Most like them just in front of the ear. Measure about 1/4 or 3/8" from the sweatband to the center of the hole and you're good. Don't Crimp the eyelet too tight or it will end up misshapen and cut through the hat. This is much simpler than lining up the eyelets in the crown.
I prefer a tight fitting hat, and am in the brush alot, so I don't usually use them. I can't say I prefer one style or the other. The eyelets do allow you to use one long piece of string with the center looped behind the crown.
Other than showing you how and letting you do one thats all it usually takes to train a new employee.
Hope this helps,
Timothy
-
Thanks Pete,
Perfect timing, too. I had just satdown to look for a pattern to use on a quirt popper. The belt pattern without the repeat will fit perfect. Off to work on it now.
Tmothy
-
Good work,
Lariat ropes make good bosals if you can get them shaped right. I don't care if its not leather, I like to see nice braids.
Timothy
-
-
Thanks for the feedback.
This was my first tutorial, so I thought it turned out pretty good. Only took 3-4 hours, but most of that was spent typing. The most used key on the keyboard is the backspace button.
I used to do this braid in string, and realized I had never done it in leather so I gave it a try. Been thinking I'll use it to make a hatband when I get done with current projects. I started one with a 7 plait but messed it up (still learning to handle this rawhide), so I used the leftover string for this tutorial.
I can't take credit for the pictures. I don't always get along with a camera, so I got my Dad to come take them. That really made it work because you could see what both hands were doing and I didn't have to stop to reset timers or anything.
Beaverslayer, TomSwede, Hilly, et. al.,
Your work amazes me. I've learned so much from your posts that I thought I would do my part and pass on what little I know. Yes, this really is a great site.
Glad ya'll like it,
Timothy
-
Freak,

'nuff said.
Please make this a regular feature.
Timothy
-
This looks great.
Thanks for the tip on how you did the braid stamped ring.
As a braider, I think I'll add this stamp on to my wish list. Its cool.
Timothy
-
Festus,
Check out the braiding section. I just posted a tutorial for a nine strand herringbone braid here:
http://leatherworker.net/forum/index.php?showtopic=2822
I've never done an eight strand flat braid. I've done four and six strands flat, but for me the odd numbered flat braids seem to be easier to work with.
If you haven't already, look into buying a book on braiding. Mine get constant use.
Hope this helps,
Timothy
-
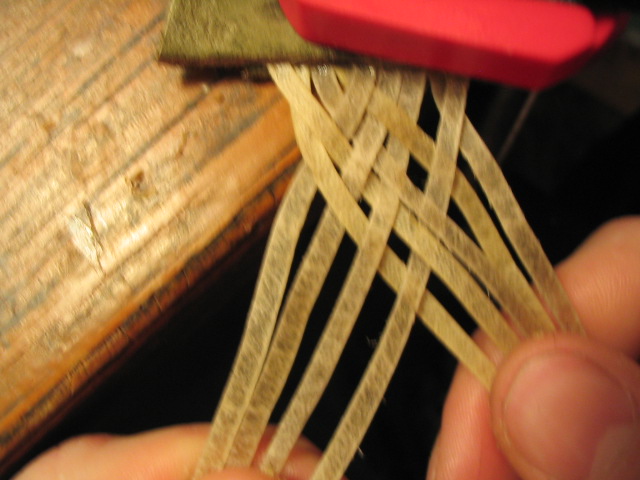
Now take strand #2, the outside left strand to the right over #5 and #6, under #7 and #9.

Take the outside right strand, #8 to the right over #4 and #3, under #1 and #2.
At this point you will have five strands on the left and four on the right. Continue working the outside strand from the group with 5 strands towards the center over two and under two to add it to the inside of the other group so that it now contains 5 strands. Repeat the procedure with this group. Try to keep the bights on the edges even and the braid pulled tight.
Here is a picture of the completed braid.
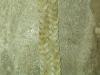
I couldn't find anything I had made using this braid so I'll have to figure out something to use this short piece for.
I hope ya'll enjoy this and make use of it.
Timothy
-
Howdy,
Someone requested this braid in the How Do I Do That? section, so I thought I'd see if I could do a tutorial. There are several different 9 strand braids, but I think this is my favorite. It is an over two under two pattern that gives a nice herringbone effect. Just for your infrmation, it is commonly used to braid the tails on bull ropes.
Note: All numbers refer to the starting position of the string, begining with 1 on the left and continuing to 9 on the right. My braid is left loose to show the path that each strand takes. The first few steps show how to close up the top of the braid to make it more attractive when the end is already fastened in place.
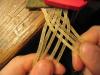
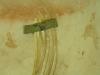
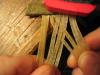
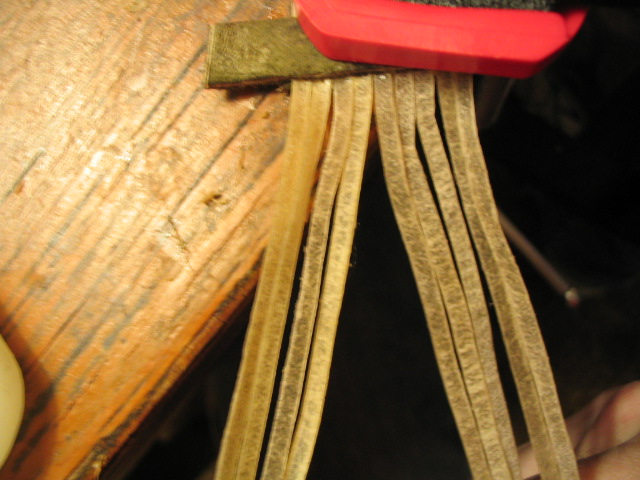
Begin by arranging your strings next to each other with the hair sides up and lash, tie, or glue them together. I used contact cement to stick them to a piece of suede, then folded it over the top of the strings. Clamp them in a comfortable position to work.
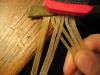
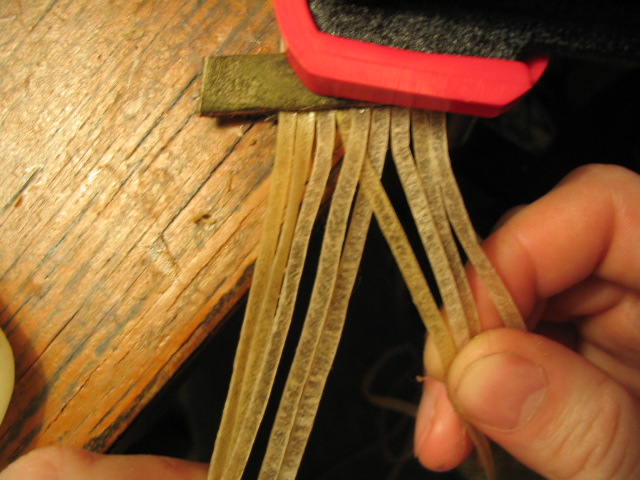
Split the strands so you have 4 in your left hand and 5 in your right.

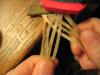
Cross strand #4 (the center strand in your left hand) to the right understrand #5. Now #5 is in your left hand and #4 is in your right.

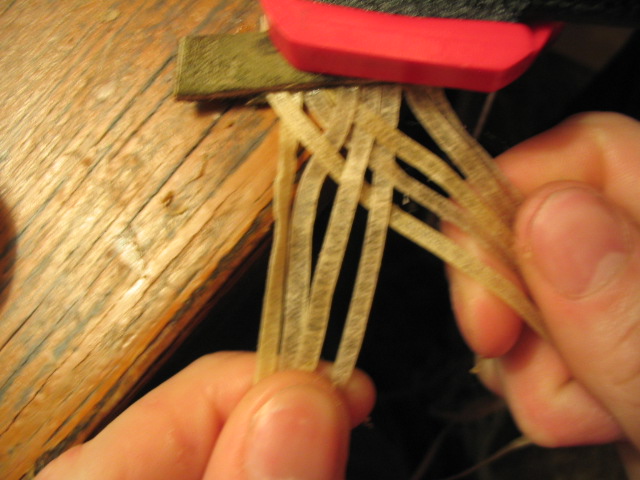
Take strand #6 from your right hand and cross it to the left over #4 so that it becomes the inside string in your left hand.

Cross strand #3 to the right under #5 and #6 so it is the inside strand in your right hand.
Cross strand #7 to the left under #4 and #3 so it is the inside strand in your left hand. This completes the closing up of the top of the braid.
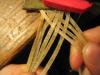
Now the main braiding begins. At this point you should have 5 strands in your left hand and four in your right. Take strand #1, the outer strand in your left hand, and cross it to the right over #2 and #5, under #6 and #7. Add it to the inside of the right hand group so that it contains 5 strands.
Take the outside right hand strand, #9 to the left over #8 and #4, under #3 and #1. Add it to the left hand group.
-
Thank you both.
It will be #2 or #3. Have to think on it for a little while now that I have your imput.
Heading back to cut strings now. I'll let you know what I come up with.
Timothy
-
Howdy (or maybe How To?) Again,

I am about to start braiding my first quirt. I made my core tonight, and will start cutting strings when I get home from work tomorrow. My question is about attaching the popper. The only instructions I have are in Bruce Grant's Leather Braiding and I don't like the method of popper attachment he shows. I want to make a popper that goes through a braided eye and is secured with a ring knot. Like on this page: http://www.lacemaster.com/showcase.htm
The ways I have thought of to do this are:
1. Make a simple braided eye and cement/lash it to the core. This does'nt seem like it would be as strong.
2. As above but spliced into the body braid of the quirt.
3. Cut my strings for the body half as many, but twice as long and make a small braided section in the center, then braid over the core with both ends from the bottom up. Ex: With 4 strands I would get a four strand eye and 8 strand body. This is the method I am leaning toward because I have done it before using rope.
4. Make a small twisted core for the eye, nail or staple it to the main core, and I can braid over it or not. For strenghth it shouldn't matter.
Is one of these methods correct or is there something simpler I am missing?
This is my first attempt at making a quirt, and will hopefully end up hanging on the saddle horn when I'm not riding. I'll probably keep the braids fairly simple as I'm still not to confident in my ability to get the moisture right with rawhide yet. I'm going to start by braiding my wrist loop and cut some long strings and hope I get some answers. Feel free to chime in.
Thanks for all the help,
Timothy
-
I've had good luck making my boot grease out of beeswax and olive oil. Don't know about the Ivory soap though.TimothyI've had good luck making my boot grease out of beeswax and olive oil. Don't know about the Ivory soap though.Timothy
-
Try a light coat of Olive oil. Don't try to saturate it just use a couple of drops at a time on your finger or a cloth and rub it in. On large items keep repeating until covered. Let it sit for a few days and repeat. After 2 or 3 aplications the leather ought to soften back up.
I've brought back some old tack of my great grandfathers I thought was gone using nothing but saddle soap for cleaning and olive oil for conditioning.
Hope this helps.
Timothy
-
Once again, thank you all.
Personally, when cleaning I always rinse until my water comes off clean but that is to get all the dirt off. Cleaning leather I've been doing since I was old enough to use a boot brush (still learning though.) Its making stuff out of leather I'm still new at.
Rawhide,
Ostrich is considered an exotic, and they do not react the same as bovine and equine type leathers. The only cleaners/conditioners we reccomend are reptile cleaner and leather balm types that state that they are safe for use on all exotics. I was taught that heavy oils and waxes actually dries out exotics and will crack them. They seem to need to breathe more, and are much more prone to stains than cowhide. I have even seen heavy sweaters stain light colored ostrich boots.
Hedge,
Some bootmakers consider 'roo exotic, probably so they can charge more, and others don't. I have had good luck treating it like any calfskin or thin cowhide.
Thanks,
Timothy
-
Well, I like it.
If I may ask; What did you finish the knot with? Its got a good shine to it.
Timothy
-
I decided as a rider I'd speak up about the boot/stirrup issue.
Pointed toes were designed for broncy colts and cold mornings. Sometimes you need that right stirrup right now!
I thought work boots were designed not to fit stirrups because they aren't safe to ride with. Mud treads and stirrups don't mix. I have been drug. Ten yards can seem like ten miles. Don't take that chance.
Timothy


Braided Headstall
in Saddle and Tack Accessory Items
Posted
Beautiful.
Just now saw it.
Thanks for sharing.