hanns
Members-
Posts
26 -
Joined
-
Last visited
Content Type
Profiles
Forums
Events
Blogs
Gallery
Everything posted by hanns
-
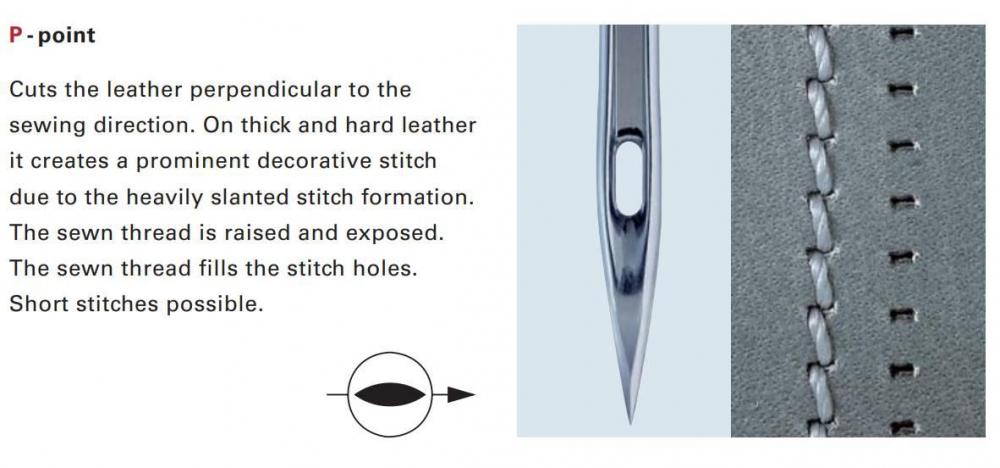
Hi folks, I've been experimenting with P/NW type needles to create a slant stitch effect. And it works great! Except the slant is on the back of the work rather than the top. Is that normal for these needles? Needle is installed in the machine per instructions (scarf toward hook, groove facing away).
-
I forgot to mention: I did try this. I just removed the screw and the little spring arm assembly to get them out of the way so the thread could go through the guide freely. It didn't make any difference in this case, so I put it back on.
-
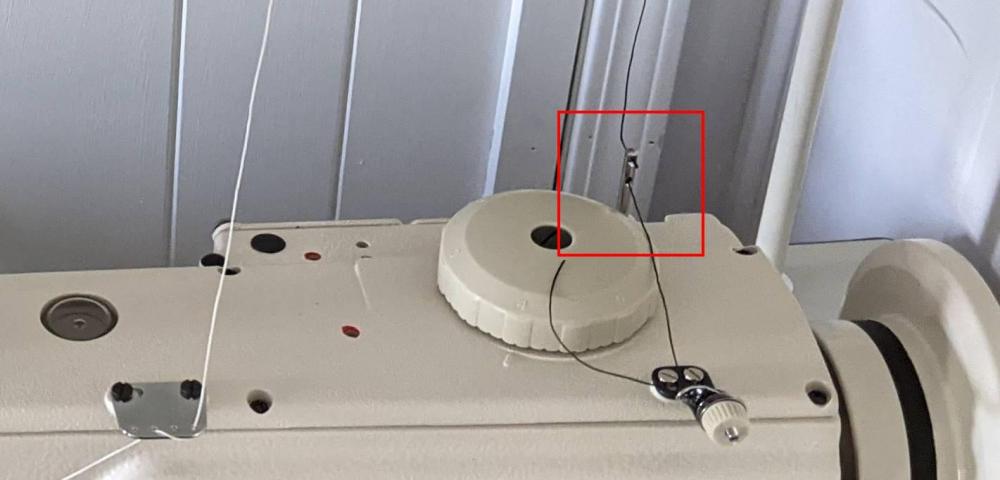
Are you referring to this? I will see what I can do to decrease the angle from the spool to the machine and see if that helps.
-
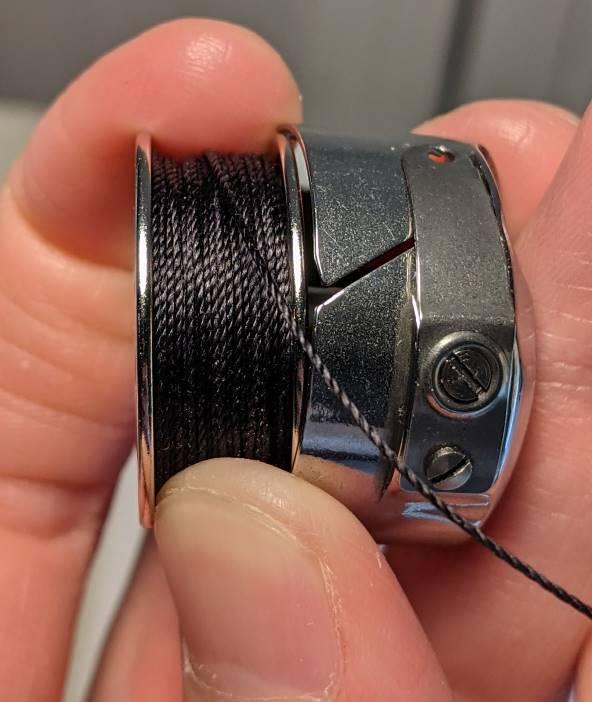
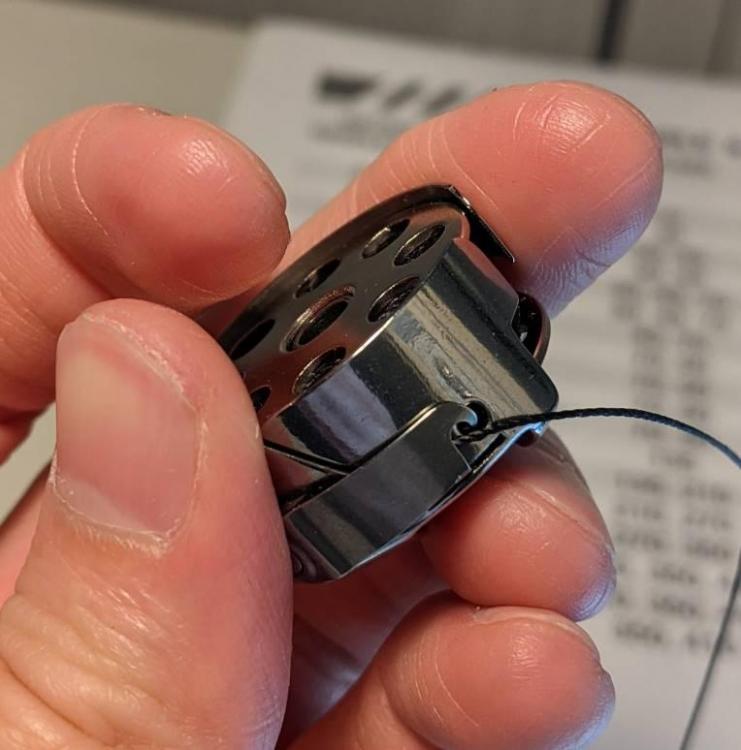
I wasn't 100% convinced the issue was resolved, so I spent more time today testing and sure enough there it is again. I was thinking about your test here as well as the issues people seem to have with these smaller spools, so decided to test that part in isolation and video it. Thread seems to be getting snagged before it even gets to the tensioners.
-
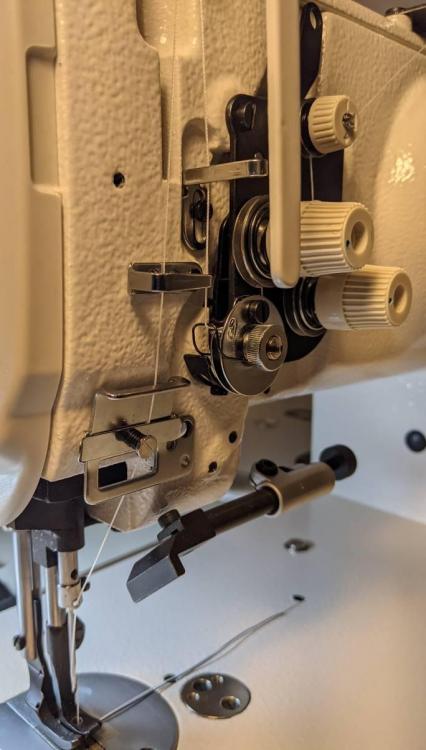
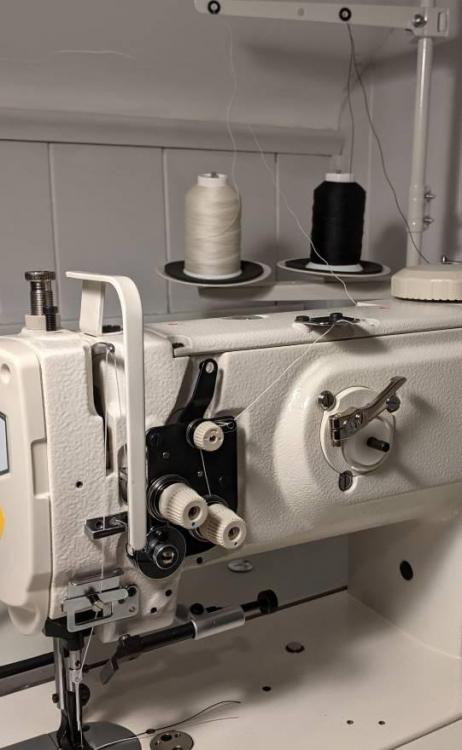
I finally got some time to work on the machine tonight. I ended up getting something that looks better. Here's what I tried: Note: When I say "didn't fix" I mean I didn't notice a difference. It's possible there were a lot of little improvements that added up. Switched to 138 thread for these tests. Amann thread top and bottom. Switched to a new TRI point needle. Didn't fix. Wound up a new bobbin. Didn't fix, but needed to anyway. Change thread path to right side of the spring thing below the takeup lever. Didn't fix, but it's the way illustrated in the manual so well enough. Lowered the thread spool holders to decrease the break angle to the machine. Didn't fix. Removed the spool sock things. Didn't fix. Significantly loosened the small/upper tensioner and adjusted the main ones to compensate. I think this might have helped. It had been pretty tight. Significantly increased foot pressure. I had backed it almost all the way off previously to avoid leaving prints in the leather, but it's possible that it was so loose the leather was being pulled up with the needle - exacerbated by larger needles. I think this helped. At this point I could still see variations in where the knot landed in a single layer of leather, but nothing as egregious as my original pictures. So I moved on to a more realistic scenario - multiple layers. With much thicker material I could bury the knot enough that it's not visible from either side. I still don't think it's perfectly consistent, but it seems better and I can get acceptable results consistent with my initial tests of the machine when I first got it.
-
I don't think the thread I'm using is cheap? It's Amann and A&E brand from Thread Exchange. Are there brands of bonded nylon thread that are better? This thread is also new (at least to me, could have been sitting in a warehouse, who knows). The issue happens even with a freshly wound bobbin.
-
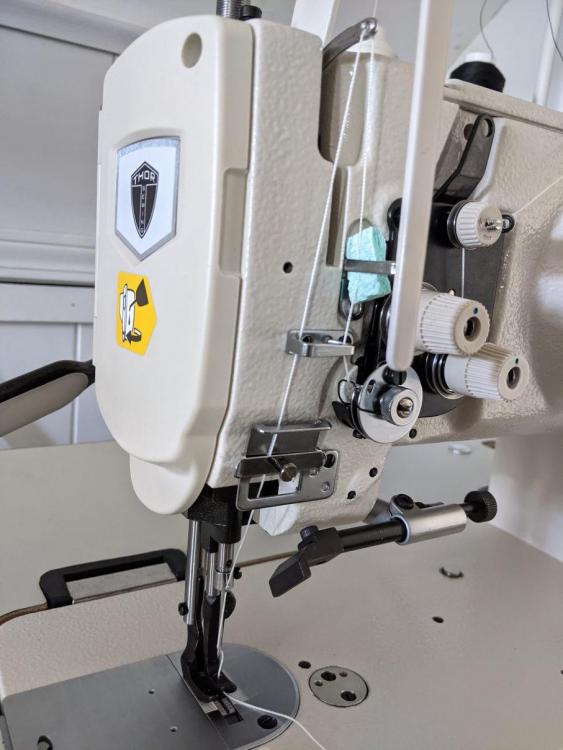
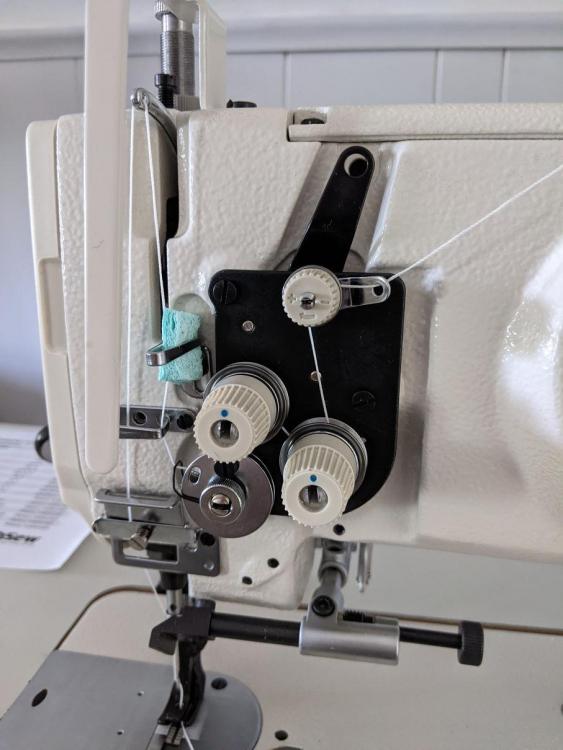
Thanks for the suggestions. I will give these a shot. I'm hoping I have some time to play around with it again tonight. Ah, I may have misunderstood what he meant. They can be a little hard to describe over the phone. I'll try moving the sponge to the horizontal guide below the takeup lever. The manual that came with this machine has it threaded on the right as well. I think I was trying it both ways when this photo was taken. It didn't seem to make a difference but I'll do it on the right per the directions going forward. Funny story about the socks - I bought them specifically because of this issue. I thought maybe the thread was falling off the spool and getting caught. Sadly they didn't help, so probably no point in continuing to use them. Anyway I will make some adjustments as suggested when I get a chance and report back.
-
I was actually working with maybe a 50-25% full bobbin most of the time. The brown piece was done from the top down. What changed along the way was tension on the bobbin (tight on top, looser on the bottom). Even with the settings for the top row where it looks good, the issue would crop up if I did a longer run of stitches. So it was never really eliminated even with very tight bobbin tension.
-
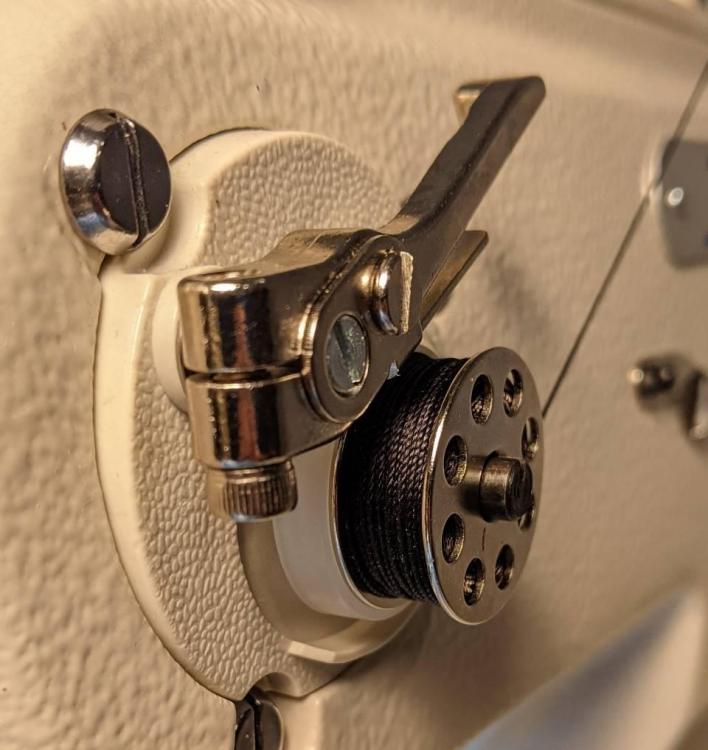
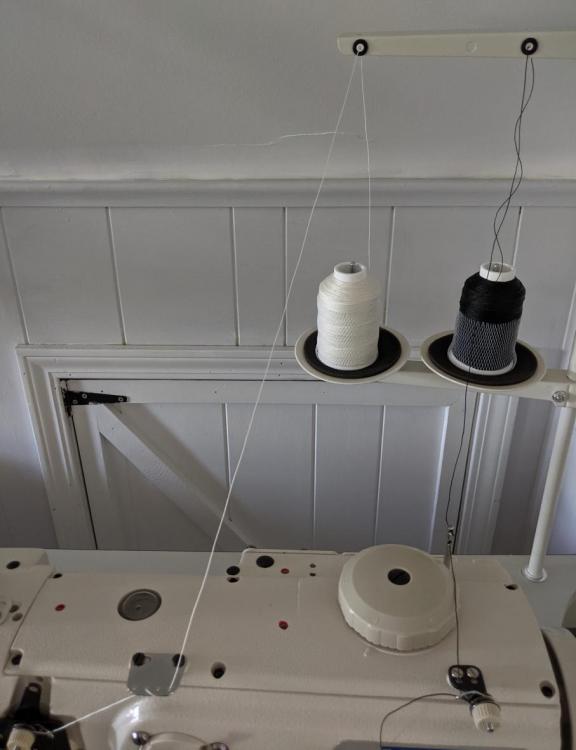
It's 8oz spools of Amann (138) and A&E (207) brand thread from Thread Exchange. I've added some pictures showing the thread path. The black spool here was for loading a bobbin, but isn't actually hooked up to anything. Ignore the sponge. That was something the service tech had me try to ensure the thread wasn't getting caught up as the take up lever moved up and down, but it ultimately didn't help the issue. This was a NW type needle that is meant to make a slanted stitch. However the slants are appearing on the back rather than the front, so maybe that's related. I'm not sure why (installed needle per directions), but I'll try moving the needle around a bit and see if it helps. I think for my next test I'll try a diamond needle and see if the issue goes away. I was actually thinking about a gauge. I have a small one that I use to calibrate bobbin tension on my older Singer domestic machines. $10 for a heavier gauge isn't a bad idea to have on hand. And if this keeps up in spite of other changes, having a closer look at the bobbin case spring sounds like a good thing to try. What thread works well for you? I've just been using stuff from Thread Exchange, but I'm open to other brands/sources. Thanks for the suggestions everyone. I will report back when I've had a chance to test them.
-
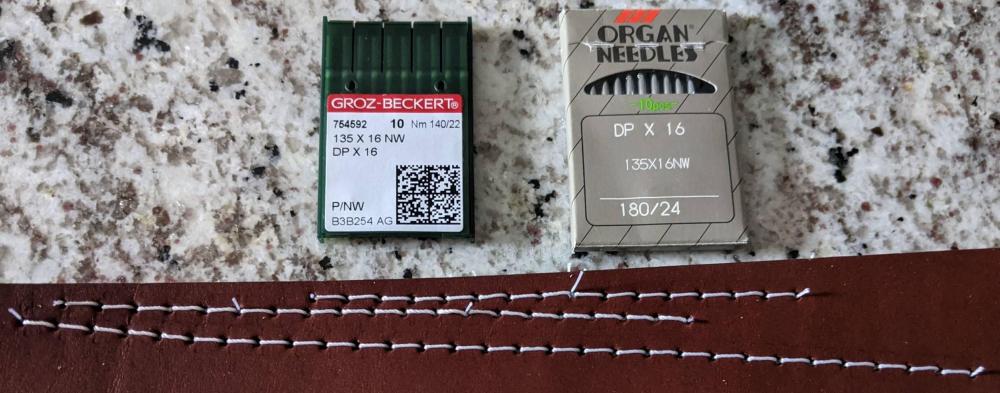
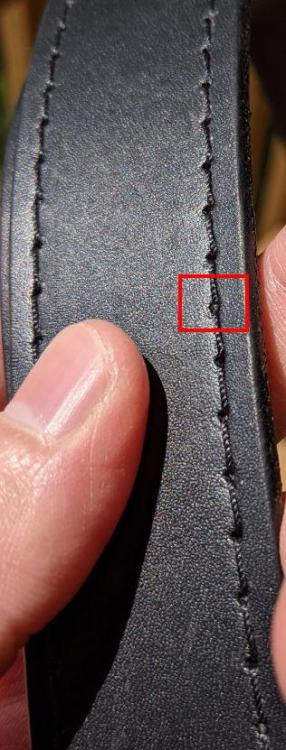
Hello, I've run into an issue that I haven't been able to track down with a new 1541S clone machine (Thor). The bobbin thread intermittently shows prominently on top. This originally happened with size 138 thread (black belt photo). I am using 207 in the brown leather photo to make it more visible with black in the bobbin and white on top. Things I have checked/tried: No spool snags Thread is pulled directly over top of spool. New needle/needle is large enough for thread size Tension discs are clean Machine is threaded correctly & thread is not snagging in the path (that I can see) Bobbin tension set based on drop test. Also tried higher tensions. Talked with a a technician at the seller. Got to a point where we could hide the issue by dialing in tension, but never really eliminate it or identify the source of the inconsistency. I noticed the bobbin thread shows less often when the bobbin tension is set very high. It still happens, just very occasionally. Setting bobbin tension lower (and then adjusting the needle tension to compensate) seems to make it happen more frequently. I'm almost wondering if something is snagging in the bobbin area. Could an issue with the bobbin case cause this behavior? Has anyone seen this before or have other ideas I should check? Appreciated.
-
Please Help!!! Techsew 2750Pro Servo Motor SS-1221-P
hanns replied to Stefanie1982's topic in Leatherwork Conversation
Speed reducers are expensive, a pain to install, and bring some of their own fun issues along for the ride. Here are some things to check out before going down that road: 1. Swap the pulley on the motor for a smaller one, if possible. The smallest ones I've seen are 45mm, and most motors come with something larger than that by default. Cost: ~$20 if you need a new belt (I did). This will give you more reduction, as demonstrated here: 2. Use a larger hand wheel. Some people swap the one that comes with the machine for something larger. This is a little more of a pain because you need to find a wheel that has the proper bore diameter (or drill it out yourself). But the effects can be dramatic, demonstrated here: https://www.youtube.com/watch?v=9y2Aapk7X8E Here's a handy calculator to see how much benefit you'll get from these kinds of mods, as well as calculate the belt size you'll need: https://www.blocklayer.com/pulley-belteng.aspx According to this, if you had a 45mm (1 3/4") pulley on the motor and a 6" hand wheel with your motor running at 500 RPM, you'd be down to 146 RPM at the machine. If that's too fast, it might be time to consider either swapping out the motor for one that runs slower or a speed reducer. Personally, I got frustrated with the speed reducer and ditched it in favor of the SewPro 1100 motor which bottoms out at 100 RPM with a lot of torque. New motor would likely be easier to install and set up, but it's potentially more expensive. Here's the result on my machine (a 1541S clone). No speed reducer, 45mm pulley to the standard hand wheel: -
Glad to help. A little more info: This type of motor has a brake which makes operating the hand wheel a pain. The brake pad is easy to remove, but I found that the speed reducer adds quite a lot of momentum to the system and the brake is helpful to get the machine to stop quickly. To get around this, I found that there's a small "gap" between when the brake disengages and when the motor starts turning, so if I carefully push the pedal a bit, I can turn the hand wheel no problem. Just have to be very careful. I'd still like to know if the speed reducer could be avoided entirely with a small pulley + low speed brushless setup. I put the smaller 45mm pulley on the motor tonight and although I don't have a speed tester, I'm pretty sure I can get below 1 stitch per second now with light pressure on the pedal. It was a $15 upgrade ($10 for pulley and $5 for a slightly smaller drive belt). It's also easy to do, so I'd recommend it if you want to go slower. Good luck in your search. It's not the easiest thing to shop for.
-
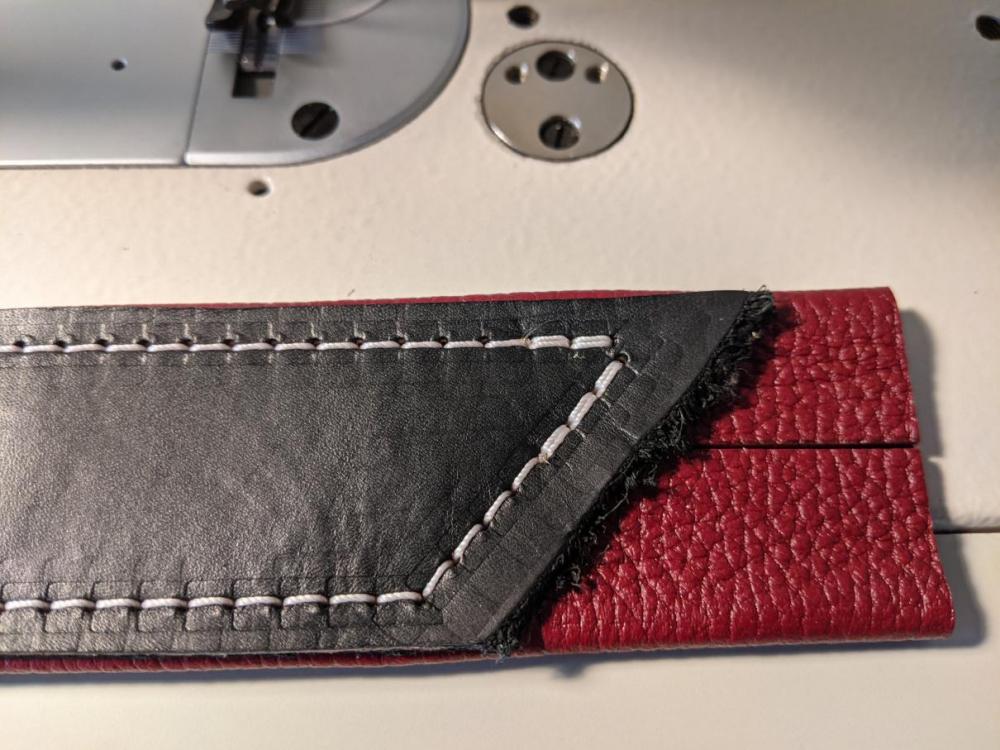
I ended up going with the Thor GC1541S-SRG package from Sunny Sewing Machines. It's a 1541S clone with dual tensioners (similar to the 1508) and a top-mounted foot height adjustment knob like the 1541-7. This particular kit also comes set up with a 550W brushed servo (the same one that comes standard on a lot of machines) and a speed reducer. The main reason I chose this machine over the name brand Juki is because it is specced to support larger thread sizes. Spec says TEX 270. I was skeptical, but I've now tried it myself and it works beautifully for my purposes, albeit with limited bobbin capacity for such a thick thread. Tonight I'm going to slap a 45mm pulley on the motor (comes with a 75mm by default) and see if I can get the speed down a little more. Also, my dealings with Sunny Sewing Machines have been positive. The first machine they shipped was dropped in transit. I took pictures, rejected the shipment, and Sunny sent a replacement a few days later. They've been very responsive, and I was supported even after the sale when things went wrong. This machine (and probably any of the 1541 type machines I'd imagine), does *amazingly well* for my purposes. It goes through two layers of 8-10 oz bridle leather like it's not even there. Bridle + layers of chrome tan? No problem. I've experimented with a bunch of needles and the Organ NW leather needles (and probably others) give the stitches a nice slant very reminiscent of saddle stitching. I'm very happy with it so far. I've attached some photos of different tests so you can see what I mean. One is 8-10 oz bridle + 2 layers of 4 oz deer. The other shows off the slant effect.
-
I should have mentioned that I am looking at Keystone for my vendor since I'm somewhat local to them and may be able to arrange a pickup. The speed reducer they offer is the SR-2, not the box type, and not being able to tilt the machine back seems like it would be a real pain to me. I suppose another option would be to order the machine with the FESM motor and no speed reducer, then order the box style reducer separately and install myself. Hmm, I think I assumed that if I ordered the machine with the speed reducer, it would be set up for me and I didn't think about the issues around installing it. I'll have to ask that question. I'm curious if anyone has feedback on the SP-1100. What I'm seeing so far is the reducer is known to work well, but it comes with its own set of issues. Could the SP-1100 be used without a reducer to the same or similar effect and not have to deal with the installation and belt geometry issues of a reducer?
-
Hello, I recently posted about choosing my first industrial machine - thanks to everyone who chimed in to help there. I am going with the Juki 1541S and wanted to discuss the pros and cons of the motor setups I'm looking at to make a more educated purchasing decision. Cost difference: $10 - negligible. Typical use case: Sewing through 8-10 oz bridle + two layers of 4 oz soft leather. Would like headroom to ensure power isn't an issue if I need to use heavier material for some projects. These pros and cons are based on my research so far, including reading a lot of threads here, not actual experience. Please feel free to correct me if something seems off and/or add your own experiences. FESM-550S w/ reducer - PROS Gold standard - used by lots of people, known to work well. Very slow speeds possible. Maximum controllability. Reducer can be used with a variety of motors. Easy/cheaper to replace motor if it poops out. FESM-550S w/ reducer - CONS Reducer is a heavy cast iron wheel that might introduce some additional momentum into the system that the motor has to brake. Anyone have issues with this in reality? Might not be an issue at low speeds anyway. Reducer makes for a more mechanically complex setup compared to other methods of slowing things down (smaller output wheel, larger hand wheel, motor that supports very low speed/high torque out of the gate). Less powerful motor for the money (reducer itself costs more than the motor), though still plenty to do the job. SP-1100-NPFL - PROS Every account I've read so far has described this as a torque monster even at low speeds. Probably overkill for me, but nice to know I'd never want for power. Simpler setup with detached control box in easy reach. Comes with the needle positioner, which seems cool, but might not be needed at slow speeds anyway, and could just be another gizmo to break. SP-1100-NPFL - CONS Expensive - if this motor poops out, high replacement cost since I can't just slap a $150 servo on it and call it good without a reducer. Not as time-tested as the 550S/reducer setup. Perhaps not able to reach the low speed/high torque abilities you can get with a reducer (without aftermarket mods)? Can anyone chime in on this? Question: Which of these setups would you choose to power your new machine if you were buying today, new to using a sewing machine, and wanted a reliable low speed setup that has room to grow for the future? Or should I just toss a coin because they're both pretty darn good?
-
Although my work is similar to your friend's, I'm personally a klutz so I'll be doing things very deliberately - especially early on when learning the machine. Hmm, $10 difference is negligible. My inclination is toward the 1100 for slow speed torque out of the gate and ability to easily ramp up should I ever want to by pressing a few buttons. Again, appreciate your input. It's helping me scope this down to what I believe will be a very nice setup that handles what I normally do now, with plenty of headroom to spare.
-
Thanks! I appreciate you taking the time to dig that up and the tip on searching. I had a read-through and I have to admit, I really like the idea of a beefy motor with high torque at very slow speeds to keep the setup simple. Earlier you said: A reducer from Keystone costs $186: https://store.keysew.com/parts/sewing-parts/sr-2 Add $130-150 for a motor, and you're well over the cost of the SP-1100-NPFL. So the only real advantage I can think of is if the motor dies, your replacement cost isn't as much. Are there other advantages to the reducer setup you're thinking of? I'll go through the other threads, but figured I'd ask since you mentioned it.
-
This is something else I was thinking about: cheap motor with a reducer vs expensive motor without. If the motor dies, swap in another cheap one. Reducer is just a big wheel - not likely to die. Might be a more robust long-term setup for a similar up-front cost. I'll see if I can dig those up and point my research in that direction since the "which machine to get" question seems to be coalescing around the 1541S, both here and in my other research as a machine that would handle my current needs and provide some room to grow. Particularly for me, who has no experience using sewing machines other than practicing some hems on our old Singer home machine right now. I'm likely to screw this up! Okay, I'm sold on the safety mechanism.
-
Researching the motors Keystone has, this seems interesting. Basically the same promise as the SewQuiet, but more powerful and detached control box. Video I found demonstrating it:
-
These are the motors I keep seeing everywhere on new machines, so I was confused when I kept being told everything's brushless now. Is this a problem unique to the 1541? Or do all the other machines already have some kind of safety mechanism and don't need a special model for it? That's a good idea. I would actually like to visit in person to see how the machine works and discuss options before buying, but I'm not sure if they have in-store operations right now due to covid. I'm waiting to hear back on that.
-
Good to know! This is one of the things that makes navigating the sewing machine world, uh, interesting. Clones and rebrands of rebrands lol. But the Workhorse or SewQuiet motor does seem to do the job well in third party tests I've seen regardless of the marketing. Shop "local" to me (not really, but it's not like there's an industrial sewing machine dealer on every corner) has a refurbished Juki 1541 non-S for under-budget. Also a refurb Consew 226 for just under a grand. I'm waiting to hear back from them, but whenever I do I'll ask about those and what they recommend for the best slow speed performance.
-
This is actually one of the things that really appealed to me about the Fabricator package. It comes with their Workhorse brushless servo motor that delivers high torque at the slowest speed (here's someone else's video demonstrating it versus typical brushed servos), making the learning curve much easier. You can move the needle in small increments out of the box without the need for a reducer and still have the penetrating power to go through material thicker than I usually work with. The last thing I want is to ruin a nearly-complete project because the machine got away from me, so you're right - this is a big consideration for me. What would be cool is finding something like the 1541S set up with a brushless servo like that out of the gate to save the expense of a reducer replacing the standard brushed servo. Either that, or the machine + table with no motor and add the Workhorse or similar myself.
-
Thank you. The 1541S is one I've seen mentioned a few times and am looking into seriously now. I had seen prices of $2k shipped, but Keystone seems to beat that by a fair bit, making it more accessible. Thanks for the link. Thanks for the suggestion. I am definitely going to do more research around the 1541S. I agree going in person would be ideal. Keystone is about an hour away from me if I want to deal with city driving. Might be worth a visit.
-
Hello, I am a hobbiest leatherworker and have been saddle stitching everything for years. This can easily add 10+ hours to some of my projects, so for the last maybe year or so I've been mulling getting a machine and lately I've been seriously researching it. My work mostly consists of flat items made from 8-10 oz bridle leather with a soft leather liner. Total assembly <= 0.3". Not to rule out ever doing anything else, but that's typical for me. I thought I had found "the one" in the Sailrite Fabricator because it checks all the boxes I've been told to look for: Compound walking foot Adequate foot height Large bobbin Can work very slowly at full power (a must for me because I'm new to sewing machines in general, so I'd like to flatten the learning curve as much as possible) Parts availability However I see people say that machine isn't really meant for leatherwork, might struggle, isn't as good as brands like Juki for the money, loses resale value. People recommend Cowboy, Cobra, Juki, Consew. But my problem is price and understanding options. Cowboy and Cobra have a very high cost of entry. Juki has a ton of models and I'm not even sure where to start with them and what kind of motor, reducer, whatever else I'd need to make a good leather setup. Consew seems to be higher priced compared to Sailrite for a 206 once you add the table, motor, reducer, and shipping. Ideally I'd like to be <=$1500 but could possibly stretch to $2k for a complete setup if the machine were really that much better. I am not opposed to buying used either if it's in good condition, but I don't particularly want to haunt the classifieds for a year hoping something comes up (haven't found anything to date). I'd appreciate any recommendations you might have in that price range for the type of work I'm trying to do. Or maybe I'm just being unrealistic? Thanks!
-
Hello, I am trying to find suppliers of New Zealand deerskins in the US other than TheLeatherGuy.org - and particularly ones that carry a good range of colors. If you know a place, please let me know Thanks!


