


Danne
-
Posts
772 -
Joined
-
Last visited
Content Type
Profiles
Forums
Events
Blogs
Gallery
Posts posted by Danne
-
-
3 hours ago, Spyros said:
Honest question: is a tiny amount of glue on a watch strap really that dangerous? I don't know the answer. But I'd look for some expert advice on this first before I made any decisions.
The problem I have with devices that move air efficiently is that the ones that actually do their job well are not small, or cheap, or quiet. Wall or window mounted vents are an elegant & cheap solution with basically no footprint, the problem is that along with the air that they extract they also extract any warmth you would have built up in your room. Which I would think is a problem in the winter in Sweden.
Anyway sorry I don't have a solution but if there is a practical one I'd also like to know. I'm just suspicious of small cheap devices that make big claims when it comes to moving and filtering air, from experience with woodworking dust I know that they simply don't work. But dust is dust and fumes are fumes, maybe it's a whole different story.
No, not really when wearing a respirator mask while you have your glue bottle opened and remove it when you close the bottle, a lot of the solvents are at the floor (because they are heavier than air) And as you say it's in the winter time it becomes a problem. Now I can open my window fully. But it the winter I can't and it will smell quite strong in my whole apartment. And it's not healthy, but also I don't like the strong smell.
Yes, but this product isn't super cheap 7-800€ with bench mount. But a real exhaust fan mounted through a hole in the wall would be a lot easier and no need for filter changes and such, but I can't drill a large hole in this apartment, I don't think my landlord would like that
")
Edit: You wrote "before I make any decisions" You have to first ask yourself, do you need a solvent based glue?
Have you tried water based contact cements? I use Renia Aquilim 315 and it's super strong for leather, and some other materials too. Also Ecostick 1816b seems really popular. I have no experience with waxy/oily leathers, and I can see how a product without stitched edges in waxy/oily leather would benefit from a solvent based glue. But for regular leather I would never used solvent based glue. Send me a dm and I show you a couple of examples of products i've made with water based contact cement (without stitched top edges) and that have been used for years and i'm not worried about the glued edge.
2 hours ago, Frodo said:my advice to the op is to google odorless contact cement and use that.
I have tried a decent amounts of solvent based contact cements for this type of reinforcement, those that work well have a strong odor.
-
3 hours ago, fredk said:
Try searching for 'airbrush spray booth' for plastic modellers. They are small, sometimes portable. One of these would do your job
I don't really like that one, something no branded and no information about the filters, and the air blowing back directly in your face.
-
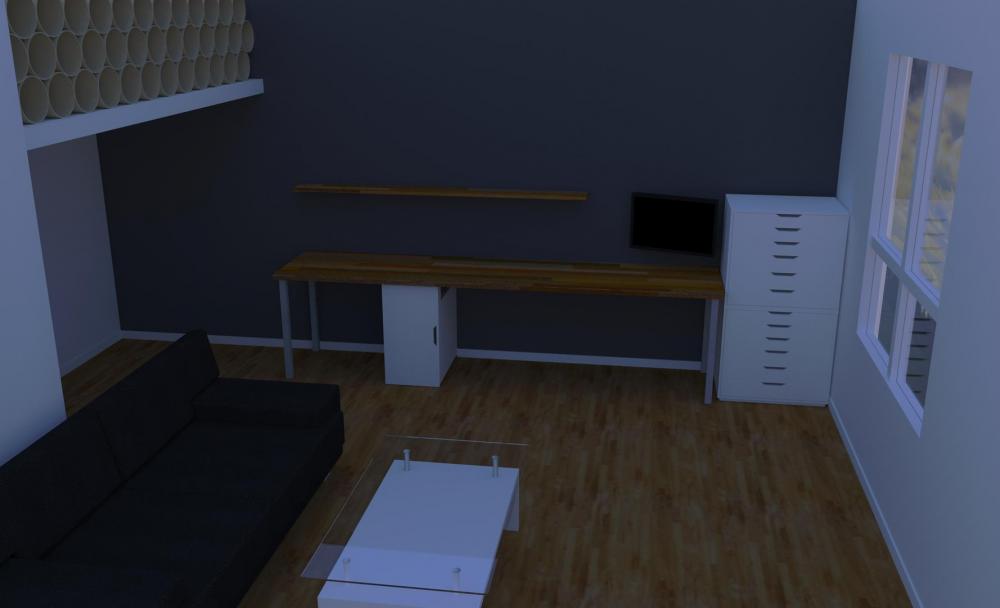
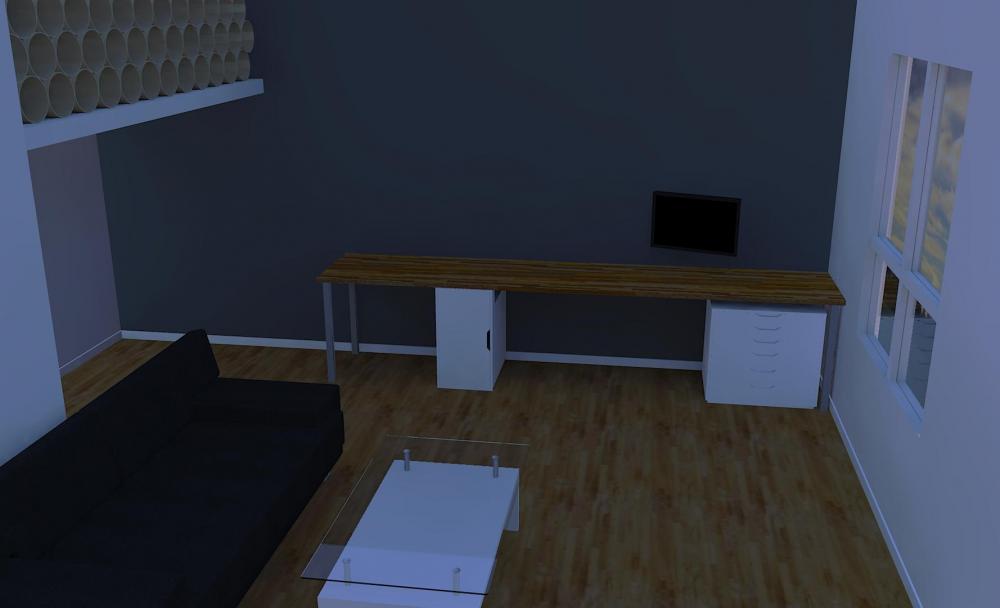
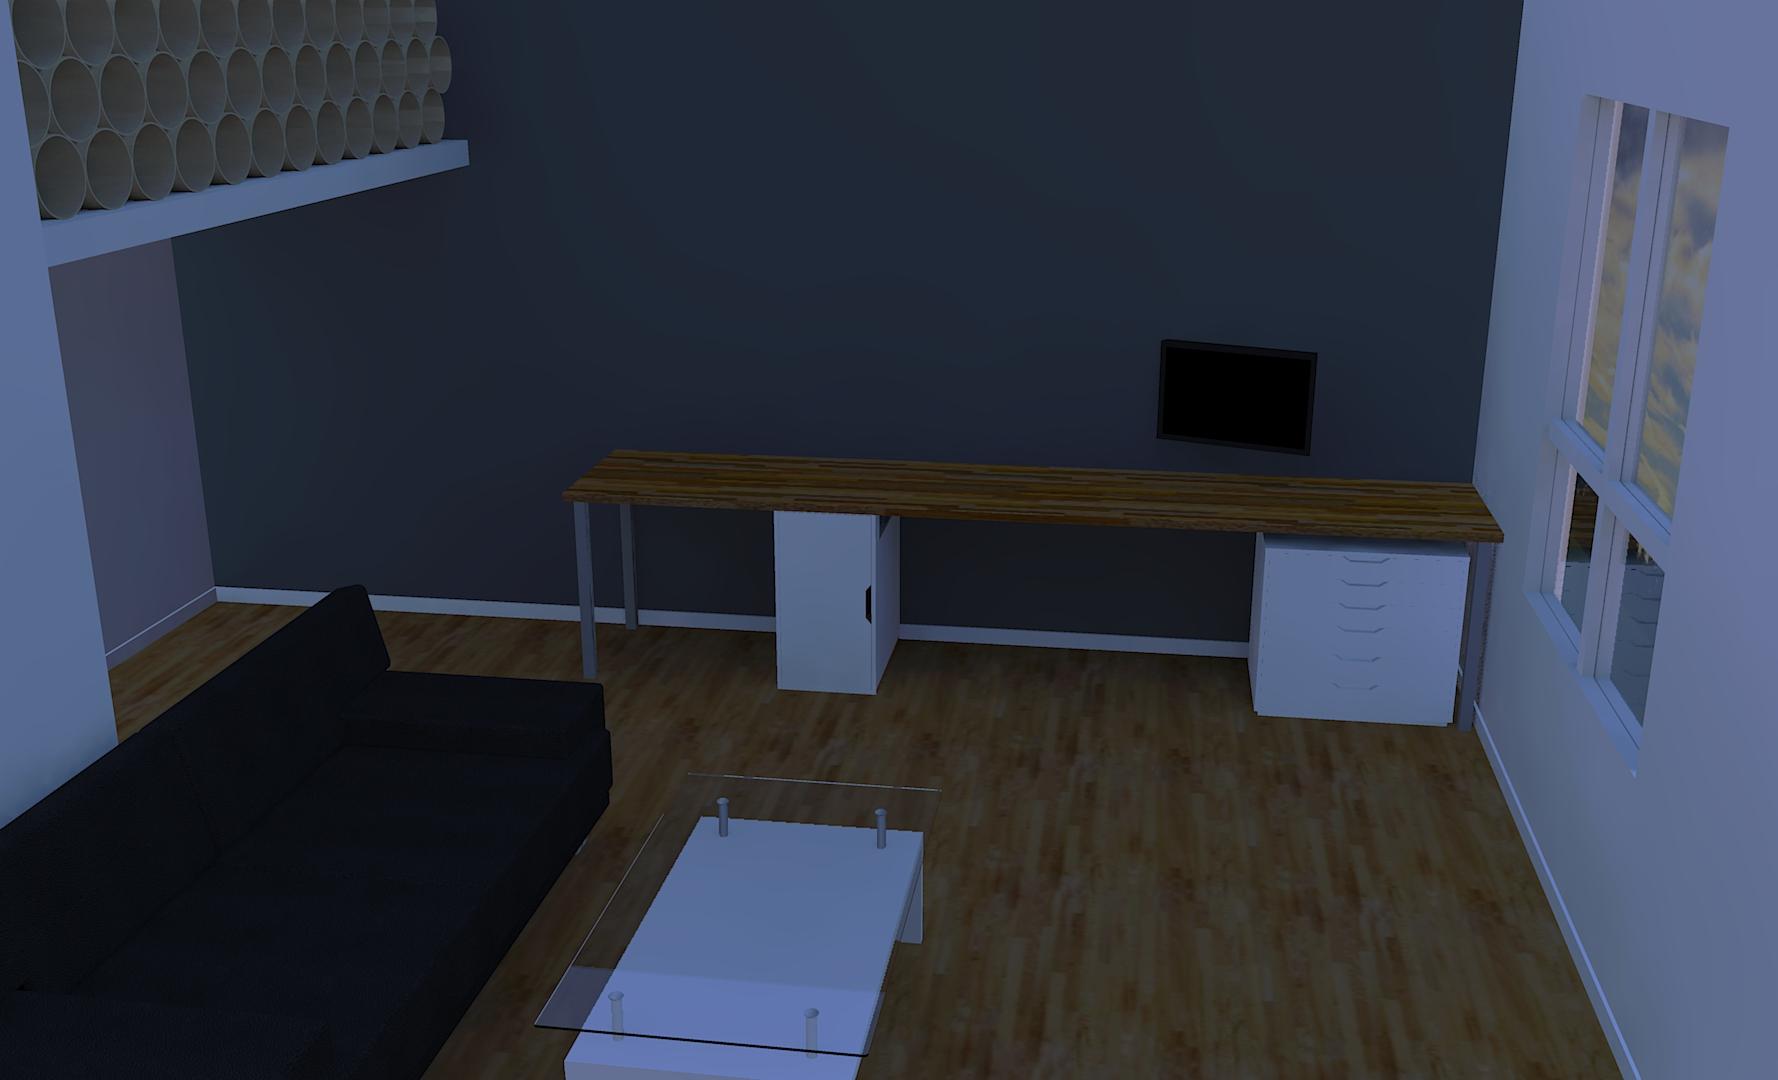
So I plan my workspace in a rather small apartment (45m2) "Sleeping area" living room and kitchen are in the "same room" not really sure about the English word (open plan?) In the left corner behind my sofa under leather storage is where my bed is placed.
I have two ideas (See Sketchup drawings) I prefer to use water based glues as long as it's possible, but for some types of watch straps I need to use nylon reinforcement and for a good adhesion I also need to use solvent based glue for this. Of course I use a respirator mask, but I would like a fume extractor. I have seen both regular ones with a hose (Which I can put outside my window when I use it) and also reciculatory filtration systems without an exhaust hose for around 400euro. But I would like some good ideas for a nice solution here. To the left of the cabinet I will have a bell knife skiving machine. In the drawing with only one drawer cabinet to the right I could have a small "glue booth" but since my space is limited it would be nice to not use up to much desk space.
I have found this (English manual) https://www.elfa.se/Web/Downloads/_m/an/BVX-101_mul_man.pdf
And it says "For light duty organic solvent and adhesive applications, a deep bed, activated carbon filter is recommended." And also I can mount it under my desk and save desk space.
Ideas, solutions, links to products that would fit my working area are appreciated (It's important that it looks nice) And I don't want to pay laboratory equipment prices.
Thanks in advance.
-
40 minutes ago, Alaisiagae said:
I made a belt at a Tandy class, and we used a wing divider to measure and mark where to put the holes. It worked well, my belt looks great and the holes are lined up. Round drive punches, plus the slot punch for the buckle tongue, and also a strap end punch (I used an English Point, I like the look of it). I want to get some strap end punches, but they're kind of expensive to try to have some in different sizes. =/
You can make templates and glue to thicker card paper. Scratch your point and "stab" walk around the shape (if that make sense?) if your don't feel comfortable with cutting the shape. If you cut the shape start with a primary cut and make as many secondary cuts you need.
dm me if you need English point templates (and give me the width's you need) And also if you print A4 or letter size.
-
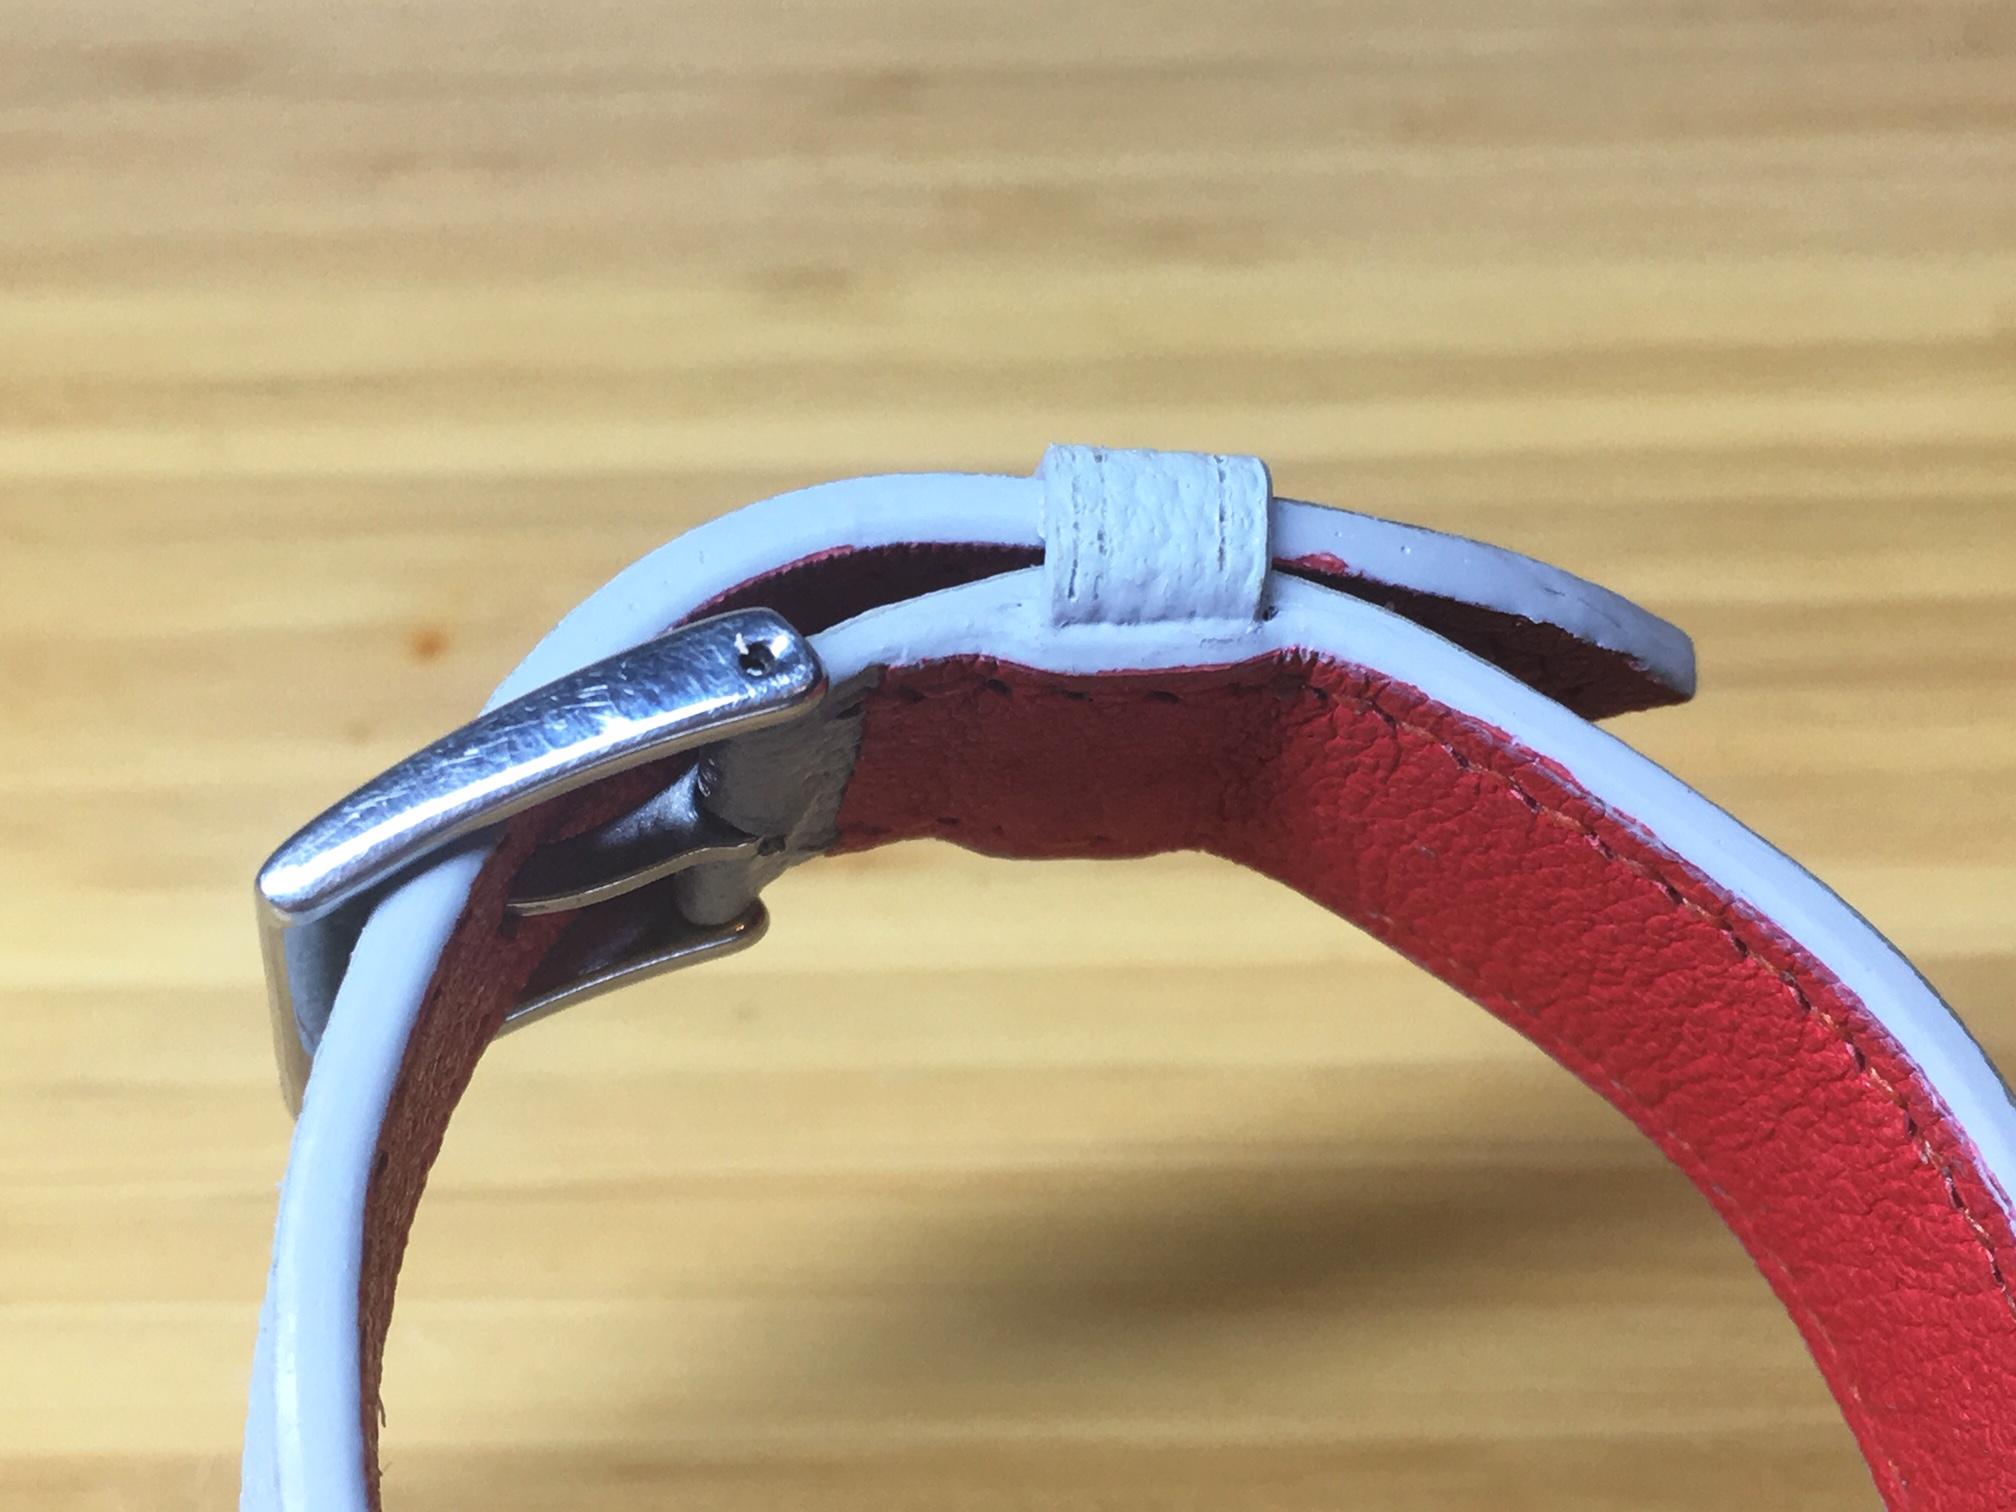
1 hour ago, Dunluce said:
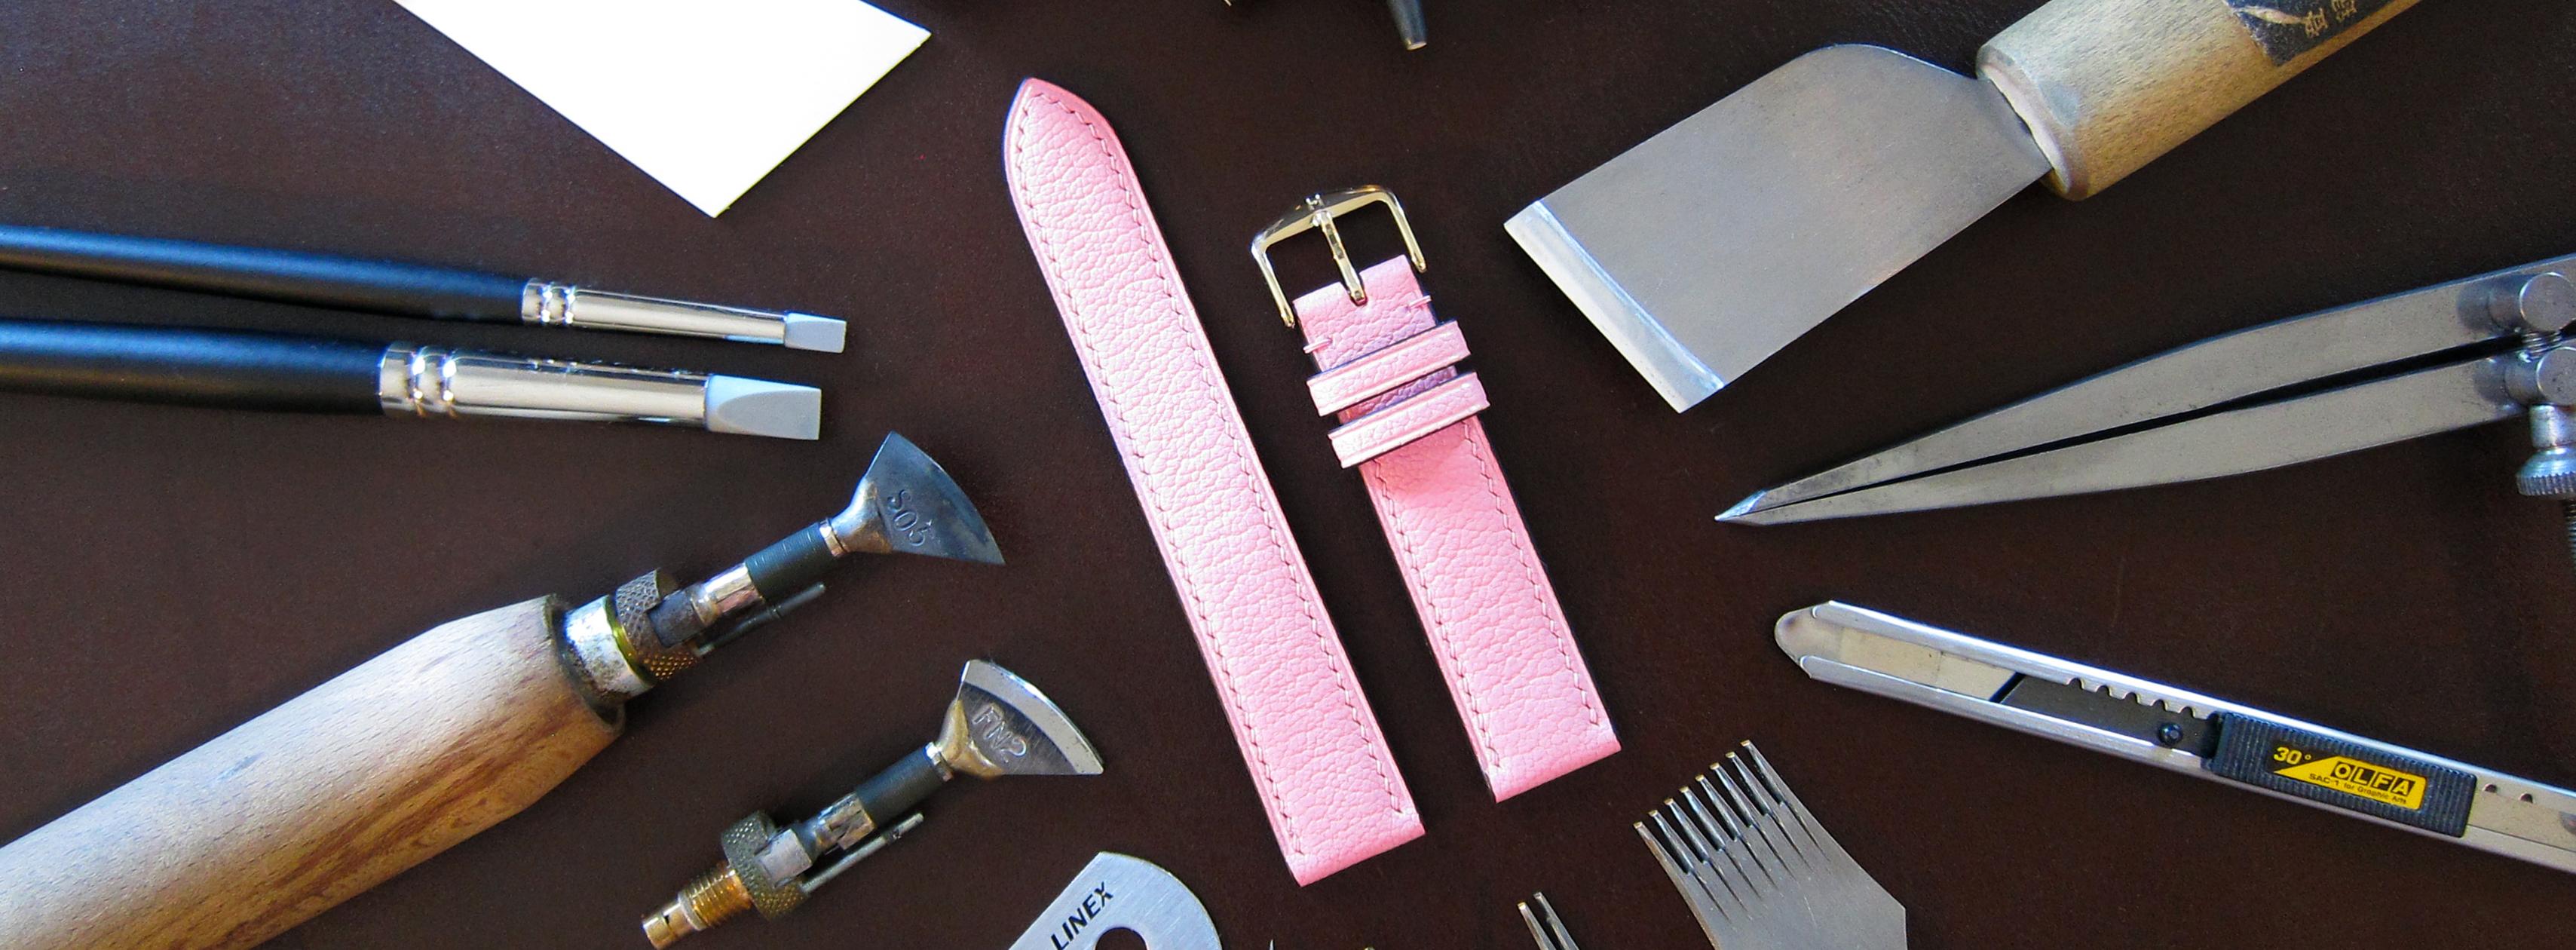
Danne, again thanks for the info. I will have to try some of the tips you have given. Here is my latest attempt. Alran caviar goat 1.2mm, some soft read leather 1.2mm (not sure what it is) with some 0.45mm Texan reinforcement.

Nice and looks like a suitable thickness for that watch. I have never used Texon. I use reinforcements from Freudenberg, Stilla and Jaeger
-
2 hours ago, Dunluce said:
Danne, thanks for the info. It does look nice: I might give it a go. Would you use it at the 1.4 - 1.6 mm it comes in or would you thin it down. Say 0.8mm?
I make my straps from top layer 1mm, and lining 1mm, if I want thicker straps I can build it up with padding or full widths layers of leather in the middle. But if I had a splitting solution, sure I would make some thicker straps with like 1.5mm top layer and 1.5mm lining. But the thing is a lot of watch cases don't have clearance (between the case and the spring bar) enough for 1.5mm so that's also something to take into consideration.
Edit: Depending on the type of strap I also add reinforcement. For a flat strap I add 0.2mm reinforcement to the top layer the whole length. On padded straps I reinforce the lining and around the folds, but in those cases I use thinner reinforcement, and usually not all the way out to the edges except at the folds, if that make sense. Also it depends on the leather you are using. A veg tan strap in 1mm top layer and 1mm zermatt lining is quite durable, but it will over time stretch both at the long part with the holes, and at the lugs and leave a small gap. (If not reinforced at all) There are probably exceptions here, like I haven't worked with Shell Cordovan, it might not stretch at the lugs at 1mm.
-
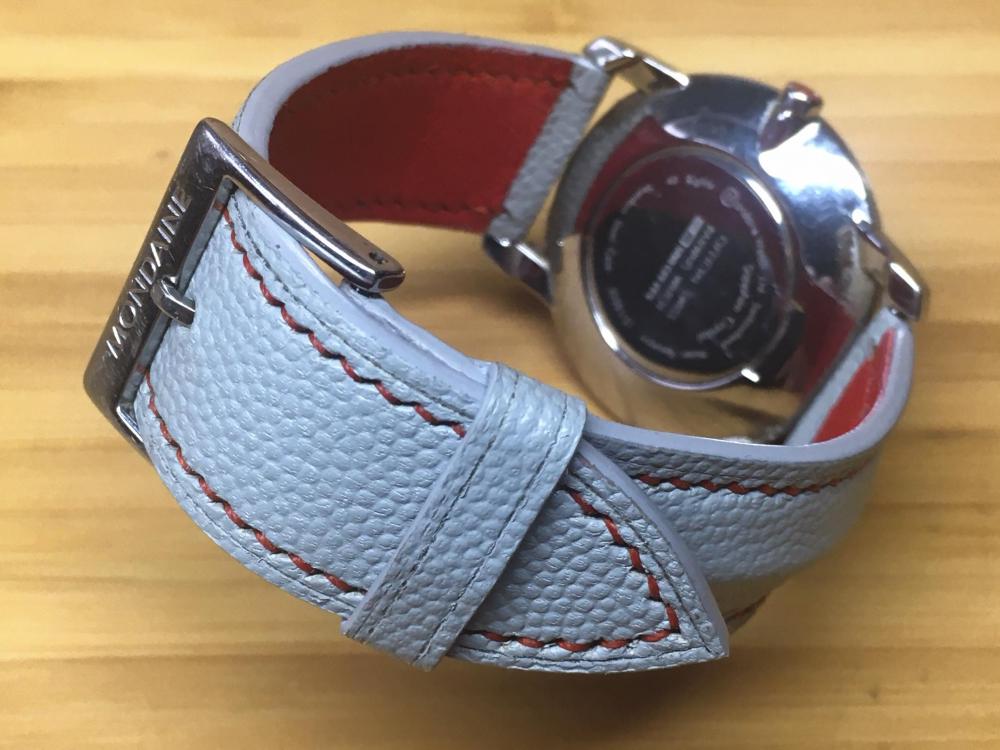
I prefer Haas Zermatt. It's available in two colors natural and black. (You can't buy from Haas unless you want to buy 70m2/color.)
The only reseller I know that have it in black is RML.
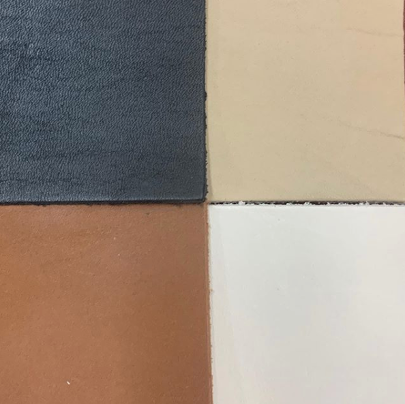
Degermann also produce Zermatt and another lining called Vat-alsavel in four colors (See photo) I have never tried Vat-alsavel, but I really like Haas Zermatt. You can see photos of this lining on my imgur. Or you can look at Hermès watch straps, they use Zermatt.
Degermann - Vat alsavel
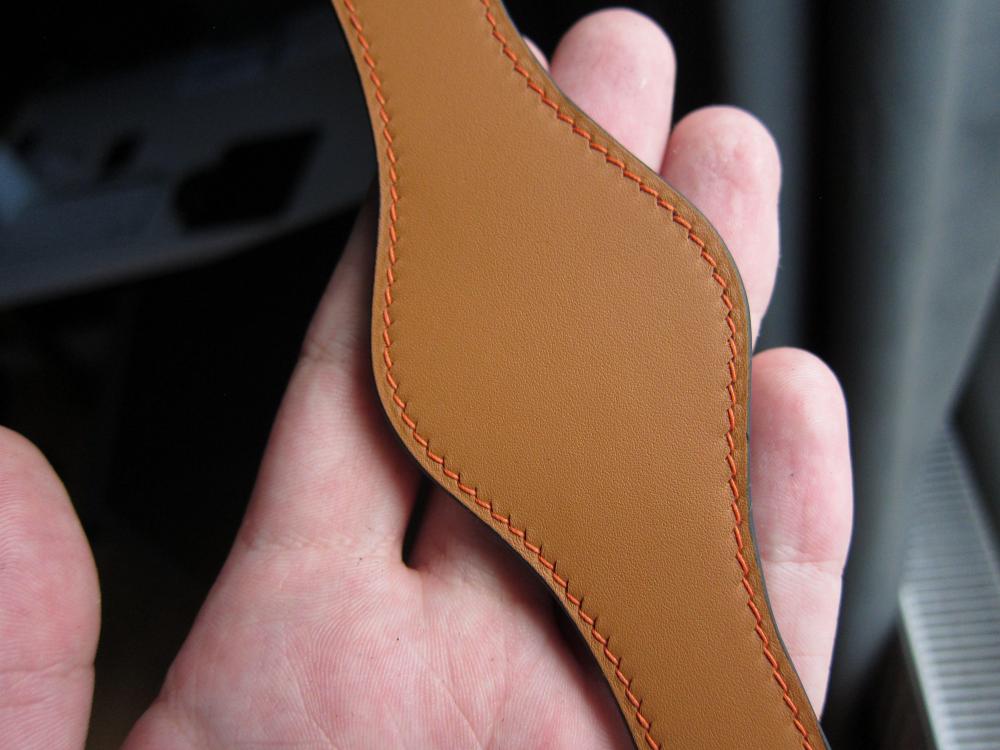
A photo of the Zermatt lining on my latest bund strap.
-
Also wouldn't Nubuck or Alcantara be more durable over time? (I get if you don't want to use Alcantara though, because it's not leather) but at the same time it's reason it's used in car interiors (even in the most exclusive brands)
-
1 hour ago, Hardrada said:
Totally agree.
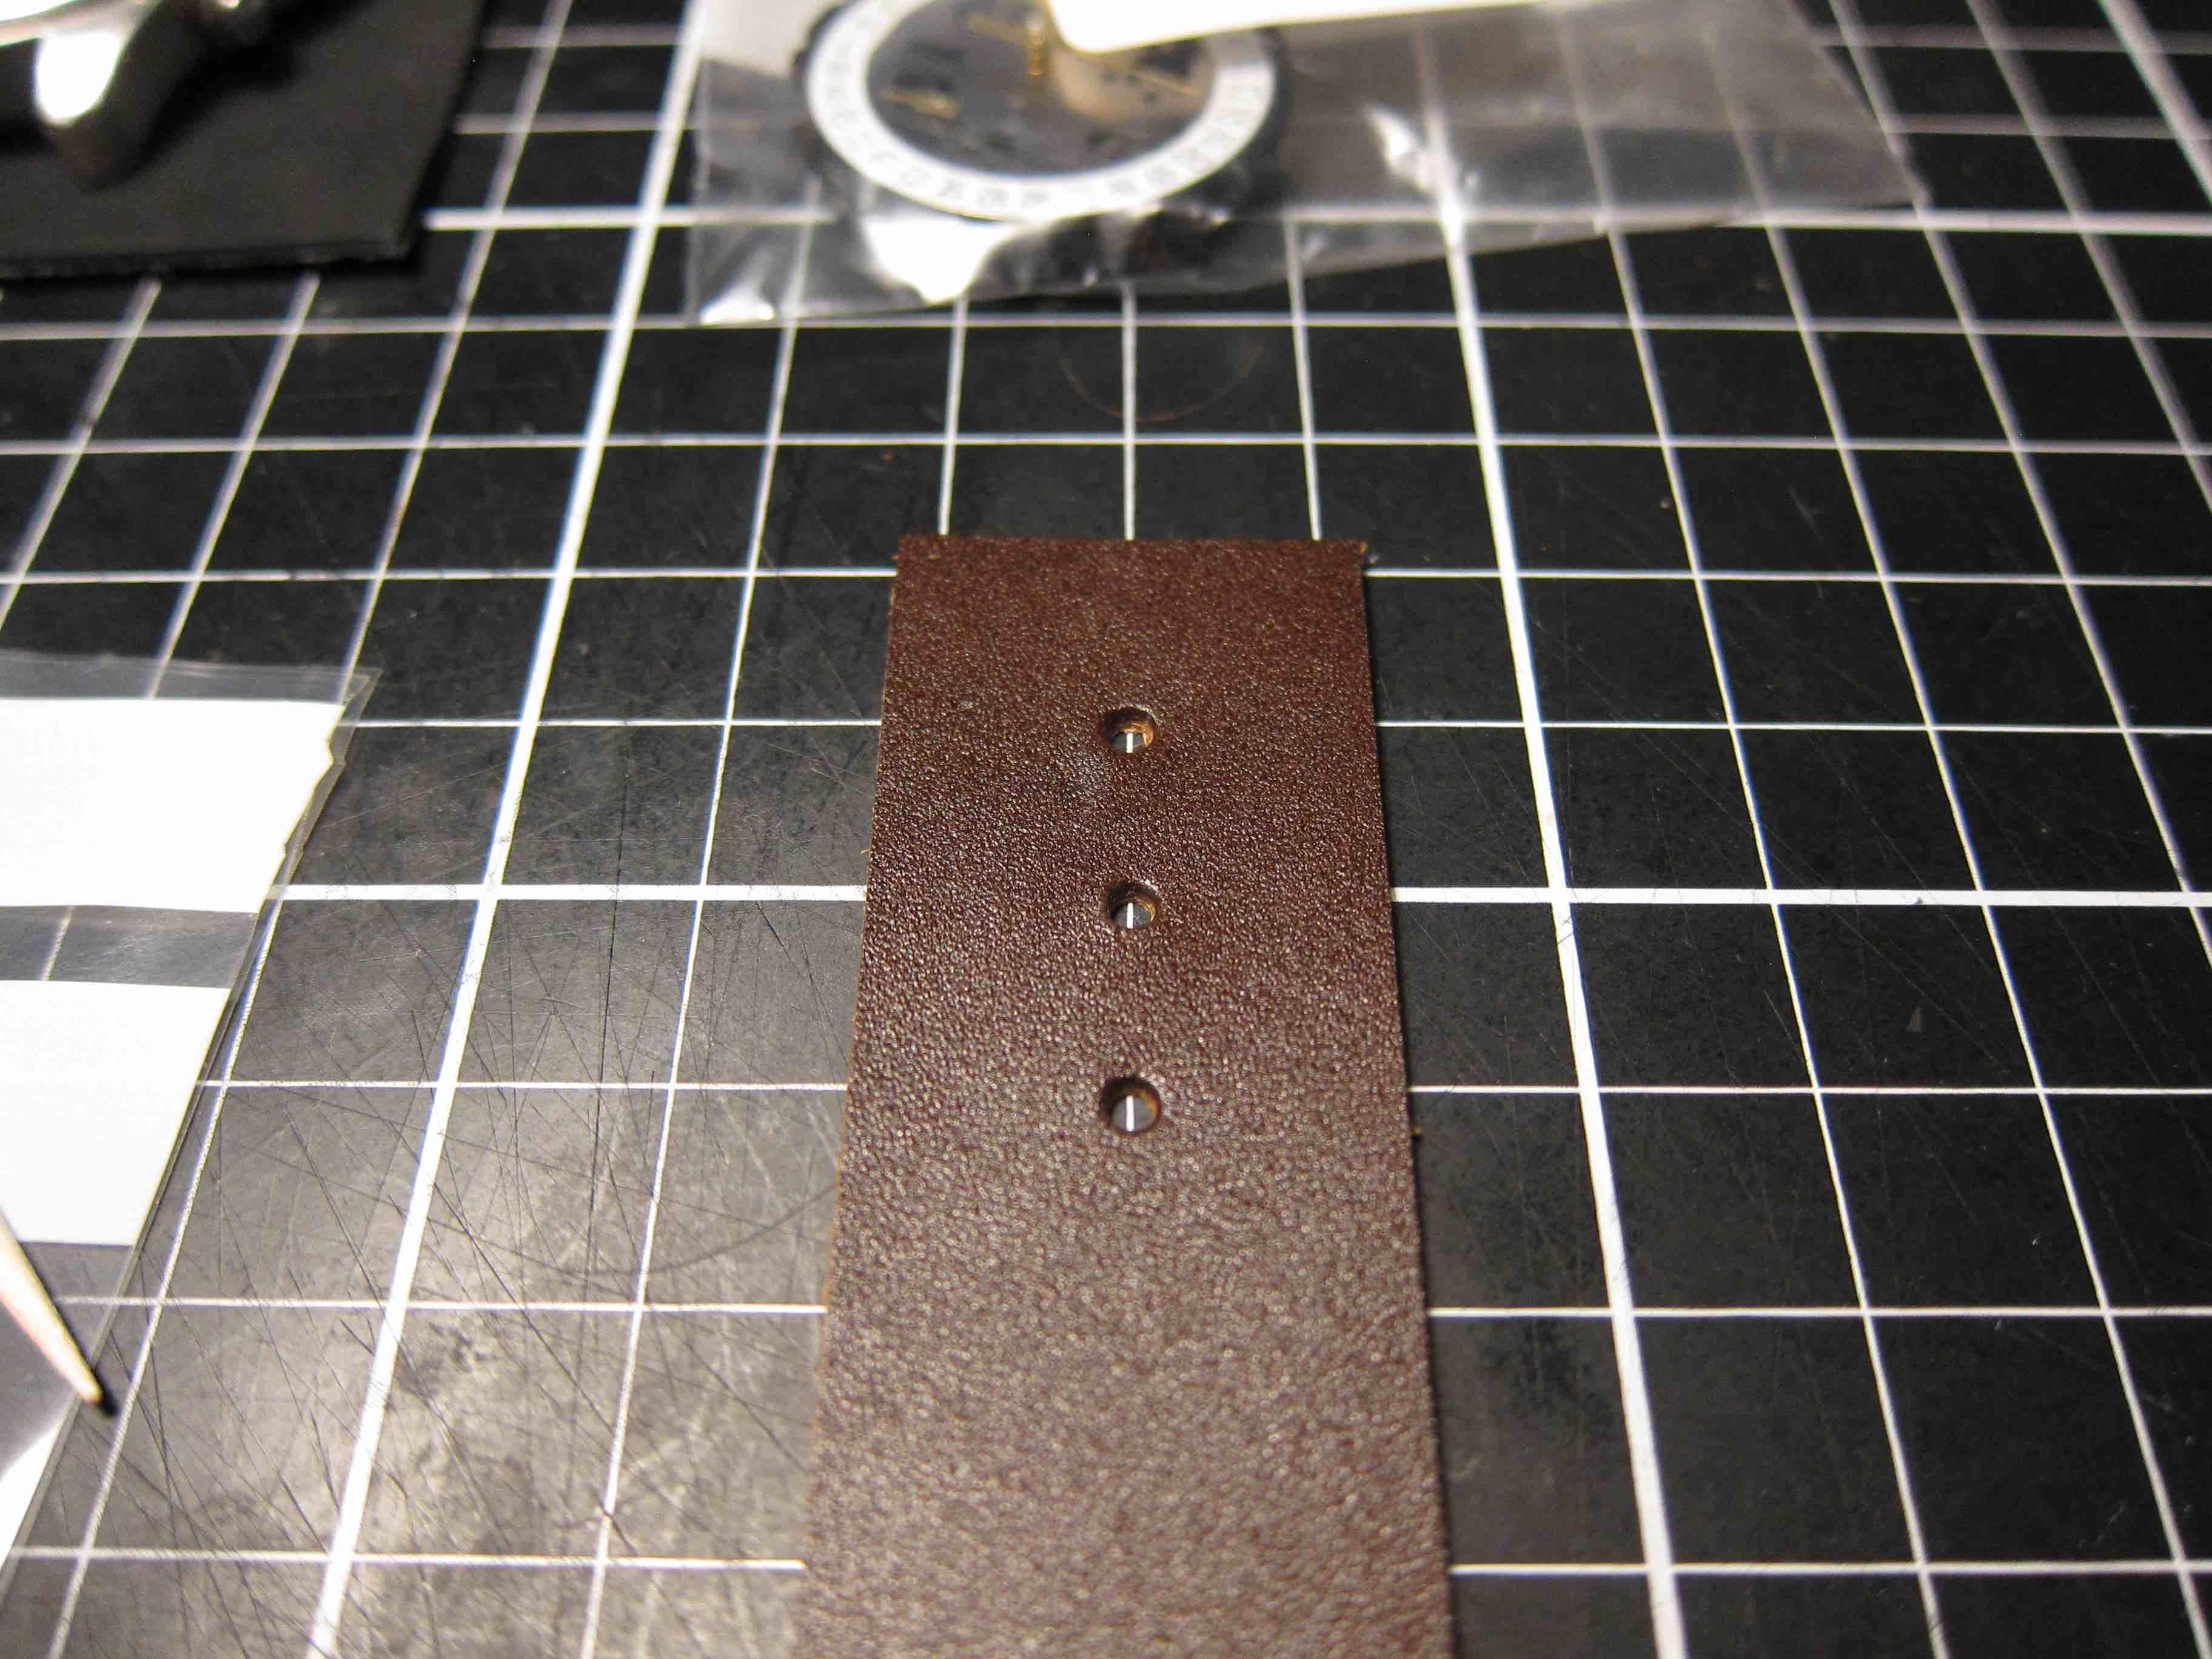
I failed miserably with that approach, though. I made a template from 3 oz English bridle and still got the holes crooked. These punches have no indexes, and at such diameters are very difficult to align properly. Suggetions are appreciated.
I would say it's better to do the template with paper. I usually use laser photo paper (A little more durable and thicker) And when you have made the holes in the template, align it carefully, and just push down your hole punch with your hands to leave an impression in the leather, and when you remove your template it's easy to align.
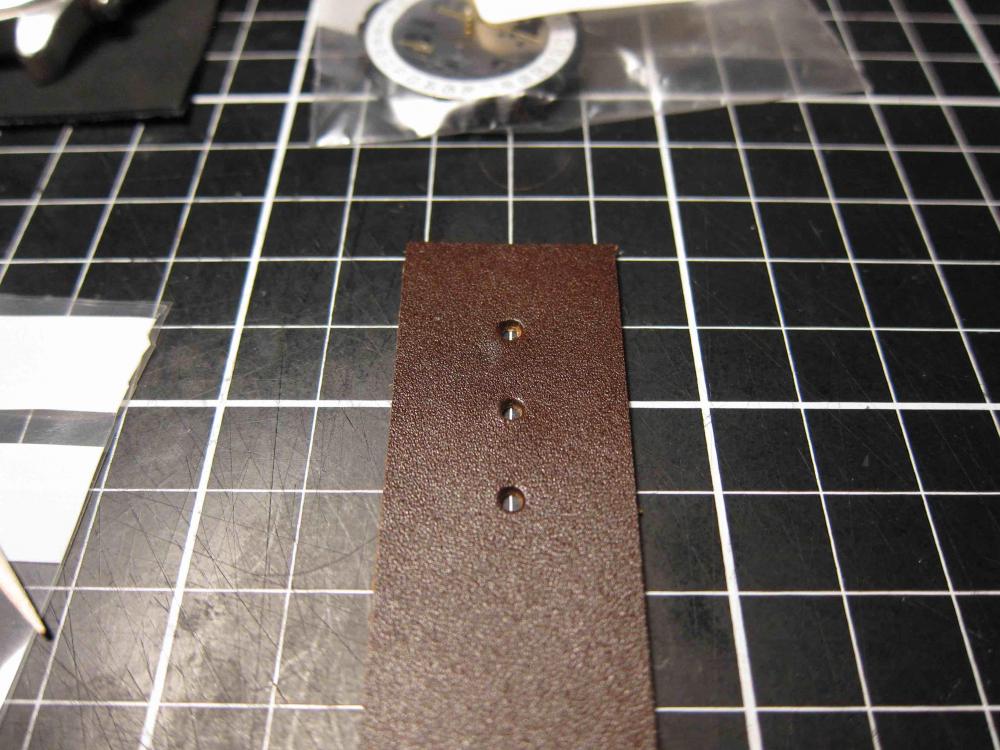
If you make a line in the middle you can use a let's say 20mm for all templates and align it to the middle of the belt with a ruler/caliper/wingdiver and on a belt you can put some weights on the template when you mark through your template. I show you an example on a test piece. This is relatively thin leather so no room for large weights so used a small hammer, but no problem just holding it down.
Those holes are perfectly centered. Holes aren't that nice though, night here in Europe so didn't want to wake up neighbours so pushed the punch through.
I don't have any oval punches, but it will work fine with oval punches too, because when you make the impression you feel when your punch is in the correct place and you punch your hole.


-
I'm certainly not expert on making strops, and I don't think anyone have to be an expert.
So let's start with the question, what do you want from a strop? 1. A surface that is relatively flat 2. Something that isn't to soft (It will round over your edge very quick if it's too soft.
I bought some wood with an even finished (planed and sanded? woodworking terminology is not my thing) I used it to build a stitching horse and a leather strop. And I used 1mm leather with a flat a relatively stiff surface, glued it with contact cement and use a roller from the middle and out. Cut the excess leather off and used some neatsfoot oil and green compound (chrome oxide) Is this the correct way to do a strop? Yes, ALL the ways that work good to strop your knives are the correct ways.
-
6 hours ago, Spyros said:
If you have access to a lathe and want to make a timepiece, I have two words for you : "Clickspring" and "Youtube"
Enjoy
Thanks, I haven't seen that channel before. Really looks like a channel for me, all clips on that channel seems interestings to watch.
-
19 hours ago, Spyros said:
Having the oval punch is one thing. Keeping the oval holes in a straight line, evenly spaced and all pointed in the same direction is a whole other kettle of fish LOL
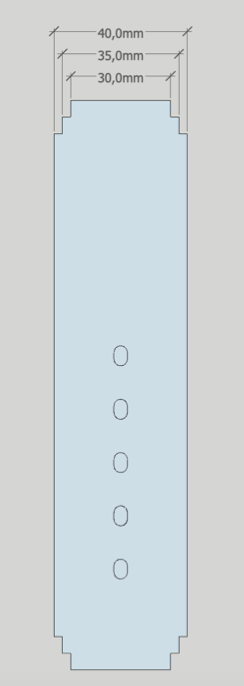
It's a simple solution for that. Print a template (Or draw a template on paper) punch the holes in the paper template. Then you can align it to your belt. push down your hole punch by hand to make an impression, remove template and punch holes.
Just a quick drawing (not to scale) just to show how I mean.
I don't make belts, but watch straps. And when I see those multi hole punches from Ksblade and such, if I made a lot of straps it would be nice to have some of them. But I think it's also important to be able to do the same things without special tools, because what to do you when you get that order with a hole size or distance between holes that doesn't match up with your "multi punch" ? The same with strap points. Yes it can be quick and nice to have a strap end punch, but I also think it's important to learn how to cut that point by hand.
-
2 hours ago, Spyros said:
Man you're opening a whole different pandora's box for yourself... a nice one though. When you end up doing Seiko mods, i want one
I really would like to make my own watch. I have a background in cnc programming. And it would be fun to buy a cheap mechanical clockwork, maybe something like a Seagull ST36 (ETA6497 clone) and machining a cool case, buy a Chinese pad printer and make a nice custom dial. Would this be a challenge for me? yes for sure, especially since my machining knowledge is mostly lathes, and have very limited experience with cnc-mills. But unfortunately I don't have access to a cnc mill. And convert a cheap Chinese mill won't really cut it (lol both literally and as an idom) with harder steels.
-
7 hours ago, Spyros said:
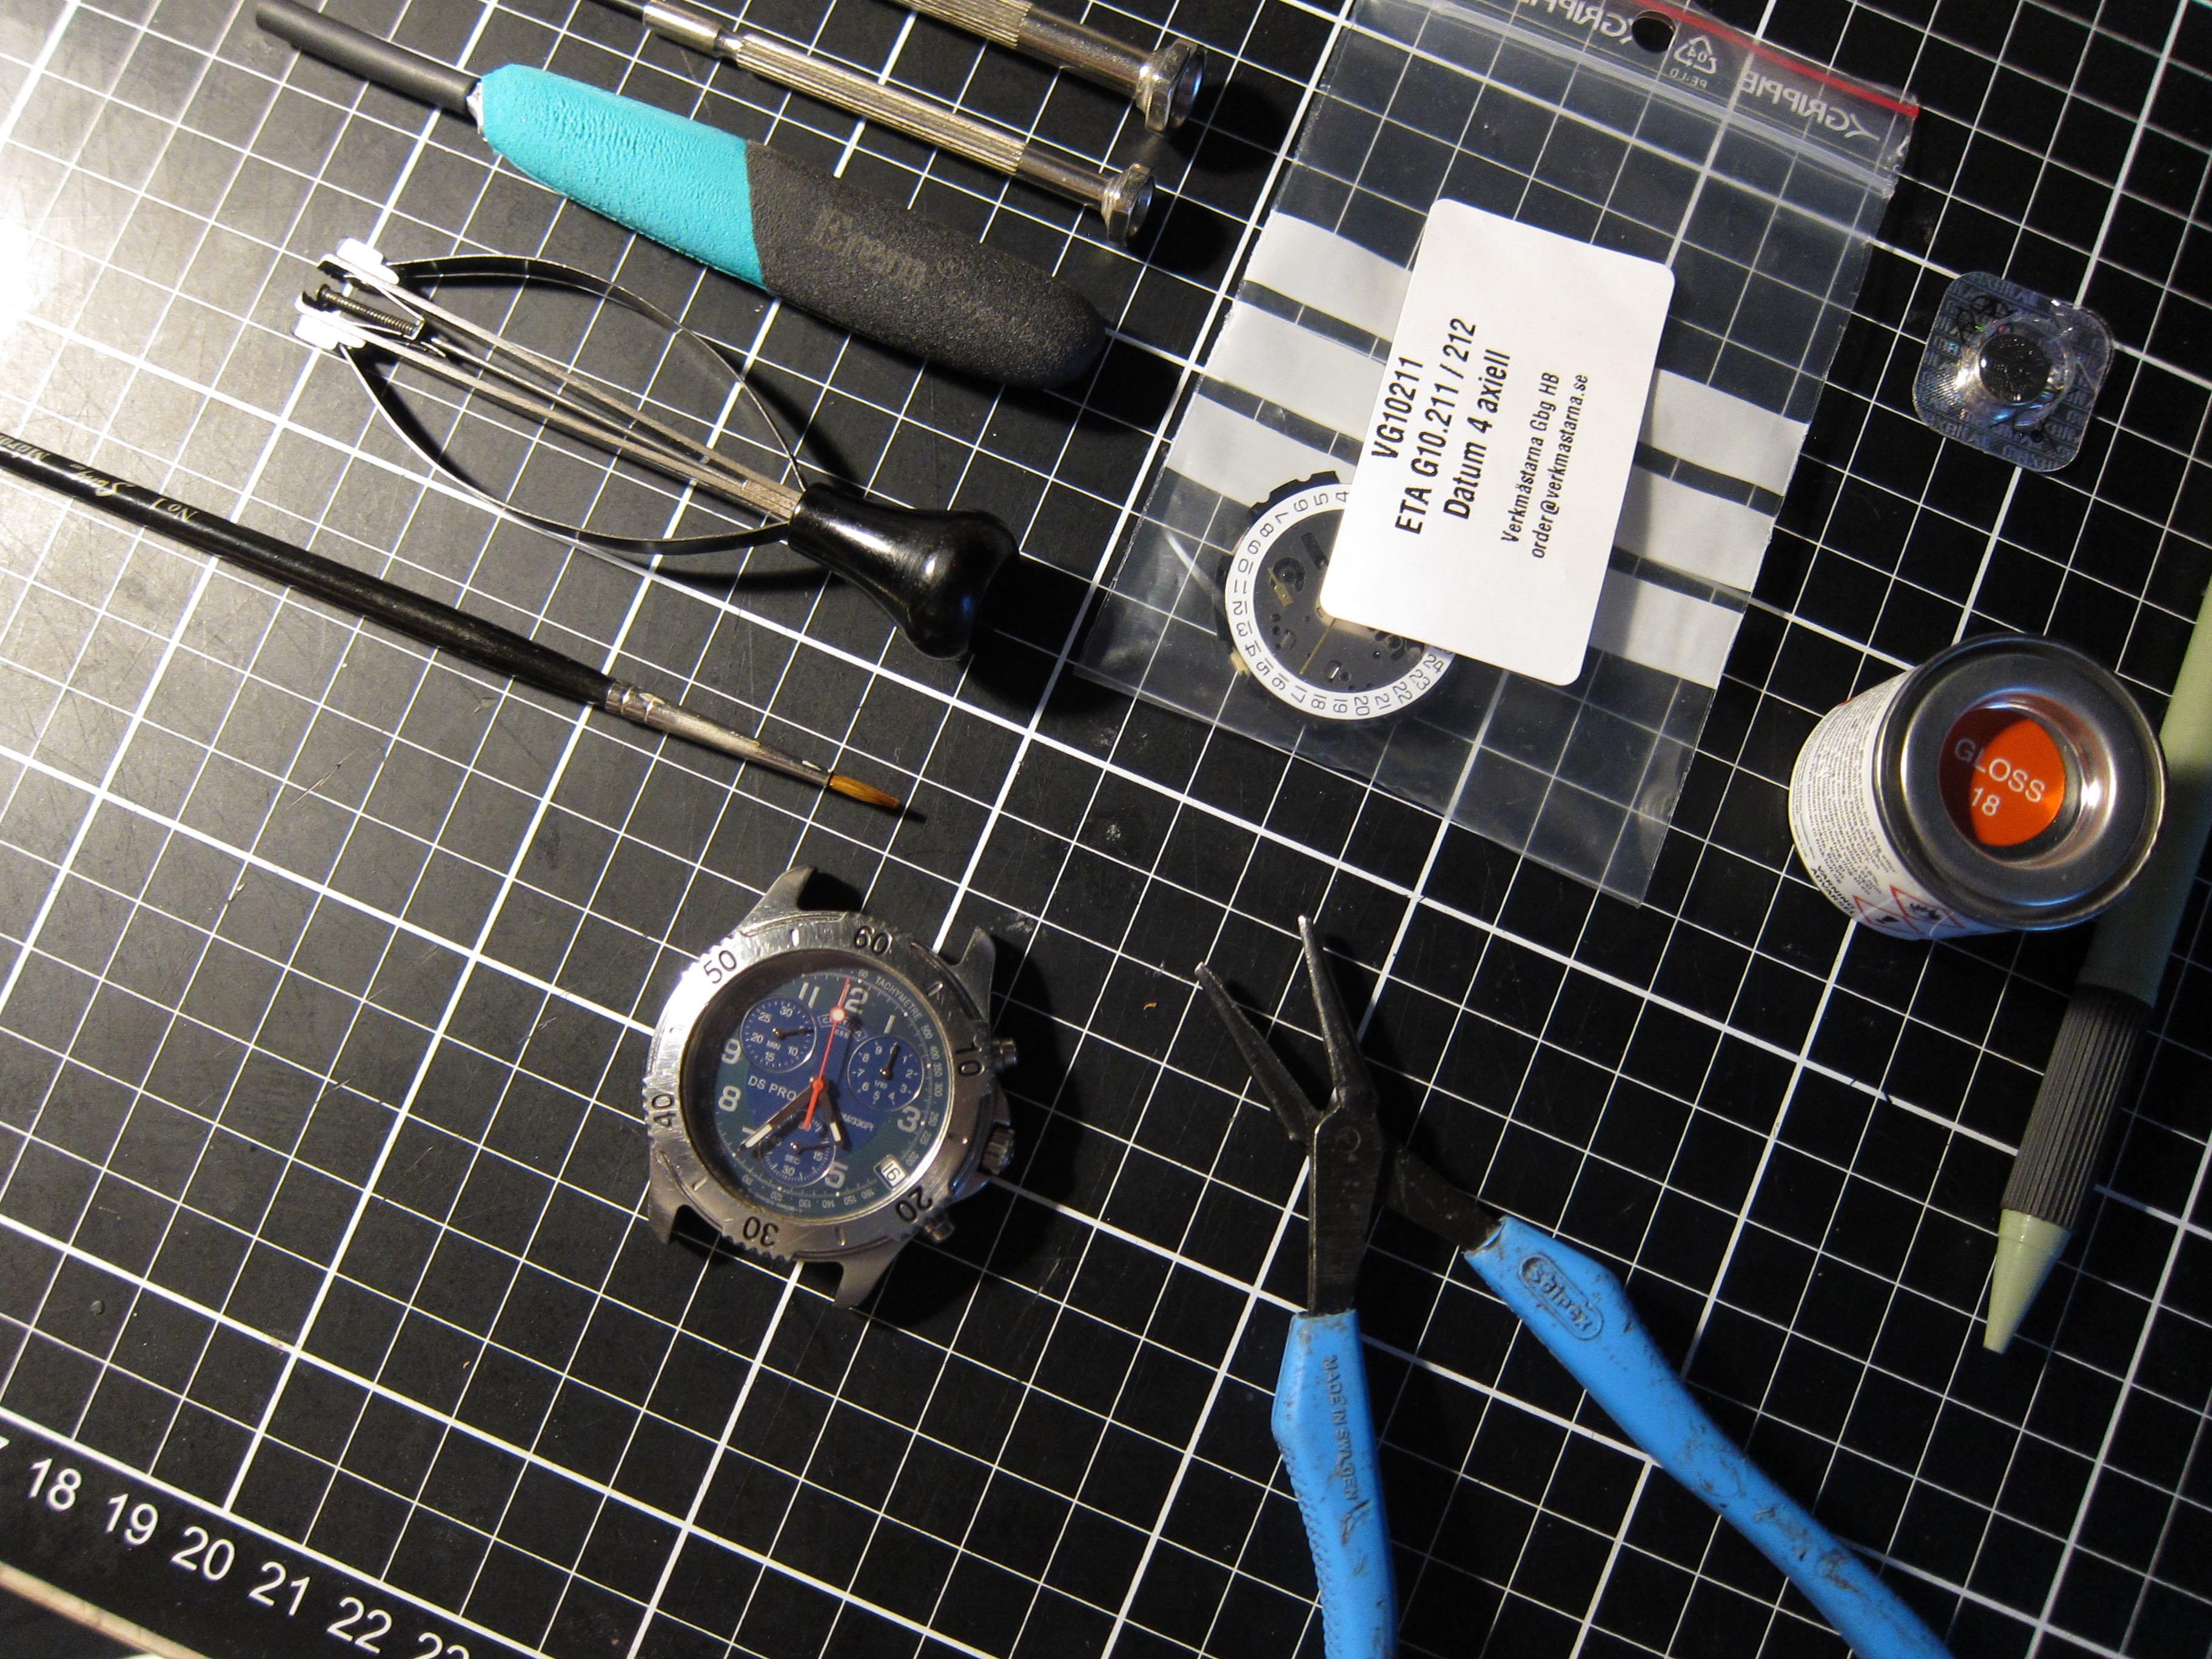
If you can reliably remove a watch hand, and then put it back on, and the watch still works, you are practically a neurosurgeon in my book
I have never done it before, except for trying on an old Rolex replica I bought for fun to see how cheap I could get it (No I never used it and will never) And it wasn't that hard. But the chronograph hands will not be easy not even with the hands puller I have. They are so small, But magnifying, and either Rodico (Google) or some thin plastic (to protect the dial) and loosen them with two really small screwdrivers from each side will for sure work fine.
The hardest part isn't removing the watch hands it's doing it without leaving any trace of the work
And I will not use the black plier with blue handles in the bottom right corner, but the one in the top left corner which is a really slim smd-plier. (Primarely used for surface mounted components on pcb-boards.)
But I can update here how it goes when it's time and I have decided a good technique for painting the seconds hand (I want it close to perfect) Because yes of course I can make mistakes, doing something this small for the first time can always result in mistakes, but I ten to plan things very well before I start so I think it will be fine.
-
9 hours ago, Trox said:
It should be an advantage to have used such tool before giving advice of how to sharpen it
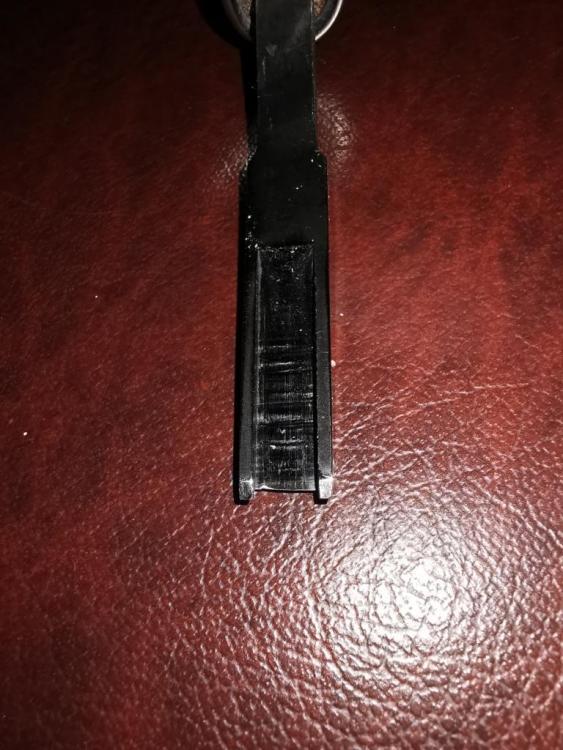
This is a inexpensive Tandy model tool that have several issues. It doesn't matter if it "slants upwards from right to left" It has a wrong edge, double instead of a single one on the bottom side. The toes are to thick and it's not polished. I use better tools but I once started out with a similar one. Here it's how it should look like, straight on top and the edge on the bottom side. Looking like yours (with a double edge) it will tend to steer downwards instead of Skiving. It doesn't matter if it's straight cut off between the toes or in an angle.
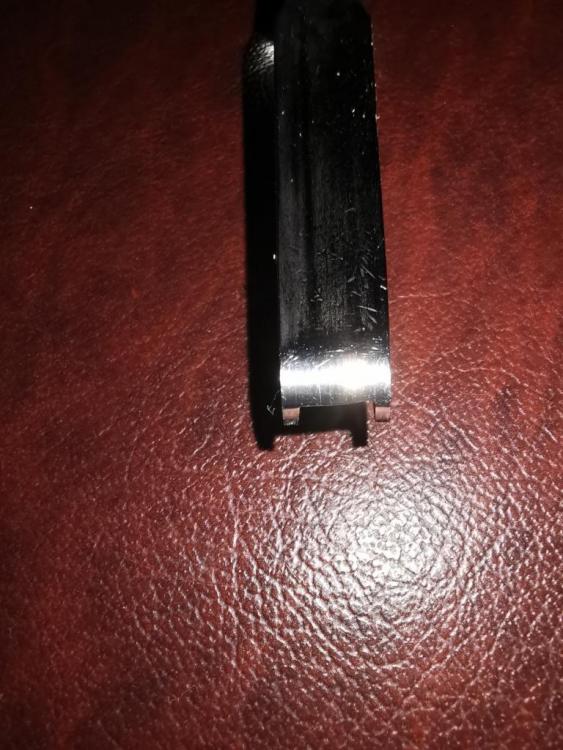
Reduce the thickness of the toes and polish off the blueing black color. That will give it less drag and make it acceptable to use.
Use a small stone/file that fit between the toes to make it flat on the top. Take a sand paper around the stone with finer grits until polishing grit's. Polish the hole tool on a buffing wheel or a strop. A strip of leather that fit between, with polishing paste placed on the desk etc. will polish the top side. Make it look like in my pics and it will skive very well.
Tor
I actually think a lot of people have been scared away from leathercraft because they have bought tools from Tandy.
Someone who is new to this craft and want to try it out shouldn't buy really expensive tools, not only because it can be a waste of money if they decide this craft is nothing for them, because it often result in buying tools you don't need. A good example is pricking/stitching irons. I started with the Japanese style, and if I would have bought a really expensive set I would later have sold it, because I finally decided I like the European style. And that decision isn't easy to make before you have tried this craft for a while.
Some tools is possible to improve by reshaping/polish them. Some tools even require this. For example a Vergez Blanchard awl is basically useless when you buy it and before you polish (and reshape it depending on how you will use it) ps. I don't recommend Vergez Blanchard tools, there are better alternatives out there for the money.
But when it comes to beginner tools, they HAVE TO be at least possible to use "out of the box" And that's often not the case with Tandy's tools (Yes I understand they have tools that work decent, but they also sell a lot of useless tools, and I really mean useless, unless you reshape them) I have talked both about their stitching irons and hole punch sets before, and especially the hole punch set, I would go as long as say it's fraud to call them hole punches. Is it possible to make a hole in leather with them? yes it is, but it is with a thick steel pipe too if you punch/press hard enough. For small leathergoods I would rather use stitching irons from Aliexpress for like 2usd instead of Tandys set.
I would recommend to stay away from Tandy, and look at Japanese budget tools, some of these tools are available in Us and Europe, but I really recommend leathercrafttools.com/ I have spent a decent amount of money on tools during the years, and have some really expensive but I still use a lot of those cheaper Japanese tools, would I like to replace some of them? yes, and why? I would for example like some nice handmade skiving knives and awls. So the reason is not that they don't do the job.
-
2 minutes ago, Handstitched said:
The product I have used in the past, also has a ' Gel' version to avoid that stringy annoyance . Its not just for leather, but also for, wood , laminates, etc. Just wondering if theres a 'Gel' version of the product that you use?
HS
I don't think so, but I really like Renia Ortec. I try the rubber seal with acetone and xylene, if it doesn't get dissolved in that I doubt the glue will. I've had the rubber in acetone for a couple of hours no, and it's not affecting the rubber. No I will try with Xylene too.
Here are the solvents and the hazardous components
Renia Ortec: Same as the thinner but also Rosin, colophony.
Renia Thinner: Ethyl acetate, Naphtha, Cyclohexane
-
4 minutes ago, Handstitched said:
I'm with fredk. I get the smaller tins of contact adhesive. I was buying the 1 ltr tins, but was going off quicker than I could use it. But I also remembered my ol' fibreglass pool days, and got some Toluene to keep it from drying out. But the jar with a tight seal should work OK .
Heads up, not sure what you call it in your part of the universe, but Toluene expands rubber ...and wear gloves & *eye protection*, it burns on contact with skin.
* I've done a few impressions of Hussein Bolt to the wash room

HSYes, I would really like smaller bottles, but I have tried a decent amounts of solvent based glue, and i'm not happy with the adhesion to reinforcement materials for watch straps. The only one that work good is Renia Ortec. The other versions is either to stringy, or doesn't adhere that well.
No Toluene in this, I don't wear any eye protection or gloves, but I do use a respirator mask.
-
24 minutes ago, Retswerb said:
Your stuff is consistently so clean, with such great attention to the little details. That’s a good looking strap, thanks for sharing.
Thank you, I share some more photos when I have changed the clockwork and repainted the seconds hand. I will probably remove the old lumen paint and don't apply it again, because good quality lumen is like 80euro, and I don't think it's worth spending that money on an old watch.

-
12 minutes ago, fredk said:
A. Its not actually the oxygen which is making the glue set. Its the release of the solvent into the atmosphere. With the carbon-dioxide treatment the CO2 keeps the solvent vapour in the glue.
b. you can buy small empty tins and jars with screw thread lids. Use the beeswax on the threads.
c. consider decanting into a small container just the amount of glue you need for the job at hand
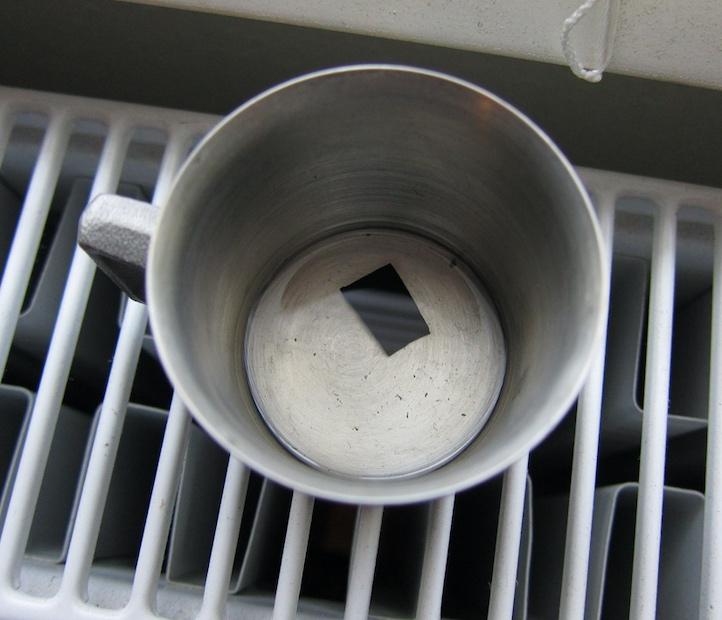
I just did a test. I put a small piece of industrial rubber mat in acetone (Will test it in Xylene too) and see if it dissolves, and I made a new gasket for my jar. It might work.


-
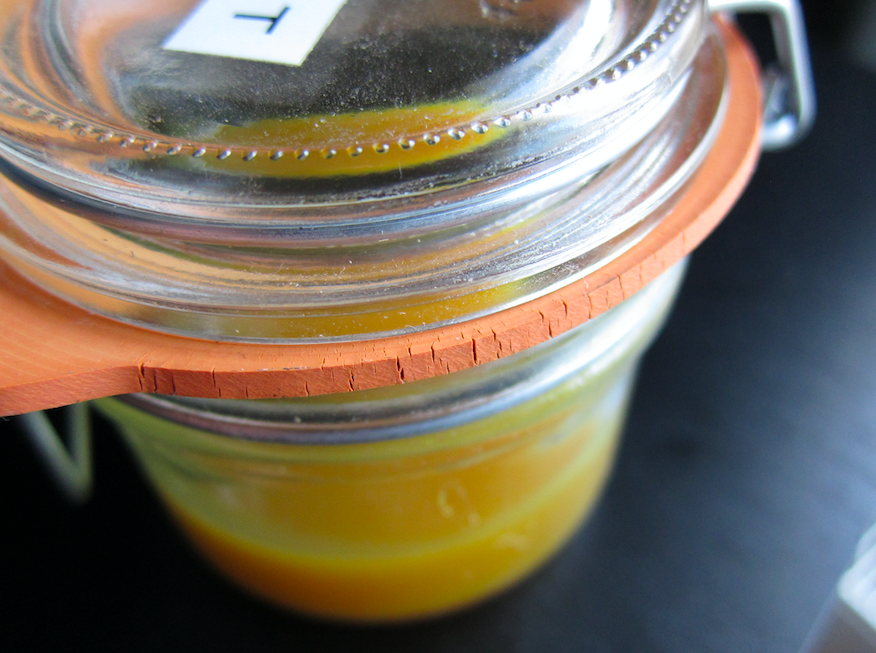
Small tins are not available. 1 litre is the smallest, even though they have sample bottles that are smaller (but hard to source) and the opening is to small for my glue spreader. (Renia Ortec)
I find the biggest problem is whatever seal the jar uses, it dissolves over time and oxygen gets in the jar. Like here (Another solvent based glue int his, but have tried it with Ortec too) And not that easy to cut a new gasket that fit good on a jar like that.
-
I can't really find a good solution for storing solvent based glue. I don't use a lot (as a hobbyist) and want it to last as long as possible without drying out (and yes I dilute it when needed) but I need something airtight. Those pots that look like a "church" Ts-boy and the Italian brand. Is not a solution for two reasons, they are not airtight, also I can't fit my larger glues spreader in it.
Those with a locking lid and a seal is not good either (at least not the ones i've tried) the seal get dried out from the solvents.
Also question number two, when I find a suitable jar, I guess it's best to keep it full, then when I open and close it, it's less oxygen in the jar.
Any input here?
Keep in mind, the opening need to be big enough for glue spreaders (Those japanese ones 40mm wide)
If I can find the product in Europe it's a bonus.
-
3 hours ago, Memphis514 said:
that strap is gorgeous
Thank you
-
11 minutes ago, battlemunky said:
Oh wow, that s a great piece right there. Beautiful work!
Thank you.
-
Just now, Scoutmom103 said:
Very nice.
Thank you


Need advice (Glue fume extractor)
in Leatherwork Conversation
Posted
Yes, that's an awesome solution. And i wouldn't even need a box, I could have a flexible arm over my desk with something looking like this. And you gave me an excellent idea. Back in the days I had a projector, and the projector screens that work decent in a room that isn't completely dark is (and was even more expensive) So I thought about solutions to make my windows completely dark. And that solution would work for this. I don't know the English word, but the sides move in "rails". I took a photo online and added an outlet for exhaust. I can open just the bottom part of my window and look it there (like a small gap) when im finished, I remove the exhaust hose and fold everything up almost to the top of the window.
This forum is really awesome. I really appreciate your idea, simple effective and cheap.