


BondoBobCustomSaddles
-
Content Count
1,033 -
Joined
-
Last visited
Posts posted by BondoBobCustomSaddles
-
-
Hey Guys, are we at the OK Coral yet? Guess I will add my 2 cents for what it is worth. At the risk of seeming patronizing, I am sure that most of you have the Stolhman books. Since Al and Ann are now riding up there in Gods Country, you can't get a response on this from them, however; I think they cover the subject of saddle fit, rigging, seat construction and design completely in vol 1 of their encyclopedia set. I have been following their teachings since I started, and can say without exception, they have never led me wrong. That is going on 20 years now. That is all I'm going to say about that.
Happy Trails!
Bondo Bob
-
Hi Jake! Nice work, they look like they will fit and wear properly. I have made a lot of chaps of all kinds for my customers, from show chaps, shotguns and bat wings,to chaps for the excersize riders at the track they are the toughest to please since they wear them 6/7 hrs a day every day and are very discriminating. One thing I have done to make sure that my paterns work is to actually make a pair for myself, and then wear them around out in the paddocks while I am doing chores, blowing snow or what ever. (my wife thinks I am crazy!) The idea is that if I wear them and use them a lot, I can see where they may need some adjustment to the pattern to make them more "user friendly" always looking to improve the product. By that I mean they don't slide down, or bunch up just above the thigh and below the waist when sitting on a horse and so on. Actually, I have found that a steep back to front angle on the belt/yoke will cause them to hang well, and not bunch up in front when you are sitting. Also, when I cut my fringe, I cut all by hand because you can't buy it cut to a length that gives the look most of my customers like, I cut it a full 6.5" to 8.0" long at a slight downward angle about 30 deg, 1/8" to 3/16' wide. At that length, once the fringe is out past the side of the chap it hangs straight down and gives that professional hand made look that is desired. By the way, I start most patterns for a person by using a pair of their pants that they like the way they fit. I mark them up with a marker and cut the beginning pattern out of those pants, that way the outside seams hang straight (very important). Suffice it to say that they don't get the pants back!
Just a few tips for you. Keep up the nice work. There is a lot of people out there wanting custom chaps, and you will find no trouble getting work when your work gets out where people see it. Word of mouth is the best advertising.
Happy Trails!
Bondo Bob
-
I wouldn't use one for love nor money! I would rather see a prospective sale go away than put them in one, knock off or not! If I had 100 of them for free, I'd give them to a plastic molder I know and let him regrind them and make signs out of them.
I know the price of a custom made saddle is not for everyone, but; you can certainly find a good used real saddle out there at most tack shops that will meet your needs, for anywhere from $250 to $750, and even if you have to spend another $200 or so to have it gone through and freshened up, you are miles ahead of the game. Up here in Michigan, you can find lots of "old timer" made saddles reasonable, Prices, Ringalero's, even the old Billy Cooks (back when Billy was actually making them) and more. For those in MI, OH, and Indiana, try Bob Jacobs Boots and Saddles in Bellville, he will either have what you want, or can find it. By the way, with respect to the way the stirrup leathers come through the ralide tree. I had a customer who took the stirrup leathers out of the brand new saddle to oil them before his grand daughter was going to start using this youth saddle. He couldn't get them back in because of the way they pass through the tree. He had to pay me (an hours labor) to take the saddle part way apart and accomplish the task. That was the first of many more times I am sure that I will see this saddle for some kind of repair. That money saving tree, will cost him in the end! By the way, he owns a tack and supply store, so it isn't like he does'nt know how to put a stirrup leather in!
Like I and so many others here have said, " I wouldn't ever use one"! I think too much of my saddles, my reputation, and especially my customers.
Happy Trails!
Bondo Bob
-
Jake,You are asking a question that has several possible variables. There are several threads discussing the attributes of in-skirt riggings. They are certainly strong enough to rope with if produced correctly. They are strongest if hooked over the tree bars both in front of the swells, and in back of the cantle. The saddle you want to build would be best if the rigging plate that is on the outside is all one piece of leather and covers the entire back of the skirt. It is harder to fasten to the tree as you can't put screws in the bar behind the cantle concho. Attached is a drawing of an in-skirt rigging that I use. You would simply cut the rigging larger to extend to the back of the skirt. It can be any shape of skirt that you wish.
Hope that helps,
Keith
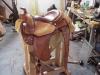
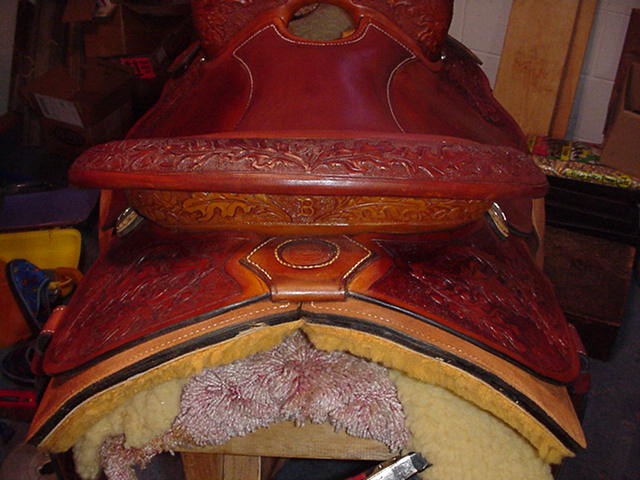
Keith is right. Besure to take your rigging in the rear over the top of the bars behind the cantle. I actually lace both sides together. Here is a picture of one I did that is a slight take off of the sketch that Keith provided.
Happy Trails!
Bondo Bob


-
Can the true difference in weight be so discernable as to truly provide a significant weight difference? A pound, maybe 2? If you are that concerned with weight, skip breakfast before riding, and ride a saddle with a quality tree. It sounds deceptive. They want to make cheap trees real fast, but need a gimmick to get them to sell. I am sure they do not compare their products strength to a proper tree do they? This is exactly why I hate the idea of going to a tack shop and buying a saddle off the shelf. Do you really know what is inside? My money is just so hard to come by.A buyers perspective.
I agree with all the comments here. Final note, these trees are "blow molded", a very cheap way to make them and why they are hollow. Using the excuse that they are hollow to save weight. Unless you are a die hard barrel racer who feels that that couple of pounds is really worth a hundreth of a second and have a competent maker make one for you saving the weight in the right spots, you shouldn't be concerned about a the weight of a saddle. I have been riding for over 55 years on all kind of saddles and horses, and I have yet to see where a couple of pounds will make a difference to a 1000 lb. + animal. By the way, I weigh over 200 lbs, and the saddle I personally use weighs about 50 lbs and "Old Duke" never complains! If you are going to error, do it on the side of safety. My saddles can range from about 35 lbs. to 60 lbs, depending on what it is made for and the type of rigging, stirrup leathers and so on. The most important thing is that the maker use only the best materials and tried and proven methods to make your saddle.
Happy Trails!
Bondo Bob
-
If you have a dome before you put your filler on you should still have a dome when your done and if you have a flat horn it should be flat when you are done so why not order the tree the way you want it. With or without dome. GregGreg's right! Order it the way you want it. Bottom line is that the filler should be tacked down by either the machine screw method or the tack method. I have repaired 100's of saddle horns , a lot of them belonging to people that do not even use their saddles to rope, or dally, or pony. They simply grab hold a lot, or set them down on the front of the fork and the front of the horn, (which is the correct way), and they come loose. In many cases the saddles are only a couple of years old. This (skipping the tacks in the filler) is a short cut that is used by manufacturers of "store bought" saddles. A large number of those saddles I have repaired were Circle Y saddles by the way. So many that I actually called them and tried to get them to let me set up as a repair center up here in Michigan. They weren't concerned about the need for repairs. They said "if they want them fixed they can send them back.
Happy Trails!
Bondo Bob
-
One last word. I only use PURE neatsfoot oil, and over the years it has served me well. If you use too much it WILL soak through to the other side. You have to experiment to see how much is too much. So, use it as Bruce says in steps. If it is PURE it will not darken the leather very much at all. Once it dries it will com back to the natural color. For saddles that are "old and dry". Once I have them clean, I take a small iron pot, put about 4oz. of PURE neatsfoot oil in, then add 2 to 3 tablespoons of virgin olive oil to it, and take it out to my grill, (my wife would shoot me if I heated it on the stove! Doesn't smell bad to me but!!!) anyways, I heat the mixture till it is coming to a boil. Then I use a piece of sheepskin and apply it to the leather. The heat really drives the oil into the fibers of the leather, and usually rejuvenates the leather. If that dosn't get it done, then the leather is beyond use.
Again, use only PURE Neatsfoot oil.
Happy Trails
-
Saddle Fit: An Enduring Western MythA popular topic among both leatherworkers and horse owners today is saddle fitting. Perfectly fitting a saddle to an individual animal is one of those things in life that sounds good in theory but in the real world simply does not work and in highly impractical. There are too many variables, both short term and long term, which are constantly changing.
The â€Å"saddle fitting†advice should come from those who have spent years studying the art and craft of saddlemaking and who have a better than average knowledge of riding styles and equine anatomy. This background is essential to understand what can and cannot be done within the parameters of saddle building. Our goal should be to find a saddle that will fit as closely as possible, under changing conditions, and that will compliment the back of the horse when used in these conditions. The variables are; the Horse, the Rider and the Saddle itself. Another consideration that fits into this picture is Economics.
The Fit is a determination of how the first three variables interact and compliment or oppose each other. It has been stated that â€Å"the saddle is both the central and the stabilizing force wedged between two very flexible and changing objectsâ€Â. To consider the saddle as having primary control over fit versus the ever changing rider is simply absurd. This is well understood by most experienced saddle makers and why most of them do not conduct saddle fitting clinics. Many equine clinics are conducted by those with varied equine skills, but are untrained and unskilled in saddle construction. They seem to have a miracle product or system using everything from old fashioned coat hangers to new age plastics and aluminum â€Å"fitting gauges†to create the perfect saddle fitting utopia. These â€Å"snake oil salesmen†are only looking to increase their income and prestige by making reasonable sounding claims that cannot be demonstrated as possible in the real world. The true student of proper saddle fit must consider the riding style, riding conditions and the condition of the animal (the primary cause of saddle problems today). The economics of the situation must also be evaluated. Most of us do not have unlimited money to purchase an individually fitted saddle for every horse we own or may purchase in the future.
There is no such thing as perfectly fitting a saddle to a horse !! Allow me to illustrate ... Did you buy your own shoes because they fit perfectly ... or because â€Å"they didn’t hurtâ€Â? Yet by buying the standard shoes available our feet are generally trouble free. Fit and comfort are two different variables, but related. Do the shoes you wore at 21 feel just as good at 45? Not for most folks! We must realize that fit is a judgment based on many ever changing variables. When analyzing saddles and horses we must remember it is an inexact art form for which no one has all the answers. The horseman who rides with skill, has quality tack, keeps his horse in good physical condition and monitors these three essential elements will rarely have a saddle problem.
If the saddle could be made to fit a specific horse perfectly, for his entire lifespan, shouldn’t that saddle be sold with the horse when we find a new steed to replace him? What should we do with the saddle when the horse dies? Perhaps take it behind the barn and shoot it! Studies show that 60 percent of horse buyers sell their animal within the first year. A good number of the 40 percent who keep the animal through the first year will sell within the next 2 years. Rarely will they sell the saddle with the animal. The useful life of a quality saddle is many times longer than the useful life of any individual equine. Fitting a saddle to one animal would be limiting the usefulness of an expensive product.
A saddle is noting more than a backpack for an animal. How many of us (even very serious hikers) have a specially fitted backpack? We go to the nearest sporting goods store and purchase a pack that suits our needs, has an appearance that pleases us and affords the comfort and flexibility we desire. Our horses deserve the same consideration ad courtesy. Many people have several animals but only 2 or 3 saddles. Common sense dictates that we have a saddle that will fit the majority of our animals. I often have clients tell me â€Å"My trainer says saddle made to fit my horse preciselyâ€Â. My response is to ask â€Å"How many saddles does your trainer have and how many horses does he ride?†Most trainers have 3 to 5 saddles and ride 20 or more horses in a season. Are they concerned with â€Å"exact fit†or animal comfort?
Why then is saddle fitting such a large topic and why do we have so many problems? Simply because we do not want our horses developing sores which is uncomfortable for them and limits our riding time. Let us examine the most common cause of saddle sores.
Most sores are caused by the rider not the saddle! Some time ago I attended a seminar that discussed saddle fitting. The speaker had an electronic pad that measured the pressure points under the saddle and displayed a colorful â€Å"map†of these points on a computer screen. Three different riders rode one horse with the same saddle and pressure points were measured. Pressure varied all over the animal’s back depending on riding style. This animal then would require three different saddles .... ridiculous! Many horsemen ride without proper balance, too high on the cantle, off to one side and generally uncollected. These riding faults cause problems which are transmitted through the saddle which are not the fault of the saddle at all. Many riders make the mistake of riding the saddle and not the animal!
A good custom saddle is made with emphasis on fitting the rider more than the horse. This is done to eliminate rider movement in he saddle, thereby eliminating pressure points on the horse a much as possible.
The animal’s condition must also be carefully monitored by the rider. The majority of problems with saddles are caused by people who do not properly condition their animal. Without proper training and conditioning we go out and put in a 20 or 30 mile ride. Or worse we go on a week long hunting or packing trip in less than ideal weather conditions. Animas must be conditioned and built up to this type of riding. During this conditioning process their muscles develop and their skin toughens much as we develop calluses for hard work.
I had a gentleman say â€Å"I am a serious rider and put in 30 miles at a time. I use many saddles and they all sore up my horse. What do you suggest?†I asked him if he was riding 10 miles at a time at least 3 days per week as conditioning for himself and the horse. His reply was â€Å"Well, no, I have many obligations and just do not have that kind of time. However, I do ride 30 miles every three or four weeks as time permits.†His problem has nothing to do with the saddle! The problem is a lack of conditioning. Human nature is such that rather than face our own limitations we find some other factor to blame. Good riding is a process of monitoring ourselves, our animal and our equipment and making adjustments if needed. Many ignore these things until they unsaddle and then exclaim â€Å"Oh, my, look what this saddle did†never realizing or admitting that their lack of observation and adjustment is the true cause of the problem.
An animal’s body is constantly shifting both in condition and in conformation. A saddle which is very comfortable for a horse at 3 years of age will set differently when he is 7, 12, 15. Will the suit we had tailored to our trim frame at 24 fit the same when we are 48? Why should we expect a horse and saddle to be different? Our animal’s body shape changes from season to season as they gain and lose weight and even during the course of a day’s ride. Notice how your saddle sets differently after a 20 mile ride, even on a well conditioned horse. This is one reason why that rig that looked perfect at the clinic or tack shop suddenly doesn’t seem to be doing such a great job. This type of â€Å"saddle fitting†only tells us that the saddle will not harm the animal where it is place while he is standing still! The important position is where it crawls to when in motion. Saddle position may vary a great del during a single ride to the action of the back muscles and the terrain being traversed.
Another reason for saddle sores is that most riders don’t understand the advantages and necessity of a quality saddle. The recent interest in â€Å"saddle fitting science†recently is in direct proportion to the number of new owners who are beginning to acquire basic riding skills and are doing so in poorly constructed, entry level saddles. This combination gives many a very negative experience which is then focused on the saddle. Although the individual saddle is not the primary factor affecting fit it is the catalyst molding man and animal as a unit and must be created with quality materials Saddles under $1600 are the low end of the market. They are generally mass produced of middle or low quality materials and are intended for entry level and light usage riders. The top end of the mass produced market is generally much more ornate with abundant silver decorations but not necessarily better constructed. Remember, â€Å"a garbage truck with a Charles Russell painting on the side still smells like garbageâ€Â.
Saddles in the middle price and above range are usually built by craftsmen who have spent their lives studying saddles and saddle construction. Artists who, themselves, are usually pretty good horsemen and who have studied many others horseback. Cowboy’s in the old west, realizing the importance of a quality saddle, allotted two to four months pay for their saddle (far less for their horse). In today’s dollars this would be $5000 to $8000. A quality saddle showed their commitment to their profession and a level of concern for their mount, an example many today could benefit from. This, and their animal’s better of conditioning, is why they didn’t have today’s level of problems. Today’s average new owner does not budget in the cost of real quality equipment and the horse is the one to suffer the consequences. If sore develop on a long ride in an entry level saddle it is because the saddle is not being used as intended. Serious riding requires a serious saddle.
Often owners come to my saddle shop and inquire into the cost of a nice custom rig for their very special, favorite horse. When I tell them they often exclaim, â€Å"Oh, I couldn’t spend that much on just a saddleâ€Â. Then they go back to the parking lot and get into their $45,000 pickup pulling a $15,000 trailer (both of which are depreciating in value daily!). The saddle would be more make for a more comfortable riding experience for them and their horse and would be useful (an hold its value) for the next 40 years.
A common cause of saddle problems is the result of the blankets or pads. Dirt, sweat and debris collect on the blanket and for a hard crust. This rubs on the back of an animal and can cause sever discomfort and soreness. Cleaning blankets and pads frequently will pay big dividends. Use only the amount of pad required. Too much padding requires cinching too tightly and may cause cinch sores. Also, placing the blanket properly is important. A twisted blanket can cause a great deal of pressure in areas under the saddle. Many riders then blame this on the saddle rather than acknowledging their error.
Another problem is often the size of the cinch. The purpose of the cinch is to anchor the saddle to the horse as comfortably as possible. The cinch should not interfere with the horse’s action. . The width should vary according to the position of the rigging plates as follows;
full position  17 strand cinch
7/8 position  19 strand cinch
3/4 position  21 strand cinch
Using a cinch that is wider than necessary in any position would extend too far forward and the foreleg of the horse would be constantly rubbing on it, which would result in chafing and sores in that area.
Super-wide cinches have become popular in recent years. Wide cinches have their place when roping heavy cattle and should not be pulled very tight, except while roping. They have no place on the pleasure or trail horse. Most riders think that this wide cinch is more humane and doesn’t cut into â€Å"Old Paintâ€Â, but the truth is that the wider cinch must be pulled tighter to hold the saddle as well and this tightness creates a corset effect across the horse’s chest. Restricted breathing is not a desirable trait! It is much better to have the right size cinch and not have to tighten it so much!
At each end of the cinch is the ring. This is used to run the latigos through when tying to the saddle. There are three styles of rings: round ring, ring with-buckle-tongue, and ring with-crossbar. The round ring is found on the cheapest of cinches and can only be used by tying the latigo. The round ring with-buckle-tongue is an improvement because it eliminates the bulk of a cinch knot, however, when the tongue is attached at the bottom of the ring it is also considered cheap. This arrangement can become ineffective if the pressures on the ring should make it oval. When the ring becomes oval the tongue goes through the ring and doesn’t work to lock the latigo in place. I see many riders using this type of ring with a knot and allowing the tongue to hang loose. This is a potential hazard to man and horse!
The best cinch ring is the ring with-crossbar. The crossbar prevents the ring from being pulled into an oval and the tongue is much shorter and less hazardous. The ideal ring with-crossbar is made with a flat profile (more surface area distributes pressure wider), a flat top surface (prevents unnecessary distortion of the latigo) and a small tab on the inside bottom prevents the cords from bunching to either side of the ring. This ideal ring is made of stainless steel. The materials in a cinch are very important. In bygone days the cinches were made of horsehair. The best were from mane hair and the poor grades were from tail hair. These were very durable and seemed to work quite well, but didn’t do much to absorb moisture. Other old time cinches were made of canvas or burlap. Horses get sores because of heat and moisture! The ideal cinch promotes transference of sweat away from the body and allows evaporation to cool and dry the heated area.
The best material to transfer water is cotton, but cotton looses much of its strength when wet. The next best is . Mohair is a blend of Angora Goat hair and Wool. It transfers water (sweat) rapidly AND becomes stronger with the addition of moisture. Mohair is also the best cinch material because it cleans easily and is best washed with mild soap (Ivory, dish soap, etc.) and water. [be sure to rinse out all soap before putting back on the horse] Mohair cinches are expensive, but not excessively so and will last a very long time. Many cinches are made of 100% nylon, or synthetic, cord. While these are strong they will not absorb or transfer moisture and will create a certain amount of heat.
When a problem occurs it is common today to point the finger at one variable such as the saddle or the pad and place blame there. This is way too simplistic an approach. Usually the problem is a combination of the variable we have been discussing. If we change one of these variables the problem may be temporarily eliminated but it should be monitored for some time to determine if that was the only problem. Often not!
Changing conditions mean we cannot expect the saddlemaker to take responsibility for choosing our saddle and placing it on our horse any more than we would expect the auto dealer to choose our truck and drive it for us. Anyone who places a saddle on an animal and states that it perfectly fits or does not fit is claiming they have the ability to see into the future. Changing conditions will always be present and, as horsemen, we must be aware of these conditions and react accordingly.
Owning a horse is, indeed, a lifestyle. It is a series of continual lessons and mistakes. People are so worried they are going to do something wrong that they forget how much fun it was at the beginning. Let’s step back and take a look at our horses, our equipment and ourselves and relax. Most of the â€Å"saddle fitting†problems will work themselves out with a little applied logic. A good saddle should last the rest of your life. Choose it carefully and enjoy the ride!
Happy Trails,
Dusty Johnson
Pleasant Valley Saddle Shop and School
Hi Dusty!
Well, first I will say that every one on this thread should be happy that you took the time to explain in great detail the reality of life about saddles and how they are built, used, and interact with both the horse and rider. The only way I would expend that much time and breath is if someone was in my shop and serious about taking that next step from a manufactured saddle to a custom hand made saddle, that they want to use and at some point pass on to their grand children!
I fully agree with what you have said here, and would only add this, it has been my experience over many years, (at least 40) in observing horesmen (and ladies) that after several years of owning horses, buying and selling them until they settle on what they like in style, type of riding, and conformation, and the like. Most horse folks are not ready to get a saddle made because they do not know what they need to know in order to be happy with the product. I generally won't make a saddle for a novice, and certainly will not make a saddle for a horse under 5 years old. The reasons are obvious, as you stated too many things change in the first several years.
It has been my observation that generally, once a person has finally settled on what they like, the majority of what they end up owning (horses) for the rest of their life are pretty much conformed the same, and a saddle that fits one of them really well, will most likey fit the others they end up having over time. Of course, there is never a perfect answer, and some folks do change completely what they ride like going from an Arab to a Draft horse of what ever, and in that case, all bets are off!
My advice to beginners out there is simple, go out and get yourself a good used old time makers saddle. The likes of a Price, Ringalero, or Ryon, from your local tack shop. You can get them for a reasonable price and will at least have a quality made piece that you can ride, and enjoy until you are ready to have a good custom one made. Those older saddles are like putting on a good comfortable pair of old slippers. They "just feel good"!
Happy Trails!
Bondo Bob
-
It is pretty amazing how well they hold up considering how poorly most are built! Tells you how critical the rawhide is, and how strong it really is.Keith
Keith,
I agree with your comments completely. The bottom line is that quality materials, and quality work make a quality product. I have always tried to stick to the "old fasiohed" ways, and never pass up a chance to aquire a really old ( late 1800's early 1900's saddle) that has been discarded because it just is too warn out for rebuilding, and taking it apart to see how the masters did it. Never too old to learn something else about the craft. Most generally they adhear to your comments.
By the way, whose trees do you use?
Bondo Bob
-
Here you go...a quick scan.
Regards,
Ben
Thanks Ben,
You beat me to it. As a side note, jigs, paper patterns, nails, strings, whatever; the most inportant issue is results. Once you have your rigging tacked in place, put your tree on your tree stand with the front sticking out forward of the end of the stand so that the rigging is clear of the stand. Level the tree bars from side to side, and be sure it is square on the stand, and the stand is level on the floor. Then put a broom handle through the rigging. If it, (the broom handle) is level with the floor and square to the front of your stand you have achieved your goal. If not, start over.
Bondo Bob
-
Hi Everyone,
At the risk of either agreeing or disagreeing with the comments in this thread, I find that this topic is fully covered in detail, and also how to make a "jig" that works on all styles of rigging, and instructions on how to use it, can be found in The Encyclopedia of Saddle Making by Al Stohlman. I have used this method for a very long time now, (15 years) and have never had a saddle that came out wrong. I have used it on saddles with Quality , Superior, Hadly & Fox, and Bowden trees. The outcome is the same and does take into consideration any inconsistancies in the tree itself.
Bondo Bob
-
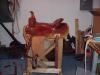
OK, this is just my opinon, and like belly buttons, everybody has one, but; My recomendation is simple, first, get the set of books from Tandy (Encyclopedia of Saddle making by Al Stholman). They are the most detailed and complete set of instructions on how to, I have seen. After spending some time reading and understanding at your own pace you will know if you want to go on. Given that you do, you can buy a "kit" from Bowden Tree Company in Texas for about $700. Since you have read the books, you will then know that the kit is really just the materials to make a saddle, but; it is pretty complete and a good way to get started. Then locate the nearest Tandy store near you, you can get all the books you need including how to hand stitch and so on and they are fairly inexpensive and you will become very aquainted with them through the process of working with leather. You are now ready to start. Take your time and pay close attention to Al's directions. They are complete. Depending on your level of expertise with using your hands you can make a quality high dollar saddle out of those books, but; more importantly you will learn much more than you can using the videos. I have been making saddles for over 15 years and have made a lot of money and currently am retired from my career job (Advanced Seating System Engineer) and now have become an "antique seat system engineer", and cannot tell you the enjoyment and satisfaction that I get from making and repairing saddles. By the way, I still pull out those books each time I make a saddle, I always seem to either find something more to learn, or come up with an idea on my own. They are an excellent investment. I hope that you will decide to go forward with your project.
Good luck!
Bondo Bob
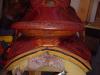
P.S. This is a pic of the very first saddle that I built from the books.
-
JW
Nicely done. I hate it when people let the tooling get in the way of getting the basics right. Good balance, nice rise in the ground seat, should be a comfortable seat. Do you use leather or tin for your ground seats?
Bondo Bob
-
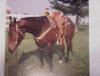
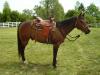
Traveller,
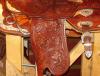
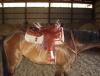
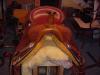
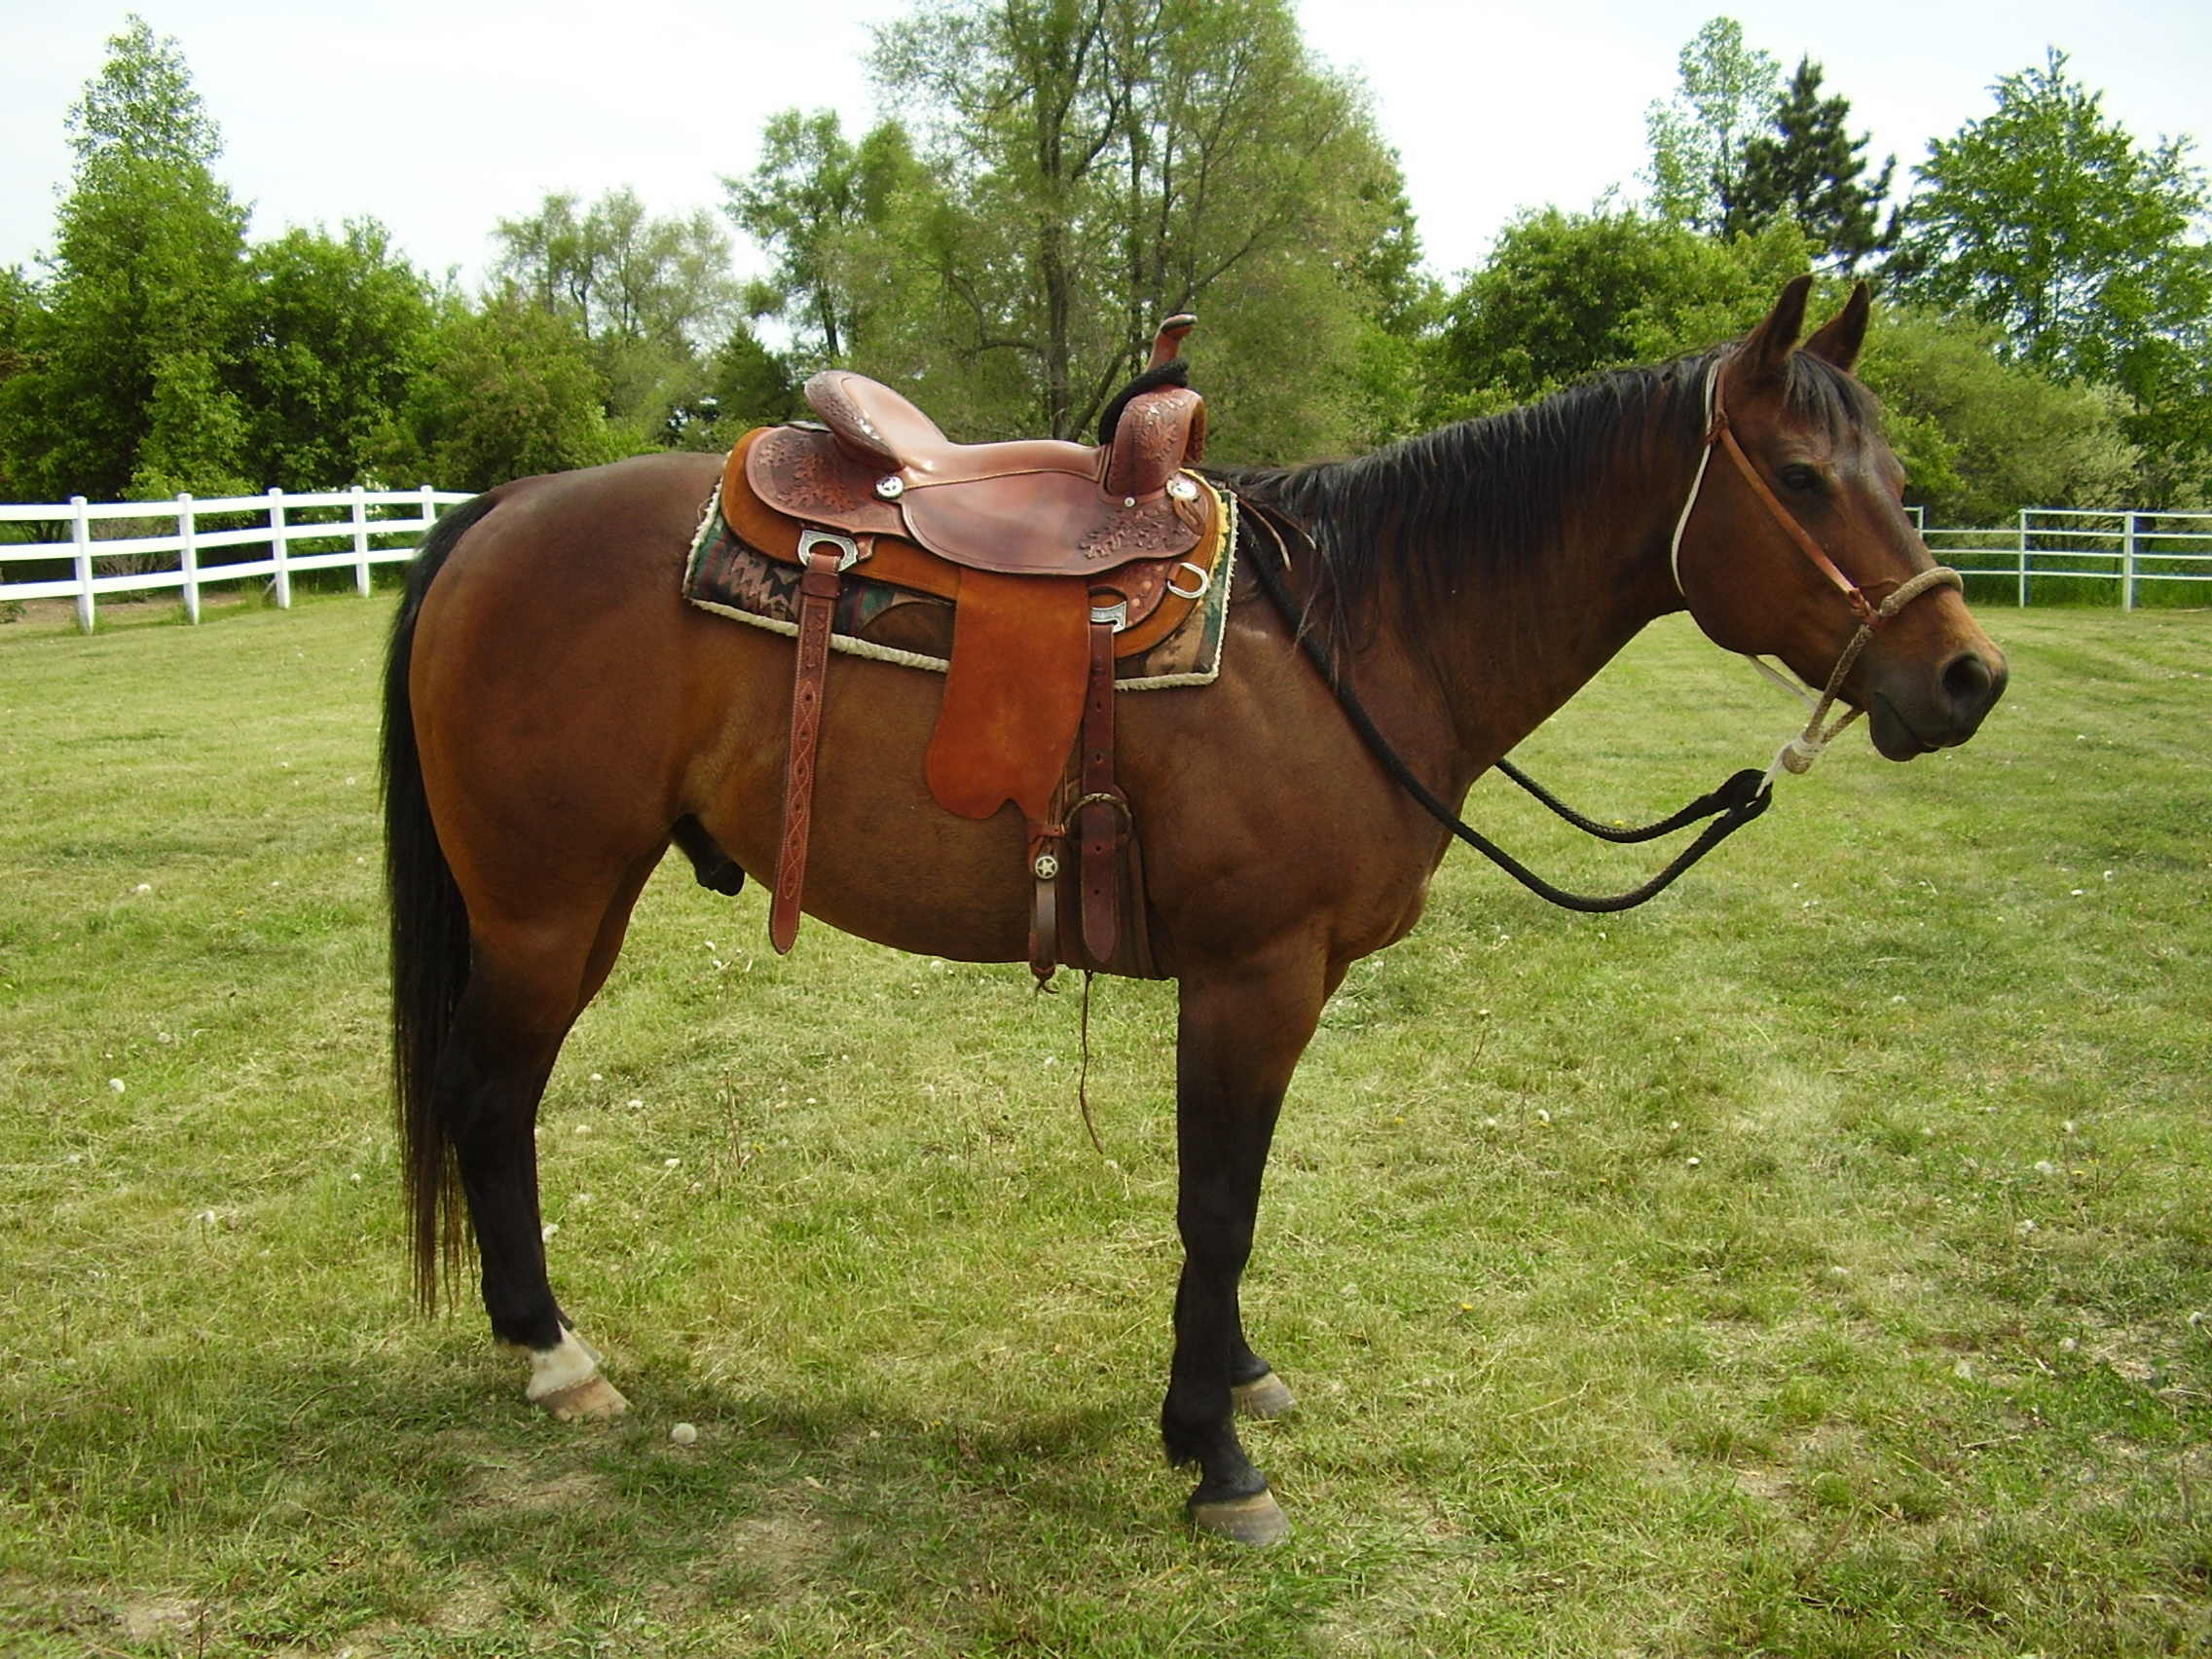
Just a couple of words here. 1) you have gotten a lot of good advice from the others, and should be able to find the remedy in all that text. 2) From the pics of your horse, he appears to be an old "stock type" built horse with plenty of muscle. I like those types myself, however, a lot of today's production saddles are made to fit the general type which seems to be a cross between 1/4 and Thorobred. The problem is that most saddles are either too wide in the withers or too small in the withers, both can cause problems. Yours appears to be too wide for the horse from the pictures. Regardless of how comfortable a saddle is for you, if it dosen't fit your horse correctly it just doesn't fit! A good fitting saddle should fit giving even pressure throughout the length of the bars without any pad. I use a strip of linen about 2" wide, by 8" long. I place it under the saddle starting at the withers and pull it out slowly taking note of how much restance there is to it being pulled out. I do this at 3" intervals the whole length of the saddle tree, both sides. The resistance should be the same all over. 3) As for height at the gullet. when I make a saddle, I make sure that the tree I am using, has between 2 to 3 fingers of clearence between the withers and the top of the gullet when the tree is sitting on the horses bare back. Once the saddle is made with the skirts and all, this will equate to about 3 1/3 fingers to 4 1/2 fingers without a pad minimum. 4) Once a saddle fits like that, you don't need 4" of padding! I am exaggerating here, but, I will attach a picture of a horse that is built similar to yours with a saddle the fits properly, you will see that I only use a single pad and I use this horse hard on cattle, trails, and all around fun with no problems. 5) Lastly, the information about the saddle being laced to the end of the skirt is correct. There should be at lease 1 1/2" of free corner at the end of the skirts in order to keep it from pinching, and rubbing on the horses back. If you are trailing up and down hills and so on this is a real problem, remember ropers rope on level ground (your saddle is a roping saddle), and it doesn't effect that area so much, but; up and down hills and over logs and so on will cause it to dig into his back. I will also attach a pic of how it should look at the back of a saddle.
Hope this helps!
Happy Trails!
Bondo Bob
P.S. I lied about the just a couple of words!

-
Nice work Bob. How long does it take to build a carved saddle?Hi Rusty,
To answer your question, Once you have the tree, ( I have mine made to my specifications in Texas and it takes about 10 to 15 weeks to get one from them), it typically takes about 8 to 10 weeks to build a plain saddle, (lot of time waiting for leather components to dry after being molded over a part of the tree like the swells, cantle binding, horn and so forth, and fitting the parts together just so,) then comes the tooling which depending on the intricasies of the pattern and the amount of tooling to be put on the saddle and additional 3 to 4 weeks.
Hope that answers your question.
Happy Trails!
Bondo Bob
-
In the process of making saddles and other leather projects, using water is common. The way I avoid water spots, or "fix" them when they occure is this: First I only use pro oil stains, they are deep penetraiting, and do not wash out. Second, once water has gotten on the leather, I wet the "whole thing" no matter how big a piece. That way it will dry evenly and not leave a stain where the edge of the water is. the same thing for a project that has gotten water stains on it. Remove the sheen, or finish or whatever you used, (I use laquer thinner for that purpose) then wet thoroughly and let dry. Then proceed with the new finish and complete the project.
Hope that helps!
Happy Trails!
Bondo Bob
-
BillB,
Thanks for the advice on computer help. I think I got it. I posted a few more pictures last night . You should be able to see them in "showing off". All together, there are pics of 4 different saddles I have made in the past, I am working on one right now in my spare time, that is a period design. I will post some pics of it as it gets along to recognition, or if I come to a part of particular interest for someone out there on the "how to" section.
Happy Trails!
Bondo Bob
-
Well I think I finally have it down as far as getting the pictures small enough to attach. Here are some more, and now I can dig into the files and see if I can get out some more interesting photos for you.
I have added a couple more pics of that cutting saddle for Greybeard. Also, Greg, that rig on "Duke" is a setup up I kind of worked up. He is a great working horse with a motor that just keeps running. Never quits, but; with a bit in his mouth he is always playing with it to the point that he stops paying attention to the task at hand. He loves to work cows, and in that rig, he pretty much goes at it on his own, all I do is point him onto the one I want. He is now 13 yrs and shows no sign of slowing down.
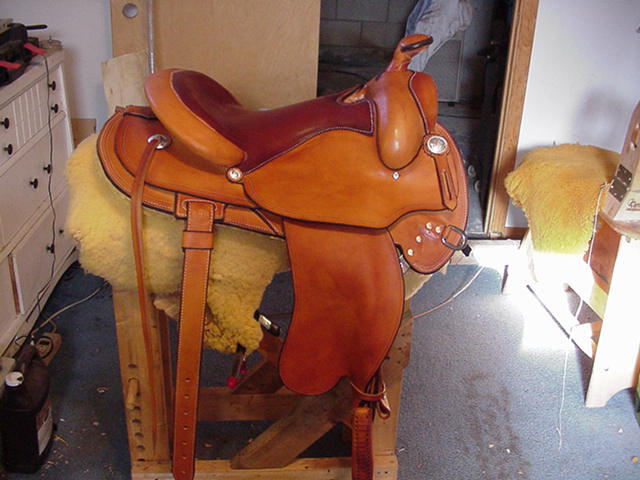
Shown here are pretty much the gamit from a "base saddle" to one that is decked out. All saddles that I make are custom made to order of the owner.
Happy Trails!
Bondo Bob

-
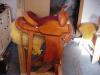
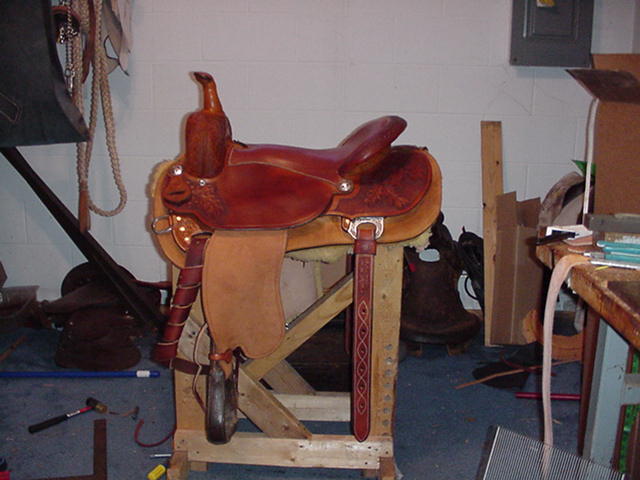
So far, these are the only 2 pics I can get small enough to attach. Guess I will have to work some more at it. Shown is a saddle I built for a lady that had a buckskin. It is actually dark brown and makes a good contrast on him. Also, there is a pic of a cutting saddle made for a horse that is really wide through the withers and chest and they had a hard time finding a saddle that fit him correctly without pinching him.
I will try to get that picture resizing thing down, so I can post some other pics.
Happy Trails!
Bondo Bob


-
Tim,
A final word. Basically all the info in other posts is good. If you feel that you need a more detailed description of how to do it, with or without a slit and lacing, the best explanation I have seen, is in the Encyclopedia of Saddle Making by Al Stohlman. Very detailed, and if you take your time and follow all the information, you will end up with a professional looking finish.
Bondo Bob
-
Alan,
Just a word, using raw hide to reinforce stress areas is the old fashioned way. I have been doing it that way for over 15 years myself, and yet to have one fail. Several years ago I spoke with Ann Stohlman about the use of raw hide and it was also her observation that the use of rawhide, while difficult to work with , yields excellent durability. The only problem I have ever seen with rawhide is, if you are not careful as to where you keep your saddle when not in use, the mice/rats will get at it. To them it is like candy! I am currently re-doing all the rawhide trim on a saddle I made for someone in Kentucky many years ago for that very reason.
Keep it up the good work!
Bondo Bob
-
Hi Folks!
This is just a note to say Hi. I am located in Manchester Mi. I have been a saddle maker for 15 years or so, and involved with horses in one form or another since 1973. I have recently retired from the auto industry, and now have more time to devote to making saddles and tack. I currently reside in Manchester. I do a lot of tack repair out of Jacobs Boots and Saddles, Lakeside Saddlery and Scott Colburns here in Michigan, and also make custom saddles for the discriminating horsemen both here in Michigan and out state also. I make all of my custom work, the old fashioned way, by hand, including stitching. I recently took over the repair work at the newly opened Pinnacle Race Course in Romulus Michigan, and durring the race season that keeps me pretty busy. Anyway, I think, I just posted a couple of pics of some of my work with this note, this computer stuff is not my forte. I just thought that I would join in on the conversations and so on maybe I could help, or maybe learn something while I browse on this sight! I look forward to future note and info.
Bondo Bob
P.S. Guess I didn't get the pictures right or something. It says that the pictures are larger than the 1000K bytes allowed. Maybe someone can tell me how to post pictures, there has to be something I am doing wrong. Address is pbuono7733@att.net


chaps vs chinks
in Clothing, Jackets, Vests and Chaps
Posted · Report reply
There are lots of ways to make them. Generally I have made so many that I just make them. As for sizing, which is the most important, I get the customer to give me a pair of pants that fit the way they want their chaps to fit. I add 1" to cover fitting over a pair of pants and that gives you a good start for size. Cut them up into patterns and off you go!
Happy Trails
Bondo Bob