


bvdv
-
Content Count
41 -
Joined
-
Last visited
Posts posted by bvdv
-
-
14 minutes ago, DieselTech said:To me it looks like a bunch of leather strips sewn together.
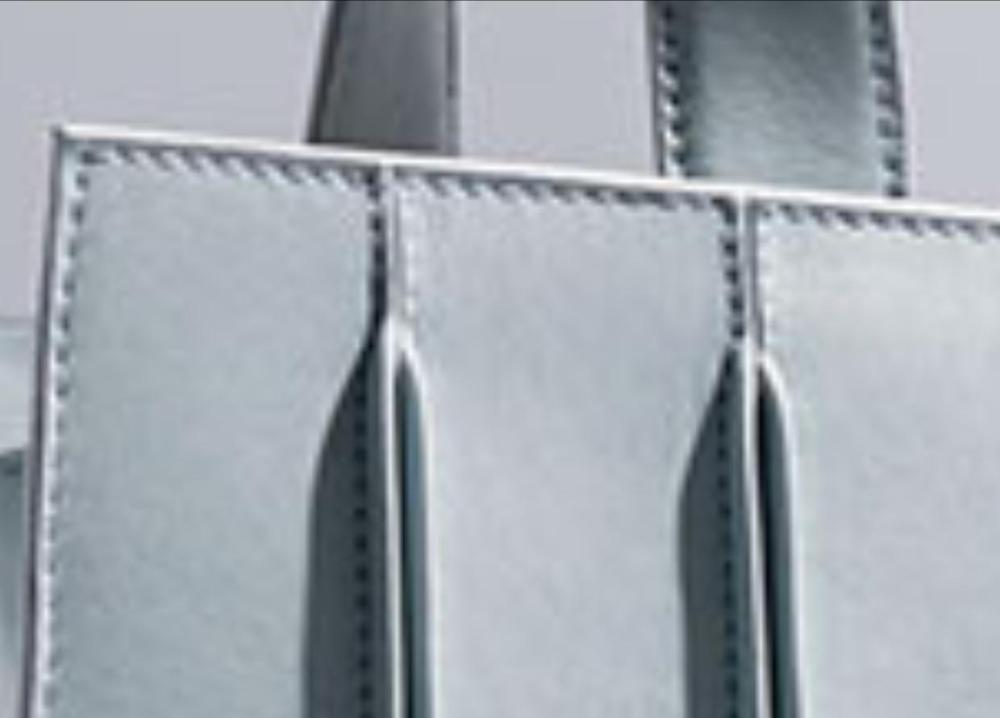
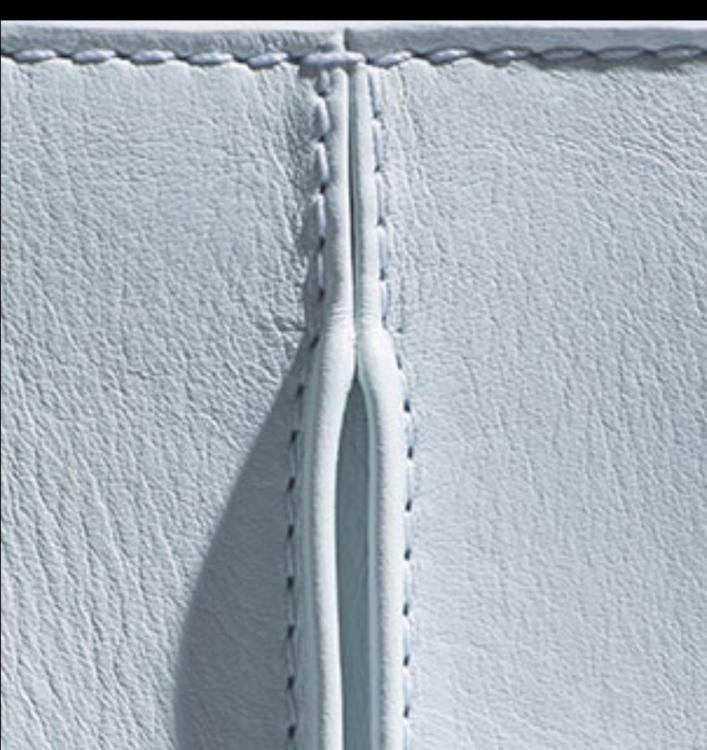
I'm sure, but how. you can't just take straight pieces. if you look closely you will see that the ribs stop at the top and at the bottom. there they transition into a flat panel. you also see that the edges are not arranged but turned over.
-
Hello all
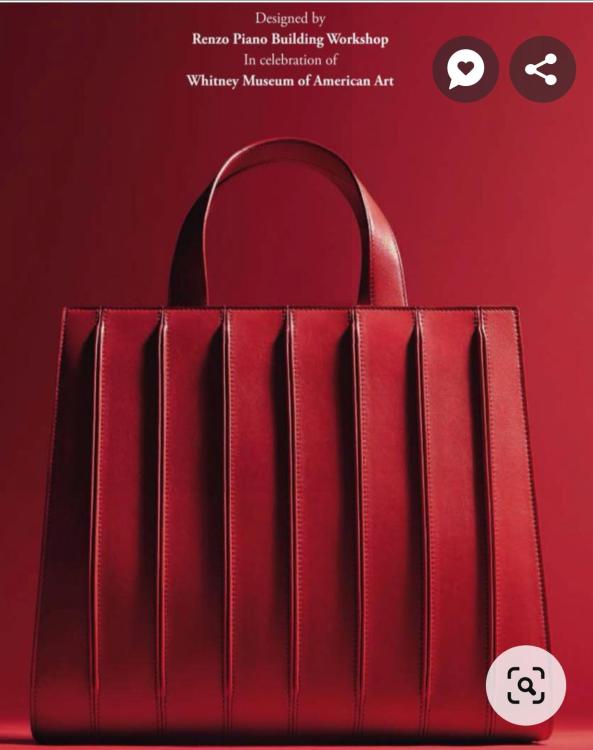
Antoine have aan idea how to make those ribs in this bag. They are so elegant .
Thx in advance
-
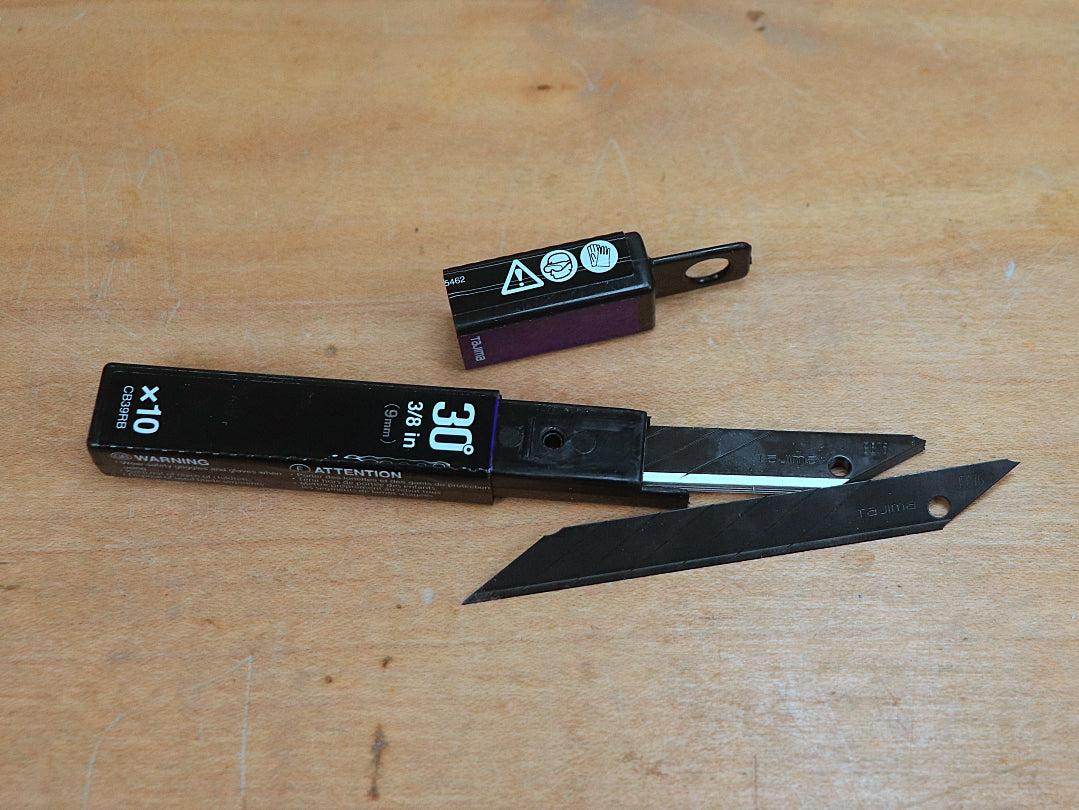
For those curved shapes I use a snap off blade, where the blade can be locked like this.
As for the blade I use the 9mm black 30 degree tajima. Be sure to take a 30 degree blade. They are much sharper and easier to cut curved shapes. There is a slight difference in sharpness between the black and the metal coloured regular ones, but not profound. The main difference is the angle of the blade. You can see the difference in the 2 attached pictures.
Greetings

-
6 hours ago, TomE said:Can't compete with them on price.
")
No need to compete in price, you clearly win in finish and quality.
-
I think it will hold, but a rivet add some bling
") .
.
-
Beautiful, I think these will outlive you.
You always pay a lot for good quality hardware, but most hard hardware can be reused. If you buy cheap mass produced rubbish you regret it in a few months.
Nice work

-
6 minutes ago, ArkieNewbie said:Thank you for that feedback! I do see what you're saying and I agree. Honestly the rounded edges on the blue one were an after thought after the rectangle patch had been sewn on and I didn't want to risk cutting and my stitches popping out.
I definitely agree with you about the thinning. The only tool I have for it is a French edger. Not ideal but it gets the job done, but I do agree it could definitely be cleaned up. I definitely appreciate your comments!
try to thin an area on a piece of scrap with the french edger, then sand this area with rough sandpaper(80-200 grid). i think you will get more or less the same leather structure as the non "french edger" area.
-
hello,
your stitching is certainly acceptable.
What I would do is bring more consistency to the whole thing.some examples
Photo 2 if you rounded the corners on the inside I would also do this on the flap, like the brown pouch
Photo 3 the same here the bottom of the rectangle are rounded, but the top is not, however here I would opt for a round patch. This way this stitching will also look nice around your magnet. The same for the inside of the magnet, a round patch would look quieter than the rectangle in my opinionAlso the thinning of the leather where the bend is looks a bit rough, maybe you can try to even this out by going over it with some rough sandpaper.
These are my remarks, about taste, shape and color you can keep arguing ;-)
Practice makes perfect -
Woow nice, did you remake the handle showing on the last picture to the one in the first picture?
-
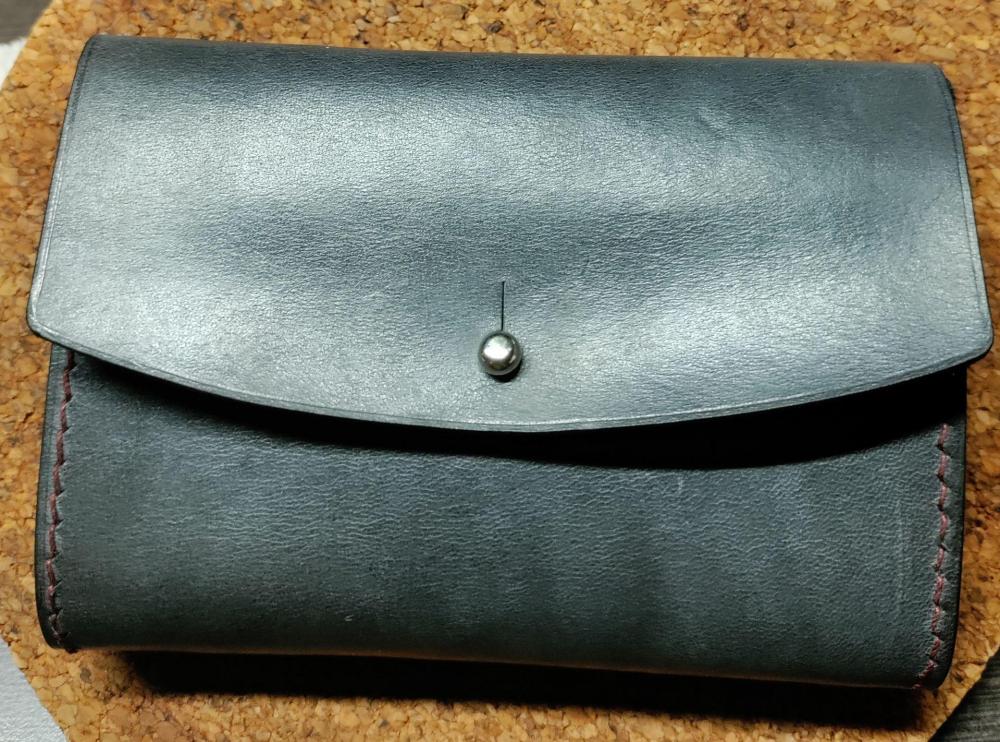
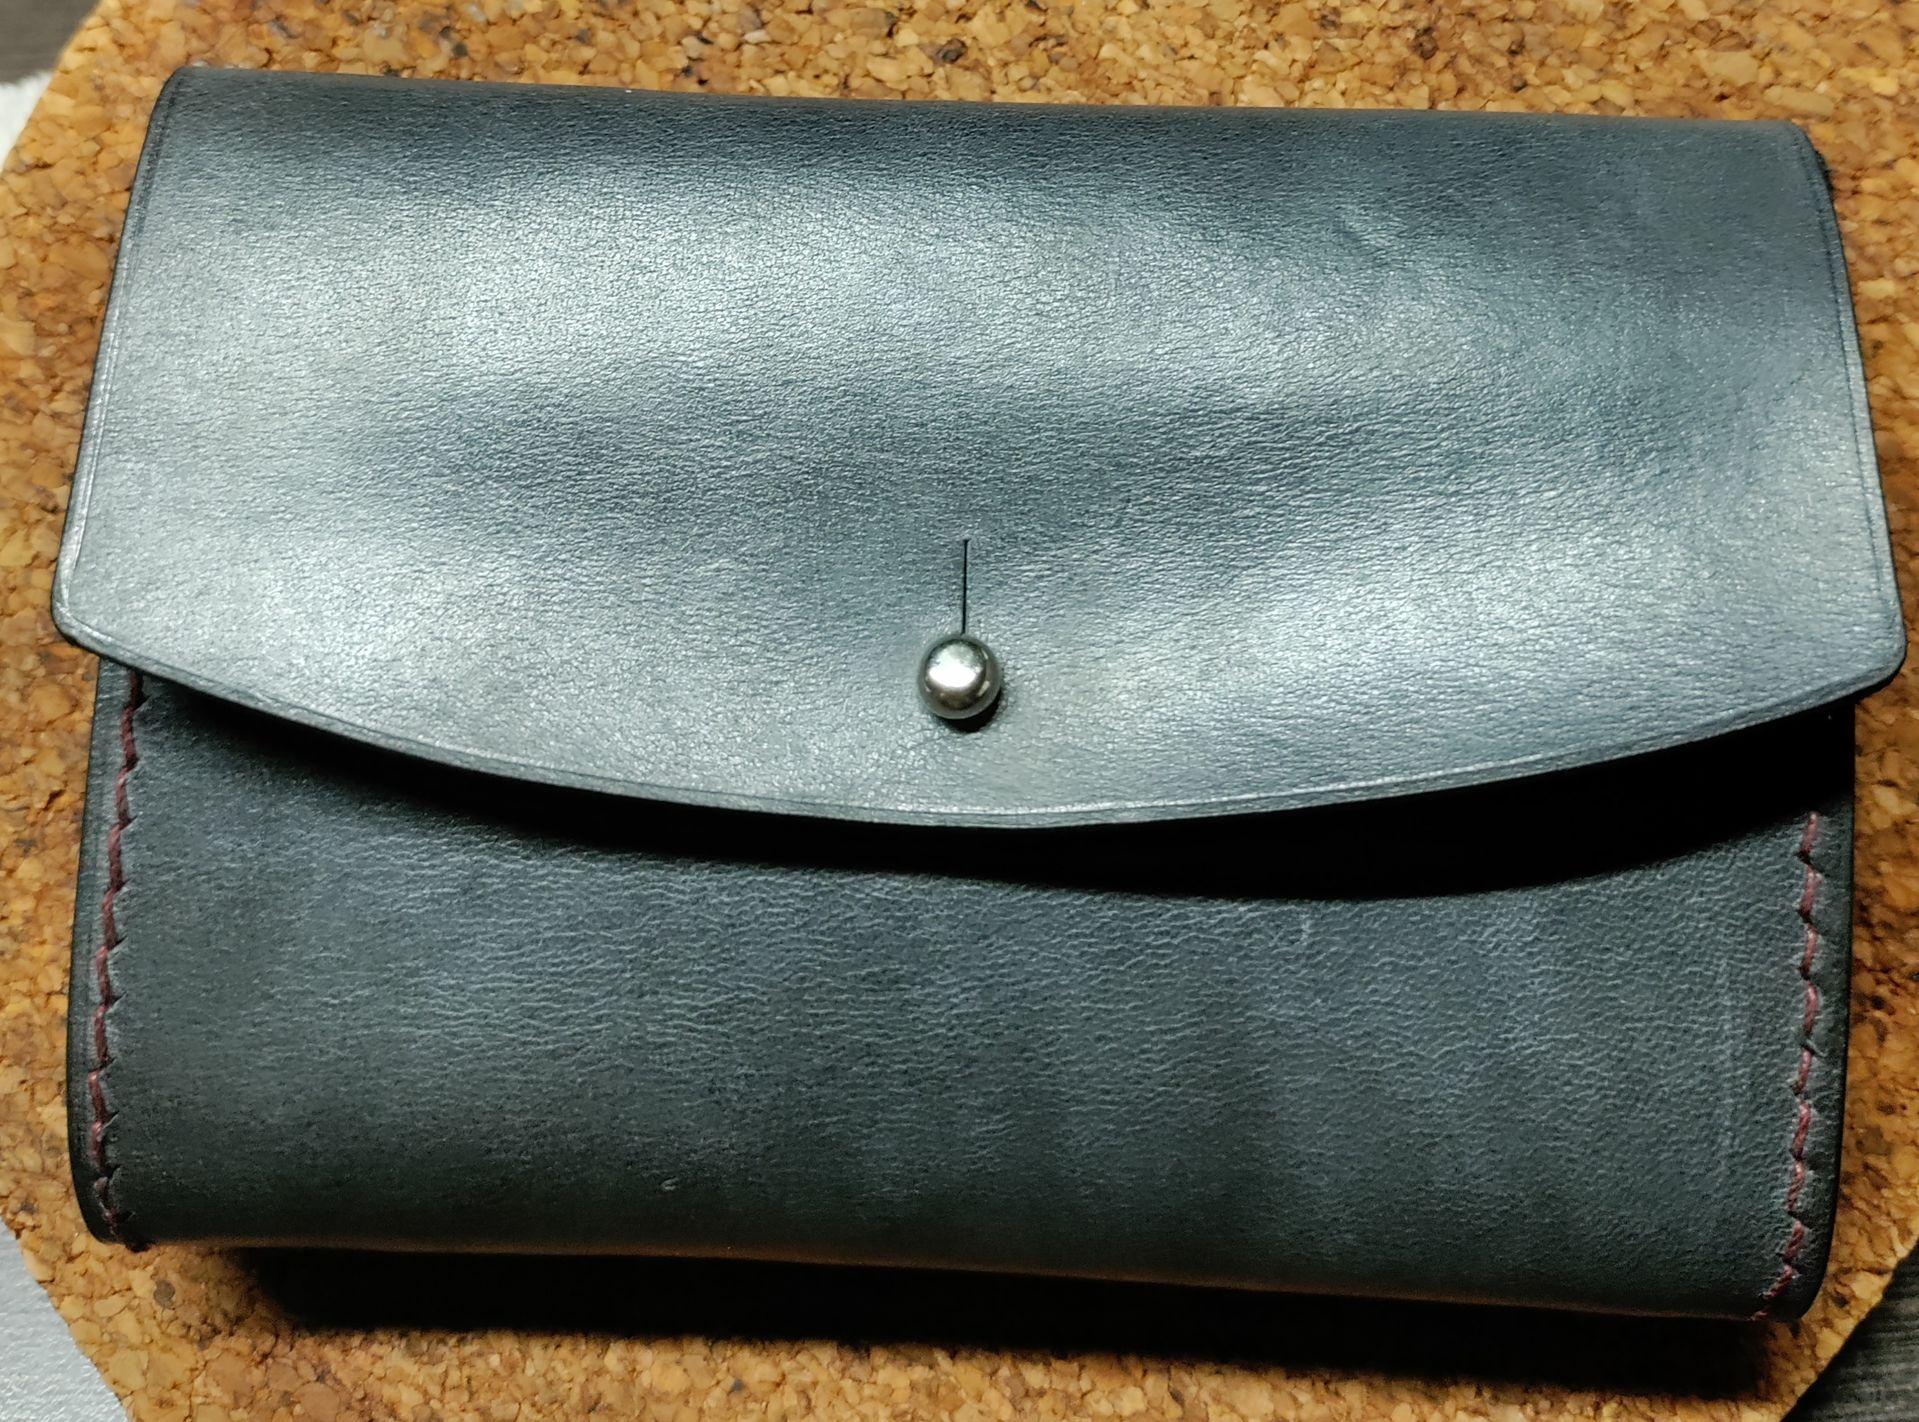
My wife and I are fans of simple Swedish/Japanese design.I appreciate the craftsmanship behind stamped and cut leatherwork as well, but it is not "our style." This is my first hand stitched work that meets my requirements. I had bought a chisel set but found the stitches too short together. So I made this wallet with an awl. The leather was first rubbed with 4 layers of vigenaroon and then with a product I found in our closet. It is a product that makes the leather a little softer but not really darker. You can polish your leather afterwards to a soft natural shine.

-
New wallet, started from 4 mm natural vegtan. Dyed with vigenaroon.
Greetings B


-
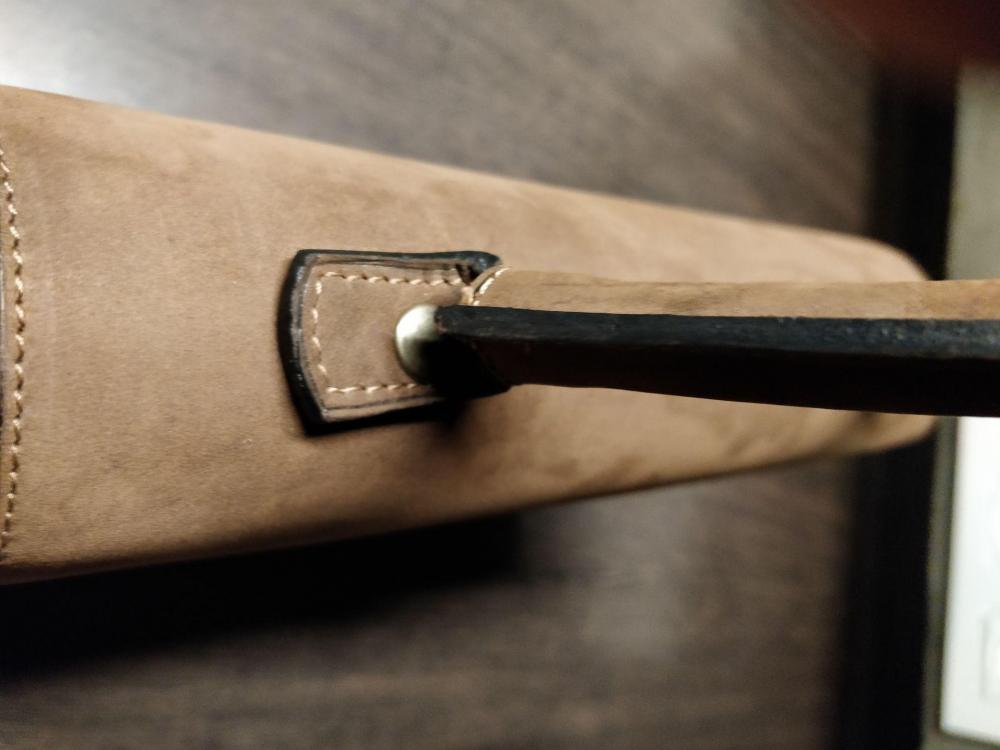
Maybe a bit late but those piping allow you to turn the leather, they act as a hinge. So sew inside out and turn. Hammer that piping to give a crisp edge.
Bvdv
-
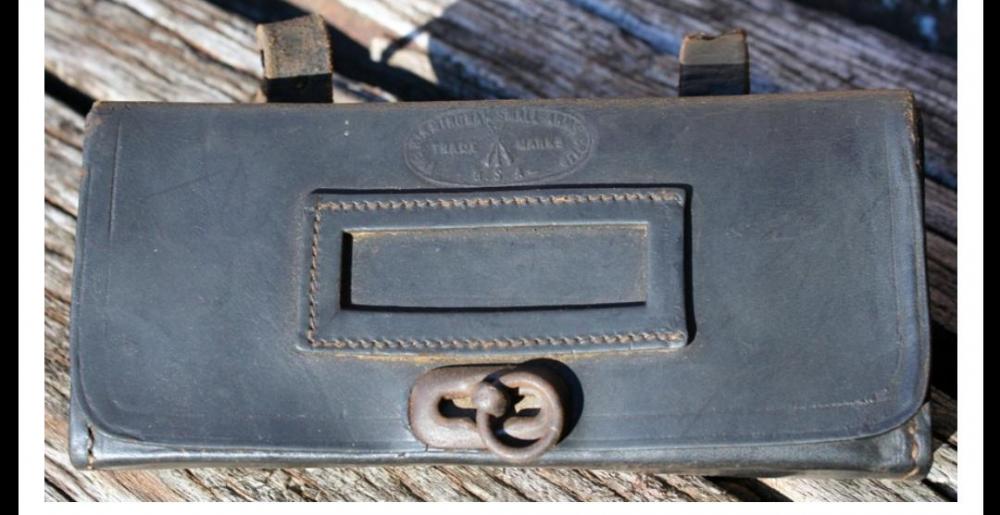
Metric measurements, explanation in Dutch . Just shout if you need help . Bottom is flat no feet
Bert
-
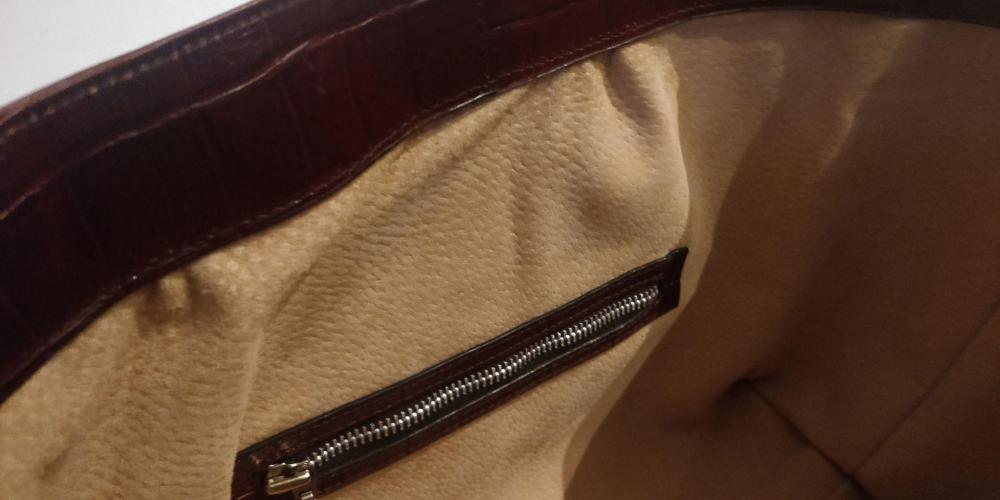
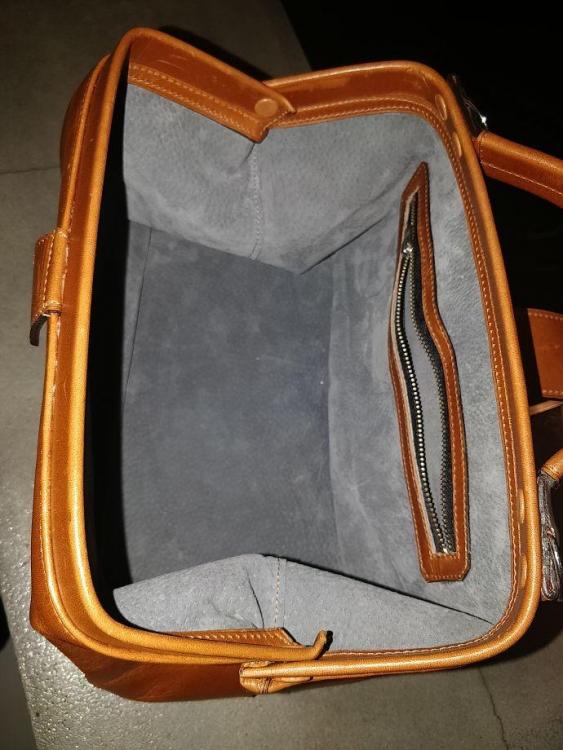
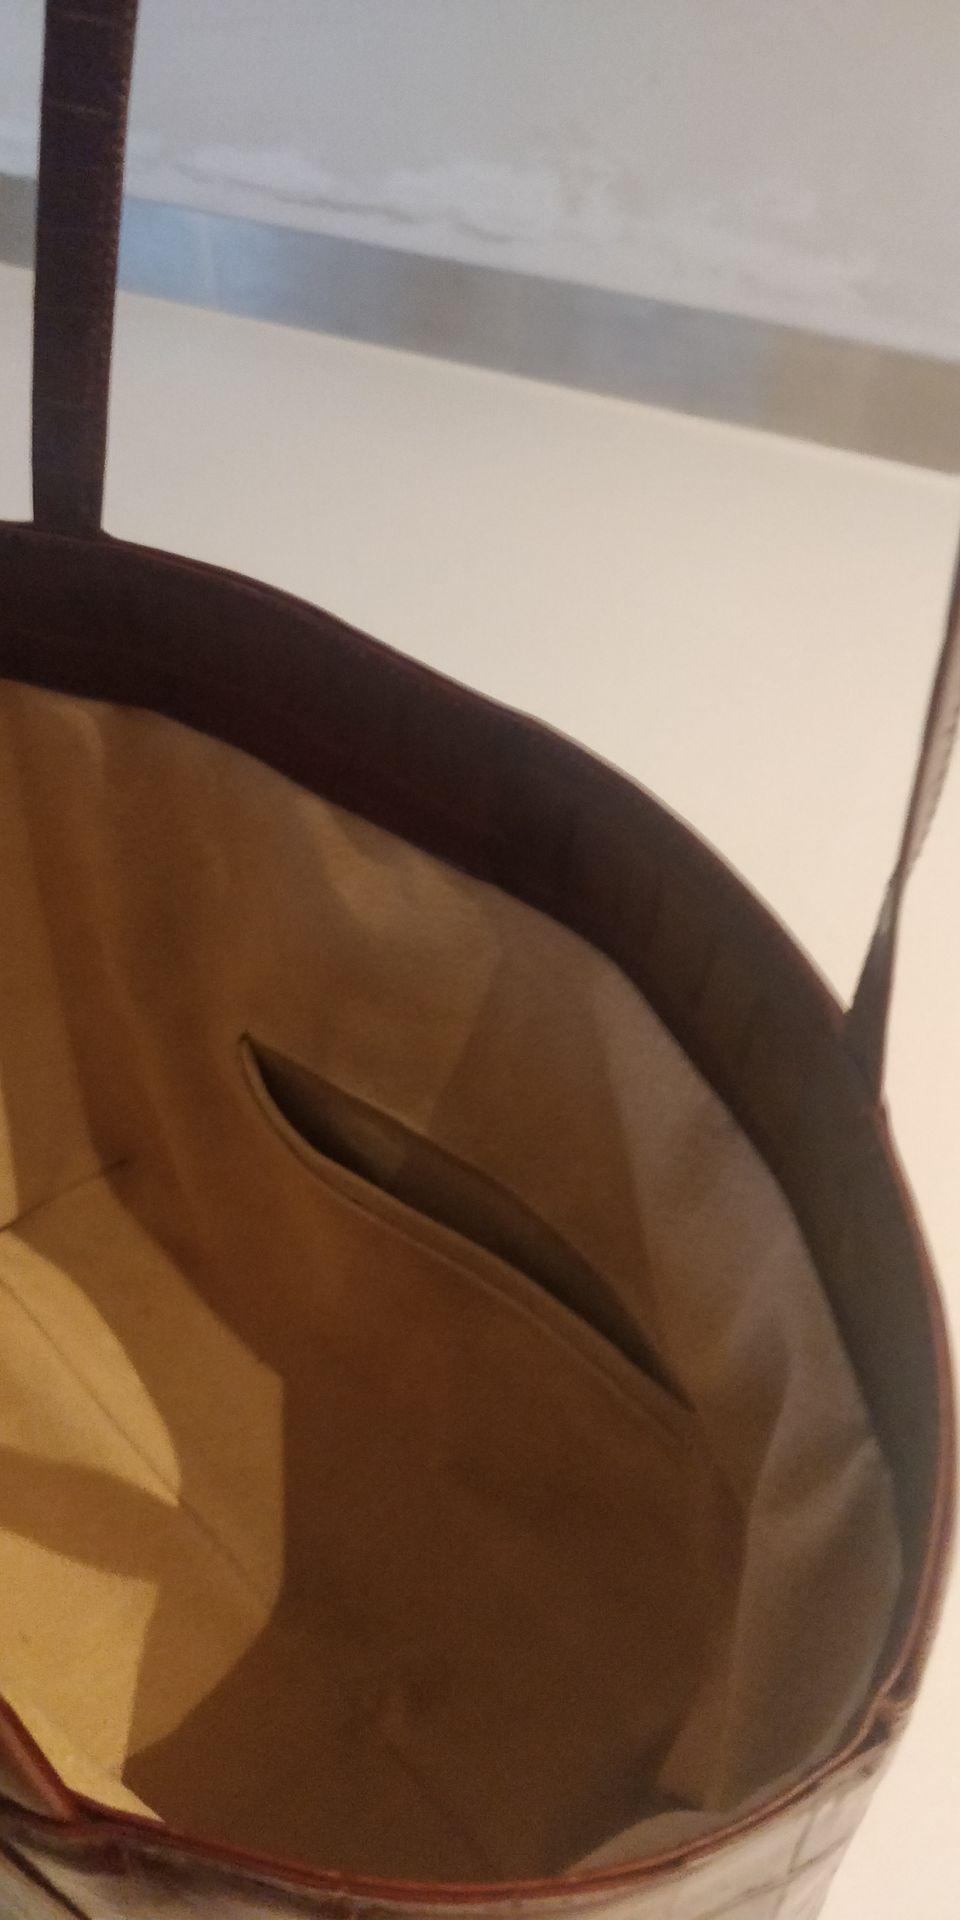
I am glad you love it.Interior bag is Pigskin with 6 closing magnets hidden in upper croc Piece.if you want the main patterns give me a sign, I got ït in pdf or librecad.
Bert
-
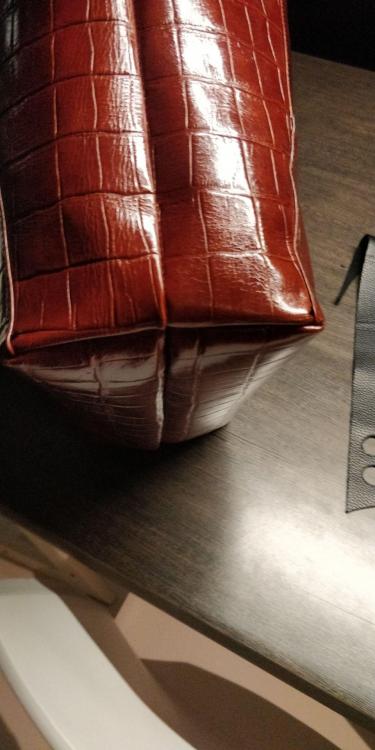
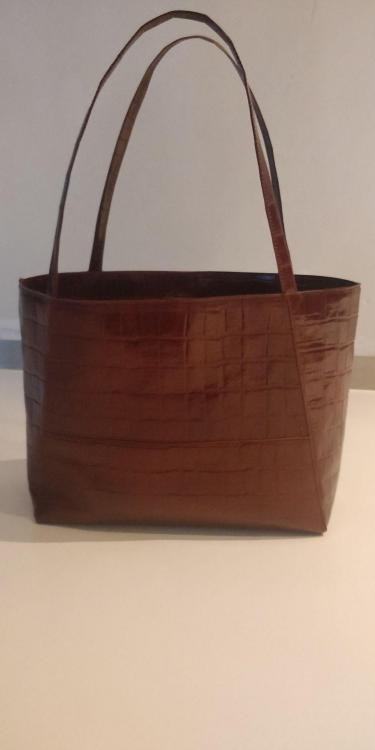
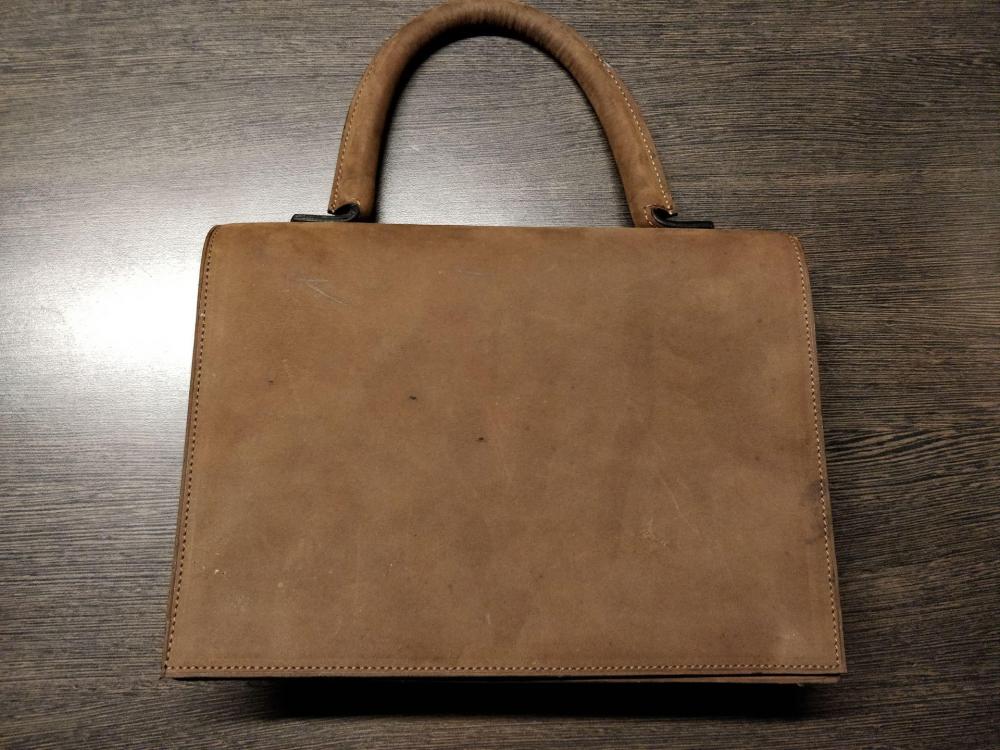
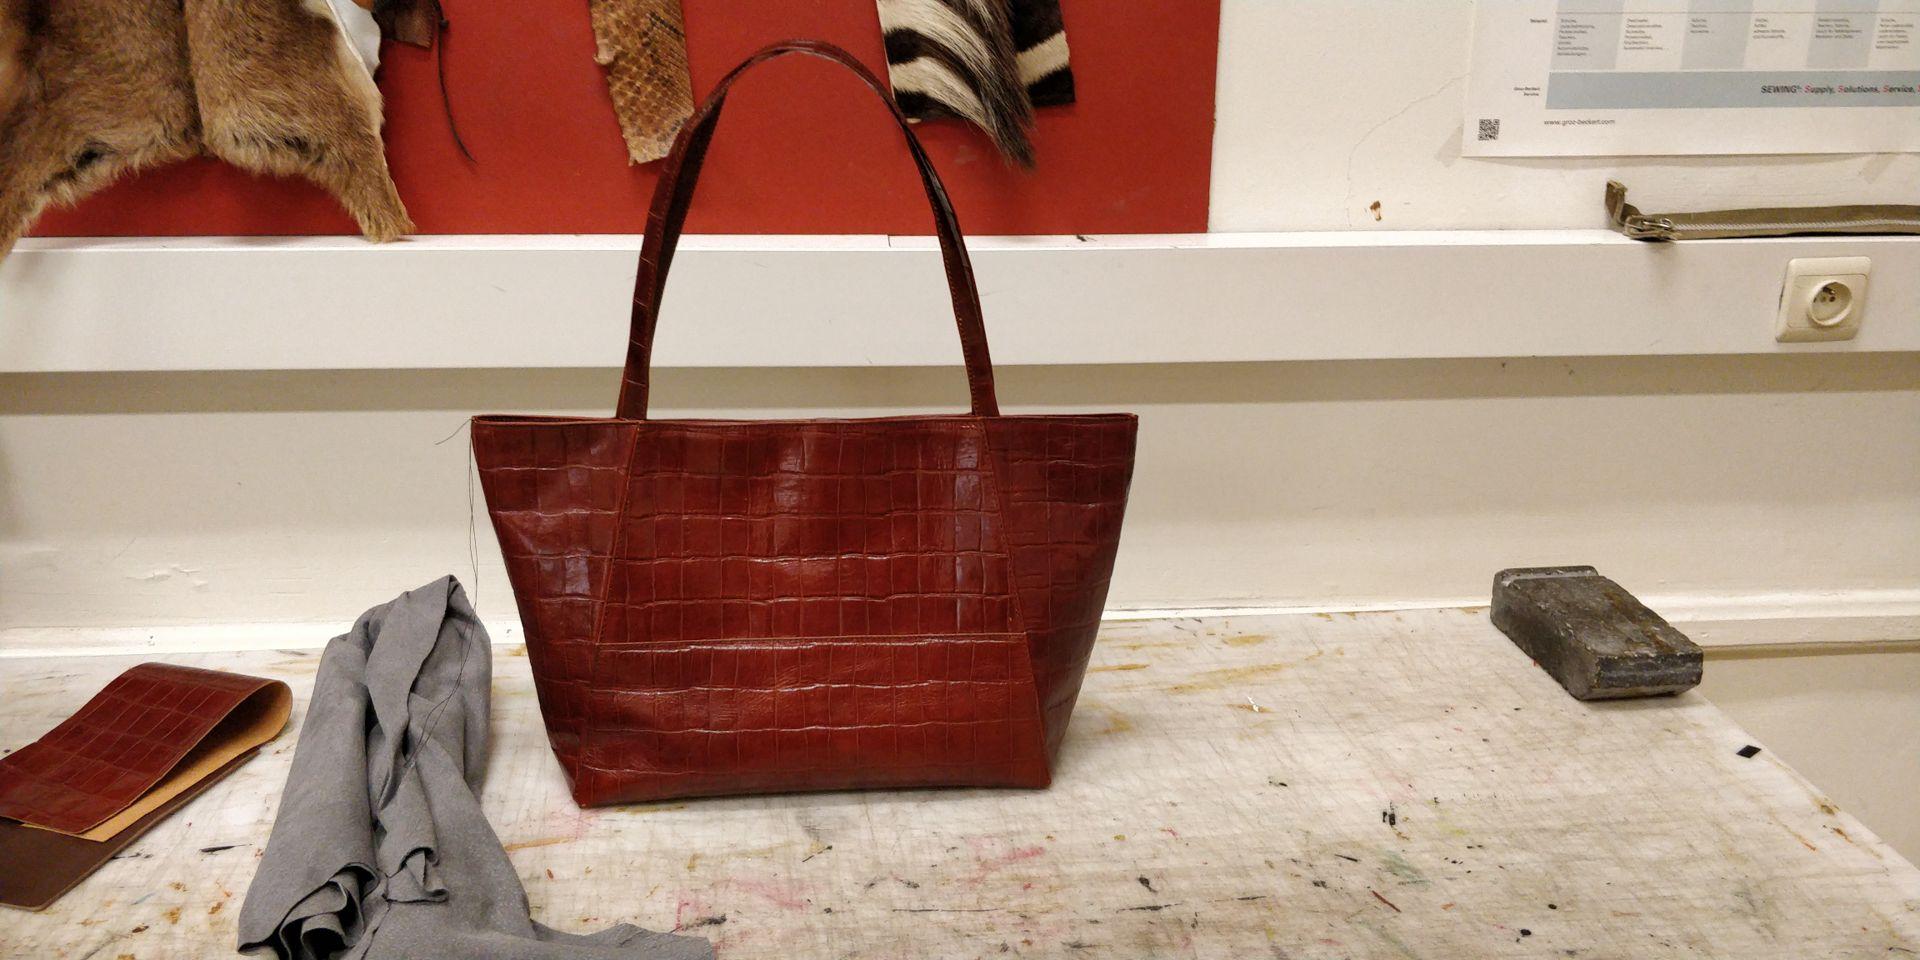
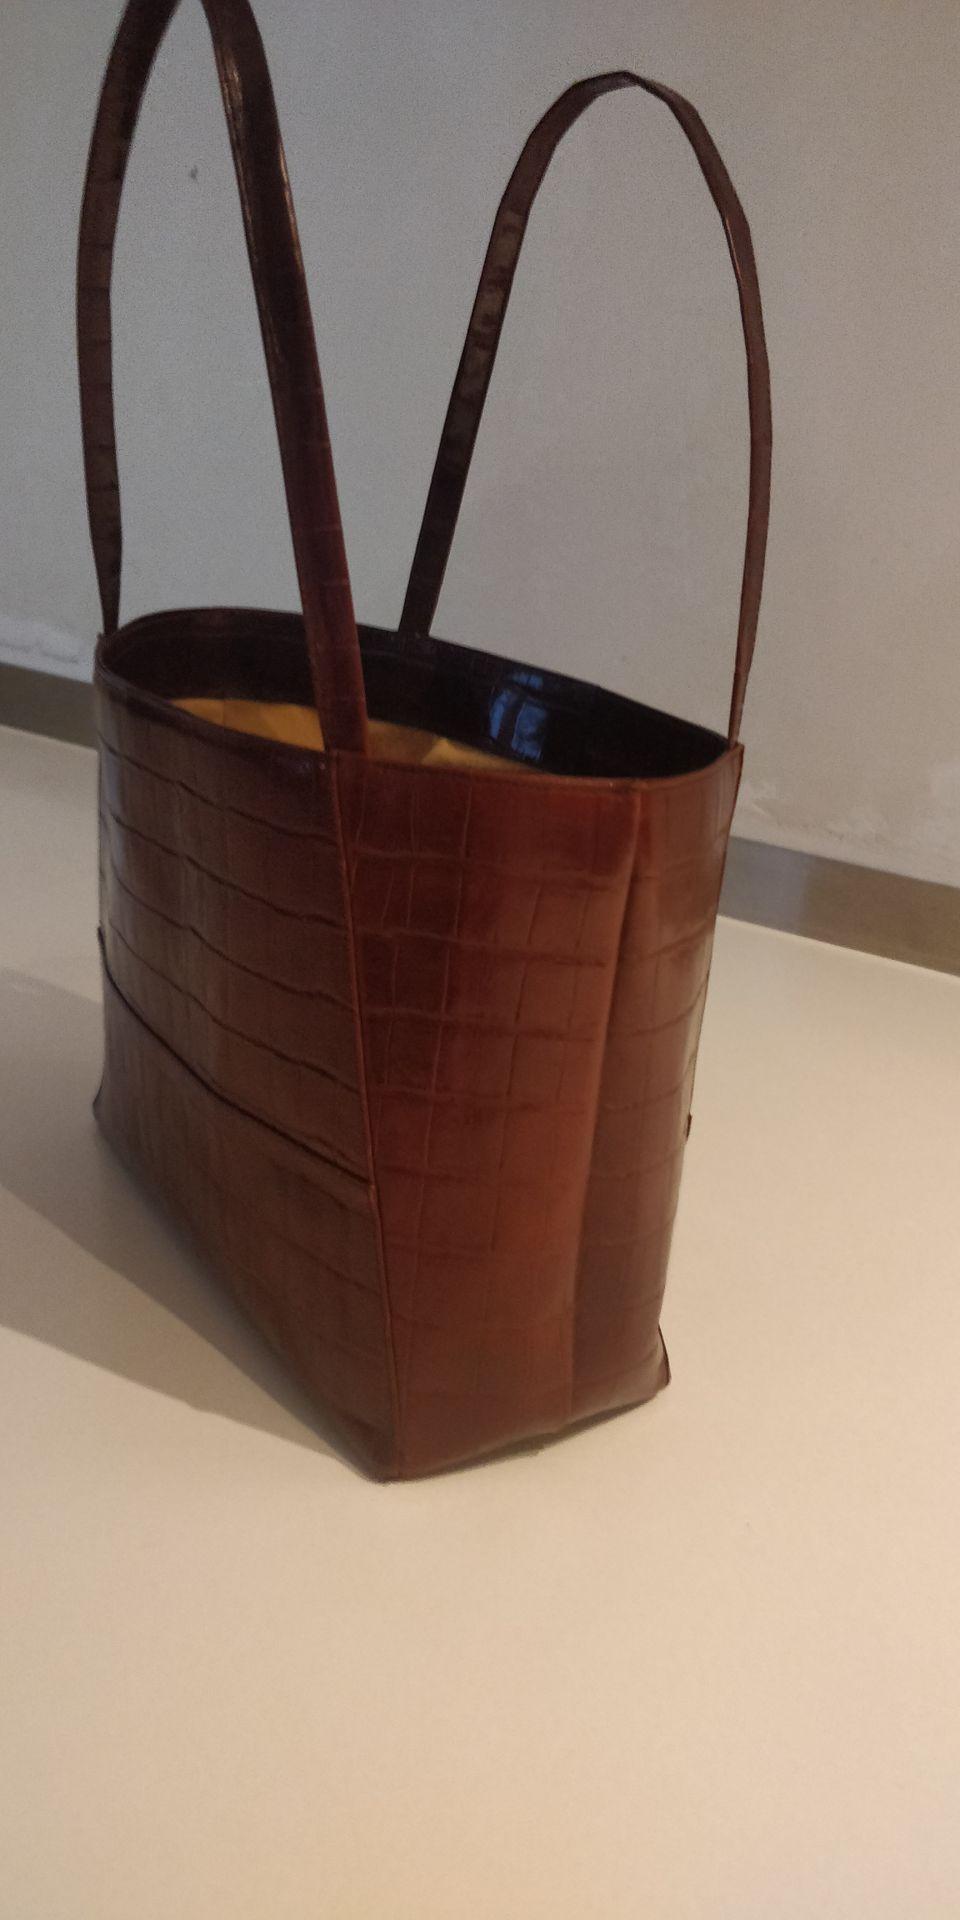
Hello al, my latest project. A croc printer bag for my wife.
Greetings from Belgium


-
Very nice executed, nice stitching, edge work, ....
Maybe a crease on the outside to be more consistent, just my 2 cents. Greetings
-
Thx for all the reply's and kind words.
Some of the comments are justified, but I have to say we had to follow a particular pattern.
The one handle does the trick, no issues here.
The fastening is another case, first of all the belt is 1.5 cm (3/4 inch) to long to be effective. As you lift the bag it opens a bit by itself. I am going to shorten it a bit and see if the locks hold. I also think the magnetic lock isn't strong enough a push button would be better but hard to close. I did discuss this with the teacher 2 weeks ago. He told me he wasn't behind this design but a co-teacher of him wanted it in the course. I am not for or against it, I just want fool proof bag designs, and this isn't one of them. For me it just was a good exercise to practice some techniques but the end product is useless in the designed state. As mentioned before I rework the closing mechanism to a working state. I keep you all updated.
The course is only 1 evening every week so everything goes slow maybe I rework it at home.
Greetings B
-
Nice work, the problem is now you opened the box of Pandora.
You will try other projects and before you know it your house is full of leather.
Good job
B
-
I like it the way it is, nice leather, nice stitches. If I had to change something I would skive the edges, it will look less bulky. But that's personal. Great work.
B
-
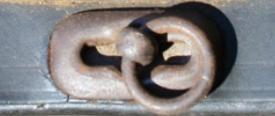
Anyone knows where to buy these or something similar ? I like clean/simple/slim, not bulky or fancy. Preferably Europe to avoid custom but all hints are welcom. I need to make 5 old school bike bags for oldtimer bicycles.
The photos are just to show the lock, I didn't make the bag
Any help is highly appreciated.
B
-
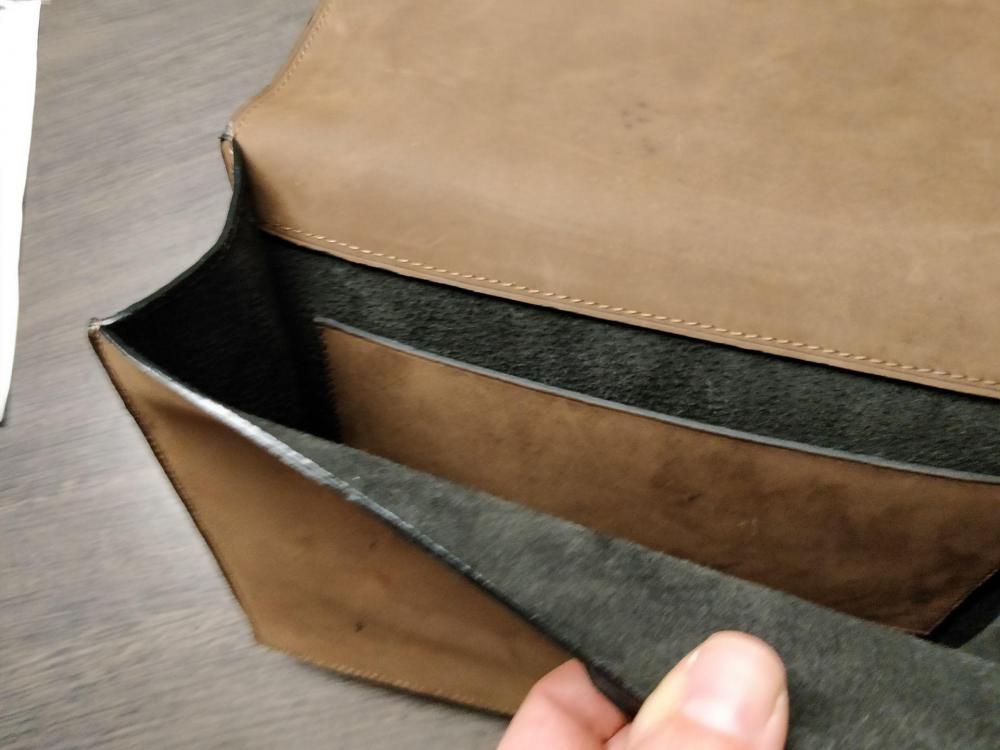
I am a second year leather working student. I am no leather expert. The leather is unknown, I don't think it's the best quality.I bought it to practice, its cheap, It looks good but it's prone to scars. I don't care about the scars doh. I gives what they call cachet in French. It also learned me to watch out for scars.
The lining is Grey pigskin
Greetings from Belgium
-
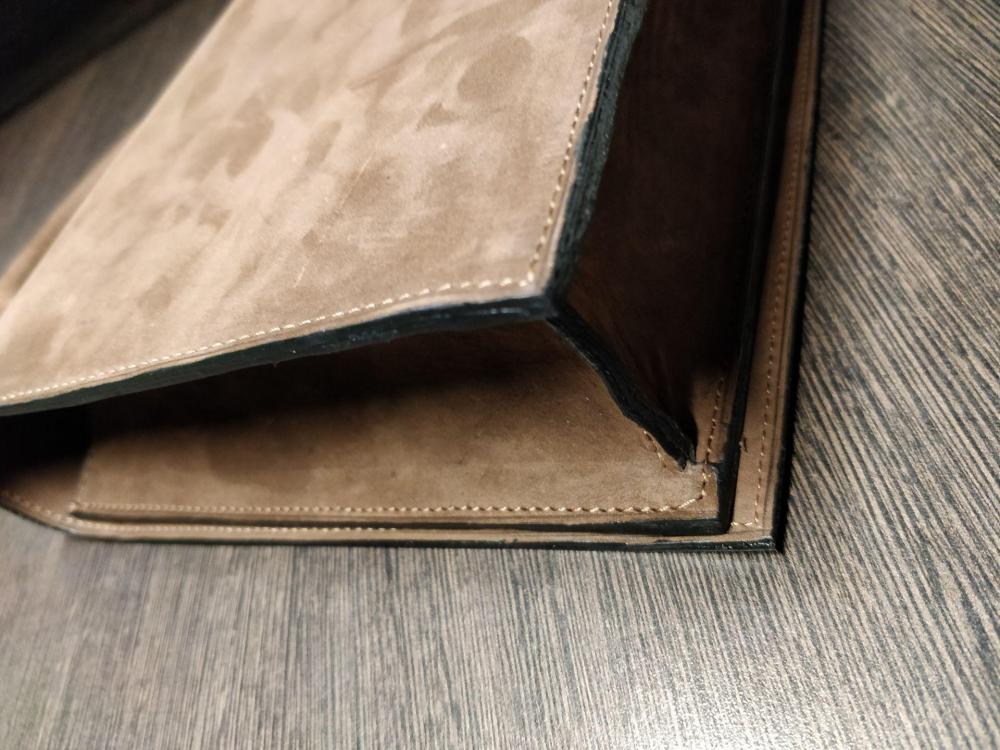
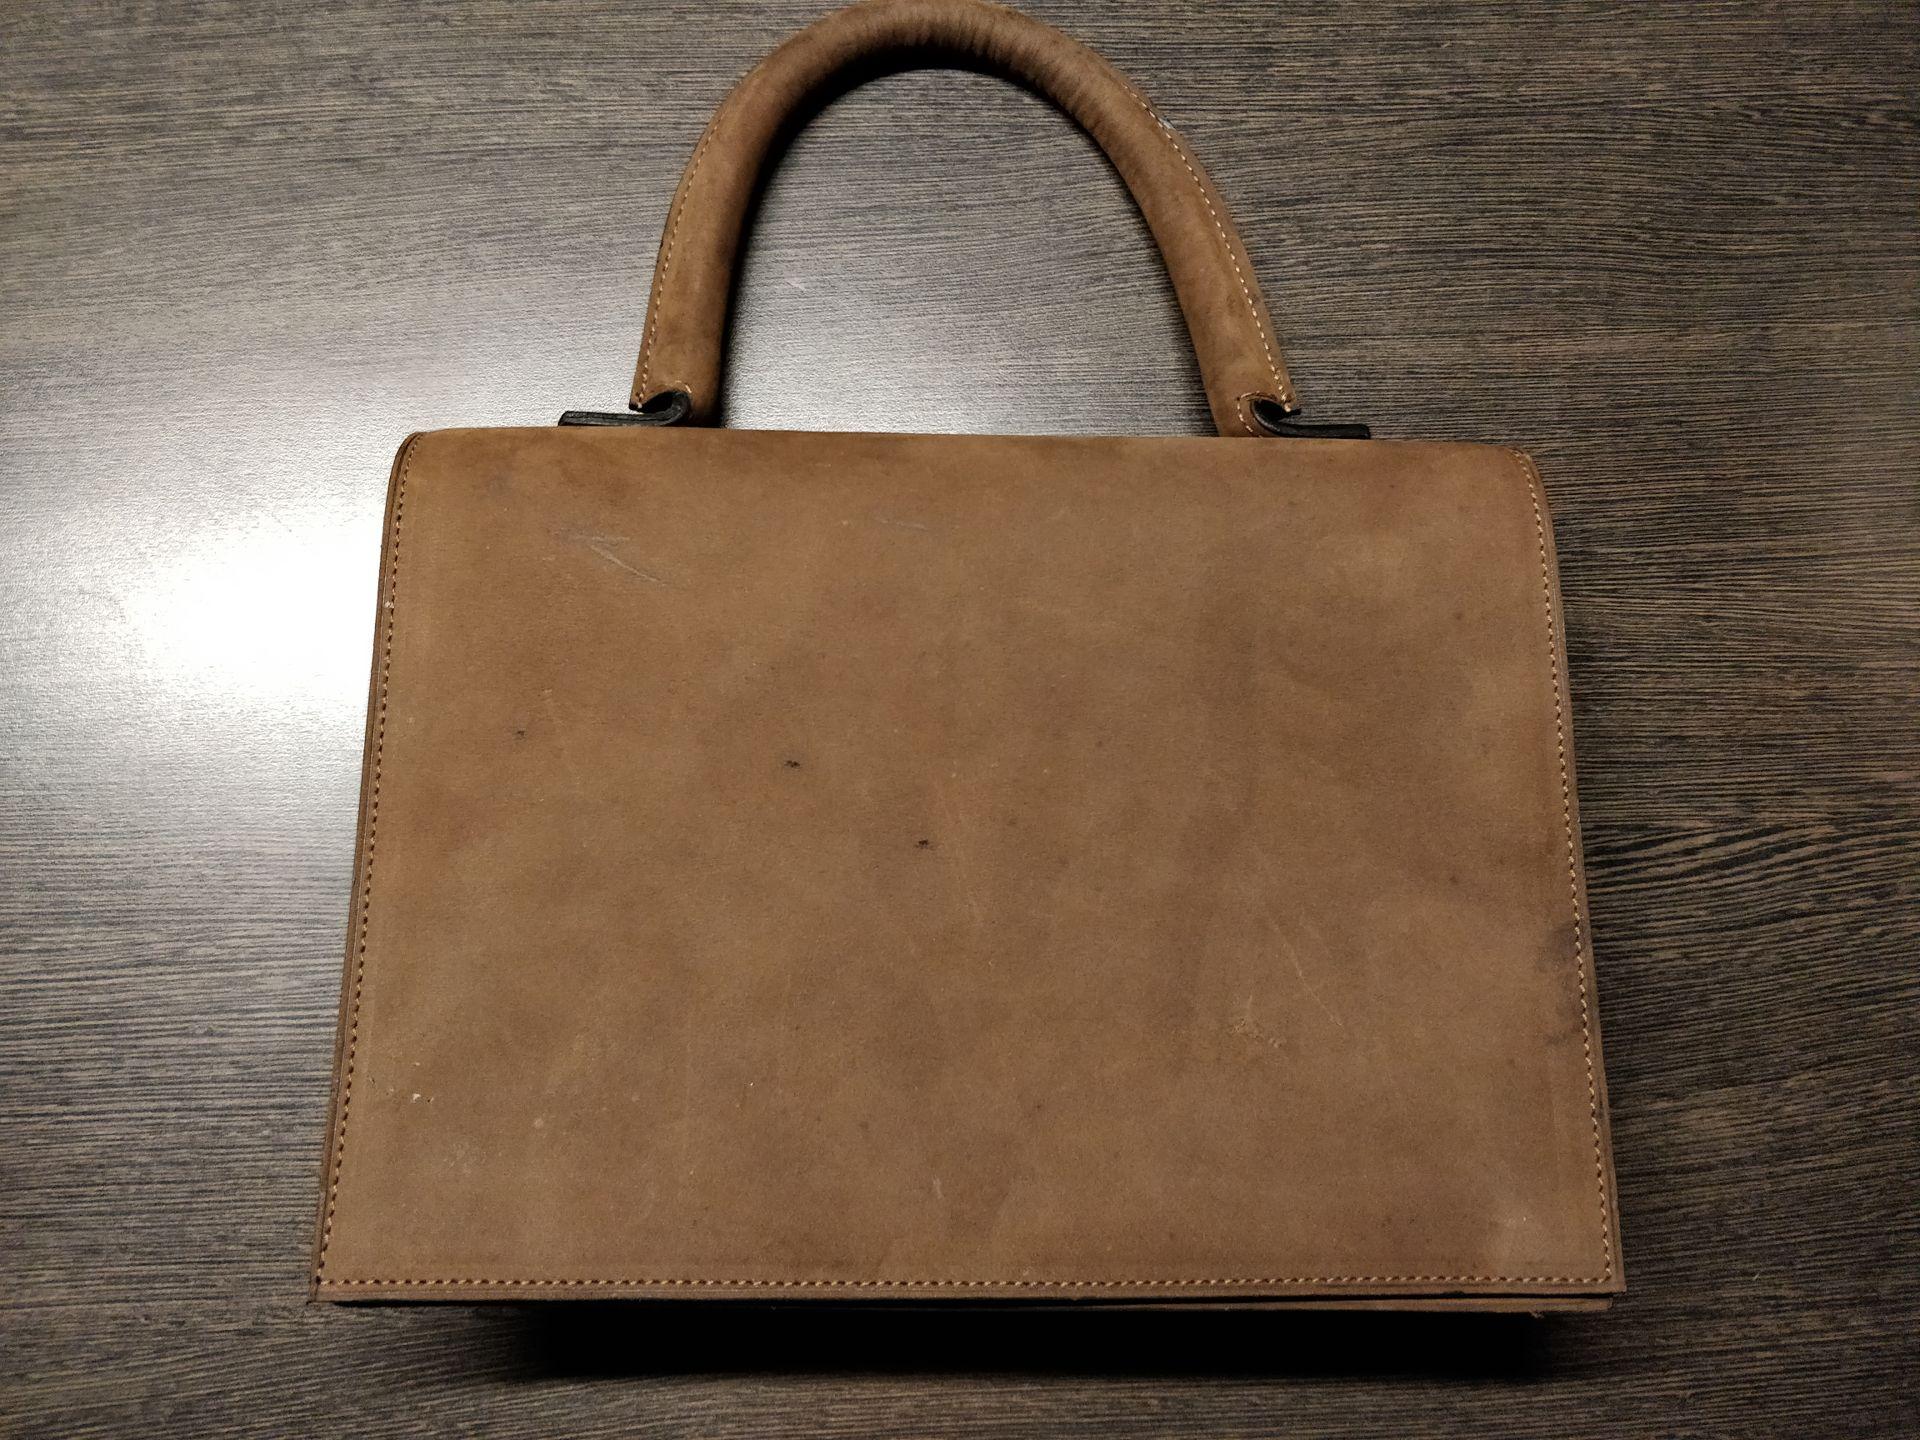
Finished my doctor's bag. I like critics, good or bad as long as it is constructive.
Greetings B

-
Next school project a domino bag. Some second or third class leather to practice.
Greetings B
-
Thx, our next project is a small briefcase. I follow leather classes for 3 months now (1 time a week 4h). I make a new post with the result.
Btw the numbers on the bottom are for traceability. They were put there when they skinned the cow.
Bert
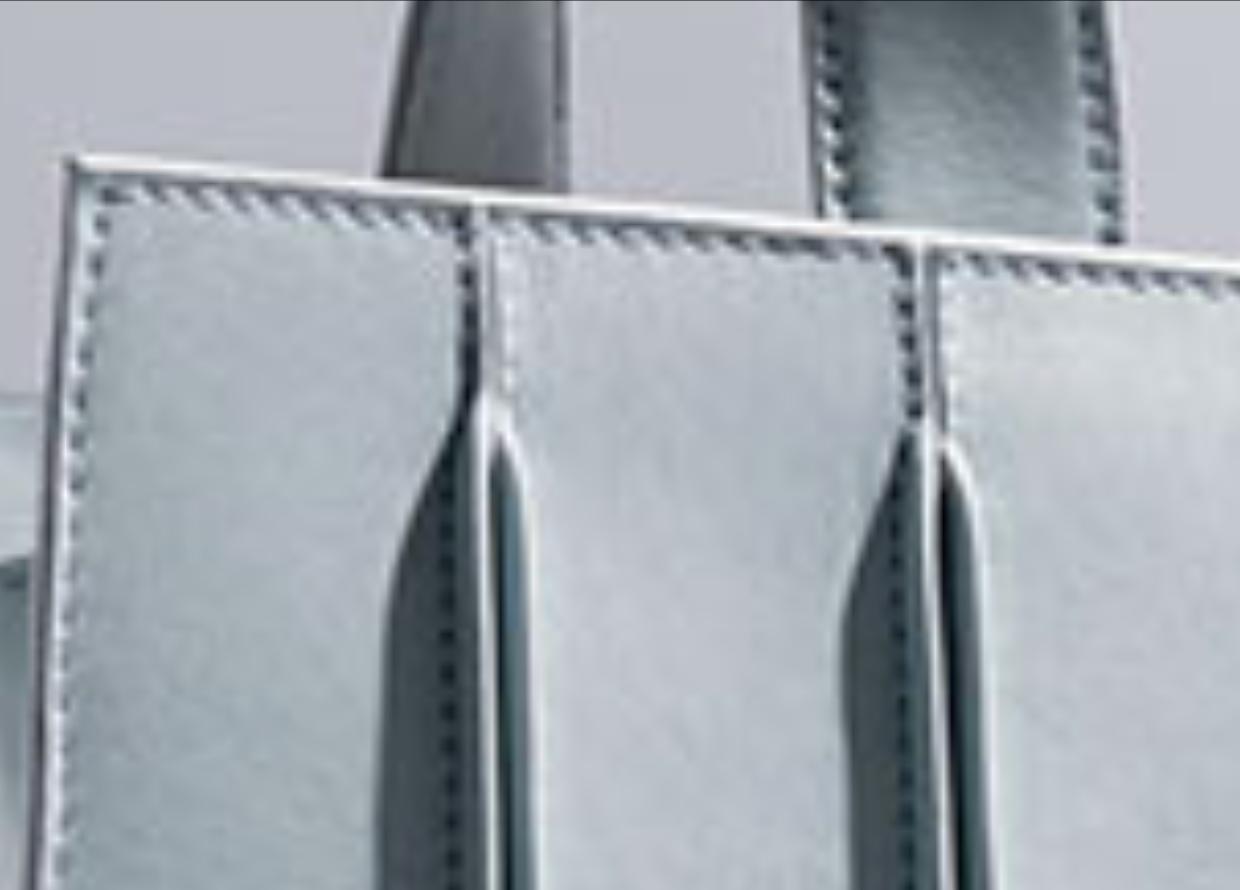


Renzo piano ribs
in How Do I Do That?
Posted · Edited by bvdv · Report reply
@Mulesaw, I try it and post my experiments here.i had the same thoughts/idea, but this is some nice craftsmanship doh. I think they used 3 layers