nylonRigging
-
Posts
485 -
Joined
-
Last visited
1 Follower

nylonRigging's Achievements
Member (2/4)
-
Singer Industrial Sewing Machine 591-D300A
nylonRigging replied to novaroper's topic in Leather Sewing Machines
Lilly White / amazon - -
I just recently switched off of A&E , and got a couple cases of Coats nylon t-70, and ( for me ) I finding it better Bond/stronger, and you get less of the little annoying snaggy spots on the thread windings as you work threw the Cones . The lb. Cone snaggy spots I was getting on the A&E might have just been just on that specific Thread run ? . but overall I like the Coats much better. .
-
Along with single-needle and double-needle lock-stitch . You see a LOT of Industrial double-needle 'Chain Stitch' on the denim Jean industry being used. Denim Jean Seam -
-
This one is the Juki ( mdl. LH-3528A ) I bought new about 12 years back, It gets run pretty regular and I have Zero negatives about this juki mdl. and would not hesitate to buy another one . it basically is just a more modern design variation of the oldschool workhorse Singer double-needle/needle-feeds . But I still keep the old singers around . I even have a real old 211 that I have replaced both L&R-sides with complete bobbin assemblies back in 2015 and it still going strong to this day. It is just a proven design that gets used worldwide for many decades. I really just never think about the L-side needle problem anymore. I used to worry about it years ago for someway to fix or conquer the dreaded L-needle/thread twist on the double-needles . But reality is it just a minute problem, you just buy good thread, periodically throughout the day check it sewing, and get your work done.... LOL .
-
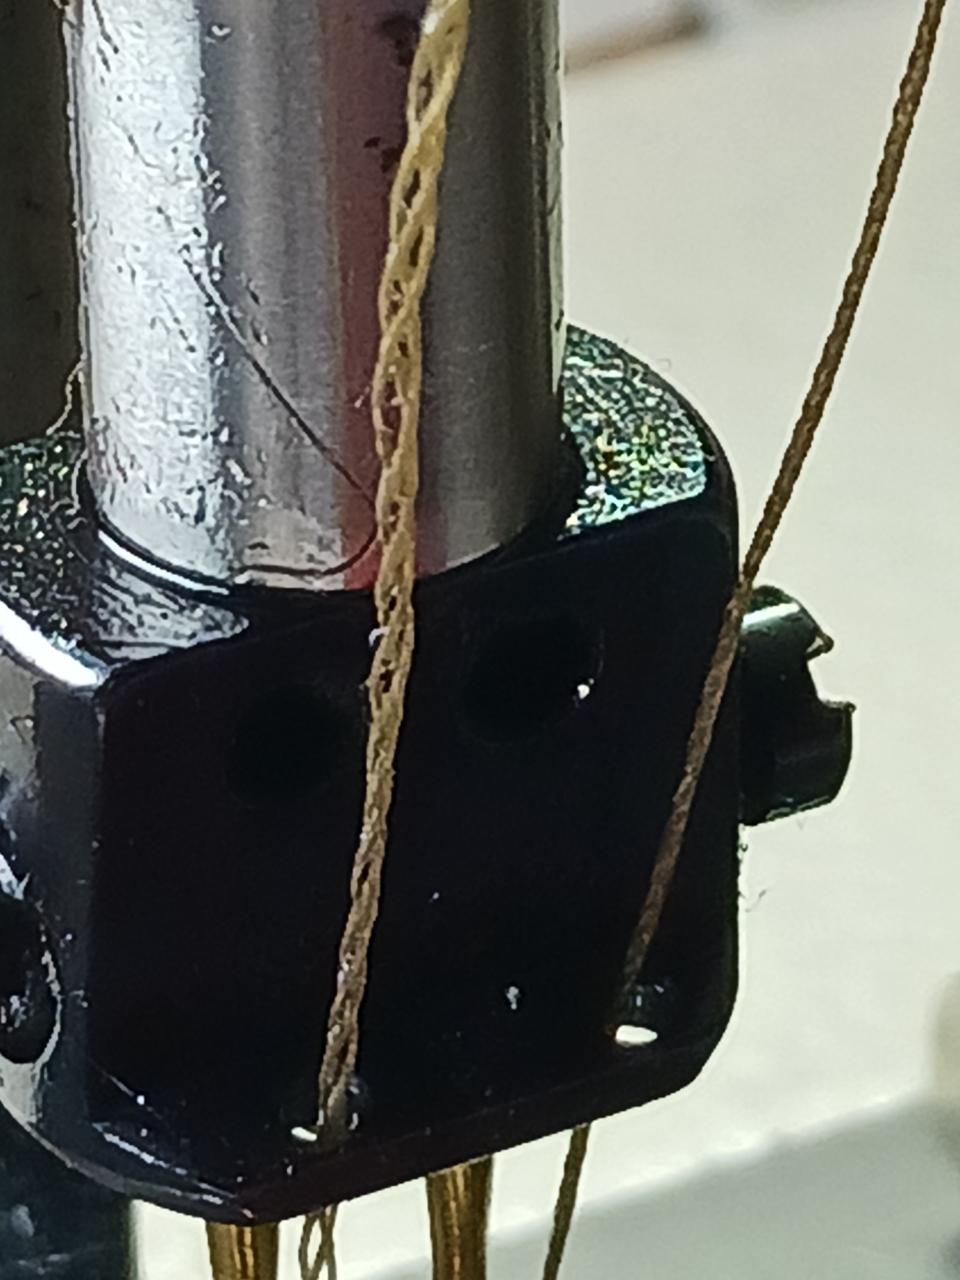
I always sewing in late evenings, and just finished couple items on double-needle machine . Here Pic. of using good quality nylon T-70 on the Left-Needle after a couple items finished stitching . L-needle thread always gets compromised. You can see it when stopping on the needles up-stroke, and you can see the way L-side will eventually loosens the twist even with using Good quality Bonded. On the down-stroke thread tension and twist is pulled tight, and the finished stitching on the product looks good. You can't see the compromising on the thread twist even using magnifying glass, but you got to always keep eye on it, and when see it getting loose twist just peal-off a few feet of thread on that L-needle to freshen it up before starting on new item. You said you using #20 needle and T-80, and that probably good to go. but like @nejcek74 said you might try bigger like #22 if ? you got thick over lapping with material, and larger might keep the fiction temp lower pulling threw the needle . I usually go with a #18 with the 69/T-70 thread. It what I usually stick with. In the Pic. the items sewn was multi-layer '5 layers' nylon, and It takes a couple items finished moving pretty steady to start looking like this. So that a lot of friction/needle heat till I freshen-up the L-side thread. - -
-
I have also a Juki ( mdl. LH-3528A ) that is double-needle, needle-feed like the old Singers 112/212 . I dont know of any other double-needles different than this design with both Vert. shaft bobbins moving spin same 'clockwise' direction . It possible ? and don't know if another machine is designed different ? . . also don't know ? But if there is a Double-Needle machine models with Bobbin Assemblies that spin in 'opposing directions', rather than both 'clockwise' that it might counter the L-needle problem of compromising the thread Bond over time stitching. He is right. that thread looks pretty crappy on that close-up Pic. most definitely there better choices for quality and stronger better twist bond to take abuse of the L-needle . .
-
Common with all double needle and the L-Needle side, and That is just the 'nature of the beast' all with Double-Needle machine . You need to use/Buy the best 'bonded' nylon on that double needle . Or buy an opposite twist thread cone for that L-Needle Side . If you use a good quality bonded thread. You can go for quite a while sewing without the L-Needle side doing the Frey/twist problem, but Even If You Have Mechanically perfect machine, Proper thread and Needle size. you still need to keep an eye on the L-side Thread. using Lesser quality thread will just amplify the quickness of the flaw and will just frustrate the hell out of you all day long. I been using double-needles for a Looong time. . edit add: Just change out your thread brand for now . I know it a pain in ass especially if you got a good color code you found and like, and 1 Lb. Cones are expensive when buying a bunch of them for the specific job you doing. but Most people, small shops Never buy opposite Twist for that L-side . Just getting a good quality bonded will do you good job of retarding the L-side problem from happening as much throughout the day, and your work stay quality. also.. Nice. looks like you into working up some custom denim Jean patterns ? . I always thought in back of my mind that if I had not gotten into what I been doing now sewing. That I would have really liked to do a line of custom Jeans. ... LOL .
-
Juki LS1341 - presser foot adjustment
nylonRigging replied to MackProvisions's topic in Leather Sewing Machines
I would imagine that it same as 1541 . there an access plate on backside that you have to get to a screw . It little hidden and you have to look Upward to see it. You have to lift UP the manual press-foot lever to even see and have access to the screw . You also have to make the foot height adjustments with presser-foot lever locked Up position with loosening and then re-tightening the screw . - - -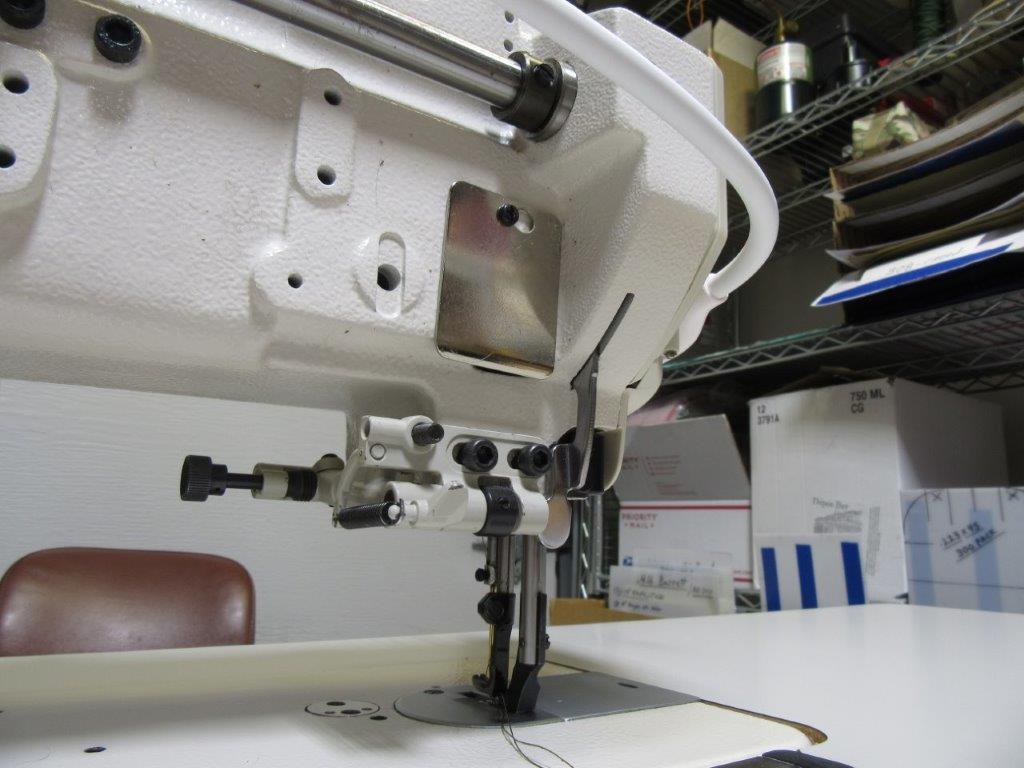
-
Domestic Motor with Plywood Pulley
nylonRigging replied to friquant's topic in Leather Sewing Machines
Try just E-mailing your high-Res. pic's to yourself . Your email will most likely resize them automatically down from a large MB size, to usable smaller KB size. plus it will also convert it to a jpg format . When you open your email, just drag that resized jpg Pic. off your email right to your desktop . Then just drag or attach that smaller KB size jpg Pic. to your forum Post with using the ( choose files option ) in the lower L-corner of your screen. . -
I always keep a couple of double-needle needle-feed around. The Mitsu. dn-275, It will stitch thin leathers very nicely, it uses common found, inexpensive needle-gauge sets for changing it's set-up for what you might need, and if ? it has a split-needle bar that even better. It Not a industrial machine you want as your primary leather stitcher, like a good compound feed single-needle. So I assuming you have other machines already ? ,
-
Your not going to find an in-line for your Juki compound feed. So just use or buy a narrow zipper like people mentioned above in posts . 441's are easy to find for in-line press-foot. You can also just cut and make your own in-line foot. If you use a thin zipper press-foot, It really NOT going to matter much for your application . All that matters is if you have a 'full' flat heel on that thin zipper foot for good press contact. What I mean with a 'full flat heal' is one that does Not have a radius cut Heel . Your L-foot is mute anyway, and just going to float off the edge, because it not touching the material, and you have open boundaries on the left. The thin zip-foot is reallyNot in the way, and you can just cut it off and leave the Heel if you want and make that foot a in-line . With an in-line press-foot riding back behind your center feed foot, and getting to those tight looking right radius curves. Your in-line foot is going to swing-off your stitch line and probably not even touch your material until you get around it and back to a straight-line stitch. So when you get to those R-turns. You needing to go slow and use your fingers to press and do a slow walk with the turn with center press-foot. - What you Really NEED to do is trim/cut a nice center foot on the needle-feed, and that lets you walk tighter, and helps give you a nice clean visual. I just did one tonight on my 1541 for doing similar to what you asking about. It easy to cut and shape feet. I mostly use just a dremel and a grinder. Just keep dipping in cool water as you go so not to harshly over-heat the steel. - Center Foot ( cut and shape ) that started out as a full size width/length, not split-toe Foot . - Thin Zipper Foot with a full flat Heel . -
.jpg.23a12c2a6b8f856a6d01b7d8d0db900d.jpg)
.jpg.52f157711de726885e834cb9bb9f8c28.jpg)
-
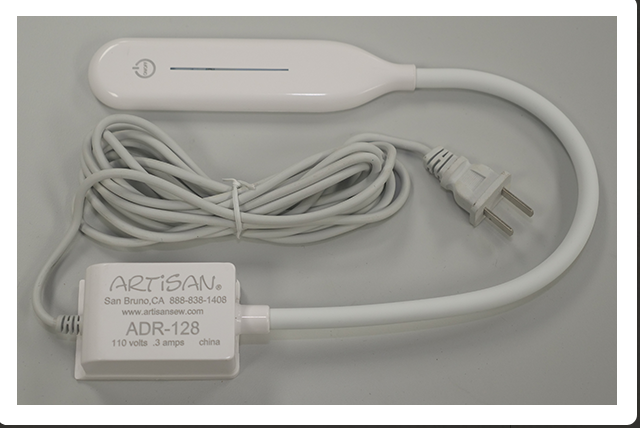
Used these light for years and they bright with a stout goose neck .. Best LED Sew
-
Bringing a neglected machine back to life (Juki LU-563)
nylonRigging replied to MikeG's topic in Leather Sewing Machines
I picked-up a few machines in past years that were good shape, but stored longtime and bone dry. I did nothing more than wipe-down, remove all covers, and set the head on metal flat pan. I just 'heavily oil' every moving part. Then just let it sit for days with rolling it by hand every once while every day. After that I just check it out, like bobbin assembly, hook, timing, thread routing, feet and feed,..etc .. Then string it-up and see how it stitching. After that you can start working out all the little bugs, and getting the table/drive situation worked-out . But I have found for most part, if nothing is obviously BAD broken. Old industrial machines don't take to much of your time to get back to running condition . . -
OK I'll bite .. how about Ebay . Plenty of ' Faux ' Louie Vuitton on Ebay ...LOL . Also sell scrap Fabric remnants 'claiming' authenticity . also.. Amazon ... Louis Vuitton I always under the impression the LV designs, materials, and patterns are all proprietary owned international copyright. Now doing your own ( LV Artistic Interpretation ) is legal as long as zero reference or labeling is made as Louis Vuitton. I have bought LV knockoff items overseas markets.. LOL, BUT The only way to buy or sell from, or have authorized fabrics Milled Louis Vuitton, is from LV . I don't think that even selling LV remnant fabric bolts or scraps is actually legal to do under LV Lic. agreements. LV might or might not be aggressive as Disney with their Lic. fabrics. Disney is pretty ruthless, and I know someone who was sent a cease and desist from Disney lawyers, after purchasing a large amount of leftover remnant Disney print fabric bolts. .
-
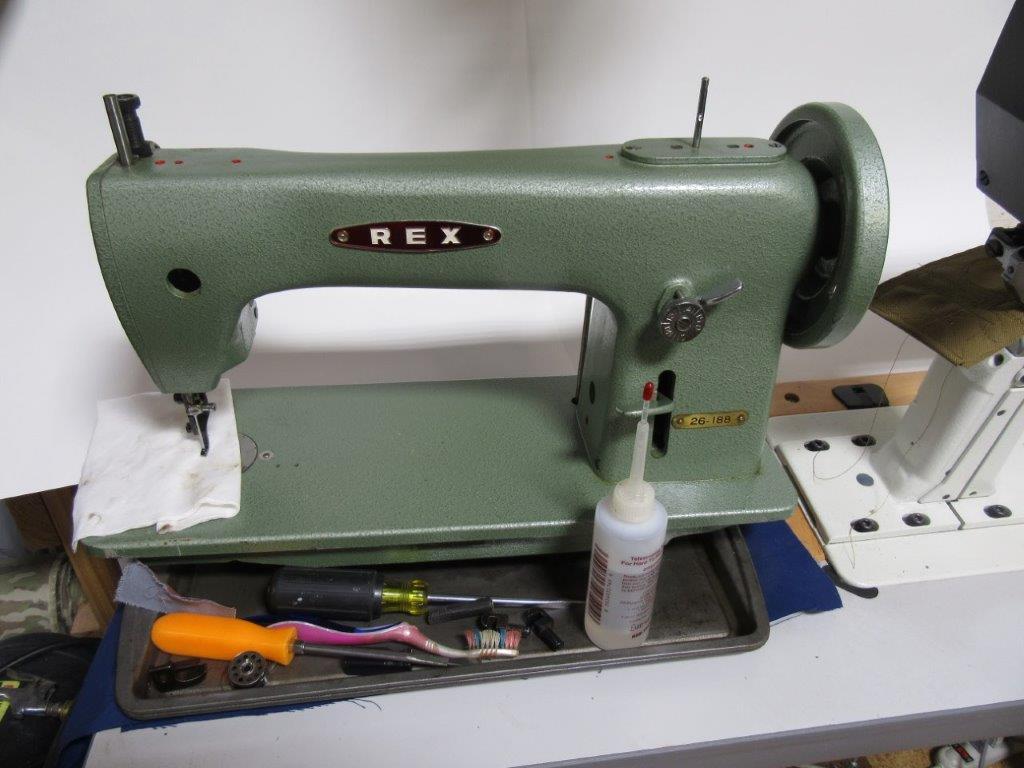
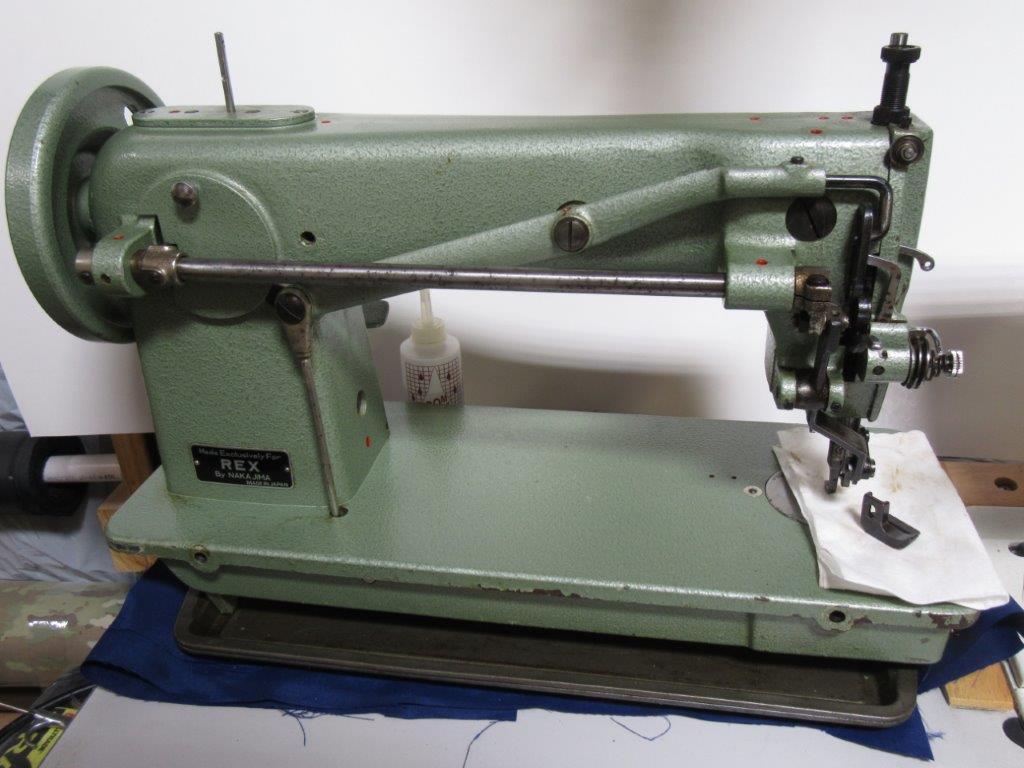
BUMP this up from the 2015 Necro Basement. As I just picked up a Cherry REX 26-118, ( aka: Singer 16-188 ) , made in Japan/Nakajima plant . Been sitting dry for 'years' . Even had the parts manual, and original sales receipt in the table drawer. Was bought new with one owner in 1976 . The Head is just pristine for the age. No wear, No Rust. Looks like it just sat unused far more than it was ever used to sew . I saw it sitting in the house, and a 100-$ took the head and table home. Pulled it open and OILED the hell out it . Then started Rolling it by hand last coupe days . It just a drop-feed walk, light-medium duty industrial . I got 10 other running machines and don't really need it because.. I got No More Room . BUT... I looked on-line and seen that there are some feet-sets still available . And the machine Bed is the 'standard' ( 18.75" x 7" ) and hinge pins are the standard spread also . Looks like it same as a couple flat-bed Consew tables I already have . So I just need to ditch the old Banjo Hinge/pins, and the Head will just drop into some other running tables I already got with just fitting a new drive belt to the 26-188 . I will just scrap trash the old sew table and clutch motor it sat on, and just keep the Head . So.. I thinking I just Keep Head only, and set-up for just doing some Piping trim. Then just keep and store it on the shelf out of the way till being used. . =