


Loudcherokee
-
Content Count
97 -
Joined
-
Last visited
Posts posted by Loudcherokee
-
-
Hello all,
Been really wanting to tackle a laptop bag, messenger bag, satchel type of a project, and have been watching tons of videos on YouTube and think I know what I want to do, but one thing is throwing me that I haven't seen demonstrated in any videos or tutorials.
If building a laptop bag, what is the best way to go about adding padding or foam, to provide a little drop protection for a laptop? I've considered sandwiching in some 1/2" foam between a couple of 2oz layers, then basically doing a liner of sorts for the "laptop" compartment, but feel like this will add too much bulk, especially at the gusset seams.
Any ideas?
LC
-
Thanks for the replies! Ouch, that creaser is $250! I'll have to keep practicing with the ones I have and heating them for awhile. Thats not in the budget at the moment.
I will have to research left handed creasers for sure. Most things I can adapt to and use in different ways but I'm struggling with these tools.
ETA: I found these on Ebay and i have a nice 80 watt soldering iron.. i wonder if they would work well?
LC
-
Thanks for the replies! Ouch, that creaser is $250! I'll have to keep practicing with the ones I have and heating them for awhile. Thats not in the budget at the moment.
I will have to research left handed creasers for sure. Most things I can adapt to and use in different ways but I'm struggling with these tools.
LC
-
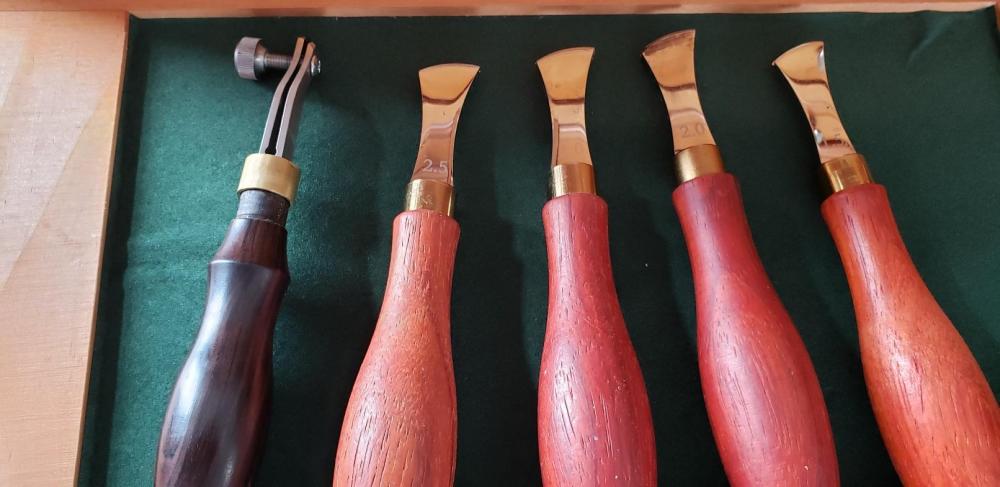
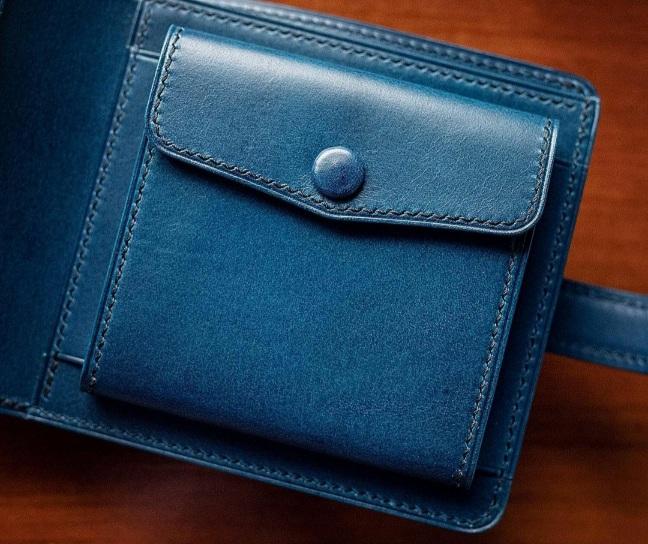
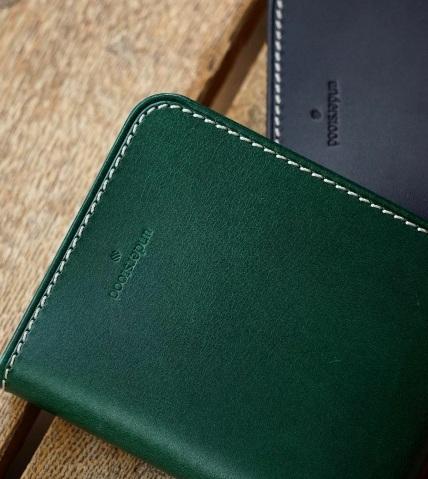
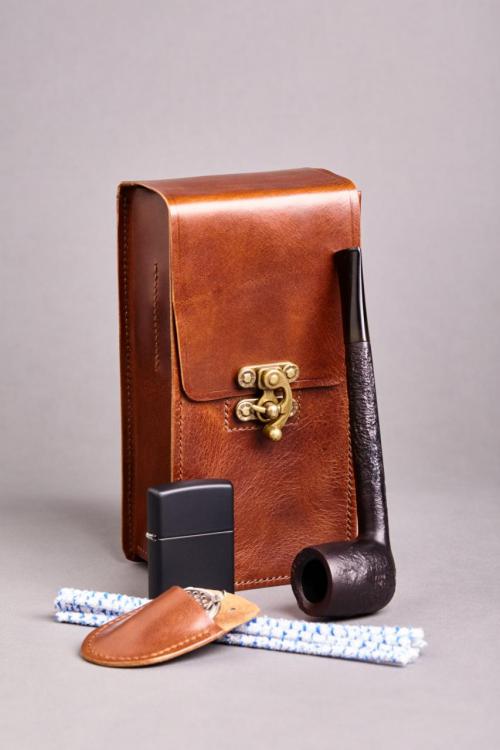
Hey guys, just curious what kind of tool you think is being used on these items to get that nice edge crease as seen in the attached photos? How can I achieve this kind of edge? I've attached a photo of the edge creasing tools I have on hand.
I've tried heating the tool, with a torch lighter, to no luck. Should veg tanned be wet to get this kind of crease? Would you burnish first or after creasing?
I think part of my issue with my tool may be an orientation thing. Im left handed, and the way the edge guide is setup, I have to flip the tool around and use it that way, which is backwards.
LC
-
10 hours ago, Hardrada said:That's some beautiful leather you got there!
That's the colour I originally wanted to get, but the customers wanted different for their pipe pouches: one wanted the walnut you saw above, and the other one wanted dark brown. Ah, well.
Barring more expert advice from other members, I would leave the leather as it is, and only do the conditioning on the finished goods, as part of the finish. My pieces also looked a bit matte and even dull when I got them, but the sheen you see on the finished items was the result of Fiebing's Leather Balm with Atom Wax as the final step in making them.
If you don't have one yet, you should have a horse hair brush to brush the leather with, when you get the whole hide, and when you finish buffing the finish on the completed products.
I just ordered some fiebings leather balm with atom wax and a pair of horsehair brushes. I currently only have fiebings carnauba creme and some Blackrock on hand. Love the Blackrock for my boots but haven't used it on any of my projects. What do you use to apply the balm? I have lots of soft microfiber from my car detailing hobby I can convert over.
47 minutes ago, tsunkasapa said:Try rubbing with a soft cloth in a corner. Friction will sometimes "erase" the pull up. Or use a hair dryer. It is the heat that does it. But try in an out of the way spot. If it works then you do it on your project AFTER you are done, because you will create more of that as you work it. And that is why I don't use any pull up leathers for my projects. I do not find the effect attractive at all. YMMV
I tried to rub it a little with my finger, which has worked on some of my oil tan pull up, but didn't work here. I'll get a cloth and try the hair dryer trick too. I normally like the pull up effect, but as received, this looks like its all been pulled up already! I would rather the pull up and character be infused into the finished product, rather than starting off already worn looking.
LC
-
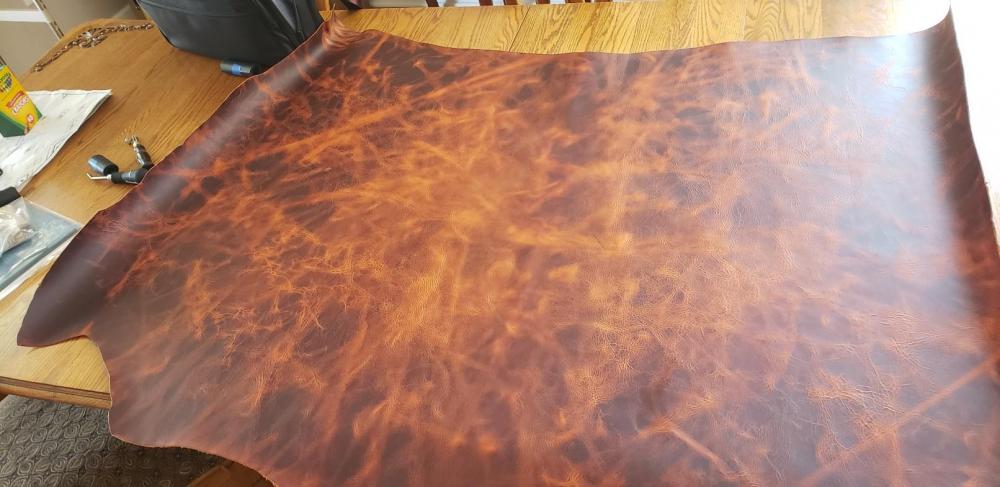
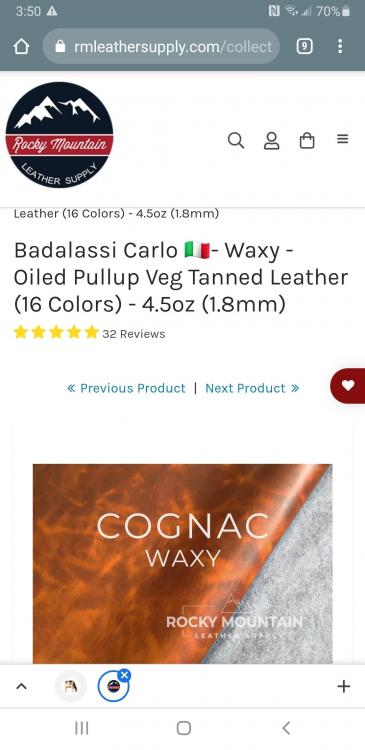
So I went with the badalassi in Olmo. I received it today.
This is my first go round with any "premium" leather. My piece is far more distressed than what I was expecting. Is there a conditioner I can use or a way to massage some of the wrinkles and marks out of it?
LC
-
10 hours ago, Hardrada said:Yes, it is. It's great to work with, skives very nice, and burnishes very well. Just make sure your nails are well-clipped because it marks easily.
Excellent for small projects:
Chromexcel is a bit more—well, I'll just say 'different'. I'd 'practice' on the Badalassi first.
I may end up going with this. Im torn between the cognac and olmo colors. At $209 for a full hide I don't want to pick something that I will be unhappy with.
Do you think I would be able to recoup the cost of the hide by selling some journals and wallets? Not looking to get rich or anything but at least would like to come out even.
LC
-
27 minutes ago, sbrownn said:The Chahin Bridle leather from American Leather Direct is very nice. It comes in a lot of colors and weights and instead of being split only, the lighter weights are pasted on the back. It holds stamping well and when wetted for shaping absorbs moisture well and doesn't change color.
Thanks for the referral! I saved that website. They have some good looking leather also.
LC
-
46 minutes ago, mike02130 said:This stuff is beautiful!
LC
-
4 hours ago, Tugadude said:That is a very attractive journal cover! As far as "upscale", you might try a textured leather. Springfield Leather Co. has a Saffiano leather they are selling in bundles. You can't choose the colors I suppose, but it is some really nice stuff. You can find it in other places too, or at least very similar leathers. I bought some small remnants of a textured leather and made some small items with it. I found that the textured leather, while beautiful, requires a great deal of precision in your stitching, otherwise it looks bad. I don't know if it amplifies deviations or what, but once I learned that and acted accordingly it was great.
That saffiano looks nice and may work out for a bag project I have in mind as well. I may have to get a bundle next time I place a springfield order. Im not sure it would be stiff enough for the journals though. I suppose I could make the interior a veg tan 4/5 ounce.
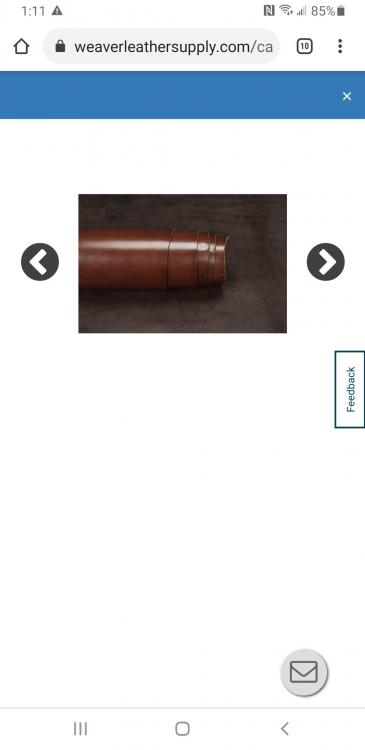
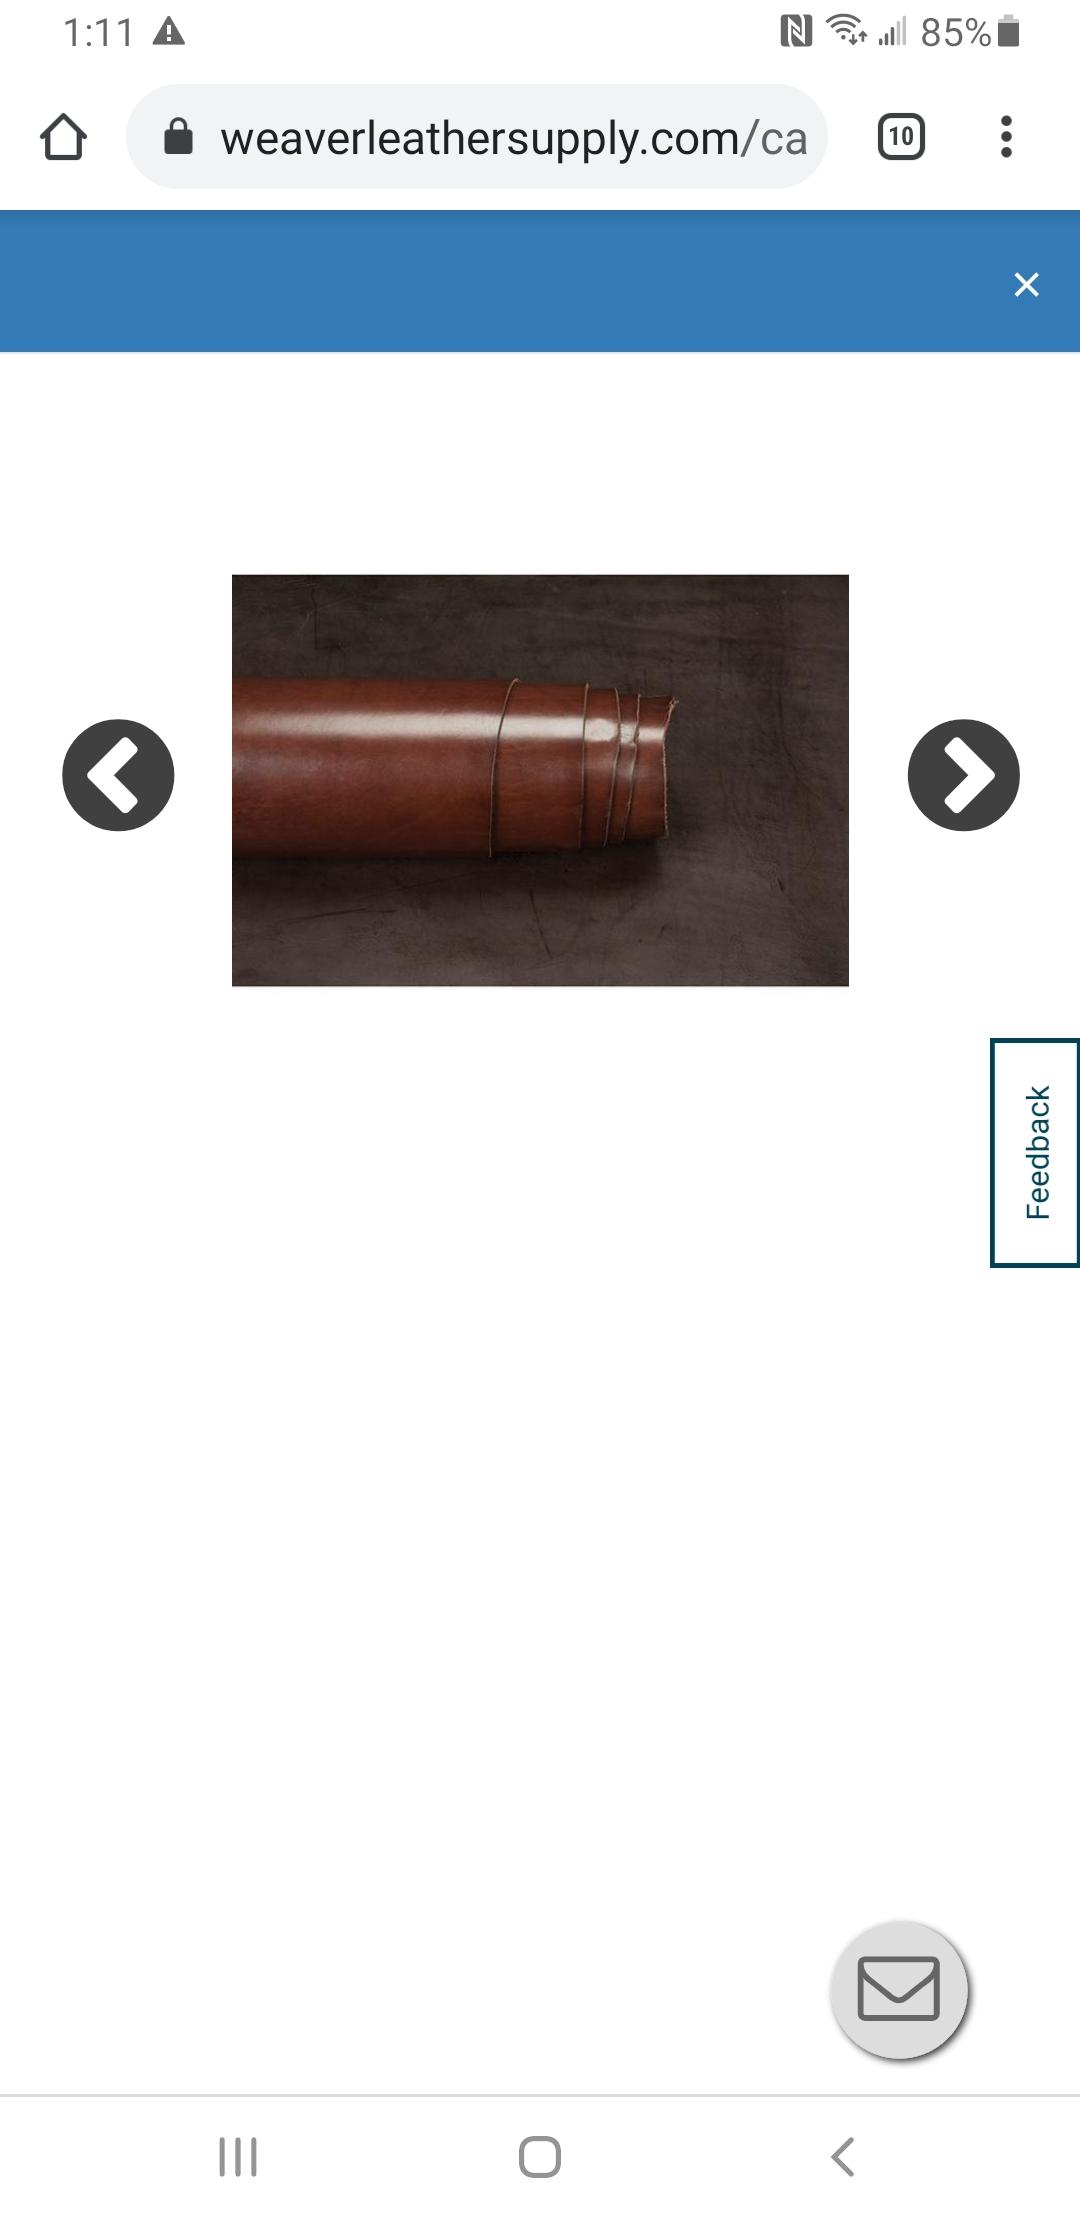
I really like the look of some of the bridal leathers but they are 10-12 ounce and I'm not sure if it would be an appropriate kind of leather for my intentions, or if I can get it split down to 5/6 ounce, and if it would be wise to do so. They have that sheen that I like. Weaver has some English bridal in Havana that is absolutely gorgeous but its $320 a side for 10/12 ounce.
ETA: added a picture. This is the look and sheen im wanting, but in a pull up. Im not sure something like that even exists.
LC
-
Hello!
I'm planning a banjo strap project for my father as a fathers day gift, and plan a 1" strap with a 2 or 2 1/2" pad section.
What is the best material to sandwich between two layers of veg tan? Some kind of foam? I'd like that puffy kind of padded look so I'm not sure if something more firm than just some open cell foam would work or not.
Should the padding inside be left "floating" or should it be glued to one side of the leather?
LC
-
10 minutes ago, Tugadude said:One of the nice things about Springfield Leather Co. is they sell many leathers by the square foot. That way you can try various leathers without breaking the bank and investing in a shoulder or side only to find you don't like it.
You need to tell us what sorts of projects you want to make. Thickness comes into play too.
Regarding Horween, they are top notch as is Wickett & Craig and Hermann Oak. There are others that might be appropriate, but it depends on the project.
There are also some European tanneries that provide amazing product.
Right now as far as projects go, im really liking the journals im making. This one was made from one of springfields $30 oil tan sides, which is a great deal but I have no way of identifying the leather and they said they can't tell me what it is either.
As far as thickness, I believe this is a 5/6 ounce and that works really well for these journals that are 8x5 in size.
I would just like a leather that appears more upscale or finished.
LC


-
Hello all,
So I'm at a point in my leathercraft journey where I would like to move up from the cheaper budget leathers and scrap packs and try to make a few things out of some nicer leather.
Thing is, im not sure what I want to work with. I know I want something that looks nice, ages well, will show a nice patina, and that i can finish the edges on. I'd like to try something that has a nice grain to it, and also maybe something that has a nice sheen to it. Not like patent leather obviously, but something that isn't dull. Maybe a glazed something?
What is a good leather to try that isn't going to break the bank, will be eye catching, and will not bring me to tears if I mess up a cut or stitch line?
I'm thinking of possibly some horween Essex or maybe horween Dublin. Chromexcel looks nice as well. I'd like something that is somewhat firm but still supple, especially for journals where I like a 5/6 ounce so it has some body. Wallets 3/4 ounce seems to work well with my designs.
I'd love to eventually work with shell cordovan but that is WAAAAAAAY down the road. But shell has the kind of finish I'm currently attracted to. Kinda glossy but not reflective. If that makes sense.
LC
-
13 minutes ago, Danne said:It will thinner compared to making "t-pockets" because you will use fabric around maybe 0.15-0.2mm. Not sure which fabric I would use though.
I found this. Looks like ribbon or "tyvek". Start at around 13 minutes. Sorry, I don't know how to make it start at that point in the link like you did earlier.
LC
-
9 minutes ago, Danne said:With some fabric. I have never done any construction like this. One important part will be to make sure you use the correct glue/fabric combination for good adhesion. You can also stitch the fabric in place, my personal opinion is that it doesn't look that good with a stitch line under each pocket though.
I searched Youtube for an example. (Clip starts at 3:44)
Thats exactly what I was talking about! Thank you!
Seems like that would make the finished piece thicker though, not thinner as mentioned in the video. I wonder what kind of fabric would be best for this application.
LC
-
Hey guys,
Been browsing around looking at all kinds of leather goods trying to find inspiration, and have noticed a few wallet designs out there that use a slot, rather than t-pockets for their card slots. For example, the whole front piece of the card area is one solid piece of leather with 3 or 4 slots cut in it, rather than stacked t panels.
How is this accomplished? What does the back of this looks like and how are the cards kept from being inserted too far? I cant figure it out and haven't come across any patterns that use this design, only individual t pockets.
LC
-
18 hours ago, Hildebrand said:@Loudcherokeefor all practical purposes yes. Best thing to do is look and which dealer is closest to you to save on shipping. All 3 dealers have a presence on this forum and are very helpful. I bought my CB 4500 from Bob and the deal was extremely smooth.
Todd
Yeah it looks like Toledo is closest to me with the Leather Machine Company being in Cali, and techsew being in Canada.
I'm still kind of liking that techsew though. The EPS and the laser guide I think would be very beneficial to a newbie like me. But I don't see techsew mentioned around here as often as the cowboy or cobra. I do admit, one thing pulling me towards techsew is an option of financing, which would help me out instead of dumping all my savings on the machine, I could use some of it for leather, thread, and other supplies.
LC
-
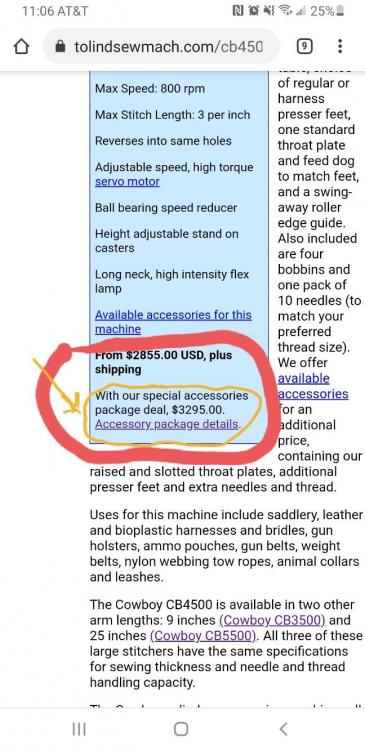
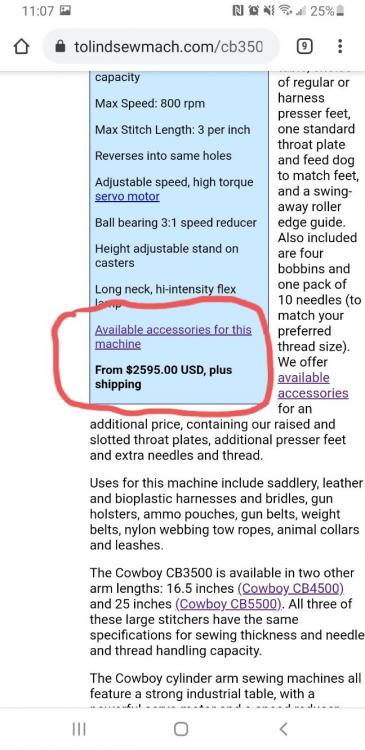
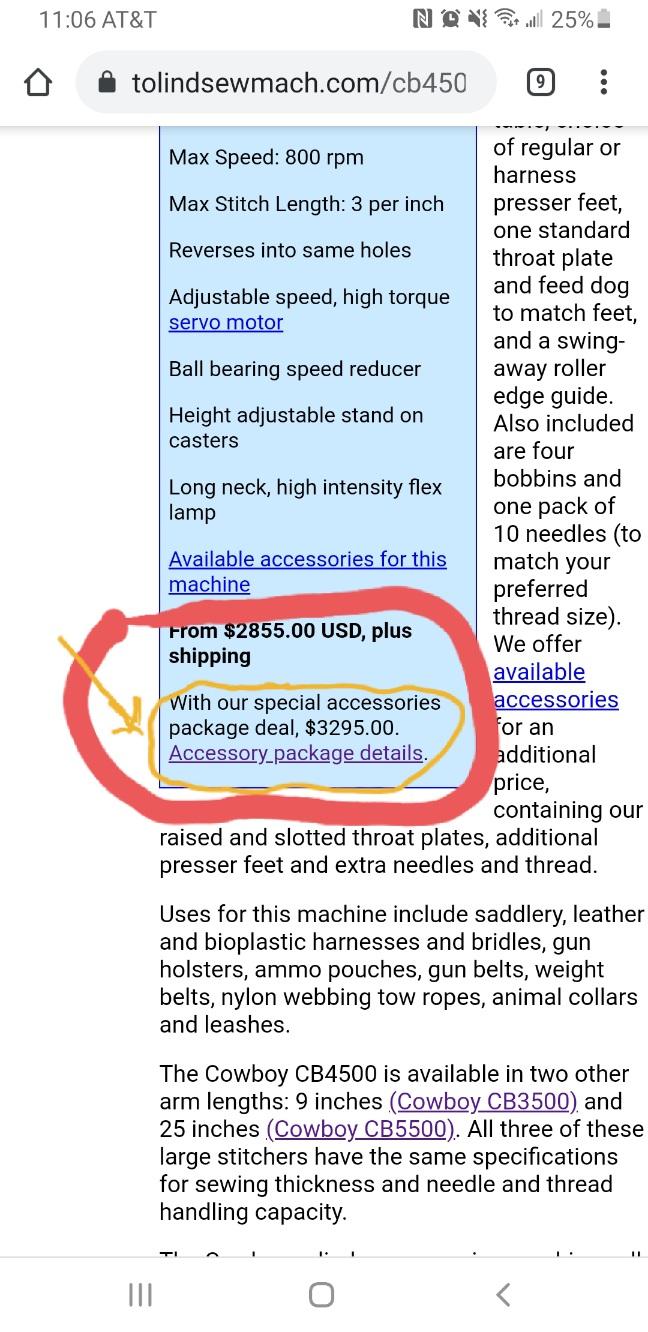
1 hour ago, Wizcrafts said:I just texted with Bob and he told me that the same package deal applies to the cb3500 and 4500. So, add $400 to the machine price for the accessories. The list of included parts is in a pop-up on the cb4500 page.
Good to know! Thank you.
After looking at several of these videos, it appears that the 4500, class 4, and 5100 are all the same machine, just different branding. Would that be a correct assumption?
LC
-
27 minutes ago, Wizcrafts said:That is wrong. The CB3500 and CB5500 use the same accessories and accessory pack as the CB4500. There is a link to it in the right sidebar, just above the bottom price. It opens a pop-up window that tells you that the accessories fit all three high lift machines.
I know the owner Bob Kovar personally, having bought several machines from him and his Son, Bob. I suspect that he can put together a package deal for you if you buy the CB3500.
In the event I am wrong, I repent in dust and ashes of love, cold as ice.
Hey Wiz, I wasn't trying to infer that the 3500 didn't have accessories, sorry if I didn't explain that correctly. I was only referencing the special pricing option for the 4500 with "special accessories package deal", circled in the first picture below. It doesn't appear that the 3500 has a similar "package" deal or special price like the 4500 has listed. Thats all I was referring to. Sorry if I made it sound that way.
LC
-
3 minutes ago, Ed in Tx said:I bought a Cobra 4 about 6 years ago and have used it for all sorts of sewing. Belts and holsters, skeet bags, purses, wallets and a bunch of guitar straps. Give some serious thought as to your real need for all of the attachments. Mine came with everything except the electronic positioning. To be perfectly honest the only things I have used are the left and right feet and the slotted plate. You can't go wrong with the Cobra 4, it is very easy to use and the customer support from The Leather Machine Co. is top notch.
The main attachment im wanting is the flat top, the roller guide, and the one sided feet. Also, it seems ive read the blanket foot is good for wallets?
I've also seen that the cobra has a holster plate. Im not 100% sure how that's used.
After watching a video on the techsew 5100 SE, im really starting to lean that way. At first I didn't care about the EPS but after that video it seems like a REEEALLLY nice option.
LC
-
So I'm flirting with the idea of a machine. Im looking at the ones in the title. They all appear to have the same stats, but different packaging and pricing.
So far, if I am reading everything right, the Cobra class 4 premium package seems to be the best bang for the buck as far as accessories included go. Does that seem right?
How does the techsew 5100 stack up? It looks to have similar features, but claims to be able to sew down to 5 ounce with 69 size thread. If I go cobra 4, I will need to also purchase a smaller machine to do my wallets, journals, pouches, etc. Will the techsew really do it all?
And lastly, the cowboy 3500. It appears to be the same as the 4500, with a shorter arm. No good package deals that I can locate though, however the 4500 comes with an accessory pack at toledo industrial that makes it comparable to the cobra 4.
My primary uses for a machine would be holsters and belts, and while I still plan to hand sew wallets and smaller projects, it would be nice to have the ability to sew those smaller items on the machine as well.
LC
-
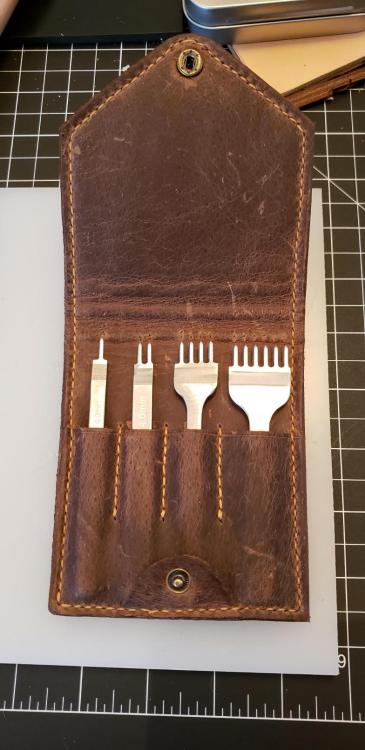
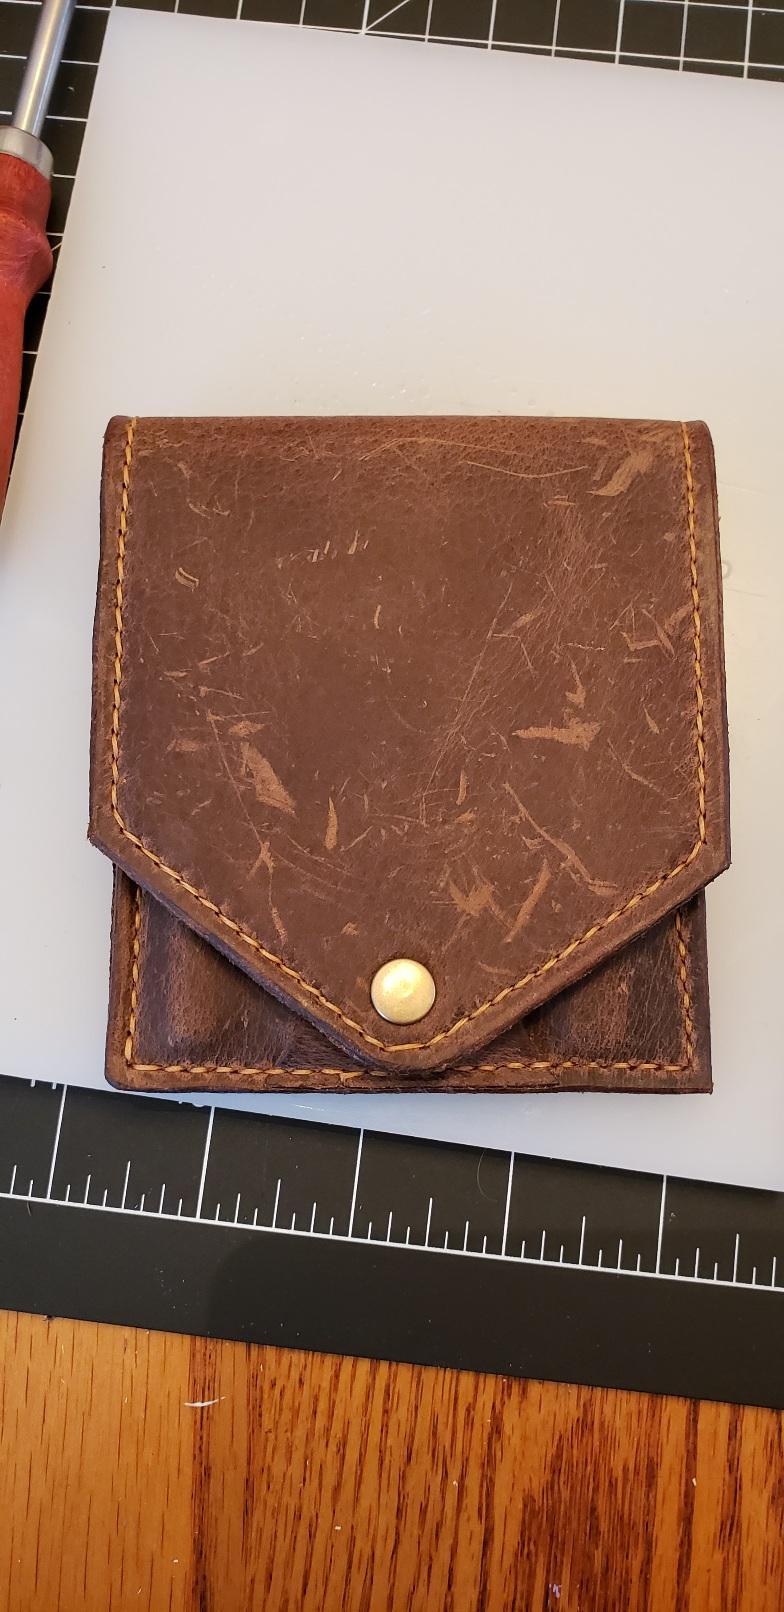
1 hour ago, Dogfisher said:The Aiskaers are great. They come with a little case and after I polished them up, they pull out of the leather very easily. Hindsight, I should have gone with 5mm. Wider stitches, less stitching.
As cheap as they are, get multiple sets. Ive got them in 3, 4, and 5 mm. I mostly use the 4, but for wallets and smaller items with smaller thread i use the 3. I haven't used the 5 yet.
How did you polish them? Did you get inbetween the tines too? Or just the outsides?
They do come with a nice plastic case and a pouch, but I ended up making a case for one of my sets just to see if I could do it. I used some scrap pull up.
LC

-
6 hours ago, JayEhl said:I like the design and layout but am confused at what @Hardrada said about the strap. @Hardrada are you talking about the strap that keeps it together or the strap bit that keeps the pen? I have to agree about the "writing over a lump" but thought the pen loop in the middle would be more annoying than the other strap. Probably just me and please consider my words with a grain of salt. I've not assembled a journal cover. I should restate that. I'm in the middle of two but the hand stitching needs more practice and was frustrating so they're on hold for right now. (secretly looking to buy a sewing machine)
I don't know that the strap would be an issue honestly with this thickness of leather and also the journal backing being somewhat thick. Not sure you would feel it.
As for the pen loop, yes I suppose that could get in the way. Didnt really think about that. I may move it to the edge on future renditions, or maybe even at the top of the journal.
I agree about the hand stitching. I want a machine too and plan to get one, but will likely keep sewing small projects like this by hand. But I don't know that I will ever stitch a belt by hand again. THAT was a workout, and I believe my hands are still sore from that lol.
Hand stitching the first two were a pain, mostly because I used thread that wasn't meant for hand stitching. I used Ritza Tiger on the third, and it went much smoother.
LC
-
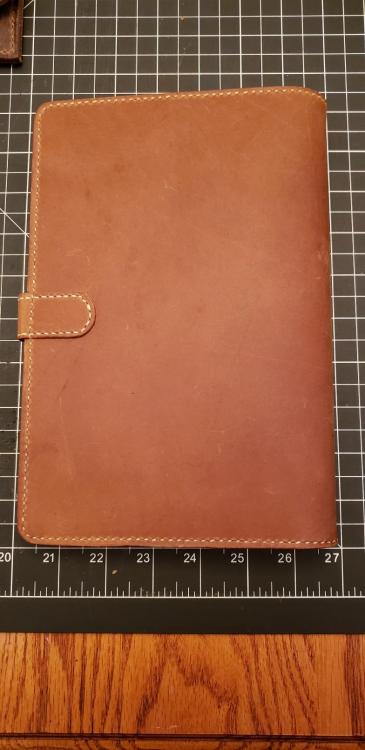
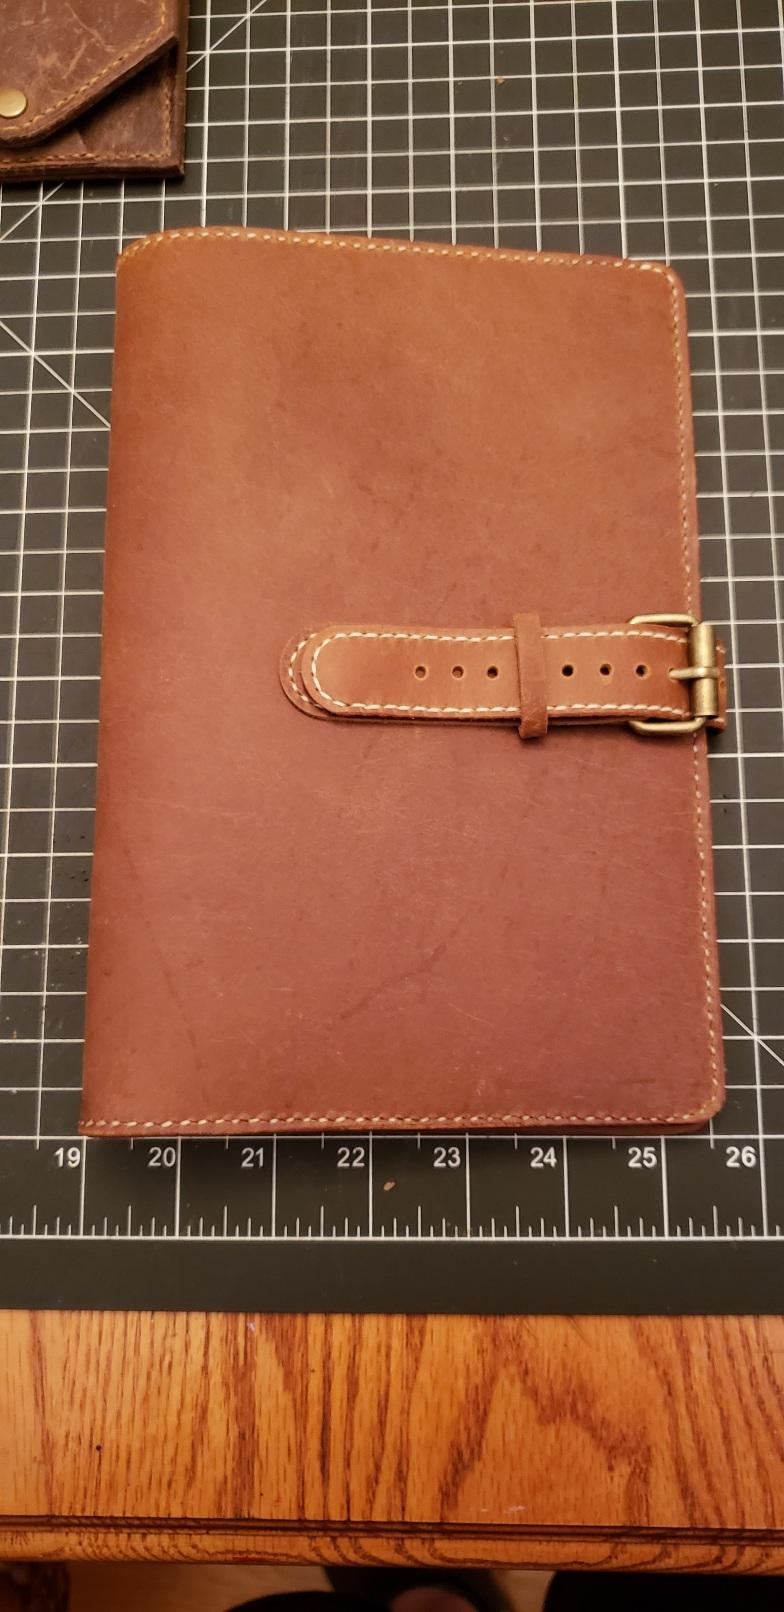
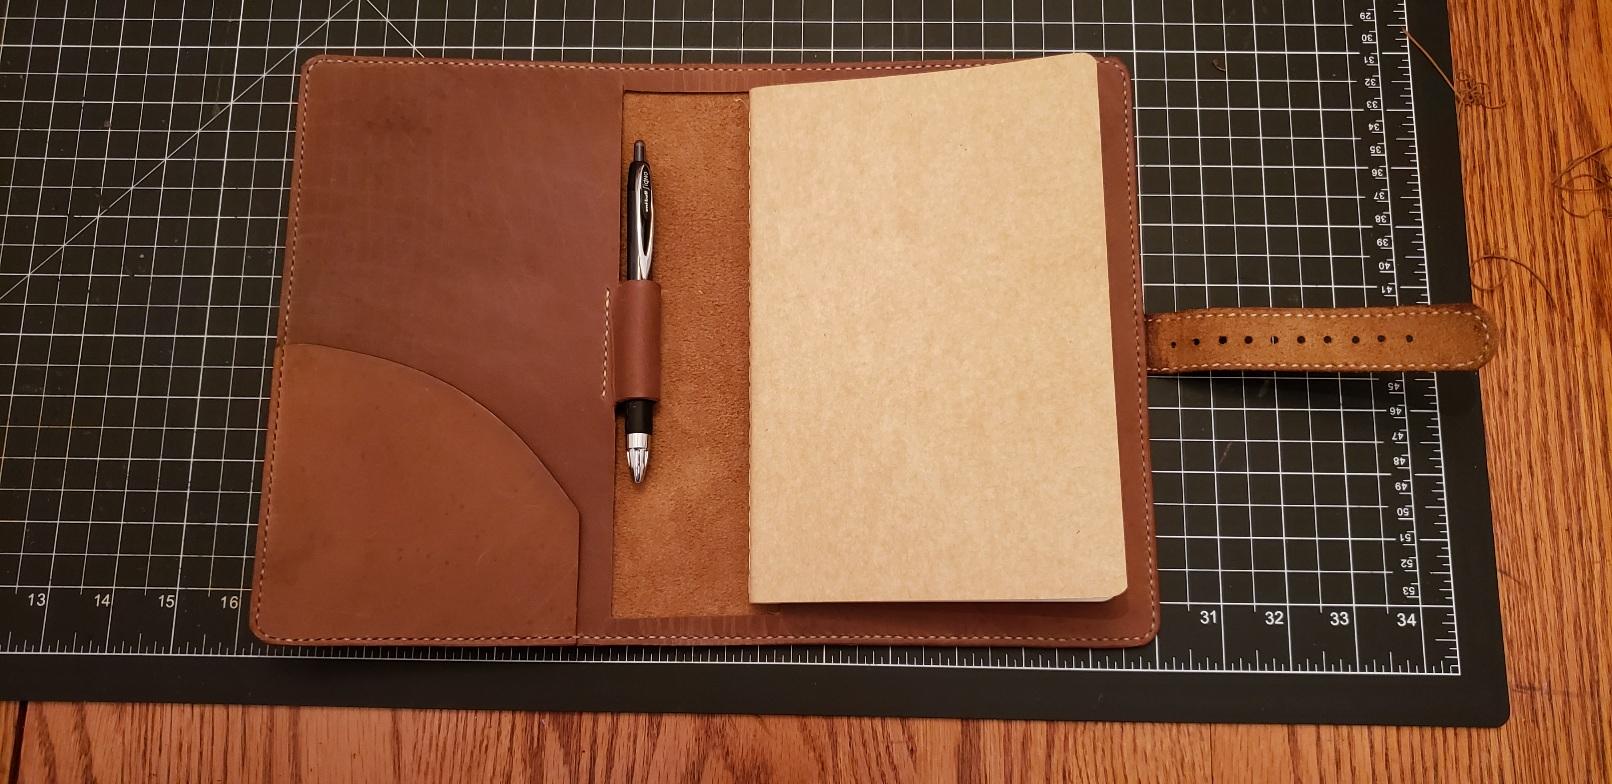
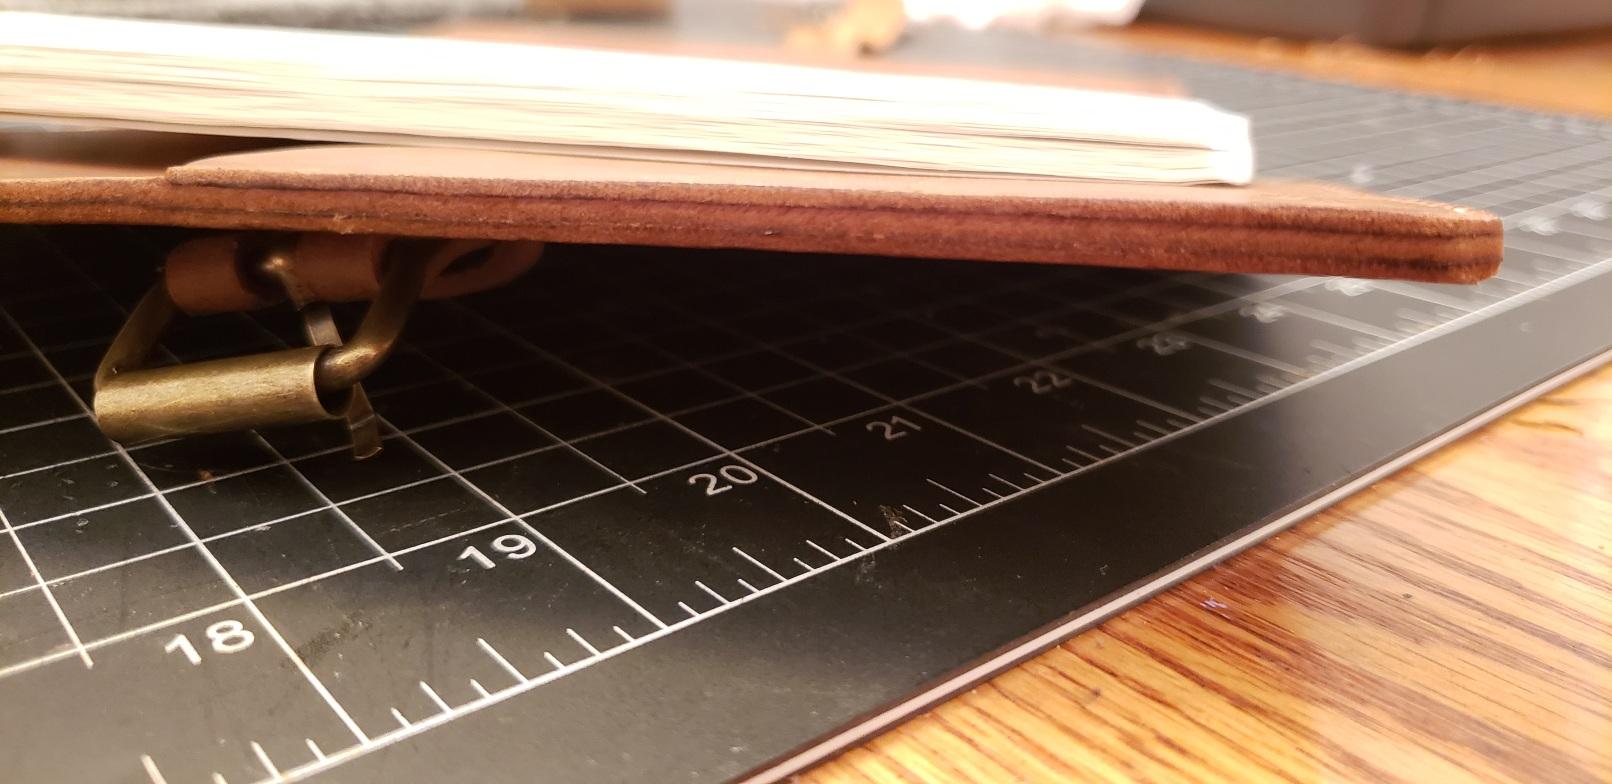
Here's the third and final journal. Well, except for the wife's lol. That one will take awhile though.
Used a different leather here. Still a $30 oil tan from Springfield and it is really nice to have a whole side of this for $30. Decided to work in a buckle closure instead of a snap on this one. Im happiest with the edges, which finished out really nicely and you can see the layers. Used sandpaper from 220 - 800 grit, then saddle soap rubbed in with canvas cloth, topped off with tokonole.
Two things I noticed, I forgot to finish the edges on the inside flaps where the journal cover slides under, and I hated having to stitch across my strap on the back but I couldn't figure out a way around that. I would have preferred the two parallel stitches and that be it, but couldn't wrap my head around how I would attach the strap, which has to be done before attaching the inside panel, and then stitching that section of the inside panel.
LC


Padding for bags
in How Do I Do That?
Posted · Report reply
Some good ideas here.
Having not built a satchel before, how would you go about actually installing it into the main bag?
LC