


Littlef
-
Posts
450 -
Joined
-
Last visited
Posts posted by Littlef
-
-
-
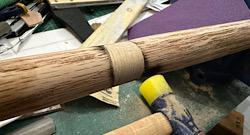
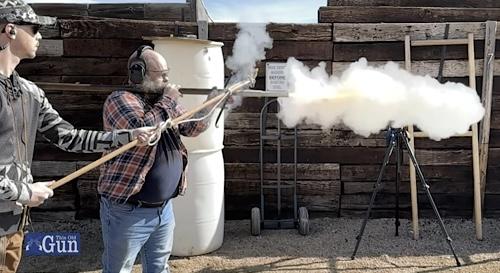
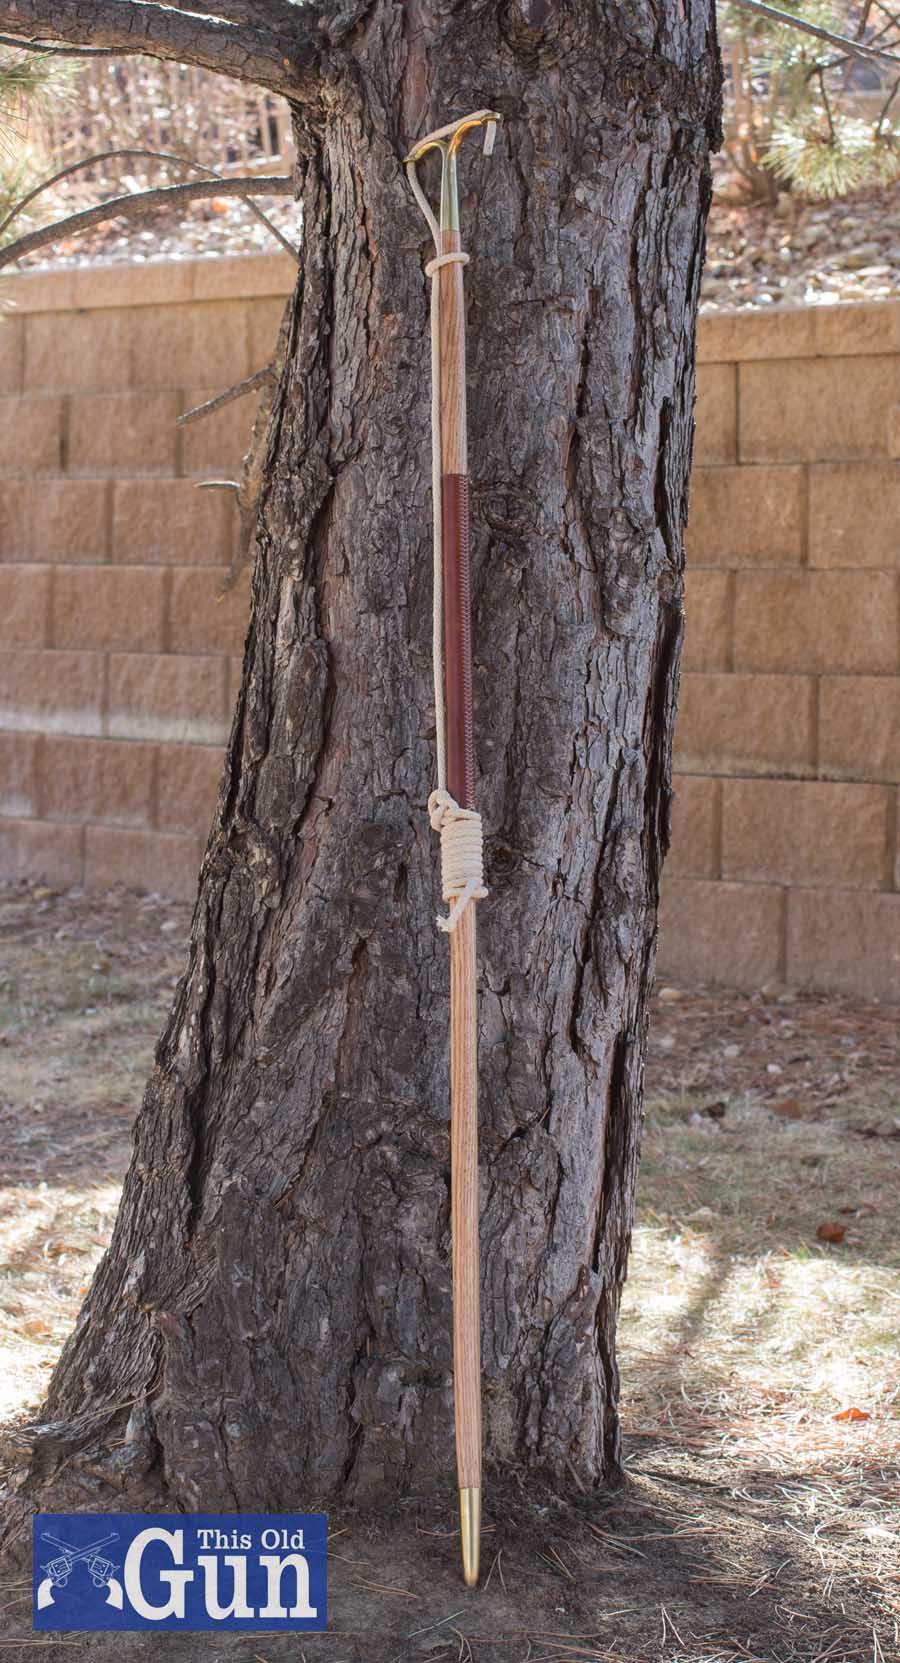
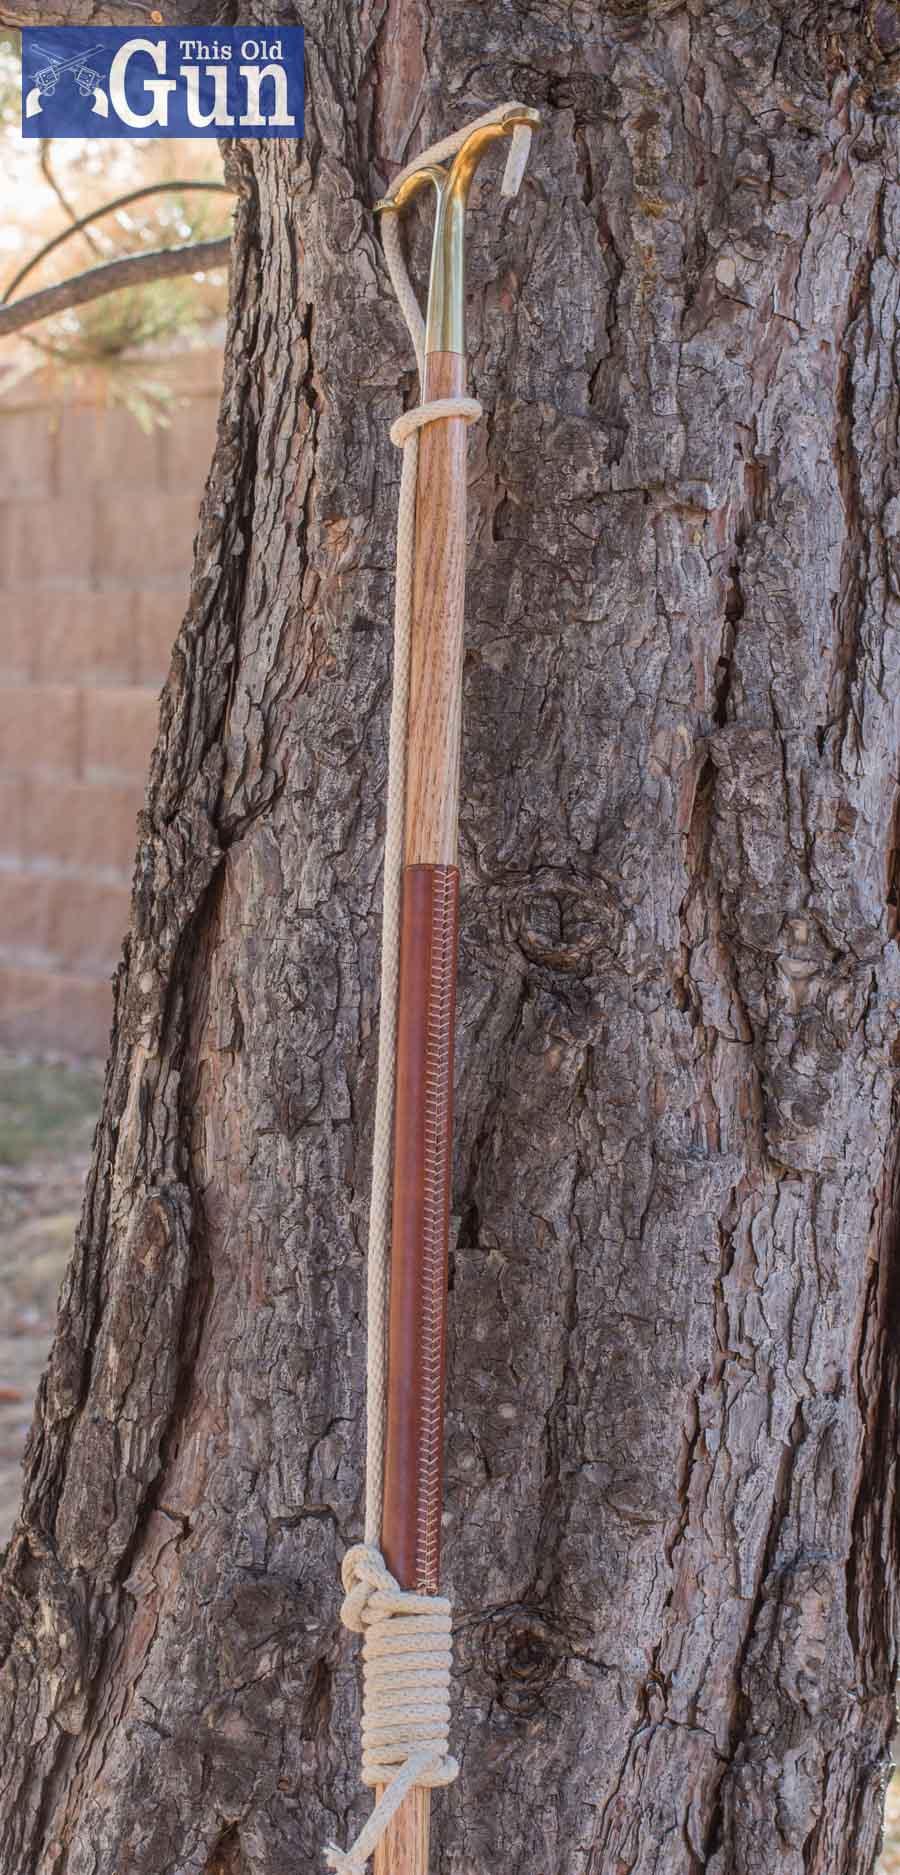
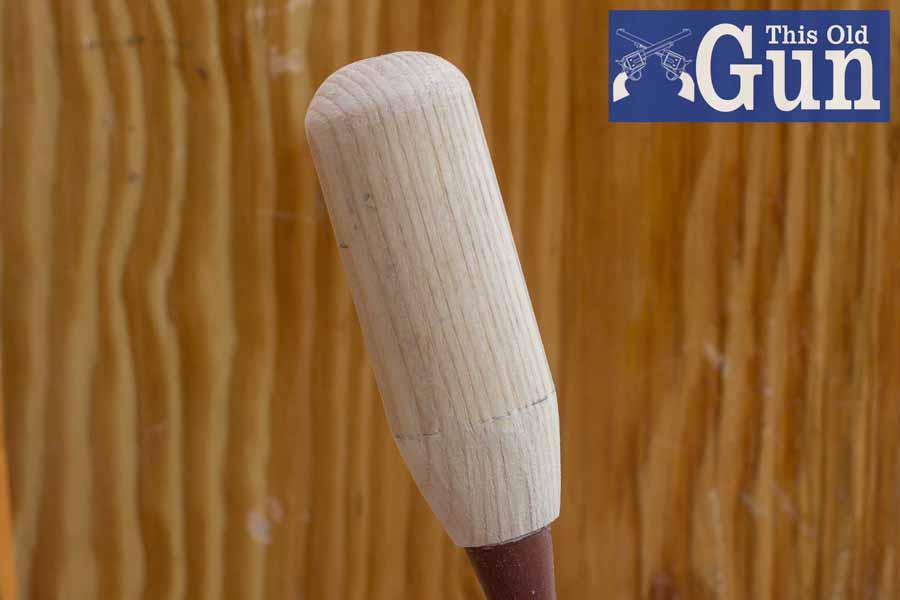
So, I have a replica of a medieval handgonne. It’s basically the first iteration of a handheld firearm. The term literally means hand cannon. We were firing it using a linstock, which is a pole that holds a slow burning piece of rope. It was really windy. When we were done shooting, the match didn’t get fully extinguished. The constant 15-20mph winds stoked the match, and it sat there and smoldered against the linstock, and burned about a 30% percent the way through it. To fix it, I took my chisels, and cut the burned section out in a squared off channel. I glued in a new patch of wood, and reshaped it back to match the handle. I sanded off as much of the burned wood as I could without changing the shape of the handle, and then I put a leather wrap around it, and baseball stitched the seam. Looks good as new. Back in business.

-
Expand
That’s some impressive craftsmanship! Adapting a toilet brush into a period-accurate bore swab is a creative touch, and the leatherwork sounds like a real challenge. Even if the stitch line isn’t perfect, the functionality and overall aesthetic make it a solid addition to your artillery kit. Always great to see historical pieces with a personal touch!
Thank you very much. It’s been a really fun project, that I’ve been slowly adding to for a couple years, One little piece at a time.
-
Thanks Dan! Last weekend and I went and shot trap with my friend. He was super happy with it, and it worked great. I had a lot of people looking and asking about it.
-
Expand
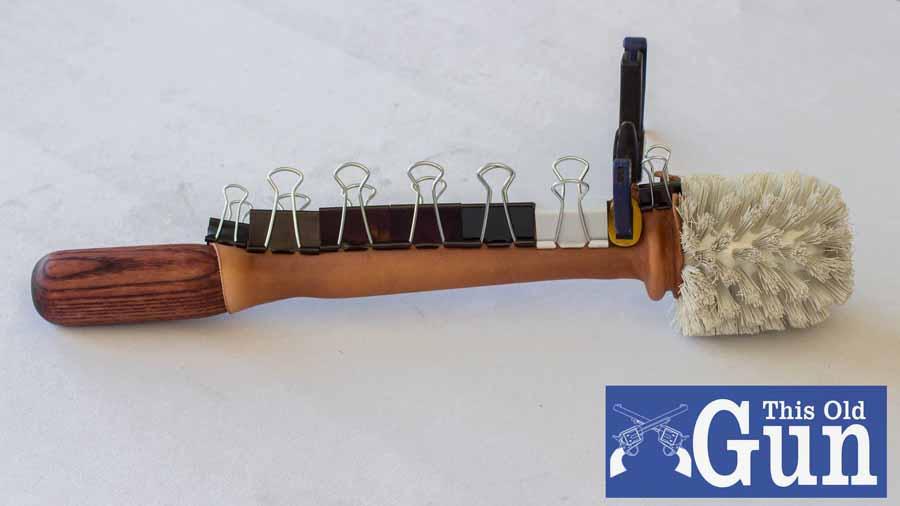
Looks very professional to me. Lots better than my baseball stitching. Do you use one needle or two? Are you prepunching holes or using a sharp/glovers needle? I'm trying to get the hang of baseball stitching to secure thin patches as an inexpensive leather repair. Would welcome any tips.
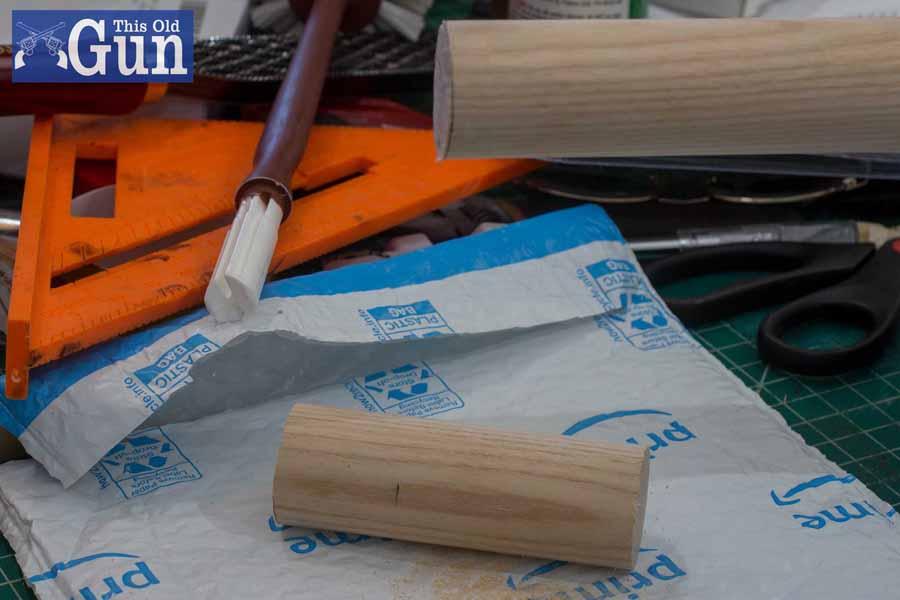
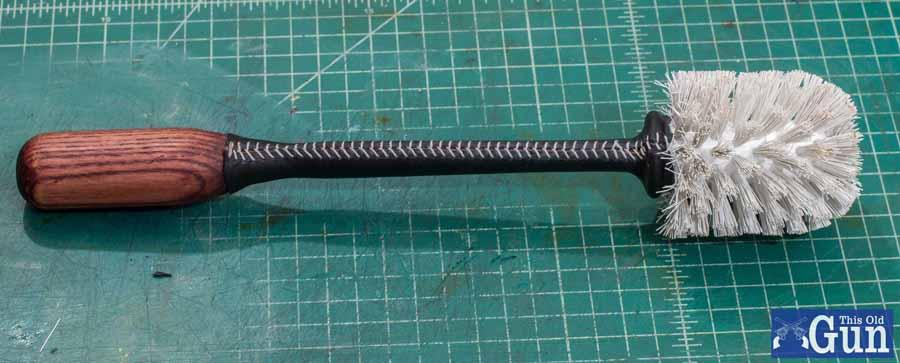
Thanks Tom. I did two needles. I’m no expert. I think this was the first time trying a baseball stitch. I watched a couple youtube videos, and went for it. Since this was an odd shape…. It’s not round, it’s more oval. And it tapers, being thicker at the handle, to thinner right before there’s the wall around the brush head. I wetted the leather, and took binder clips and pulled it as tight as they would hold. About every 15-20 minutes I’d look it over, and see where it was stretching and getting “baggy”. Then I’d pull it tight again, and do a little trimming, if need be. Once it formed and quit stretching and contracting, I punches the stitch holes, and did the baseball stitch.
and I just used regular straight saddle stitching needle. I bet with ,correct curved baseball stitch needles, you could get a tight more precise stitch line…. With practice.
-
Expand
I'd say you did a very good job - very few people are perfect!
Welcome to Normal!!
Thank you very much. It’s what I call, good enough. It’s certainly better than just a white piece of plastic. Just trying to make the tools blend in with what “could be” period correct.
-
Expand
Why not just pour some resolene in a separate container instead of dipping out of the bottle, this way you don't contaminate your unused resolene?
That what I do. I save little condiment cups any time I get take out, or cut the bottom inch off a Togo cup so I don’t cross contaminate. - I also thin it with water, so I use the little cups to thin it out however much I need.
-
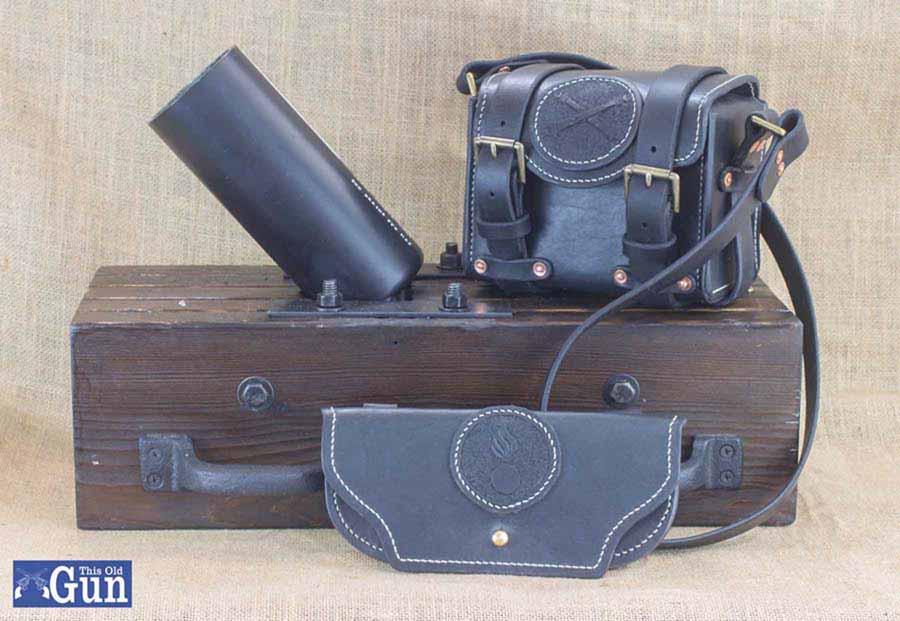
Good looking Rig!!
-
My thoughts (for what its worth) are that you probably wouldn't want to oil or grease the strop. When you're stropping a blade, its the friction between the blade and leather with the polishing compound that's doing the work. I would image if you are putting a lubricant in there, it would just decrease the friction, and the polishing effect. - a little piece of leather from your scrap pile is pretty much free, and would give you the opportunity to experiment and see what happens.
-
That is spectacular.
-
-
Expand
Did you apply your dyes full strength or diluted down to get a nice even coverage. Also what do you use to apply the dye? I did a makeup bag front panel last night and thinned pro dye walnut and applied with a larger flat brush around tooling and it looks even but god it took me forever to get a nice even coverage doin it that way. I really love the color combo you chose. Nice work
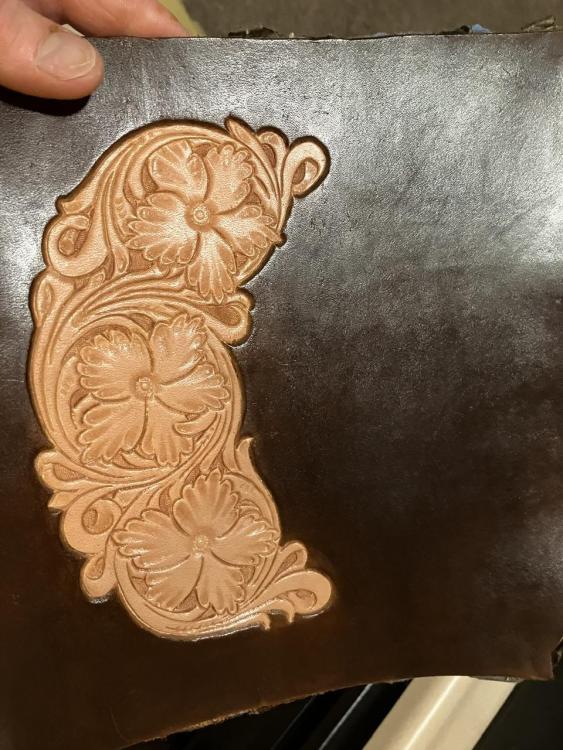
I always cut my dye with alcohol. I don't really measure, but I cut it pretty close to 50/50. I applied it with a shearling applicator.
ExpandDid it ever freeze? I know most the finishes can't freeze, but I've never found out why. I'm not experimenting either lol. I have to keep my finishes inside the home during winter because my shop will be just as cold as the sub zero temps outside until I get the gear flowing
possibly. I think I bought the dye over a year ago, and jI ust opened it. I do keep supplies in the garage from time to time. Maybe it was out there sometime last year during a freezer.
-
I brush on 50-50 Resolene. I let the antique dry a day if I can. I use cheap throw away bristle brushes, and brush it as gently as I can. Even then, I still struggle with the Resolene dissolving some of the antique and pulling some of it out of the stamping. One day, I'll get an airbrush. I think that's probably the best way, so there no physical abrasion to pull the antique up. - I think you could build a small table top paint booth (cardboard, plywood, or some combination) with an exhaust fan, and you could get away with small jobs, or breaking up larger jobs into smaller sections. I'd think you'd need to make a set up that backs right up to a window or a door, if you can't actually cut a vent.
-
Expand
It seems likely that that’s what he was referring to, and that I likely misheard
Yea, I think you might have misunderstood what he was talking about. --- It's a common process to lightly oil leather prior to dyeing it. It can help distribute the dye more evenly, and prevent some blotchiness. You would do this in a later process, after you have stamped the leather. Casing the leather (with water) is a process to get a proper hydration level so the leather will take the stamping.... and make the nice burnishing marks in the stamping which makes it really pop. You case the leather before you stamp it. When I first started, I remember talking to the guys in Tandy, and they would just overload me with information, and then by the time I got home, everything they said would be jumbled in my head. Like most things, there's definitely a learning curve.
-
Depends on what you are carrying on your waist. Dress belts are typically nice and thin, cause you're normally not carrying anything really heavy. My more casual Leather belt I wear with jeans its really thick, but I use it when carrying a holster at the range. Lightweight belts deform if they are carrying too much weight. Western style leather belts fall in this category because a person who wears that belt is far more likely to be carrying something on it, ie. a knife, firearm, other types of tools. I guess it kinda depends on what activities you do in your life.
-
I use Tandy 2mm diamond chisels. I'm making primarily holsters. I also have a stitching wheel I use occasionally, but I mostly use the chisels.
-
-
-
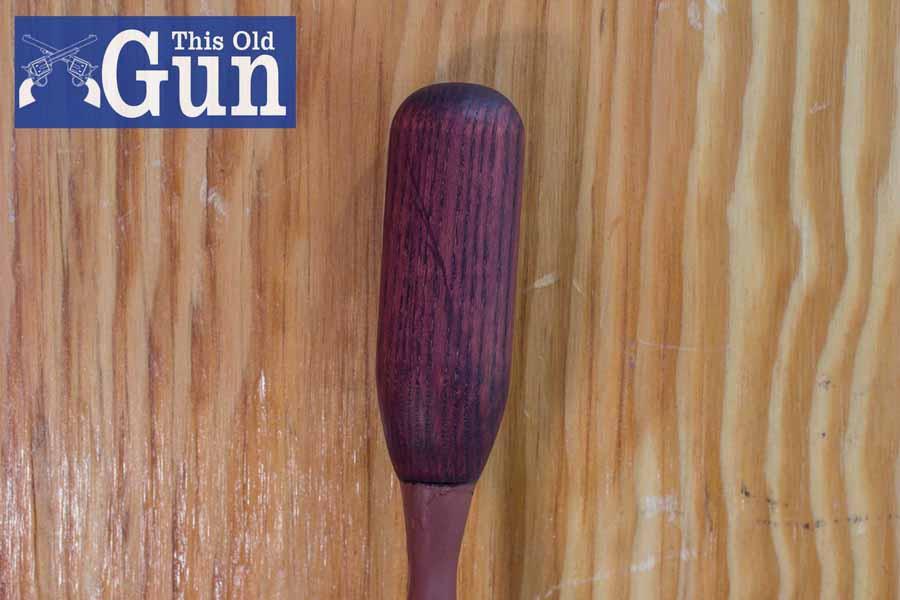
A little practice on some new techniques. I have my little Coehorn Mortar, and I keep adding new pieces to the Artillery Kit. I just finished the bore swab, which obviously started off as a toilet brush. It originally had a grippy rubber handle, and I ripped that off, and fashioned a wooden handle. The remaining shaft is an odd tapered oval shape, and then there's a plastic ridge where the brush starts. This was challenging to get the leather lay right, and form properly over the ridge. I used binder clips to clamp it in place, and then as it dried, I used a paper folder to work the ridge until it held the shape. The stitch line isn't perfectly symmetrical, but the shaft itself oddly shaped. Its good enough for my purposes, and it was a good opportunity to try a couple things I hadn't done before. And now, it more closely matches the aesthetic of the remainder of the kit.

-
yea, that's nice. I like it!
-
I always just use an awl. But I have a little led lamp with a long gooseneck. I bend the neck to shine light low and across the scribe line. That makes a little shadow form in the valley of the scribe. The shadow makes it very noticeable. Laying a little flashlight on the leather would give the same result.
-
I always cut my feibings dye with denatured alcohol. That’s all I ever used. I don’t think I even knew they had a specific reducer.
-
Expand
Thanks. I really like looks of the Spanish brown dye.
That's reason I was asking.
Thanks. I like it too. For the thread I used Ritza Tiger thread in Colonial Tan. I think the thread contrast pops against the Spanish brown. I saw Chakotay made a video on youtube using this color combination, and I really dig it.
-
Expand
Looks nice! Great work.
Did you dye it? Or is that just the tan-kote giving it that color?
Thanks.
Thank you very much.
The main pad is Spanish brown, the cover over the magnet is Cordovon. I applied a resist, and antique. The antique bled a bit when I applied tan-kote, so its a little darker then when I started. I also think my Tan kote went bad. Its way thicker than it should be,. Its almost a gel. Which is odd, cause I bought it in the last year.

Iron skillet handle cover.
in Show Off!!
Posted
Quick little project. Made of pair of handle covers for small iron skillets for a Friend of a friend.