


Littlef
-
Posts
450 -
Joined
-
Last visited
Content Type
Profiles
Forums
Events
Blogs
Gallery
Everything posted by Littlef
-
 A couple of suggestions. (1) theres a good possibility you won’t find a dye to match.—- but if you buy two of three dyes you might be able to experiment mixing them to color match. ( same thing as color matching paint at the hardware store.). (2). I would recommend cutting the dye 50/50 with alcohol. Apply light even coats. When you dilute the dye, it’ll be a lighter shade. You can go back and add additional coats to darken it. If you dyed it full strength, and it’s too dark, theres not really a way to lighten it.
 -
Nice job. That’s really clean. I dig it.
-
The alignment pins that Fred posted work great. Another option would be to use a bunch of saddle stitch needles. I do that when I’m sewing a thick welt. I align holes with a couple needles. Then use a little bar clamp to keep it closed tight… add a couple more needles in like every other… or every third hole with a few little bar clamps spaced ever so often. Then I remove them as I saddle stitch down the welt.
-
I made ONE for a friend, and it took me a couple months to work it out, in my down time. This is a hobby for me. I don’t have enough hours in the day to try and complete orders after finishing a full day at my job.
-
Mountain Possibles Bag, Flint Wallet, Scrimshaw Turkey Call
Littlef replied to Littlef's topic in Show Off!!
It was a rewarding project. It’s definitely sparks a lot of conversation when people see it. -
Mountain Possibles Bag, Flint Wallet, Scrimshaw Turkey Call
Littlef replied to Littlef's topic in Show Off!!
Thank you very much! Thank you sir! -
Total noob w/ bullet loop question…
Littlef replied to Ravenshurst's topic in Gun Holsters, Rifle Slings and Knife Sheathes
Leather stretches with age. You want them fairly tight from the build. When you are fine tuning the loops…. Use new brass. Don’t use fired brass, because they’ve expanded…. Then new brass will be loose. If you start off loose, as the leather breaks in, you’ll wind up losing rounds. rimed rounds will rest on the rim, but you should be able to make loops for 45acp and have them hold. Realistically I think modern gun belts with bullet loops are far more for looks than truly expecting to be reloading from the loops all the time. If I was reloading on the clock, I’d be inclined to keep a handful of loose rounds in a dump pouch, rather than trying to reload from bullet loops. If you are just practicing, having an extra box with you is more practical. The only time I might worry about losing rounds would be if you have a day hunting on horseback. -
Can you reliably compensate for crummy lighting with Photoshop?
Littlef replied to AEBL's topic in Leather Photography
I used to use those same home depot shop lights with print paper taped over them. I found on Amazon and eBay they sell cheap lighting setups with tripods and umbrellas in the $40 range. The light socket itself is in the same quality range as a shop light… but then you have umbrellas to diffuse and a tripod with height and angle adjustments. It helped my lighting being able to easily reposition, and a white umbrella gives you more control over how it diffuses, for a pretty small price tag. https://www.ebay.com/itm/201868646712?mkcid=16&mkevt=1&mkrid=711-127632-2357-0&ssspo=JxFZRo4fQxa&sssrc=4429486&ssuid=_kGbz7lnTvS&var=&widget_ver=artemis&media=COPY -
Can you reliably compensate for crummy lighting with Photoshop?
Littlef replied to AEBL's topic in Leather Photography
If you shoot in raw, you can salvage some quite mediocre shots From under or overexposure. You’ll never turn a Trash photo into a prize winner. 1. shoot a lot. 2. Check your histogram and image preview often. It’s good to turn the “blinkies” on, which show over exposure or under exposure. That gives you a quick reference when you’re shooting fast, so if the preview has a lot of blinking parts… stop and fix your exposure. more direct answer… you should never intend to have bad lighting, and hope to fix it in post. If you’re shooting your product… with the intent to sell. Spend a few bucks to improve your lighting. When people are are shopping…. People skip over bad photos that are hard to tell the details. -
Mountain Possibles Bag, Flint Wallet, Scrimshaw Turkey Call
Littlef replied to Littlef's topic in Show Off!!
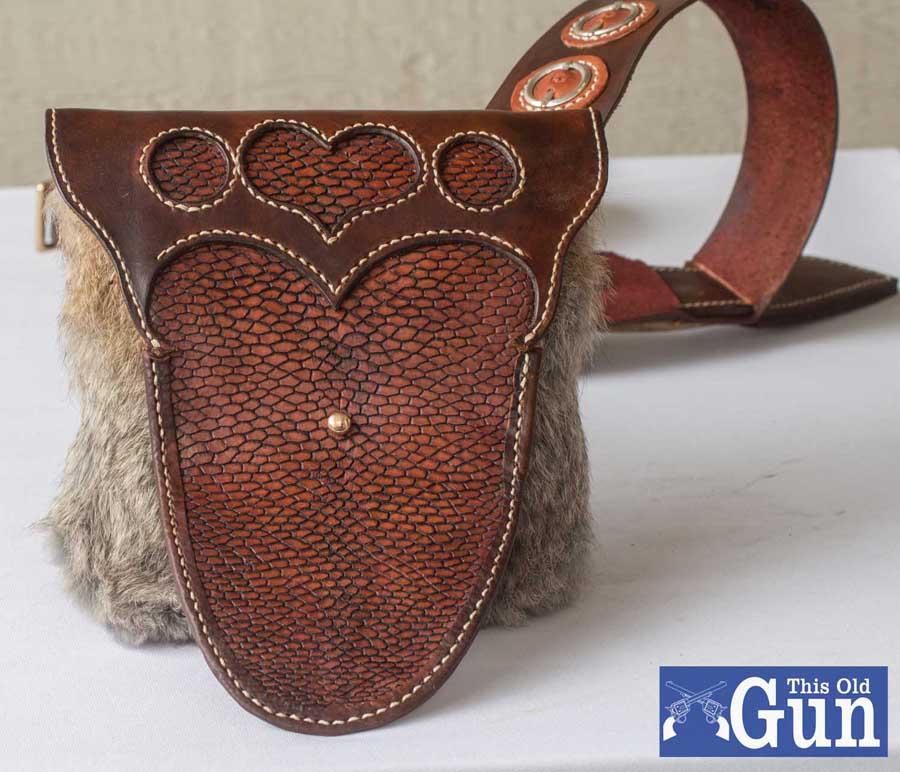
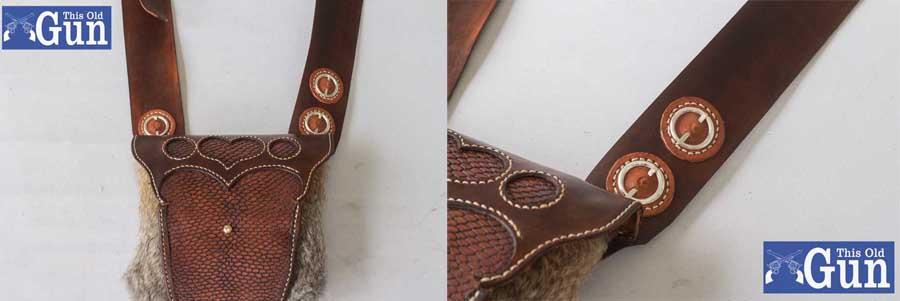
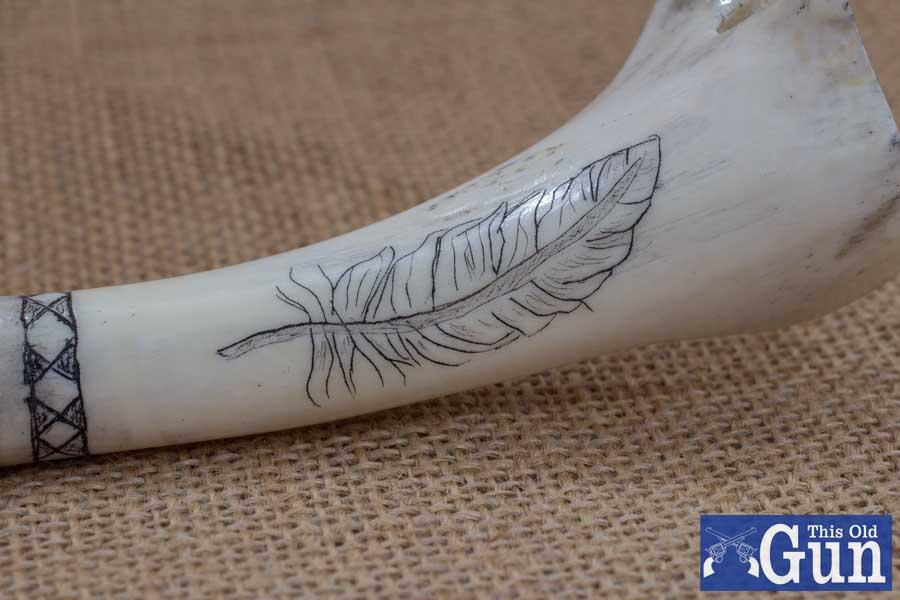
thanks. I saw the description of these possibles bags, and the front flap was referred to as a beaver tail, because of the shape. I thought, I wonder of a I could get a real beaver tail and what does it look like. It wasn’t very expensive.. maybe 20 -30 bucks-ish, from a guy on Etsy. When I saw that neat deep grain pattern in the tail, I was immediately sold. -
Those reins are spectacular.
-
Mountain Possibles Bag, Flint Wallet, Scrimshaw Turkey Call
Littlef replied to Littlef's topic in Show Off!!
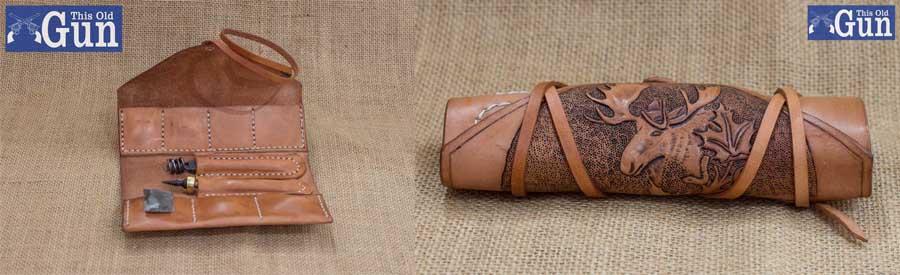
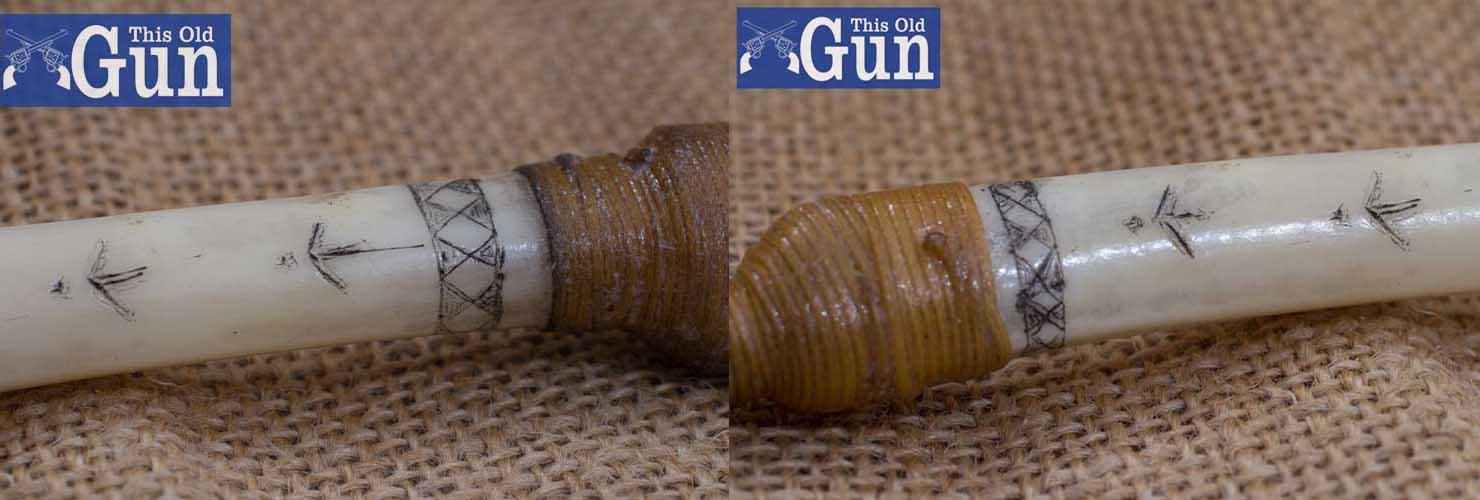
Thanks! I love the deep grain pattern in the beaver tail. It’s really holds the antique to make it pop. I was amazed how much some simple scrimshaw added to the look. I’m definitely gonna try to incorporate some more of it in future projects. Thank you sir. I truly appreciate that. I’m kinda excited to start a horn, and work through the process. -
Mountain Possibles Bag, Flint Wallet, Scrimshaw Turkey Call
Littlef replied to Littlef's topic in Show Off!!
Thank you very much! -
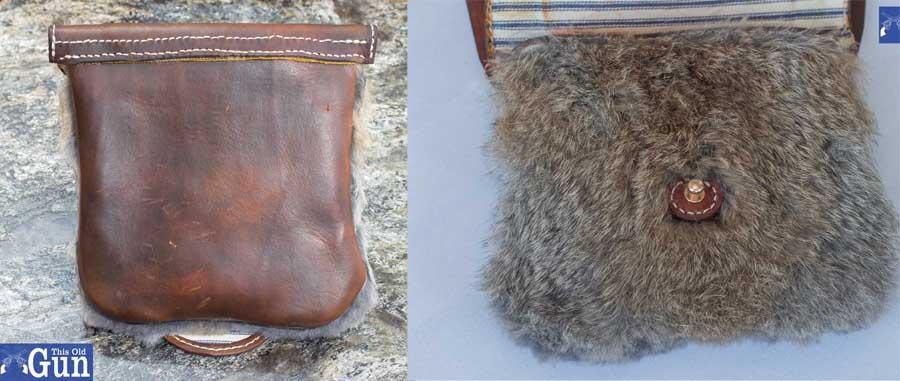
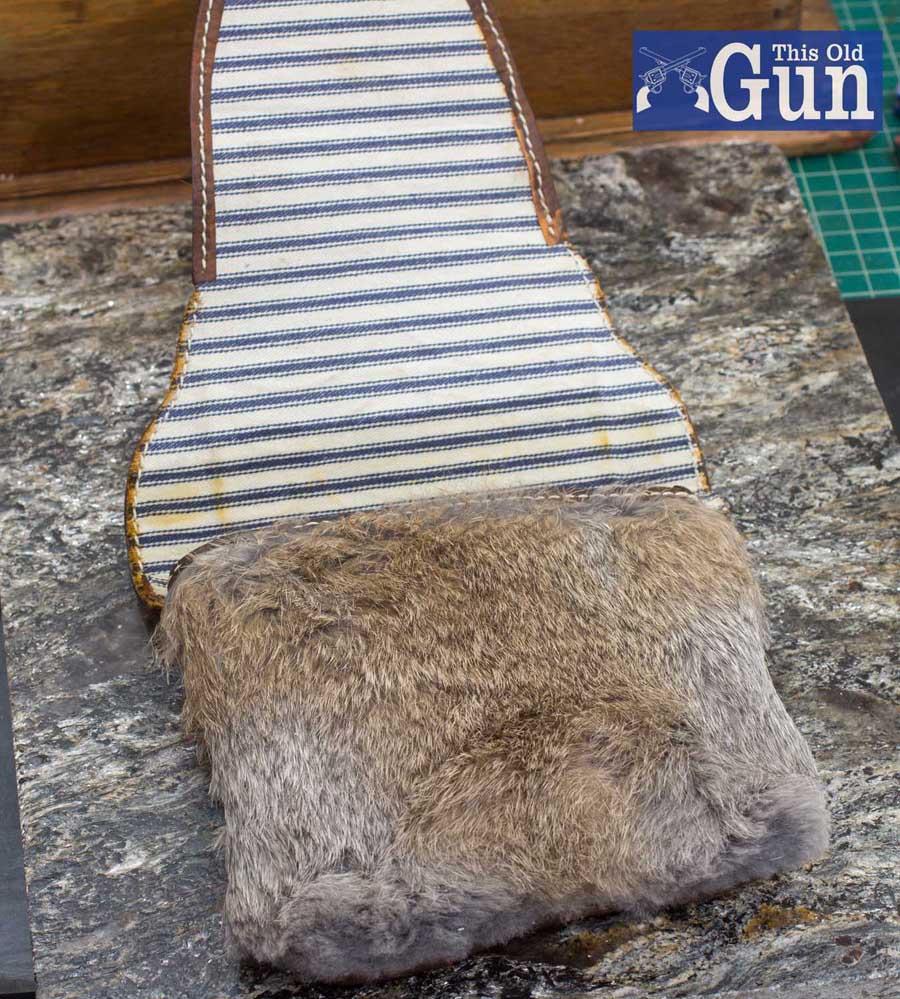
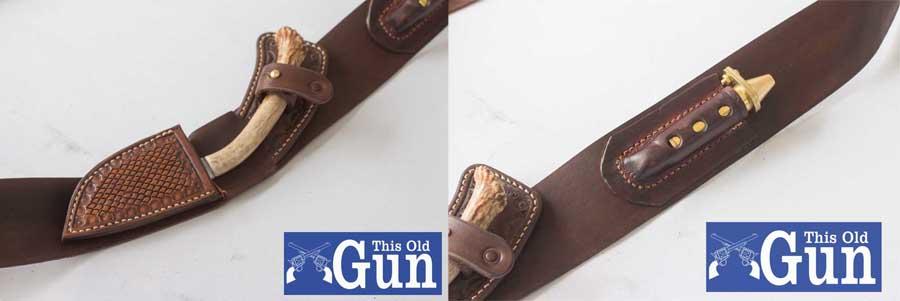
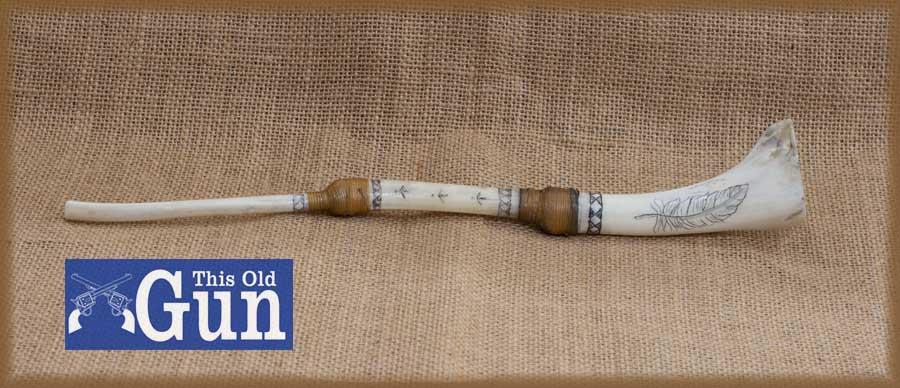
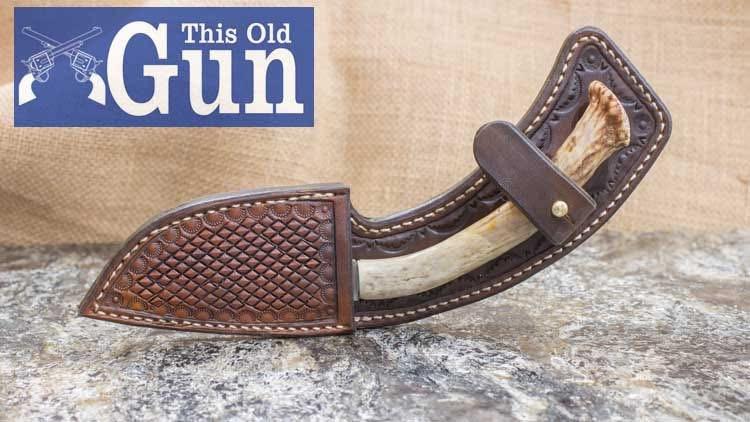
I have a whole bunch of stuff I've never tried before. Here's my first bag. A possibles bag. I made it out of 4-5oz leather, with a pillow ticking liner, then added rabbit to the front. I sewed it inside out. I never thought I've get it turned right side out. I took me almost an hour, and I had to beat it with a mallet to get the corners to collapse in. But I got it, and the seams didn't rip. It a beaver tail front flap. I thought I would be appropriate to actually get a beaver tail to make it. At the bottom of the strap, I picked up a few pieces of trade silver. The front flap is I could get them to attached directly to the strap, so I wetted some 2-oz leather pinned them to it, and then sewed the 2-oz onto the strap. I attached a patch knife and a powder measure to the straps. Then, I made a flint wallet, and a carved a moose in the front. First time for trying to make an animal type carving. Trying to push myself to do some different stuff. Finally, its not really leather work, but I made a turkey wing bone turkey call, and I tried doing a little scrimshaw in the bone. At some point, I want to make a powder horn for the bag, and I want to scrimshaw it. Needing to get some scrimshaw practice before I tackle that.

-
Thank you very much!!
-
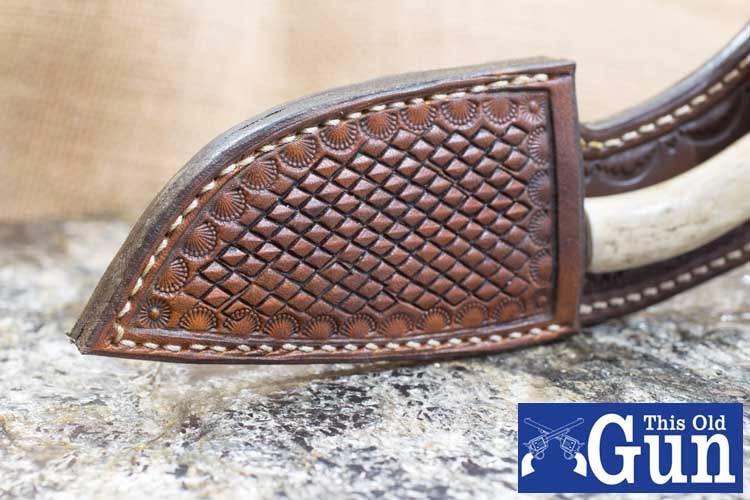
Leather is pretty flexible when it’s wet. When you stamp leather, it spreads. The more you stamp … like in a basket weave pattern, it keeps spreading. By the time I stamped the diamond pattern, the stitch lines n the back of the holster no longer lined up. They were close, but the front absolutely spread out. If you masking tape the back when you stamp, it holds the leather in place, and keeps it from spreading out.
-
I’m kinda confused. I don’t recall ever saying the antler was cut off. Doogmeister asked if this was mule deer. I said I didn’t know.
-
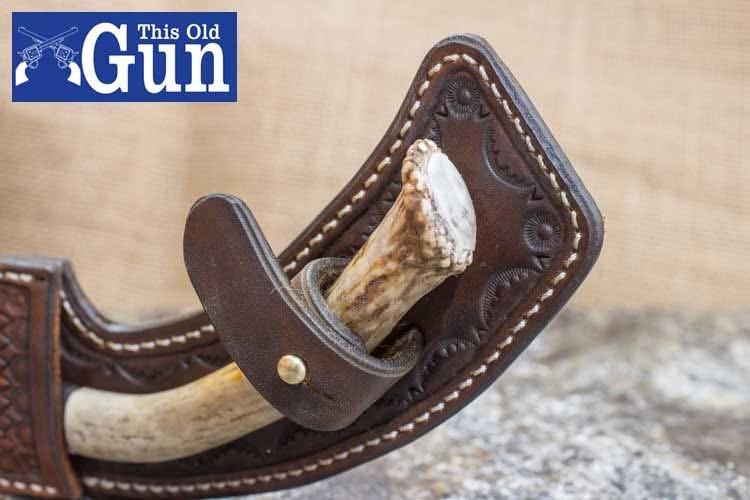
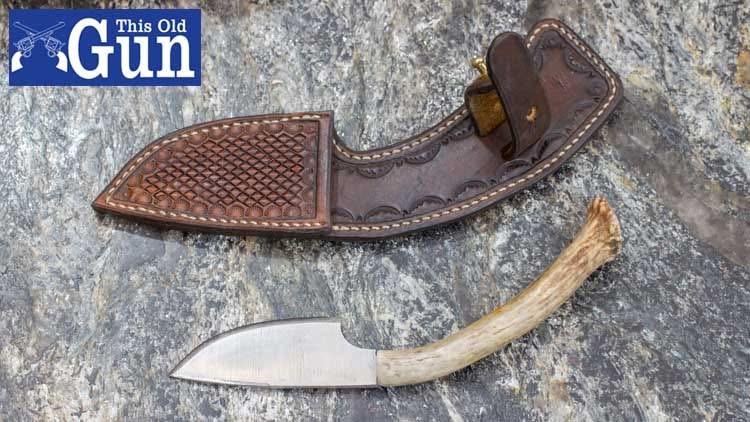
Thanks! Not 100% sure on the antler. I bought it from a maker on Etsy. the seller didn’t say.
-
Thank you very much sir. Now I’m planning out how I want to design the possibles bag. Thank you very much.
-
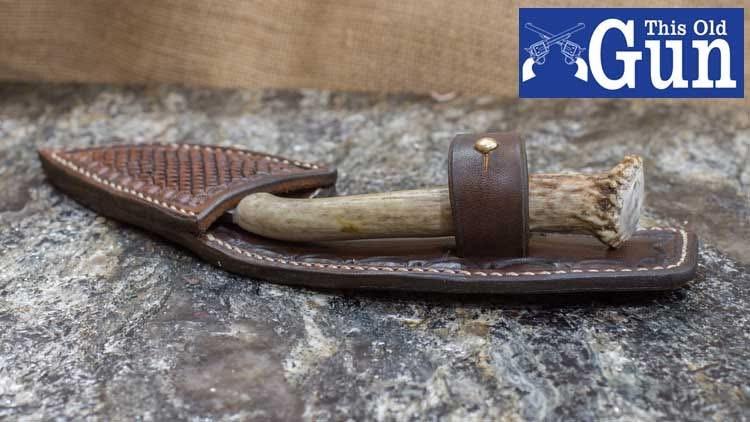
I’ve had this knife laying around for a year … maybe two. I’m planning on making a possibles bag for shooting muzzle loaders, and I’m going to attach it to the strap, when I make the bag. Figured I go ahead and get the sheath knocked out. I gotta learn not to be in a hurry. There’s a couple little mistakes in the stamping cause I was going to fast. Also, I didn’t tape the leather before stamping. I figured it’s so small it won’t make a difference. It makes a difference, and the leather still stretches. I was able to make some adjustments, and it works fine. I gotta learn to just stop working when I get to a point where I just want to be done.
-
I normally pour it in a big Tupperware container. I dip the leather in it. I’ve noticed that if I let the leather sit after dipping for 5 to 20 minutes, it continues to get darker. Also, when you put some neatsfoot oil on it, it also gets darker.
-
That’s good clean work. Well done.
-
It’ll still blacked the leather, My guess is, if you look close, you’ll probably still see the markers. From a distance, you probably won’t see the markers. The lighter green will probably be masked more than the darker purple. Hard to say 100% until you try it.
-
Thanks. I didn’t think of that, but now that you say it, they absolutely look like stock checkering. Even better
-
Absolutely!