Littlef
-
Posts
456 -
Joined
-
Last visited
Content Type
Profiles
Forums
Events
Blogs
Gallery
Store
Everything posted by Littlef
-
like with most things, a little maintenance goes a long ways.
-
Can you use regular acrylic paint on leather?
Littlef replied to DaleksInc's topic in How Do I Do That?
Thats good to know Fred. I expected that the leather formula probably had more flexibility. I'll have to try it sometime. -
acetone does a good job cleaning up barge. I learned if I take a q-tip ..or even a piece of paper towel, and wipe the inside of the lid, and the threads of the can with acetone, after every couple of uses, the lid doesn't stick anymore. Before that, it stuck once, and I had to use a pipe wrench to unscrew it.
-
One thing to add, which may be obvious. - Make sure your work surface is nice and clean, so you don't beat up the nice stamping while slicking the back. It might be worth laying down a soft t-shirt type material to prevent any scrapes or abrasions. As long as the top -stamped side is dry, it shouldn't affect the stamping. I'd probably be a little more gentle than normal, knowing that the other side is the nice pretty outward facing side.
-
For a spur, I'd check dimensions on my boots. I'd place the spur on my boot, and use a tailor's tape measure to verify the distances from post to post. (I actually plan to make some spur straps, maybe this fall, and will have to work that out.)
-
Vinegroon
Littlef replied to rleather's topic in Dyes, Antiques, Stains, Glues, Waxes, Finishes and Conditioners.
Baking soda neutralizes the acid, not the smell of vinegar. I don’t think there’s much you can do. It dissipates over time. I use it quite a bit, and I don’t even notice the smell of vinegar after a few weeks. I think if it bothers you, use a black dye instead of vinegar -
I use Barge, but the only place I've found it locally is at the Tandy Store. I also have some Aquilium 315, which works, but the original barge makes a significantly stronger bond. I'm getting close to the bottom of my can of Barge. Next time I go into Tandy, I plan on picking up a new can. If I couldn't get it locally, I'd probably try Weldwood, but as long as its available at Tandy, I'll keep using it.
-
My guess is that the powdery substance might be mold spores. I occasionally buy historic military rifle slings / ammo belts, etc. I see powdery mold spores on them from time to time. If its mold, it can be difficult to remove. The mold actually can have a root system that grows into the leather. you clean it off, and it grows back in a few weeks. I would first just try to clean it off with a 50-50 mixture of water and vinegar. I'd also test the leather first some place inconspicuous to make sure it wont affect the finish. You could also try the same thing with bleach, which is stronger..... but also might have an affect on the leather finish. Hardware stores have fungicides. If you try those and the mold keeps coming back, I'd try a specific fungicide. As always. Test it in an inconspicuous place before treating the whole case to make sure its not going to affect the leather color/shade/finish quality.
-
well done!! you did an awesome job replicating it. Packing Iron is such a great book.
-
I have not had that problem. I recommend trying it and checking to make sure it printed correctly.
-
not acrylic, but Tandy has a free patterns in their library. Spur Strap Pattern — Tandy Leather, Inc.
-
What I typically do, after I work out a pattern, is I use spray contact adhesive, and glue my pattern to posterboard, so its rigid. Then, I have a few different sized paper weights to help hold it down, in addition to holding it with my non-dominant hand, as I scribe around the pattern.
-
Definitely. That's a nice thing about vinegaroon. If you need to further clean up an edge after its dyed, the material is black all the way through, and not just the surface. Certainly helps with wear, down the line also.
-
Edge beveled size for various leather thicknesses
Littlef replied to Aventurine's topic in Leather Tools
The sizes really are not standardized. I've found that if you look at 5 different makers, each one numbers them sequentially, but the widths are different. I have found that typically the makers do give specs on their websites to give a little clarification. They normally give specs in how thick of leather for the tool, shown in in mm, versus showing it in Ounces. A quick google search should yield charts with corresponding thicknesses compared to ounces. Also - There's not a hard set rule on how much you have to bevel. In general, the thicker the leather, the wider the bevel, but it comes down to making a bevel, and determining if you like how it looks. I keep 3 bevels on hand. A skinny one, a medium one, and a larger one (I have no clue what the numbers are), and they cover pretty much anything I'm doing. -
a cheap option is to just get a kitchen cutting board from walmart.
-
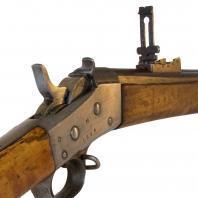
And now, for something completely different...
Littlef replied to TomE's topic in Saddle and Tack Accessory Items
That's sharp!! -
+1. I agree with Black Dragon. having the customer take a photo of their badge, above a ruler would be the simplest solution.
-
love it. that rig is a tank. My friend hunts and carries a scoped revolver in similar a chest sling. He really likes it. I've never heard a suppressed .45 fire. I bet you could make that nice and quiet.
-
Love those leaves. Great work.
-
Wow, I like that a lot chuck. Good looking blade and sheath
-
Lining Sheath: Rough or Slick Side In?
Littlef replied to Gosut's topic in Gun Holsters, Rifle Slings and Knife Sheathes
I have the same concerns about trying to carry a 10" blade inside your pants. That sounds uncomfortable, and very limiting in movement. I'd recommend putting the knife in your pants, lined up how you are intending on carrying it, and just walk around for a couple minutes. Try sitting in a chair, and try getting in and out of a car. I'm sure you could do it, but I don't think it'll be pleasant or comfortable. -
looks good! those straps look really secure.
-
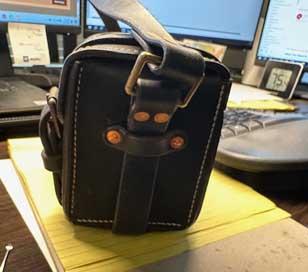
Dachshund bag
Littlef replied to Stetson912's topic in Purses, Wallets, Belts and Miscellaneous Pocket Items
Finished bag looks great, well done! -
glad you found it helpful. Post some photos when you’re done. I’d love to see the finished product.
-
If you're looping the straps underneath, I doubt they need to be glued all the way around. Use a heavy enough leather to support the weight, and secure the straps to the box to keep them from moving around. This leather box has a motorcycle battery in it, so its pretty heavy. Its really secure. The straps are just kept from moving around with the leather bands, but the straps themselves are not glued or stitched to the box itself.