Steelart999
Members-
Posts
30 -
Joined
-
Last visited
Content Type
Profiles
Forums
Events
Blogs
Gallery
Store
Everything posted by Steelart999
-
All I have to say is ... lovin' the honesty here !!! It is always hard to wade through all the "help" one gets when starting on new projects / hobbies. Thanks for being of real help; you've demonstrated that many, many times. I'm all about not learning everything the "hard" way, but relying on the generosity of those like yourself.
-
Again, newbie here, but I'd read/watched vids where glue between two layers was not/should not be applied along the stitch line in order to avoid pulling the glue up into the stitch line. And, to avoid gumming up the sewing machine. That was what I was attempting to ask about. It seems that you in fact do apply glue to the entire mating surfaces .
-
When you attach thin exotics to the 7/8 leather, do you glue the entire surface or just the area inside the stitch line? How to you edge finish the thin exotic leathers? Thanks
-
I like that overall design. I tend to want to use the natural patterns of exotics on the items I'm making, but, that said I've ended up buying a variety of texturing punches over the years ... without actually learning to use them properly. So, tooling designs and instruction would be a great addition for me.
-
Sweet !!! Very much my preferred style. I haven't felt the need to explore decorative "Dog" embellishments, but we had a cat once ... And we had some racoons that totally trashed our corn harvest two years in a row ... but then those I'd just feed to the dogs.
-
Excellent summary of "standard" parameters; thank you. I have done very little leather tooling as you've done (okay ...almost none), but have always wanted to make a set of gun belts with exotic overlays of elephant trunk, hippo, cape buffalo, rhino, shark, croc, stingray and possibly a big cat (yeah, right). You know, something along the lines of the "Big Five" for hunters, plus more. Obviously legal hides. I tend to have a bit of an unusual (and sometimes frowned upon) taste in materials. BUT ... I have a ways to go before I'll feel that my creations might be up to par for doing that.
-
I'm really liking that particular G19 holster (above). A better, snug fit to my body improves the ability to safely draw a handgun without yanking my pants around Yeah, that and a well made gun belt ... Okay, about gun belts. Is there a standard for the width, thickness, layer count, layout for gun belts? I realize that there are always going to differences and variations, but are there any "must-haves" regarding form/function?
-
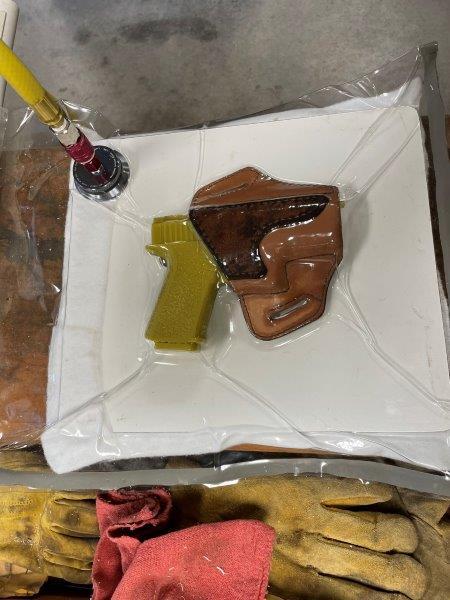
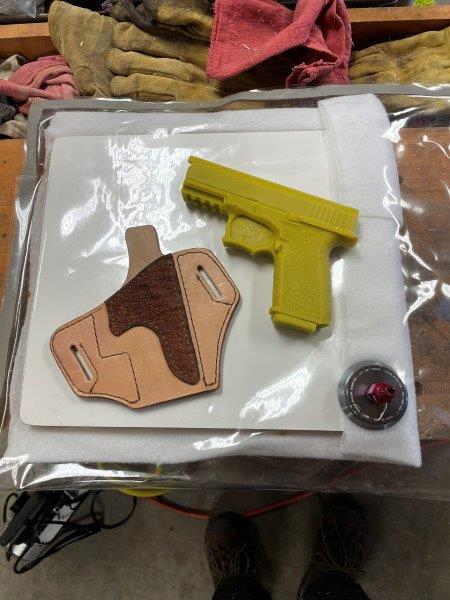
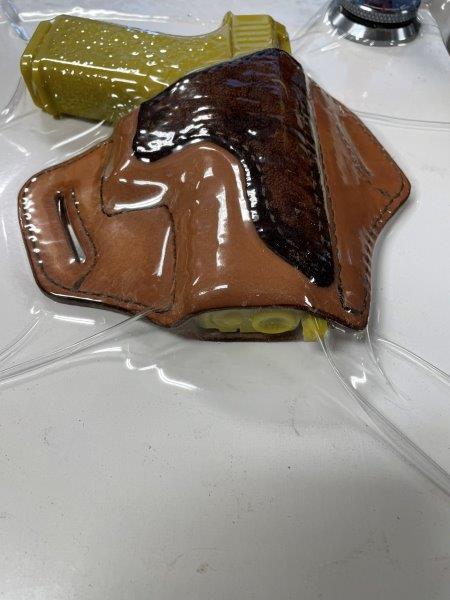
Ahhh ... I see what you did there. Was the holster wetted and then formed over a gun mold via pressure or vacuum? Or did the firearm fit the existing opening without molding? The more I thought about it, I decided to try doing a molding of the leather pattern (oversized) of just the front panel, then sewing to a properly profiled back panel and then sanding/shaping the both pieces of leather to the back panel pattern. Of course, I'd have to shape and finish the entry edge of the front panel before or after vacuum shaping it, but before sewing them together. With any luck, this weekend I may retry my Glock 19 pattern using the above plan to see if I can get a better finished product from my first attempt. I do recall your comment about the leather being a bit dry looking (i agree), so I'll do a better job of prep there too. Thanks!
-
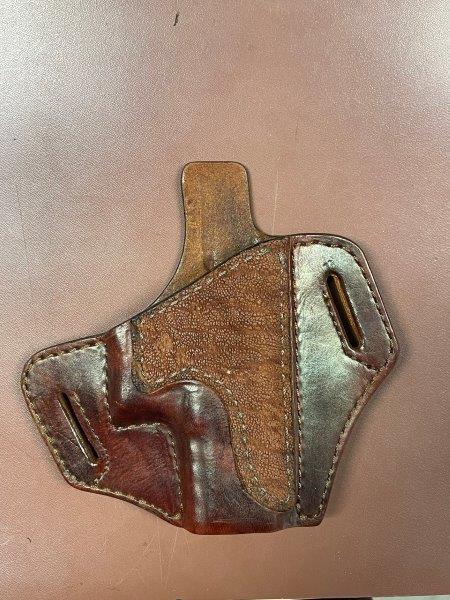
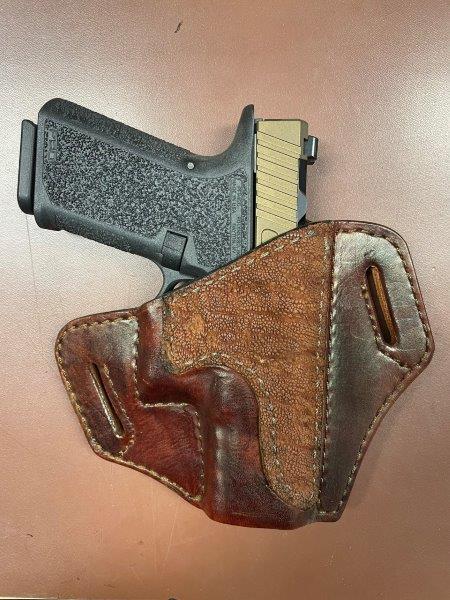
J, the shaded area you marked is not the slide, but rather a ridge added to the top of the slide, with the profile of the front sight, that stretches all the way to the back. This creates the channel in the leather for the sight when removing the handgun. I think that is much the same effect as what you were suggesting with the dowel ... right? This mold is of a Polymer80 version of the Glock 19 and was made for creating kydex holsters. It does have a few differences from a factory G19. The rail is that aggressive, but there is no reason for me not to fill it in with epoxy and smooth it out. I didn't have any issues with the leather forming into the rail, but it very like would with thinner leather. I dunno ... I'm still learning the properties of leather and wet leather. I DO like the looks of the "curved panel" holster you showed. I had thought to fabricate a block of wood, profiled into a curve, that I would mold the leather over inside the vacuum bag. Is that what you ended up doing?
-
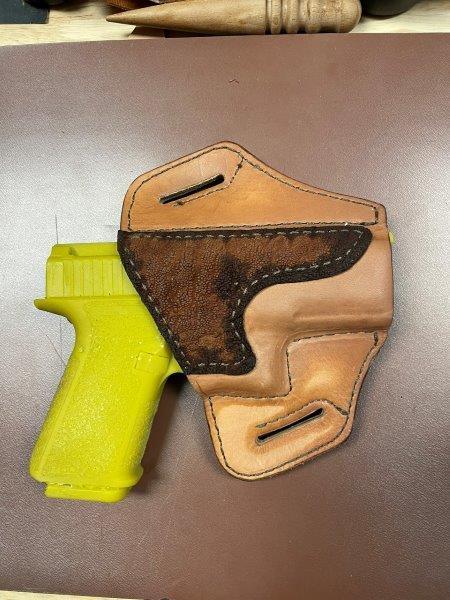
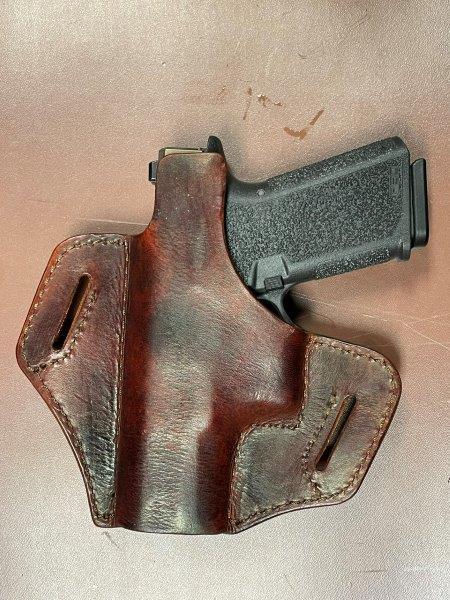
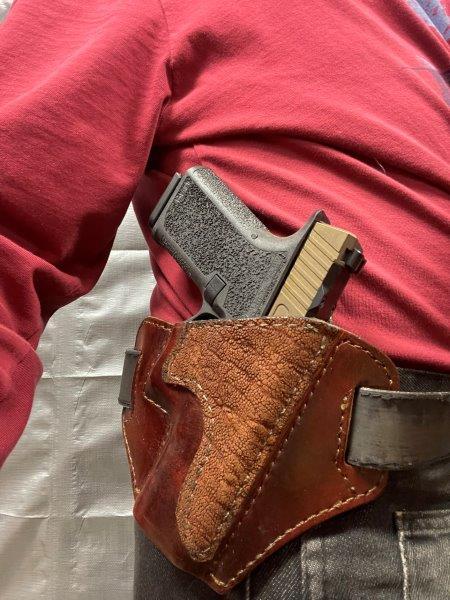
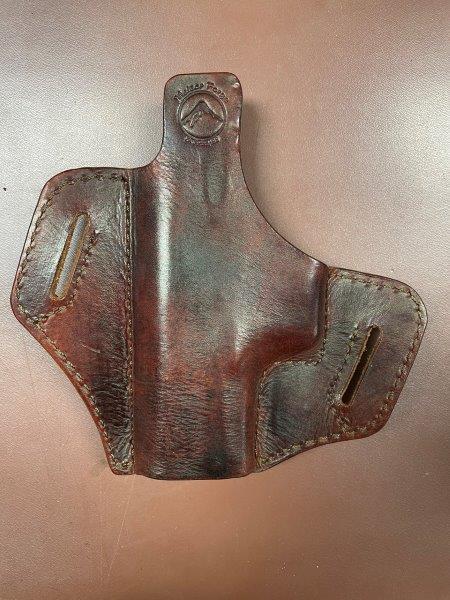
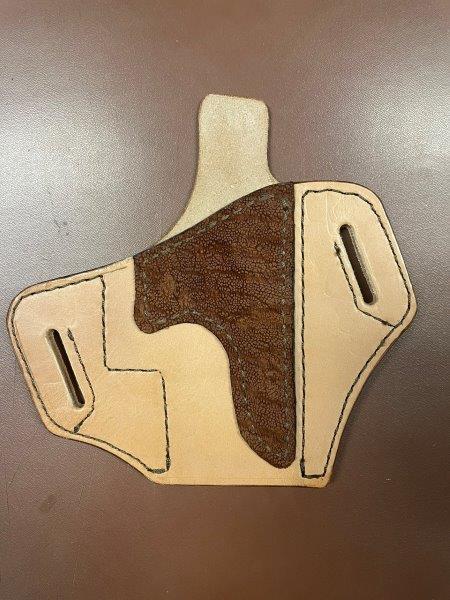
Geez ... I'm glad you like the design ... I'm a fan I did treat the leather with neatsfoot oil several days before dyeing, but I'm mostly working in a shop at below freezing ... could have affected my entire process I was using 277 thread on both a straight diamond shaped needle and the bobbin, but I'm obviously still learning how to adjust my machine appropriately. The gun holds well and will NOT fall out. Pull is just a little bit tight, but I feel that will ease a bit with use ... and warmer weather. My thought on the next one is to try to get a flatter backside. I'm going to do some vacuum forming of the frontside over the gun mold before sewing it onto the backside and then shaping the outer edge of the two when together. I'm hoping that I can sew close enough to the formed edge using a left-side foot on my machine. Alternately, I'll just loosen up the opening by moving the stitch lines a bit. That is elephant on the front. I've collected way too much exotic leathers over the years with the intent of doing leather sheaths for my knives. I only ended up doing a few, but have just gotten the itch again ... so here I am. This is FUN!!!
-
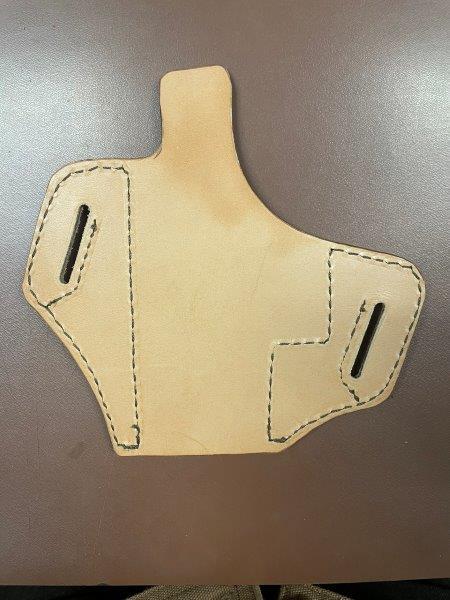
I just completed my first pancake holster using a JLS Leather pattern. This was my second piece using my "new" Cowboy Outlaw on two layers of 7/8-oz Herman Oak with an elephant overlay. I built a vacuum press which worked fairly well. The gun mold was a P80 Glock 19 and it was a bit tough to get it to stretch the leather enough to fit in ... especially around the trigger area. Tight! I definitely messed up the leather surface through all my handling, so that is one area for me to improve. Edging is just so-so ... another improvement area. Any critique is appreciated.
-
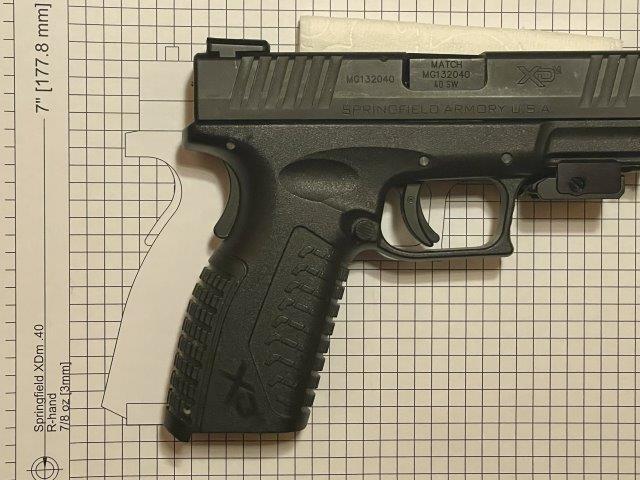
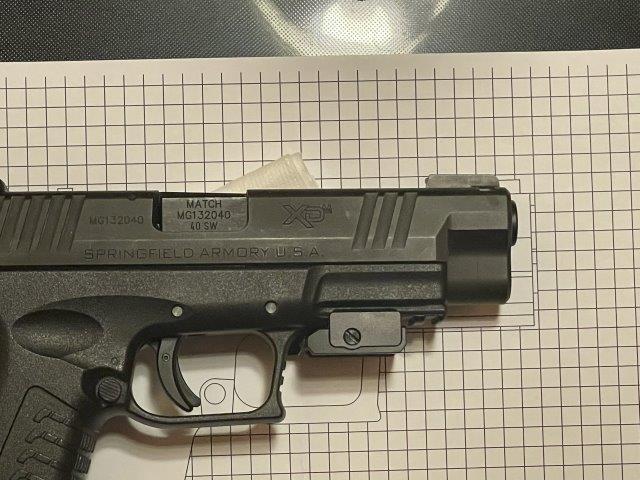
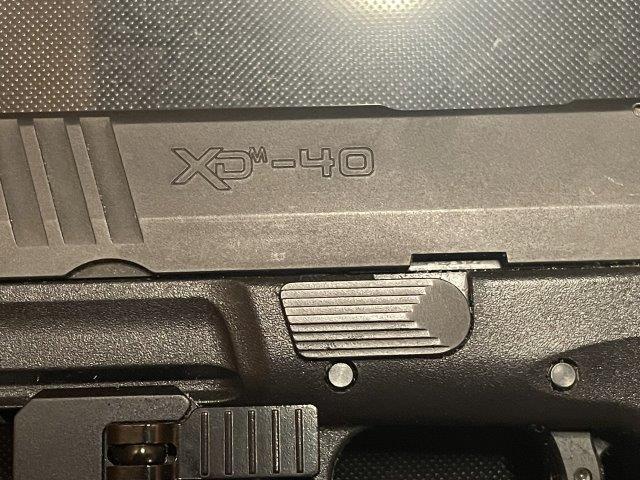
Yeah, 4.5 barrel and I have a light attachment that I removed while taking the pictures. Good job on the drawing; Matched extremely well.
-
It looks like all the dimensions are good. My XDM-40 has a longer barrel, but other than that ... looks good. Pictures below were taken by iPhone from about 4-foot, so parallax is an issue that makes it look like the gun is larger in some images, but it is not. It's an artifact of taking a picture from a fairly close distance.
-
I'll check against my XDM .40 later this morning and get back to you.
-
Thanks guys. I did practice quite a bit on double layers of 9/10 oz. without any problems. I went through all the possible adjustments to see how they affected the stitching just to get as familiar as possible with the Cowboy machine. The 1/2" welt, when I was just trying to hold it in place by hand, was the killer. Eventually, I did get the machine to stitch through all the layers (after bonding them all together) ... until my bobbin ran out of thread. Note to self: Check the dang bobbing before starting any project ... sigh. I'm working on a pancake holster now and I'm definitely getting a bunch of the steps out of sequence. I learn a lot on my first attempts at just about everything.
-
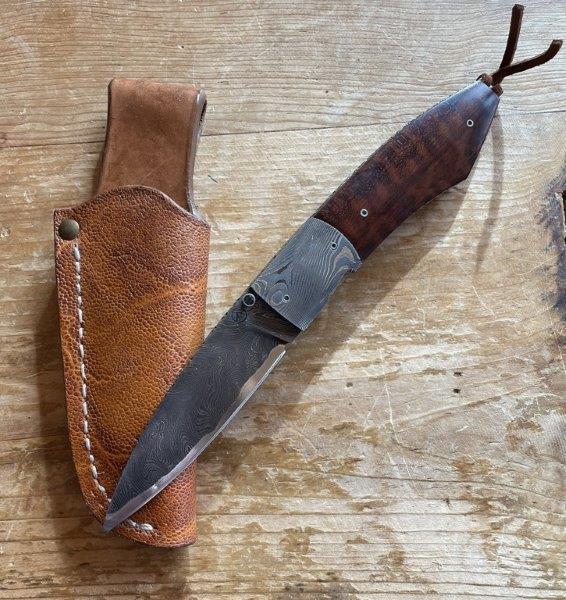
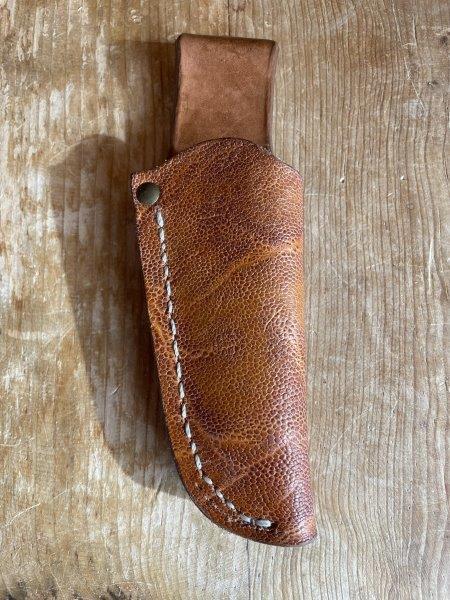
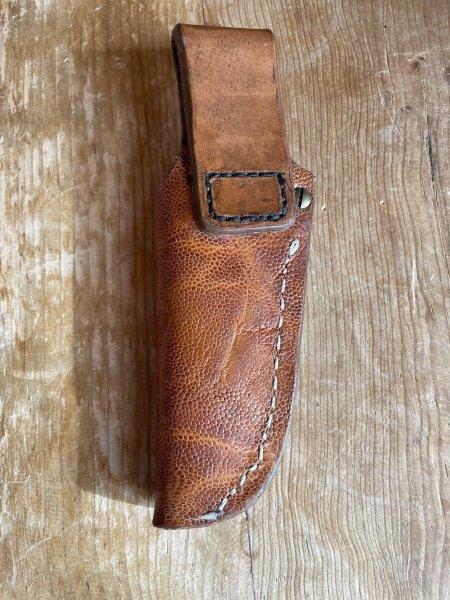
My first shot at using a Cowboy Outlaw that I just purchased. Well ... I broke quite a few needles before working out that I needed to bond the welt in first instead of trying to just hold everything together by hand and holding the alignment with a couple of needles. Then, on my last stitch, after getting the Outlaw working, the needle broke again leaving the broken tip jammed inside the welt ... sigh. It wasn't until a couple of days later that I realized that my bobbin had run out of thread and forced the needle to jam/break. The bobbin thread was looped and tied solidly to the bobbin. I hadn't changed anything after receiving the Outlaw and that was how the bobbin had been threaded. I was able to "sorta" backstitch the last stitch by hand and then added a Chicago Bolt to finalize the finish. Wow ... quite the learning experience. I had originally started this pouch by hand stitching. Thin, tan elephant overlay on about 7/8 oz. cow leather. Although I'm embarrassed to show this thing from all sides, I guess I need to if I want to get any feedback and learn more of what I "should" be doing. Messed up finish on the leather by too much handling and experimenting Yeah ... messed up the backside stitching while trying to learn the Cowboy Outlaw machine and breaking a bunch of needles The folding knife I made for my brother many years ago. Meteorite Damascus blade in a San-mai format. Damascus bolster and snakewood handle. Thumb-bob inlay and backspine inlay are stony meteorite. Titanium liners are fully fileworked. Knife in the belt pouch. There wasn't quite as much room as originally fabricated. I had to narrow and move the welt after screwing it up with all the needle issues.
-
Dwight, I have a small lathe and thought about going down this route, but then most of the shaft diameters were close to the head diameter that I wanted . Thanks ChiefJason, they do have a size that I should be able to use just as Dwight noted. I was being "lazy" and looking for something stock, but that was a bit silly of me considering all the time I put into making knives and now leather "sheaths"
-
I'm working on a folding knife pouch and would like to locate some Chicago Screws (any design) with a head size of 3/16" (5mm) as part of the assembly. So far, the smallest head size I can locate is 1/4" (7-8mm). Does anyone know of a source for ones that small? Are there any other aesthetically pleasing fasteners of that size? I'd prefer an brass or antiqued brass finish.
-
I have a Cowboy Outlaw coming which includes some 277 thread. I've repeated seen the suggestion to use 207 thread on the bobbin. Is that a good option for this machine for sewing holsters, belts and sheaths, or should I just move forward with just the 277?
-
There are lots of listing for pine rosin on eBay. https://www.ebay.com/sch/i.html?_from=R40&_trksid=p2499334.m570.l1313&_nkw=pine+(resin%2C+rosin%2C+sap)&_sacat=67659
-
@picker77 If this has not been sold, I'd be interested in discussing this with you. Please PM me. Thanks Burkhardt ... us old(er) guys are still learnin'
-
If this has not been sold, I'd be interested in discussing this with you. Please PM me.
-
Jeff, thank you for that feedback. I guess I've been leaning towards the concept of not cutting the surface layer, although what little I've done was with a groover. Do you recall the make of the creasers you've preferred?
-
Maybe not the "right" section for this question ... I've read multiple posts about using a creaser instead of a groover for stitch lines to avoid cutting off the top layer of the leather. What is the "typical" spacing for a creaser (or groover for that matter) on holsters/sheaths/belts, i.e., the offset from the edge? Any leads on the sources for creasers? For the amount of pieces I'll likely create, I assume that a manual (vs electric) creaser is suitable. For that matter, I'm a metal worker (knifemaker), so I can probably make one if I knew the proper configuration/profile. Thanks to all


