Members Icutcows2 Posted July 21, 2013 Members Report Posted July 21, 2013 Thought I'd post these chinks to see what kind of feed back everyone miht have. Thanks for any and all comments Quote
Members Averya Posted July 21, 2013 Members Report Posted July 21, 2013 Stunning...absolutely stunning. I'm about to attempt my first pair of chinks. Can you tell me what weight and type of leather you used? I love the fringe detail....would also appreciate any hints as to how to do that,.....I do not like the plain cut in look. It looks so much more professionally finished when the fringe is sewn on. Gorgeous! Thanks for sharing.....Avery Quote
Members sheathman Posted July 22, 2013 Members Report Posted July 22, 2013 Supper nice. Real neat work. Lonnie Quote
rickybobby Posted July 22, 2013 Report Posted July 22, 2013 Nice work! I like the front strap, it is a unique feature. Your tooling is excellent too!! Quote Rick
Members Icutcows2 Posted July 22, 2013 Author Members Report Posted July 22, 2013 Avery, thank you so much for the compliments. Just wanted to reply real quick and let you know I can answer your questions later today, got an early appointment so I'm rushing this morning. I'll have plenty of time this evening. Cody Thanks, everyone for your responces. When you stay in the shop all the time it's hard to know how your doing sometimes. Quote
Members Averya Posted July 22, 2013 Members Report Posted July 22, 2013 Hi Cody: I will look forward to your reply.....and appreciate your willingness to share info. Your work is amazing!!!!! Avery Quote
Members Icutcows2 Posted July 23, 2013 Author Members Report Posted July 23, 2013 Hi Avery, The leather I used for those chinks was glovetan cowsides from The Hide House. It was cream color and is a 5 oz that is a soft temper. I know these don't really look like you could go build fence in them but the leather is soft but yet pretty tuff. The fringe is the same cream color glovetan on the top and purple cowside leather again from The Hide House as the 2nd layer. The purple is a 3-3 1/2 oz weight. I use this a lot for all types of chaps and chinks and a lot for rodeo chaps. It comes in over 40 colors so there is all kinds of possibilities. When I did the fringe I cut the leather from my pattern but added 1 1/8" to overlap on to the body of the chink for the purple. This would allow for pinking the edge, my pinking punch is 5/16". After pinking from the top of the pinked scalloped it will overlap about 1 1/16"on the body of the chink. Next I cut the cream and added 7/8" for the overlap, then pinked the edge which left 3/4" from the top of the scallop to overlap on the body. I offset the purple so the middle of each purple scallop was between each cream scallop. I put a bead of barge cement on the grain side below the scallops of the purple and on the flesh side of the cream to help hold things in place. Also on the flesh side I used some masking tape in a few places to add in holding things together. After both fringe pieces are glued together, and make sure you don't get glue below a line where the body of the chink is so it doesn't show when completed. I then put the spots on the cream scallops. This actually bonds the cream to the purple. Do all the spots on each scallop of the cream, the prongs on the spots will go through both layers and is bent inward to hold the spot onto the leather. I have a Standard Spot Setter so that speeds up the process, but it still takes a while. The spots I used were 3/16" Sunburst. When all the spots are on then the two pieces of fringe material are put together very well. Then put some glue on the egde of the body of the chink and on the flesh side of the purple, again make sure you don't put glue below the line marked as the edge of the body. Put the two layers of fringe material onto the body of the chink. Again if you need some added holding use some masking tape in a few places to help hold things together. It will peel off pretty easy. I then sewed both fringe pieces onto the body of the chink. Everything is gonna stay put now. Next I put the spots on each scallop of the purple. After those were all on now it's time to cut the fringe. I cut both layers at the same time. This insures each sting of purple and cream are the same width. I have a wooden straight edge I made that has one end cut at a very sharp angle, it's pretty close to the angle that I cut each string but this will change as you get towards the bottom of the leg. After all the strings were cut I did a bleed knot on each string, I started off using a knife but it was hard to get the cuts the right length so I got a stubby straight screw driver and sharpened the edge. I could then just tap the head of the screw driver with a small mallet and get slits the correct length every time. Needless to say doing all those bleed knots was a slow process but it's not something you see every day. I was beginning to think I had lost my mind by the time I got both legs done. Hope this helps explain things, and I it's fairly easy to understand. If there's any part I confused you on just ask away. I have 3 flat bed sewing machines I do chaps and chinks on, I normally use size 69 thread with about 9-10 stitches per inch. The tooled pieces I sewed on my Adler cylinder arm machine with size 138 thread. Since the tooled pieces on top of the glovetan leather is a little on the thicker side it was just easier to sew it on the Adler. I did cut a couple of pieces about 4 inches long and practiced putting the two fringe pieces together before I actually cut the leather for those chinks, just wanted to work out any bugs before I messed up on the real thing. If you need any pictures of anything just let me know. Also you can look on my web site for ideas as well. It's Codyscustomsaddlery.com I have a facebook page too thats Cody's Custom Saddlery. The web site is pretty new and still has pages to be added to it but I know there are some chaps and chinks on it. The facebook page has them as well. Good luck and let me know if I can help any more. Cody Quote
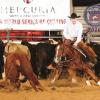
Members Icutcows2 Posted July 23, 2013 Author Members Report Posted July 23, 2013 Here's some twisted fringe ones. Quote
Members Averya Posted July 23, 2013 Members Report Posted July 23, 2013 Wow Cody!!!!!! Thank you SOOOO much for the detailed instructions. I will print them out and try to follow along. I ordered leather from the Hide House, but they recommended what they call Butterball. Guess I will experiment with the first pair using that and then order some of the glovetan. I usually make horse tack, but am anxious to do chinks and chaps. It will be a learning curve for sure. However, your instructions will be invaluable. I will certainly check out your website. You work is stunning and something to aspire to. Love the twisted fringe chaps too. Again, I can't thank you enough for your help and willingness to share your techniques. Avery Quote
Members Icutcows2 Posted July 23, 2013 Author Members Report Posted July 23, 2013 Hi Avery, I've used the Butterball a lot especially for Cutters, batwings and shotguns. It's lighter weight and buttery soft. I have also used it for chinks that were just going to be used for riding. You can get a good fit that is a little forgiving with it. I taught the chap class at Sheridan several times and also Reno and Rome. I did use some of the Butterball in the class a few times and everyone that worked with it liked it. If you need any pictures to help explain anything just let me know, I'm making some pretty much most of the time so it's no problem to take a picture. I am self taught so I think I've made about every mistake imaginable so I also figured out how to fix them. You can also call anytime you would need to, sometimes writing things are more difficult to understand than talking. But I'll clue you, I'm from Texas so I sound funny, or at least that's what they tell me here. Good luck with the chaps ! Cody Quote


Recommended Posts
Join the conversation
You can post now and register later. If you have an account, sign in now to post with your account.
Note: Your post will require moderator approval before it will be visible.