MadMorbius Report post Posted November 23, 2013 (edited) Hey all, on to the next chapter of the "Rob sets up his expensive machine" saga. I just installed the stirrup plate for the Techsew 5100, and I can't seem to get the tension set right. No matter how much I tighten the top tension, I still have loops on the bottom. I dread adjusting the bobbin tension but am I correct in assuming the next step here is to loosen it up? I'm sort of concerned at the amount of adjustment required to dial this in...and hoping I'll be able to use it for multiple purposes once I get i set up and not have to switch the plates out too frequently (feed dog removal, bobbin and thread adjustments....ugh). Thanks - Rob Edited November 23, 2013 by MadMorbius Quote Share this post Link to post Share on other sites
Geneva Report post Posted November 23, 2013 If you still have loops after tightening the top as far as it will go you need to tighten the bottom tension not loosen it. Tighten the shuttle spring tension 1/4 to 1/2 turn and check stitching for loops. Quote Share this post Link to post Share on other sites
CowboyBob Report post Posted November 23, 2013 When you have a problem like this,you might want to double check your needle threading before you start in adjusting alot.Once in a while I've had people forgoet to go around the 2nd tension 1 & 1/2x & that will do it.Or the thread migt of jumped out of the top tension. Quote Share this post Link to post Share on other sites
MadMorbius Report post Posted November 23, 2013 I'll check but I believe it's threaded properly. The only reason I made any adjustments is due to the installation of the stirrup plate. Quote Share this post Link to post Share on other sites
Wizcrafts Report post Posted November 23, 2013 The stirrup late raises the point of the the work, but not exactly in a linear fashion. The real difference in the thickness of the plate itself. If the original plate is 3/32" and the stirrup is 5/32", loosen the bobbin tension, or tighten the overall top tension to raise the knots. OR, increase the needle by one size. A bigger hole allows the knots to float higher. Quote Share this post Link to post Share on other sites
MadMorbius Report post Posted November 24, 2013 The bottom thread is basically straight along the bottom of the work, not tucked up into the work at all. I have one response that suggest tightening bobin tension, another that suggests loosening. Looks like either way I'm mucking with it. Will report back. Quote Share this post Link to post Share on other sites
Wizcrafts Report post Posted November 24, 2013 Would you please post a close up photo of the thread on the bottom, with the stirrup plate installed? Additionally, please post a photo showing how you have threaded the top thread. Take it head on, from the left side of the machine, where the disks can be seen. Also, state the thread sizes and needle size. Quote Share this post Link to post Share on other sites
MadMorbius Report post Posted November 24, 2013 Hi Wiz, thanks. I'm using 207 thread with a 180 needle I think, I can't remember for sure but will verify shortly (once I can find my magnifying glass). I don't have anything smaller or bigger in the color I'm working with but if required I can fill a bobbin with 138 with another color to test the smaller thread on the bottom option. Pics will be up shortly. Very much appreciate your assistance. Quote Share this post Link to post Share on other sites
Wizcrafts Report post Posted November 24, 2013 Using #138 in the bobbin would confirm or deny the need for a larger needle, depending on the outcome. If #138 bottom thread gets properly pulled into the holes, you needed to move up 1 needle size. Note: this only applies to other leather that has the same density on the bottom. If you change to a softer bottom layer, the existing needle may suffice. FYI: I usually use a #180/24 needle with 207/207, on my CB4500. I sometimes even go down to a #23 if the work is only 7-8 ounces thick and bridle leather soft. I use my stirrup and holster plates on a regular basis and only have to either loosen the bobbin, or tighten the top tension to compensate. Quote Share this post Link to post Share on other sites
MadMorbius Report post Posted November 24, 2013 (edited) HI Wiz, hoping these photos are sufficient. Here's the view from the right side of the machine: Here's the back, looking at the tension disks: Here's the underside of a piece of 10oz leather I use to test with: I confirmed the needle size is 180. EDIT - FYI noticed the thread was off the side tension disk when I took this shot...fixed that and testing now. Edited November 24, 2013 by MadMorbius Quote Share this post Link to post Share on other sites
MadMorbius Report post Posted November 24, 2013 It seems to have gotten much better with the above adjustment and further tightening of the top tension but I believe I've hit the point where it's not getting any better now regardless of what I do...diminshing returns as it were. Quote Share this post Link to post Share on other sites
Wizcrafts Report post Posted November 24, 2013 Back off the bobbin tension spring until the thread flows smoothly with about half the current force. Quote Share this post Link to post Share on other sites
MadMorbius Report post Posted November 24, 2013 Backed it way off..and it doesn't seem to be making any measurable difference to how the stitch is coming out a this stage. I'm getting very, very frustrated with this process Quote Share this post Link to post Share on other sites
Wizcrafts Report post Posted November 24, 2013 Are you using a leather point needle? Quote Share this post Link to post Share on other sites
MadMorbius Report post Posted November 24, 2013 (edited) Gave up on the stirrup plate and tried to revert. Now I'm missing sitches. I changed the needle and adjusted the tension, re-threaded the machine....I'm about ready to jump out a window. EDIT - Note to self and others reading....make sure the needle is *completely* inserted before freaking out and thinking you have a timing problem. Time to walk away from this for awhile...back to mostly normal operation for now. Wondering if my stirrup plate issue was also related to the needle being improperly reinserted after I pulled it out to check the size Will try again later. Edited November 24, 2013 by MadMorbius Quote Share this post Link to post Share on other sites
MadMorbius Report post Posted November 24, 2013 On a side note, while we're dissassembling and reasembling stuff...what constitutes the "correct" height for the feed dogs when one reinstalls them? Ron, Wiz, all of you...thanks so much. You've been very patient and it's greatly appreciated. Quote Share this post Link to post Share on other sites
Wizcrafts Report post Posted November 25, 2013 According to the manual, the feed dog teeth should be about 1 or 1.2 mm above the plane of the throat plate, at their highest point. However.....Some of us set them flush with the top of the throat plate, for mystical reasons, known only to Mr. Peabody and Sherman. Quote Share this post Link to post Share on other sites
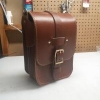
MadMorbius Report post Posted November 25, 2013 (edited) Ok, that's about where I put it..In my trial and error I found that having them higher seems to add a bit much pressure on the work and may actually keep it from moving forward consistently. I'm going to try installing the stirrup plate again tonight...feeling pretty rediculous about going through all that yesterday only to find that the needle wasn't fully inserted...AFTER I gave up and reinstalled the normal plate. We'll see... The type of work I intend to do with it is the same as pictured in my profile picture. I can't move the center gusset around the machine to stitch around that curve with the formed gussets on either side of the seam, it winds up butting against the bottom of the machine and inhibiting the feed. Really hoping this plate resolves that and is worth the effort Edited November 25, 2013 by MadMorbius Quote Share this post Link to post Share on other sites
Techsew Ron Report post Posted November 26, 2013 Hi Rob, check your email, we did some troubleshooting for you and sent instructions. Ron Quote Share this post Link to post Share on other sites
Wizcrafts Report post Posted November 26, 2013 Ok, that's about where I put it..In my trial and error I found that having them higher seems to add a bit much pressure on the work and may actually keep it from moving forward consistently. I'm going to try installing the stirrup plate again tonight...feeling pretty rediculous about going through all that yesterday only to find that the needle wasn't fully inserted...AFTER I gave up and reinstalled the normal plate. We'll see... The type of work I intend to do with it is the same as pictured in my profile picture. I can't move the center gusset around the machine to stitch around that curve with the formed gussets on either side of the seam, it winds up butting against the bottom of the machine and inhibiting the feed. Really hoping this plate resolves that and is worth the effort The stirrup plate is what you need to sew curved gussets. Once you will get past the thread loop position problems, you'll laugh at this beginner's speed bump. Have you ordered some leather point needles one size larger? This may solve the loops on the bottom problem. Did you know that leather points are available in more than one shape? I use mostly type S, but also have some triangular "diamond" points on hand. They produce a different top and bottom stitch. One more thing: you might try adding some more top pressure to the feet. If the leather is not absolutely pressed down against the stirrup plate it will usually have bad results on the bottom. Quote Share this post Link to post Share on other sites
MadMorbius Report post Posted November 26, 2013 I do have some 200 needles, I will give that a try as well. The gusset on that piece is about 3/8 inch and I'm using the left side pressor foot. Can't wait to see some roi... Quote Share this post Link to post Share on other sites
MadMorbius Report post Posted December 2, 2013 Hey folks, here's where we are. After all the suggestions above, I finally got to a point where machine makes a decent stitch (mostly... more on that in a minute). I finally wind up Increasing the needle size to a 200, and going through two holes on the thread post, which allowed me to actually back off the tension knobs and pull the knot down (where it was previously way too low). The stitch seems OK when I do a test stitch. When I try to do anything on the actual production leather ( both test and final are 8oz WC bridle) ie the gusset on a formed piece, it seems to miss stitches randomly. Banging my head here...so close. Quote Share this post Link to post Share on other sites
MadMorbius Report post Posted December 3, 2013 And now my thead is fraying and snapping occaisonally as well...and I've started drinking to cope with this expensive pain in the ass. Quote Share this post Link to post Share on other sites
MadMorbius Report post Posted December 12, 2013 (edited) Ok, it's been awhile since I posted here. I've had varying degrees of success, and while troubleshooting with Mike from Raphael, I think we've identified part of the problem. It appears that when the stirrup plate is on, the wedge that is supposed to open and close the primary tensioner (attached to the long black arm that attaches to the pedal lift mechanism) doesn't move out from between the disks. With the regular plate, it seems to move out of the way...so in other words, it makes no difference how much tension I put on the top thread because the wedge is always holding the discs open. Note the placement of the wedge in the photo below - this is where it stays. It doesn't move under machine operation, and will only disengage when I step down on the lifter pedal or lower the manual lift lever: Note that the earlier problem with the outer presser foot failing to descend all the way down has returned; I definitely believe these are related issues. I opened up the side cover and took some video of the machine cycling. Please, someone tell me I'm not crazy and there's in fact something wrong here and not just a user failure... Oh...did I mention the iron filings in the bottom of the compartment? Pretty sure that isn't supposed to be there...And those two little cams attached to the manual lifter bar and the lifter mechanism...I don't suppose those are supposed to move independantly of each other? Coz they are... Videos are uploading, I'll post links once they're up. Edited December 12, 2013 by MadMorbius Quote Share this post Link to post Share on other sites
MadMorbius Report post Posted December 12, 2013 OK, here's a short video I put together. Quote Share this post Link to post Share on other sites