All Activity
- Past hour
-

Hand-cast solid Brass Buckles from a small foundry
Origibelts replied to Origibelts's topic in Suppliers
@DieselTech Hi DieselTech, Thanks for pointing that out. The prong and the joint where it nests in the frame is definitely the area I’ve focused most on reinforcing during casting and finishing. I’ve been testing different thicknesses and alloys to make sure that part stands up to stress, since I know that’s where buckles usually fail. Best, John -
Hand-cast solid Brass Buckles from a small foundry
Origibelts replied to Origibelts's topic in Suppliers
@Mulesaw Hi Jonas, Thanks so much for the thoughtful feedback — that’s exactly the kind of perspective I was hoping to hear. I’m glad you noticed the little “dip” for the prong; that was something I experimented with to make the buckle both more solid and a bit easier to use. I’ll definitely take your points on board: strength and solidity first, then style and sizing in the 1.25" and 1.5" range. Roller and center bar buckles are already on my sketch pad, so it’s encouraging to hear those are useful for your work as well. And I hear you on finish — a straightforward brass look is also my preference, no plating or “bling.” It keeps the buckle honest, and it develops a patina that works well with leather over time. Really appreciate you taking the time to share your view. It helps me make sure what I produce is actually useful to makers like you. Best, John -
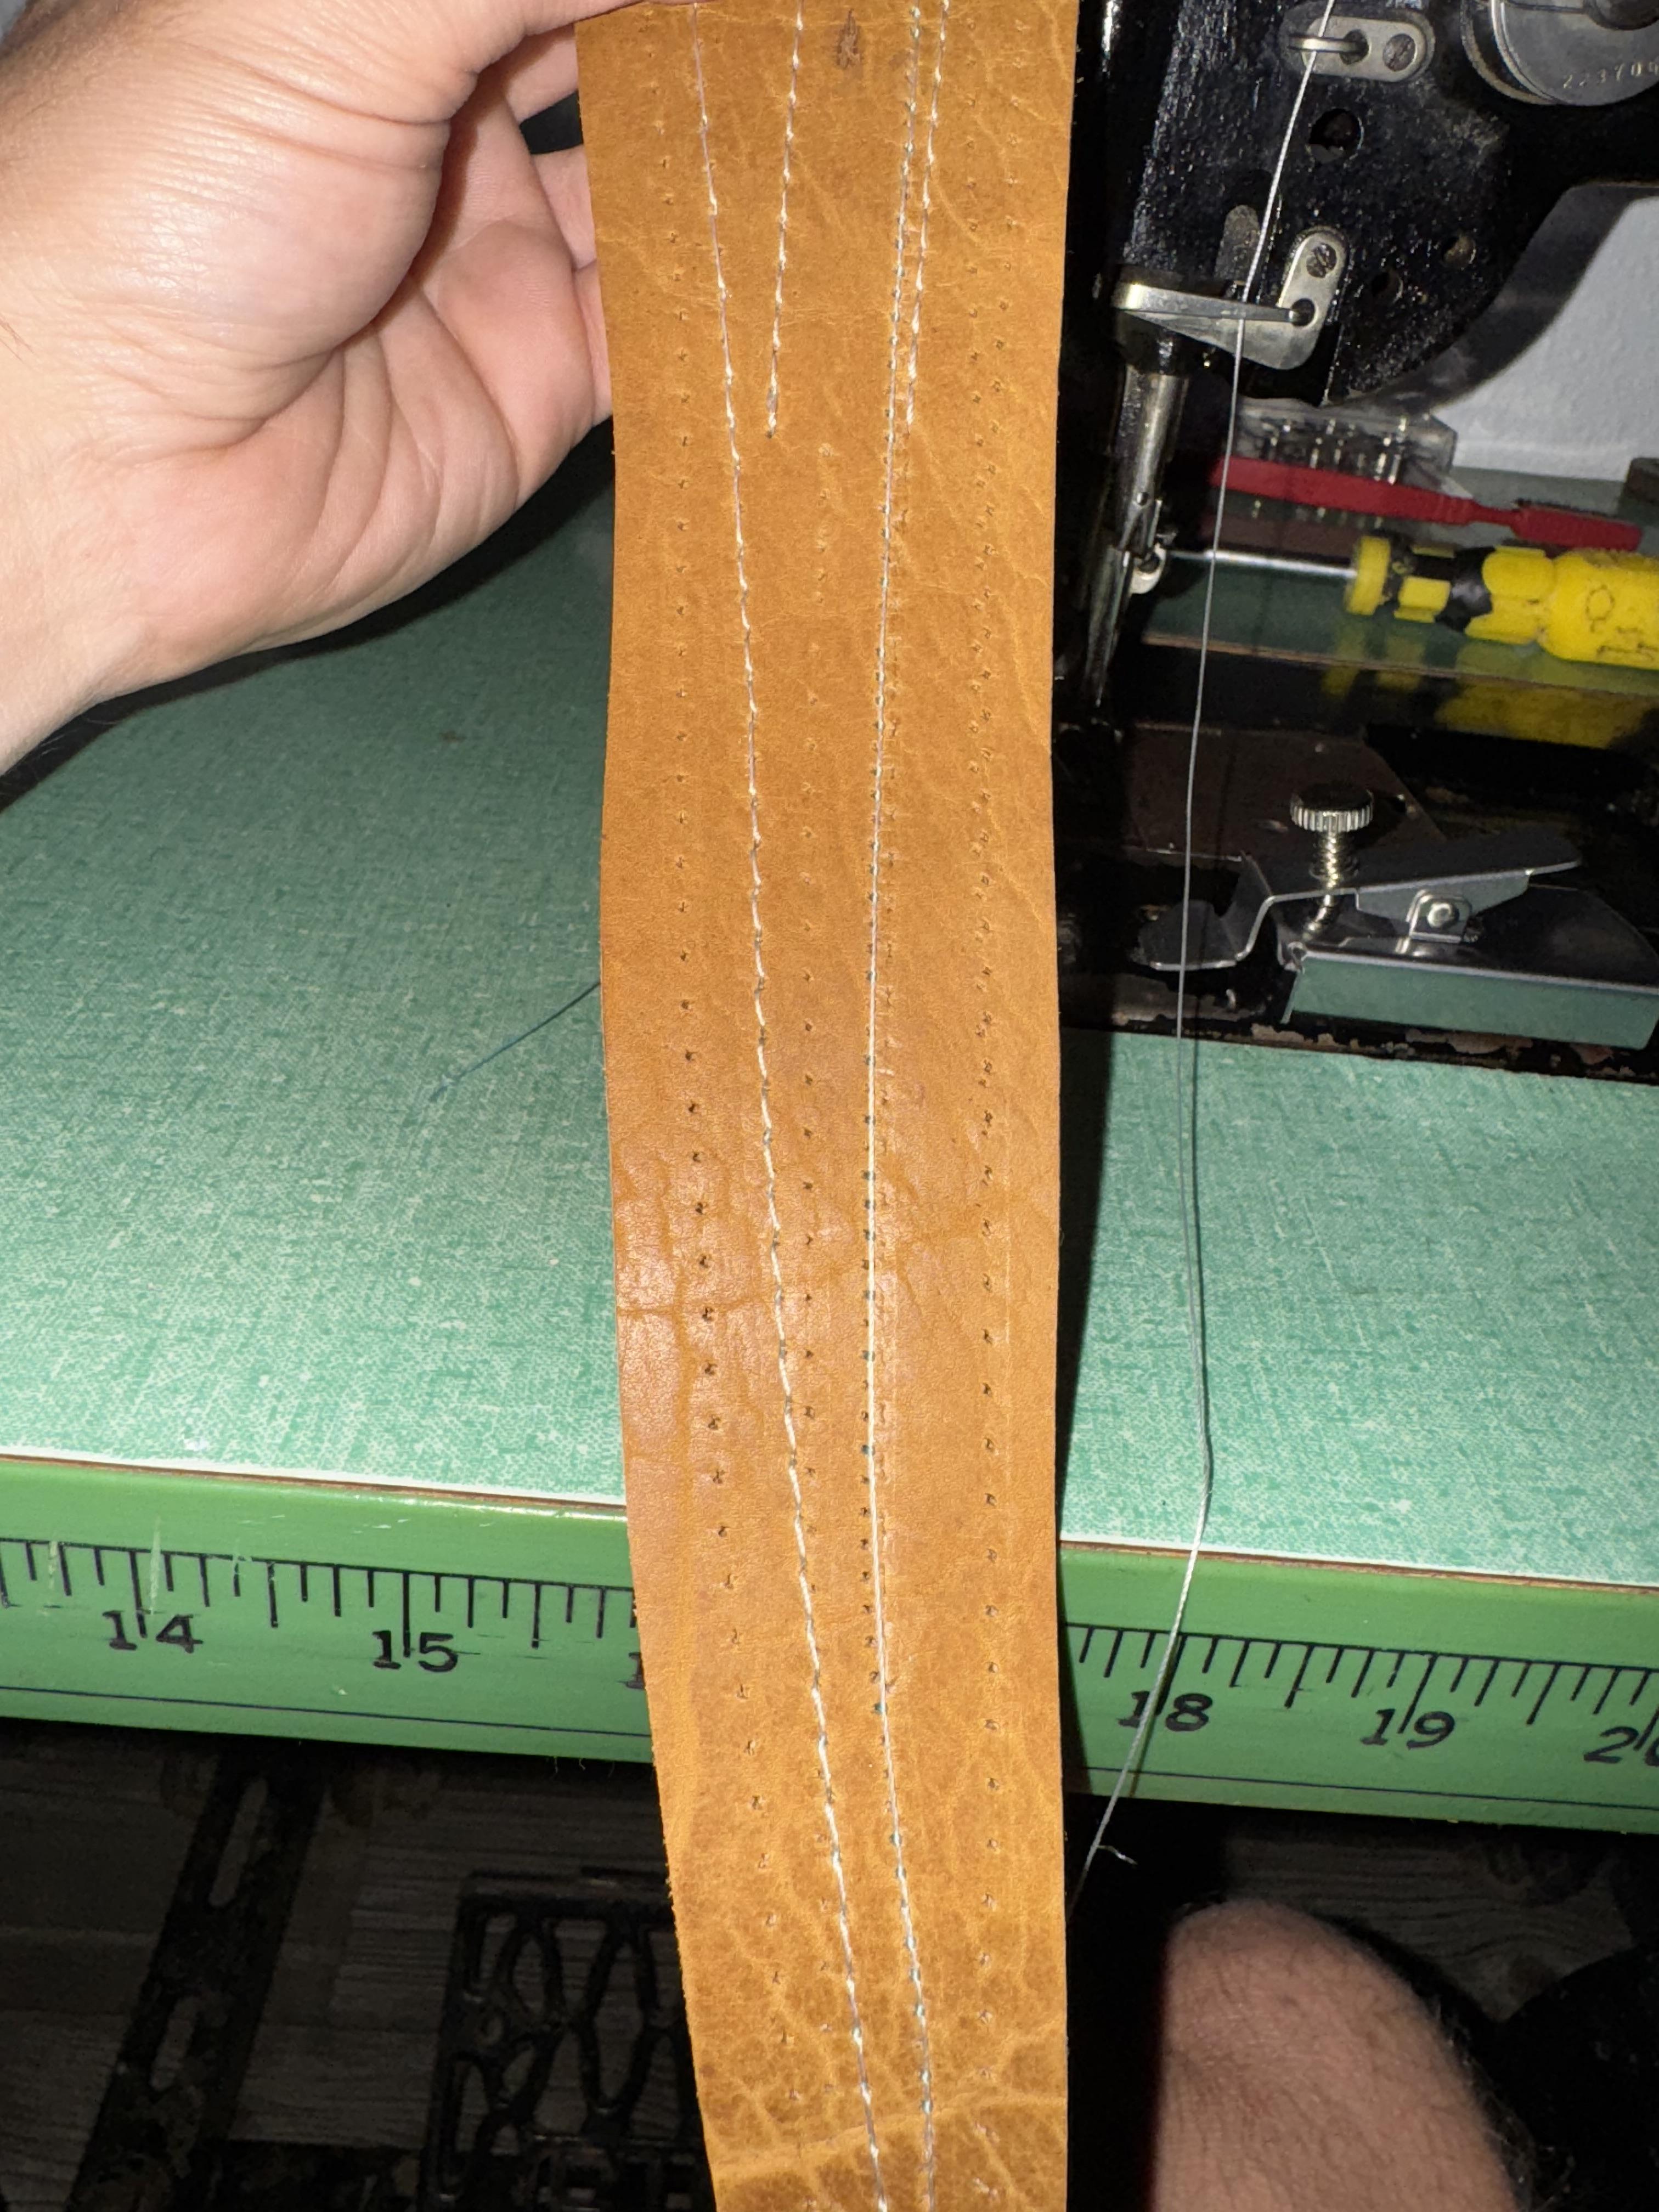
When you turn the work, first bury the needle and raise it up a quarter inch. Raise the presser foot and turn the material. This allows the hook to catch the bobbin thread and prevent skipped stitches. Same thing with turning a corner. To begin a stitch line, start about 3 stitches down the line and sew back to where you wanted to start. Turn around and go in the direction you wanted to in the first place. At the end, you can just turn around and sew back 3 stitches. If you begin at the start, sew 3 ahead, then turn around and sew back to the beginning and THEN turn around yet again, sewing in the "right" direction, you have gone over the first 3 stitches 3 times! Way too many stitches in leather. Practice, practice, practice ...
-
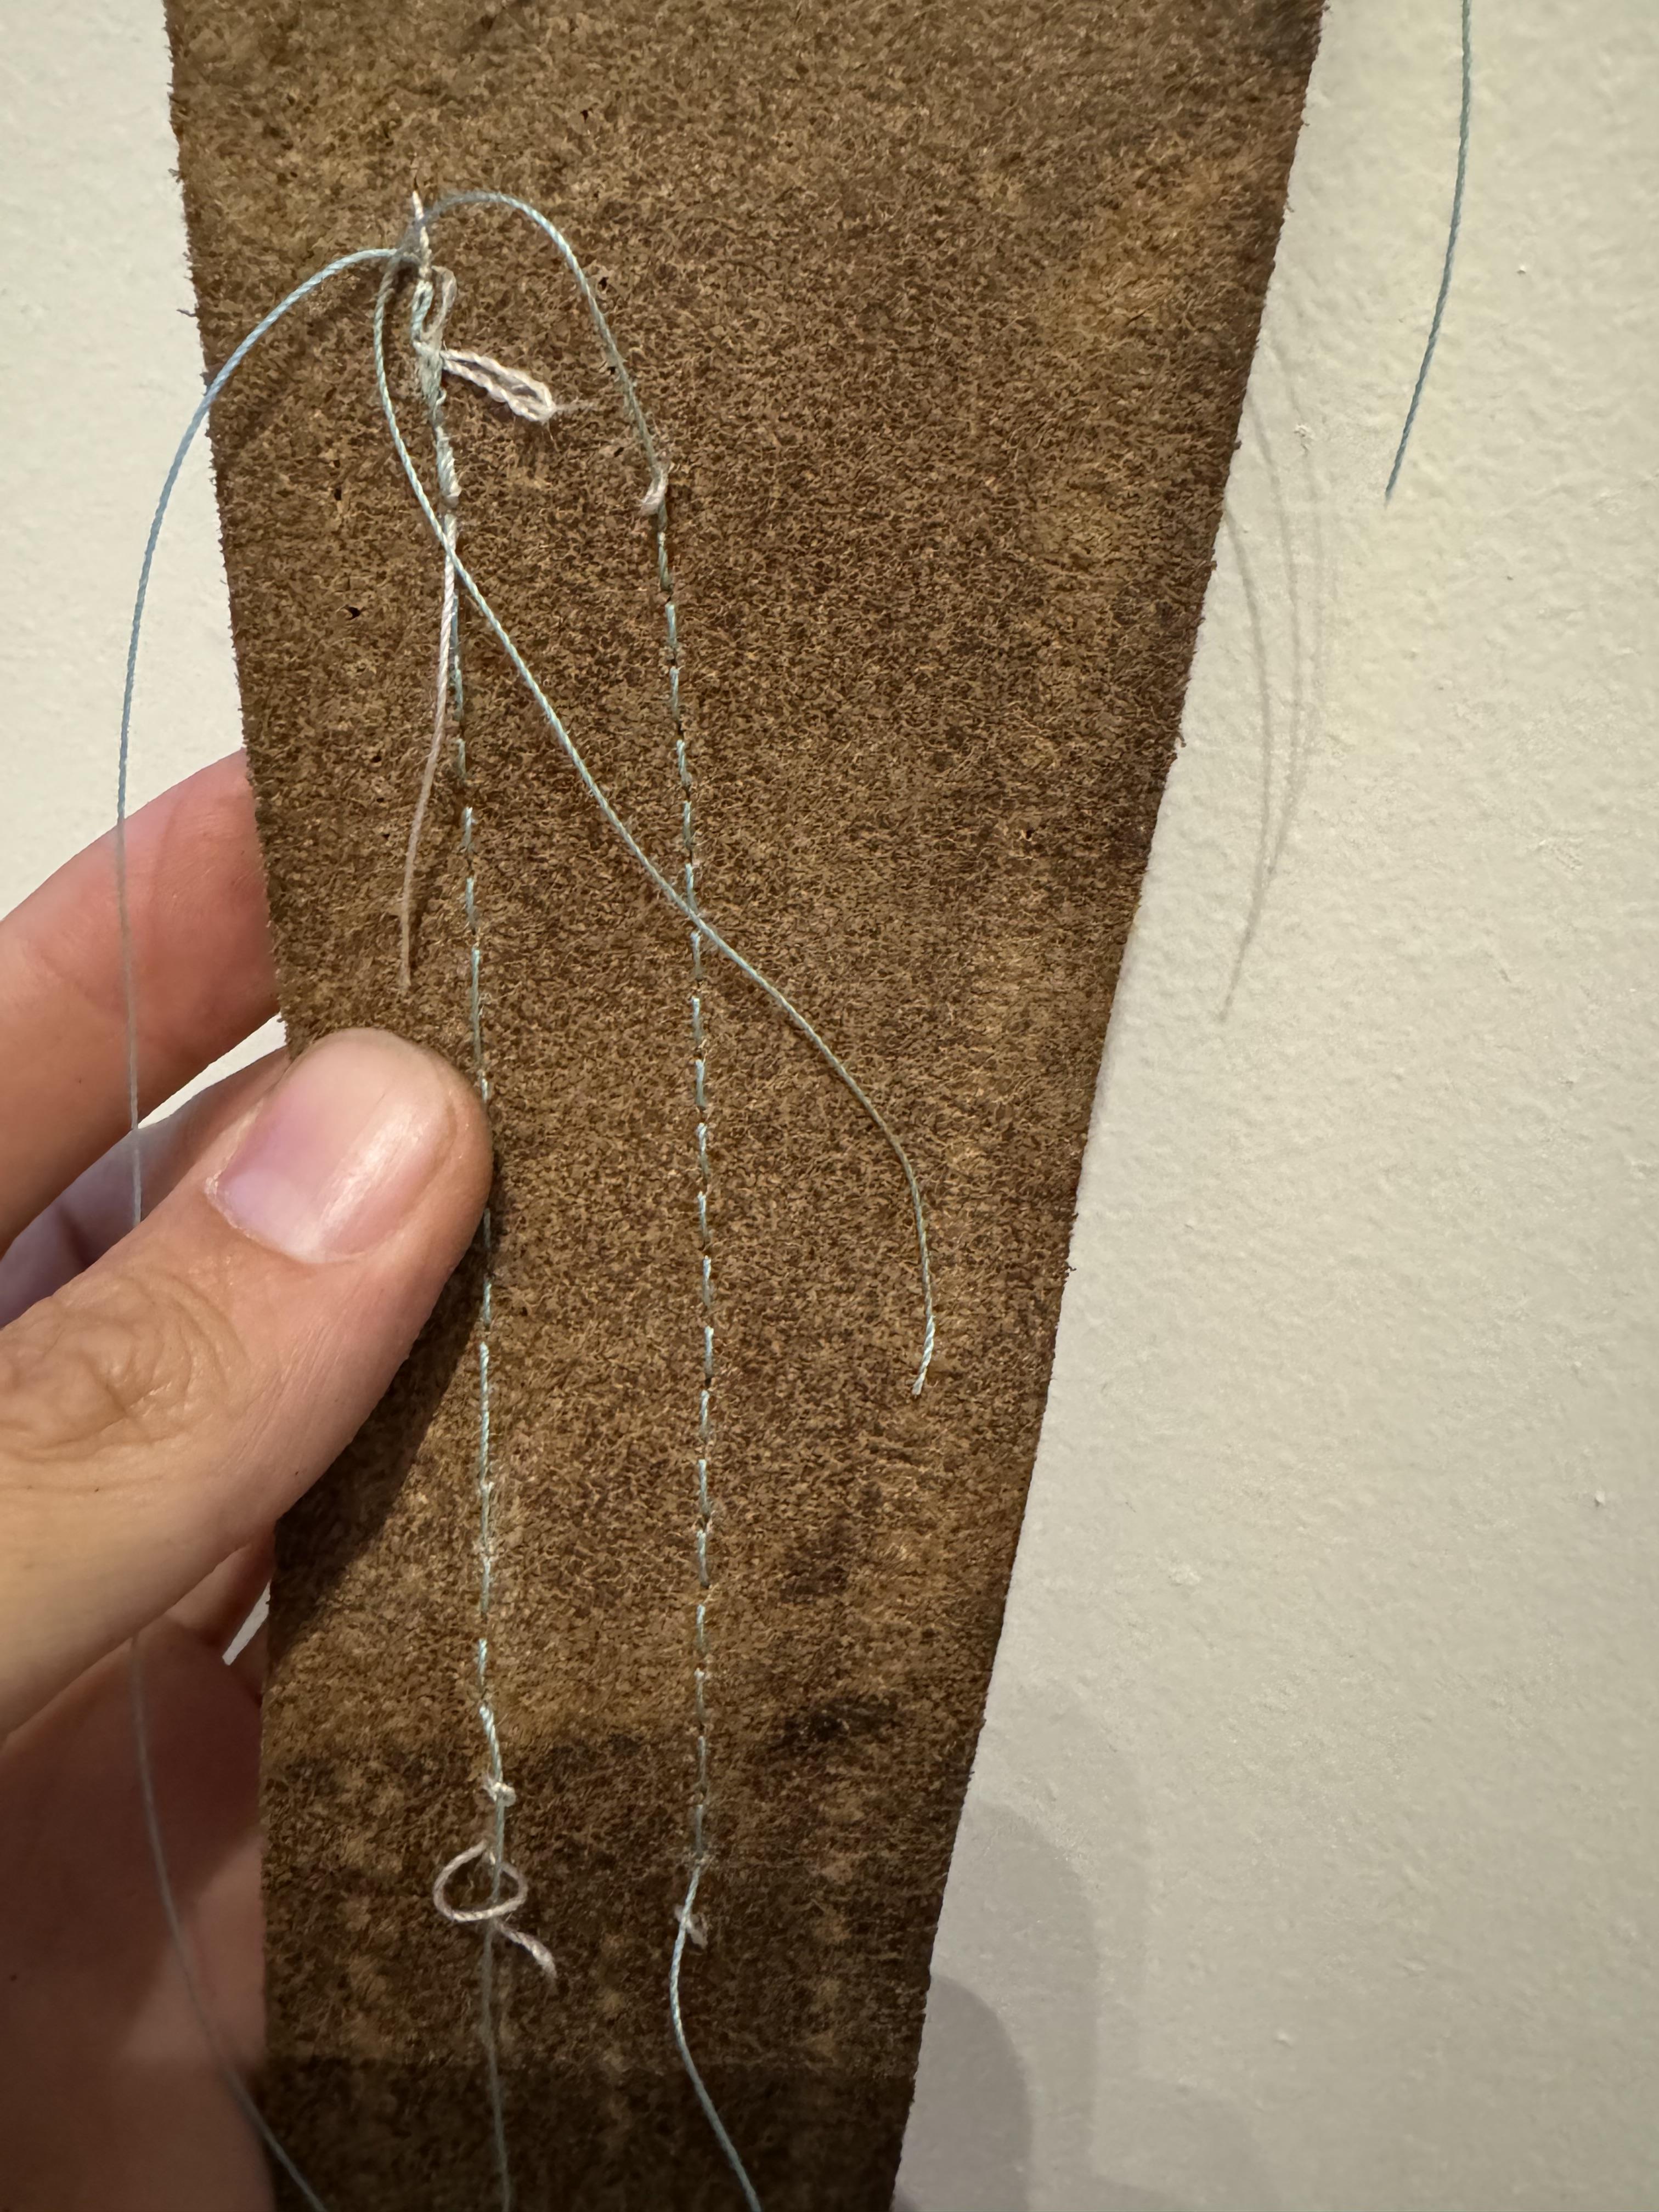
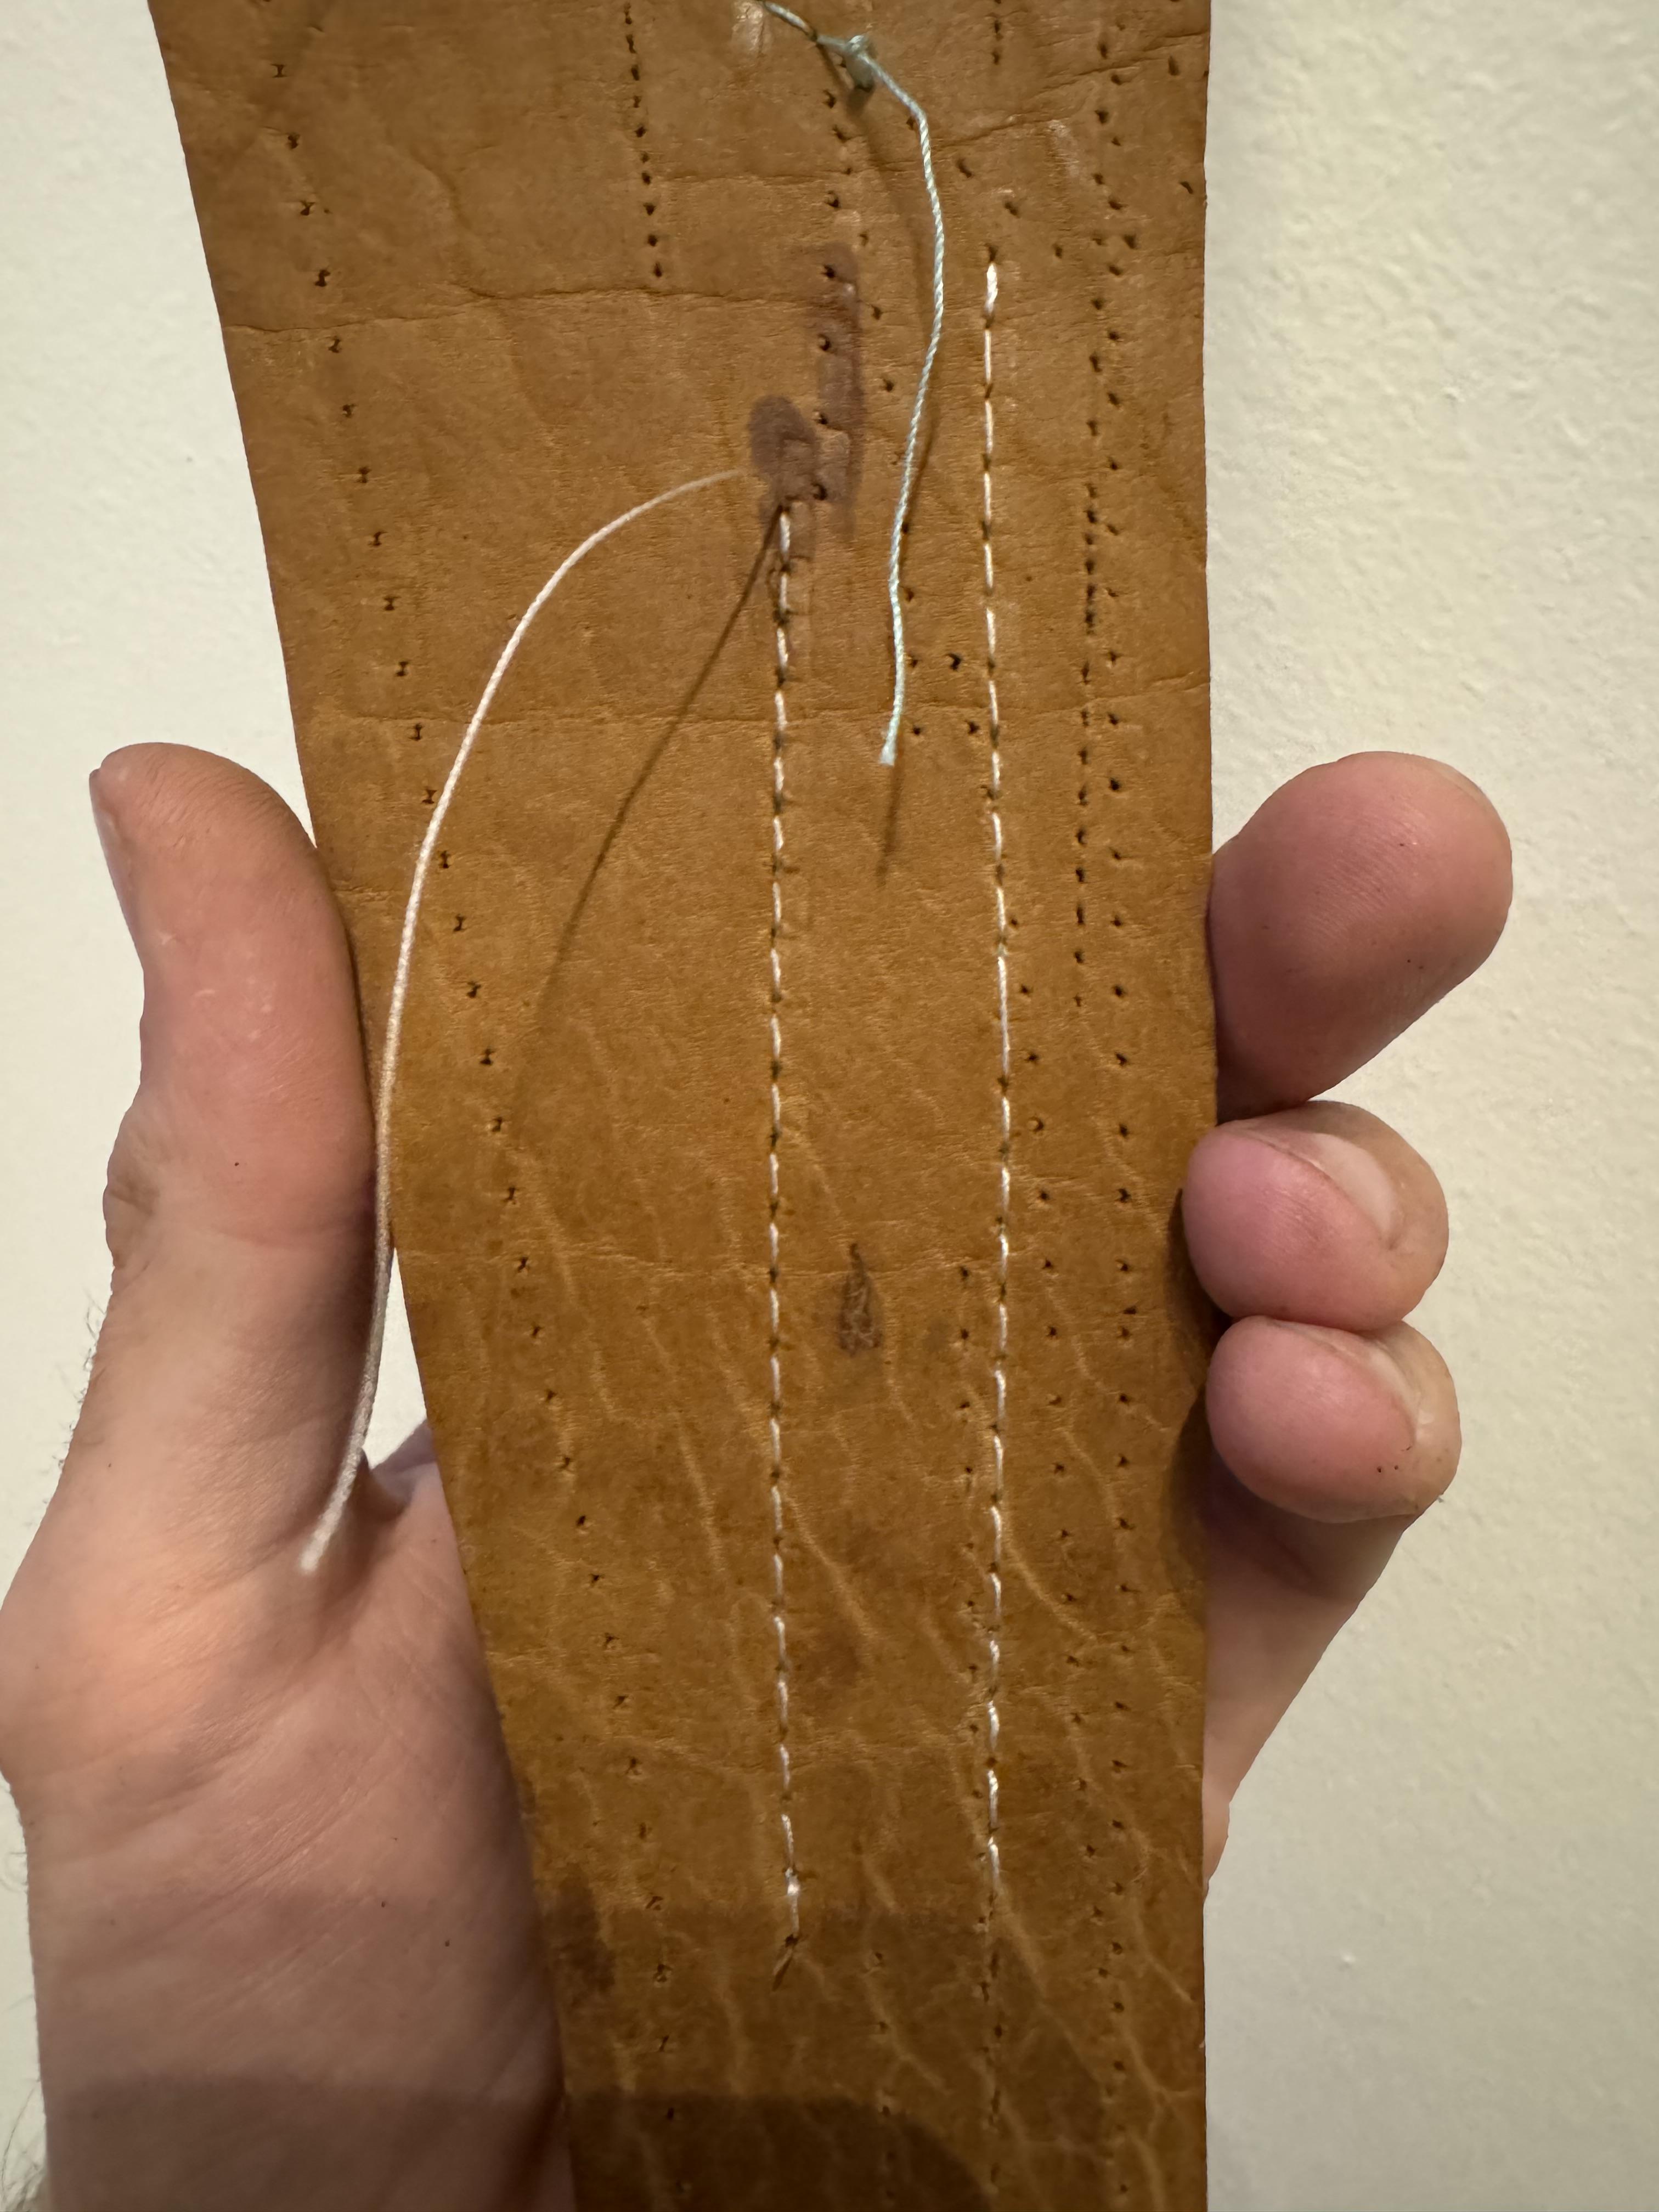
The locking stitch is what I’m practicing right now on some scrap. I’m trying to go forward a few stitches. Spin it around do it again and then spin it around one more time but it’s tough realigning the holes. It was doing really good until this began happening. Messing with the tightness of the different thread tension points to get it perfect. I’ll check your other forum below to see what’s going on. Thanks so much!

- Today
-
Funny enough, I'll refer you back to my old post when I was where you are. KGG and Wizcrafts were kind enough to explain thread locking without reverse to me:
-
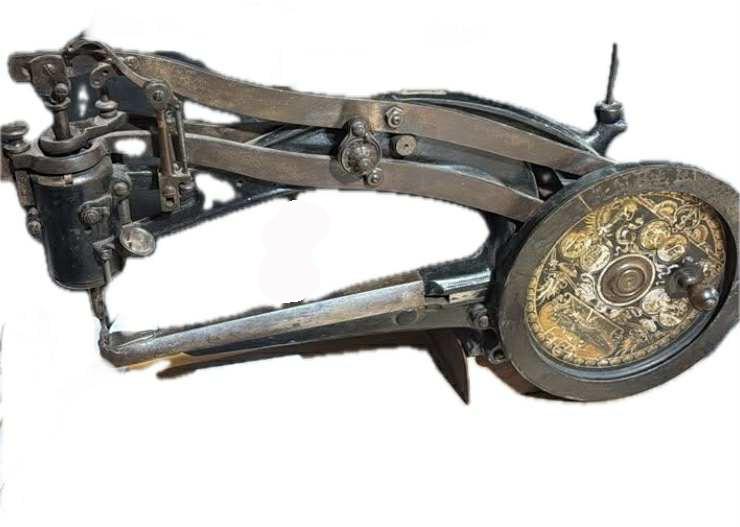
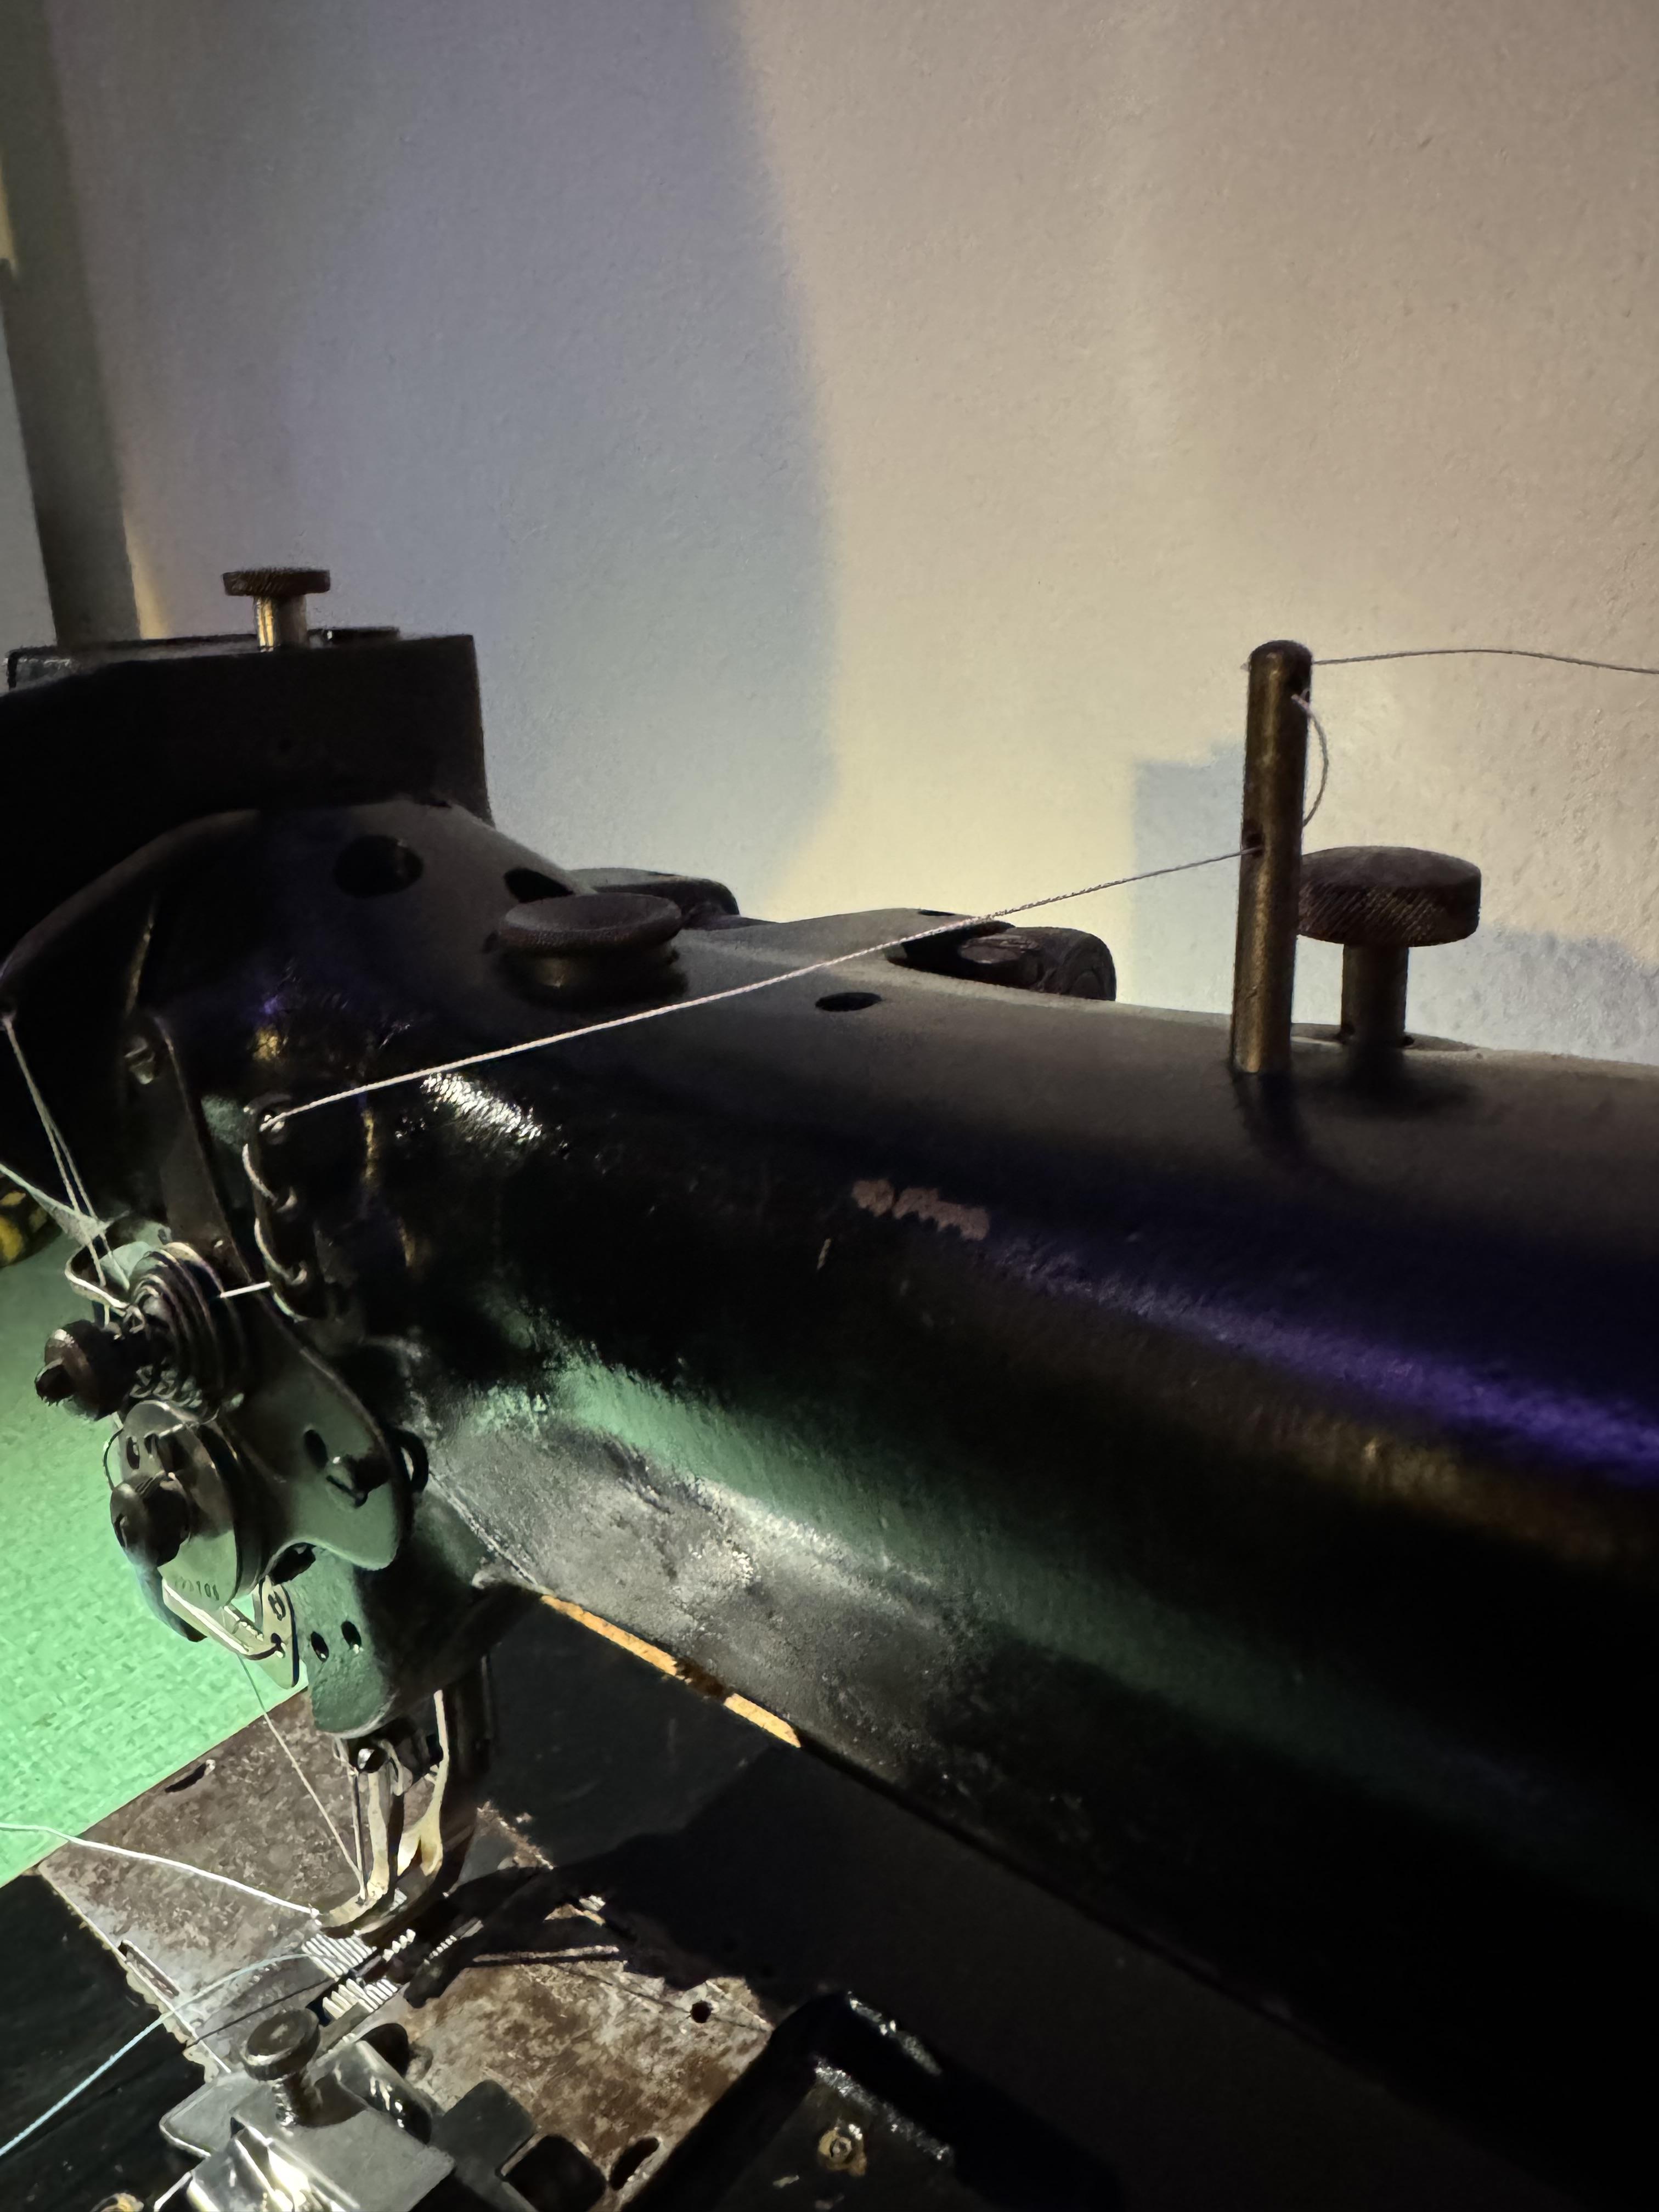
I am late to the party and perhaps this information is well known and documented so I apologize in advance for asking. Do we know who is the original designer / maker of the Patent Elastique machine and what year it was created? I have read the whole of the "Mystery Machine" thread with all of the great information there, and @shoepatcher thread gathering any and all makers. I apologize if I have missed a definitive statement of the origin of this machine type design and creator. The machine pictured below shows faint lettering ANKER and is posted here as an example of the type of machine I am asking about. Many thanks in advance for your consideration and information. @Constabulary @Uwe @Harfindel @mikesc @HatoriKun @Et Al
-
Cool. You may have some learning curve with starting and stopping but the stuff in the middle looks great. I'll look for a post about locking your stitch without reverse. I had a long learning curve getting proficient with mine. Somewhere I read to hold back hard on the tails when starting and that was wrong. Just hold the threads and hold an ounce or two of pressure for the 1st 2 or 3 stitches. Good job getting it worked out!
-
 NJIPENS:We do not engage in exaggerated promotion. We adhere to the principle of meticulously crafting every leather bag, making it convenient for everyone to use and enhancing the convenience of daily life and work. This is a large-capacity, fully handmade, completely original, and entirely leather handbag.


-

-

-

-

-
That was it!!! Thank you all so much for the help!
-
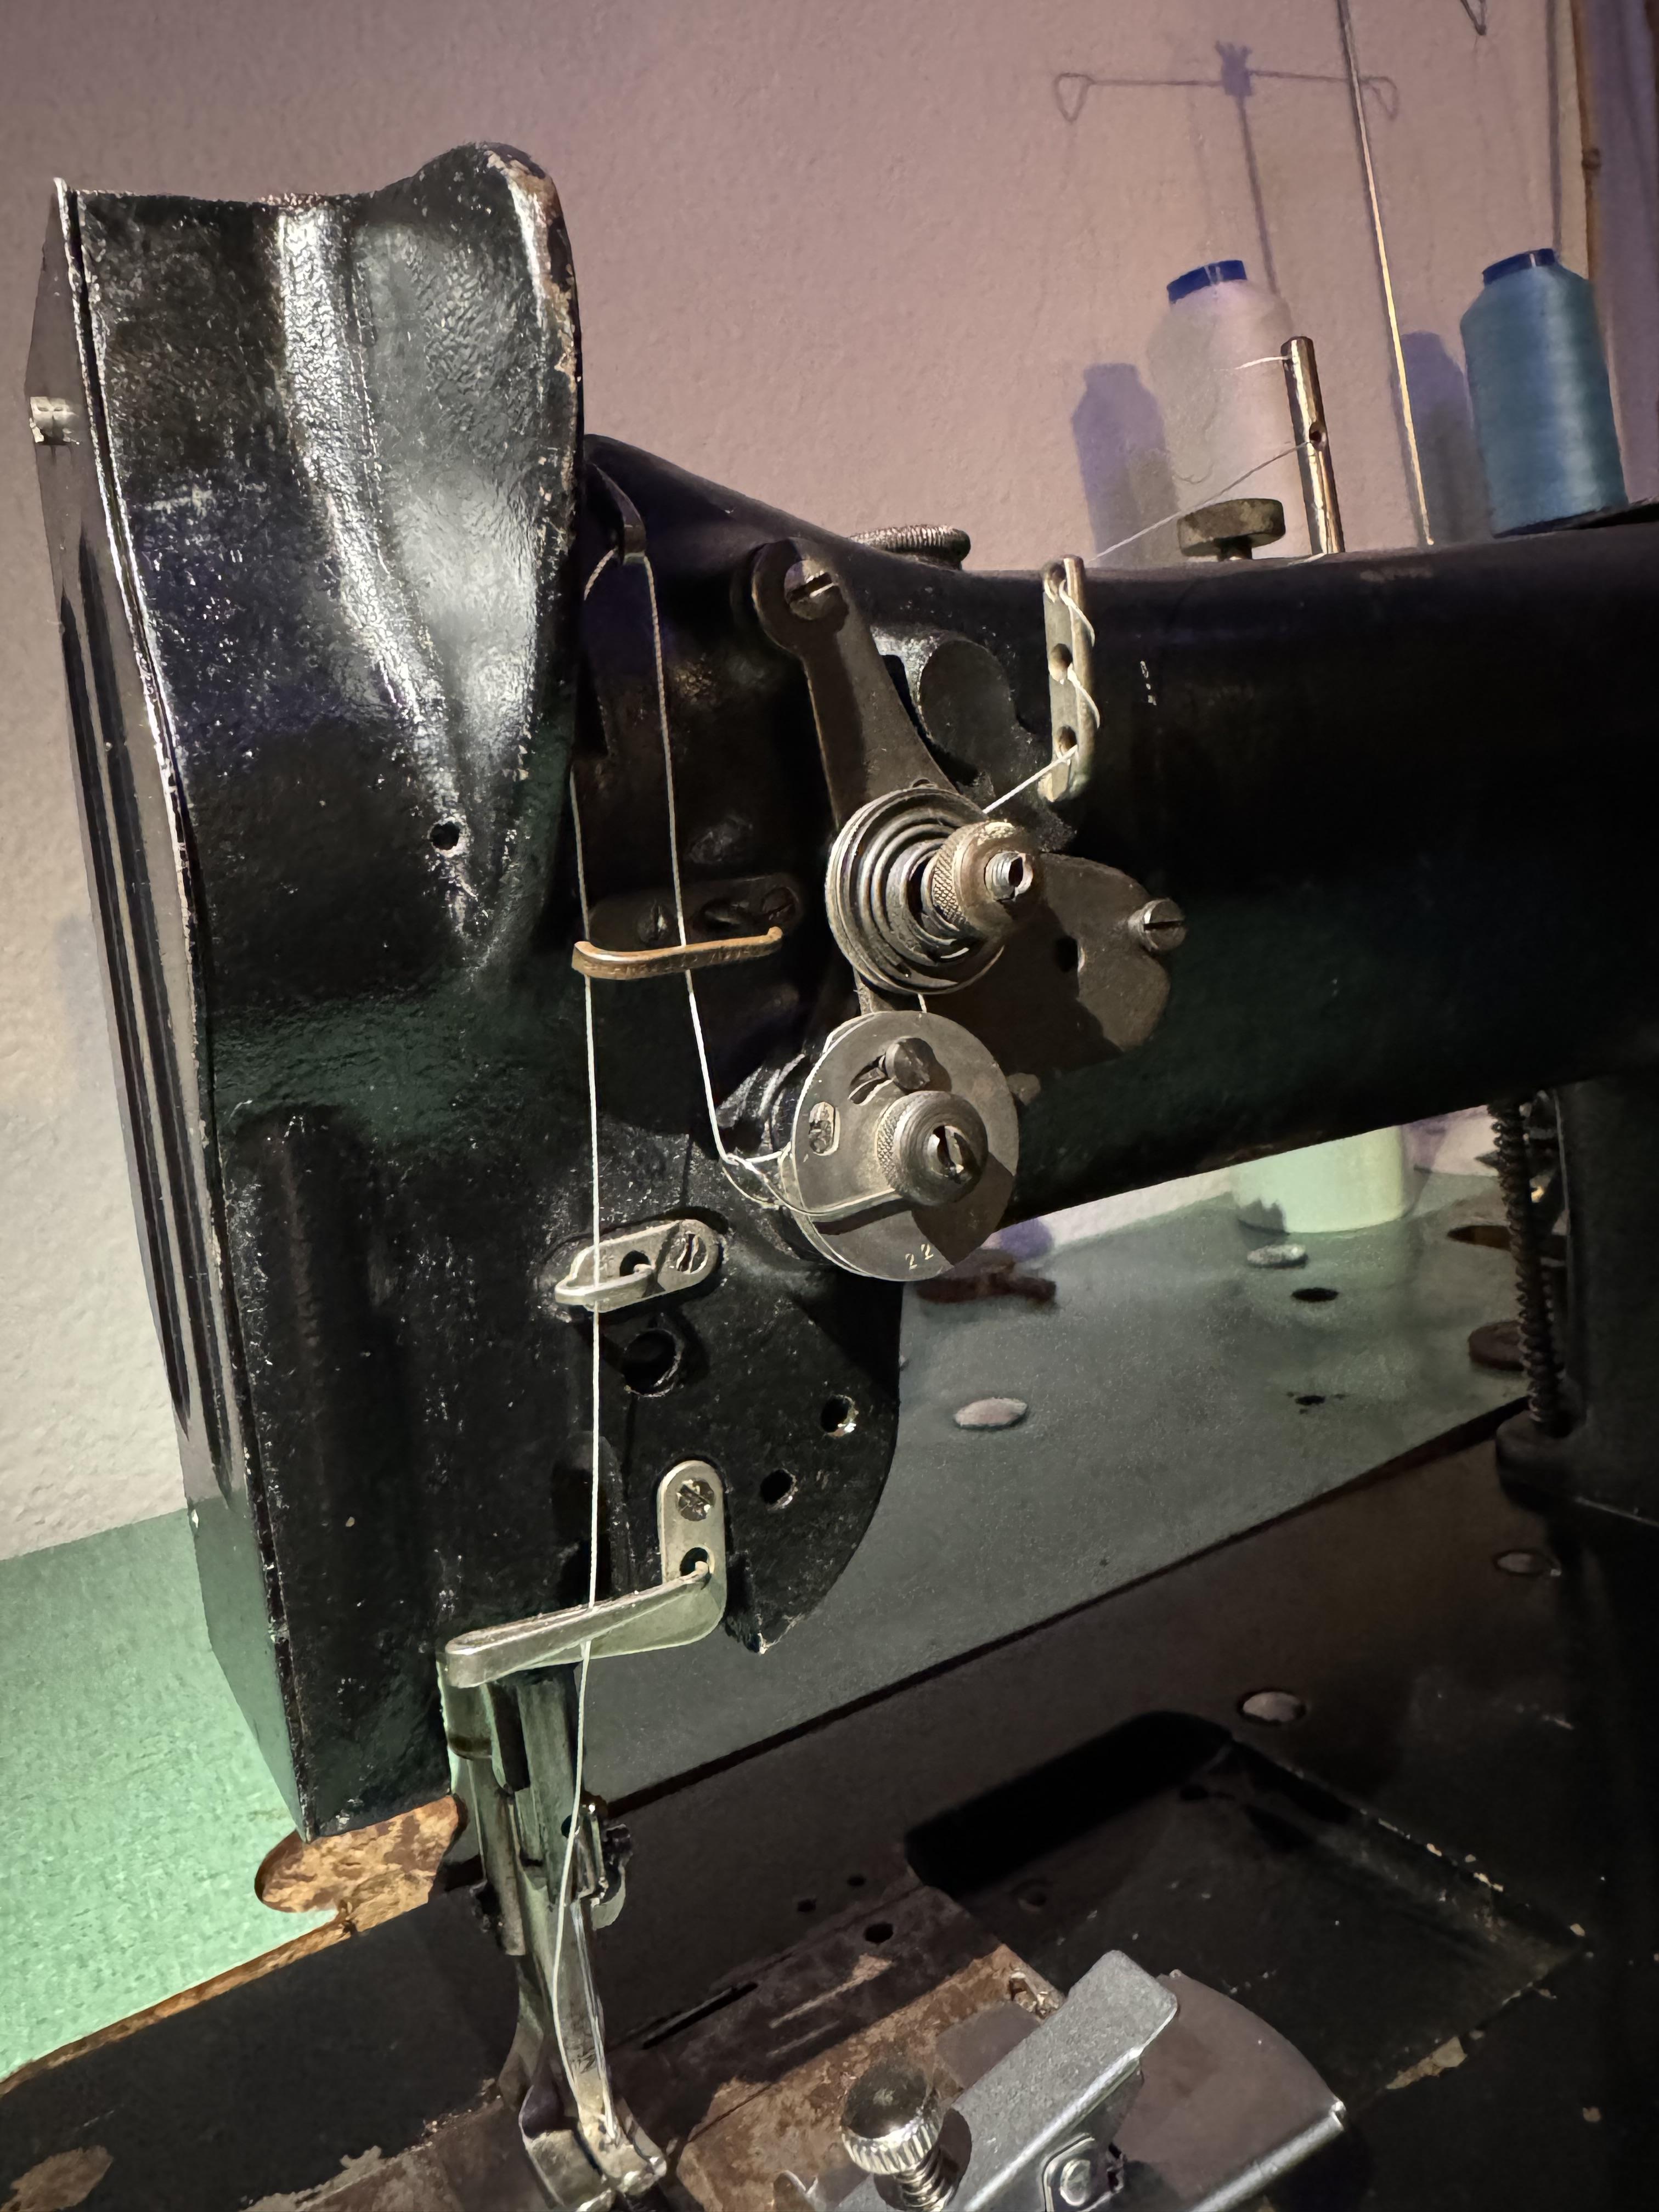
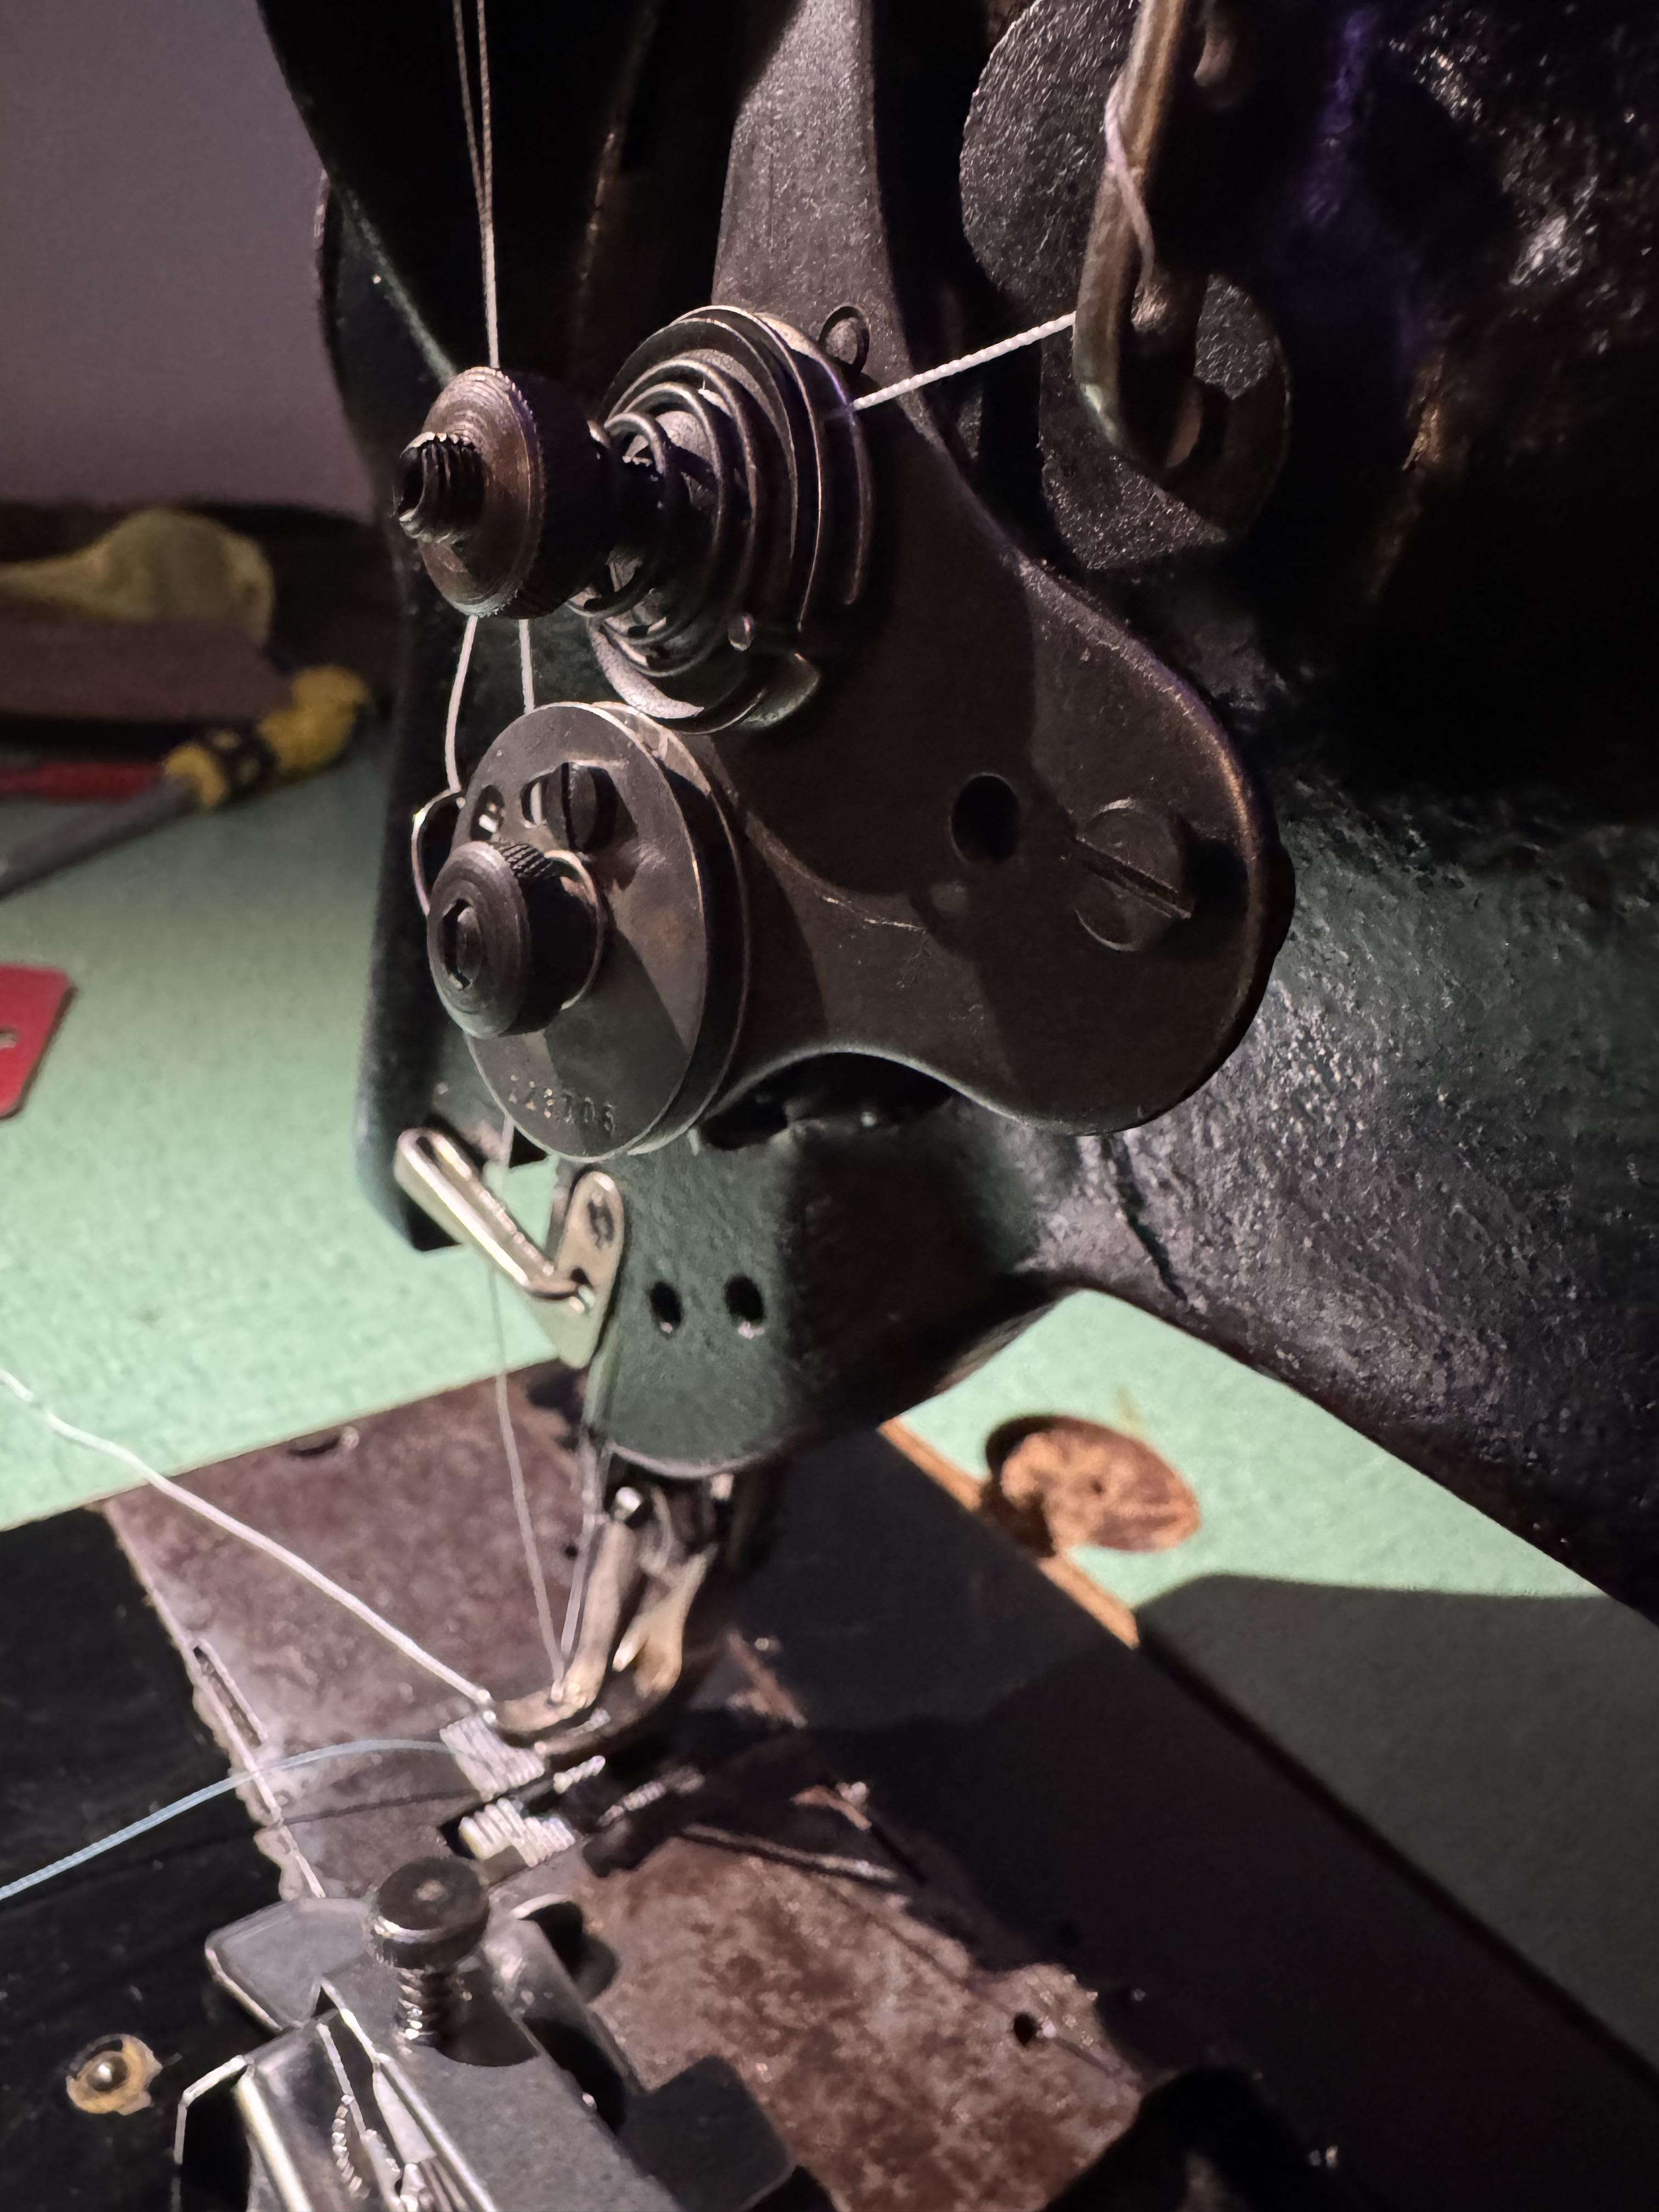
It looks like you have the check spring wrong and the 3-hole flag at the top wrong. On my machine, the 3 holes are horizontal and the thread goes down through the first hole, up into the second and back down through the 3rd. Then into the tension unit and on to the check spring, where you need to pull up on it until it "pops" and goes behind the little ear. The tension unit looks pretty tightly screwed down, but the looping says it's too loose. I'd make those couple of changes an see what happens.
-
-
-
Thank you for your suggestion. I will make improvements.
-
Me too! 🤣
-
@Northmount, I misunderstood and thought he was keeping it. I'll go fix my error. Thanks for catching it. @GPD You could PM the update text to a mod and request the change. Or it might be more expeditious to post a new ad and we can remove the existing one, either way. Another option in a case like this would be to "Report" your own post and request the changes. Sorry about that!
-
If you want that spit-slicked look without the spit, go to your local homebrew shop and grab a package of Amylase Enzyme. Dissolve a little in some water and use it to slick your edges. Amylase is the enzyme in saliva that breaks down starch. I like that a lot. Nice job.
-

Singer 211 U166A walking foot problem
NowhereMan01 replied to NowhereMan01's topic in Leather Sewing Machines
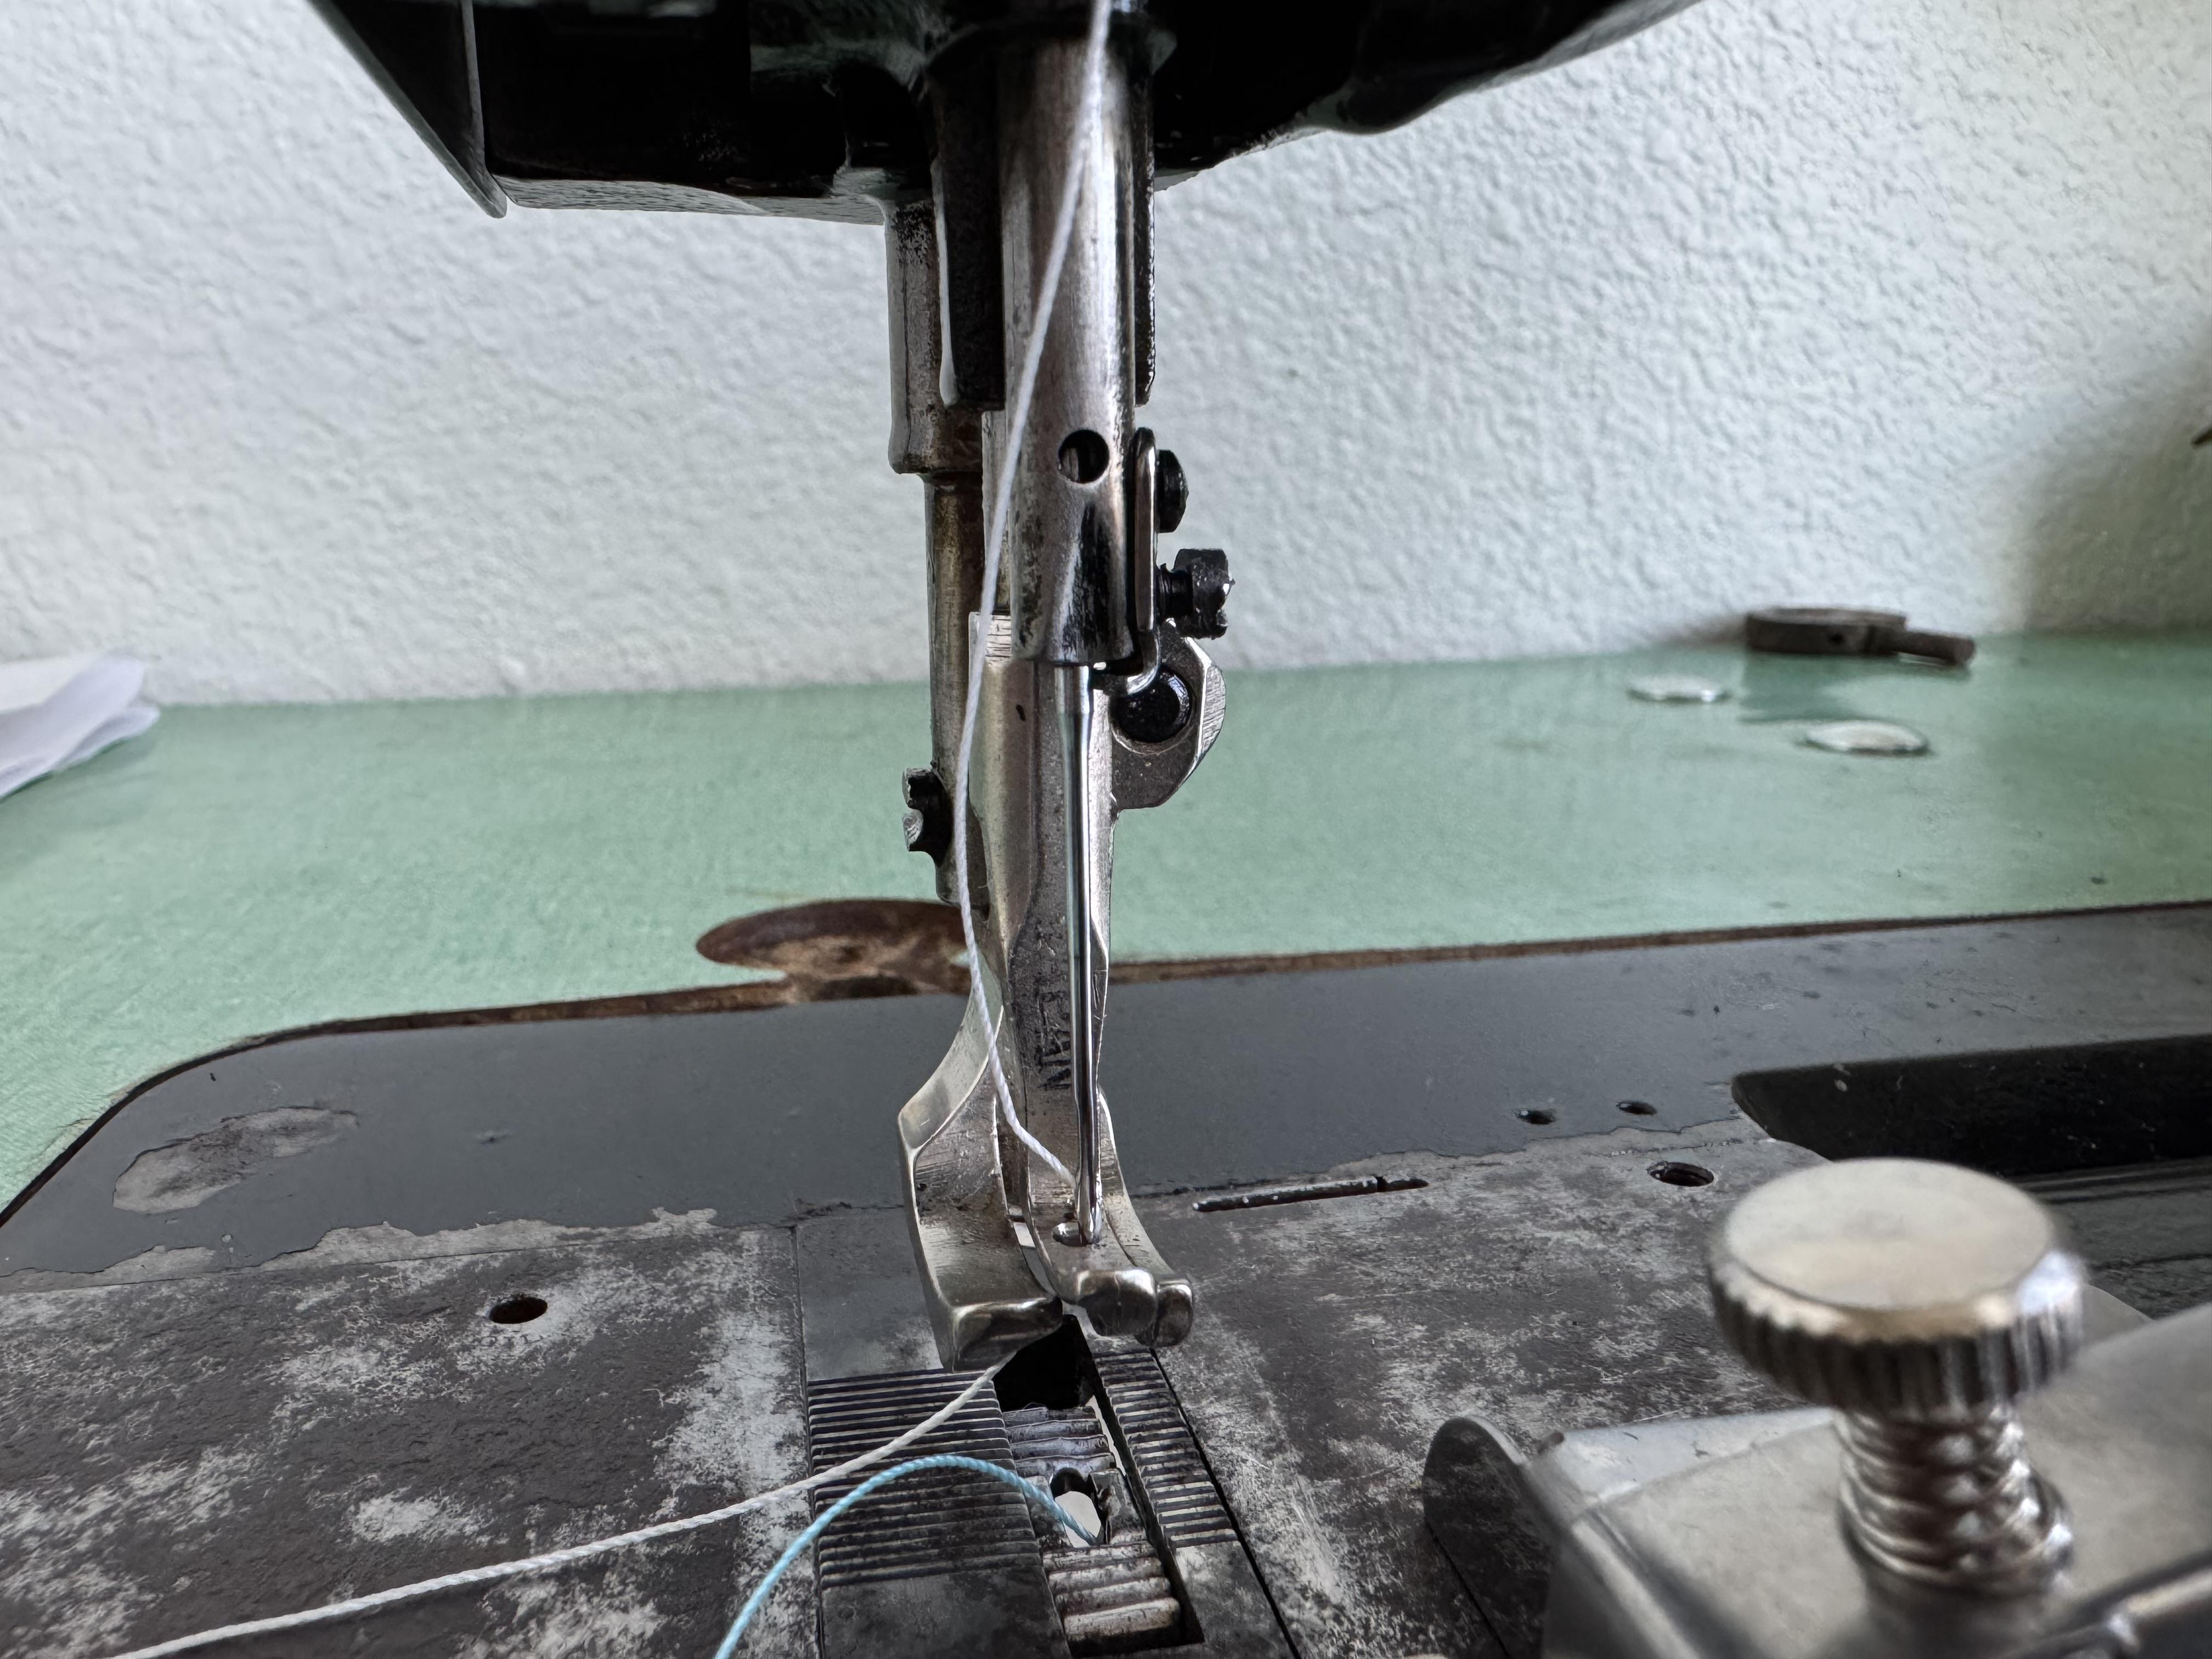
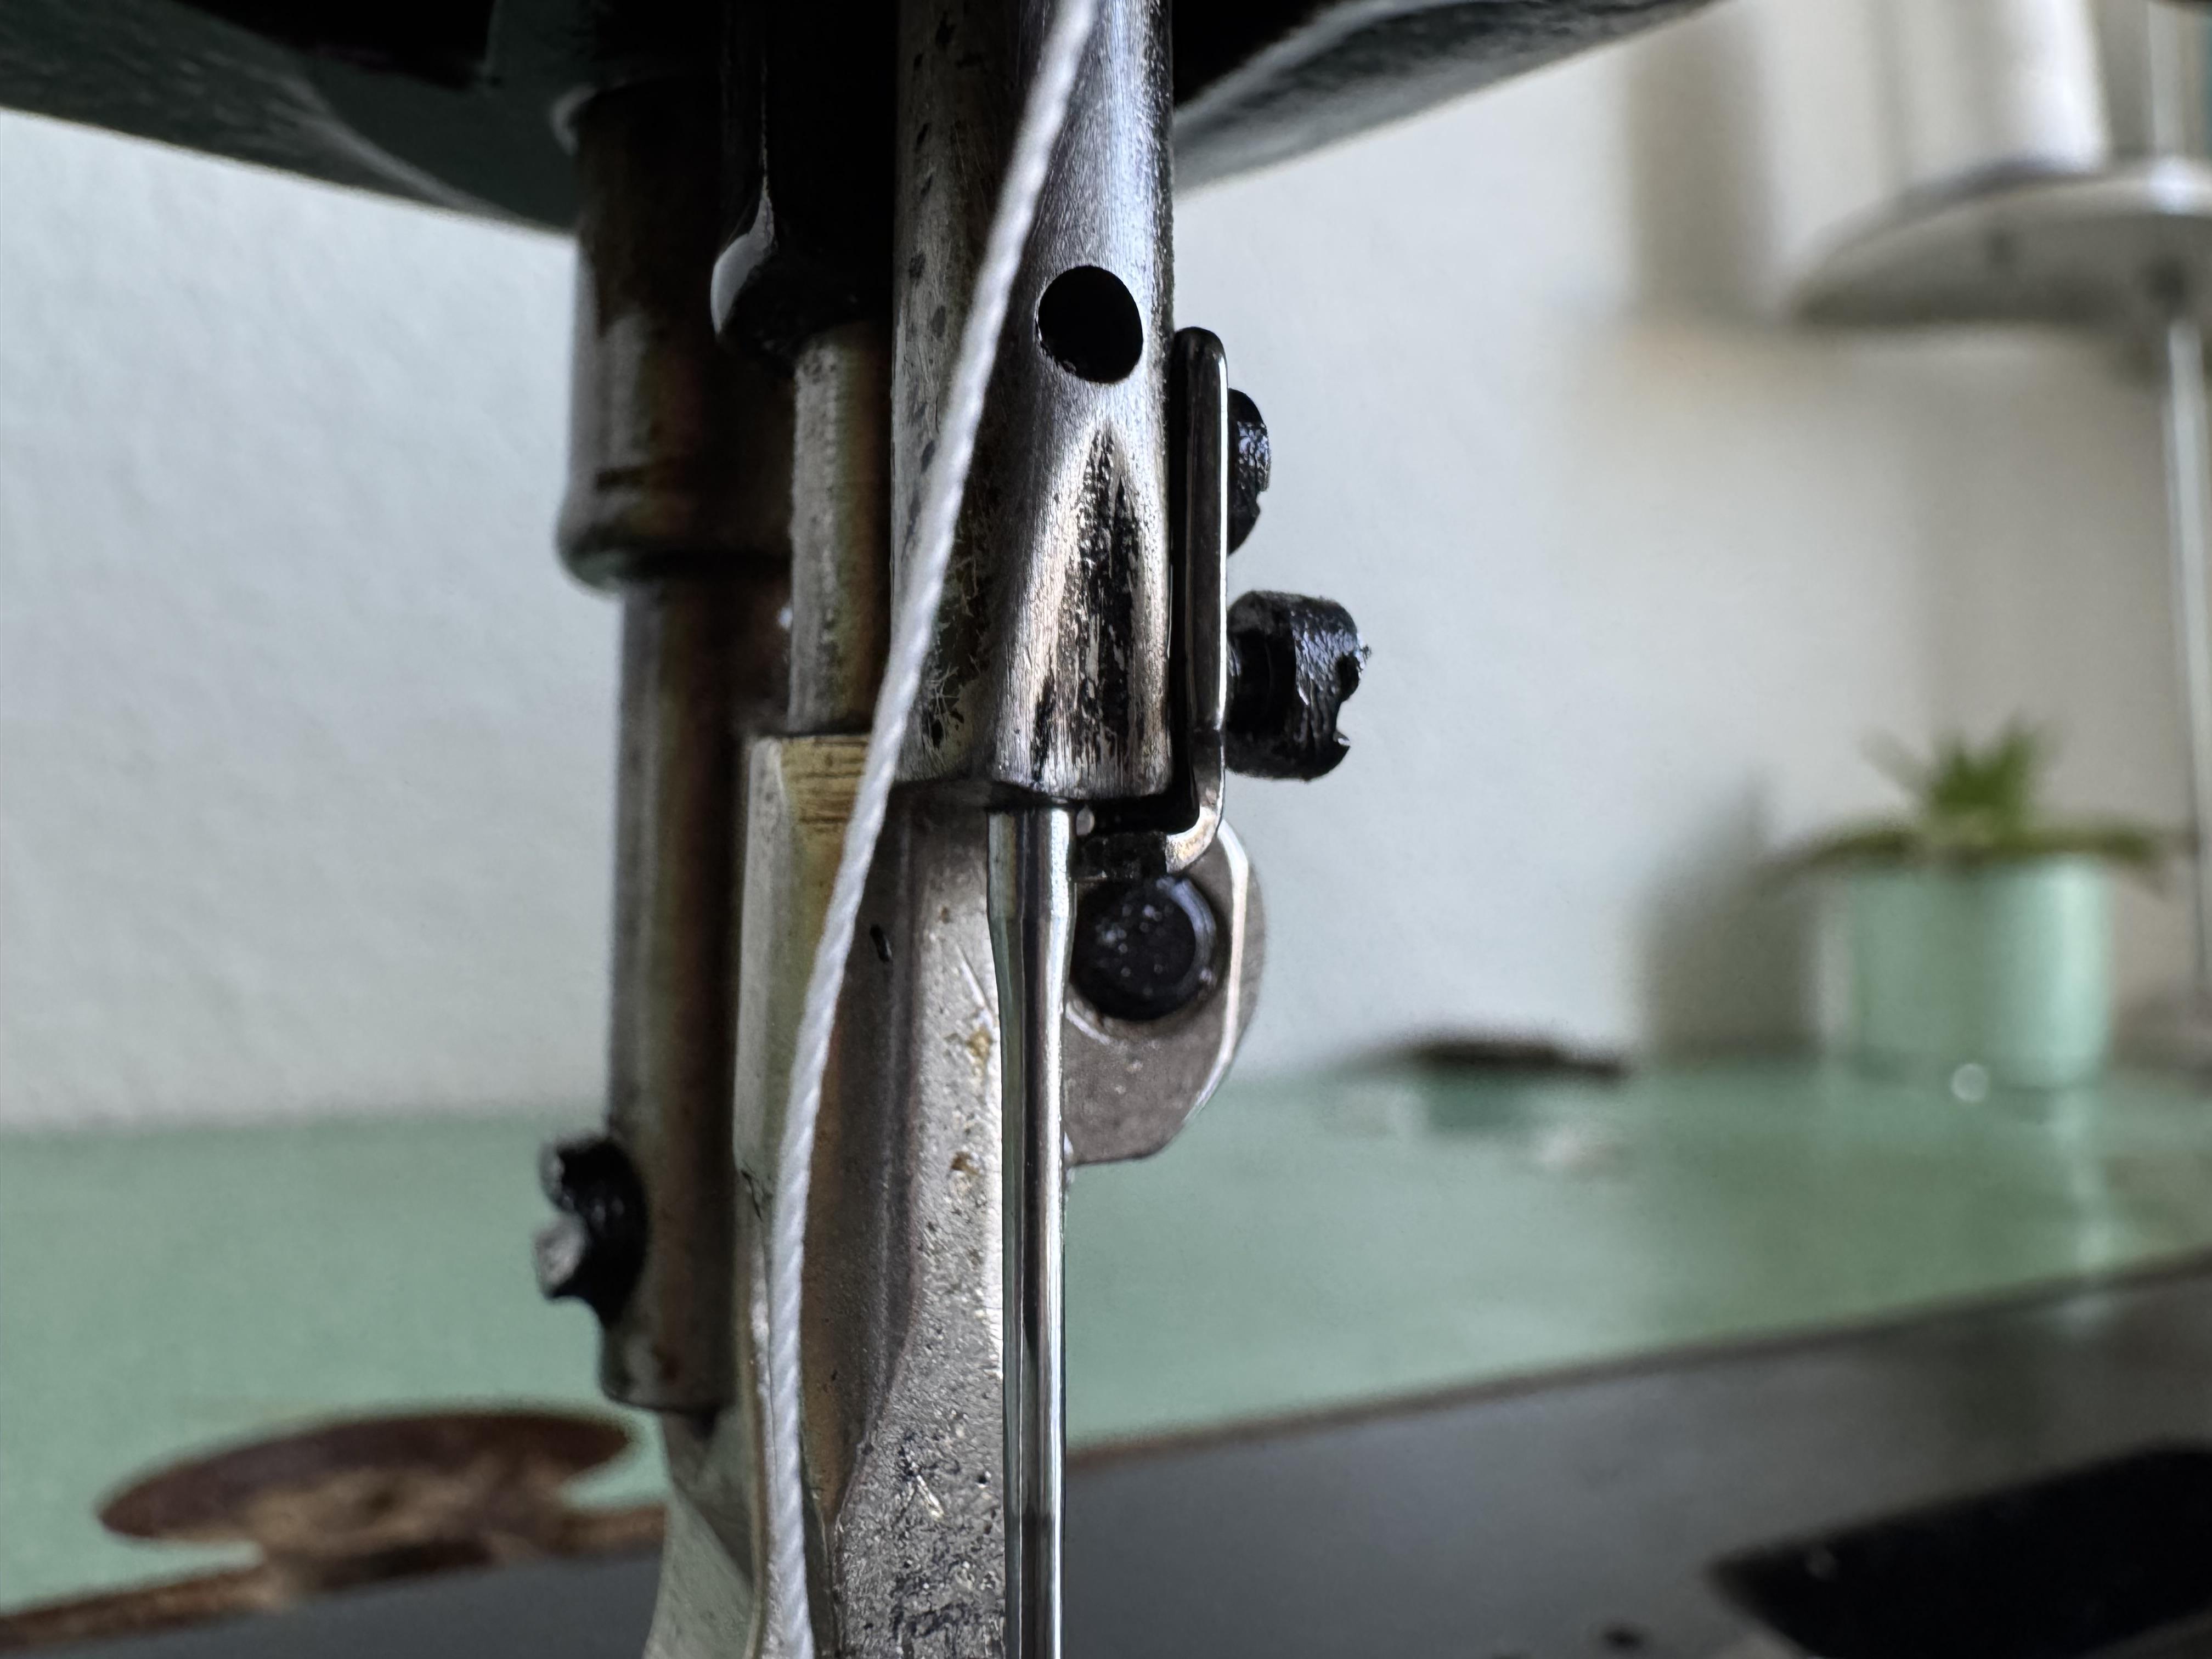
I'll check that, but it looks to me like the timing is now correct, that is, the hook passes by the needle at the correct point. However, it is not quite close enough to consistently catch the thread, so I plan to adjust the "distance between the sewing hook and needle" (p. 19, Fig. 45 of the manual), and I'm fairly confident that'll get it working. Either way, I'll post an update here. -
Let us know how you make out . . . I actually built a box out of 1 x 12 pine lumber . . . a piece of clear plastic . . . put a fan in one end . . . bored a hole in my shop wall . . . and all the burnt leather stink gets blown out into my side yard. I do have the benefit of doing a lot of wood stuff . . . so wood scraps are usually laying around for me . . . but even if you have to buy it straight up at Lowes or Home Depot . . . it's still a lot cheaper than the enclosures the mfg's want to sell you for the laser engraver. May God bless, Dwight
-
The biggest issue going on is the top thread is not being pulled up all the way to form a tight stitch...rather, the loops of top thread are hanging free on the bottom. As kgg said, tighten the top thread tensioner, and if that does not clear it up, post photos of your top thread path so we can see if it is threaded correctly. The other issue is that it is skipping stitches. Here you will want to make friends with the service manual so you can set the hook to needle distance, the needle bar height, and the needle bar rise.
-
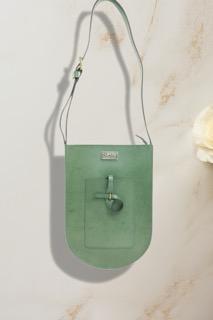
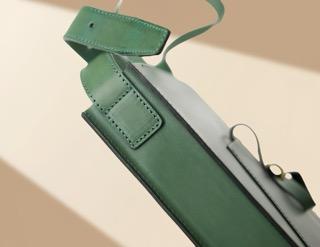
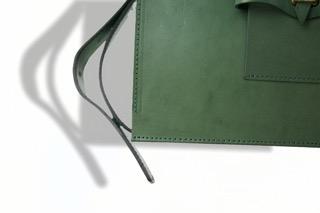
 Not exactly the style I would build . . . but from what I could tell . . . the craftsmanship looks good . . . the dye job looks very even . . . and that is a cute little tie thingy in the center front to set it off. All in all probably would sell on the uptown market . . . You did a good job. May God bless, Dwight
 -
 Jpalms joined the community
 -
Original design, handmade, sustainable cowhide. We strive for the ultimate simplicity and elegance. We use simple lines to outline every line of the bag, giving you a unique beauty.njipens-bag.com