Tigweldor
-
Posts
241 -
Joined
-
Last visited
Content Type
Profiles
Forums
Events
Blogs
Gallery
Store
Everything posted by Tigweldor
-
I would also look for a different bottom transporter - the hole in yours seems extremely large and with no sharp edges - when the needle penetrates through leather - it will push it into the very large hole and leave ugly dimples - like in your pic #5 that you posted in a different topic - the white bottom thread around the latch.
-
Do you mean the spring on the inside of the needle bar ? AFAIK the very early needle bars did not have this spring built in - if it sews without any probs - just keep it that way. Greetings Hans
-
Found one (in German) - 51 pages - seems pretty thorough with adjustments needed - maybe you can find the English version. https://manualzz.com/doc/4480676/juki-ddl-8700b-7--ddl-8700bs-7--ddl-8700bh-7--ddl-8700bj-...#features
-
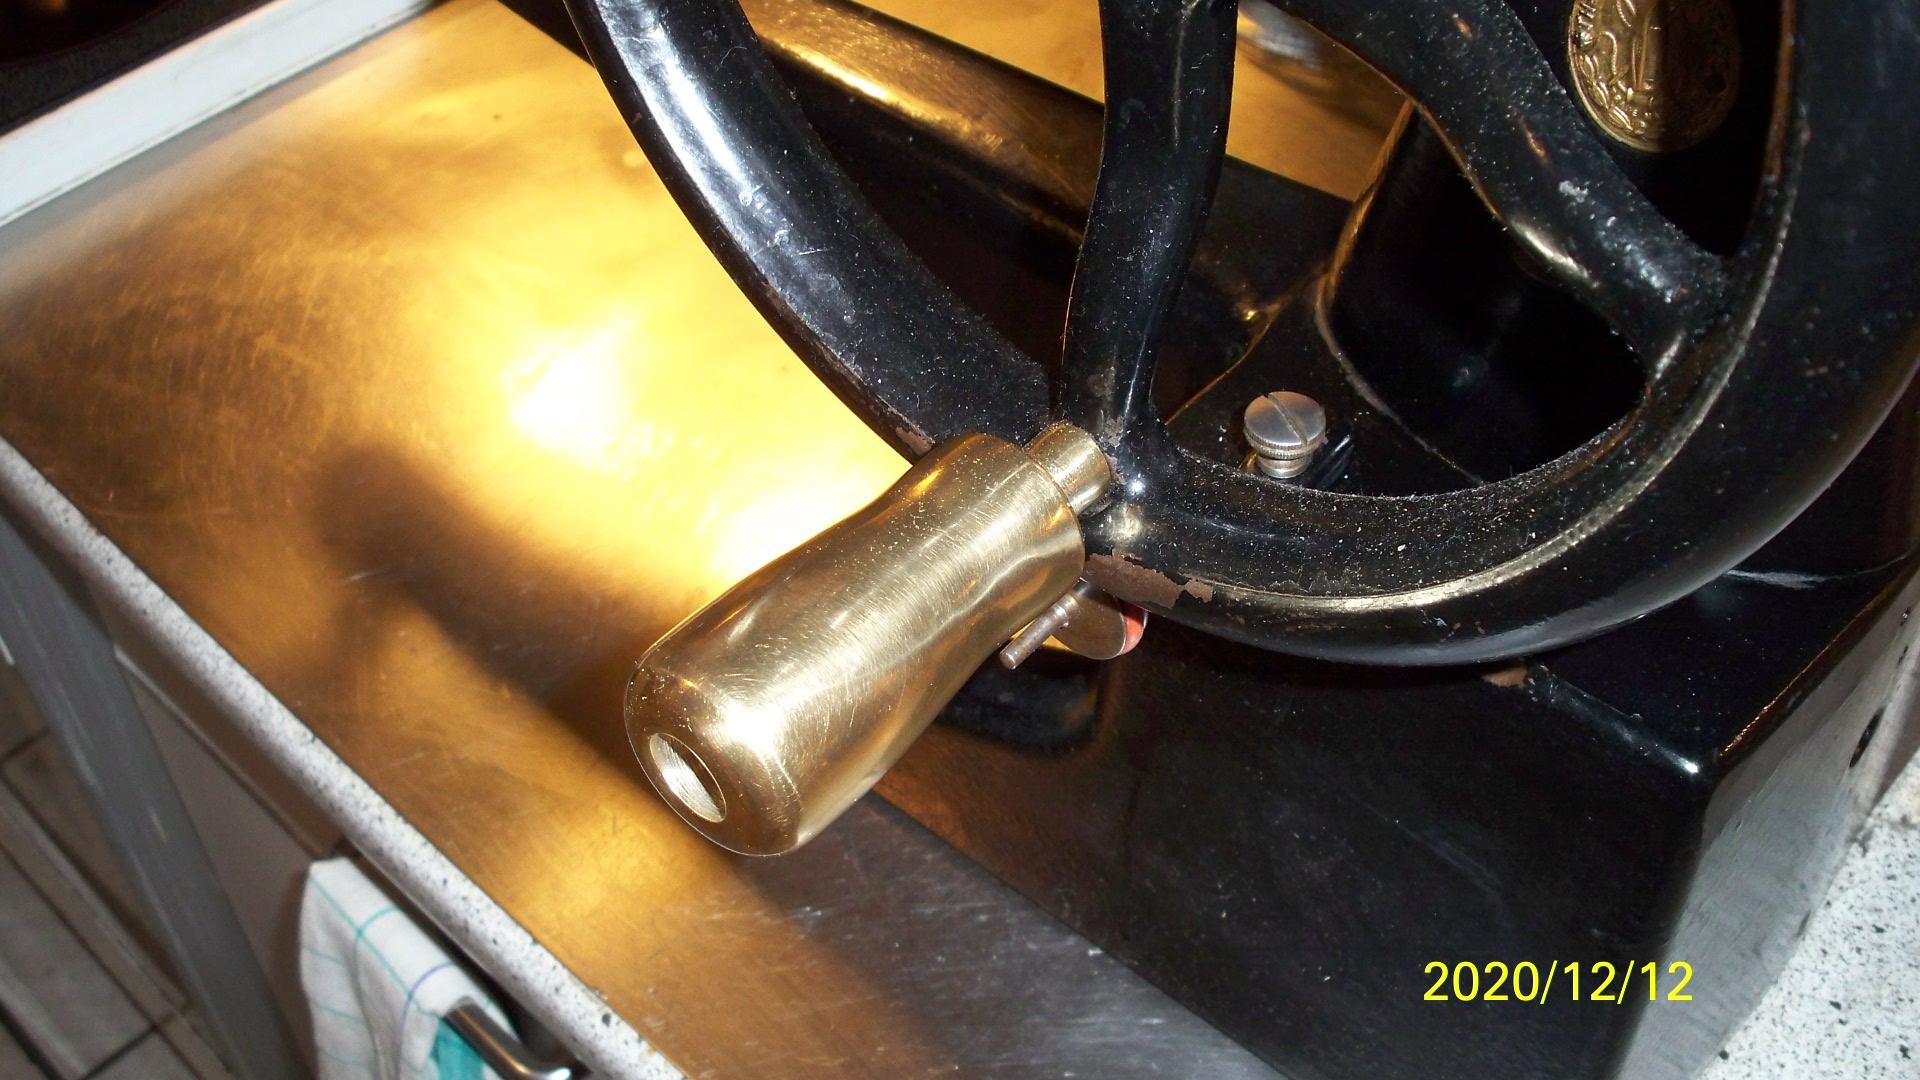
29K171 Handwheel automatically drops down.
Tigweldor replied to kidbeey's topic in Leather Sewing Machines
Take a look at the handle on your handwheel - I made one out of brass to replace the wooden one - I now have the same problem as you have. The handle will - when the 29K33 is not under belt tension - sink to the bottom As soon as I switch back to the very light wooden handle - the wheel stays in place where ever you leave it. Naturally the handwheel also stays in place when the machine is under belt tension (to treadle or motor) To pull the bobbin winder wheel of the spindle - you need a gear puller and since you have to pull it over the small pointed shaft that the bobbin affixes to - you have to protect this skinny shaft with a tube a little bit longer, so the puller spindle will press on the tube and not the shaft. A small piece of steel brake line would work. You could also place the wheel over a socket, heat the wheel with a propane torch, put the steel brake line over the shaft and hit the brake line with a hammer. Do NOT hit on the little shaft - you will bend it and then your bobbin will wobble when being wound. If the wheel is really stuck - I would just throw it in a small jar of acetone (close the lid, else it evaporates) and leave it over night (without the rubber "tire") - that will dissolve all hardened gunked up oil - the next day oil it thoroughly - there is no need to pull the wheel in my opinion - never had to on all my 29Ks Should you feel grit after the acetone treatment - it is most likely rust - throw the unit into a small jar of vinegar - leave it for a day or two - that will dissolve the rust. Oil thoroughly afterwards.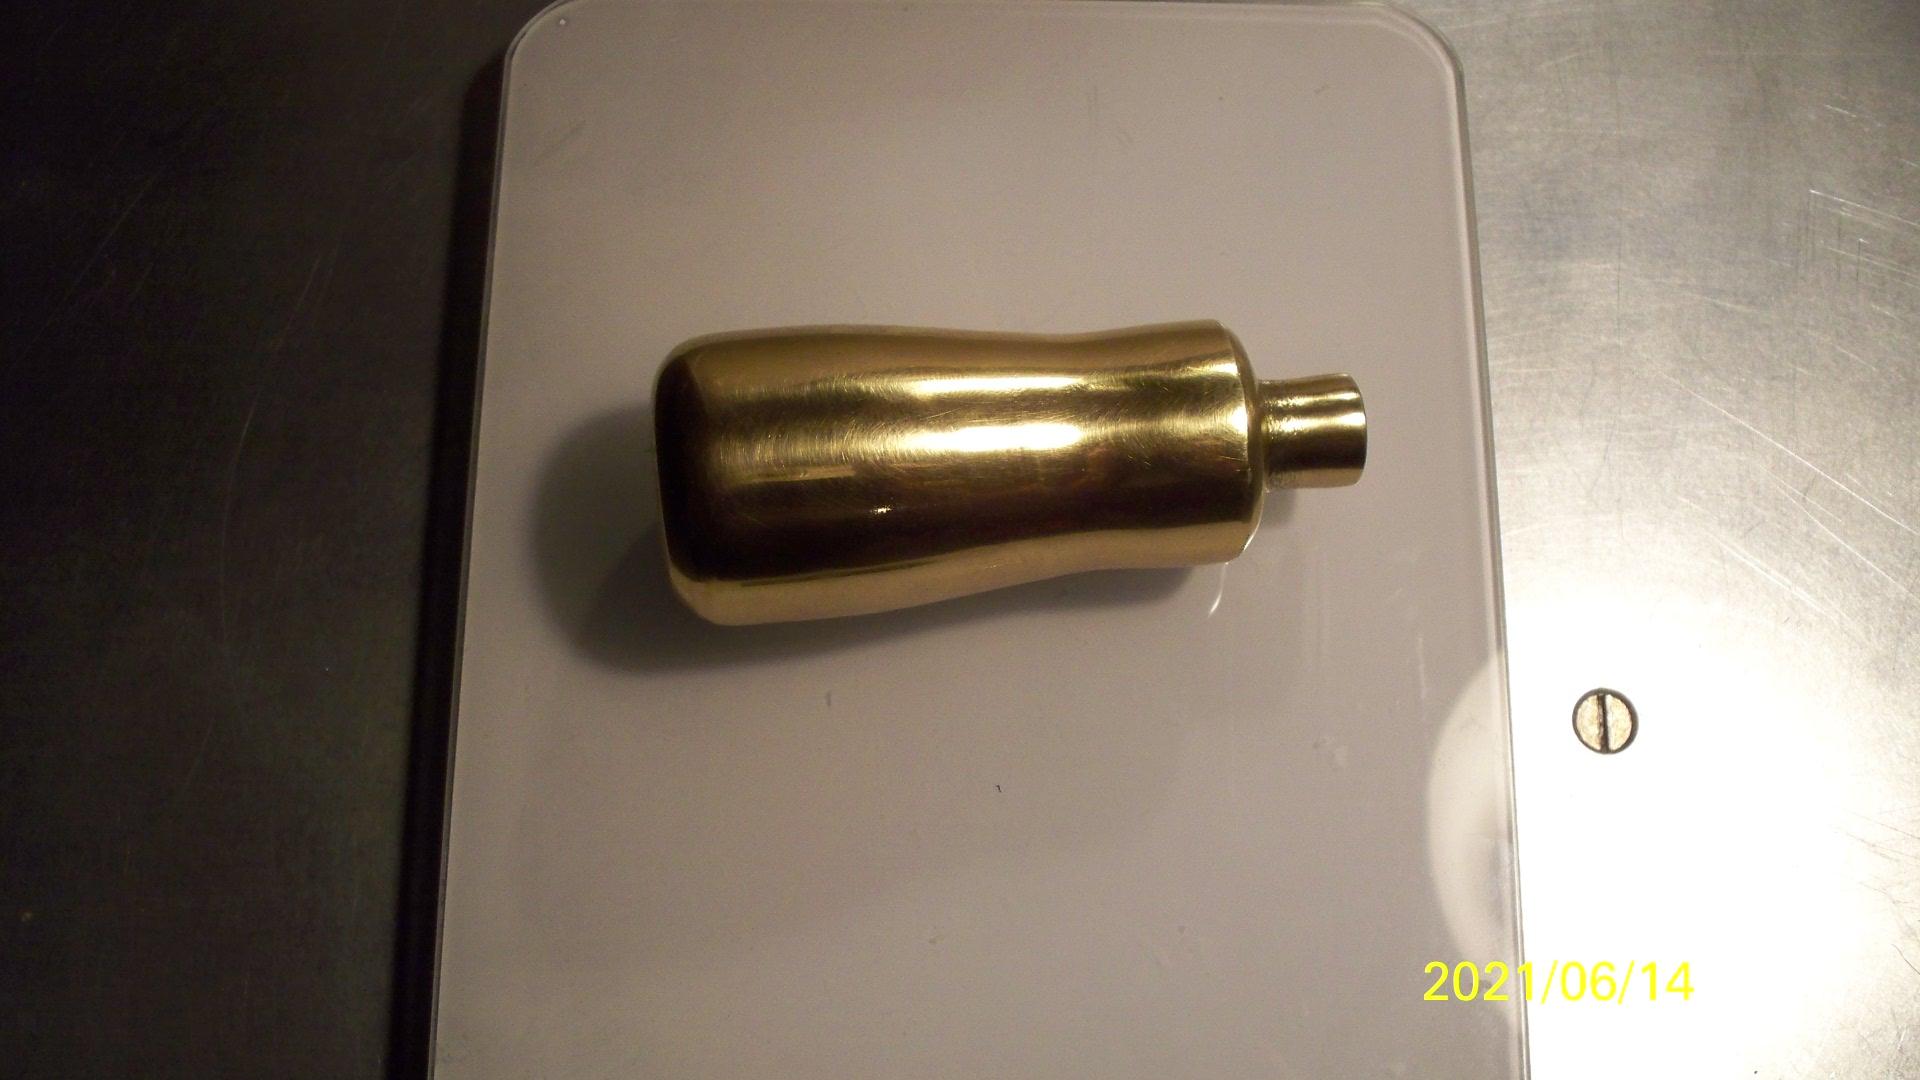
-
You will have to play with your thread tension though. On pic#5 the white thread (bobbin) has pulled the brown thread right through the leather. The hole in the arm plate left ugly dimples - comes either from using a fabric needle (for a straight stitch) or to big of a hole in your bottom plate. On the last pic bottom stitching - the slots left by the needle seem to large for the tiny thread coming out of the hole - more of an optical thing than structural - but picky customers could be turned off by that. Please only take this as a hint and not as major faults Greetings Hans
-
Chinese netizens share their sewing machine
Tigweldor replied to PiZhihong's topic in Leather Sewing Machines
When they are new, the stitching effect is similar, but Japanese made machines can still maintain good results after high load work. However, Chinese made machines have some wear and tear ------------------------------------------------------------------------------------------- That is very true. And depends directly upon the quality/hardening process of built-in metals used. But to say the honest to god truth - the Asians have caught up to the once superior " Made in Japan " or "Made in Germany" quality standards. And to latter is to say : after WWII this was a British invention to blemish German steel cuttlery from Solingen in order to save home production from Sheffield. Again : "Made in Germany" was not a German invention - it was made by other countries to belittle/berate German quality of workmanship after WWII - which totally did backfire in the end. Nowadays it stands for products with high end tolerance specs - thanks to the Limeys. Now with every factory that foreigners build in China - the Chinese get Know-How for very cheap. They then copy/transplant this Know-How into their own production factories - no own research necessary - saves a lot of coin - hence the cheap price available. Pretty simple logic - beats industrial espionage by a mile - you just have to be a little patient till they come of their own free will. Greetings Hans - who has no grudge in any form against craftsmen like Pizhihong - regardless of what machinery he and his team is using. Though I am glad he is using Amann thread - at least it says on the boxes : Made in Germany -
Chinese netizens share their sewing machine
Tigweldor replied to PiZhihong's topic in Leather Sewing Machines
That sure answered the million dollar question - and is about the same price we pay here in Europe for same machine - with all sorts of tariffs and shipping cost incorporated. Greetings Hans -
Chinese netizens share their sewing machine
Tigweldor replied to PiZhihong's topic in Leather Sewing Machines
That has a lot to do with paid wages. Japs are paid good - the workers are absolutely connected to their company - they have pride in their manufactured products. In China they pay very poor wages - if you don´t like it - you will be replaced by some other person out of the 1,5 billion person work force in the wink of an eye. And we all know how poor paid workers look upon quality of their craftsmanship. Greetings Hans -
Chinese netizens share their sewing machine
Tigweldor replied to PiZhihong's topic in Leather Sewing Machines
For some strange reason - there is Juki-China as well ---- https://www.jukichina.com Well, then let us look at the labels from different brands : Cowboy, Techsew, Tyson, all the Sailrite models - and see if we can find a "made in China" decal on them. Here in Germany they have veered off to a different trick - merchandise manufactured in China is declared as "designed in Germany" - with no country of manufacture declared properly on the label. That actually means : the consumer is not getting f....d about country of manufacture - he is just getting severely mislead on purpose. I am not saying this to profile my image - it is just a plain fact of modern manufacturing "ethics". -
Chinese netizens share their sewing machine
Tigweldor replied to PiZhihong's topic in Leather Sewing Machines
Well, at least you are using Amann Serafil Tex 10 - a good German thread and not some no-name-brand for cheap coin. Still haven´t answered the million dollar question, though. Greetings Hans -
Chinese netizens share their sewing machine
Tigweldor replied to PiZhihong's topic in Leather Sewing Machines
Very good - I like your set up. Looks very professional. What do you produce - or better : want to produce -- as all machines look to be in extremely new condition. And here for the million dollar question : was your Juki manufactured in China or in Japan ? I ask this because it is rumored that even Jap companies farm out production to China these days. Greetings Hans -
Still waiting for the belt specs.
-
I know that they made a version for the army - used to have one on one of my now long deceased drives. Check out "internet archives" under : https://archive.org You will have to register - but I believe that is where I got it from myself. Mucho good info on that site - all for free - I like that. Greetings Hans
-
well, a real simple experiment would be to just run a thicker thread on your bobbin. I all goes well then - you know that it is your bobbin holder tension spring that can not handle thinner string in its`present set up. You can then take out the whole hook assembly, take out the little screw on the spring to remove and flatten latter out, so that the gap between it and the bobbin holder is diminished to nigh on zero.
-
Yes, nice looking Consew. Has a peculiar thin strip wear mark on the machine table - as if it only had to sew narrow strips for a long time - or maybe a many a mile of zippers. I would use a vacuum over compressed air - and "choke" the hose of the vacuum cleaner at the end with a foot of garden hose taped air tight to it - makes for added/increased "suction" and you can get better access and real close into tight crevices - all for free - if you don´t count the half roll of good black electrician tape.
-
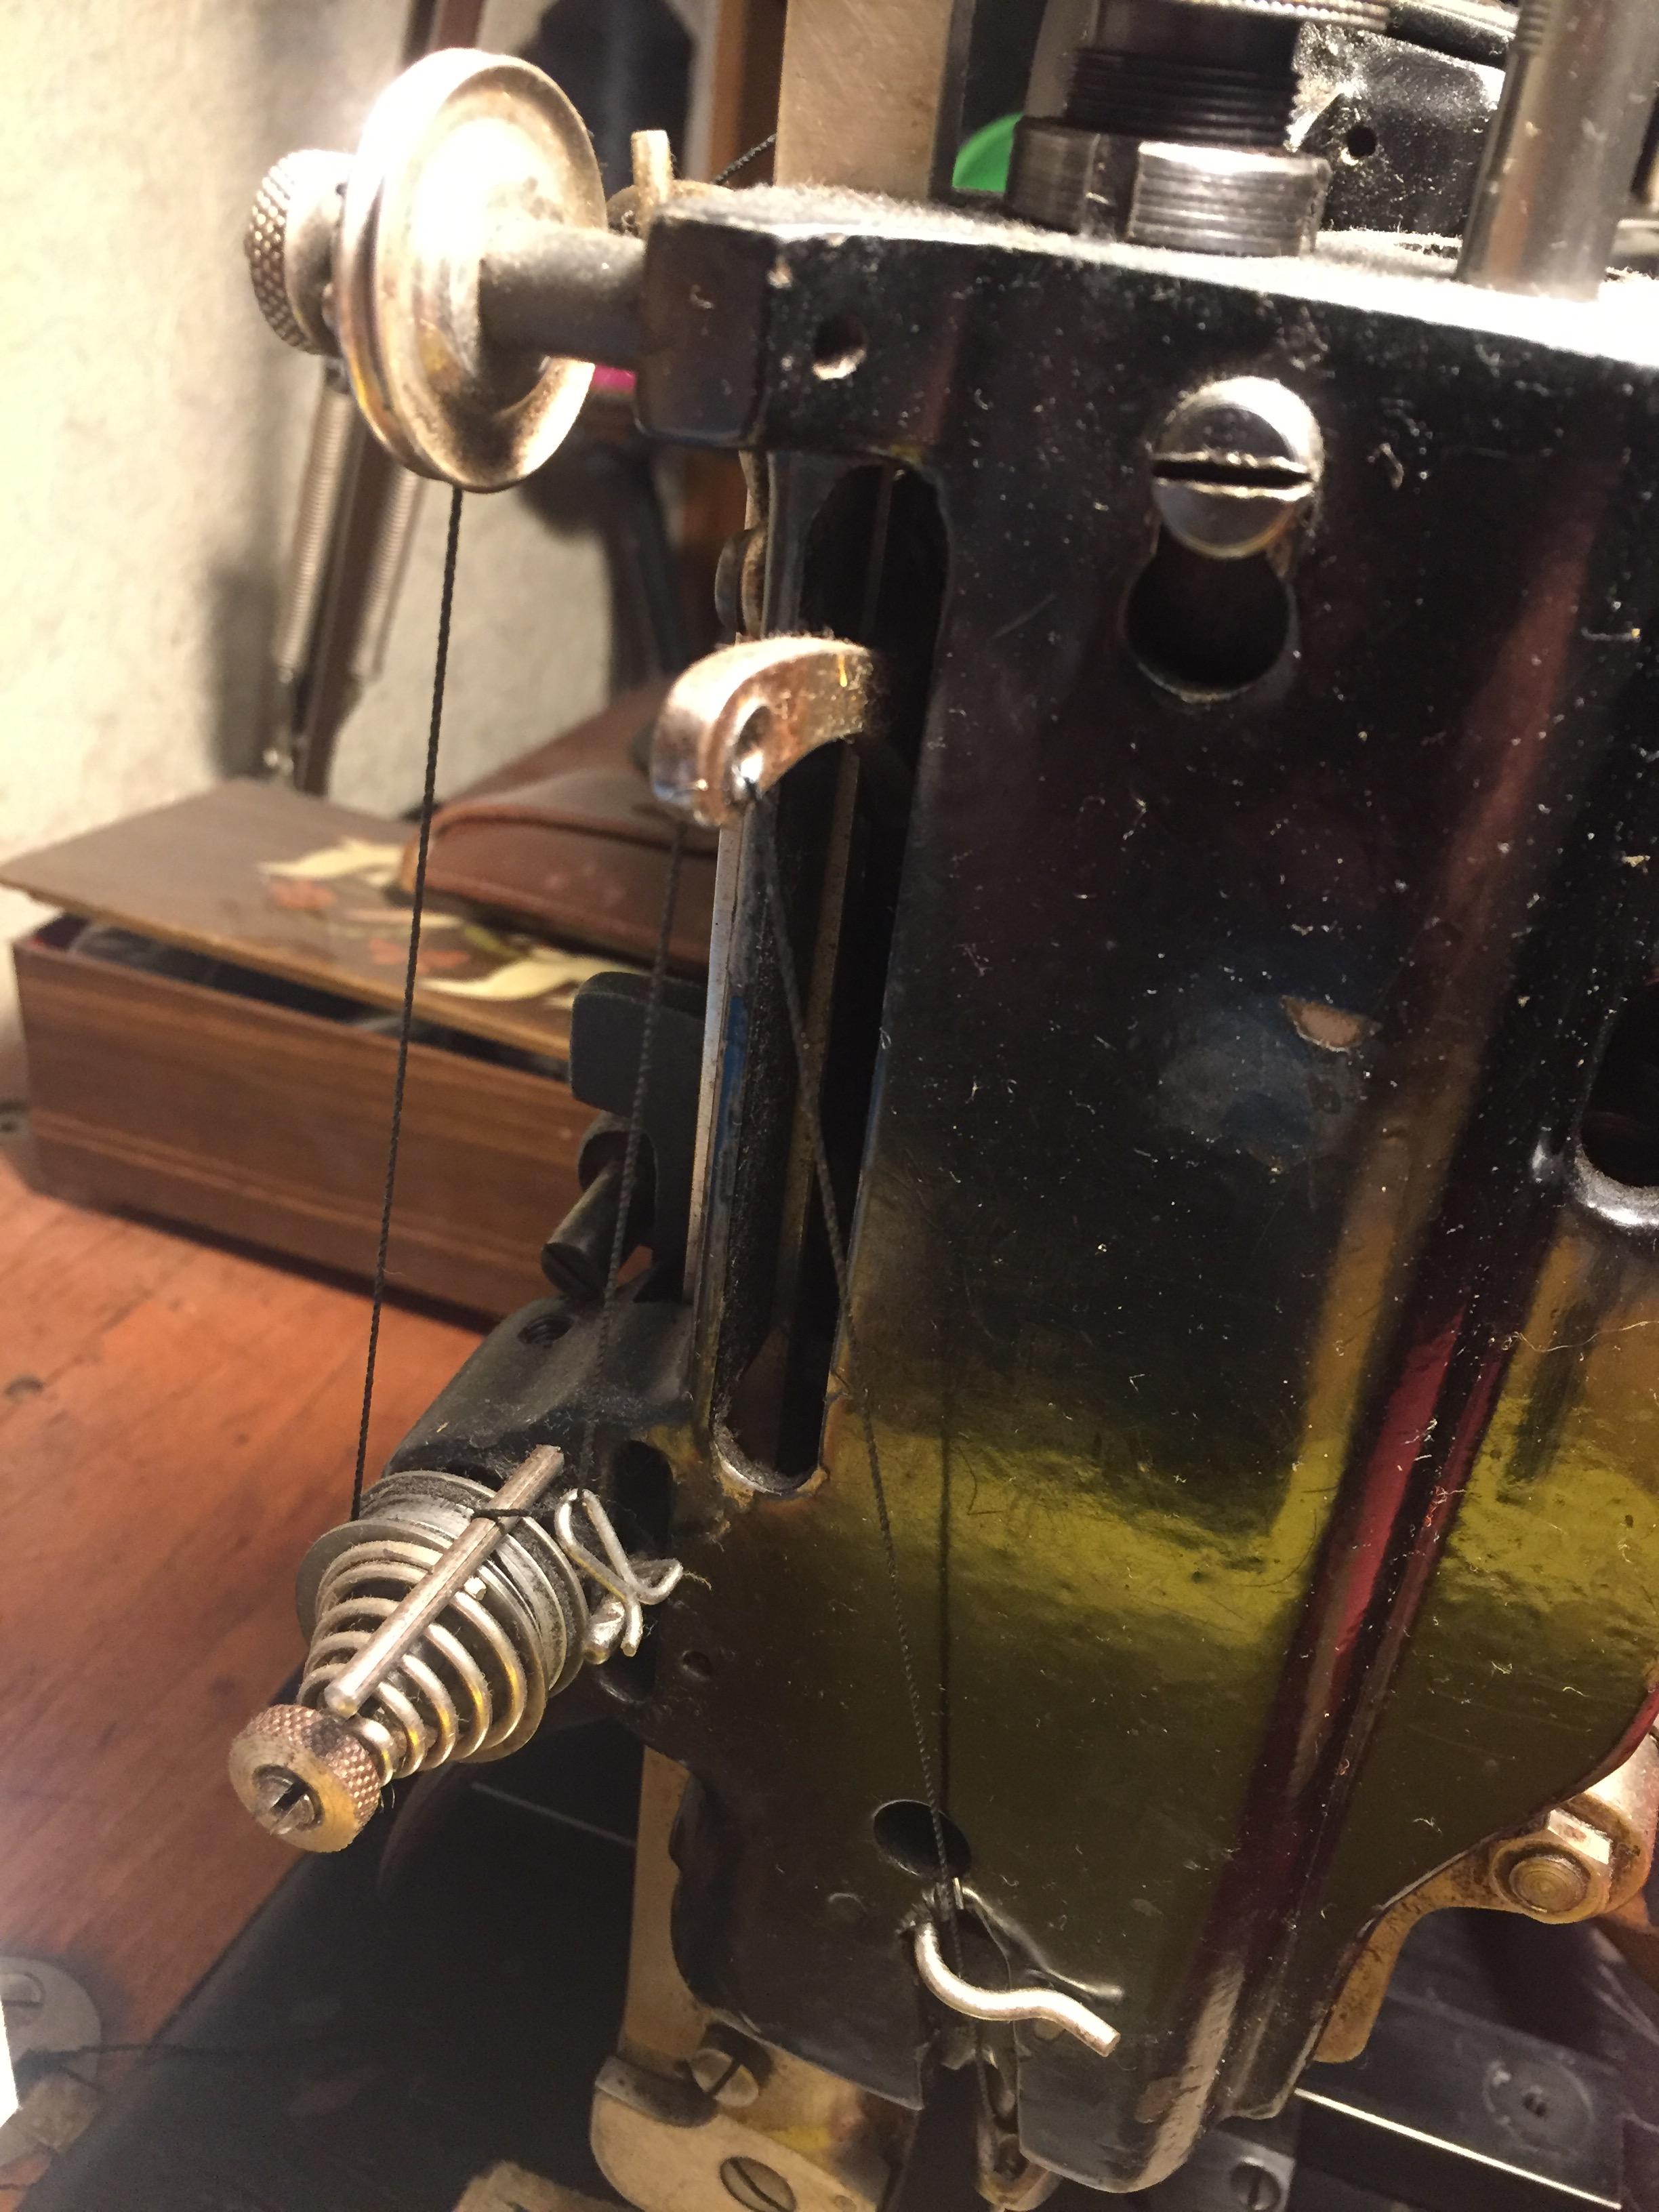
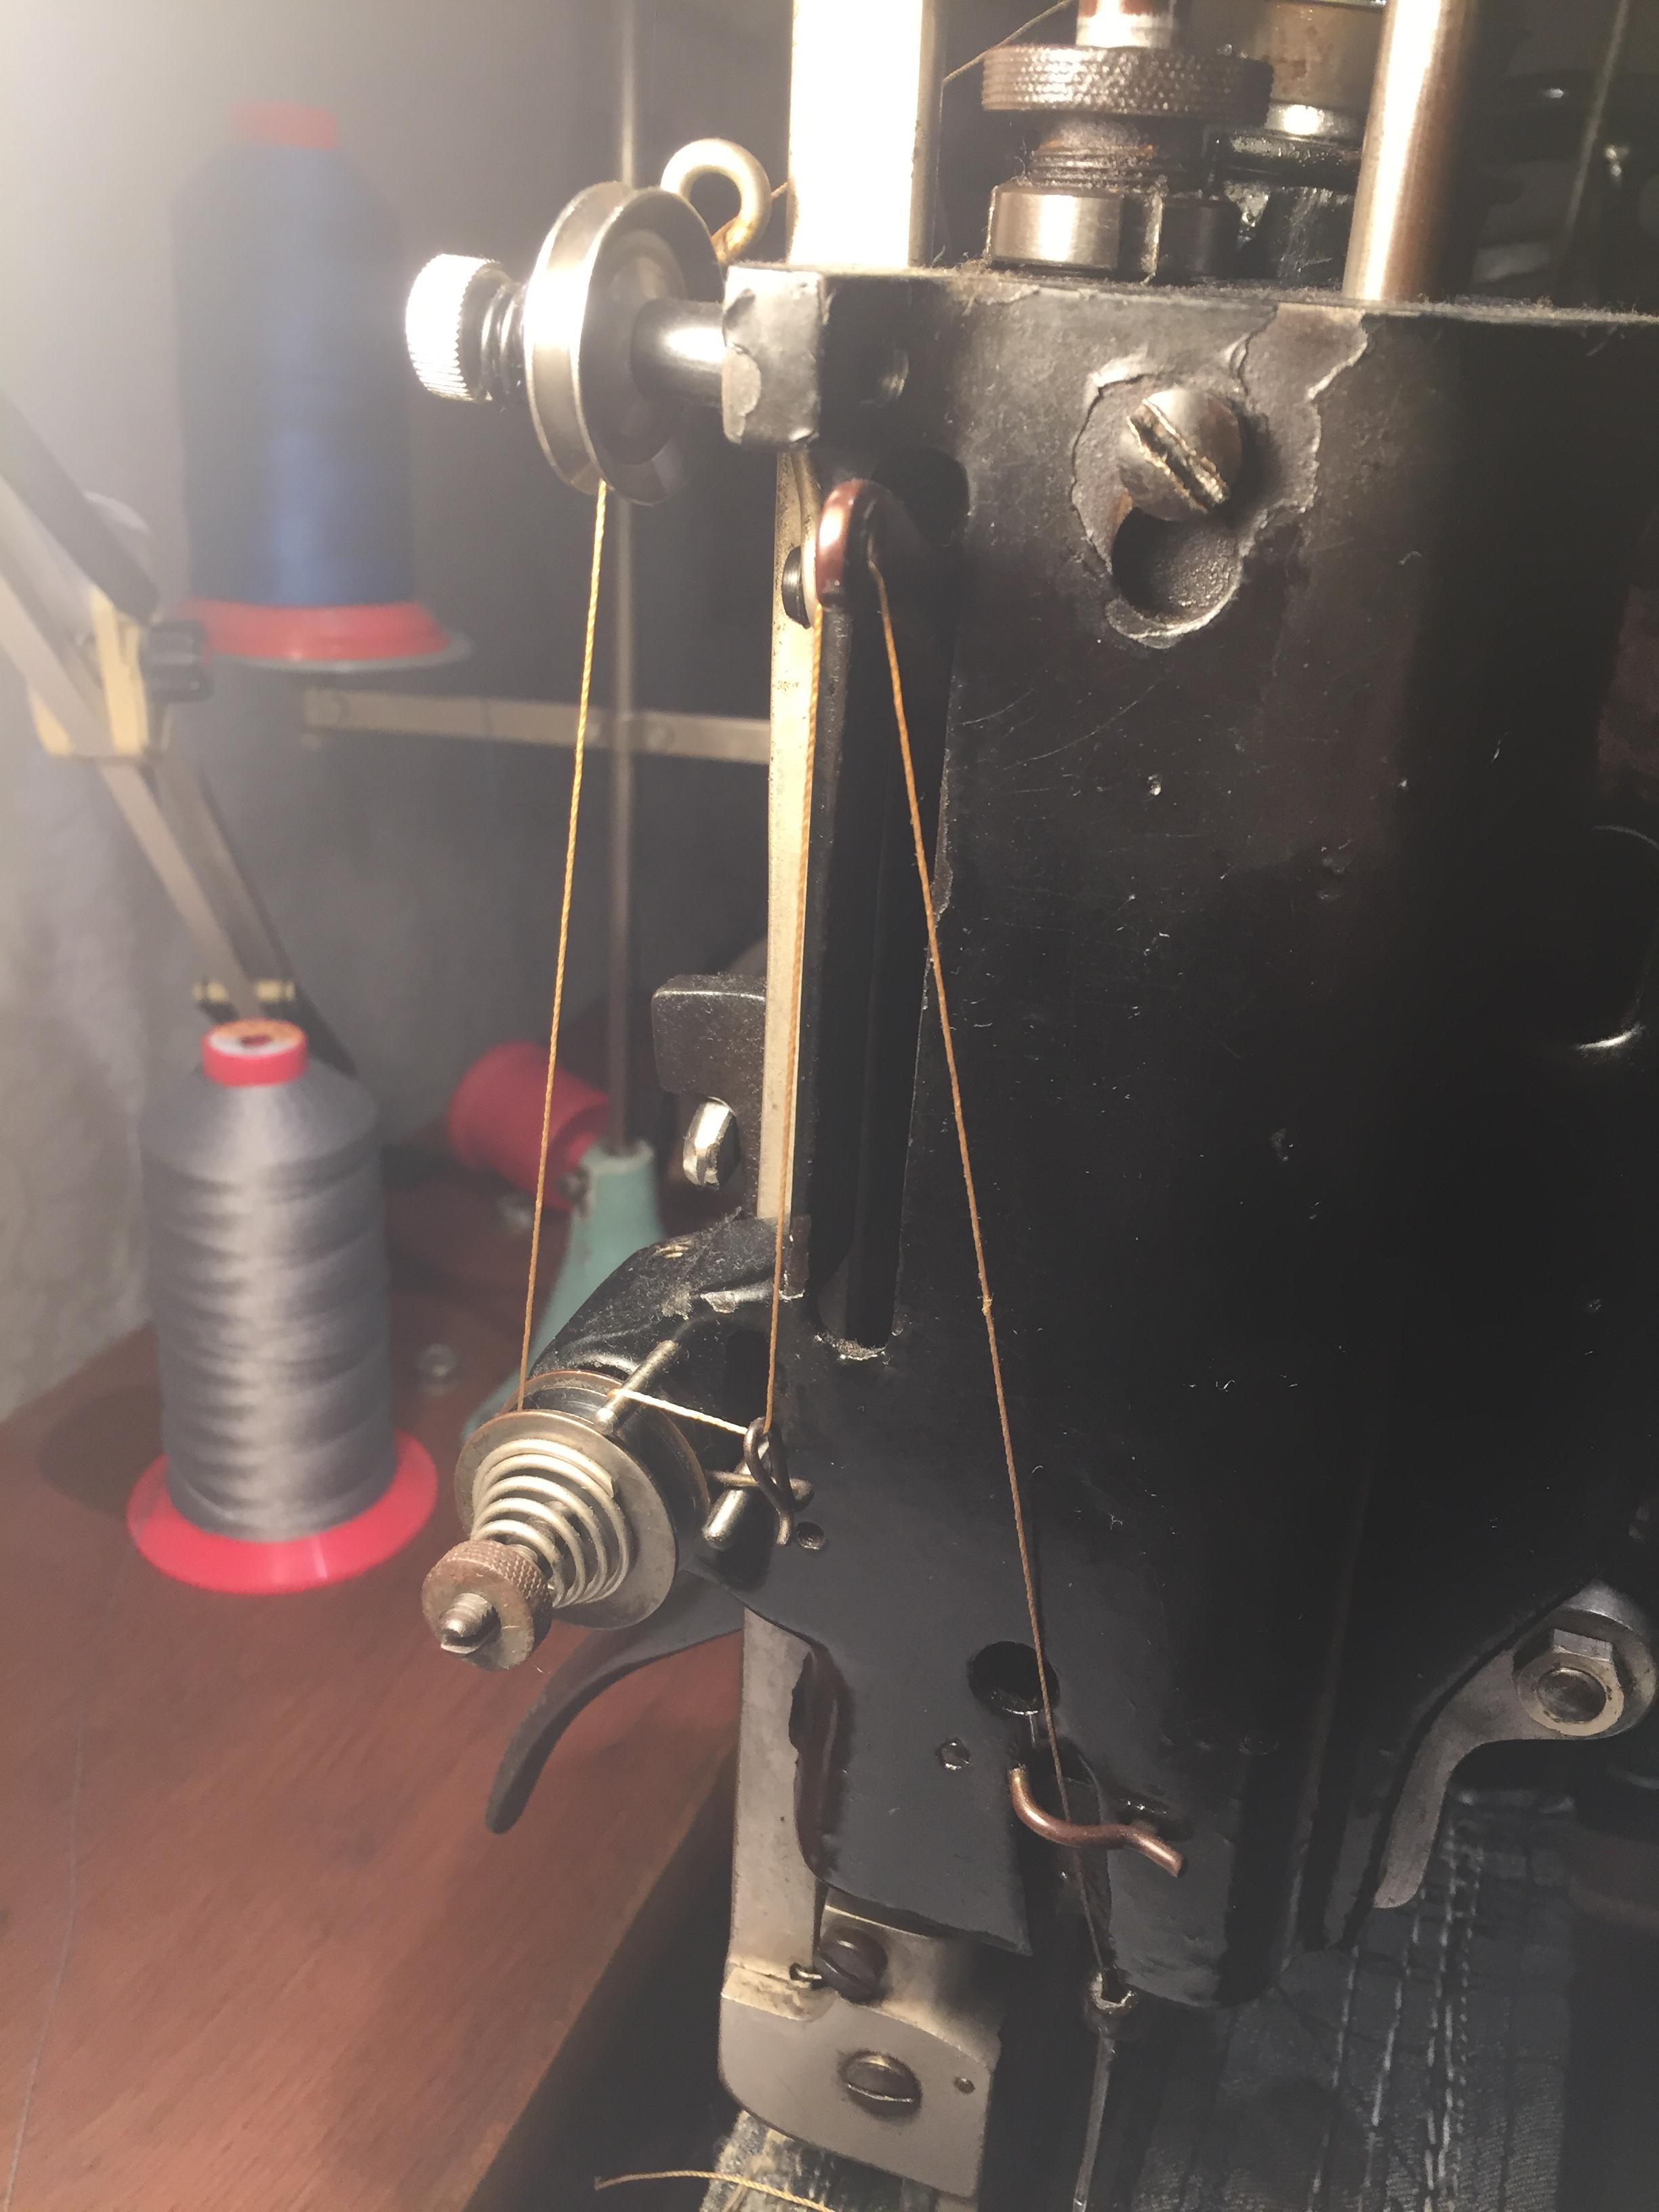
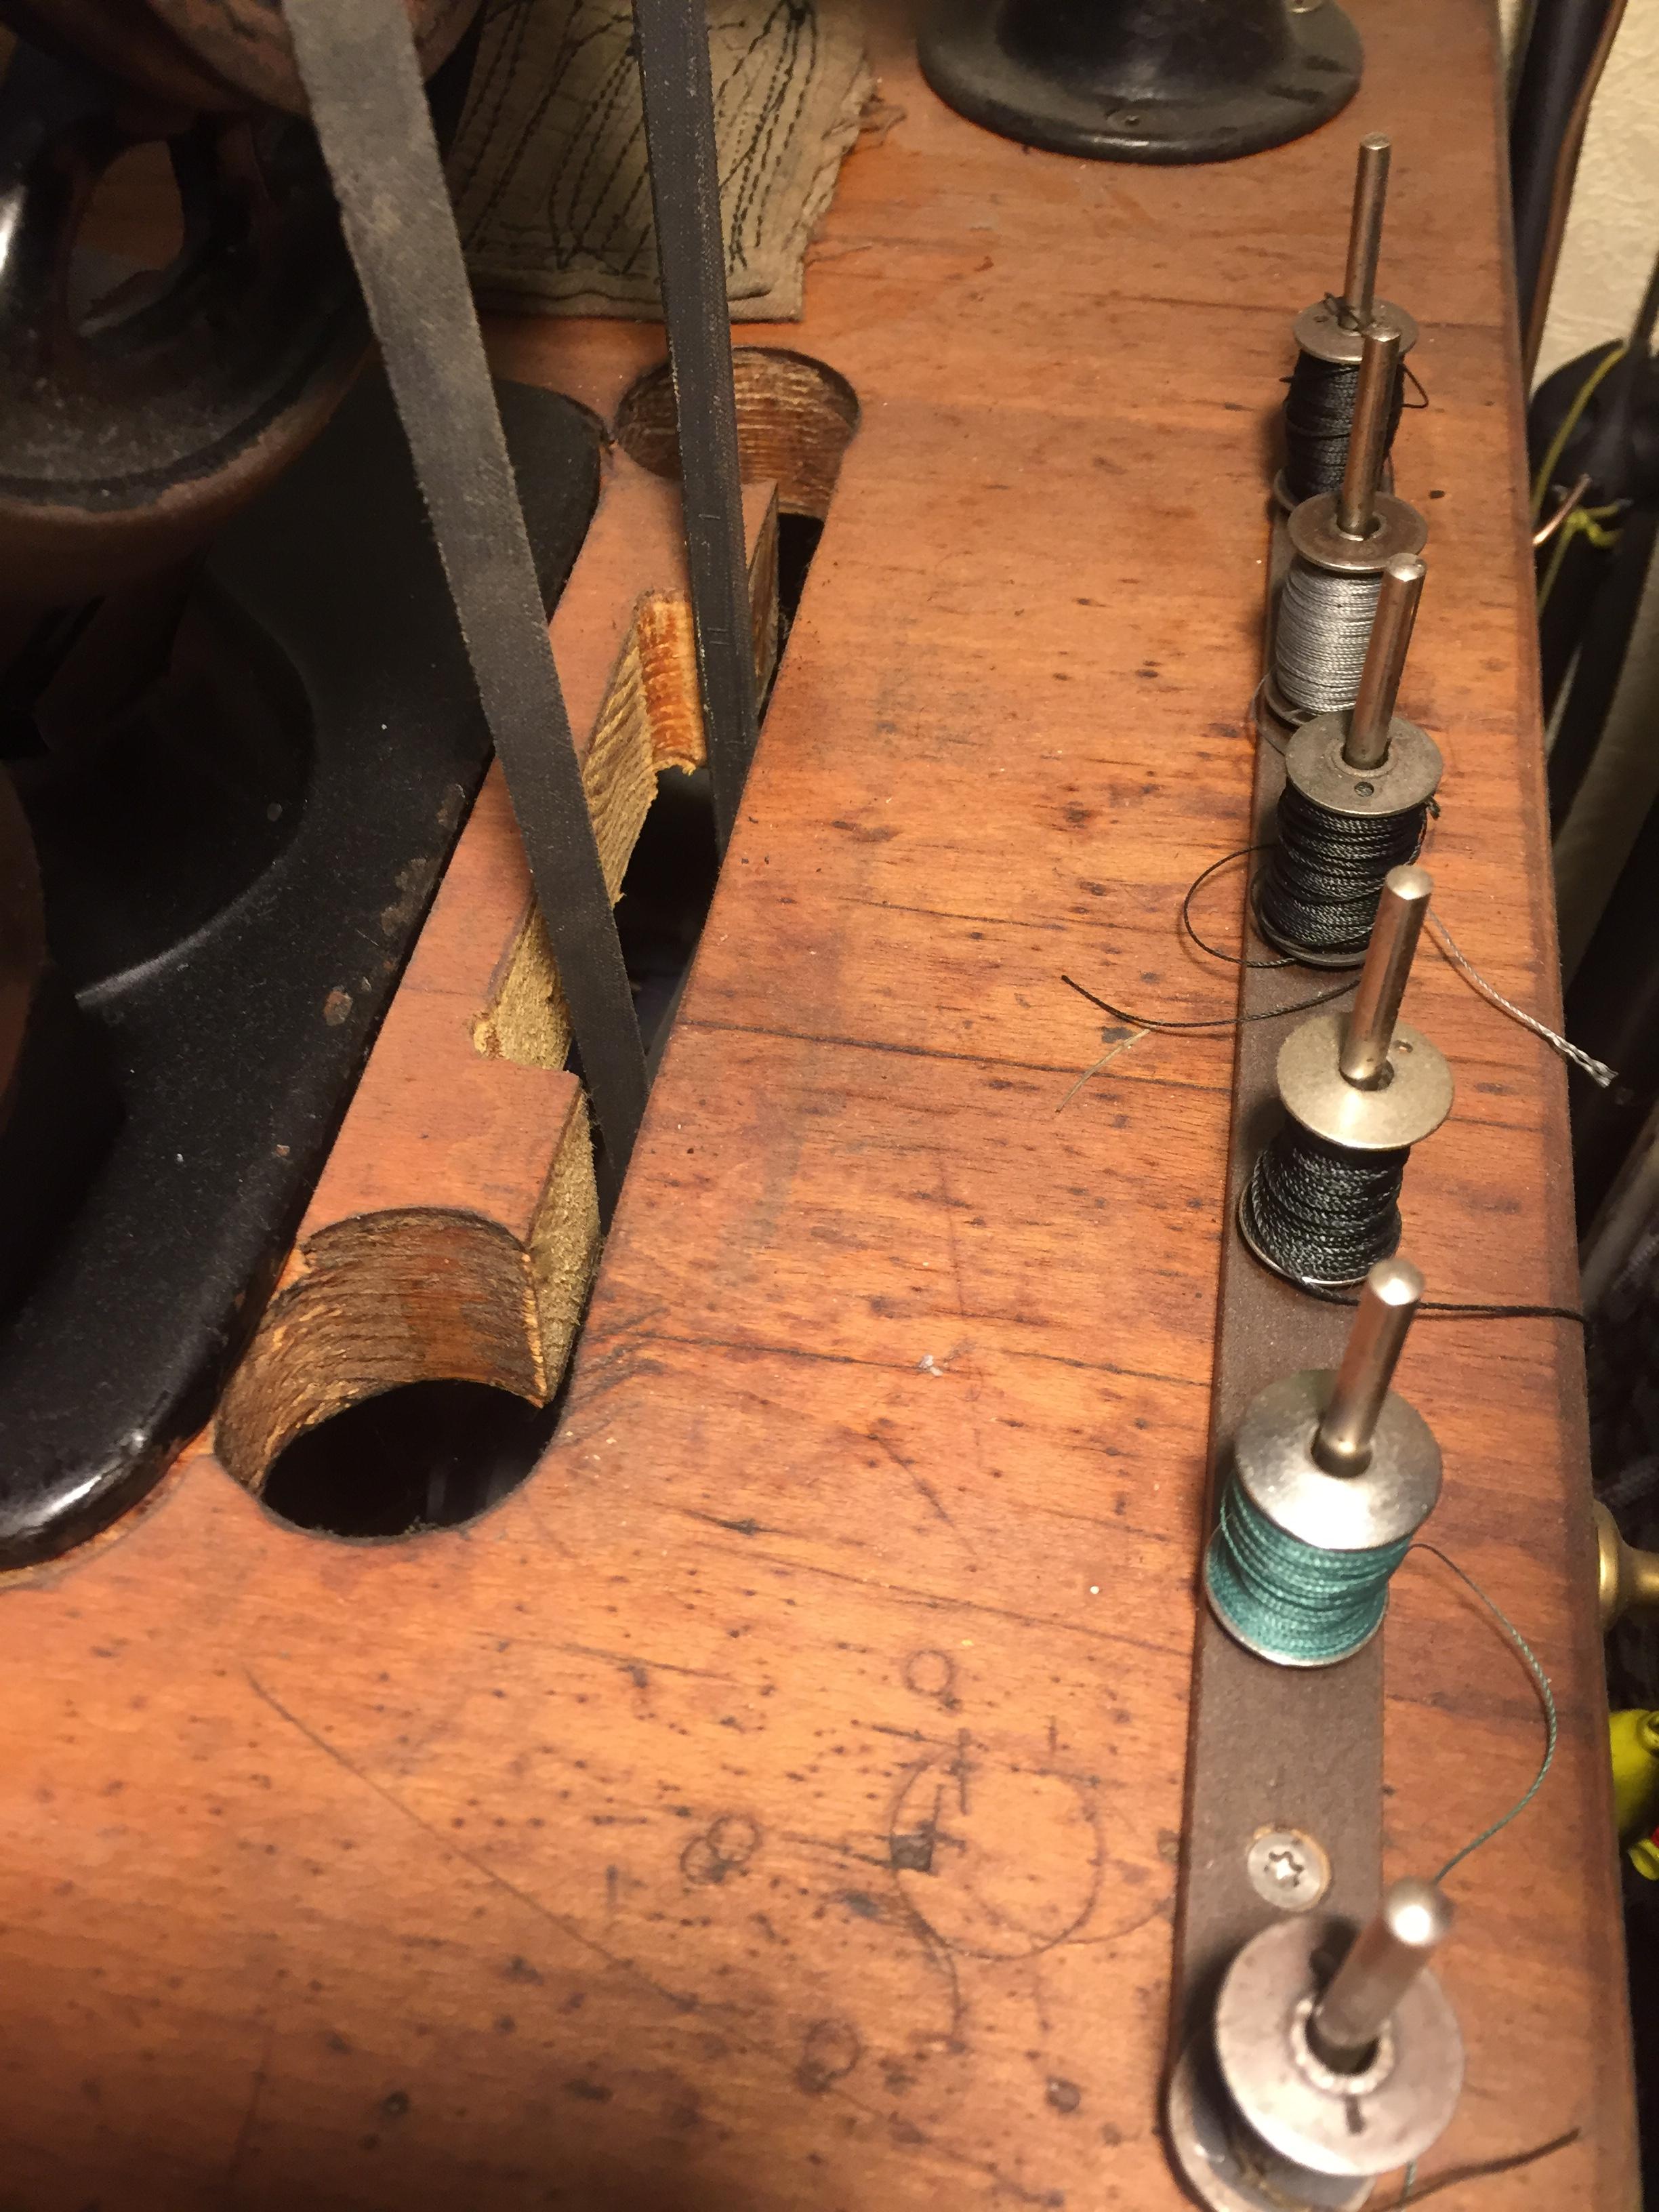
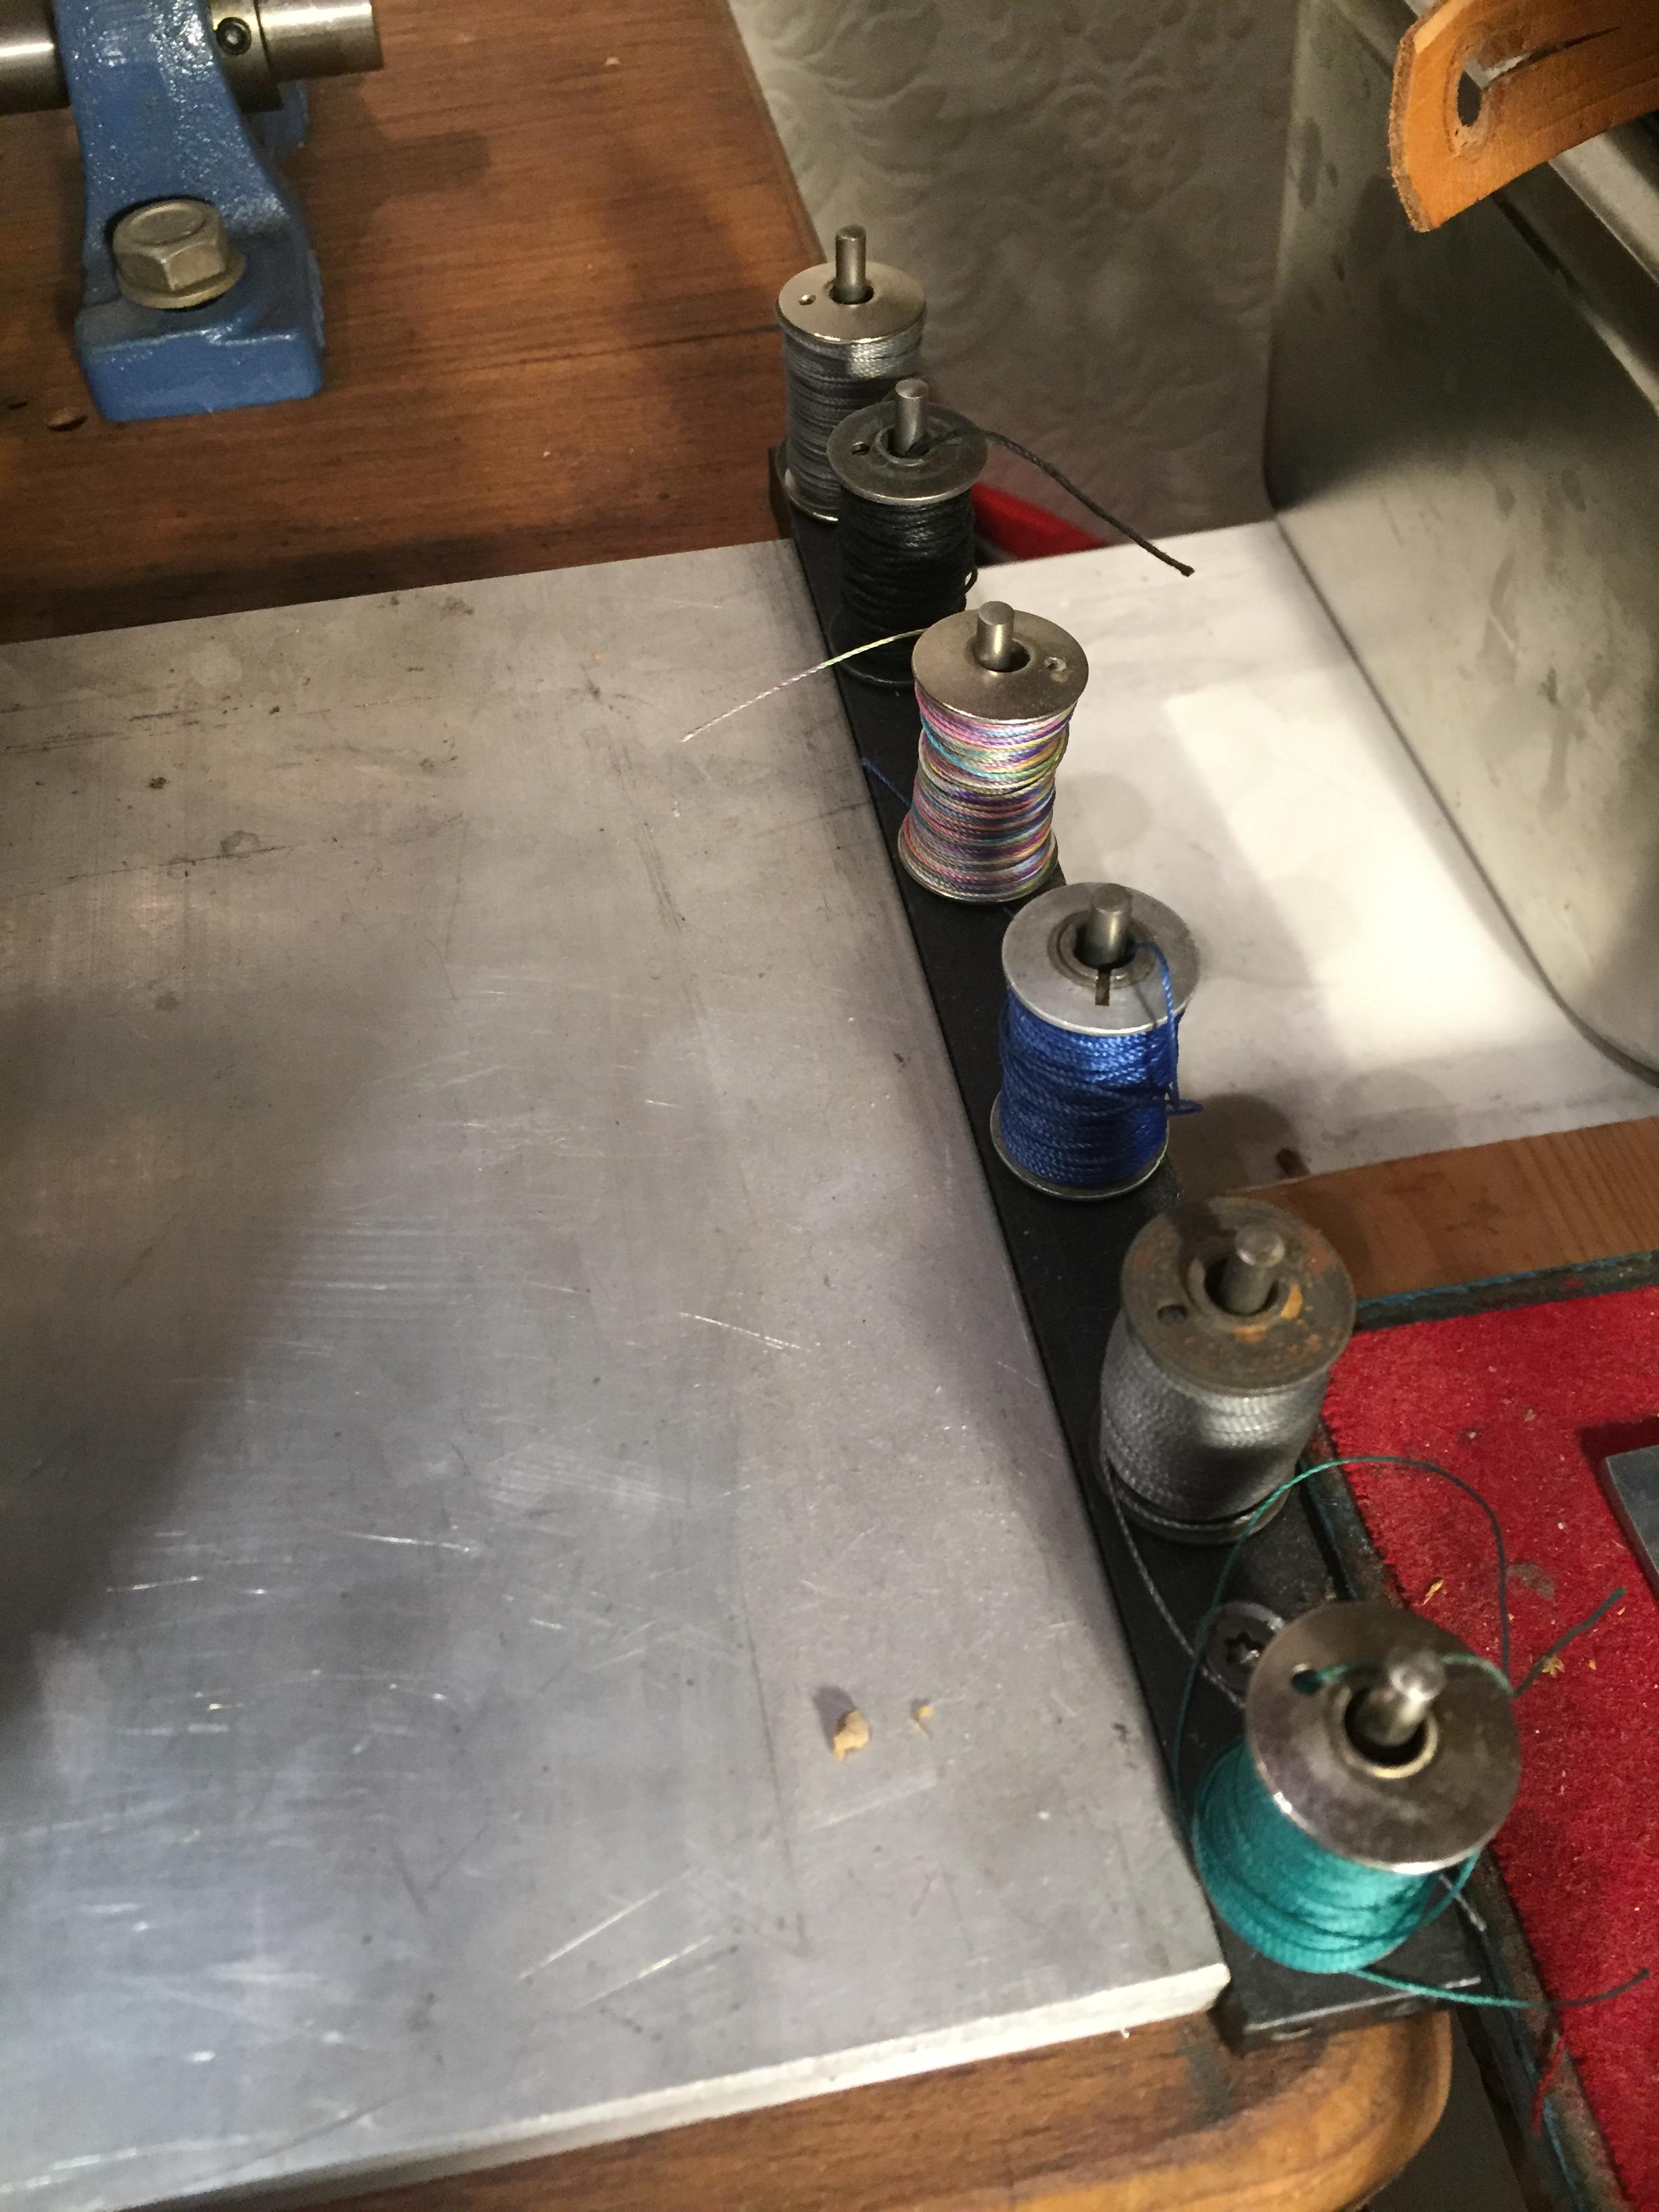
Take a look at the routing of the top thread. The last tensioning device does not clamp between two discs, rather the thread is wound around the wheel 1 1/2 times (important with that amount of turns) before it encircles the metal dowel and then enters the take back spring. That wheel is pressed by the spring pressure against a leather or felt washer. If this soft washer is missing - wheel braking can not be adjusted properly - check that. The take up spring has to work as well, to keep adequate tension on loose top thread - check that. You may have to remove the wheel to check if the take up spring leg is in the proper location to produce adequate needed pressure. You want that spring to be able to move freely under rather light pressure - not tight as hell - that defeats its`purpose. A fault often found due to an adjustment error. Here are two pics from my Adler 4 and my Adler 5 - very close clones of the Singer 45K. I usually use one size smaller than top thread for bottom thread - simply because I can get more "yards" onto the bobbin. Actually a 160/23 needle is on the big side for TEX 20 Thread - better to use a 140/22 needle for that - especially if you are sewing fabric. It is also nice to have quite a few bobbins ready to go - makes for a fast change if/when needed. The bobbin holders are easy to make : drill under size holes in a piece of flat bar and press/hammer the cut to length round stock into place. Takes no time at all if you use an aluminum flat bar and chamfer one end of the round stock on a grinder. A wood pecker would of course use wood and proper length dowels - but I am into fabricating from metal - just personal preference cause I own a metal business.
-
A whole new shuttle hook with bobbin costs small coin. https://www.ebay.de/itm/365419392772?_ Get 10 new bobbins while you´re at it. Greetings Hans
-
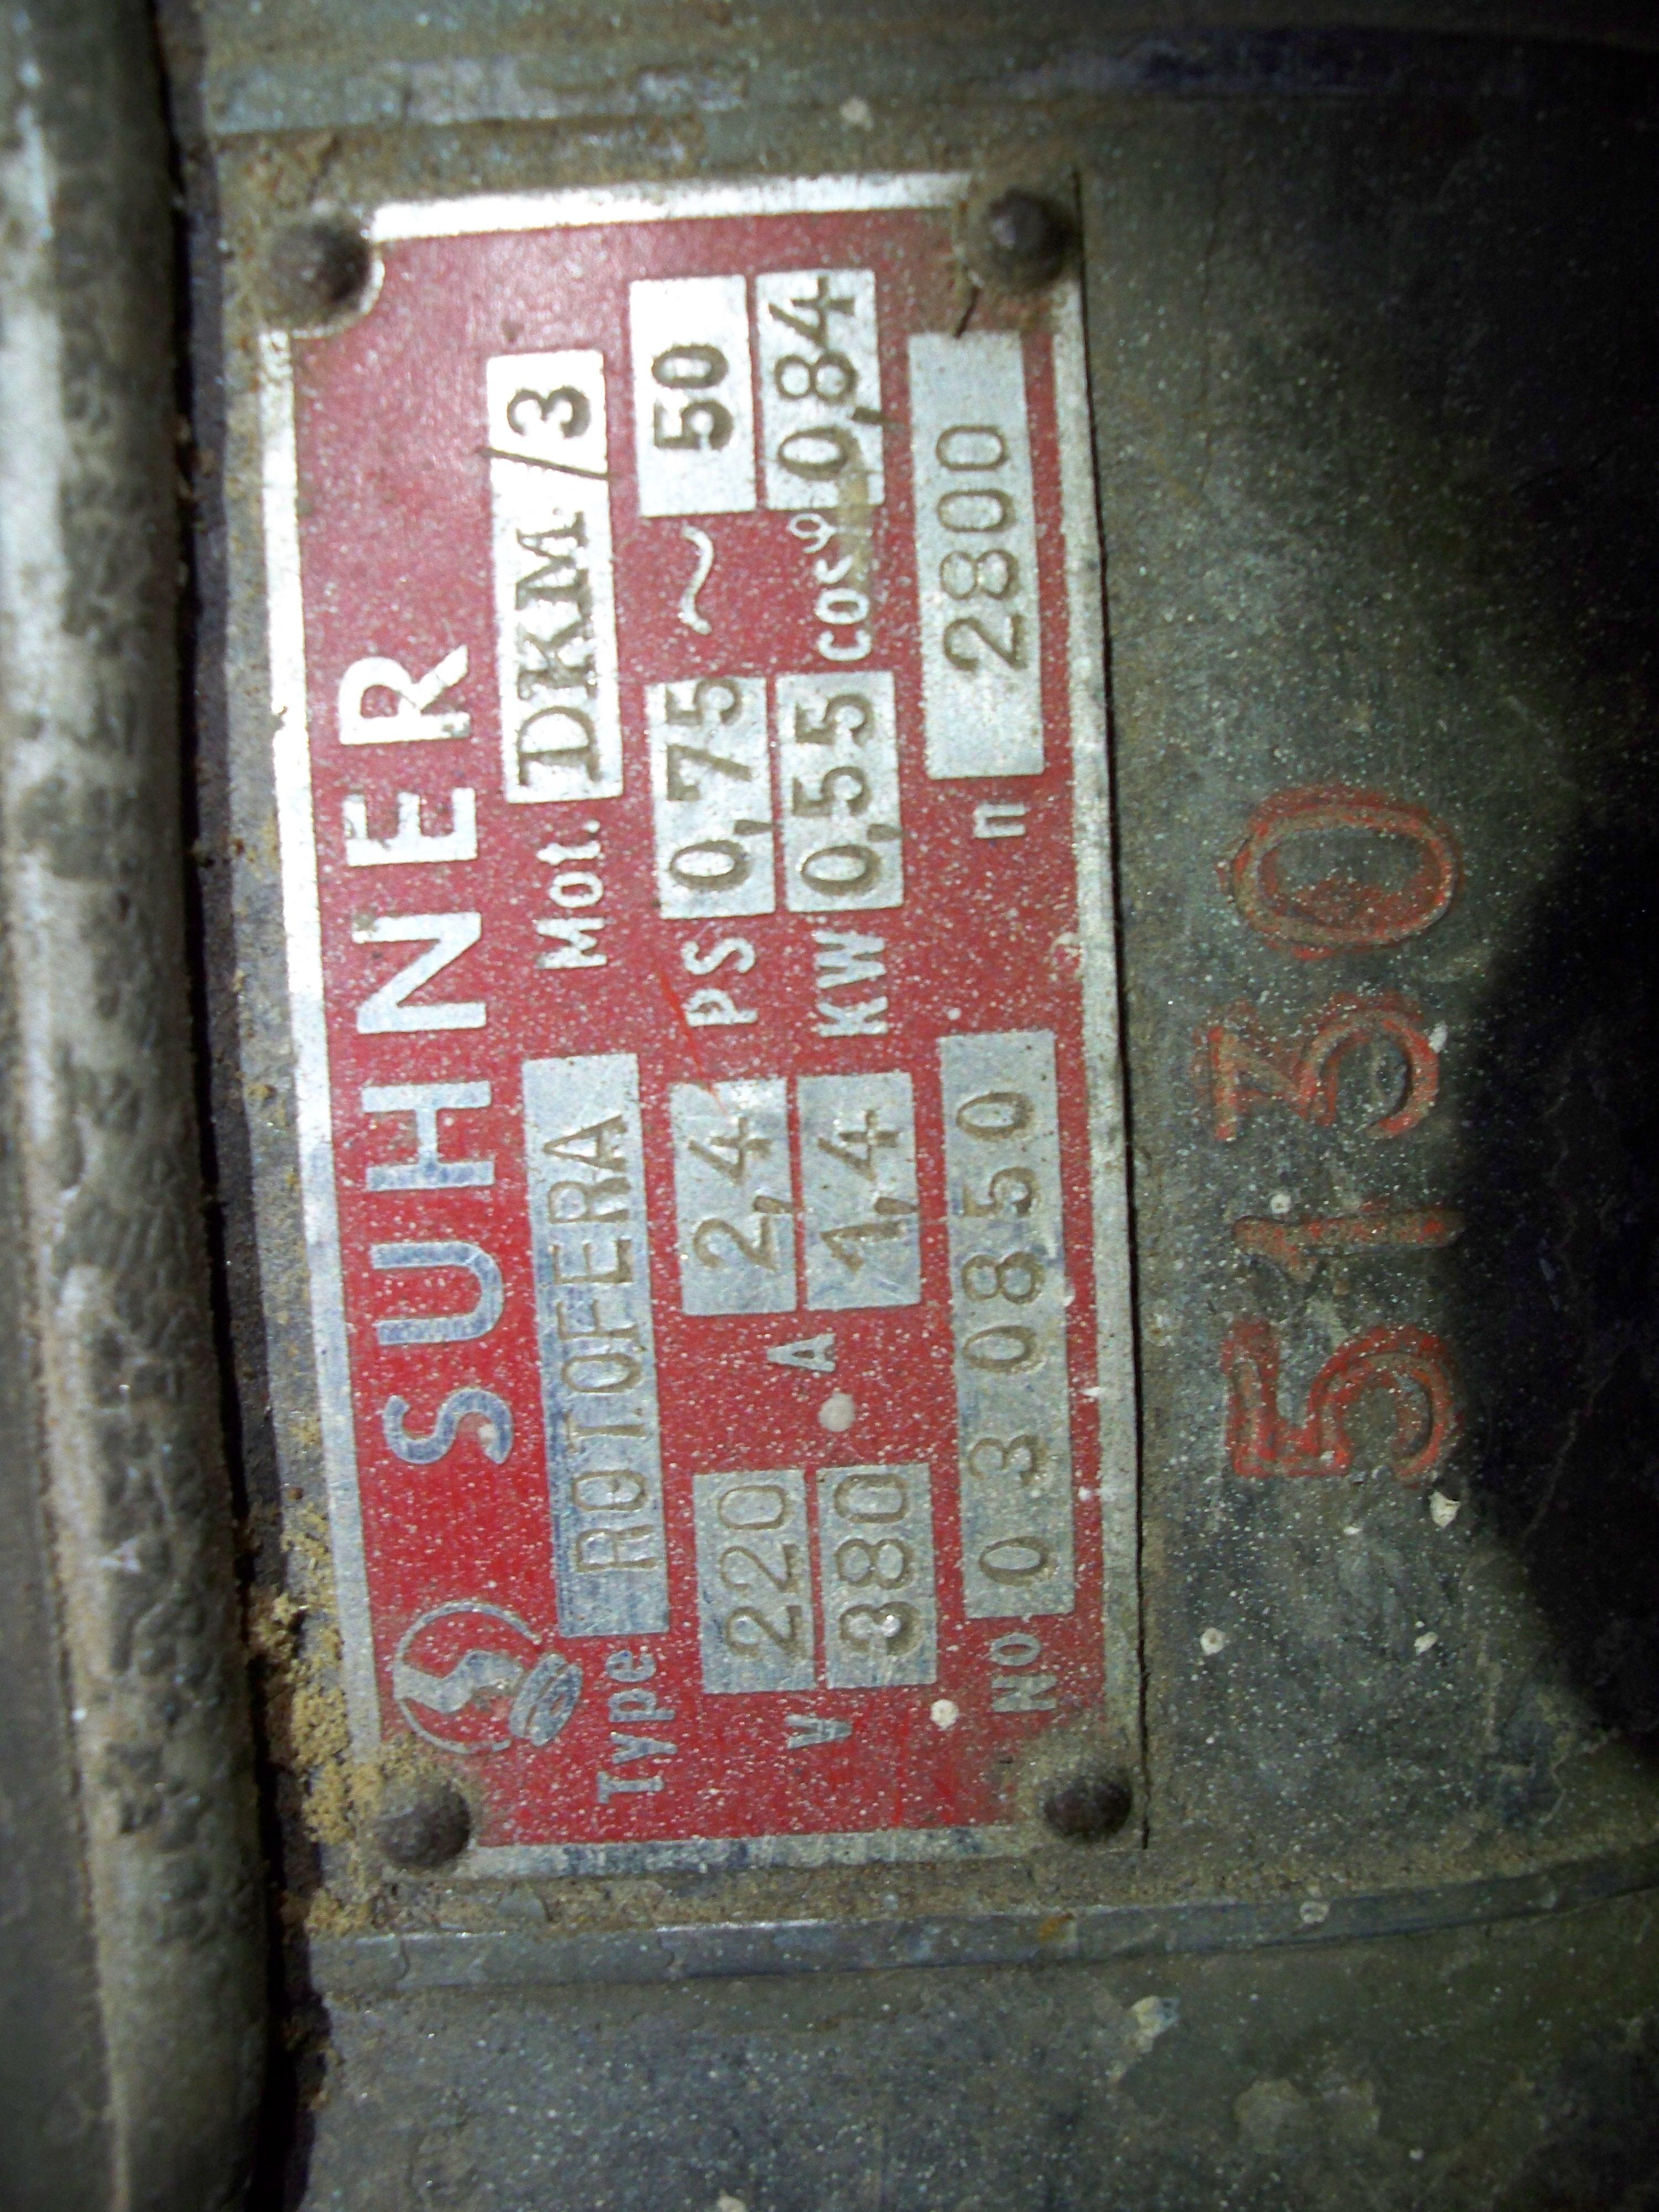
I don´t know if it´s forbidden - so I dindn´t enter it above : Suhner still makes good machines - here a link to their felxible shafts. https://www.suhner-abrasive.com/en/products/flexible-shafts/ In Germany the Pferd brand is identical - I think they even produced for Suhner - but all parts are normed and fully interchangable. I can definitely recommend them, if any amount of rotary grinding is to be done - you have the power of a 1500 Watt drive unit - but only the fraction of the weight in your hand, as when the grinder is powered with an attached electric motor. The motor is a 380Volt unit - it hums along at a decent low level growl - not like the high pitched squeal of a 20 000 rpm pneumatic tool - or the plaguing sound of an 18 000 rpm electric die grinder. That makes work so much more enjoyable. I bought ALL my stuff used - new is to much for my budget. To change a bearing in an hand piece is a cinch - should be done when in hard use more often - I do work on cylinder heads once in a while and to port them, you do not want to use mickey mouse tools. I keep the small Suhner at home - run it from my portable VFD - the bigger ones are at the shop. I have adapters for the chuck of the hand piece to accommodate the 3mm shafts - many of the diamond abrasive tools come with such tiny shaft diameter. Greetings Hans
-
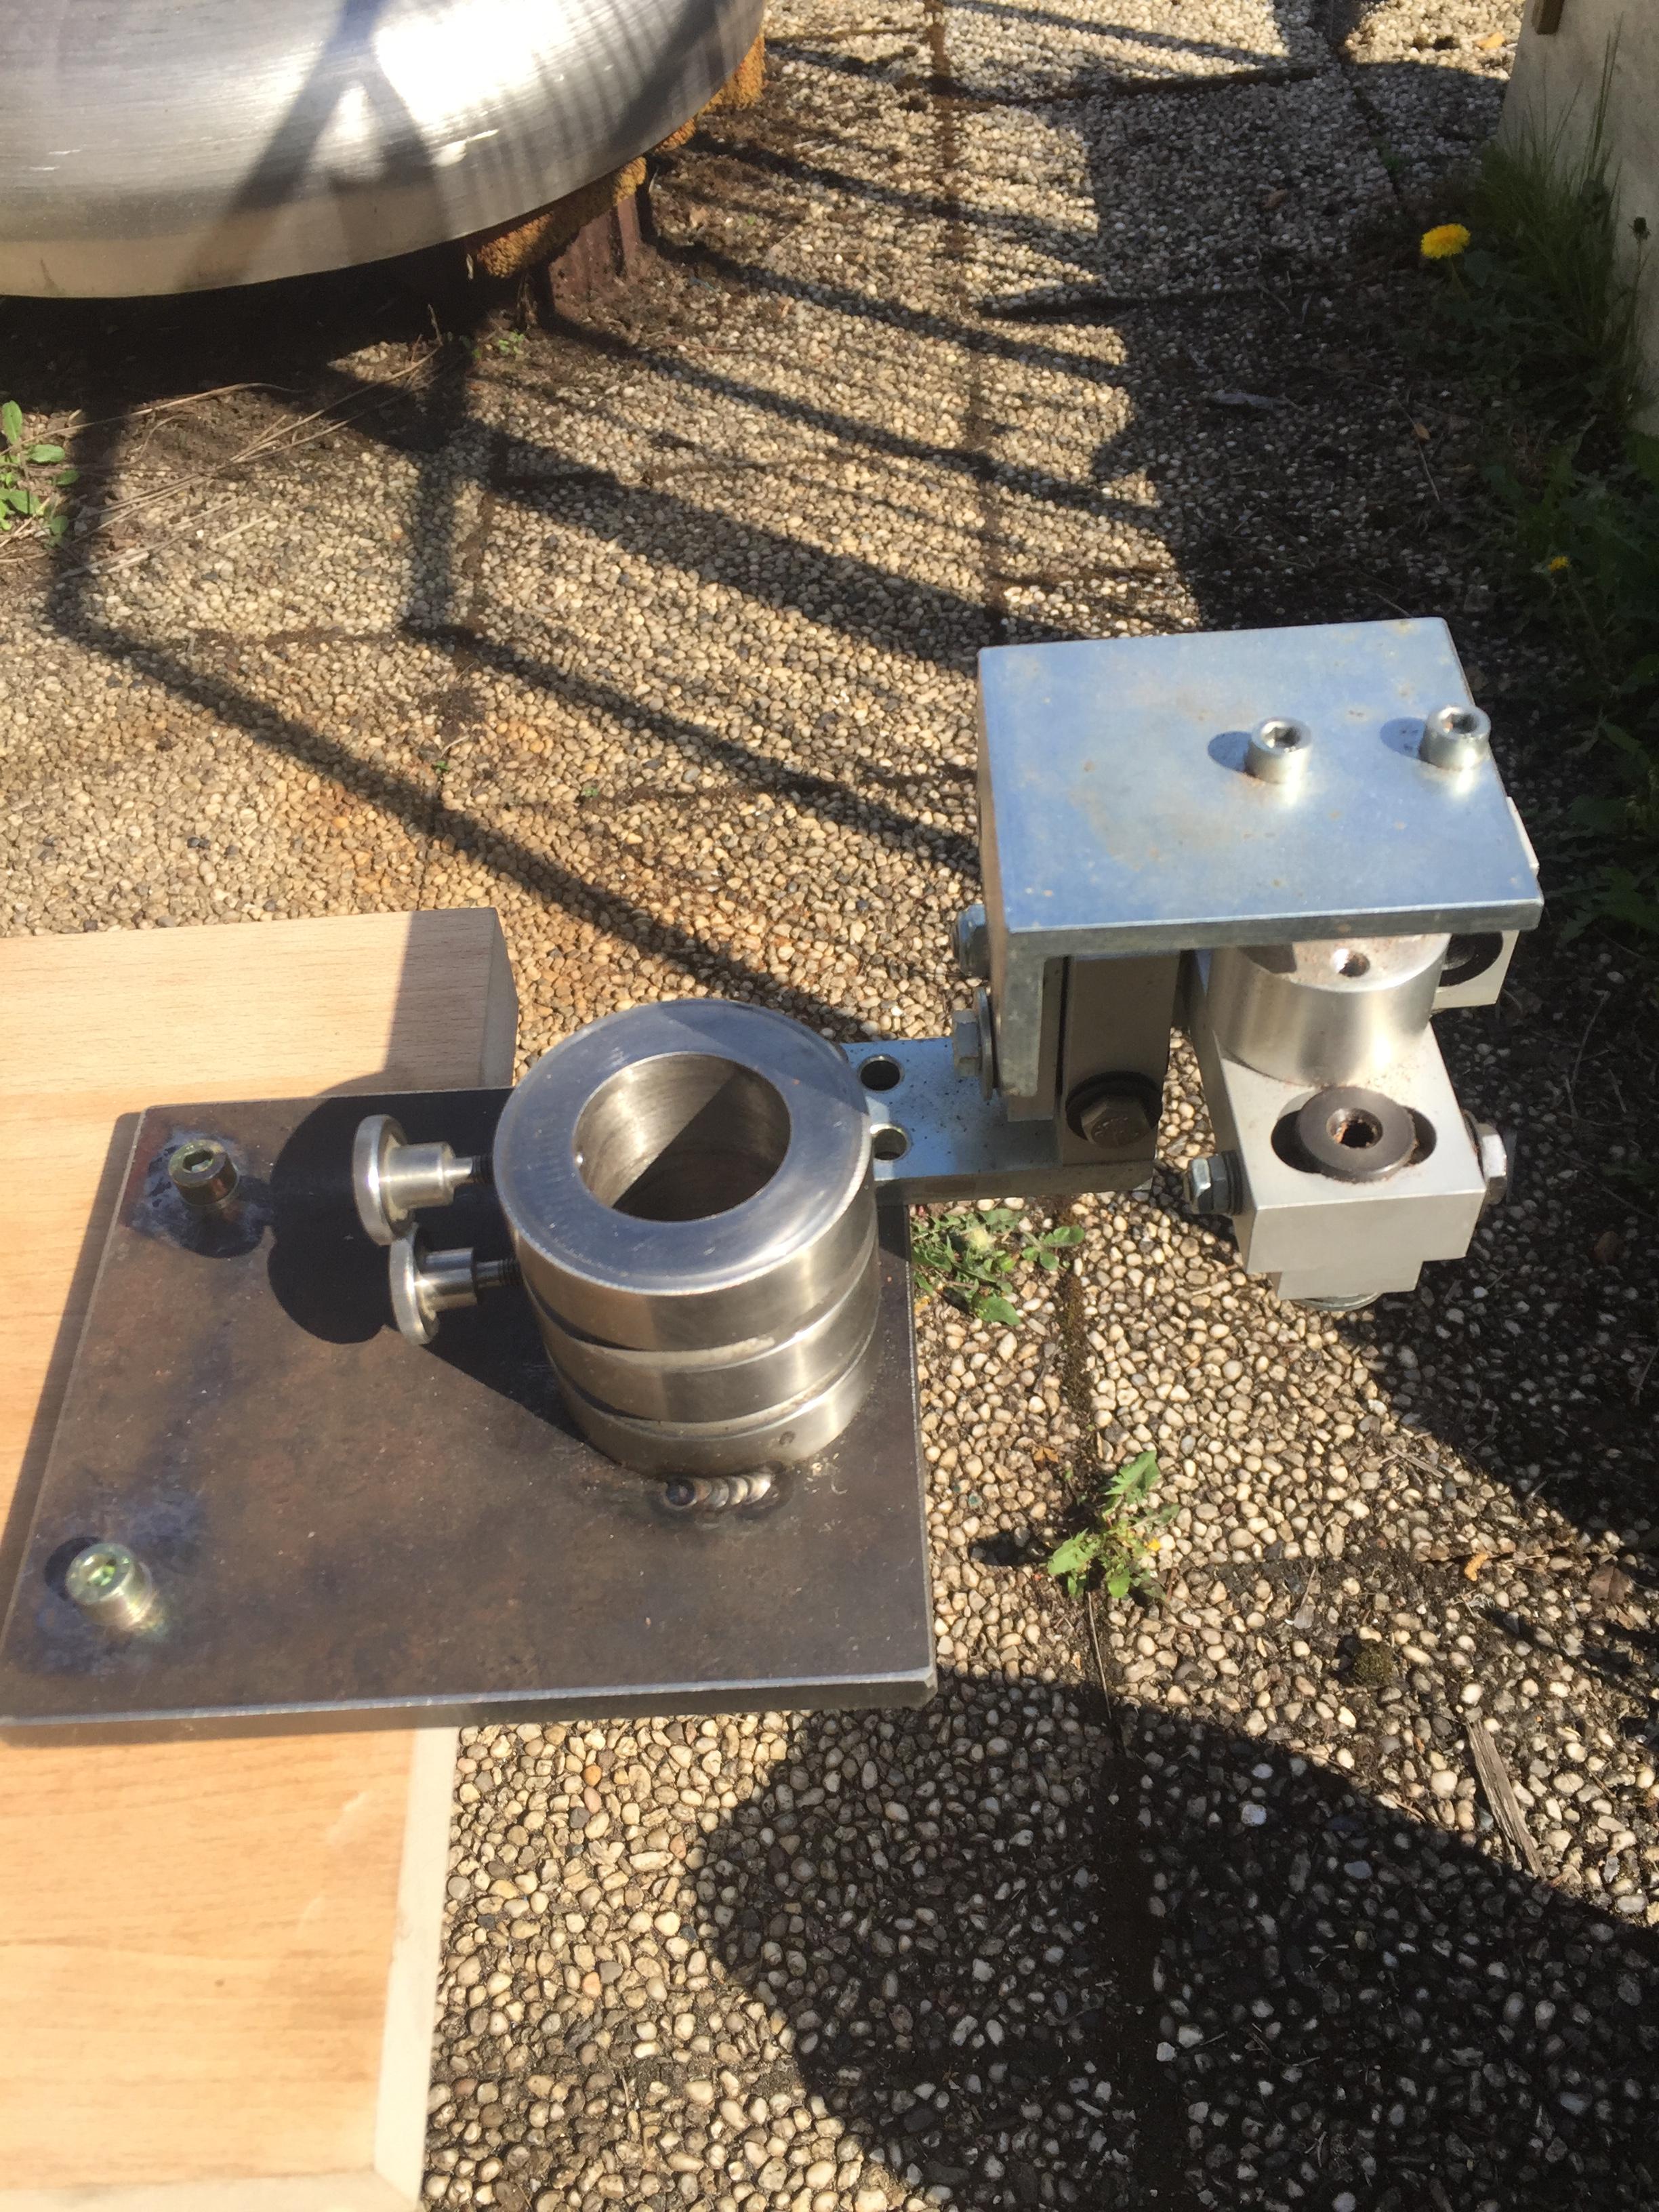
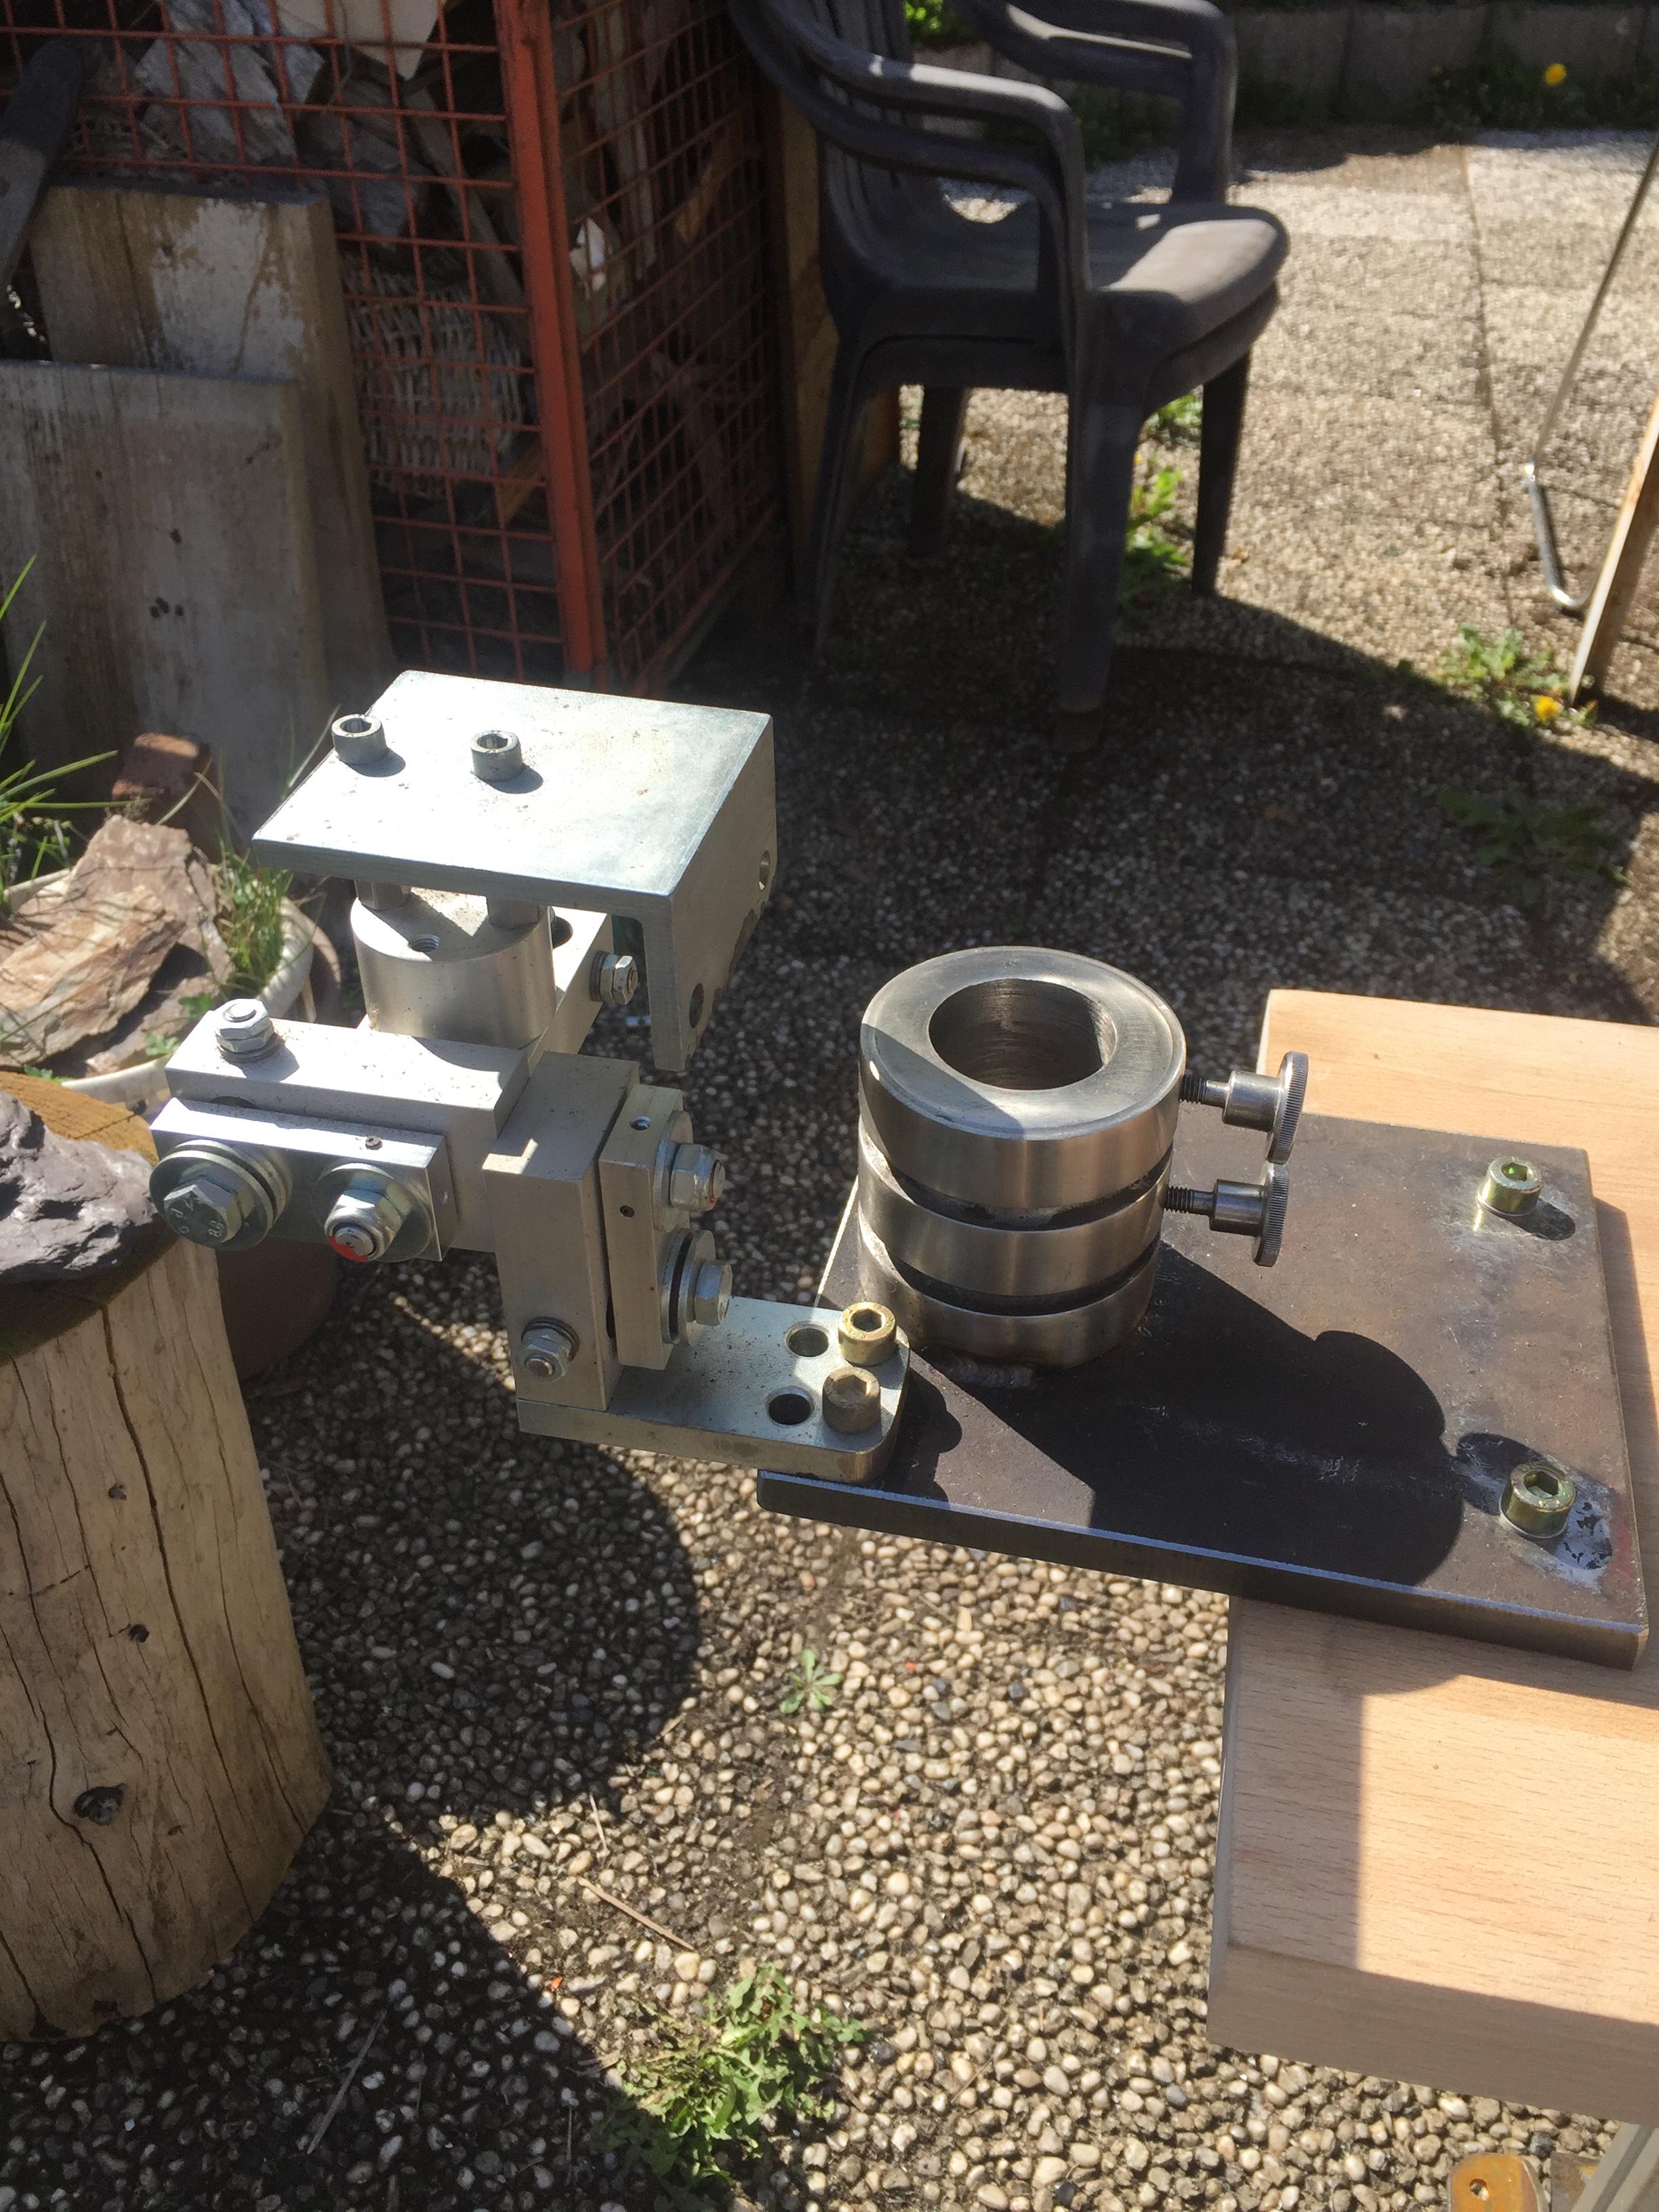
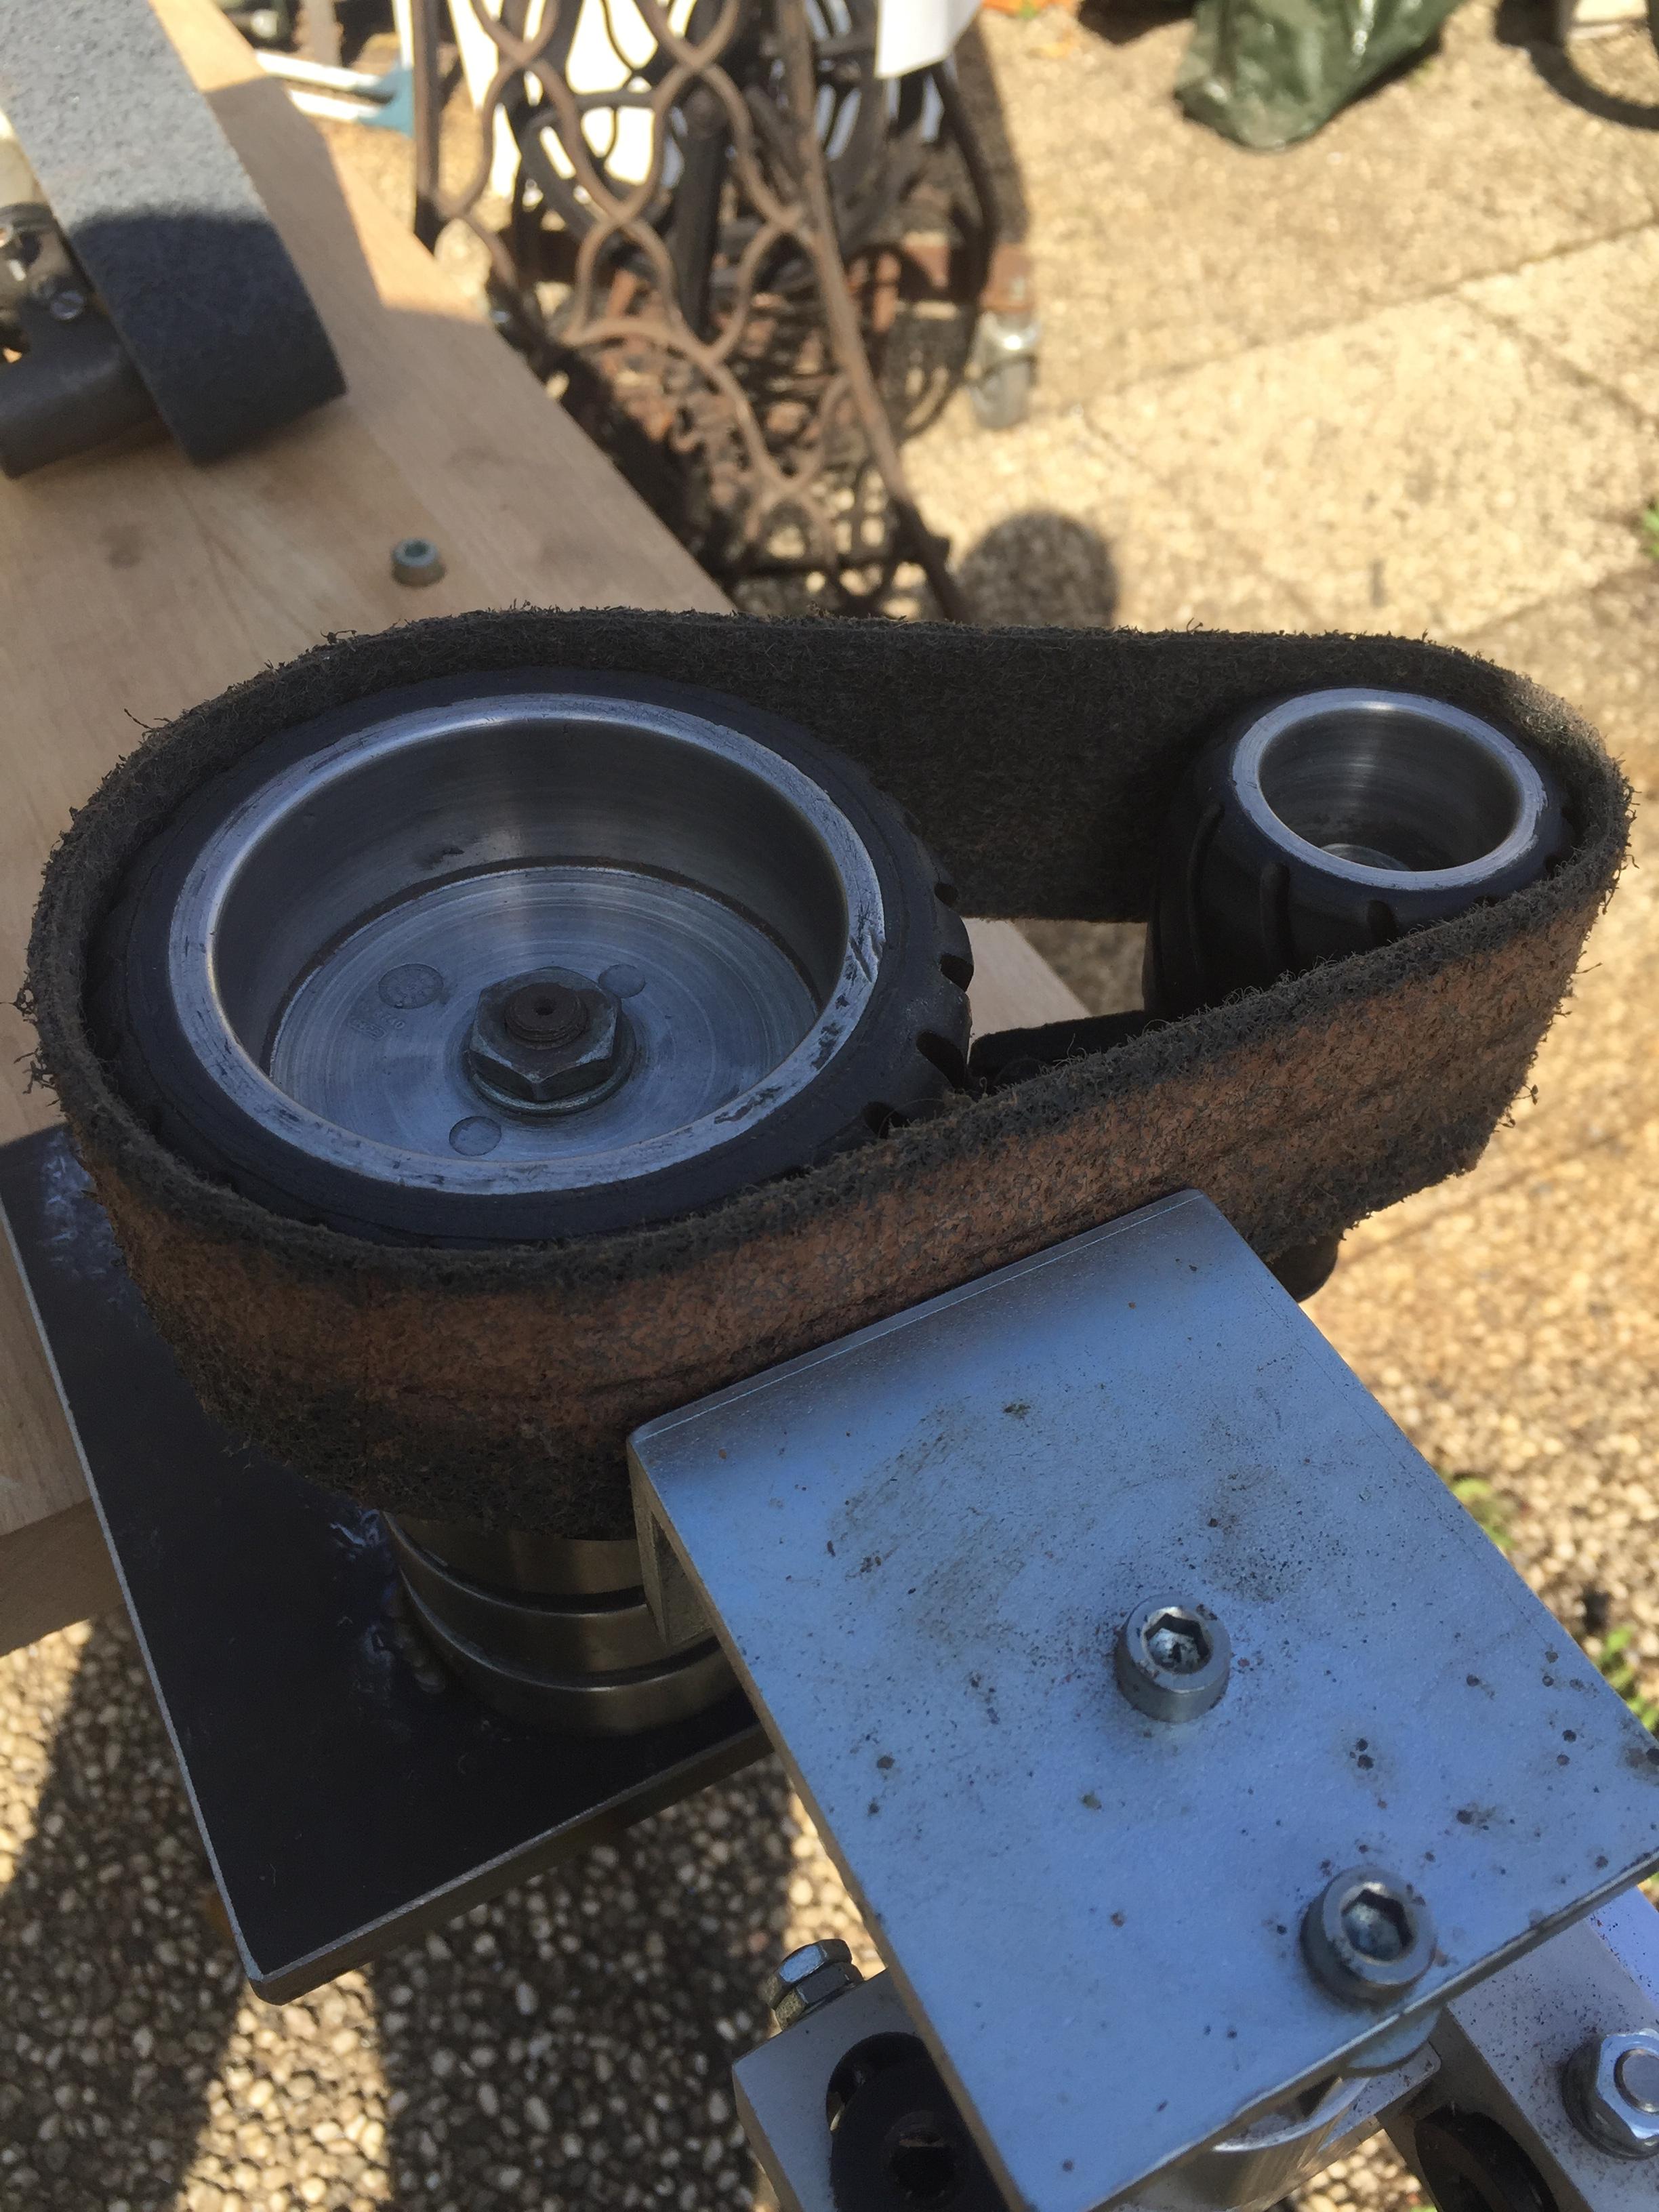
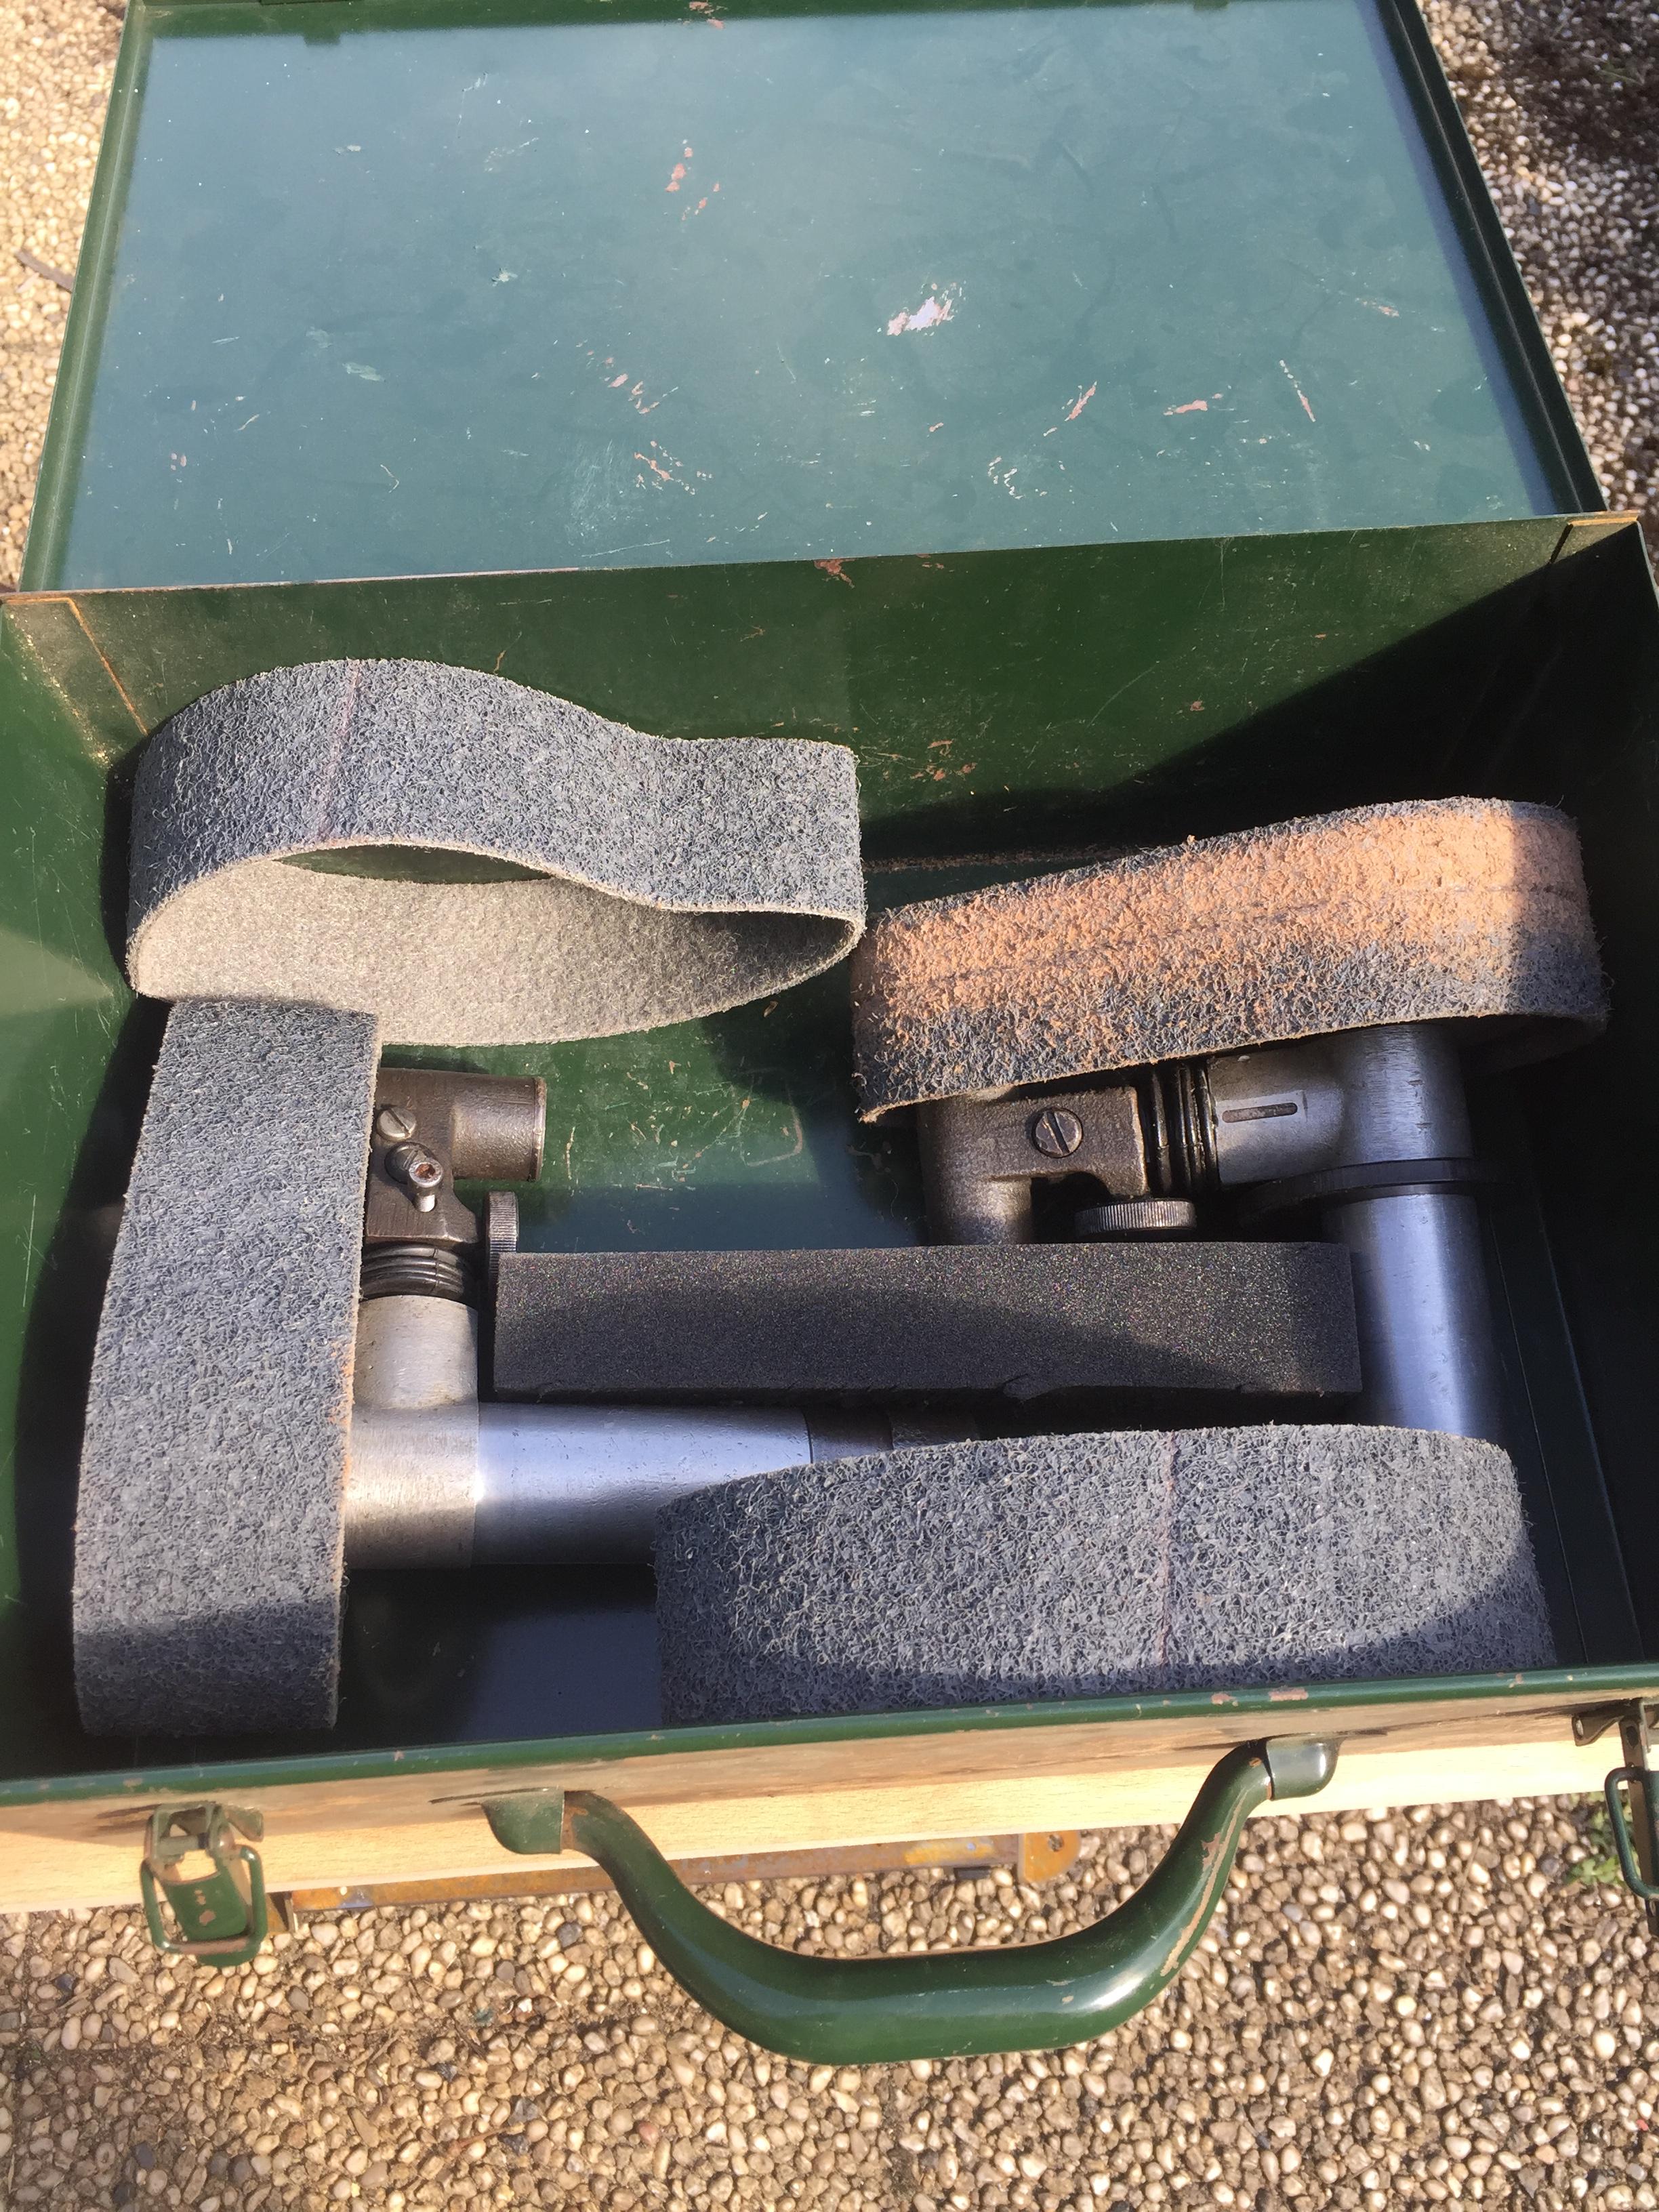
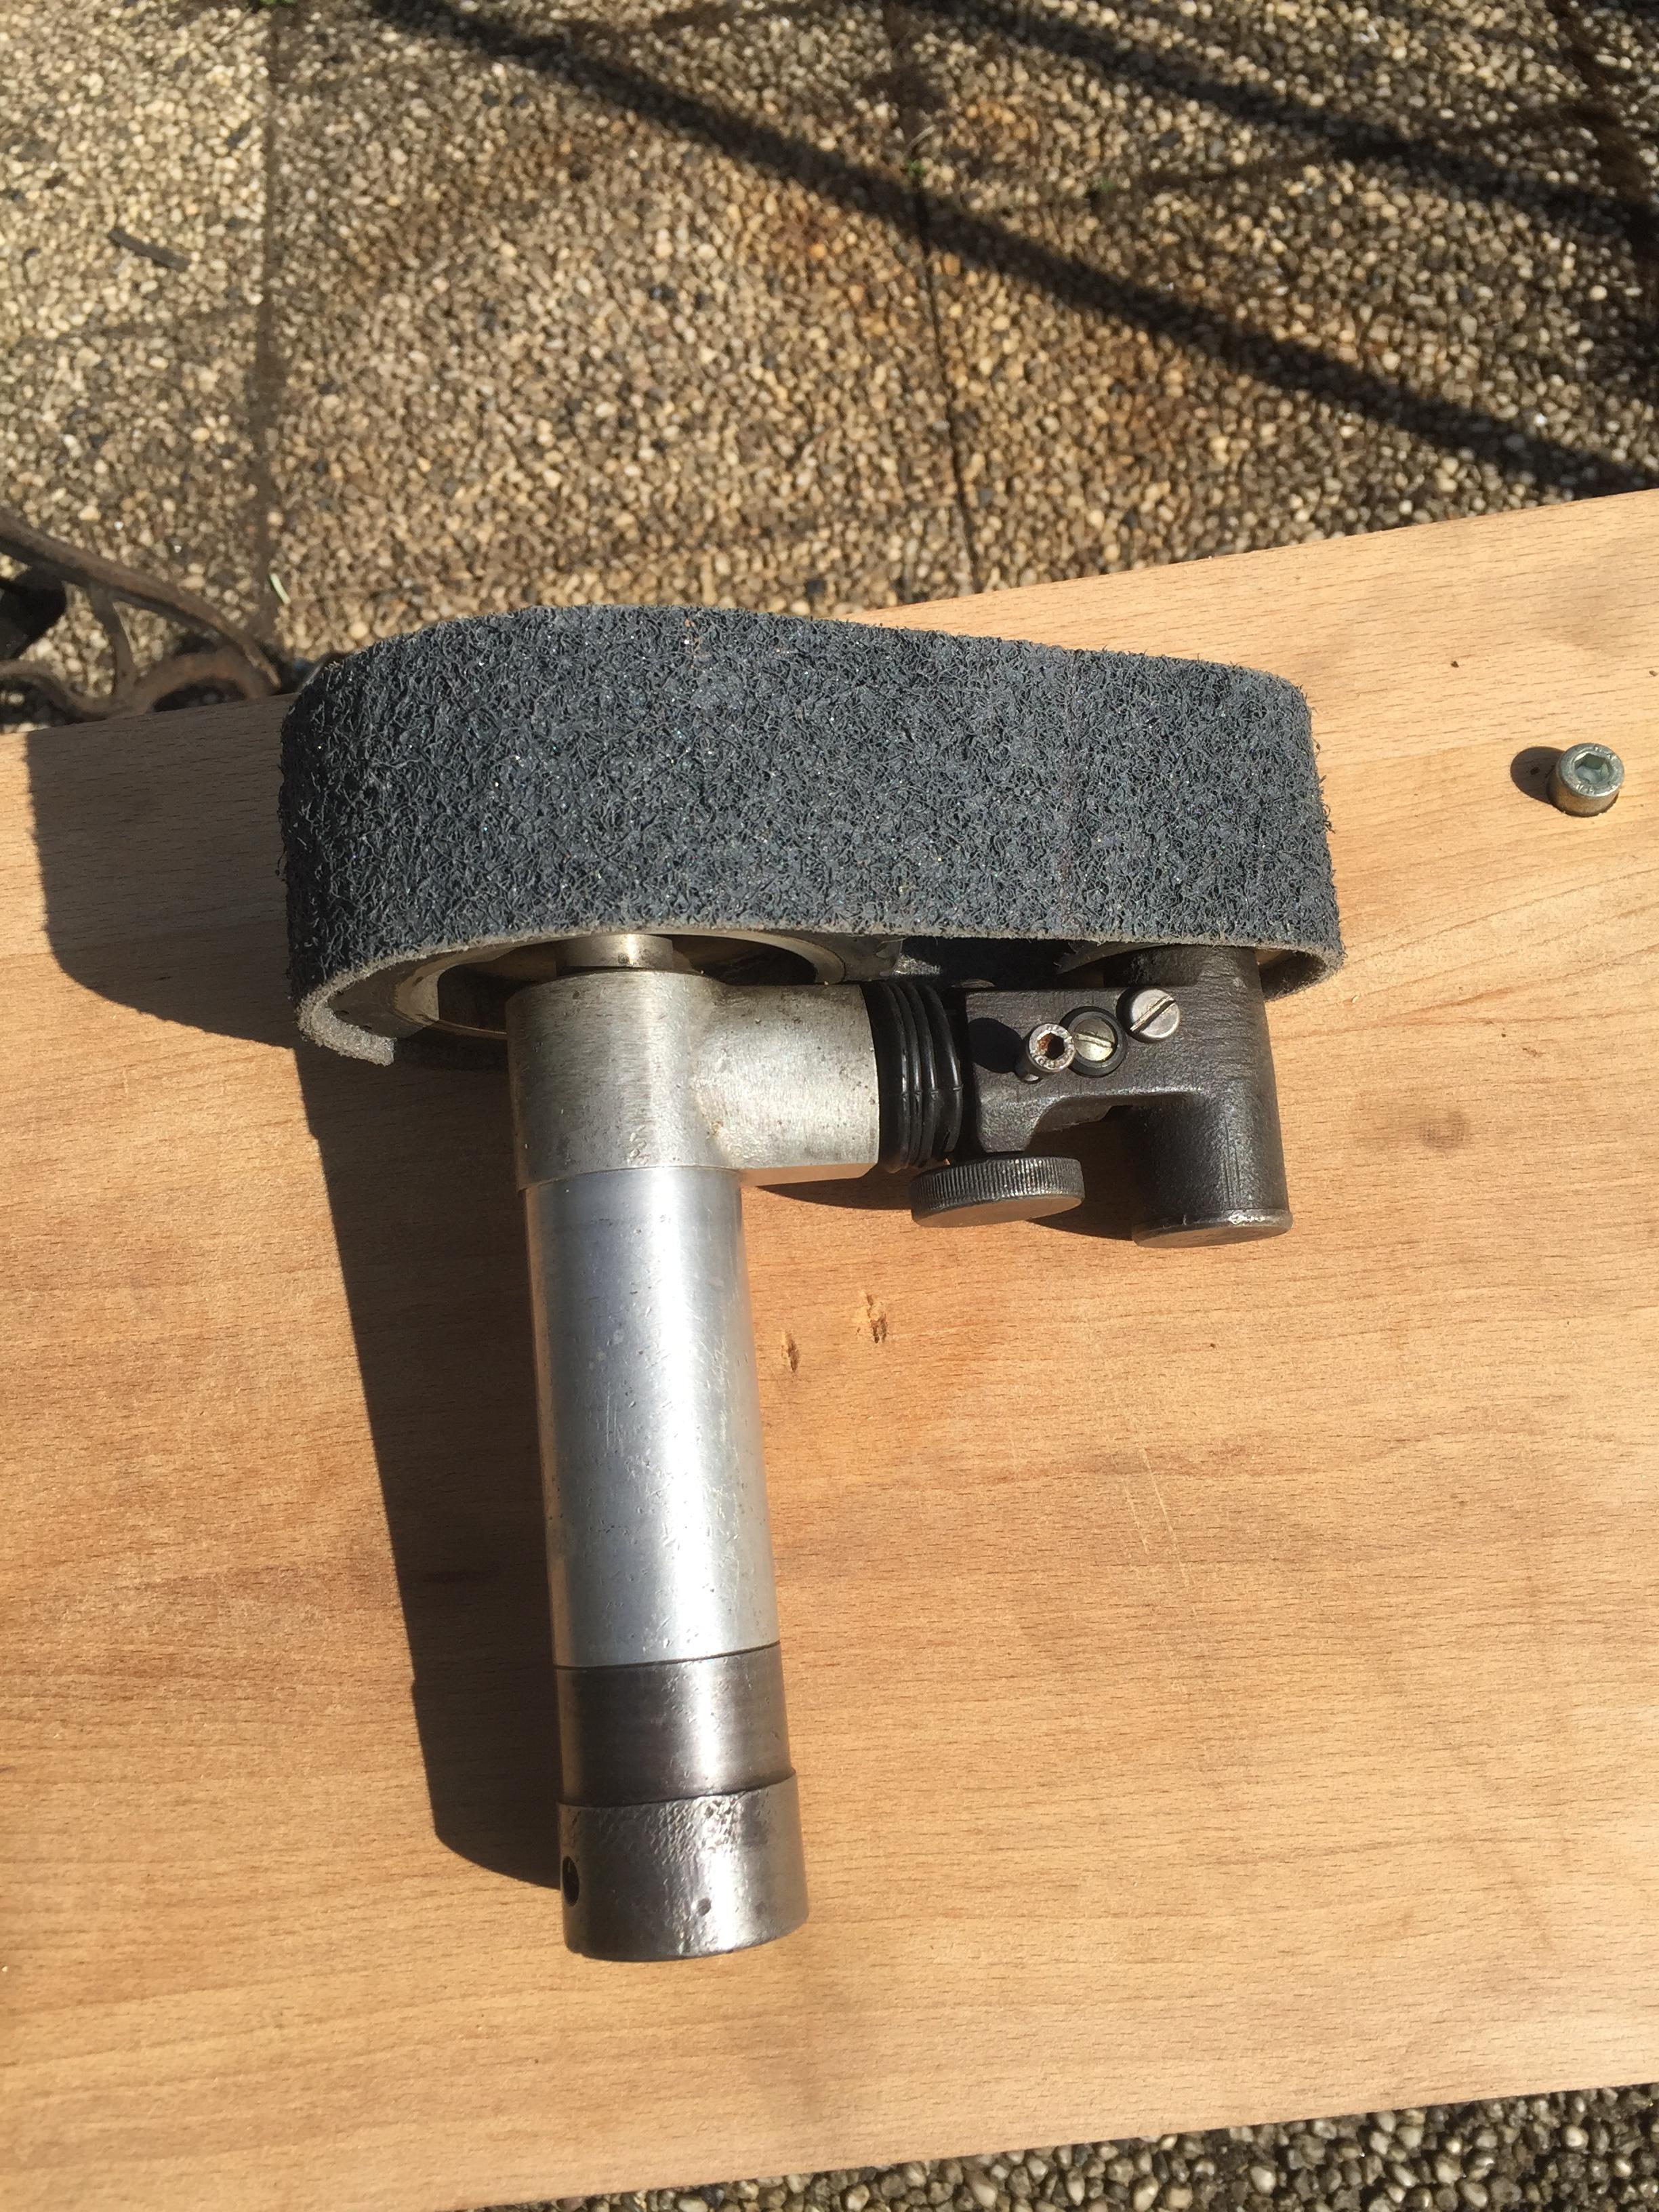
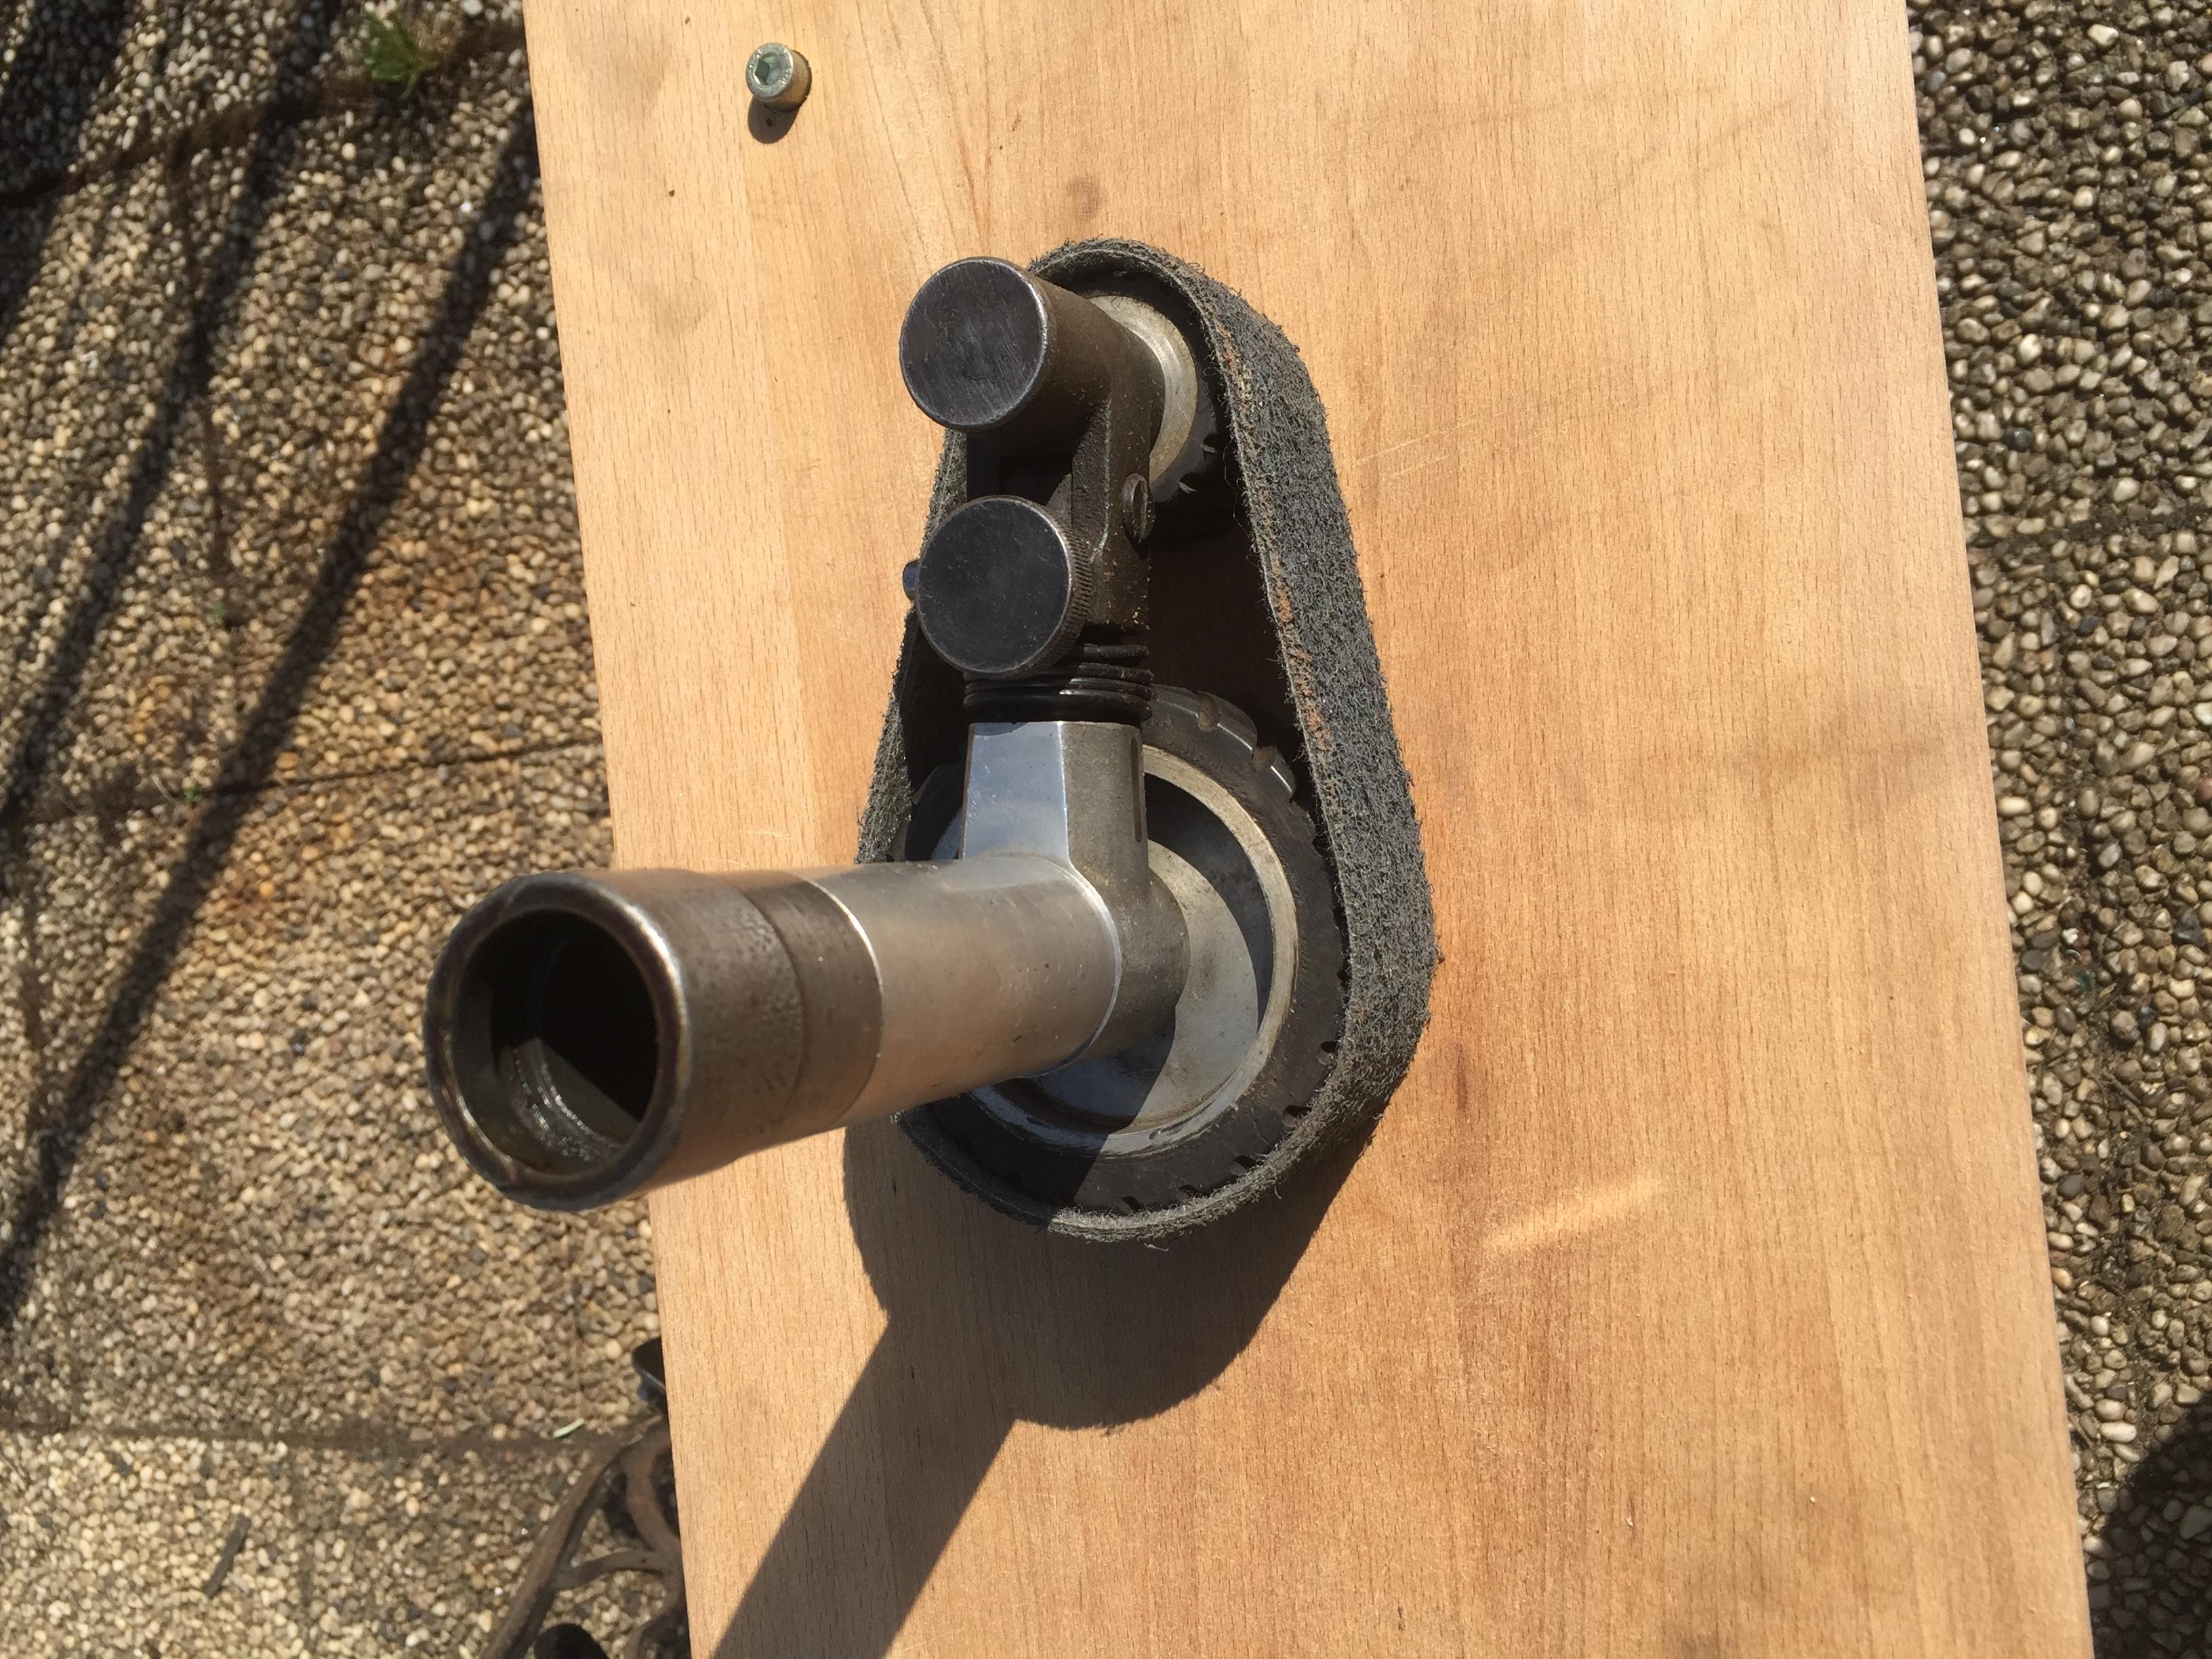
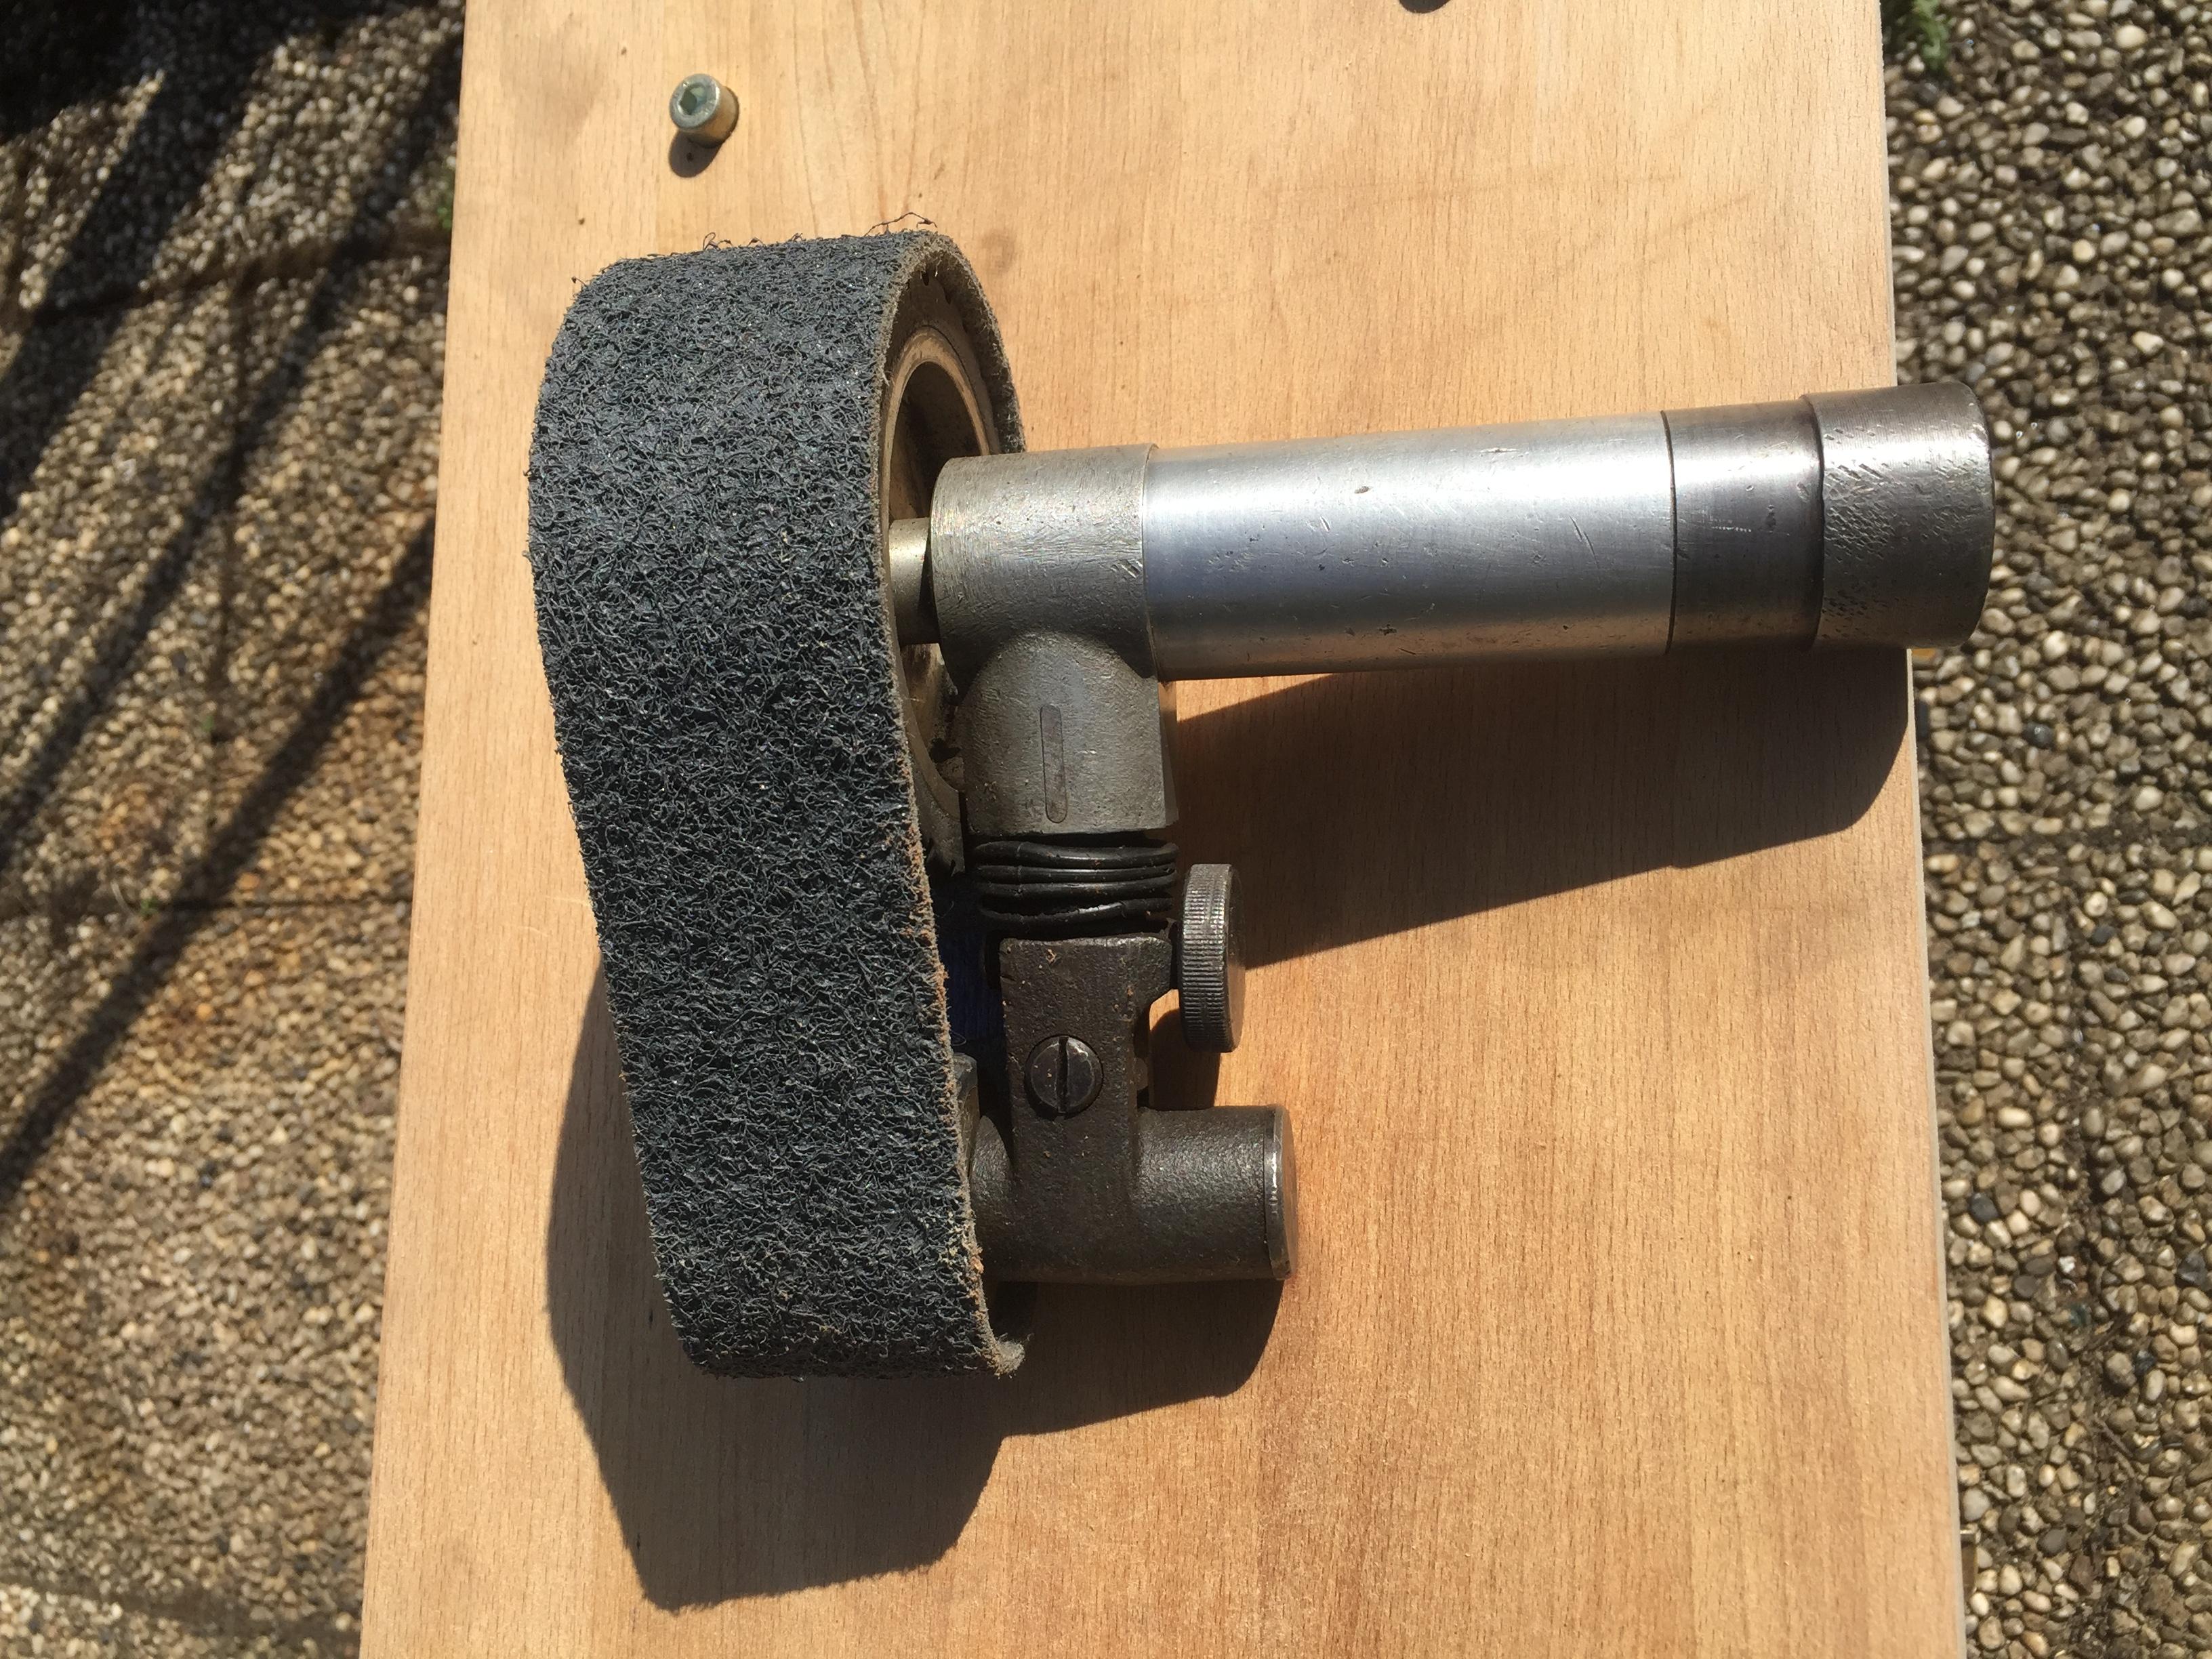
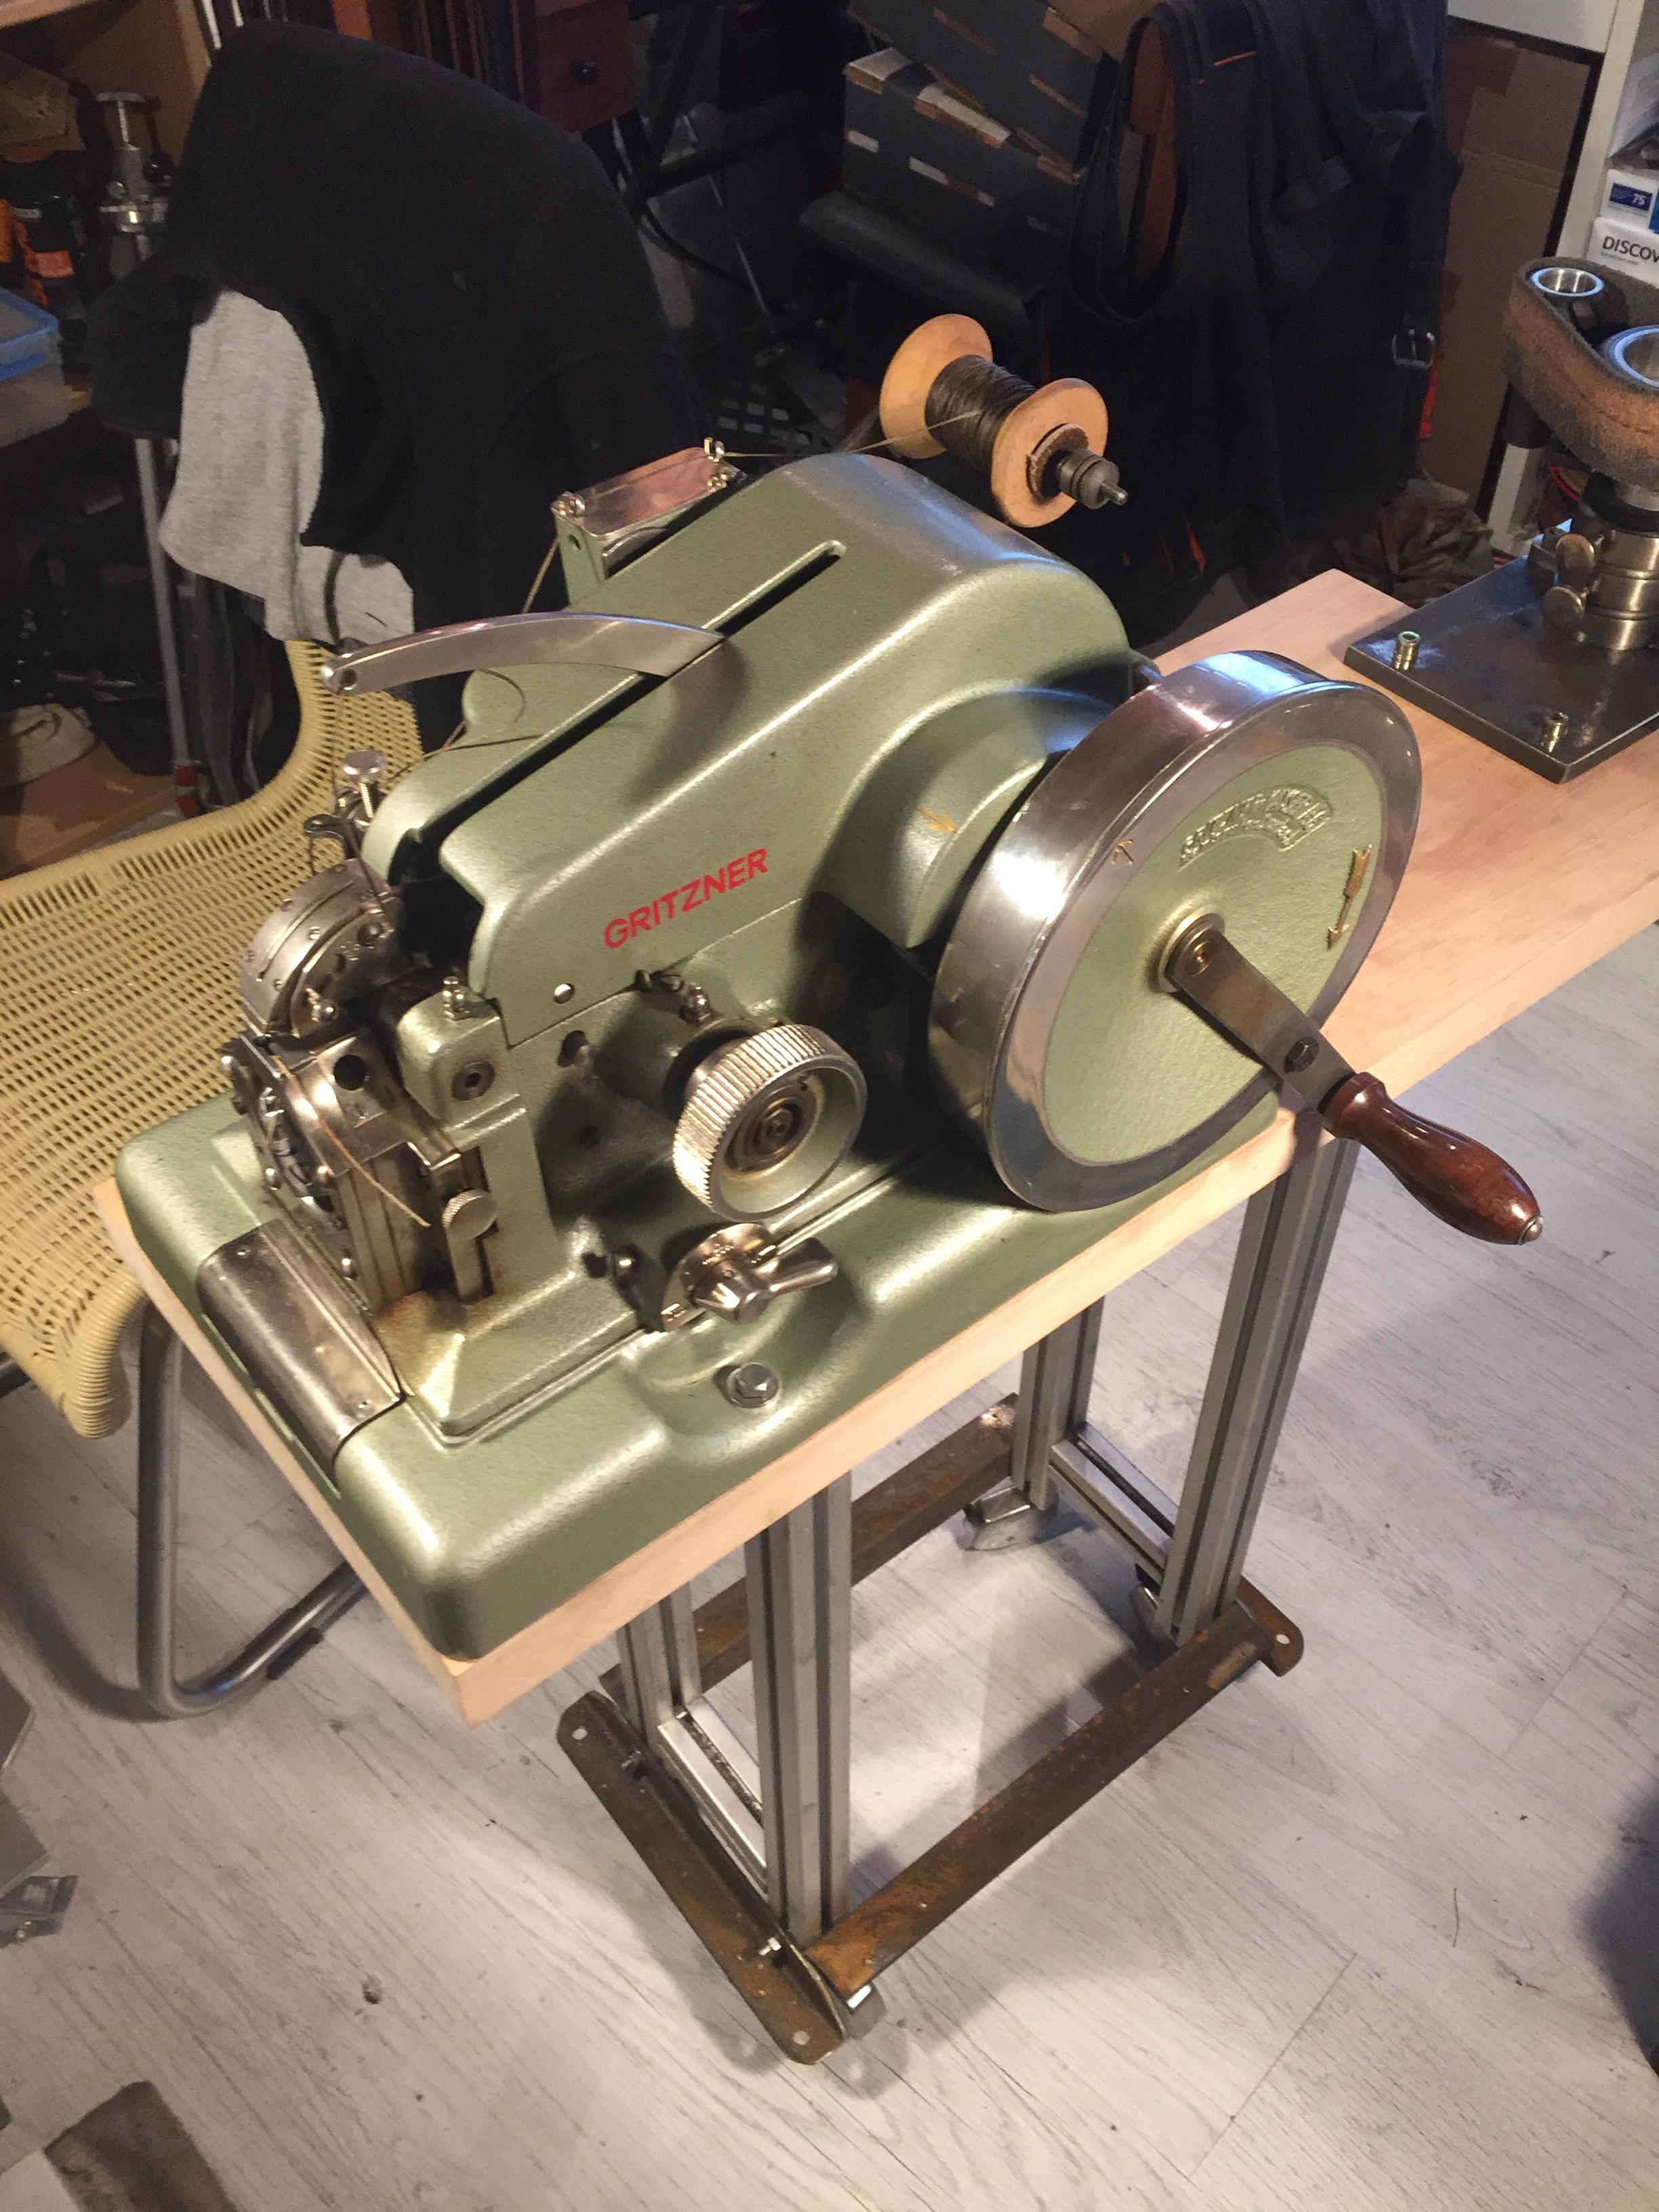
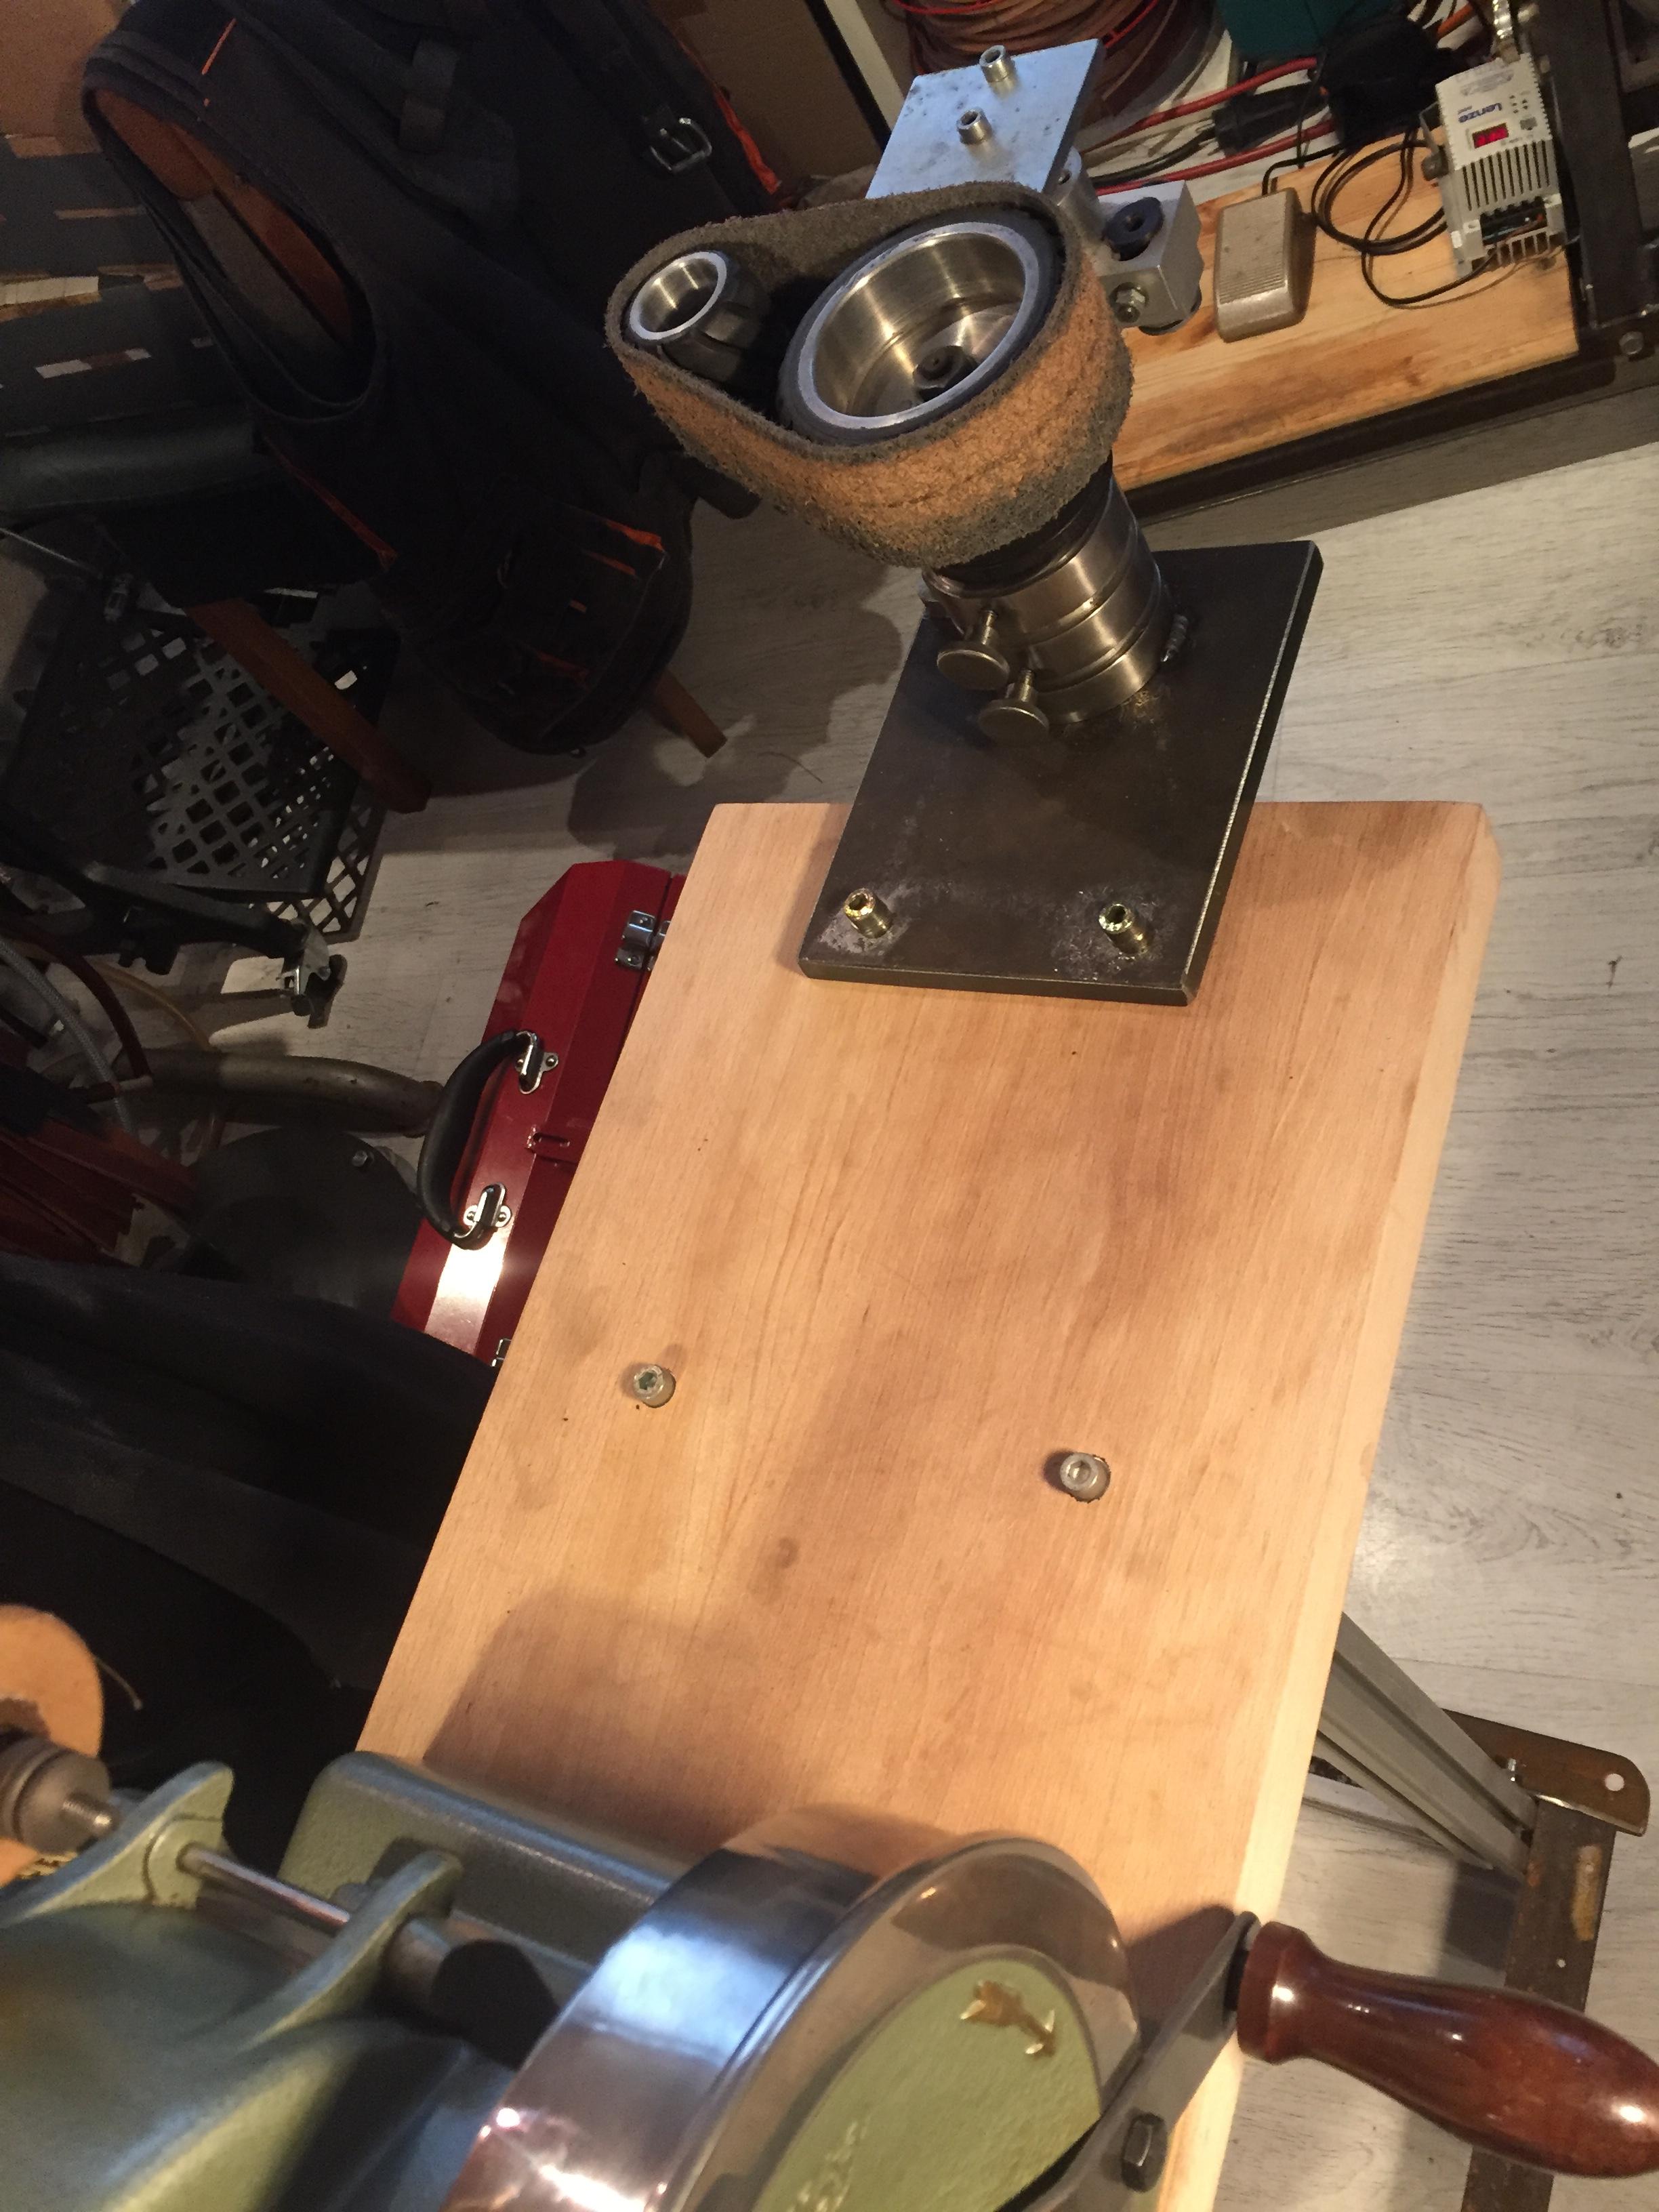
Still had 2 kicking around - for my Pferd Mammut flexible shaft grinder (basically the same as the units from Suhner) - of which I actually own 3 power units - from 500 to 40 000 rpm. I use them for satinising the surface of brushed stainless - the belts come in all different grit grinding fleece or paper backed abrasive. The table top comes from an upgrade in a baking factory, where all wooden tables had to be replaced with stainless - sure cried that day cause I didn´t have a trailer with me on site and my Kangoo only fits small sheets - it is 40mm laminated beech - the kind of material that shouldn´t be just tossed into a container. The shelf/rest for the grinder is actually a 3-axis adjustment device for a laser - it only has minute possibilities of movement in each axis though - I will upgrade to a unit that I can tilt up to 45° - and have some kind of roller/spring pressure device to keep my belts pushed against the sanding belt - so operation can be one swift pulling motion. The thick walled round holder for the sander handle is actually a slice from a conveyor belt drive axle that used tight parallel rubber ropes as the means of transportation - usually employed if you want to transport a leaking material - so the drippings can get caught by drip pans underneath and as opposed to a sheet belt conveyor system - rope conveyors are much easier to clean as no "gunk" sets on the inside of the belt and is further squished by the drive rollers - very often a sanitary requirement. I still have some longer versions - use them to store arrows in. The Gritznener sole stitcher provides a good "counterweight" on the other end of the table - sure is nice to have it mounted on wheels as well - it´s a pain in the back to tote from A to B due to the weight and it not having proper handles for such task. Ordered four 100mm industrial casters with brakes - the brackets for those are already in place on the bottom of the legs. The casters mounted now are too small and also mounted too far inward for my taste. Made some angle brackets for a bottom or raised shelf as well - nice to have all stuff needed for one machine right near it. The belts are small and I will experiment with them sewn from or laminated with canvas as well. Since I have 2 units - I can keep one with canvas/bees wax and the other with a sanding medium. To change them is a click of a small button and swapping hand pieces. Oh yeah - for the Gritzner I have a project planned - I still have small a gear reduction transmission in the shop ( I think it is 15:1) - time to motorize it - that is why I left enough space between the machine and the sanding belt holder. It will also add more weight to the middle of the table. Greetings Hans


-
Is there any bobbin thread left on the bobbin spool ? Has the bobbin thread looped over and then under the hook and now is jamming ?
-
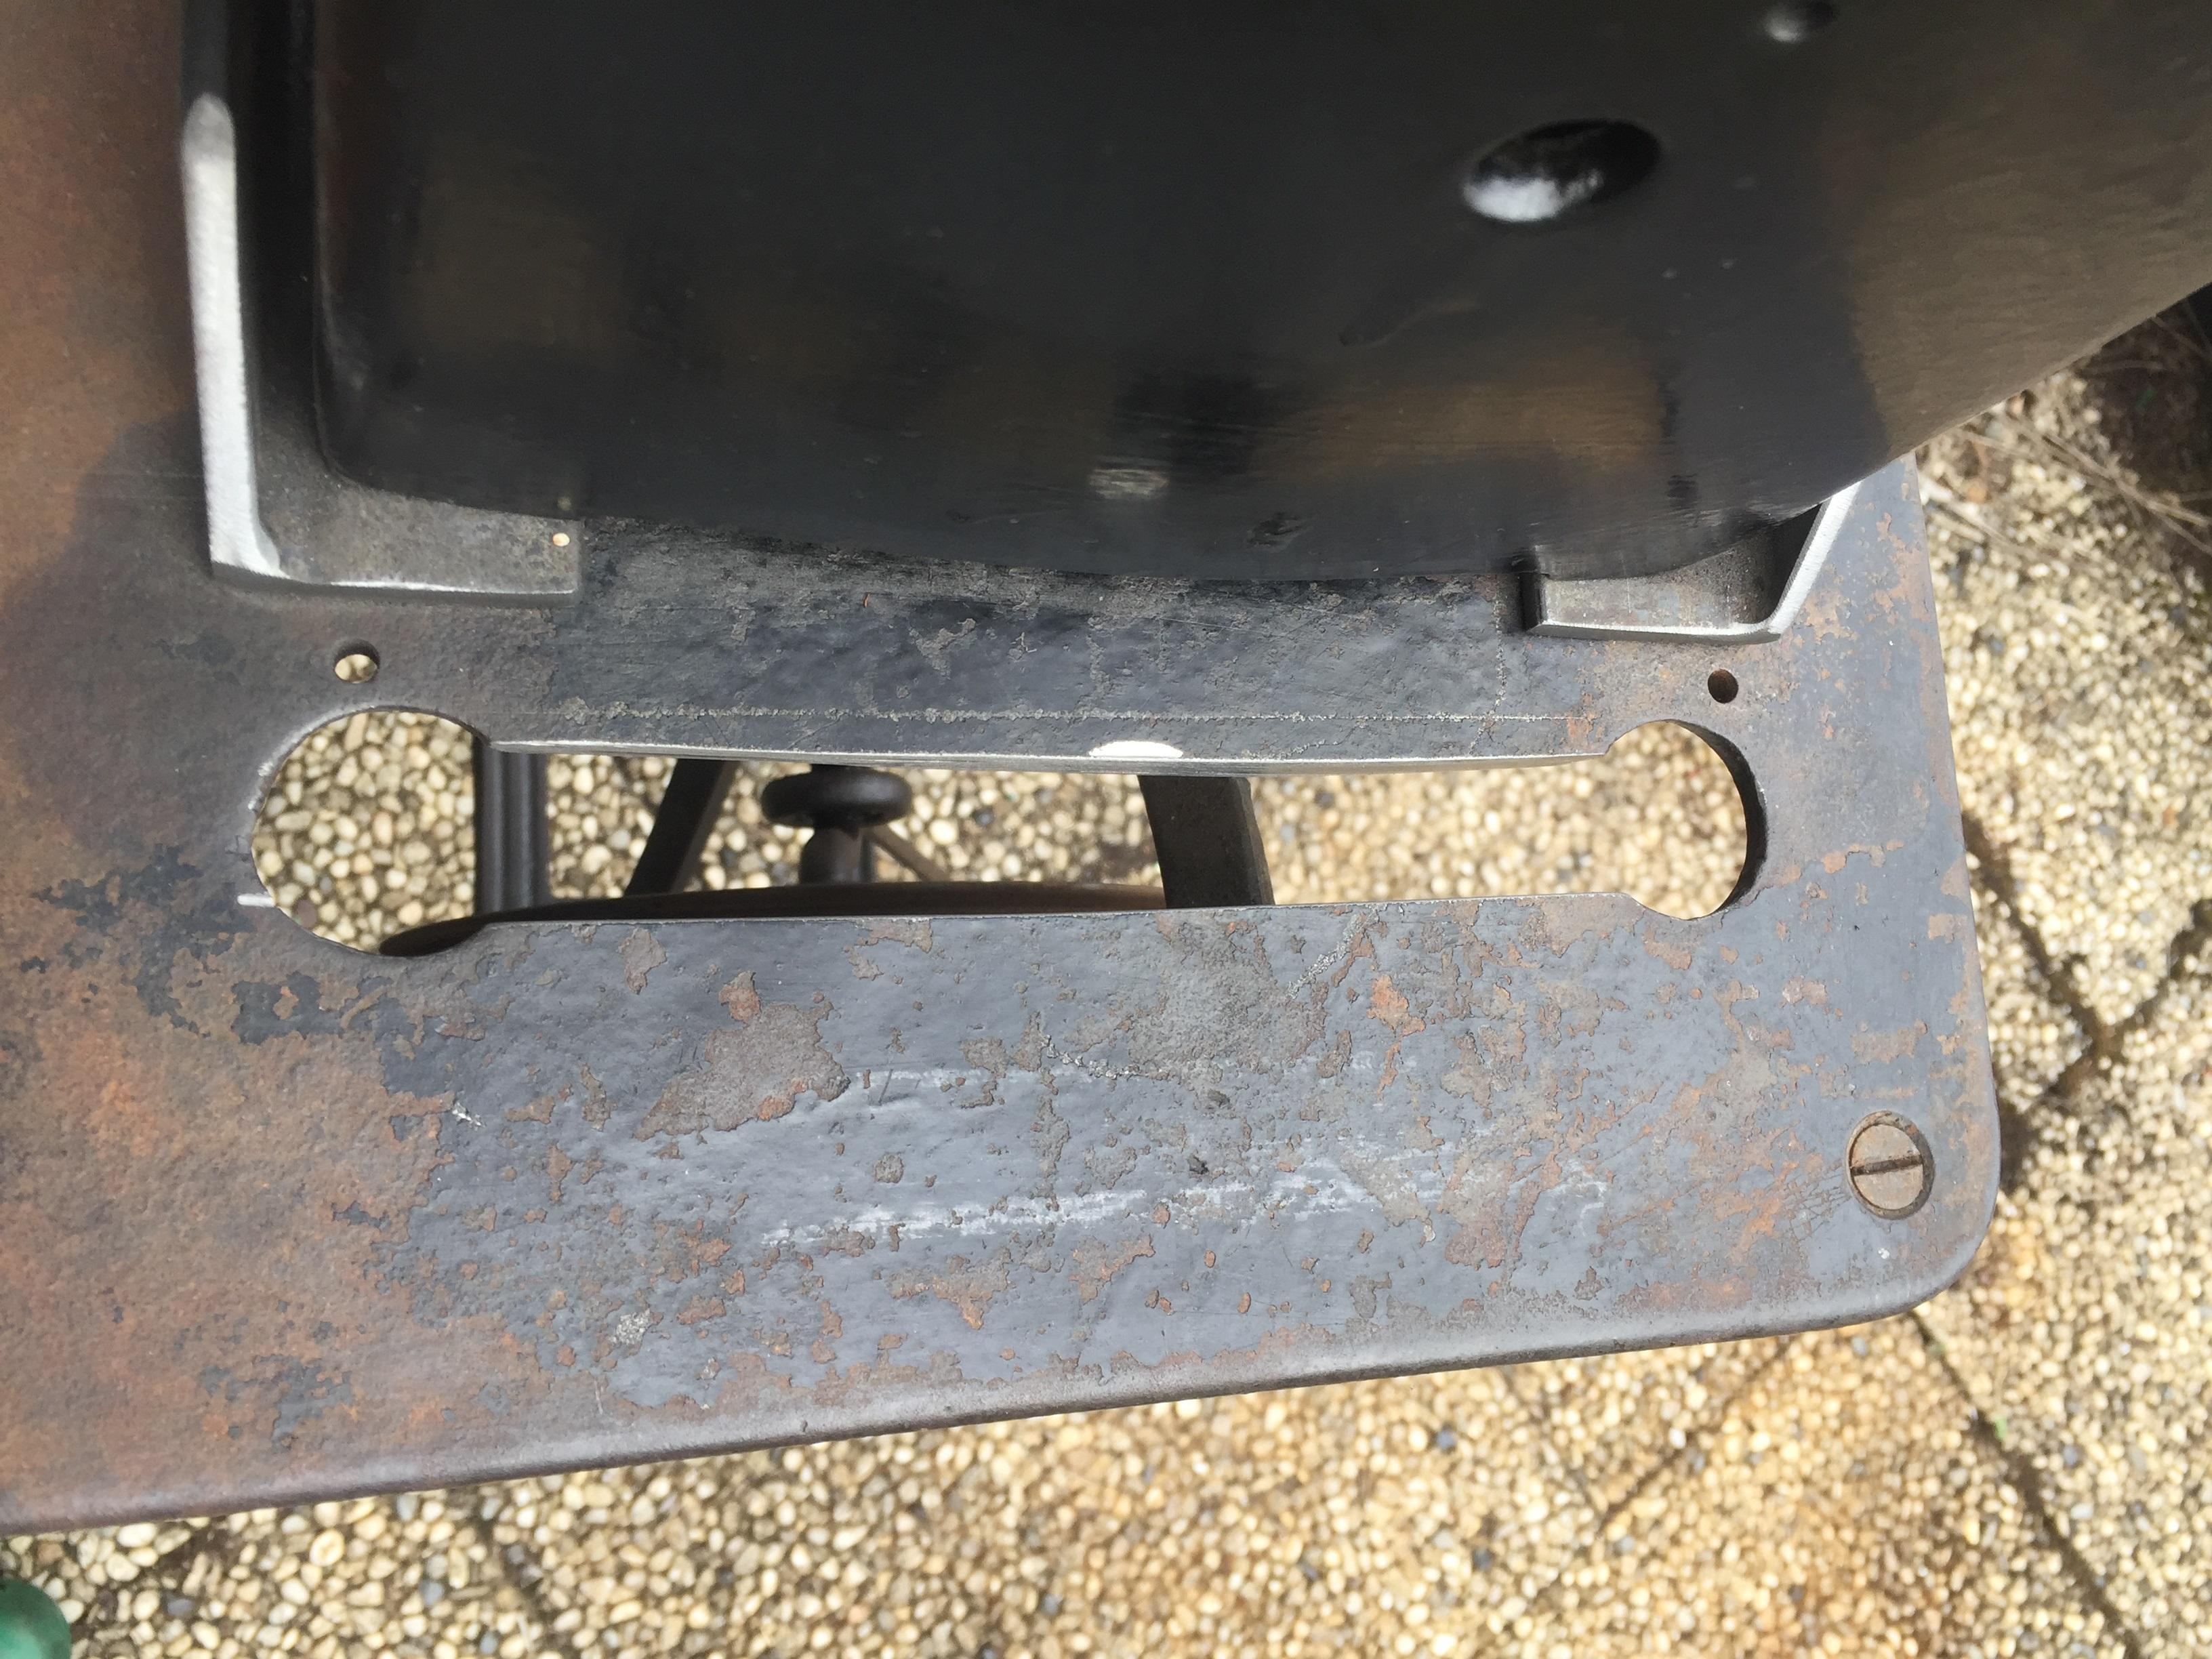
Here is what you will have to do to the stock Singer 29 / Adler 30 table, if you want to run a continuous V-belt. I didn´t cut the strip full hole diameter - kind of like the dog bone look. Sanding the inside surfaces took longer than making the cut. Table top thickness at that point was 7mm - but it is cast iron - cuts like butter with a thin 1mm cutting disc.
-
I would give you this advice : keep the treadle -- for the time being. First thing, replace the piece of wooden board that is acting as the makeshift rod from treadle to flywheel. Note the distance between the holes and replace it with 2 ball end heads as used on pneumatic cylinders - connected on each end of a piece of ready rod and secured by 2 lock nuts to maintain proper length, once adjusted. If you want to make it look pretty - slide a piece of copper or brass pipe over the ready rod - makes it look like a solid copper /brass rod. This is what I am talking about - just get proper fit bearing size for your shaft stubs on treadle and flywheel = measurement listed under "D" : https://www.pneuparts.com/en/group/ball-end-head-for-pneumatic-cylinders-iso-15552 The link is just so you know what to get - maybe you can find a different source if the metric sizes won´t fit - which I doubt on an Adler.. If you then also buy the green round rubber/plastic drive belt that you can glue/melt together - you will have one main advantage over a servo motor - you can still operate your hand wheel without a lot of fuss and without having to install a belt tensioner. Especially in the beginning, until you get to thoroughly know your machine, you will be using your hand wheel a lot - believe me. Once you oil the treadle well, it will spinn very freely and without any noise. It usually has a tension adjustment screw with a lock nut on one side -- take it apart and clean/oil the pivoting surfaces on both sides of the treadle - some steel wool and acetone will remove stubborn caked on old grease residue. A new brushless servo motor with on/off switch and speed control, all stemming from Chinesistan, costs about 150 bucks. A speed reducer consists of 2 bearing blocks , a shaft, 2 taperlock bushings (TB 1610) and 2 SPZ pulleys to fit the bushings (50 and 190mm) - cost comes to about 60 bucks and you have a 3,8 : 1 reduction. Although the SPZ is a 10mm V-belt ---- if you get a toothed V belt - the treadle as well as the machine pulley can handle traction at proper belt tension, even though it was originally designed for an 8mm/5/16" round belt. Another thing : if you want to use a continuous V-belt - you will have to cut a slot for the belt between the now only 2 belt holes in the back of table. An angle head grinder with a 1mm cutting disc makes short work of that chore - you don´t even have to take the machine of the table. If you then disconnect the bolt holding treadle support to frame - you can snake the belt through the gap onto the bottom pulley. Like I said, another 15 dineros for 2 new drive belts and some small coin for bolts, nuts and washers from you local hardware store....... So when you finally go that route - you can DIY for under 250 bucks - saves way over 500 from an 800 dollar quote. That will buy you a lot of needles, thread and leather. Greetings Hans
-
Thanks.
-
Somehow pic #3 was not intended - it is identical to pic #1 - how can that be fixed ? Greetings Hans
-
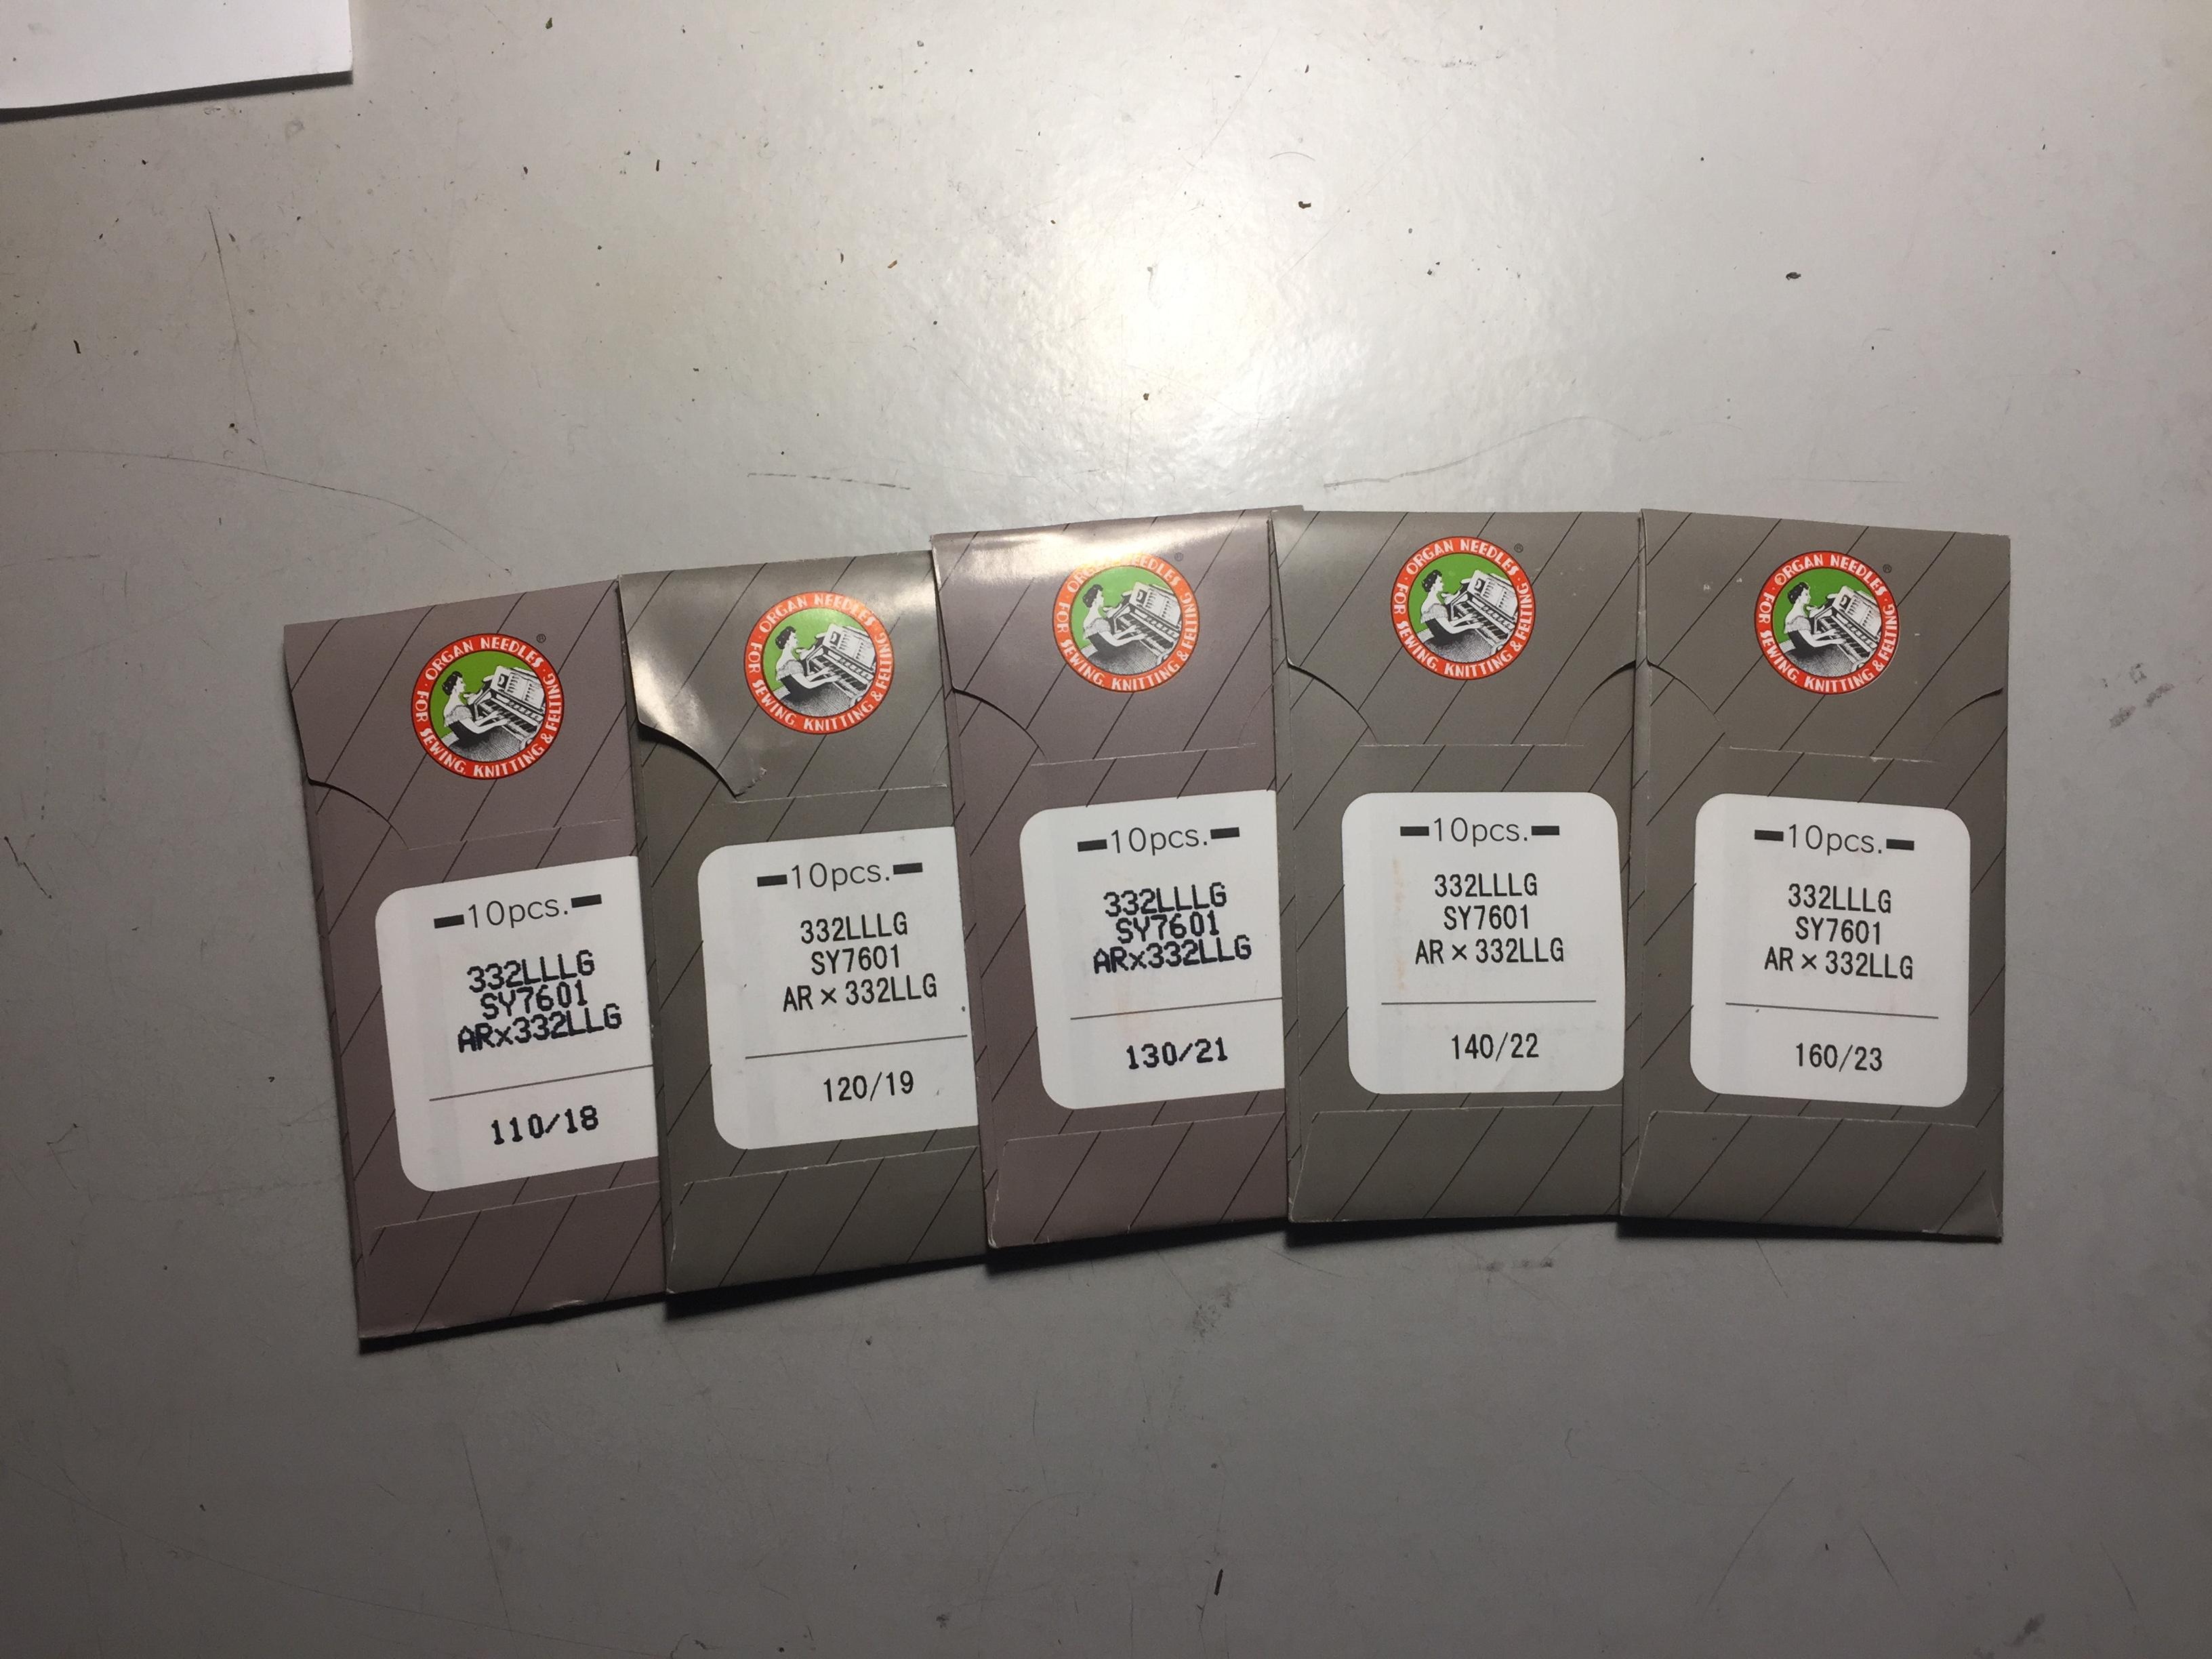
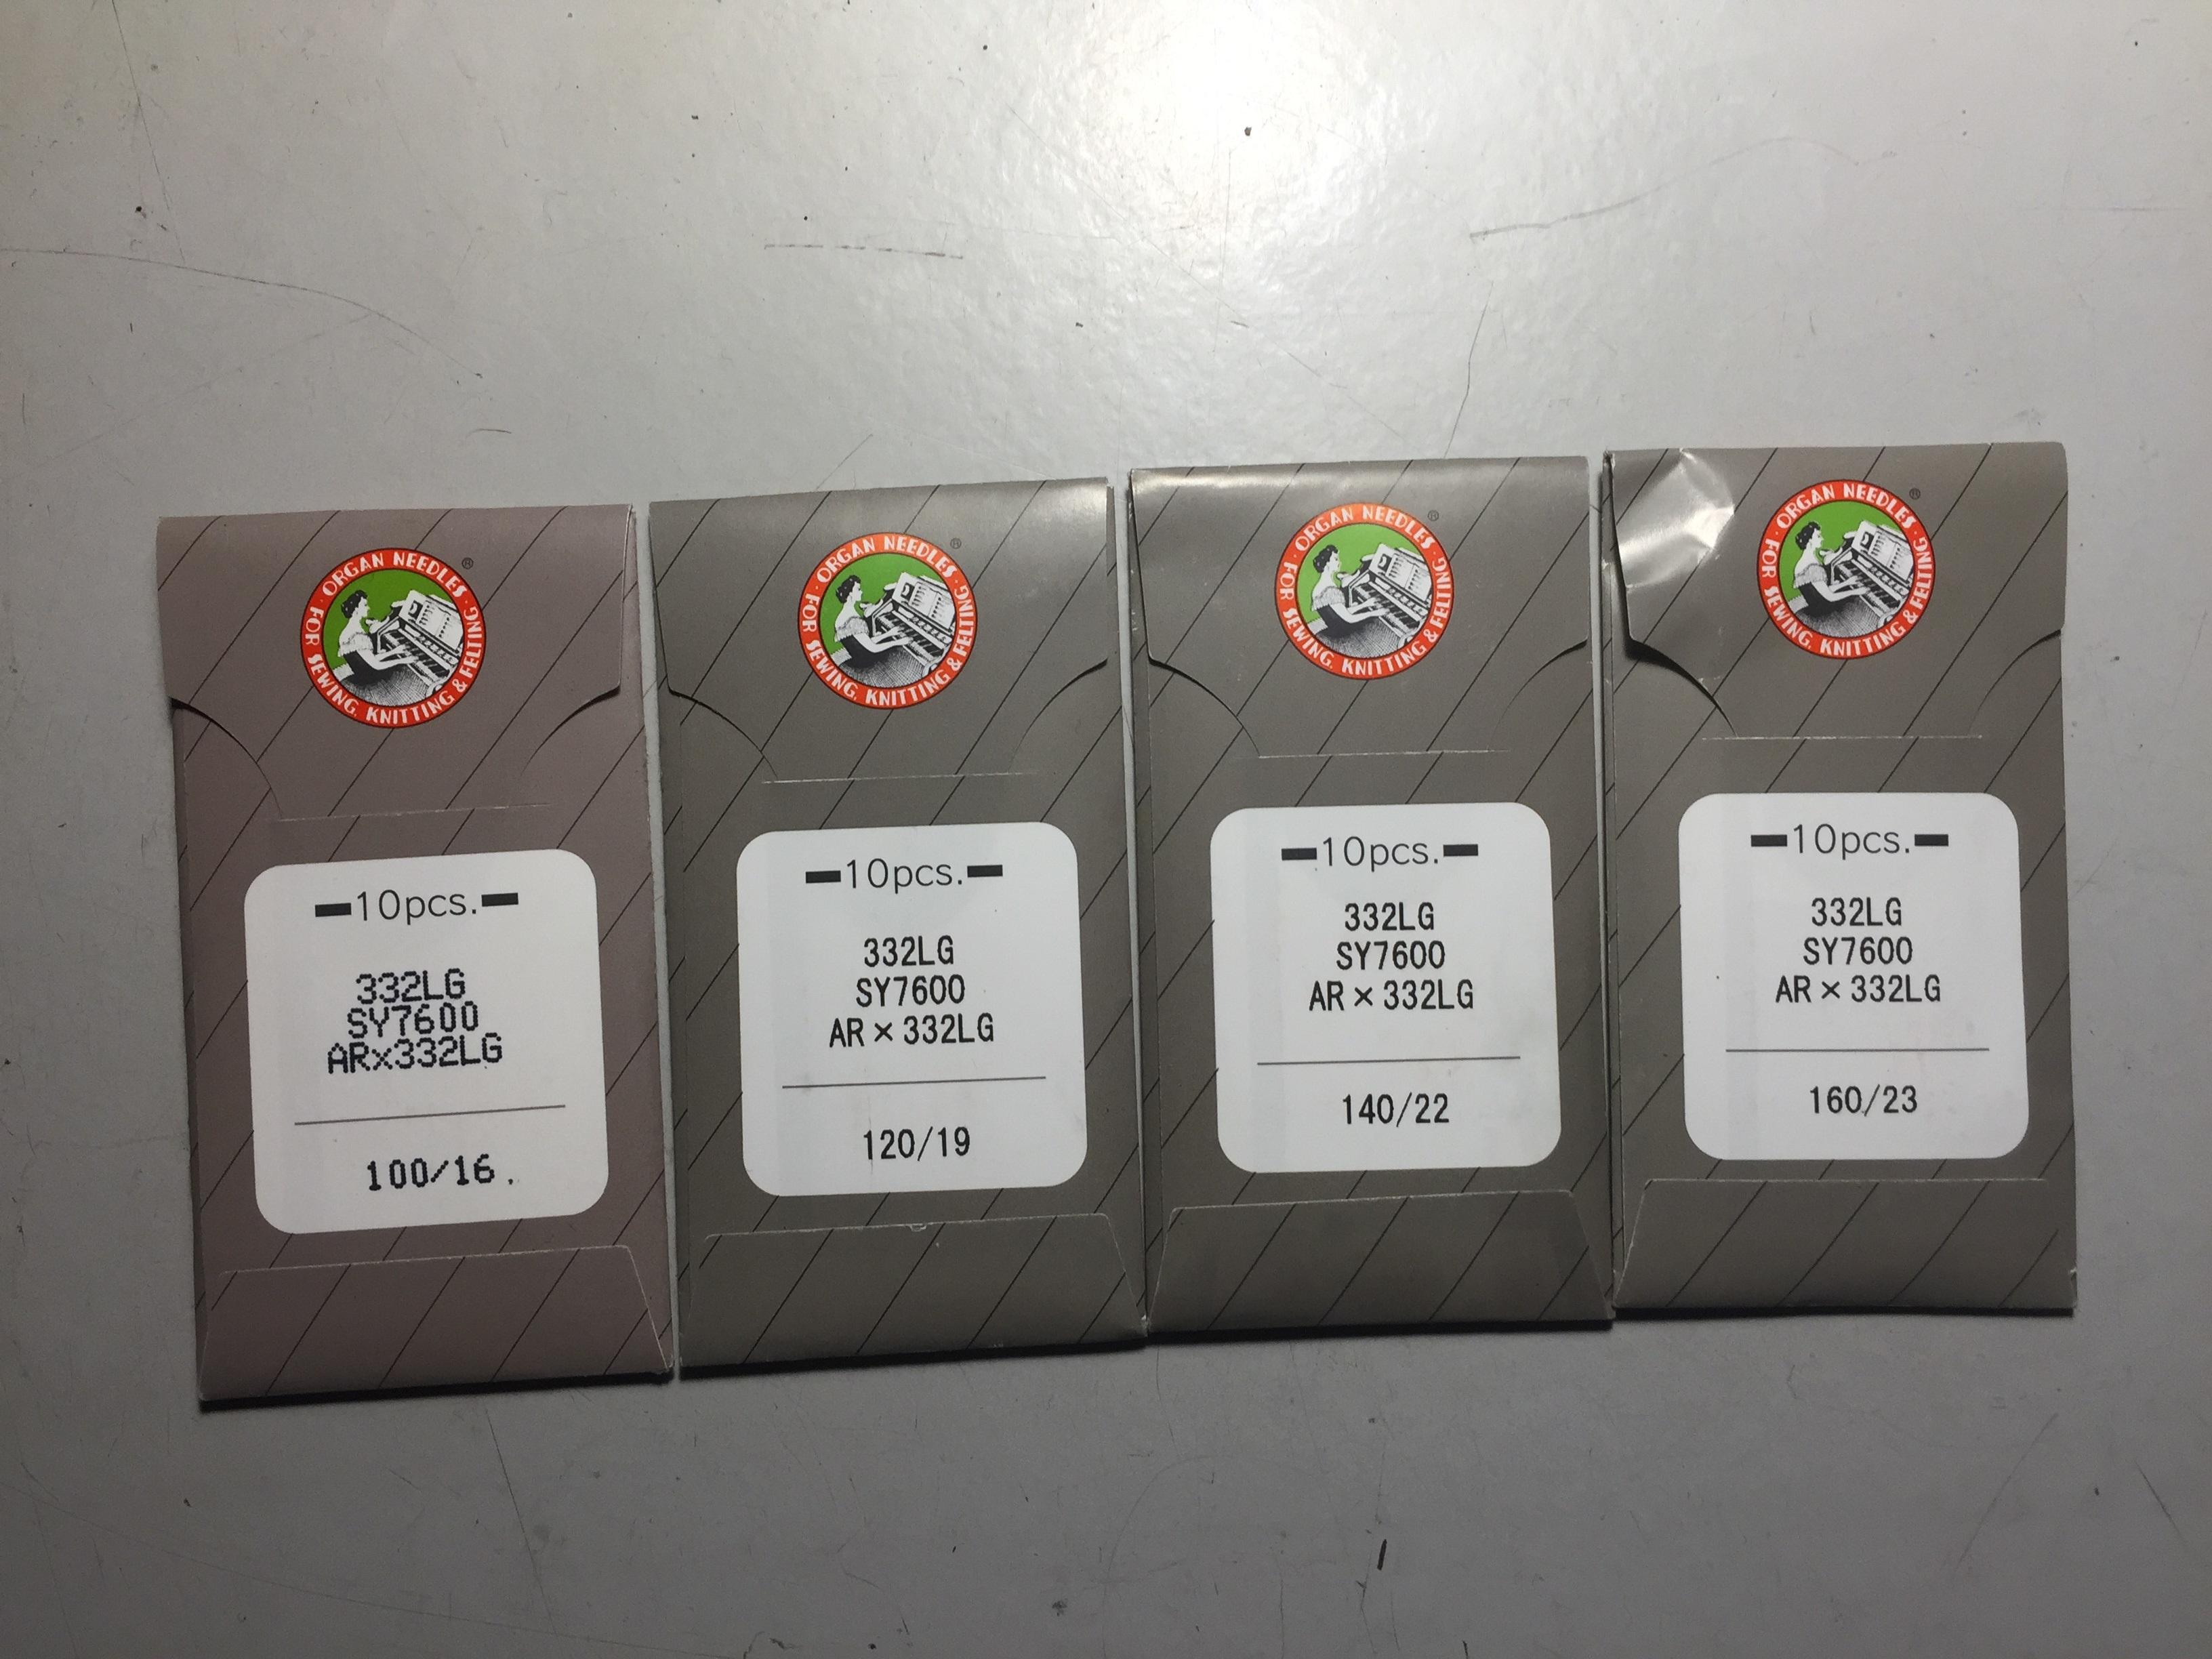
Came home from an out of town job last night and found some awaited goodies for the 30-7 in the mail box. At 5€ per 10-pack and shipping cost 1,80€ for all - not a major investment. Read an article once in a different forum where they went real picky and compared lapped finishes of sewing machine needle tips under a microscope - Organ needles rated pretty good. Some other makes looked just plain horrible with a real rough and scratchy surface - wouldn´t be able to see it with the naked eye though. They have pretty strict quality control in Japan - at least so it is claimed. Ist pic are needles for fabric (SY 7600) 2nd pic are needles for leather (SY 7601) These are the long needles for the Adler 30-7 and also the Claes 3 series - not for the Adler 30-1 and 30-15 with the small hook and bobbin. The 120 LLLG is already in action, pushing a TEX 30 top thread with a TEX 40 bobbin thread - works pretty slick.