


Tigweldor
-
Posts
241 -
Joined
-
Last visited
Content Type
Profiles
Forums
Events
Blogs
Gallery
Store
Everything posted by Tigweldor
-
gear for 29k machine metal workers please read
Tigweldor replied to catskin's topic in Leather Sewing Machines
Roger that. Price for postage would be €15,99 uninsured and €26,49 with insurance up to €500 if lost or damaged. Weight limit of 2kg should pose no probs - need any other drive chain parts for the 29k ?? - (the head is gone - now lives on my Adler 30-7) Here the link : https://www.dhl.de/de/privatkunden/pakete-versenden/weltweit-versenden/land/kanada.html Greetings Hans -
Hi, Jup - a VFD is the way to go in your case. Just remember though - in Europe most all 3-phase motors run on 380 Volts. But you can change their configuration so they run on 220 Volt 3-phase. If you want to run a VFD from 220 Volt sigle phase - you will have to also adapt to 220 Volt 3-phase which means that you have to re-arange the brass bars in your wiring different. Wiring for 380 Volts will have the bars connecting U and V and W connected to each other in line. To run 220 Volts you have to connect R to U and S to V and T to W. Only takes a 1/4 inch drive ratchet with a 7mm socket/nut. Best ya get someone to show ya how it´s done properly. VFDs from Chinesistan ya can buy via EBAY for around 80€ - best buy one that exceeds the current draw of the motor. Greetings from Germany Tigweldor
-
gear for 29k machine metal workers please read
Tigweldor replied to catskin's topic in Leather Sewing Machines
Hi, This is what it looks like : .https://www.college-sewing.co.uk/81869-hand-wheel-shaft-gear-singer-29k.html Got one from a 29k51 that I can send you for free except you pay for the postage. Used to work in Regina for GE Railcar Repair as a weldor - back in the days when the Apollo MC was still in existence. If ya think that I´m trying to gyp ya - I can provide refs that this ain´t the case - only through personal message though. Greetings from Germany Tigweldor -
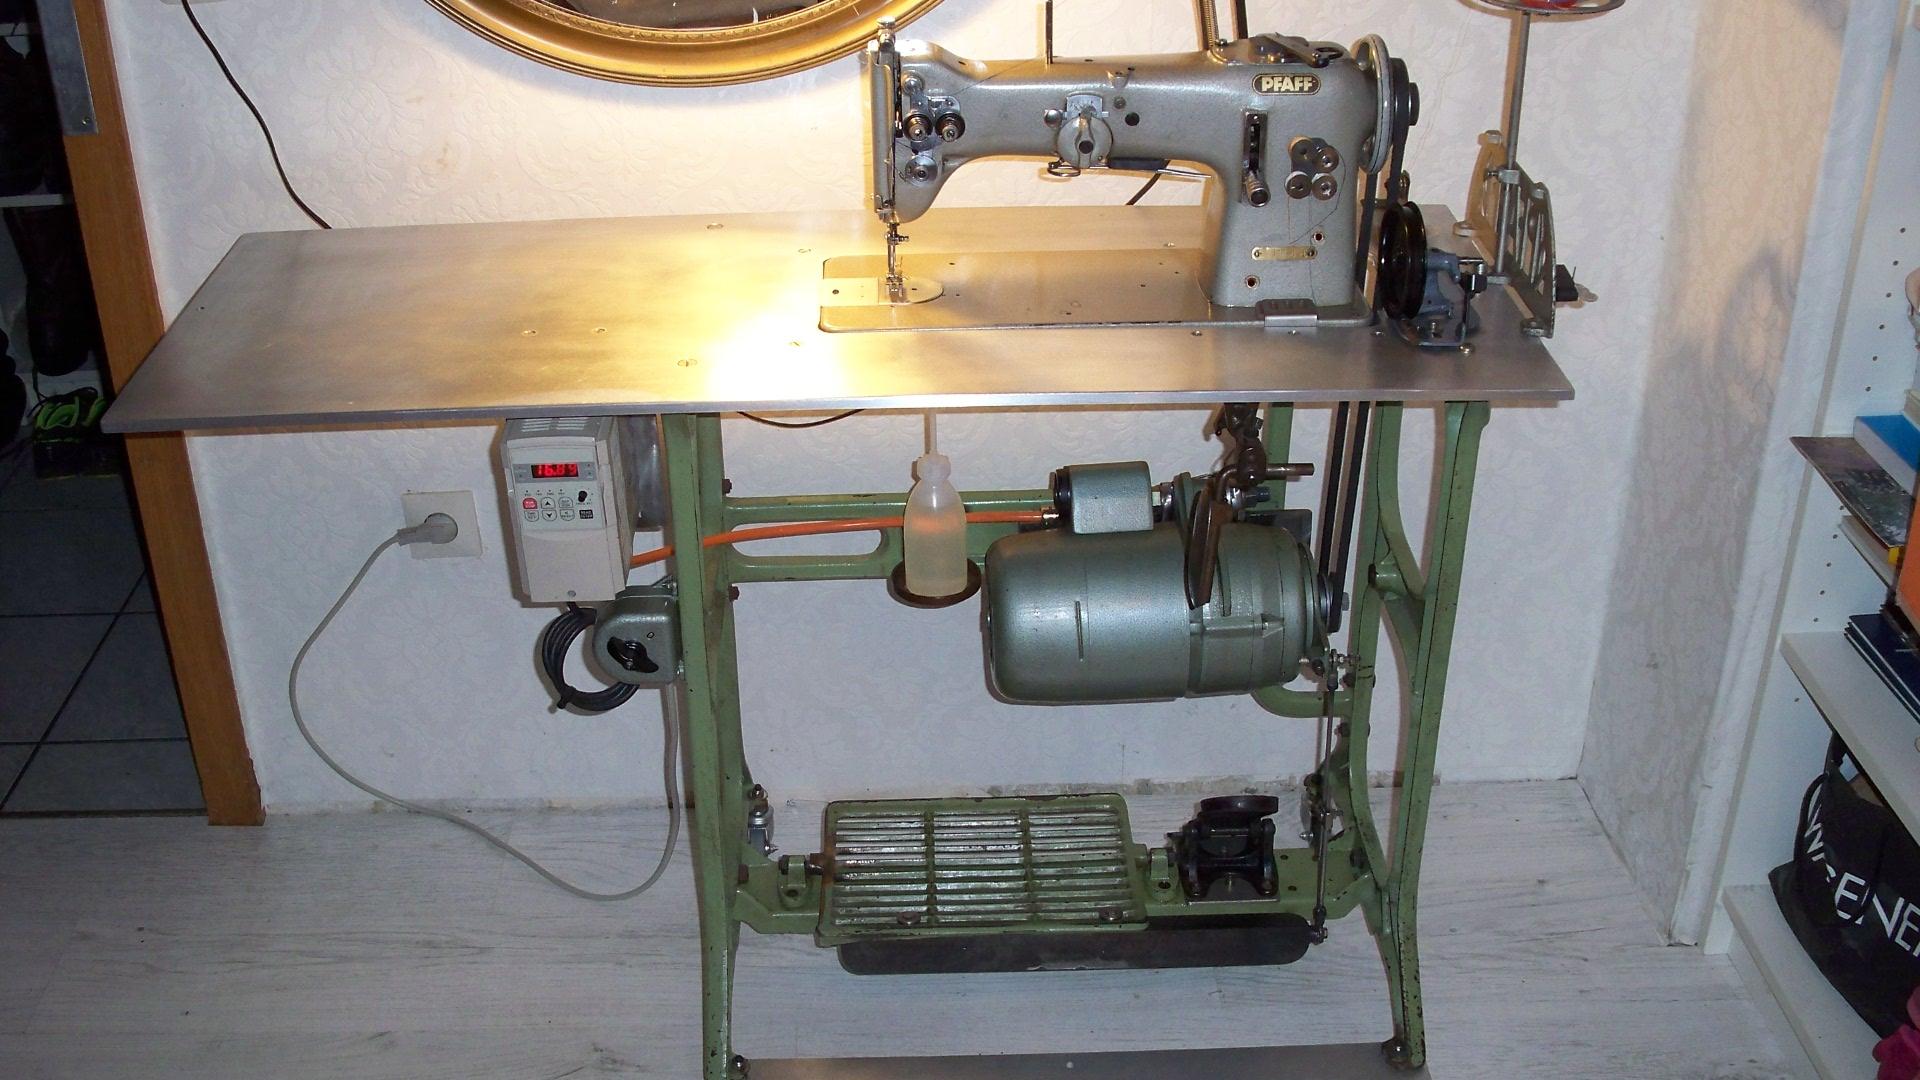
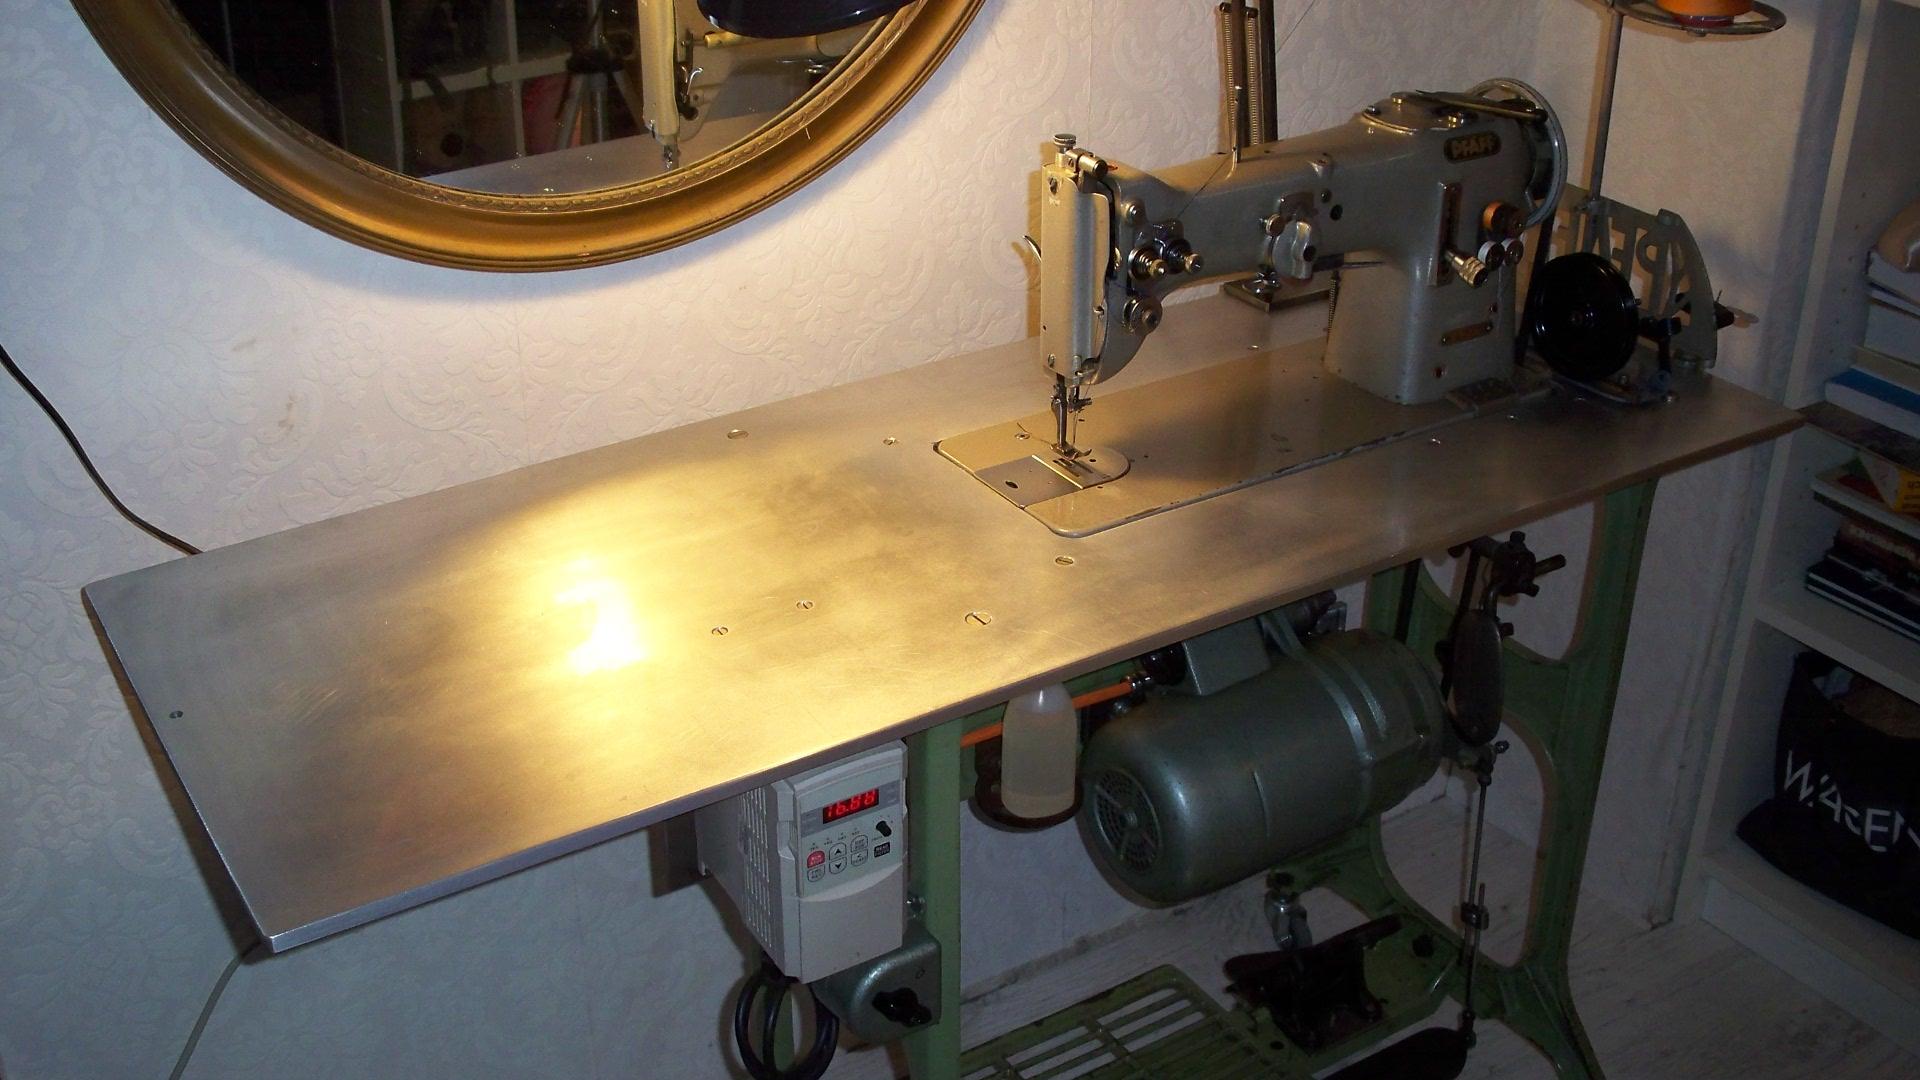
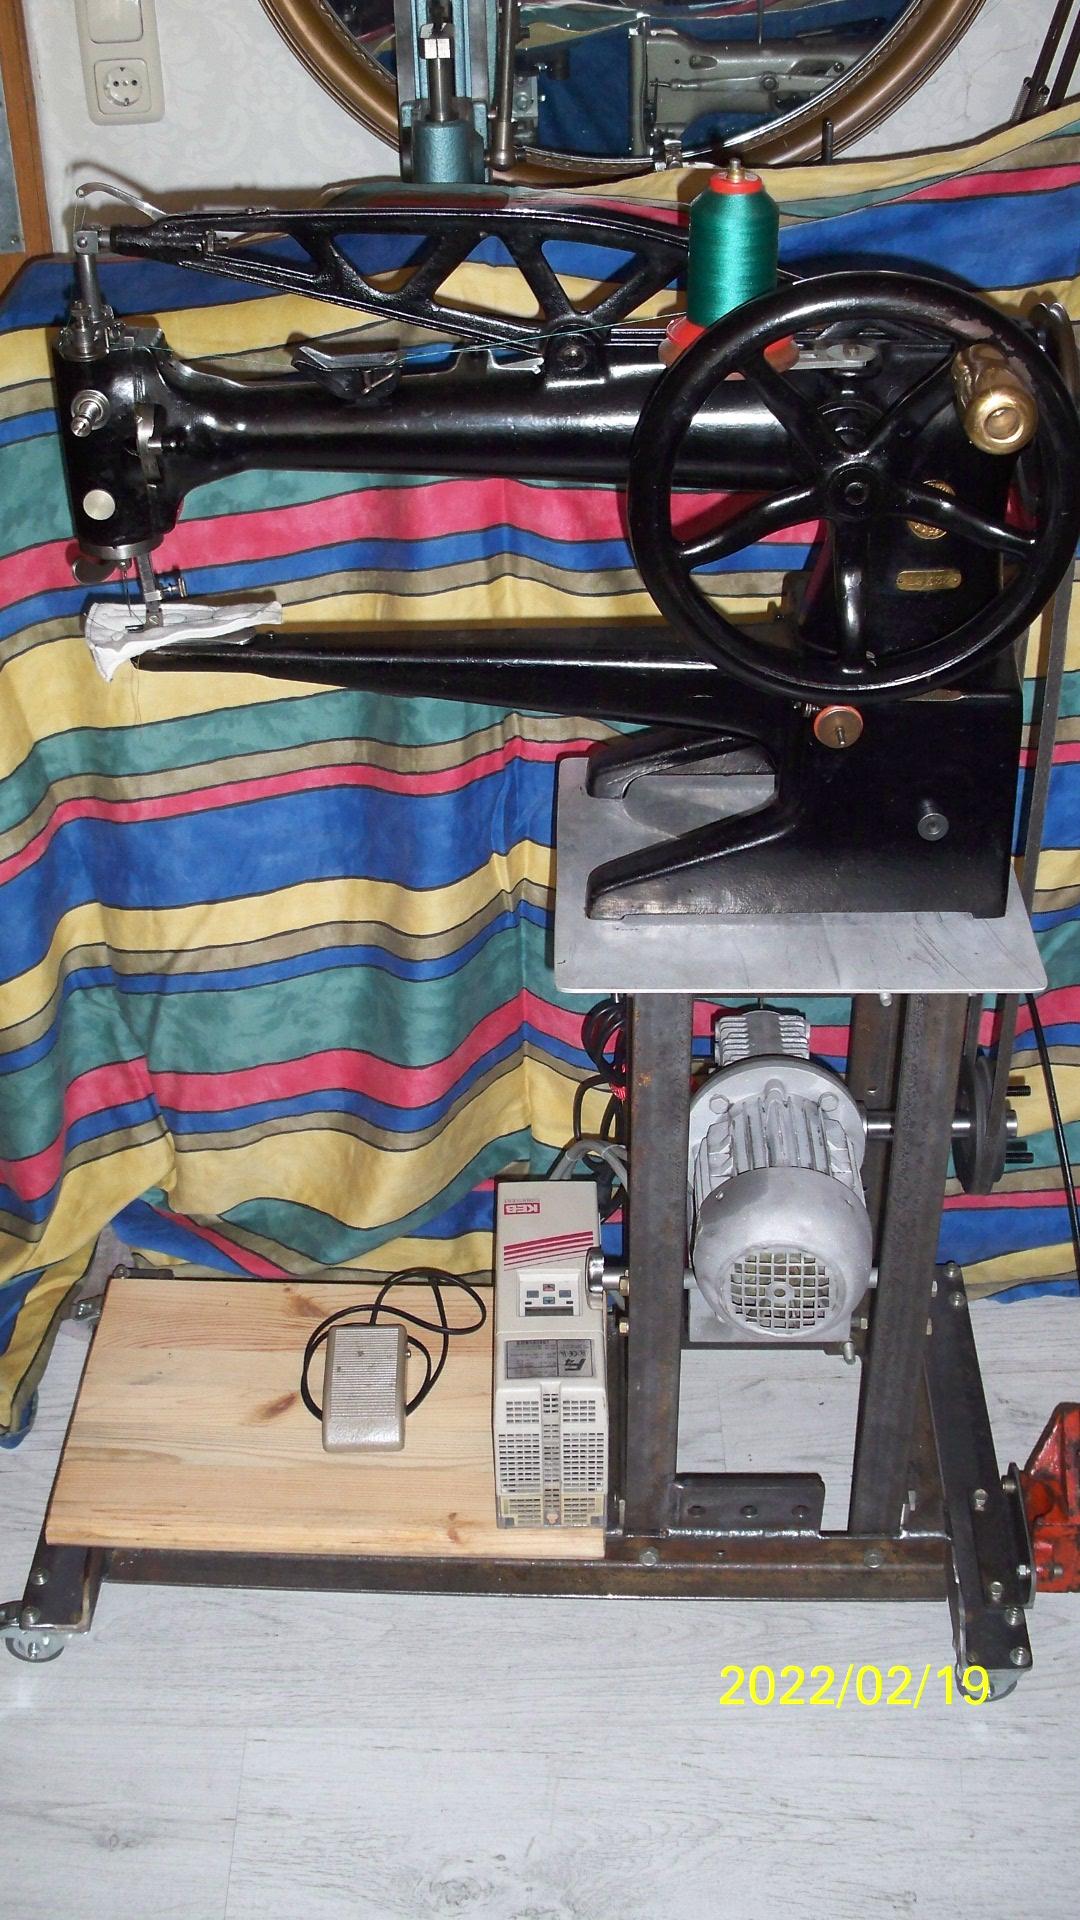
Hi, Being a metal worker by trade, I made my table top from a sheet of 12mm (about 1/2 inch ) aluminum plate for my Pfaff 138 For my Singer 29-33 (now replaced by an Adler 30-7 cause it handles bigger bobbins) I made the whole table from angle iron - bolted together to show other people that it can be done without any welding skills - even though I´ve been TIG welding for nigh on 40 years. Greetings Hans
-
Hi, If you give me your e-mail address via personal message, I will send you a pdf of the original user manual for the Adler 4 and 5 machines. It is in German language - so you should be able to understand the text without an AI translator. Another thing : are you sure that you have the needle positioned the right way ? Industrial needles as used in the Adler 4 and 5 units have to be in such a position, that the thread enters from the left side of the needle when facing your machine and exits to the right side - not like home sewing machines where you are facing the thread hole of the needle when sitting in front of the machine. Latter is just to make sure that your needle is in the correct position - else your thread will break as soon as it tries to tie a knot with the hook. Are you also sure that the needle size used is the correct one analog to the thread used ? - A heavy thread will require a thicker needle in order to ensure proper pass through the fabric/leather. Last but not least - what type of needle are you using - the Adler type 4 and 5 use needle type 328 - get the ones made by Schmetz and avoid copies made in Chinesistan or India - they are mostly junk with inferior dimensions and quality. Also : try to pull on the thread before it is engaged to the eye of the needle - if you can not pull it a centimeter before it breaks, your top thread tension settings are way to stiff/strong. Greetings Hans
-
Roger - I´ll keep that in mind. Now with English not being my mother tongue - I just hate to read written a while later and see my text as if written by an illiterate dork. Greetings Hans
-
Is B69 thread thick enough for use attaching bag handles?
Tigweldor replied to AEBL's topic in Sewing Leather
Naturally that depends upon how much weight you plan to tote around in your bag. You can always strengthen the handle attachment stitching by making a box X stitch. Also it matters on how the rest of the bag is stitched - no use having a monstrous handle if the stitches fail at the bottom of the bag and it falls apart there. Greetings Hans -
should naturally read : you will notice it FROM the grooves perpendicular to feed direction. Is there a time limit on editing - if yes - WHY ?
-
Help with identifying an Old Saddle
Tigweldor replied to Frazier's topic in Saddle Identification, Restoration & Repair
Maybe it way custom made for him in Mexico and he didn´t want to have the maker´s brand on it ? That way just my first thought when seeing the conchos. Greetings Hans -
Bell knife not sharp enough due to burr left on the inside after using the built in sharpening wheel. When the leather is still thick enough, you will not notice it other than the grooves perpendicular to the feed direction - but when it gets real thin, the burr will grab it and make a mess. Also take a very close look at the stone. It has pores that tend to clog up and leather builds up on that - thus changing foot pressure when the lump is directly under the leather. Dry ice blasting is a very good way to "resurface" the stones by cleaning the pores. With the "grabby" again stone, you can then use less foot pressure. Greetings Hans
-
To the brits : Adamson pedal identification
Tigweldor replied to Tigweldor's topic in Leather Machinery
Well, while browsing on this here web site in articles posted long time ago (nigh on 10 years) - I found a 143 page needle chart that Con had uploaded. And guess what - the first company on the list was Adamson - and they do list the BSO models as well, so it the same company. Unfortunately I could not find any models on Ebay.UK other than the Button Sew On machines.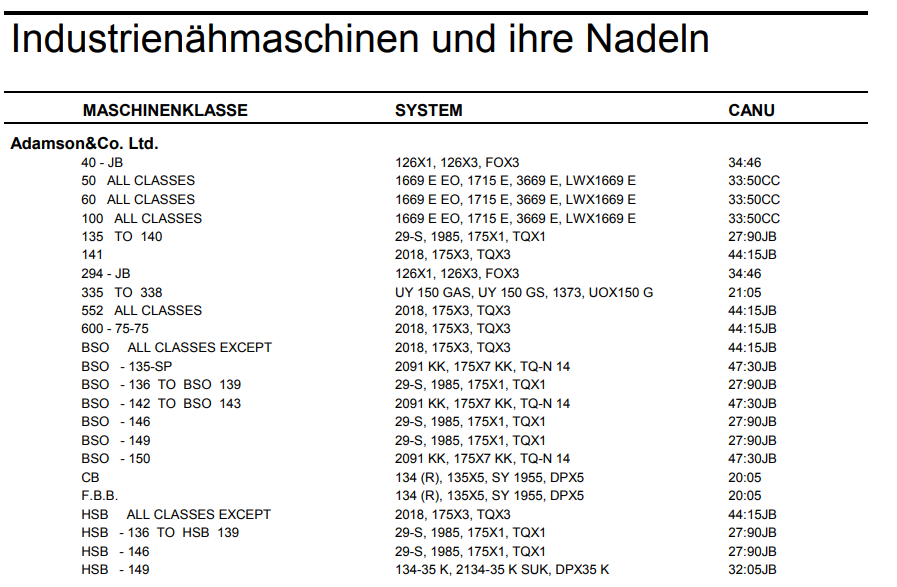
-
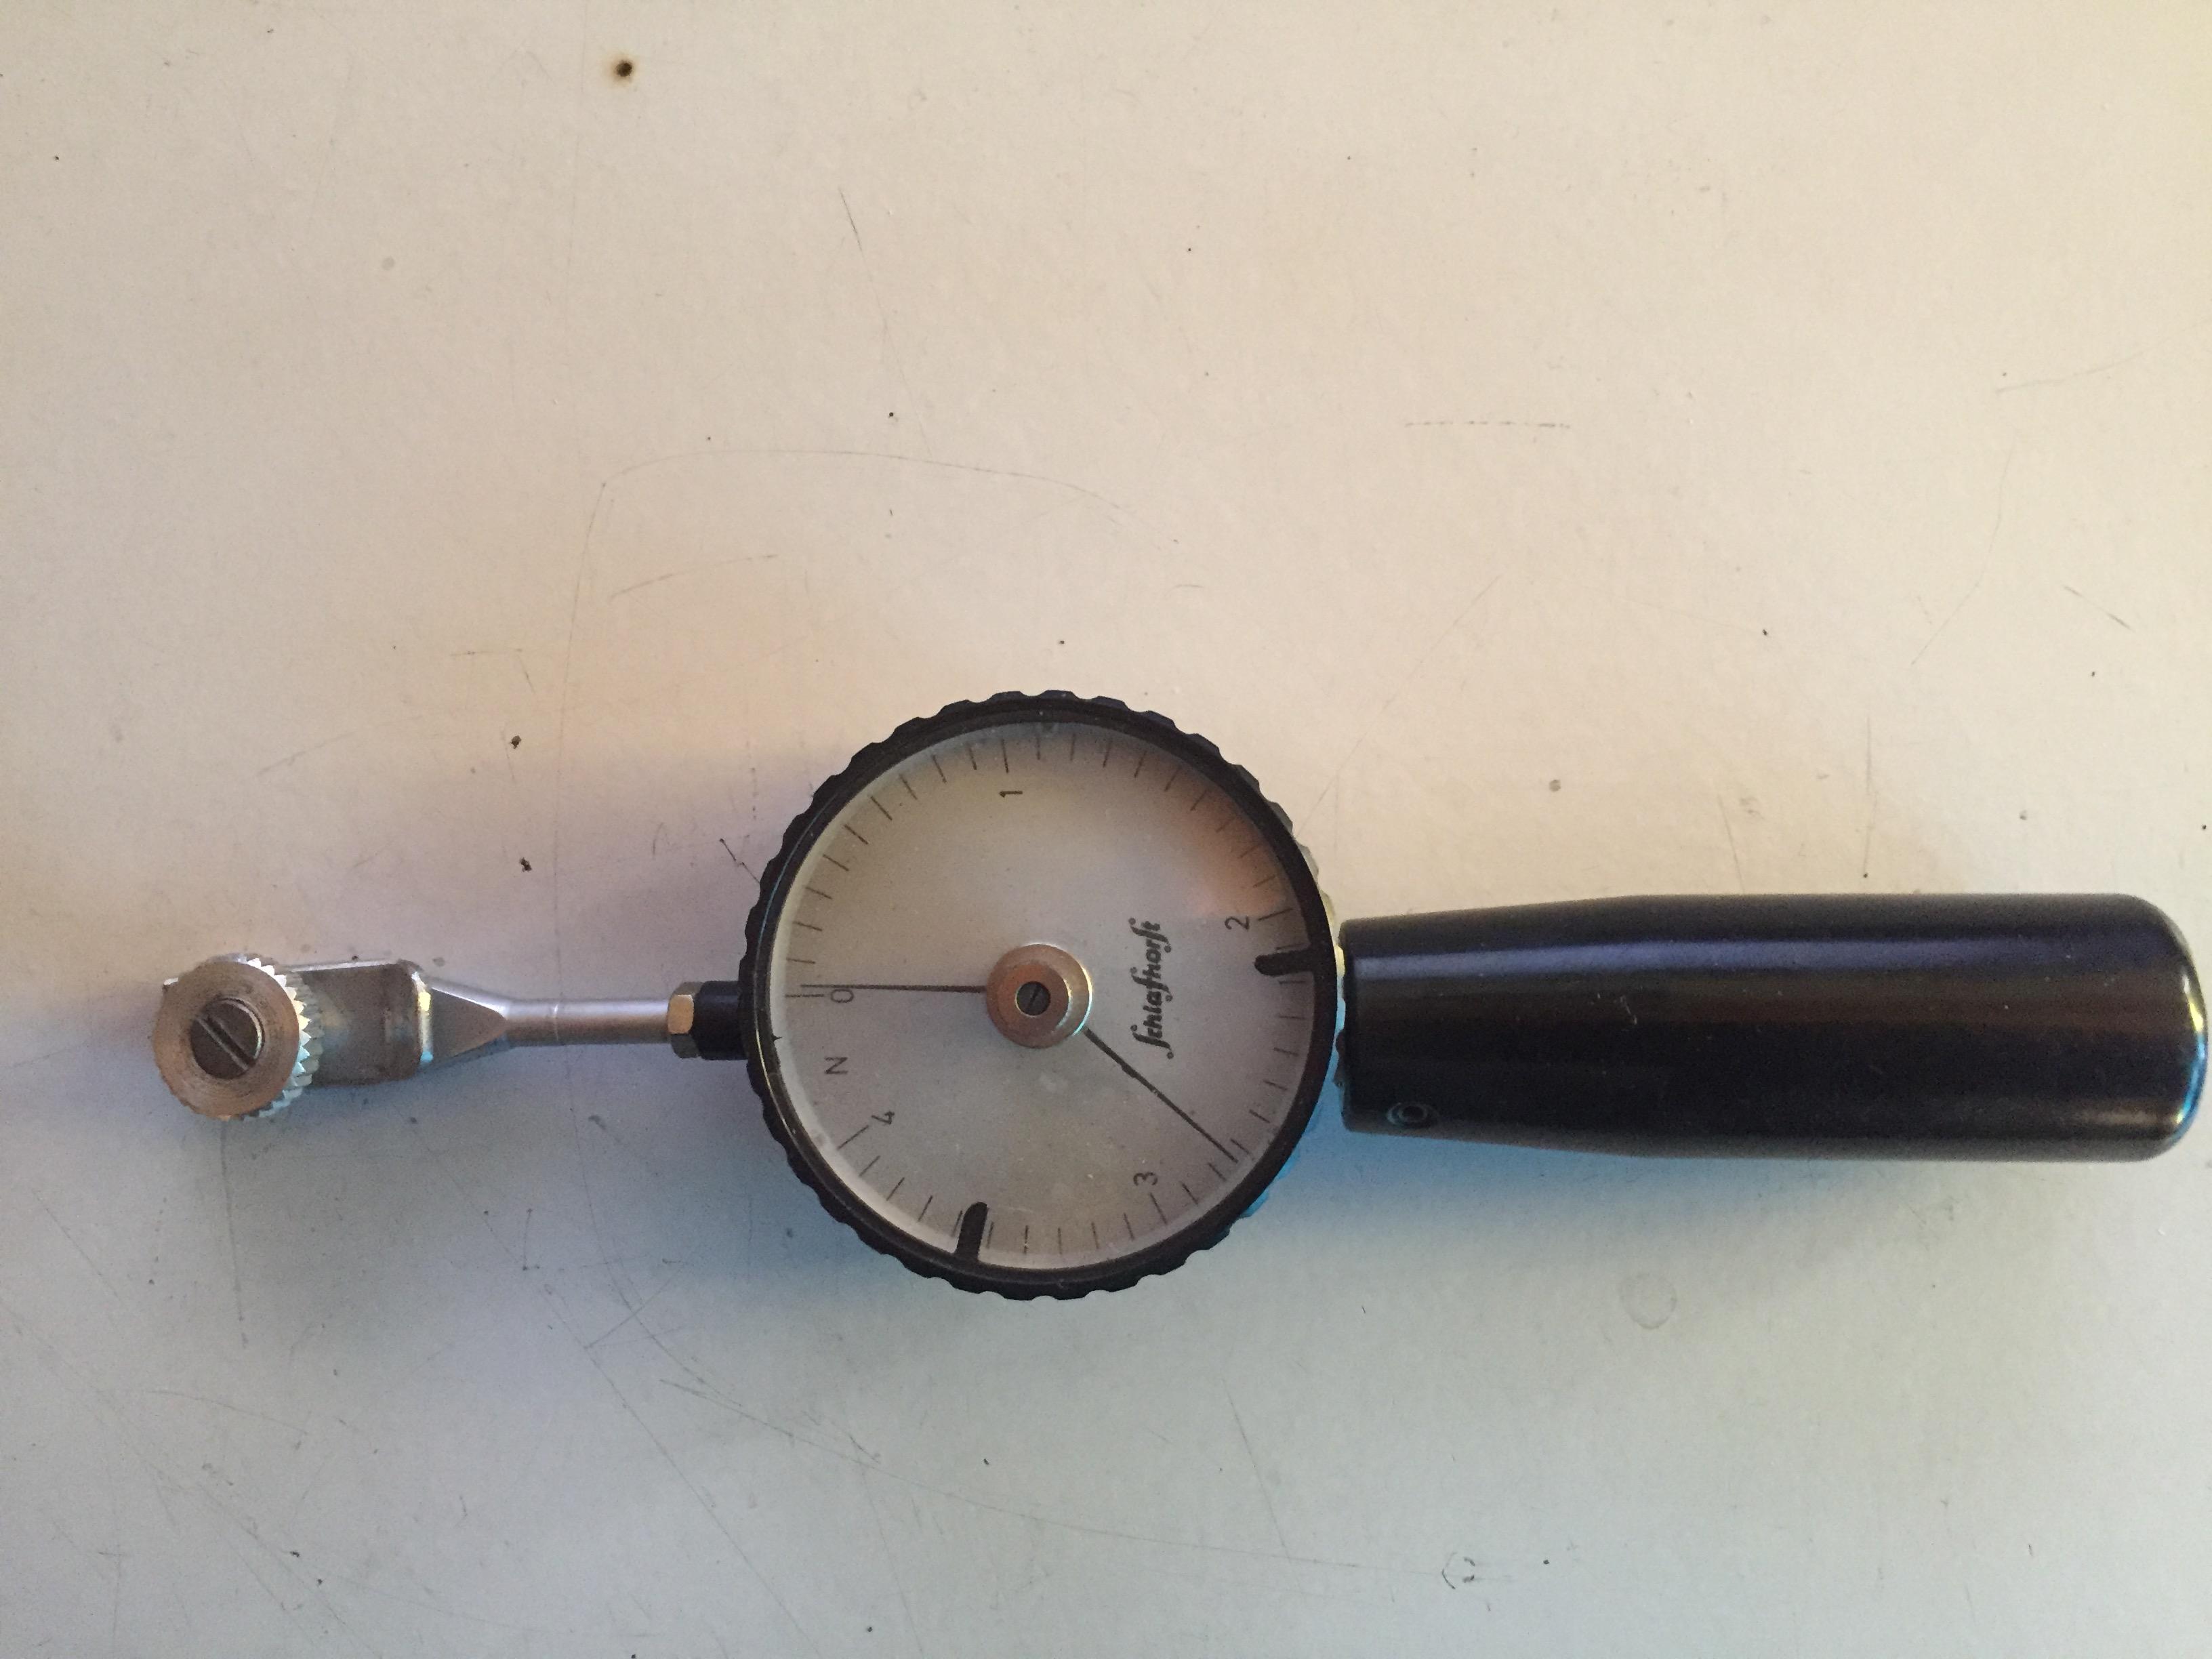
Found this article in my old bookmarks. Although it is more for industrial application, where a technician has to set up many machines in little time and thus uses a tension gauge - there are some good points mentioned and steps to follow even when not using a gauge. I bought one of those gauges made by Schlafhorst years ago ( zero to 4 Newtons) - but to tell the truth - it has not seen use much at all. The company is no longer in existence, but Towa (Japan) still makes models for same purpose - as does Hans Schmidt - latter makes gauges for all sort of tensions. https://www.hans-schmidt.com/en/produkte/tension-meter/ Thread tension.pdf
-
Found this chart on the internet a while ago - had lost it amongst my bookmarked pages. For leather sewing machines, look under : Arm- und Säulenmaschinen / Sattlernähmaschinen Also good for identifying unknown needles cause it has exact needle measurements - which for old needles are often hard to obtain. https://www.naehmaschine-antik.de/technik-nadeln.html#leather-nm Greetings Hans
-
Talked to a bud today - who has way longer experience servicing old sewing machines than I do. He said that on the old Dürkopp 18 you have to watch this unit : To the immediate left side of the top thread tensioner there is another round thread guide. The top of that thread guide goes up and down, powered by a cam from underneath, and releases just enough thread for proper loop forming before it pinches the thread again. Now if timing of that "thread pincher" is out of sync - it will stop/bind free thread movement within the loop forming process and the arm that wants to wrap the thread around the shuttle bow will lose hold of the thread. So you have to make sure that the plunger works with the up and down motion at proper timing. Also make sure that needle to thread size fits just right - on leather it is better to go on the large side of needle sizing, so thread can form a loop and is not being pinched into the needle groove by to tight of a fit of the hole in the leather - thus not being able to form a loop because the needle pulls the thread up on the up stroke. So if you do not have different size needles at hand - just try thinner top thread for now. If all works out then - you have found the prob and can order bigger size needles for the thicker thread Hope that helps you out Greetings Hans
-
Ditching EFKA Vario DC motor....what do I loose?
Tigweldor replied to alpinelite's topic in Leather Sewing Machines
Yes - read manual page 16 For the position transmitter I need the actual serial numbers - even with my reading glasses on I can not read the little lable. Type = P5-2 or P52 ?? - they have different types. Have to get more intricate info from EFKA - can not do that without complete specs or else I will make myself look silly. I have set up procedure for the old P5 units - but it is in German and very short - I know that they have more detailed info. I would seriously advise you to get help from a friend who is an electronic technician - this is all not stuff for Joe Hobbyist whose main job is a logger (not that I am knocking loggers, used to be a tree topper and a shake block cutter myself when I was young) - but you have to eliminate all potential probs step by step. Greetings Hans -
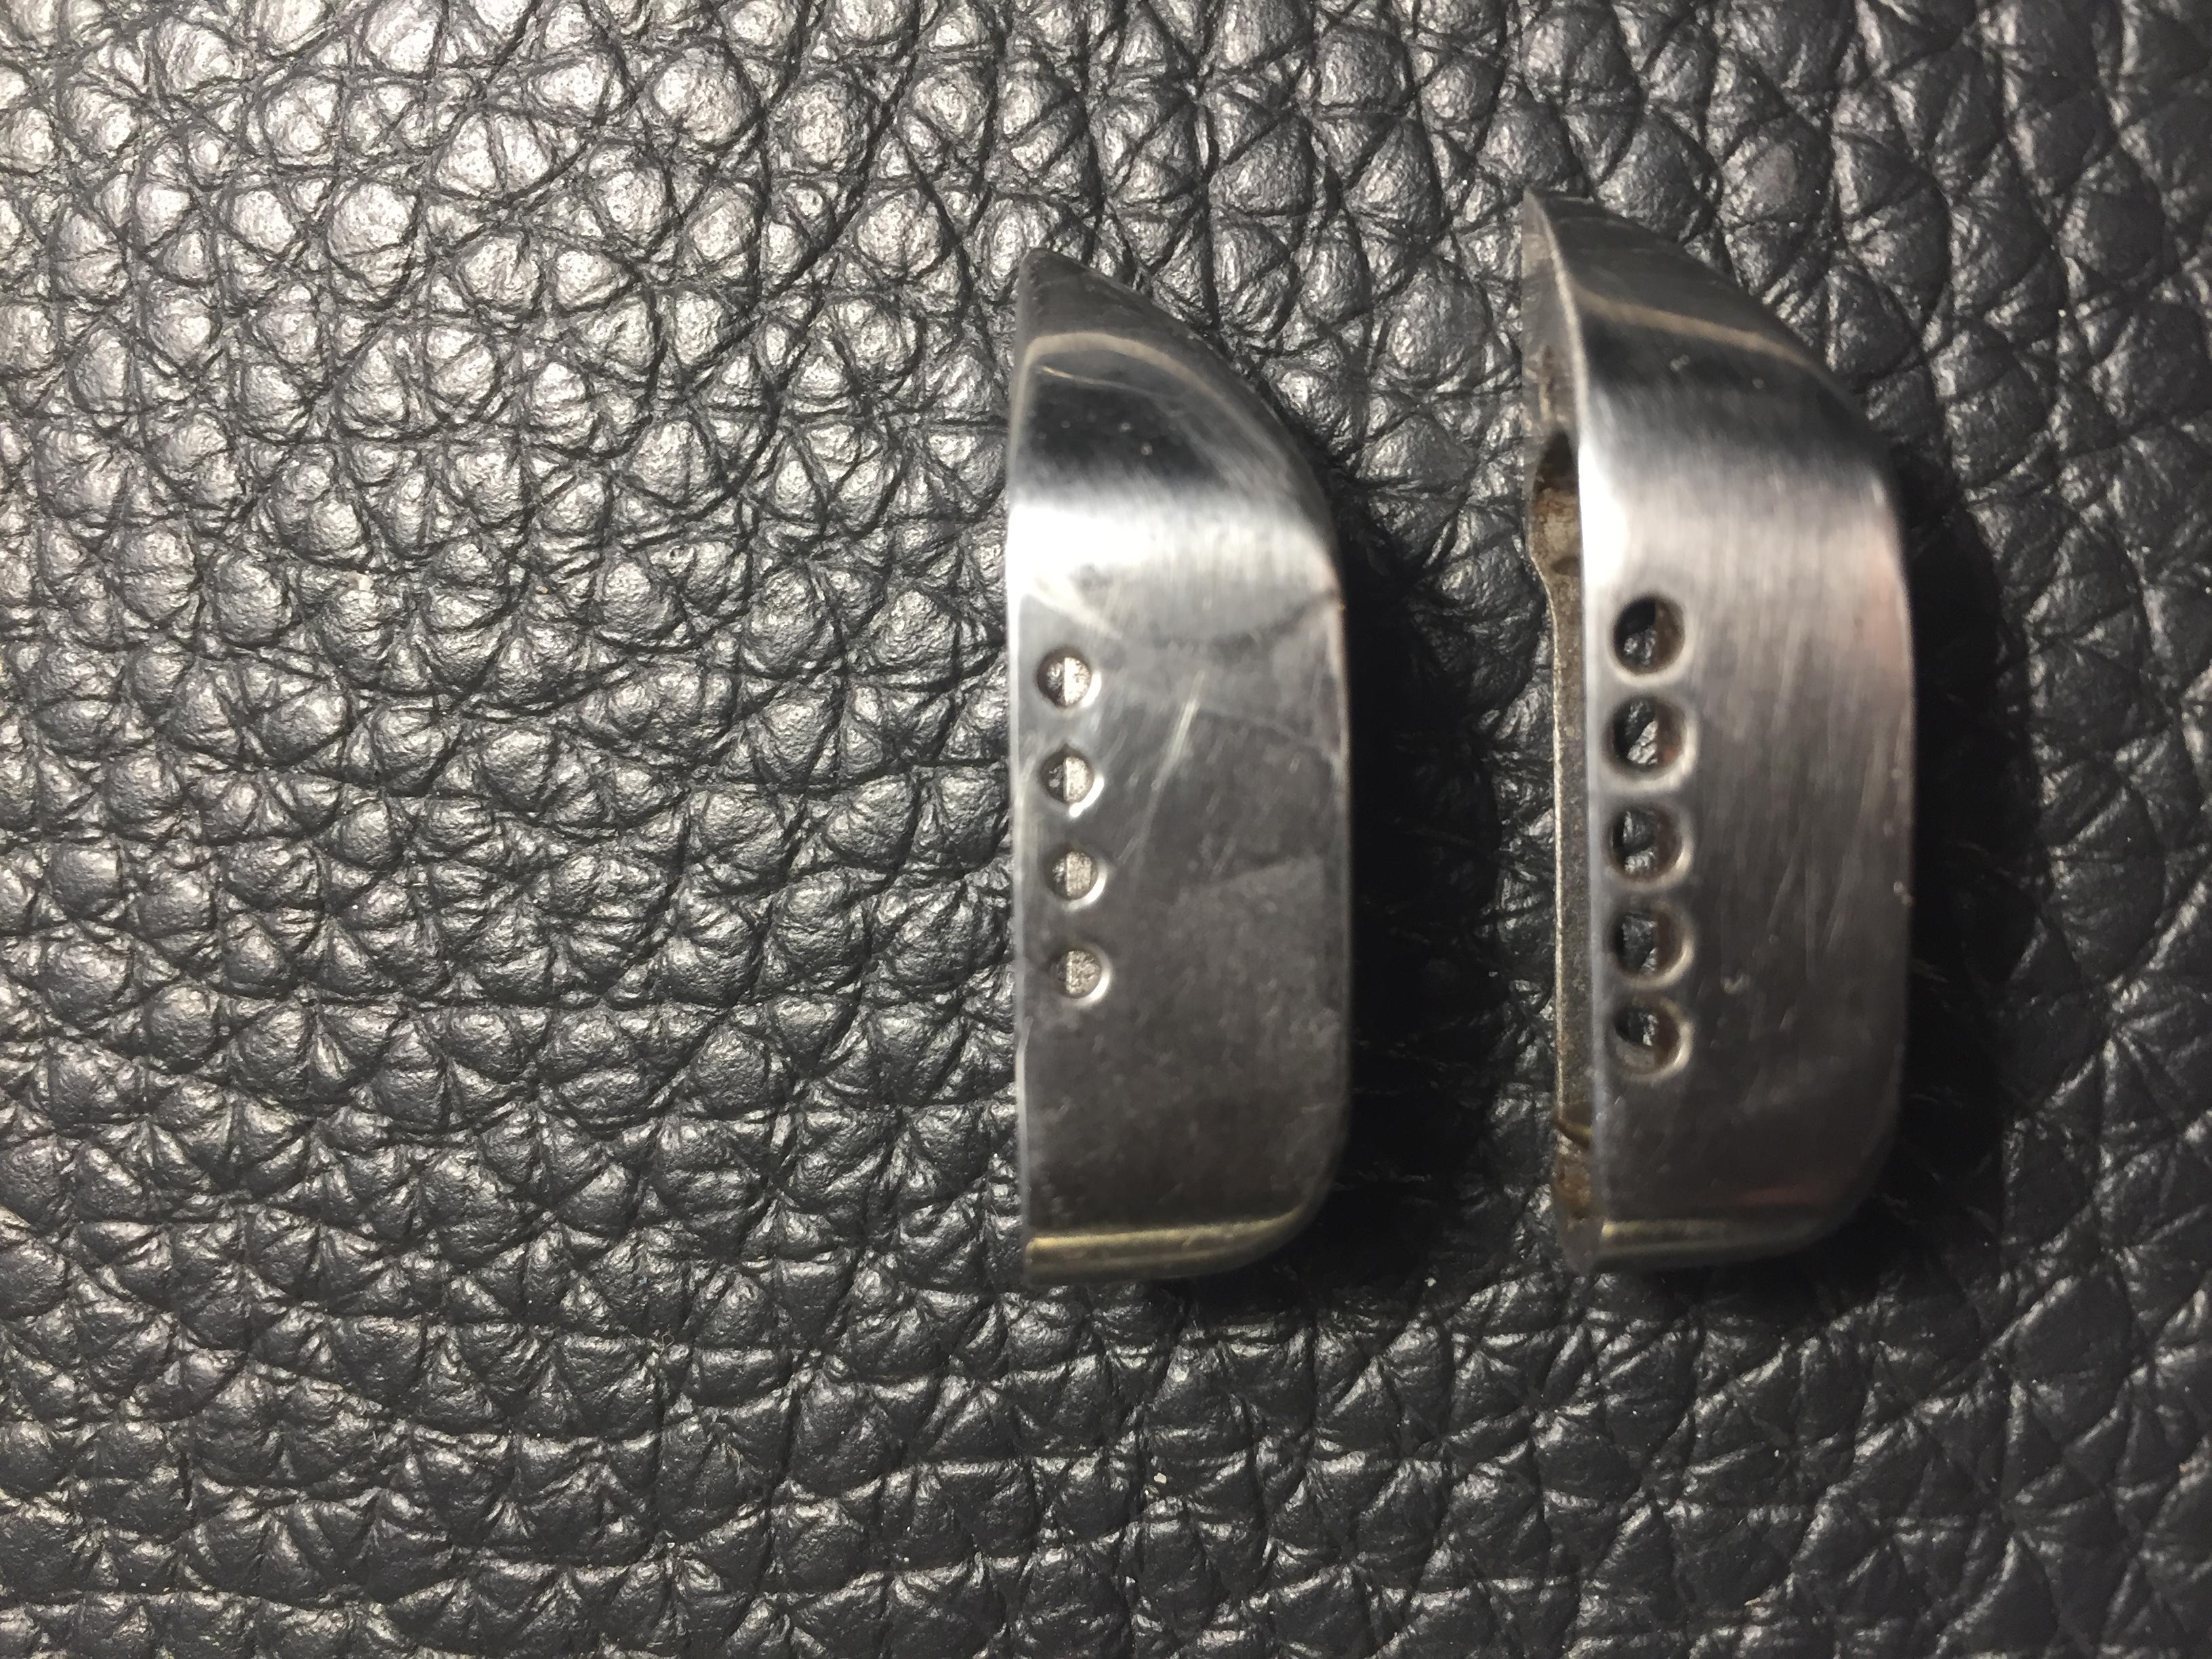
Here is a pic of the 2 different shuttles - see difference in mentioned hole diameter and number of holes analog to thread size used on the bobbin. These shuttles do not move at all - they stay stationary as the arm wraps the top thread around the bow. They are about as common as hens´teeth to find without having to buy the whole machine.
-
Merrow makes such butt stitch sewing machines - even made in the US of A. https://www.merrow.com/Overlock_Sewing_Machines/Continuous_Processing/70d3b2ls For a permanent locked butt stitch, they build a 2 needle machine. They will even build a model to your exact sewing specs - at no extra cost. If you go to Ebay.UK - you will find them up for auction - just the machine head. Otherwise you could try a fur stitching machine such as a Singer 46, Bonis, Strobel, Rittershausen - they even make one in the UK = an Allbook & Hashfield. Greetings Hans
-
You have to use needles 134 Since your machine ist in sub class B - you have to use needles between size 80 to 100. The S indicates that this machine was delivered with pressure foot for fabric. It was not really meant for sewing thicker leather as to limitation to the small needles. Should you want to sew thick leather - buy a different machine for that purpose.
-
Ditching EFKA Vario DC motor....what do I loose?
Tigweldor replied to alpinelite's topic in Leather Sewing Machines
Yes - definitely check the settings and adjust if needed. How to do it right is explained step by step in the manual. What model of positioner do you have mounted onto the drive shaft - I still have a couple kicking around in my spare parts box. These needle positioners are the "weak spot" on the whole system - there are 2 spinning discs on the inside that can move out of sync. -
also show a pic of how you wound the bobbin thread within the shuttle. I assume that you have the little short shuttle with one long hole on one side and a bunch of little holes on the other, like the one in the pics - not the newer type with a pressure spring. There are also 2 types of shuttles - one with very small holes - the other with bigger holes. You can NOT run heavy bobbin thread in the one with the small holes -- you have to use thin thread size and stick to it. Or else use the other shuttle for thicker thread - and stick to thread size that you dialed it in for with the small adjustment screw at the "bow" as well as the number of holes that you wound it through. In the pics, the thread is wound wrong. First it goes through the long hole - passes over the top of the shuttle - then through the little holes - from bow to stern All said : this is a trial and error system until you get just the right tension. And then you better stick to exact same thread size and number of holes used - or repeat the whole process. But your prob seems to be that the thread is not wound all the way around the shuttle by the little arm - that stems from a maladjustment in top thread tension so not enough thread is released to form a loop.
-
Over here in Germany, many (better : most) residential homes have 3-phase wiring to the fuse panel as well - since all electric stoves/ovens are wired 3-phase. The national electrical code is pretty strict about that - has been for many decades. We only have 50 Hz over here - on older imported record players and cassette tape decks you had to dial in wanted frequency on the back of the machine - else the turn table/motor would be "wonky"/out of tune. Some record players without that switch even came with 2 different drive belt pulleys for the motor - one for 50Hz , the other for 60Hz in order to obtain proper 45 or 33 rpm.
-
Well, as it is stated in the side bar - I live in Germany. Over here, ALL industrial wiring is/has always been 3-phase --- hence : all industrial sewing machine motors are 3-phase. And it does not matter if you buy an old Quick, Kobold or EFKA motor - for industrial application they are all 3-phase motors. In days gone past (before the internet), it used to be difficult to obtain used industrial sewing machines - the manufacturers of sewing machines had contracts with the industry and when it came time to replace models - they would rather scrap entire machines than selling them on the second hand market for use in private homes. All said : there was really no second hand market for used industrial sewing machines as we have it nowadays. This was to promote sales of "home use" sewing machines - which then came with single phase motors. As to exports to the outback and the islands around Australia - they most likely did furnish them with single phase motors as you guys did not have extensive 3-phase wiring throughout your countries, until a very short time ago.
-
Ditching EFKA Vario DC motor....what do I loose?
Tigweldor replied to alpinelite's topic in Leather Sewing Machines
Seems that you do have an EFKA DC motor. https://www.efka.net/fileadmin/downloads/DC-Antriebe-Drives/AB62AV/EN_BA_AB62AV_3_3__220995.pdf Take your time and read/study thoroughly - might take a few hours. -
The guy is an Aussi - his sort of next door neighbor country would be Japan (Juki or Seiko) - then comes China. But as I said - real quality is found in an Adler - at a much higher price than most. But you put the machines side by side - you can grasp very quick why top quality has its´price - you can actually feel it just by touching different components of the machine. Just my biased opinion as a Kraut Hans
-
Ditching EFKA Vario DC motor....what do I loose?
Tigweldor replied to alpinelite's topic in Leather Sewing Machines
Efka motors are 3-phase industrial AC (clutch) motors. It will not be the motor that is at fault - it will be the electronics that "steer" it. Usually, the needle positioning unit is at fault or just simply not set up proper. If I can give you some advice - check the needle positioner unit at the back of the hand wheel. If you give me the data on the unit - I can look into sending you correct set up procedure. No use wasting hard earned cash if the remedy is just re-setting things, which costs no coin at all. And yes - advice is free - I will not charge you 300 Euros to solve your problem - as most shops will want to do. Actually, if you unplug the positioner leads at the control unit - the sewing machine/motor should perform decent again - the thread cutter may not work as originally intended, though. That naturally all depends upon the control unit - in my eyes all stuff that may be necessary in industrial application - no "home sewer" or small shop really needs a thread cut of device. Greetings Hans