Its all about Leather
-
Content Count
45 -
Joined
-
Last visited
Everything posted by Its all about Leather
-
For Sale Tippmann Boss Sewing Machine
Its all about Leather replied to Its all about Leather's topic in Old/Sold
The Item has been sold. Thank you. -
I have for sale a used, but in excellent condition, Tippmann Boss sewing machine. This is an excellent sewing machine as the pictures show, and the reason I am wanting to sell it is because I don't use it as much as I thought I would when I purchased it. I still prefer to hand sew my projects, so it is just sitting around not doing anything. What is included is: Tippmann Boss Sewing Machine DVD and Operators Manual, Plastic container holding tools, bobbin, and needles 2 Bobbins, Including the one in the machine 1 Bobbin winder 5 allen wrenches for maintenance 1 screw driver for bobbin tension adjustment 10 extra needles of various sizes 1- 1385yd spool of #277 White Polyester thread Selling Price including shipping: $1,050.00
-
I can't remember where, or who said it, but through all of my searching in these forums I found someone say to cut on the outside of your marks and this will help with your patterns from getting skinny. Bill
-
Here is a link to the book by Ron Smith Drawing and understanding scroll designs. The best price I have found yet. http://www.contenti.com/products/books/116-614.html I hope this helps. Bill
-
Questions about scroll carving
Its all about Leather replied to Kustom's topic in Floral and Sheridan Carving
To answer anybody else's question concering scroll design that searches this site, I found the same questions answered in other forums. His name is Ron Smith and his books are called Drawing and understanding scroll designs, and Advanced drawings of scrolls. Here is a link to a website that sells his book at the cheapest price I can find. http://www.contenti.com/products/books/116-614.html i hope this helps anyone else who searches for scroll design. Bill -
Send a IM to Hidepounder (Bob Park) I think he is around that area. He could give you some great advice.
-
Leather Projects made for customers and friends
-
-
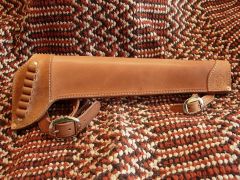
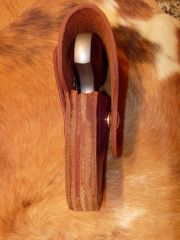
From the album: Leather Works
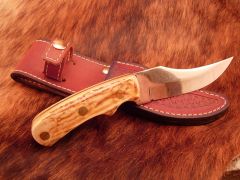
Calf Holster (Knee to ankle) for a Rossi Ranch Hand .357© © Trail Boss Originals 2011
-
Hello Galileo!
I think you can go to your profile page and click on topic and open a new topic there.
-
 Looks like you have found your niche! Great Job!
 -
Memo Pad 004.jpg
Its all about Leather commented on Its all about Leather's gallery image in Our Leatherwork Galleries
 Thanks! I think I used the A 106 bar grounder. Thats what it looks like in the pictures. Its been awhile since I've been made it. HaHa
 -
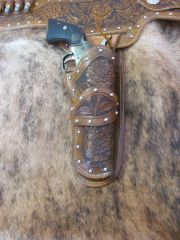
From the album: Leather Works
© © Trail Boss Originals 2011
-

From the album: Leather Works
© © Trail Boss Originals 2011
-
Show us your home-made leatherworking tools!
Its all about Leather replied to candyleather's topic in Leather Tools
Thats Very Nice Chris! -
DSCN4456.JPG
Its all about Leather commented on Its all about Leather's gallery image in Our Leatherwork Galleries
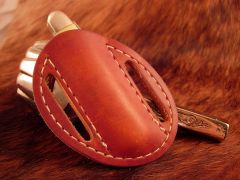
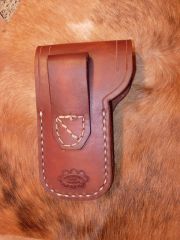
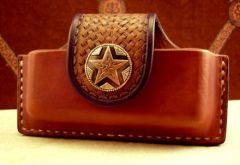
 Phone Holster
 -
From the album: Leather Works
© © Trail Boss Originals 2011
-
Show us your home-made leatherworking tools!
Its all about Leather replied to candyleather's topic in Leather Tools
Those are sure some beautiful tools BearMan. I love your woodworking abilities. Very nice work! -
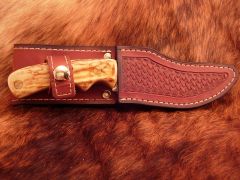
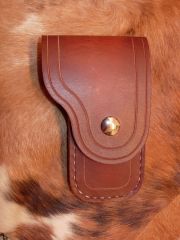
From the album: Leather Works
© © Trail Boss Originals 2011
-
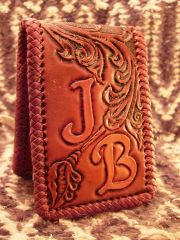
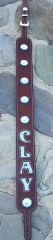
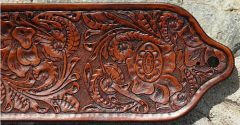
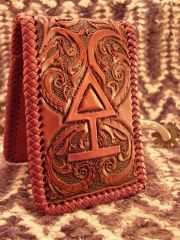
From the album: Leather Works
Its a Memo Pad I made for my uncle. It was my first hand at drawing my own design and lacing. Normally I have been using craftaids or just a basketweave stamp. I don't like the punched holes along the edge. It made it very weak in my opinion.© © Trail Boss Originals 2011
-
Show us your home-made leatherworking tools!
Its all about Leather replied to candyleather's topic in Leather Tools
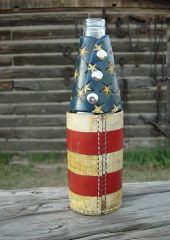
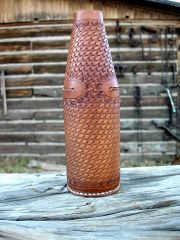
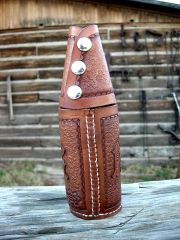
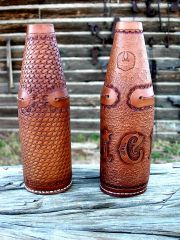
That sounds pretty awesome! You need to take some pictures so we can see. Here are a few wooden dowels I made and use when I make my koozies. I made them so I could clamp them in my Stitching Horse and sew the edges together . One fits a bottle the others fit cans. It also helps to stretch them out. I made them just a little bigger in diameter than the acutal bottles and cans themselves. -
Show us your home-made leatherworking tools!
Its all about Leather replied to candyleather's topic in Leather Tools
Thanks! Yea the light bulb can get hot after awhile. I try to use a low wattage just to help keep it cooler, but most of the time I clamp the light to my chair and set the box on my legs and it doesn't seem to get as hot that way. I made my anvil for knife holsters I make. I needed something long enough to be able to set the rivets in the back. Necessity is the mother of all invention. -
Show us your home-made leatherworking tools!
Its all about Leather replied to candyleather's topic in Leather Tools
Here is a few of my tools I have made since I started crafting a few years ago. 1) Rein Rounder made out of 2 pieces of 2" x 1/2" strap 2) Embosser : I tried to make it deep enough to be able to stamp bible covers 3) Deep throated anvil made out of 4" I-beam 4) My stitching Pony made from the plans from Al Stohlman's book How to Hand Sew 5) Something I threw together using an old 12" X 12" window pane to trace a pattern and haven't quit using it since. I didn't realize how much I have made until I was looking around to take pictures to add to your post. And I still have more, but I used my picture quota. William -
From the album: Leather Works
© © Trail Boss Originals
-
If anyone wants an inexpesnive, but very functional stitching horse/pony I would recommend the Al Stohlman Stitching horse plans in the back of his hand sewing book. I used the plans to build myself one and am very happy with how it performs. I don't think I will go to anything different. The only thing that I did differnt was use a oak hard wood for the jaws and it seems to put as tight of a grip on anything you want to put in it. I opted for just using the front legs, that way I can sit in my office chair and lean back if i need a break, or pivot and roll around to reach things on my work bench, while never having to get up from the stitching horse. The best feature I found with this style of Stitching horse is having the lever that is on the side that pushes down with the handle sticking out towards the front of the stitching horse. To me this is the best because it is out of the way and easily accessable and unlike some I have used, that you use your foot that you can accidentally kick open, or ones that are perpindicular to the jaws hit you in the shin, or the back of the calf seem to make it a bit uncomfortable when sewing for a long period of time.
-
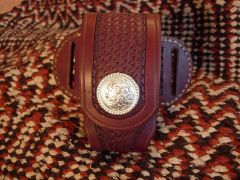
Bottle Koozie
Its all about Leather commented on Its all about Leather's gallery image in Our Leatherwork Galleries
 Thank You!