yaklady
-
Posts
548 -
Joined
-
Last visited
Content Type
Profiles
Forums
Events
Blogs
Gallery
Store
Everything posted by yaklady
-
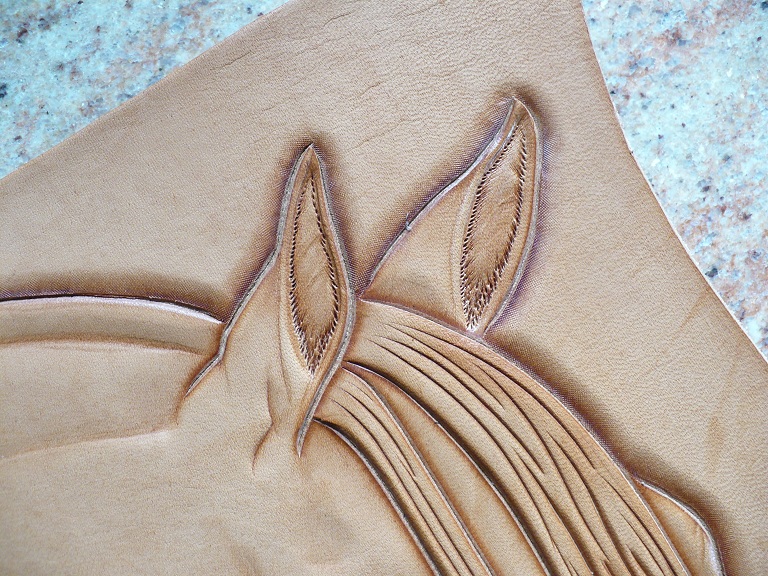
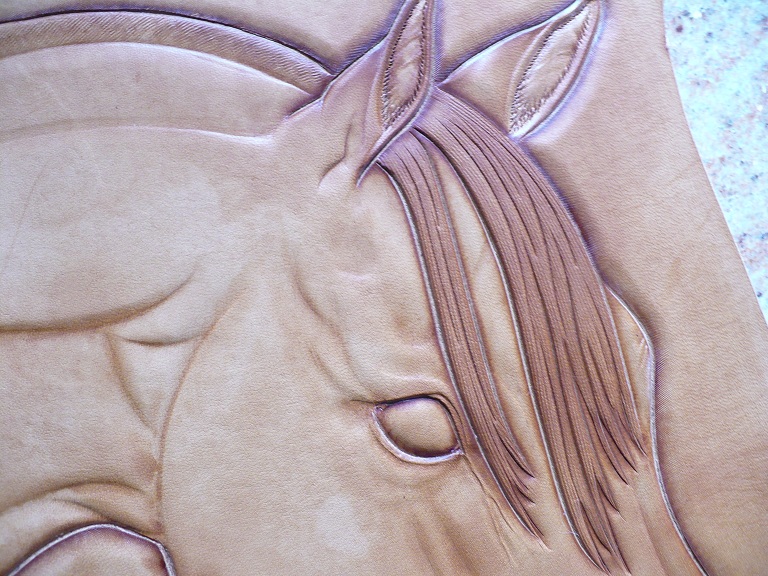
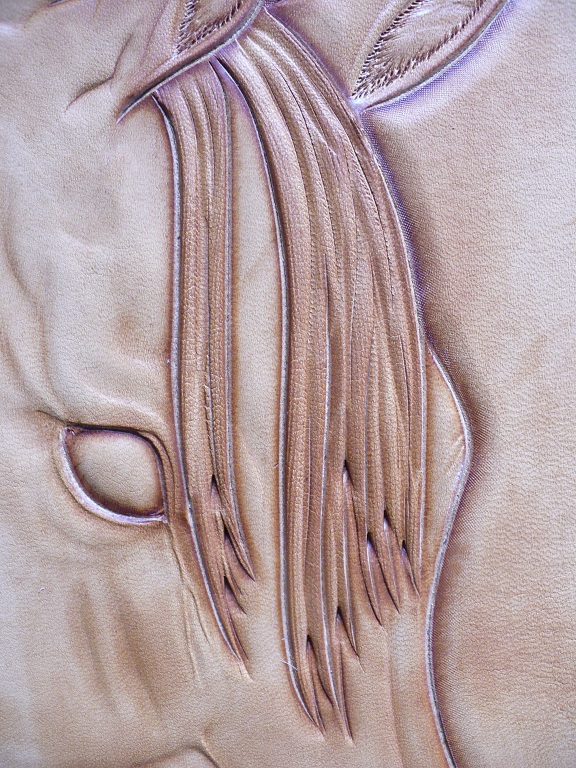
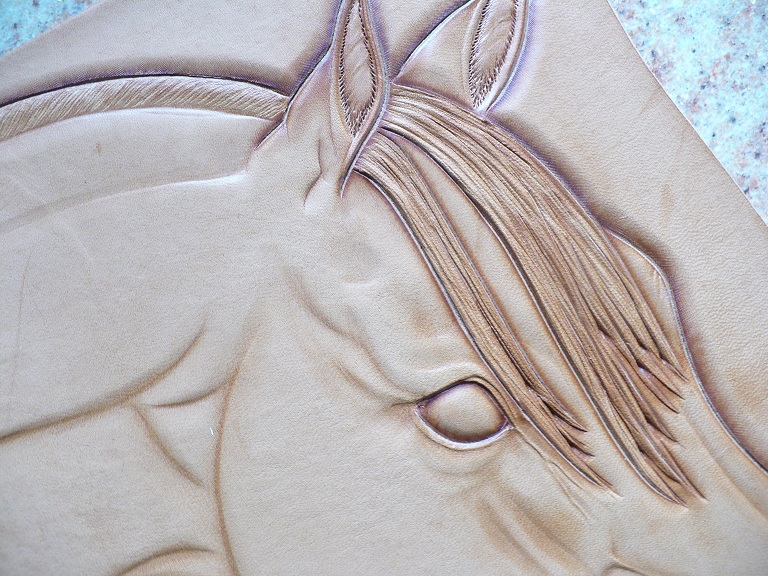
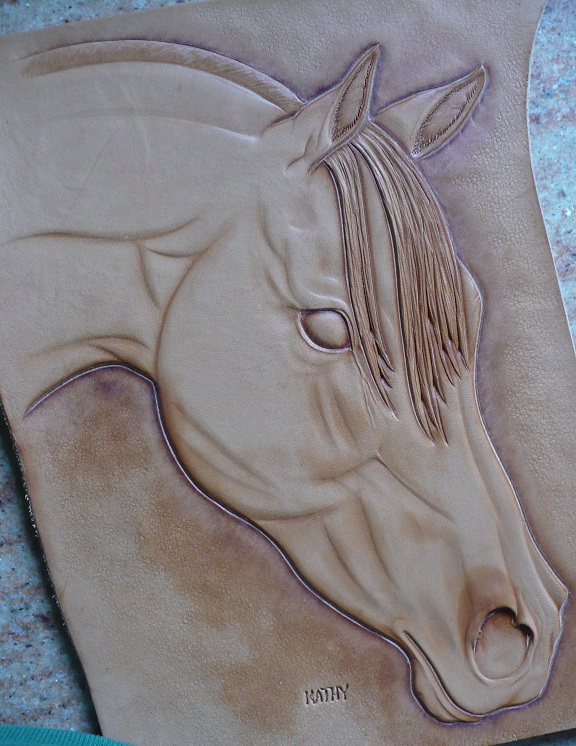
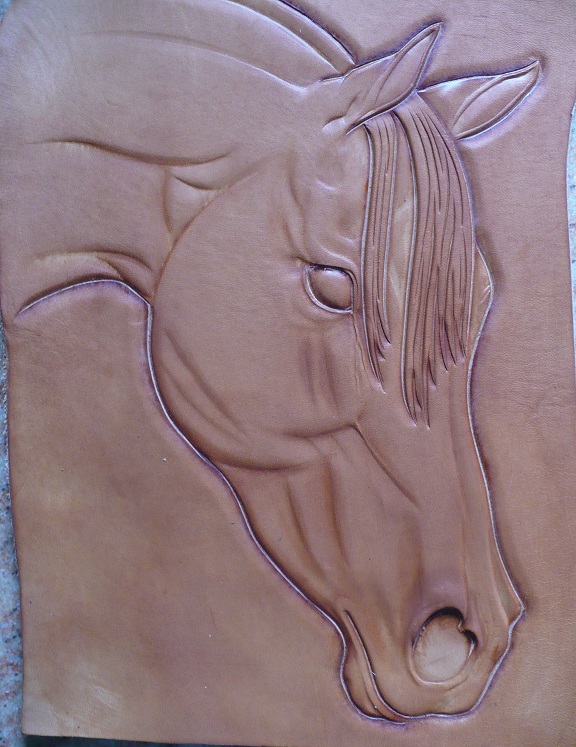
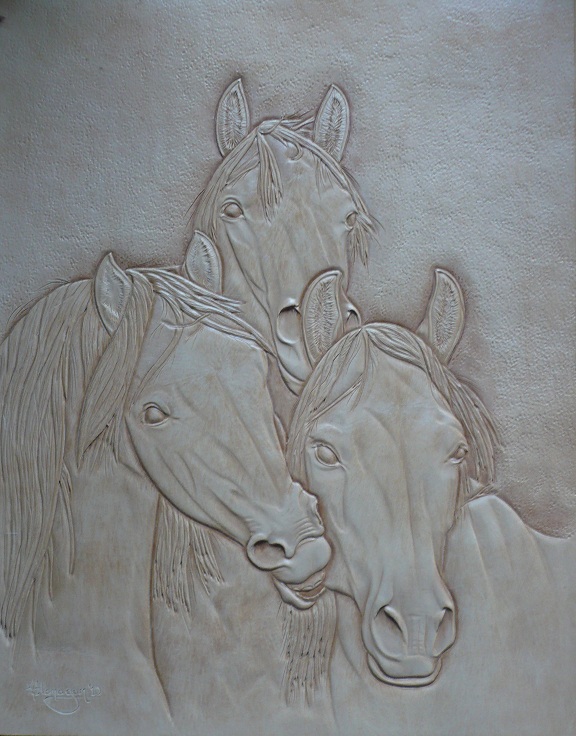
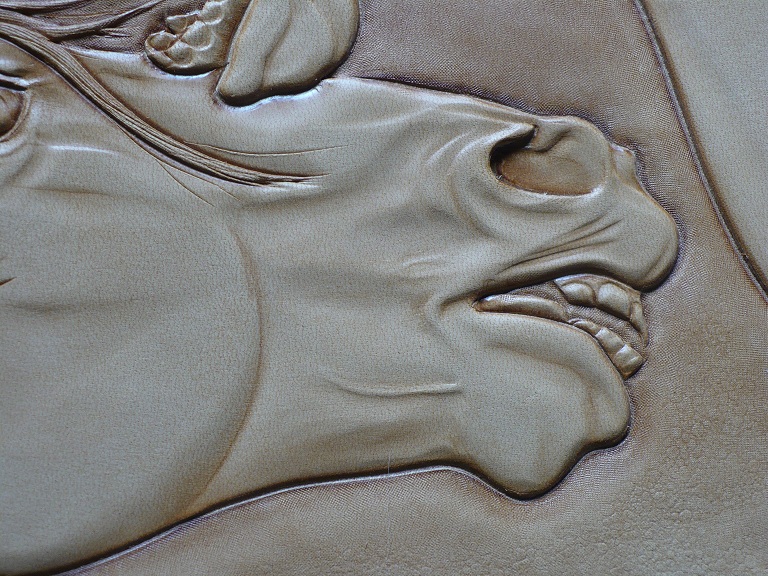
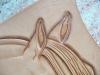
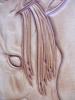
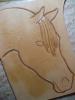
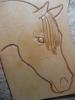
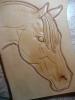
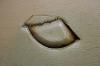
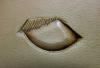
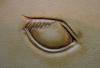
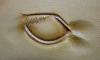
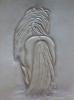
Flatten the inside of the ears with a smooth beveller. With a pointed beveller like F902, create hairs along the outer edge of the inside of the ears. Use a hair blade on the forelock and the roached mane. Use the pointed beveller to define the ends of the forelock. A fine-point stylus makes the hair look more life-like. Use it, your spoon, and even the swivel knife to create individual hairs and depth between them. Matt around the horse with a checkered beveller. Texture around any portrait sets the carving off. Don't leave the leather smooth! If any part of this is unclear, let me know and I will try harder to explain it. I look forward to seeing what you, Gisela, and anyone else who cares to do it, come up with. Happy tooling! Kathy


-
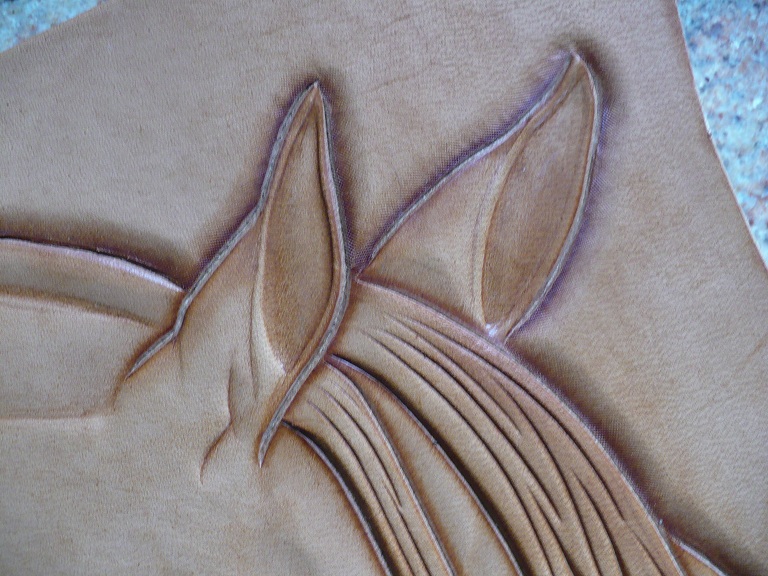
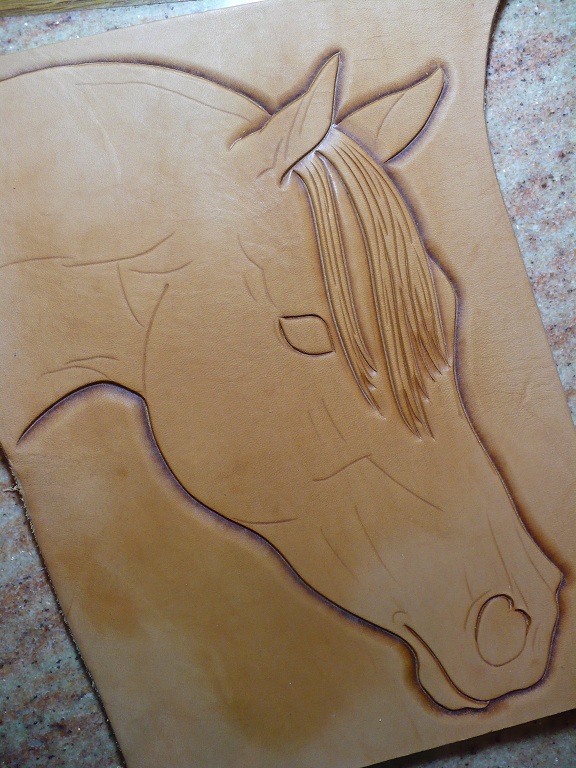
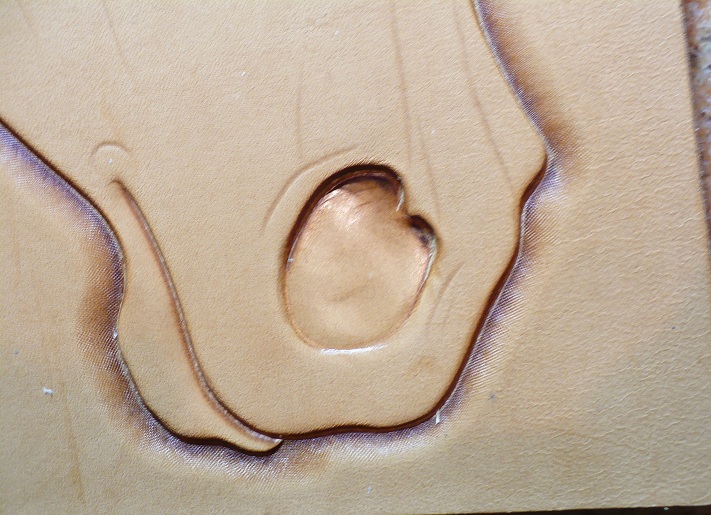
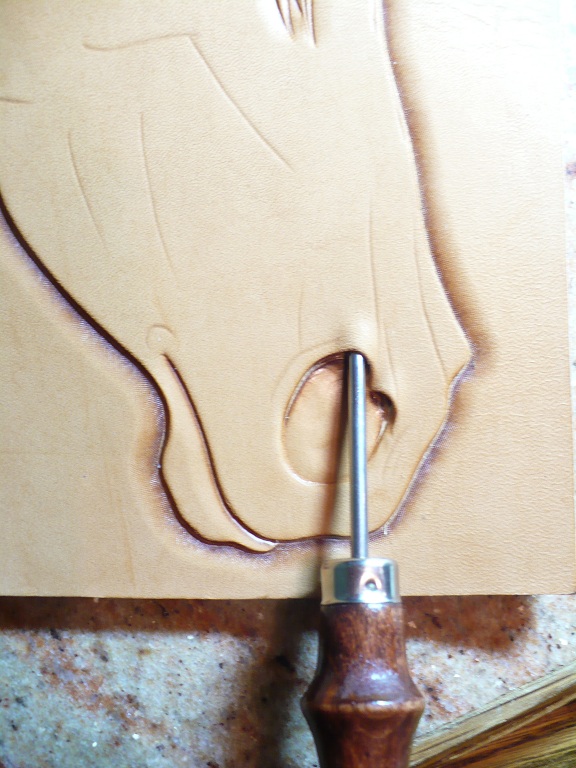
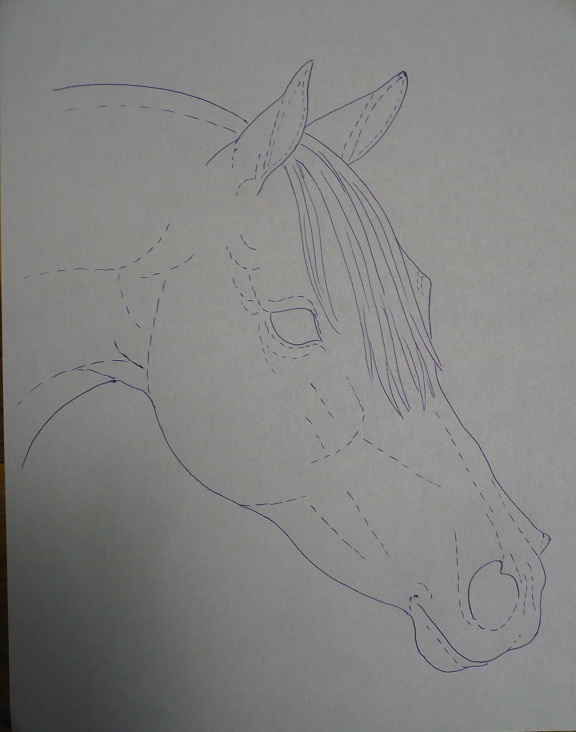
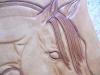
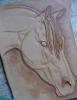
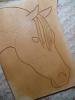
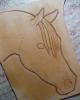
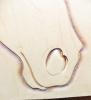
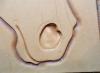
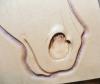
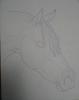
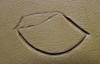
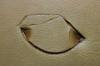
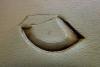
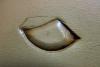
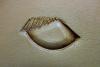
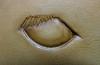
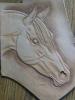
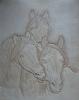
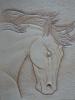
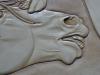
Here it is, Gisela! I took a picture after each step so you could see what I'm doing. I did not make the little dotted lines that are in the pattern because I hate doing dotted lines! You don't really have to dot them all, anyway. Just remember that you don't cut anything inside, except the eyes, around the ears and the top third of the nostril. Oh, and the forelock. That goes for any horse pattern, not just this one. This one shows which lines to cut with your swivel knife. Bevel around the outside with a checkered beveller. Never use the checkers on the horse itself. With a smooth beveller, do the ear, forelock and under side of the mouth. Do the eye like I described before. Bevel the inside of the cut line on the nostril. Flatten the inside of the nostril with a large, flat, smooth pear shader. Using a propetal, pick the horse's nose. Cut above the top of the nostril to give it a 3-D effect. It will look like this. Bevel the lines indicating where the muscles are with a figure carving beveller. Avoid using a sharp beveller here. Smooth all those lines with a modeling spoon. Round out the outer edges so that your horse does not have sharp edges. This will be continued in the following post. It seems I can't put too many pictures in one post.


-
The pattern is 8" x 10", but you can make it any size you like! I should have the horse tutorial up pretty soon. Gotta go shovel some snow first. )
-
My scanner won't work, so I took a picture of the pattern. I hope it works for you! I also started working on step-by-step instructions and will post that when it's done. Kathy
-
Thank you, Josh! It's all these nice comments that encourage me to do stuff on here. I'm happy to help out anyone who wants it. Kathy
-
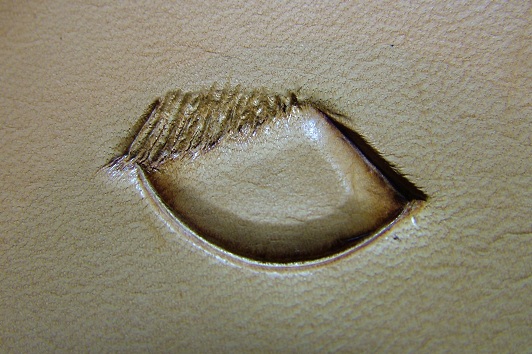
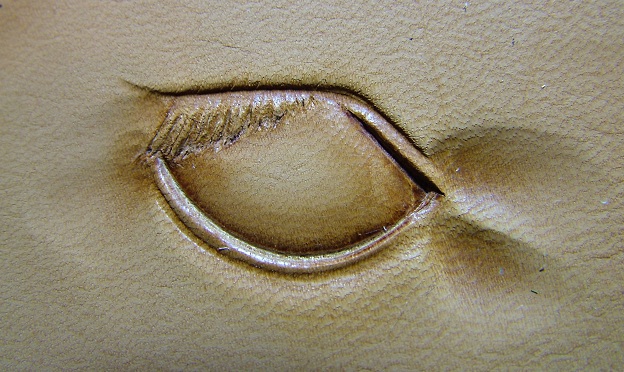
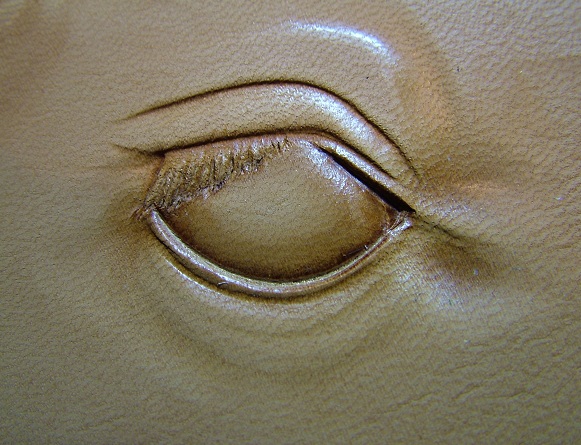
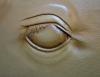
Hi Gisela, Yes, I think Germany is a little too far for you to come visit me for an afternoon of fun carving together! It sure would be fun, though. Let's talk about the eye you did. Not bad! The eyeball itself is bevelled correctly and nice and smooth. The eyelashes could use a little work. If you have a hairblade, go over the lashes with it, to give a more hairy look. Use a fine-point stylus whether you use the hairblade or not. The lashes are rough looking, so make some of your impressions deeper than others, and not too straight. The pear shader can be used at the back of the eye, like you did in the front. The lower eyelids could be smoothed out a bit. The one right by the eye looks good, and the rest can be shallow. I would be delighted to post a pattern and show you how to do it. Give me a few days at least to put something together, and figure out how to post the pattern. You can take all the time you need to carve the horse. I wish you could come to Sheridan. I'll be teaching a class there and would love to have you in it! Kathy
-
Yep, that's exactly what I have! Do you use the hair blade when you use the Bob tool?
-
ClayB has a Bob tool that he does hair with. I have an old ground down F910, and thought it would be good to figure out how Clay does it so well. My cheap tool worked out very well for this purpose. Once I got it figured out, it was a piec of cake.
-
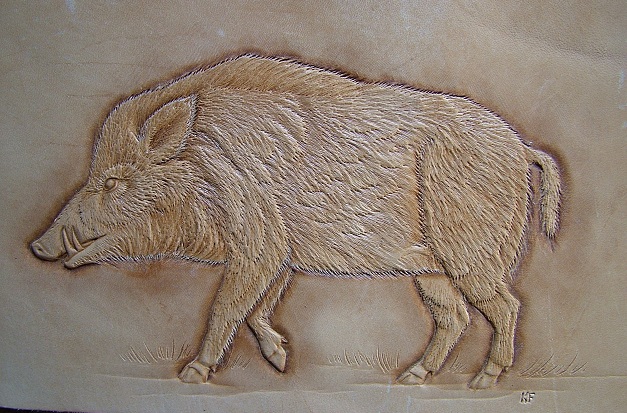
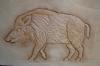
Hi Tim, The only place I know to get that modeler is right from the source, from Peter. You can contact him through his website. They were $35 last I knew, over a year ago. Maybe they haven't gone up. I use an assortment of tools. My Craftools are old ones, which work much better than the new ones. For most things, I use them. Bob's matting tools are by far superior to any others I've used and I don't use anything else for matting. I use some of his bevellers as well. When you get into scenery, he has a lot of helpful tools for that. One invaluable tool is Craftool F910, modified. Grind off the sides to make it a sharp, pointy beveller, and it works great for doing hair. That's what I used to do the wild boar under the patterns heading. The new F902's need to be ground down as well to make them work right. They're too fat and round. My Sheridan class will be on Friday, all day. We will do a horse head in the morning and color it in the afternoon. At least that's the plan! Hope to see you there! Kathy
-
Sorry for the slow reply, Gisela. I look forward to seeing what you do. I'm looking forward to yours, too, Hilly!
-
Hilly, you found some great patterns! I just couldn't resist doing this one. It's the perfect kind of pattern to follow. If I ever need a pattern, I know who to turn to. Kathy
-
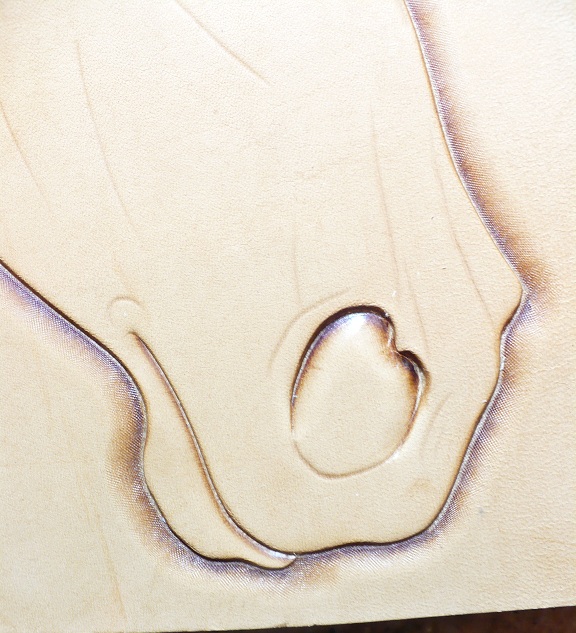
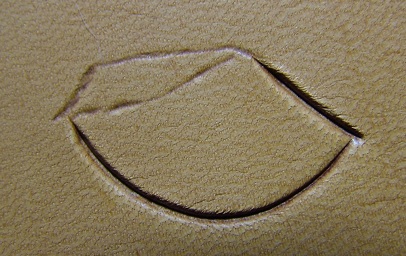
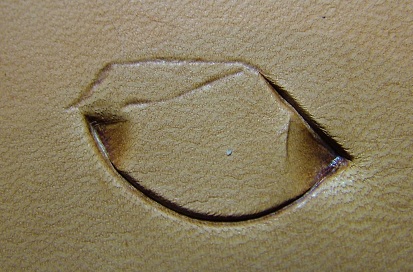
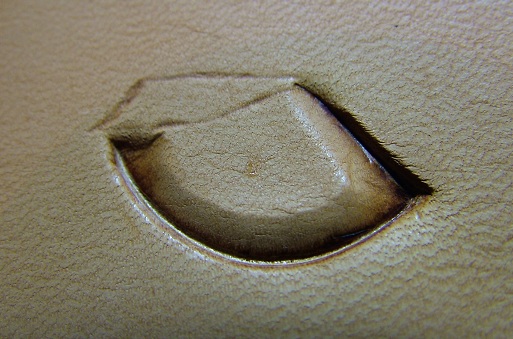
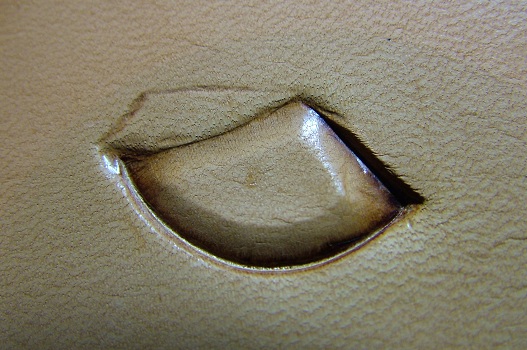
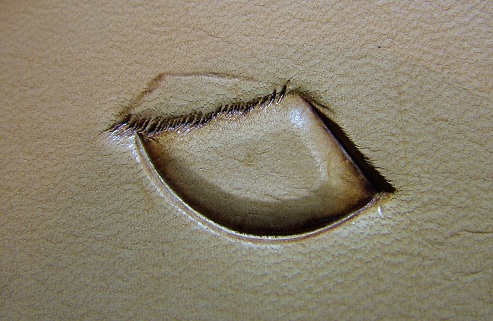
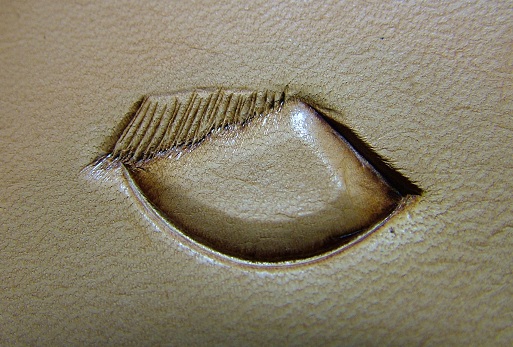
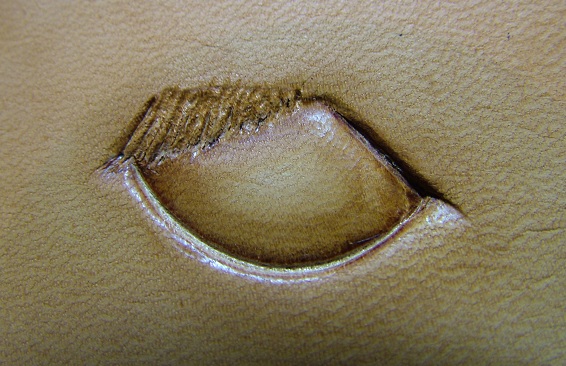
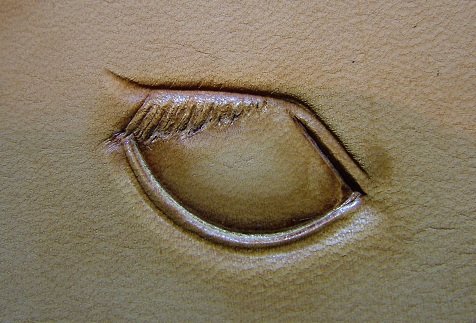
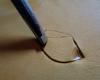
Okay, here's how I do an eye with lashes. I have to retake the eye without lashes. I used the wrong camera for that one. Note: Use smooth-faced tools only! Never checker your eyes! Start out by cutting the eye, but do not cut the lashes! Make sure you cut on the pattern lines, or even to the outside if the pattern is small. One major mistake is making the eye too small. Using a figure beveller, like F895 (the size depends on the size of your eye), push in the corners of the eye. Note the angle of the tool, pointed sharply away from the eye. Bevel to the inside of the cut line, being careful not to flatten the eye. A steep beveller may prove to be useful here. If you don't have one, tip your beveller onto it's toe. You can use the figure beveller or a regular beveller, whatever works best for you. Note: Lightweight leather will result in a flat eyeball. 8 ounce or heavier is more fun to tool on. Lightly bevel under the lashes. With a pointy beveller, F902, define the ends of the lashes. The more points, the better. Cut the lashes with your swivel knife, from the ends inward. Define the lashes with a fine point stylus. Round out the eyeball with a spoon. The better the spoon you have, the better the results. I use Peter Main's modeling spoon exclusively. It's expensive, but worth every penny. Use the tip of the spoon to define the tear ducts in the corners of the eye. I use the spoon only for most of my eye work. Here I formed the eyelids, working from underneath both on the lower and upper lids. Use a wide, flat pear shader (smooth, of course!) to push in by the front and back corners of the eye. Once again, the spoon takes over. Note the folds of the upper lid and the "bags" under the eye. A figure beveller can be used to deepen these lines where desired. Last note: Dry leather is difficult to form with a modeling spoon. If you find yourself pushing down and not making a dent, dampen the eye again. Not too much!
-
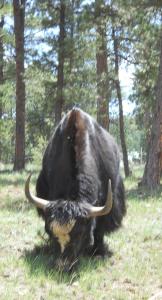
You're just full of excuses, aren't you? (full of something, anyway!) I don't know how we're gonna send you a nasty storm when we don't have one ourselves. I'll just hop on a yak head your way. Yaks would like ND in the winter. Then you can have a yak whack! No tooling for me today, I have to go try to sell yaks!
-
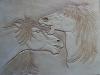
That's nice Randy! It's a cool design. I like the way you did the horse, kinda stylized, I guess you'd say. What are you going to compose on the inside? Kathy
-
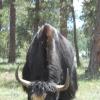
The last bale I gave them, the bull didn't like where I put it. He shoved the thing over at least 12 feet, sideways, not rolling it. The bale weighed 1700 pounds! The bull isn't even full grown yet. I tried weighing him, but when I pick him up and stand on the scale, I can't see the numbers. Too much hair. Someone mentioned hay bowling, I wonder if he was referring to this. Maybe next time I'll set up a target, besides the yaks!
-
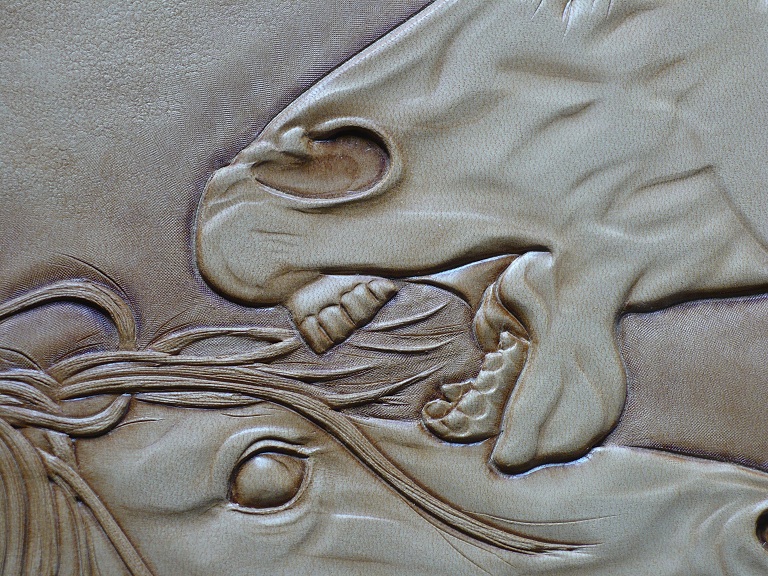
Sorry Clay, I missed that little detail. Maybe that's because you owe me an email, or is it 10?!? ) The eyes and teeth are the fun part of the whole thing. I wouldn't think of having a class without you. If you like, I can work on your teeth in class. Is that your picture of tooling feathers on the home page? Gisela, the carving is 11" X 14". It's an easy size to work with when it comes to detail. Small sizes need tiny tools, huge sizes need tools the size of serving spoons. Hilly, I can come up with tutorials, but when it comes to pinning and linking, someone smarter than me will have to pitch in! I beat my own record today with the round hay bale. It must have rolled 150 feet after it flew off the back of the truck! What fun! No, I didn't smash a yak! Kathy
-
A lot of people are afraid of figure carving, but to me it's a lot easier than geometric stamping. Animals move all the time, so if your knife slips, hey, the horse spooked! Tim, if you came to my class, I could teach you to do a mongrel horse. As far as the patterns go, I drew a couple of them, but mostly I just traced them from a book of photos. Being a leather artist doesn't necessarily mean that you have to draw all your own patterns, it just means you know how to bring that pattern to life on leather. You have to figure out what to cut and where to bevel and how to put hair on. The eyes are a problem for what seems like most people, but they really aren't that hard. I'm working on an article about doing eyes, and have lots of pictures that I'd like to share with you if you like. This morning, I'm off to get yak hay, so it will have to wait till later in the day. I'm getting one of those big round bales. I love making it fly off the back of my truck! Kathy
-
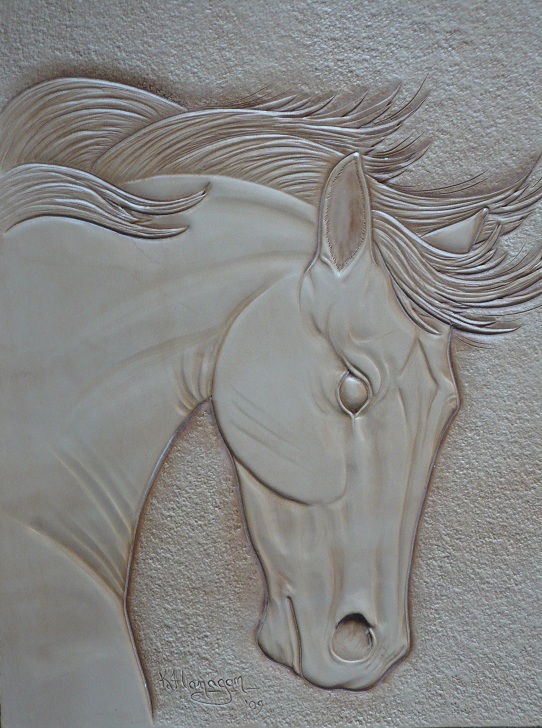
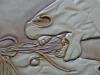
It's cold and snowy, and there haven't been many orders, so I may as well play. None of these horses are colored yet. I may leave them uncolored for a while for teaching purposes. It's harder to see how the detail was done with color in the way. Maybe a yak with big teeth should be next!
-
Figure carving is all important to Master Leather Artist, Kathy Flanagan. The horse has always been a favorite of hers, and has been a subject of intense study since she was a child. In this class, you will learn the specifics of carving and tooling detail such as the dreaded eyes, flaring nostrils, and musculature. In this full day class, the carving will be done in the morning, with the afternoon dedicated to adding color in acrylics. Place: Tandy Leather Factory, Littleton, Colorado Date: February 20, 2010 Time: 9:00 a.m. to 5:00 p.m. Cost: $40 per person Contact Tandy's at 303-795-0060 to reserve your space.
-
There is no competition in Wickenburg. Once they had a "potrait" carving contest, but that was only once. One piece of advice: get your hotel reservations early, like now. The rooms are few and go fast.
-
This is your birthday song . . . It isn't very long!!!!
-
You hit it right on the head, Hilly, and that's exactly how old I am!
-
Have a good time, Steve! I'm afraid I won't be there, no one invited me! Kathy
-
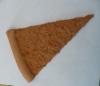
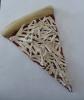
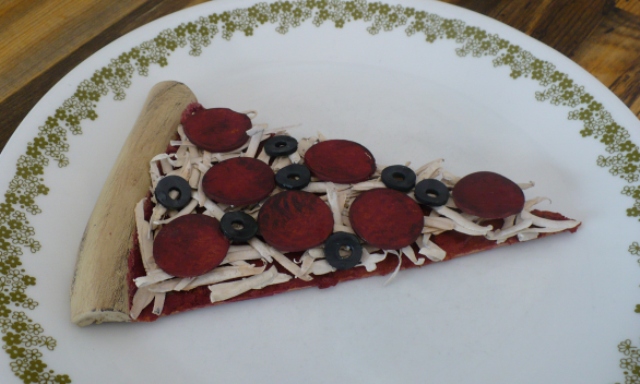
I can't find a forum for leather food, so I guess this will have to go here. Clay miller's wife Debbie invited me to go to a surprise birthday party for Clay, but my husband wouldn't let me drive 860 miles for a couple hours of fun. So I had to think of something special to make for Clay. Fortunately, it got there on the right day. Whenever I teach a class in Rapid City at Clay's store, we have pizza one day for lunch. I really don't know if Clay loves pizza, or just finds it an easy way to do lunch for class. To show my appreciation to him for having me up there to teach, and for being such a good friend, I made him a piece of pizza that he can keep forever, and will never rot.