

Peter Darby
-
Content Count
226 -
Joined
-
Last visited
Posts posted by Peter Darby
-
-
Nice looking bracer. The knotwork stands out well.
Sewing the eyehooks on. What a great idea. I've not had a problem with the rivets so hadn't considered sewing but I like it. With some of the fancy stitches it would look well.
-
Neat idea with the Mora sheath. Cutting and fire and always on your belt.
-
Congratulations. My wife received her Pelican last Pennsic and while I am not a big award person It was a very emotional event for both of us.
-
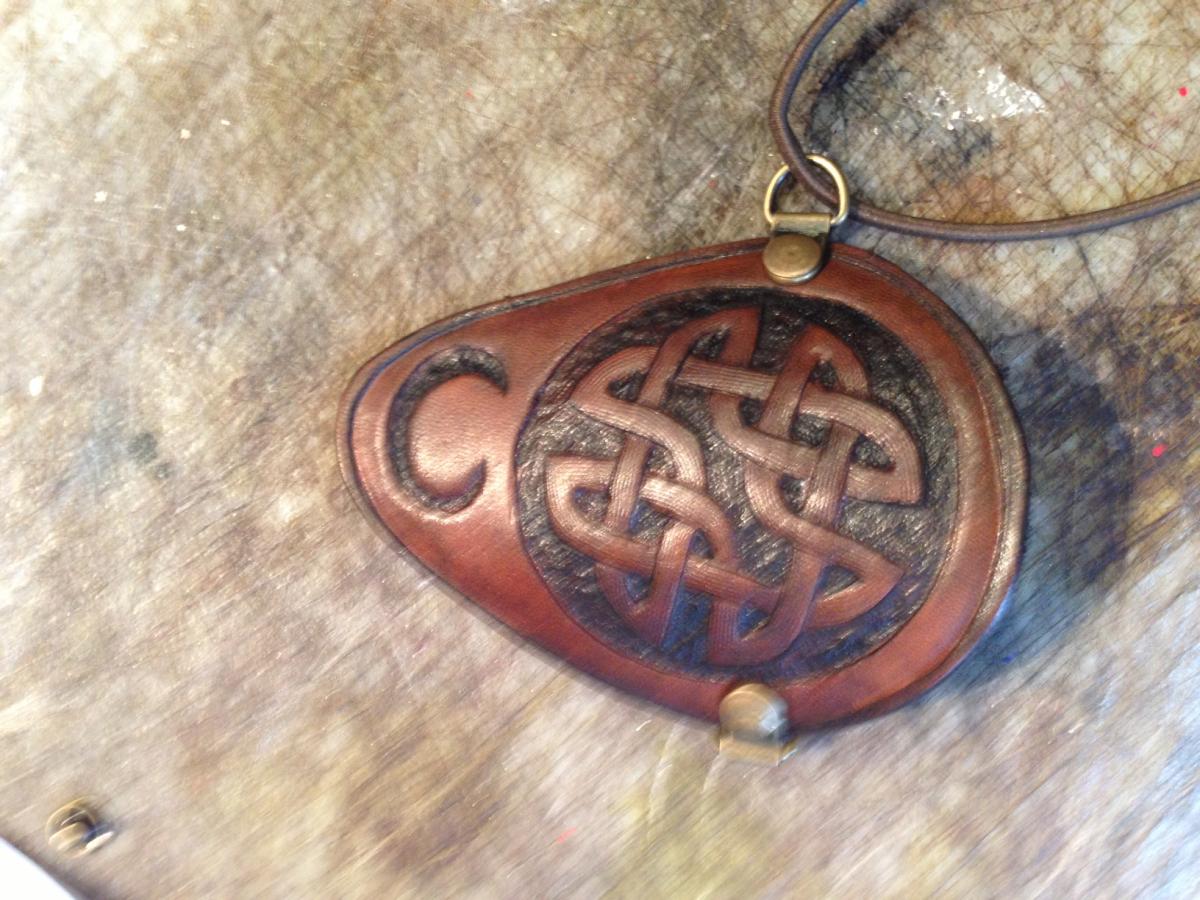
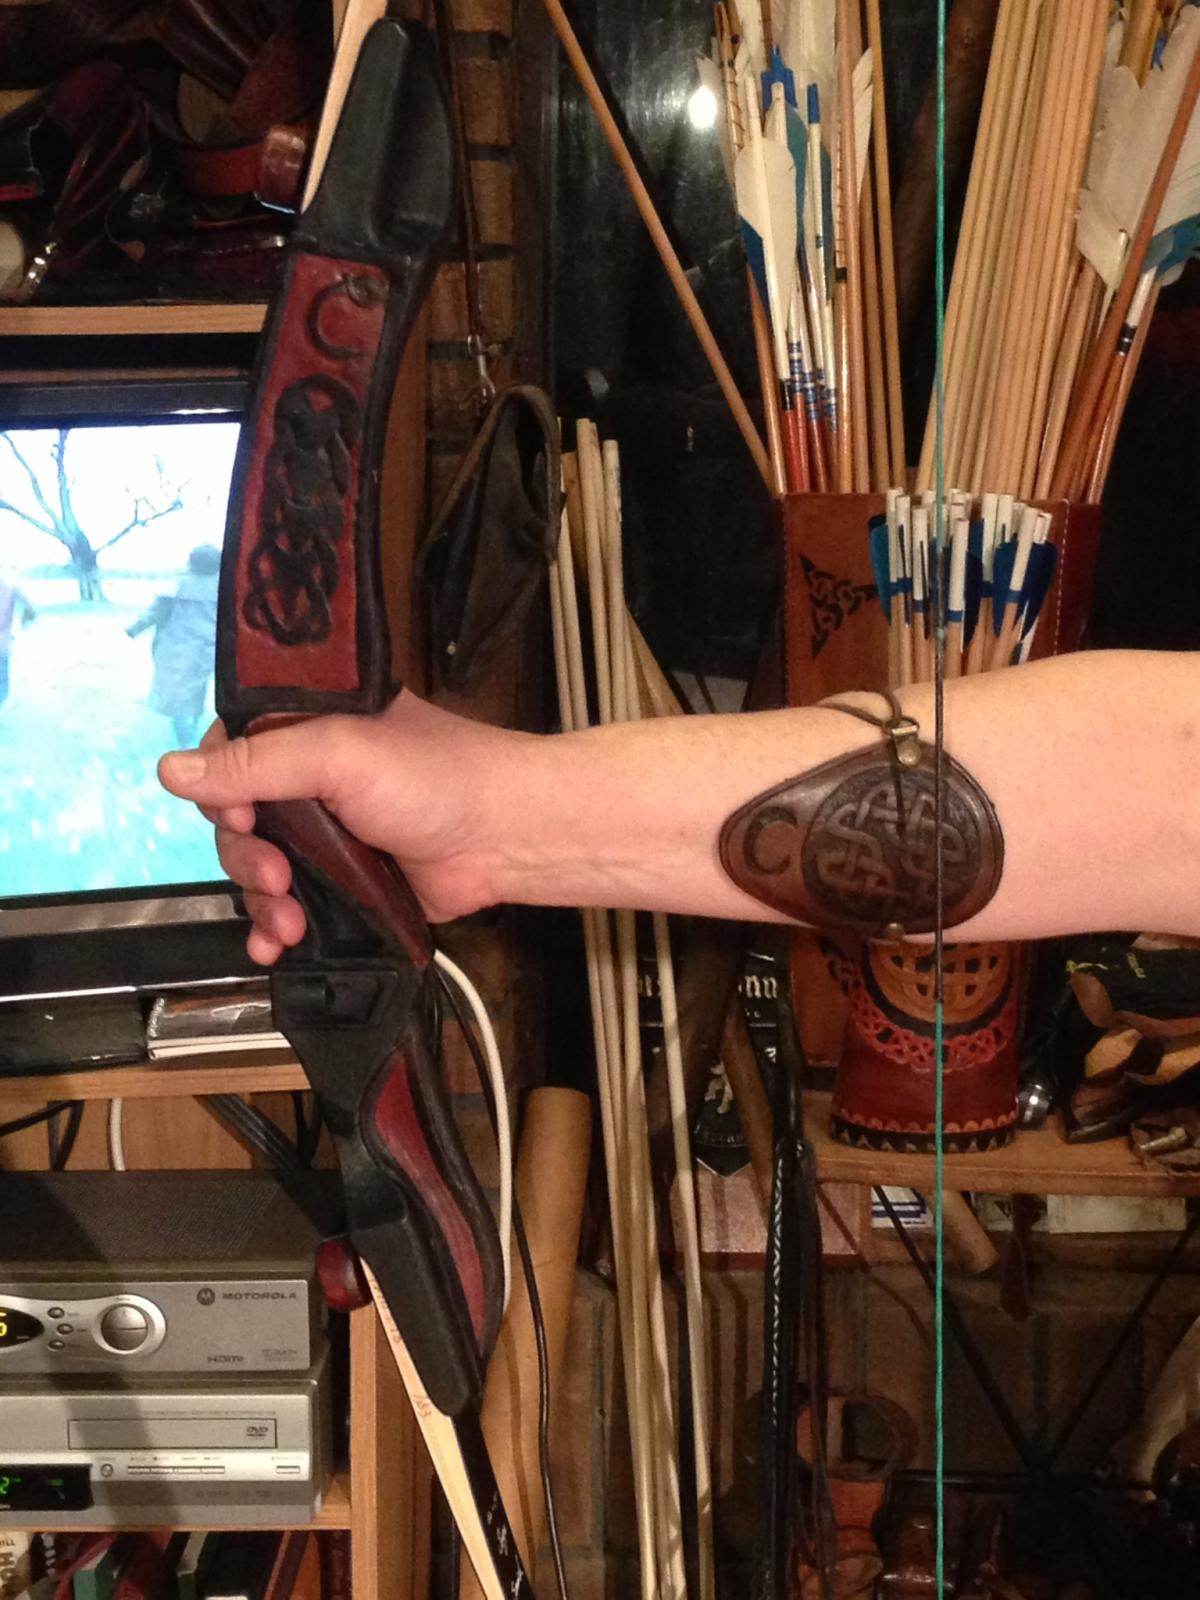
Here is a small (4") armguard I made. It is very loosely based off a viking bracer found at York. It is the first real carving I have done since my cataract surgery and while it isn't great it is better than trying to carve and tool in a fog. I decided for summer shooting that my bracer only needed to cover where the string hits. If I shoot my longbow I wear it near the wrist and if a recurve nearer the elbow.

-
Looks great to me. Ditto on the eyes
-
Here is a picture of the bracer in place for a recurve

-
]Rats! lets try that again

-
Here is a small (4" long by 4" at the widest part) It is the first real carving I have done since I had my cataract surgery. Given my lack of artistic talent I think it came our fairly well. While not trying to make it a replica medieval pattern it is fairly close to some of the viking/saxon bracers found. I guess pulling a longbow hasn't changed much in the last 20 thousand years or so.
-
I really like them. I am not a big fan of the the "show every indentation in the gun holsters" So I really like your holsters and the leatherwork looks top notch. I was impressed with the belts and your burnishing.
-
Looks good. I like the kidney pouch look to your bottel
-
Functional, well made and the esthetics conform to the type of knife. It looks great to me. Well done!
-
Mark, The envirotex is a great sealer. I have a jack I use for everything from hot coffee to Beer. Barley! Someone doesn't like you. When I am making a bottel I first case the leather then I use playground sand (clean). Fill the bottel anduse a dowel to tamp it down. When you get some space pour in more sand then more tamping. Eventually the leather will stretch out nicely. Let dry and pour out the sand. Whack it around a bit to get out as much as possible. When you put in the sealer any loose grains will be sealed up and not a problem. If you want to see some examples of period costrels and bottels the images from a google search are good. The Froisert paintings also have several examples from canteen size to party size.
-
Looks great to me. Here is something you might want to try. When I make an inlay I usually raise it to the level of the overlaying leather by skiving the cut out pieces and using them to raise the snake or lizard skin inlay. This gives a nice smooth appearance to the leather.
-
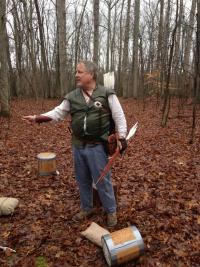
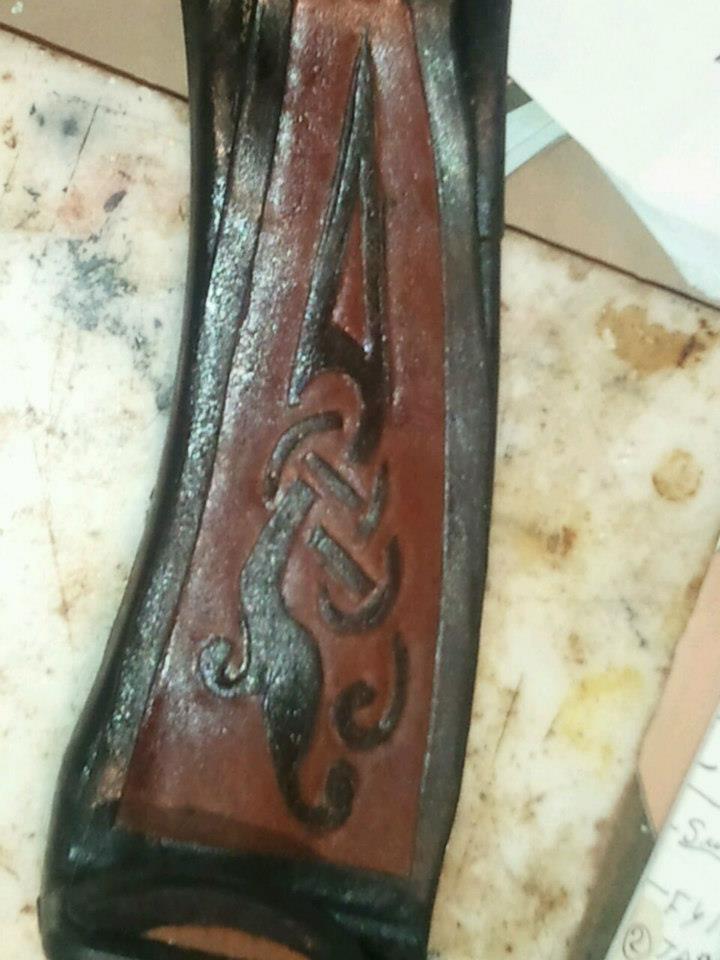
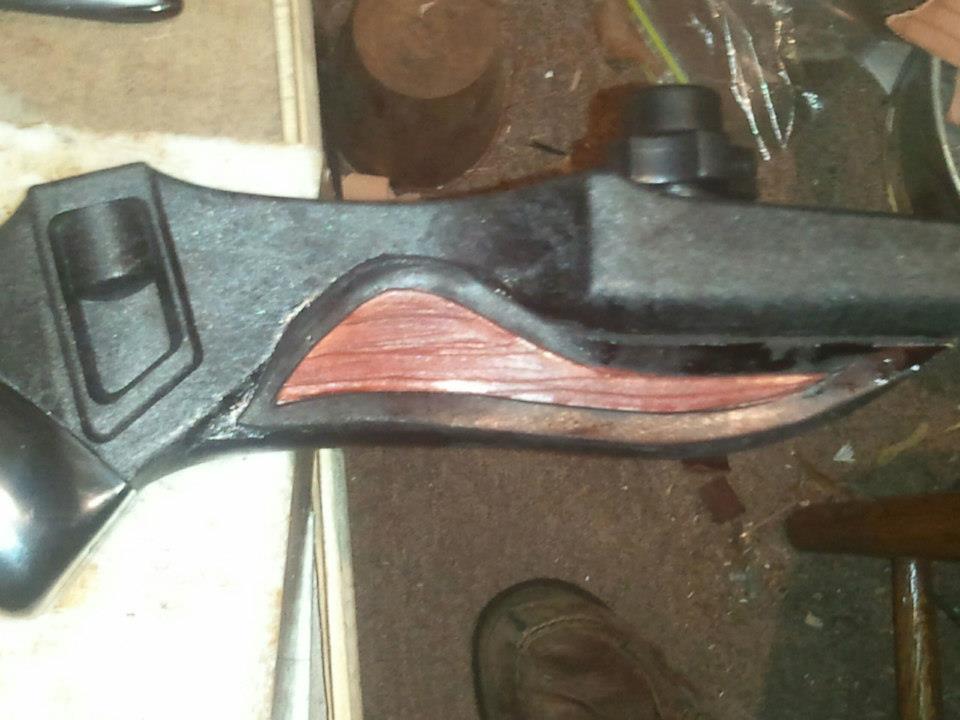
Haven't seen much posted here lately so I thought I would throw my latest project. I bought a ILF riser and limbs but don't want to hang a lot of stuff off the bow. Besides the SCA does not allow you to shoot bows with holes in the riser. So I put side panels on the bow to cover the hole above the shelf and a wood grain leather patch to cover the small hole on the bottom of the riser. I then put a leather rest on. Lastly I built up a leather grip molded specifically for my hand. My wife says I made a plastic bow into a work of art. I'm not sure I would go that far but it is better looking than the plain jane bow. The riser picture posted is of a viking pin. On the other side (no picture) is the upright viking knotwork depicted on the crossburg cross.
-
Looks great. I especially like the way you matched the sheath colors to the knife colors.
-
I can't wait to see what you do when you know what your doing. Those are awesome.
-
Looks good. Knife sheaths are why I got into leatherwork. Lots of good knives in bad sheathes. I learned the hard way to mark L and R on stuff even when it seems intuitive.
-
Your skills don't seem to have waned during your layoff. a beautiful job.
-
Very nice. The hardware and leather coloring and design compliment each other very well.
-
I would go to some of the Traditional Archery sites and search for quiver pictures. I hunt with a longbow and have used three or so different quivers I have made. To hunt with a Howard Hill type back quiver is probably best for hunting. It will hold a couple dozen arrows but of course for hunting you can put sandwiches and stuff in the extra space. For going through brush you have to learn to pull it under your arm so the arrows don't tangle in the underbrush. A side quiver also works well. Many of us use a tube type quiver that hangs over your shoulder and you pull the arrows out of the side. That is what I currently use. I put foam in the bottom which i used a hot broadhead to burn a nice hole to fit each broadhead in.
-
Why do you people do this to me? I have a new quiver to make, a pilgrim's bag, motorcycle gear. And now you posting all those great looking holsters have me thinking my S&W revolver needs a new holster.

-
Google Bazubands and you will see some excellent leather examples. Stefan's Florigilium has several methods of hardening armor.and you can take your pick. Over time you will find that strapping is the weak spot. Rather than sew or rivet straps on I would use a slot in the bazuband that a strap can slip through with a stop at one end. When the strap breaks or wears out it is a simple matter to pull it out and insert a new one.
-
Would you mind posting a pic of the backside. I'd love to see what I think you mean

Daggrim
Daggrim,
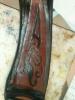
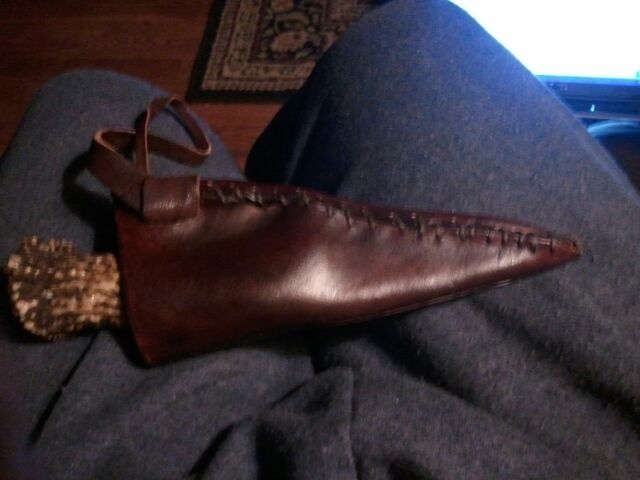
Here is a picture. Not the best, but I think you can see how I twisted the stitching up the back. The meandering edges and the thread holes on the original sheaths are what clued me in on how it seems to have been done..

-
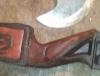
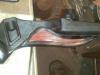
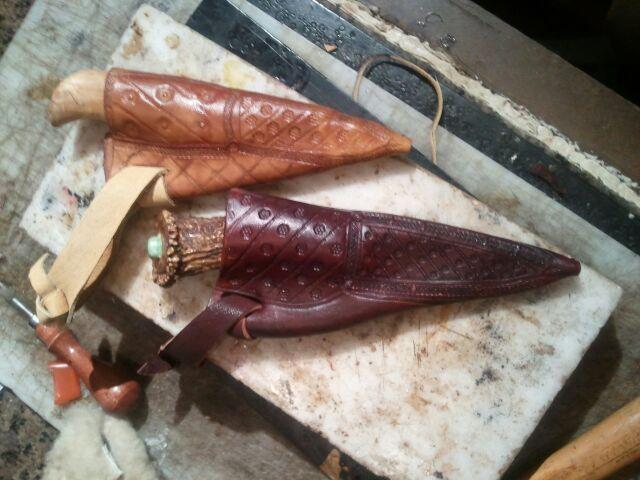
Here are a couple of sheaths based on finds in the York area of England. The construction techniques are as close to original as I could make them and the design, while my own creation, is similiar to the original motiff with a differentiated handle and blade decoration. Whether or not they are viking or angelo saxon sheaths you can take your pick and probably be right.
The interesting thing from a leatherworking standpoint is how they did the backstitching. They cut out the pattern and put the design on nearer the middle of the flat piece of leather. they then folded the leather in half and stitched the edges together using a loose whip stitch. Then they began to work the sewed edge toward the back so it can't be seen from the front. Once you get the design centered on the knife you tighten up the stitching, put the knife in and do a little forming and let dry. You end up with a totally backed stitched knife sheath in about an hour. The dark knife sheath is mine and the lighter colored one is my wifes.


Yay Me!
in All About Us and Off Topic
Posted · Report reply
Way to go!