JRCHolsters
-
Posts
178 -
Joined
-
Last visited
Content Type
Profiles
Forums
Events
Blogs
Gallery
Store
Everything posted by JRCHolsters
-
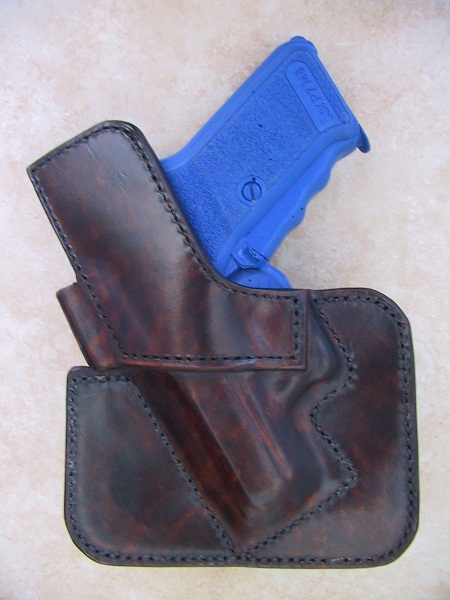
Particle, it does look good. It was a good idea to extend the wings a bit. I have handled the real gun in the past and it does have an odd balance in the holster, but not as strange as you would think. I find about 25 degrees is about right angle wise. This really lets you get on the grip. I just did an IWB for one recently. Here is a pick of the backside. The belt loop on the other side is in line with the trigger guard, keeping most of it and the ejection port tightly under the belt. Another trick I use, is to twist the butt slightly into the body when I mold the holster. This really helps pull it in tight. You have to twist it when you are first inserting it into the leather, or it is really hard to do afterward.

-
Thanks. I really like a nice simple look. There is something about the grain of the horsehide that I just find really classy.
-
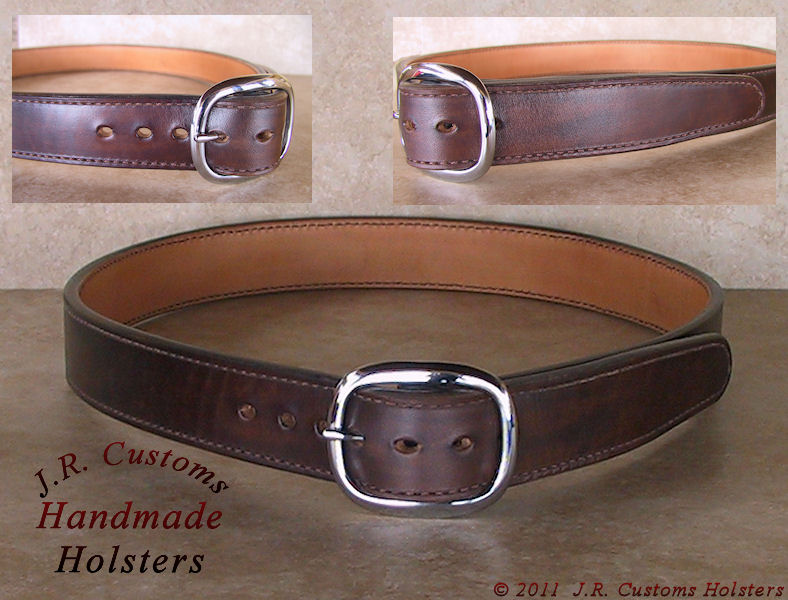
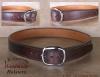
I figured it was time to make a new belt for myself. Seems like I never have much time for my own projects. It's 8oz Hermann Oak on the base with 6oz(approx) horsehide on top. It has a slight curvature to it. I used an oval center bar buckle, so there was no room for a belt keeper. 7 holes with 3/4in spacing. Finally getting some belt pictures!!
-
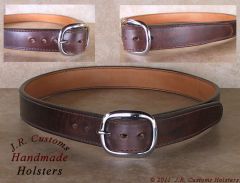
From the album: Various Horsehide Holsters
© © leatherworker.net
-
Horse Hide
JRCHolsters replied to luvthegun's topic in Gun Holsters, Rifle Slings and Knife Sheathes
I pretty much only use Horsehide. I don't really find it harder to work with, just different. I am surprised you are having cracking issues. Try wetting it a touch more before bending it. It has a tighter grain and I personally find it requires a bit more moisture to work with. I really like the character of the leather when done.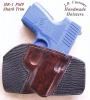
-
Alligator Iwb Holster
JRCHolsters replied to Mark Garrity's topic in Gun Holsters, Rifle Slings and Knife Sheathes
That's a beautiful rig!! Did you bond the kydex to the horsehide before forming? -
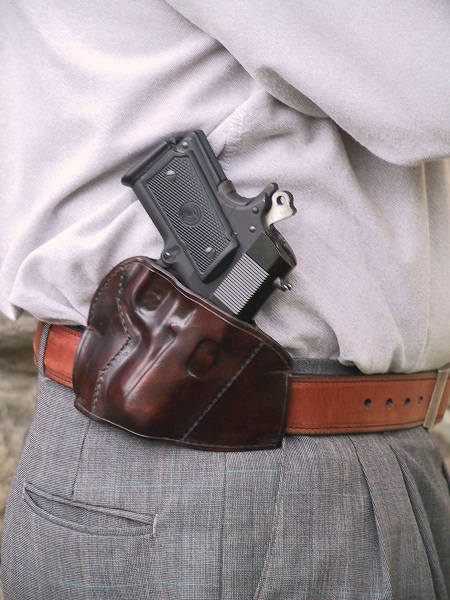
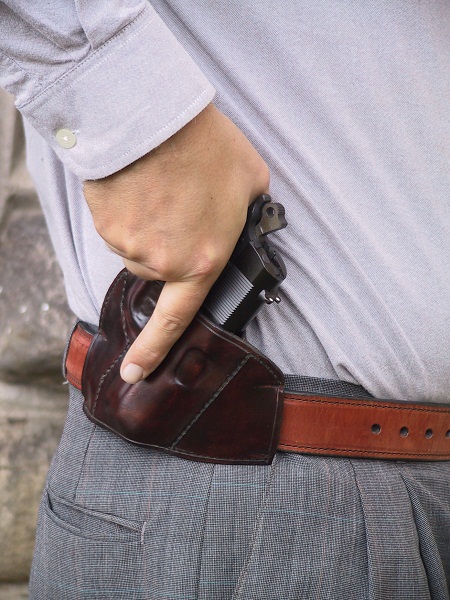
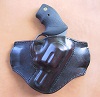
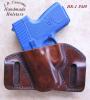
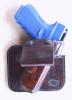
Here are a couple of pics of this model with the P-10, being worn. This will give you an idea how it rides in the belt.

-
Retention on it is great. I carry a Para-Ord P10 in one everyday. This particular model keeps the gun above the belt line, so it works best with compact guns. It has full coverage, but it's canted in the front to clear the holster as fast as possible for a high ride.
-

From the album: Various Horsehide Holsters
© © leatherworker.net
-
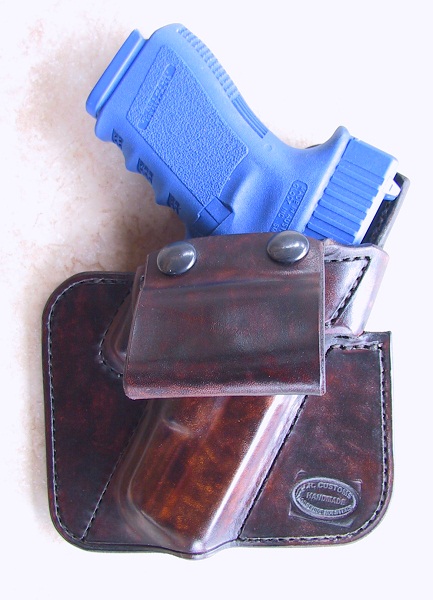
This is a new one I made playing around with some shark. It's for the Kahr PM9. It's based off on my HR-1 Holster. I decided to use the shark in the belt tunnel wings for a couple of reasons. One, I really like the way it frames the antiqued Horsehide and since it adds extra thickness, it doesn't add bulk to the holster here. One thing you can not tell from the pictures is, I always twist the gun slightly while molding it, to keep the butt of the gun in close to the body. I used USMC black on the Shark and a combination of Cordovan and Burgundy on the Horsehide. Hope you like it.
-
Kahr Cw9 Dummy Gun
JRCHolsters replied to JRCHolsters's topic in Gun Holsters, Rifle Slings and Knife Sheathes
I bone my holsters pretty tight, but if they are that close, I can probably fill the scallops with epoxy to get them close. Thanks for the info! -
Latest P-1 Iwb Going Out.
JRCHolsters replied to JRCHolsters's topic in Gun Holsters, Rifle Slings and Knife Sheathes
Typically yes, there is. This one doesn't have the slot on the customers request. -
Latest P-1 Iwb Going Out.
JRCHolsters replied to JRCHolsters's topic in Gun Holsters, Rifle Slings and Knife Sheathes
I agree. LOL, I keep telling myself to do that. That area of the holster is kinda tricky to work with and I get so tied up in the fit, that it always evades me. Cranial vapor-lock! It is hard to tell from the photo, because of glare along the beveled edge, but there is an actual radius there. -
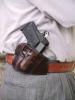
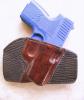
Here are a couple of pics of a nice IWB P-1 for a Glock 23 going out to a customer today. It's in Horsehide with an antique Cordovan finish. Out of all the holster designs I do, this is probably one of my favorite designs.

-
I typically only dye the backsides and areas of the holster that will have reinforcements sewn over. Then I form everything and re-dye before the holster is completely dry. I am able to get really good forming that way.
-
Kahr Cw9 Dummy Gun
JRCHolsters replied to JRCHolsters's topic in Gun Holsters, Rifle Slings and Knife Sheathes
Thanks! I took a look and unfortunately, it's not the same gun. The one they have is the P9, which has a slightly different dimensioned slide. Just enough that they are not compatible. Luckily I am moving to S.C. late summer and won't have this kind of problem. -
Does anyone have a clue where I can find a Kahr CW9 dummy gun? Rings doesn't have one and I looked at Duncan's list, but they don't have one either. Any ideas? Unfortunately, I am in NY and can't just borrow the gun
-
New Shark Design
JRCHolsters replied to troppy's topic in Gun Holsters, Rifle Slings and Knife Sheathes
Beautiful holster! The accents are really nice. -
Pull The Dot Snaps?
JRCHolsters replied to Sixer's topic in Gun Holsters, Rifle Slings and Knife Sheathes
I do both Line 24 and Pull the Dot, so it was worth it to me. It gives such professional results and saves so much time. I can't even begin to tell you how many snaps I have ruined or had to redo before I would send a holster out. The old anvil and punch method just doesn't cut it fore holsters, in my opinion. Some kind of a press and dies is really the only way to go. With the Pres-n-snap, I can be finished with a job, before I would even be all set to take my first swing with a punch and anvil. LOL, it's one of those tools I resisted buying and then wondered how I ever got along with out one. -
Pull The Dot Snaps?
JRCHolsters replied to Sixer's topic in Gun Holsters, Rifle Slings and Knife Sheathes
That tool is a Pres-n-snap. Man, I don't know how I ever lived without one. It was the best $125 I have ever spent on a single tool. -
New Cross Draw / Appendix
JRCHolsters replied to JRCHolsters's topic in Gun Holsters, Rifle Slings and Knife Sheathes
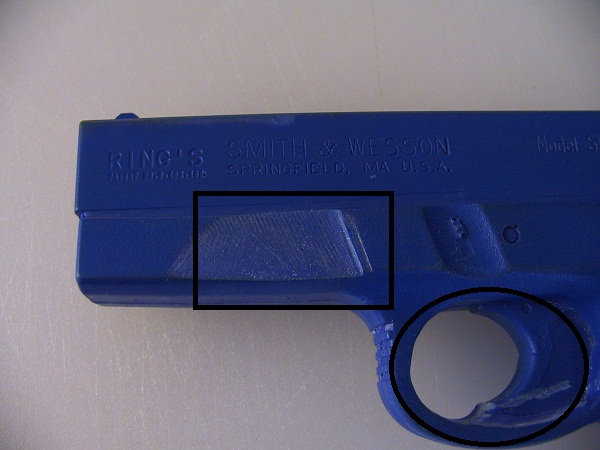
here are the mods on the blue gun. I don't have any dimensions, as I just used all the photos on S&W's website for reference. Hope this helps.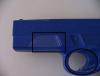
-
Beautiful work! That is a really nice carry rig. I love the duo color.
-
New Cross Draw / Appendix
JRCHolsters replied to JRCHolsters's topic in Gun Holsters, Rifle Slings and Knife Sheathes
I will take a picture of the mod later today and post it up here. I do this full time, so I eat the cost of the gun as part of the cost of doing business. In the long run, it never hurts to have more models available. -
New Cross Draw / Appendix
JRCHolsters replied to JRCHolsters's topic in Gun Holsters, Rifle Slings and Knife Sheathes
Ben, There is a slight guard protrusion below the side release on the VE, though that is not as much of an issue if this part isn't covered by leather. The main issue is with the guard area where the light/laser is attached. It's not so much the minor rail cuts as much as it is the step down on the sides of the frame. It might not make much of a difference if you are molding to the older style, but you won't get a nice tight fit around the guard area. Jim -
New Cross Draw / Appendix
JRCHolsters replied to JRCHolsters's topic in Gun Holsters, Rifle Slings and Knife Sheathes
Thanks. I appreciate it.