


Redbeard
-
Posts
37 -
Joined
-
Last visited
Content Type
Profiles
Forums
Events
Blogs
Gallery
Store
Everything posted by Redbeard
-
A wonderful idea! Think I might try this with one of my bowie knives.
-
My First Flask....
Redbeard replied to Jon P's topic in Purses, Wallets, Belts and Miscellaneous Pocket Items
I've done a couple and you learn from each one. I think you did a great job. Someone told me that when it comes to flasks, remember what goes in them. LOL -
In the EastBay myself. If we get enough of us we could meet for coffee or something. Anyway, welcome.
-
Remington and Schofield Rig #1
Redbeard commented on Frank's gallery image in Gallery- Our Leatherwork
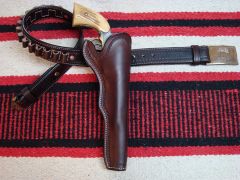 Nice rig for a hog leg. I like your plain holsters with the various edgings. Very classy.
 -
 Thank you Regalto.
 -
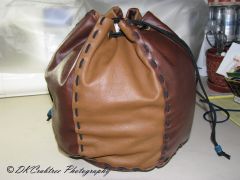
From the album: A few of my items
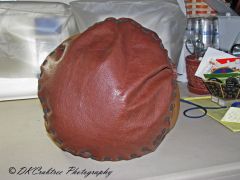
Double lacing through brass eyelets -
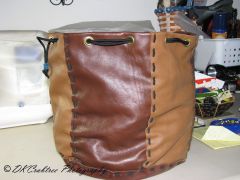
From the album: A few of my items
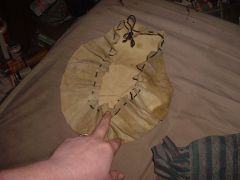
Side panel and lace weaving. -
From the album: A few of my items
This view shows the 12" diameter bottom -
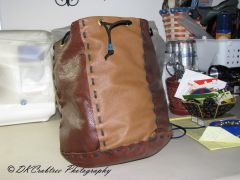
From the album: A few of my items
This is a six panel bag made from scrap pieces I had in the shop. -
Welcome! Did you really pawn your laptop to buy the starter kit? Tools? Well the quick and dirty answer is e-bay. Then there are yard and rummage sales plus my favorite, flea markets. The better answer is to become a member at your local tandy leather factory store. The discounts are substantial if you really get into this hobby. First things first though. Learn how to use everything in that kit. I do some carving but most of my items are those I make for a specific need or it's an idea that pops into my head. For example. I had this idea for a large bag to put expended shotgun shells in. Most ranges expect you to pick up your brass. About 12" on the bottom and multi paneled. Well, after using a few dusty math skill concerning circumference I used some scrap pieces too make six panels. Some hole punching and rawhide weaving later I had a bag that was ready for some eyelets and draw cord. The point it that our craft has many elements, from the complex carving and assembley of a saddle, to the simple drawstring bag.
-
First off TJ let me say that your carving and lettering is very nice. If what you did on the seat isn't the Logo of Red Horse Choppers, it should be. Secondly and from a fellow riders point of view, the top lacing would start to dig in to your leg after a while. Thats why most are stiched at that seam. If you don't have your own leather machine, and you should if you are going to do this type of work for profit, the local shoe repair guy does and you can work something out with him. Have them use black and you'll have a kind of pin stripe that will look great on that top seam and the short, vertical one. I like the lacing on the bottom very much and think it is unique. You asked TJ and those are my thoughts
-
Nice work! Even empty I think it must have some weight.
-
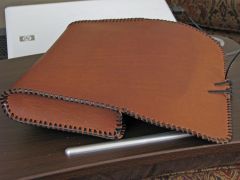
Tablet Case
Redbeard replied to Tim Schroeder's topic in Purses, Wallets, Belts and Miscellaneous Pocket Items
Very nice work! Someone said that we don't see much carving that is dyed black. Western holsters and saddlery used to be finsihed in black. I think Richard Boones rig in Paladin was black...could be wrong. Just think that in two years your wife will want to upgrade her tablet and you'll have a new project! lol Sorry couldn't help myself. -
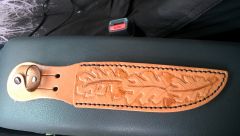 I like the unique design on the black one. With a black handled knife, like a Buck 119, it would look very nice.
 -
 Is the leather bag construction consistant with the period? Just curious as I just finished a six panel bag with a 12" base. I haven't got the picture uploaded yet. The snood look like some fine knot work.
 -
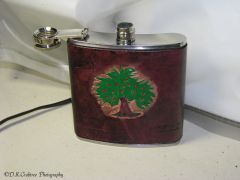
From the album: A few of my items
The Irish believe that a little whiskey everyday is the key to long life. Who am I to argue? -
From the album: A few of my items
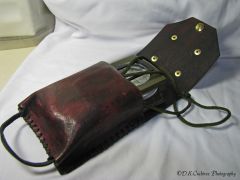
Custom molded for my lensatic compass.© D.K. Crabtree Photography
-

From the album: A few of my items
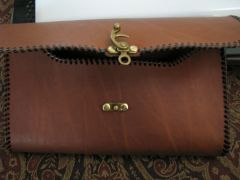
Anyone know what the design I used on the front of the case is?© D.K. Crabtree Photography
-

From the album: A few of my items
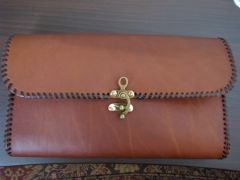
Just might put some conchos on the top flap.© D.K. Crabtree Photography
-
From the album: A few of my items
Rivets are not easy to remove. Lesson learned.© D.K. Crabtree Photography
-
From the album: A few of my items
I was real proud...until i noticed the latch was on upside down.© D.K. Crabtree Photography
-
-
-
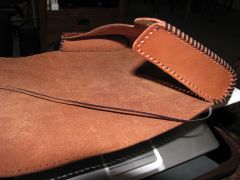
From the album: A few of my items
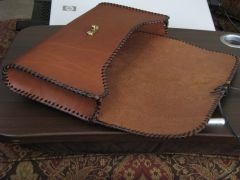
I punched 1/8" dia holes every quarter inch all around and on the gussets. Then began whip lacing.© D.K. Crabtree Photography