


DavidL
-
Content Count
1,516 -
Joined
-
Last visited
Posts posted by DavidL
-
-
looks good.
You miss spelled patina in the description. A few pictures of it being worn?pictures or the process? Its your call how you want it to be presented.
-
Avoid using a pricking iron as the slits may tear under tension over time (on something that gets pulled and stretched so much). A pricking iron slit will show through when you stitch grain to grain (stitching is hidden on the inside).
I would use a glovers needle and a overstitch. Never stitched a glove but that would be what I would try.
-
how did you manage to stitch so straight through that many layers of leather? Did you uses inverse pricking iron on the other side?
-
Has anyone found a way to prevent creasing and wrinkling in the bend of wallets? I have seen other pictures of other peoples work that has creasing in the fold of the wallet. Is there something you can do or is the answer to get thinner leathers or chrome tan leather?
-
Thanks that was along the line of what I was thinking.
-
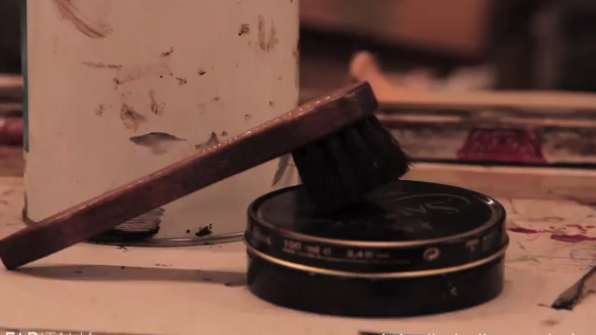
The attached picture is a screen shot from a belt making video.
Im almost certain it is Saphir but that would make it a shoe polish, unless they sell a leather dye in that type of container. Can shoe polish be used as a stand alone product to colour leather? I have seen it done before (veg tan) but haven't tested how well it works in person.
-
A few things that need to be added is a logo and also the name is feminine. Website isn't too bad 7/10, no logo, needs more pictures for the products (people wearing them wearing the style of clothing that you would imagine your target buyers is wearing), the front page should have some attractive pictures of the hand sewing process, cutting or dyeing process. You aren't putting enough of the brand out there so people don't know what the brand stands for, they have to connect with the brand, pictures of yourself working or your workshop can create a bond with the customer knowing that everything is handmade and done with care, not made in an assembly line. You decide what the brand essence will be and work everything based of that.
Which type of people are you trying to get to buy your leather goods? If its hipsters, 18-28 y/o men white collar, or whatever your website, your logo, your product, your name, your brand essence, your vision need to be in line with the target customer. Otherwise no one will connect with the brand as it should be deeper than just leather goods. Its a magpie belt (not a department store belt) that was hand crafted in britain, made to last and is stylish.
All the items are more towards the male buyers but the name isn't something I would want to associate with, as odd as that sounds magpie isn't what the male 18-28 demographic would want in my opinion. Same goes with the leather tool company called elfita, they have some nice tools but the logo has an fairy on it and is clearly targeted to women.
try to get your product in a local newspaper, online magazine, fashion website or where ever to get exposure for your brand.
Good luck
-
From a manufacturing view point the amount of marks, imperfections and difference in thickness throughout the hide is a nightmare for manufacturers. Using genuine leather or synthetic leather cuts down the amount of waste in some cases for HUGE companies in the hundred thousands to millions of dollars. There is a place for genuine leather, if you want a product that is cheap and you want to buy a different pair that is in style. Using leathers that are full grain on cheap shoes would be a waste for the buyer and seller.
Thats where full grain, bridle leather, or luxury leather has its role, for products that are meant to not be fast fashion, they are meant for classic products, and durable products.
If you want something that will cost 20 dollars and last a year buy genuine leather. At the end of the day to me when I buy low priced item I always receive something that is almost good and almost bad. Its not what I wanted but its just good enough for me to use it. So many corners were cut just to reach the price point.
A belt that will last for years expect to pay 70+.
-
Leatherworker.net has the most information on leather by far. Its a great site for information and sharing.
Like any other thing there are always ways to improve on it. The thing that keeps occurring is new members asking about how to dye leather, or what tools to buy. Often there are times where I have to repeat the same answer multiple times to different people. In the leathercraft wiki its 100 percent tutorials and FAQs.
There aren't:
many pinned threads for FAQ or
a small subsection where members can post tutorials. There is no section devoted just for tutorials (from time to time there are tutorials posted but are hard to find again) :
tutorials section:
Measuring
Glueing
Hand stitching
Dyeing
Cutting
Tooling
Saddle making
Bag making
Wallet making
accessory making
Edge burnishing
Most viewed section
Most liked section
FAQs
This way when someone is looking for help on dyeing they can look through the dyeing tutorial thread for common issues or just to look for different techniques. Even a new section where members can like an article and those with the most view and likes will be in the most viewed section or most liked section.
I think it would make it easier (having a tutorial only section) for good tutorials to be easily found as there are usually more questions than there are tutorials. When needing to look up about stitching leathers I can look at a section where there will be 20 different tutorials instead of taking 2 hours trying to find them.
basically separating the questions from the tutorials. Create a new subsection for tutorials only and there will likely be more tutorials being posted because there is now a place for them to be posted in.
Leatherworker is a great community, I wouldn't have as much knowledge doing this by myself when there is over hundreds of people's knowledge and experience. It is a huge lifesaver when you can't find a solution to a problem and can find others who had the same issues.
-
Is the wikispace only for info and tutorials. Is there any way to comment or discuss a subject?
-
Accordian gusset was the type I'm looking for.. didnt have my morning cup of coffee

-
Does any one have a gusset pattern on hand?
-
just some brainstorming :
you could pre punch holes the entire thickness piece by piece then glue, stack and stitch
Another way would be a less secure way but much easier, only stitch (in the stack of leather) the bottom piece to the base and the top piece to the second piece. Contact cement creates a permanent bond, so the leather wont separate easily . The stitching will show at the top and bottom creating the look that it is stitched through. Remember to use a groove on the inside pieces so that the stitching sits below the surface of the leather.
Using something along the lines of plastic or hard paper board wrapped with leather can work for both the compartments and the flat base.
From the first picture the flap will get in the way, hitting your wrists.
If this is a flat table the flap could turn into a stand.
-
Drawing a 3d rendering (on an angled ariel view) would make things more clear.
Have you considered substituting for wood in some spots?
-
The brand with the most exposure will get the recognition of that design, regardless of who created it.
Ex. Hydrox came before oreos, kiddicraft blox came before legos.
Why do oreos or legos gain more popularity to the point they are believed to be "original" may be that the product isn't anything revolutionary, but the marketability of oreos and legos outreach competitors.
Stay more relevant than your competitors, and like others have said in this thread keep innovating other designs that follow the same design cues.
For example if you look at car manufacturers most cars in the line up will have similar design cues throughout the models. Consistency. Familiarity.
-
I do multiple projects as well. Also, I cut extra from time to time, for example Rifle Slings are 2-1/4" wide tapering down to 1", If I cut one, I use a 2-1/2" strap because I like to keep my belt bend or double shoulder with a straight edge. I can cut a strap 4" wide and cut two rifle slings by reversing one so the tapers are reversed. I save 1/3 sq ft and I sell about 40 rifles slings a year so I save nearly 7 sq ft of leather over the year. That's just one example, but I will normally cut multiples to prevent wasting leather, I might then only make one, but the next time I have an order for one, I already have it cut. Wallet backs are a good example, I'll cut a strap 3-1/4" wide, then use a t-square and cut the length 9-1/4" and get as many as I can from that strap, then I don't have to cut out any more wallet backs until I sell those. a 50" strap yields about 5 wallets, the remainder I use for smaller items or test scraps. Just the way I've always done it, I don't like to cut one wallet back from a side, etc. If I have multiple orders, I'll work on several at once, making use of drying time on one to get assembly or carving done on another, etc. To answer your original question, I do not make additional holsters, if I have orders for more than one, then I will make them at the same time using drying periods etc, but I make each holster custom, I don't use blueguns and don't keep patterns, I only make holsters for local customers and I require the weapon for 2-3 days while making the holster. So I don't make or cut up a bunch of these. I don't save the patterns, each one is drawn, cut, used then discarded.
Chief
Do you have concerns about the leather warping or distorting if you keep spares around? It wouldn't be an issue 2 or 3 months later, but 5-6 months there may be distorting in the leather because of change in temp or humidity? It would be unfortunate to stock pile inventory and have it go to waste like that.
I know with wood that is one of the things thats an issue, less so with leather although it still can be a problem.
-
For those who get a few orders a day how do you prefer to work.
Do you do one holster at a time or do you do 10 holsters at a time. Meaning you cut out all the pieces then dye them all, stitch ,ect.
-
Nice tooling
I have a sample labelled "motor latigo" in black from Wickett. Out of the bridles leather, harness and veg tan leather, the Motor latigo had a shiny-ish solid colour. The other leathers looked dull compared to it. I suppose they employ a different tanning or finishing method?
-
http://www.leathercrafttools.com/shouhin.jsp?id=10153
plus dimmer http://www.leathercrafttools.com/shouhin.jsp?id=10154
This tool isn't for edge paint but if the tool can stay consistently it should be able to glaze edge paint. Never tried the tool, don't know how well it works so keep in mind it may not get hot enough or stay constantly at the right temp. For 100 dollars and the ability to edge crease leathers like veg tan, bridle with the addition to chrome tan it wouldn't be too big of a risk. The french version at many leather stores online go for 600 dollars plus the tips cost 100 a piece (the french version is most likely better).
-
Short answer -- yes. Those people telling stories about 12 and 20-ton presses perhaps are not understanding the meaning of TONS

But, you're not blanking - you're cutting. So "guestimate" roughly 1/3 the pressure. In the case of your "fob", your perimeter is more like 10", so you'd need like 40% of the pressure ...
Do all veg tan and chrome tan have roughly a shear strength of 40 percent of blanking (800lbs). What is blanking Im not familiar with this term.
When I did the math I got 2.4 tons or 4800 lbs. Is this the how to calculate it or did I do something wrong while calculating?
26 inches * .093 inches * 2000/2000 = 2.4 Tons = 4800 lbs.
-
Great work!
I like how you put a piece of leather in between the gusset to give it shape in picture four.
-
im interested as well.This subject is something that would be taught in european leather school, information is hard to come by. The easiest way I would think would be to apply green rouge on a piece of thin cardboard material. Just polishing the teeth would make them slide out easier while removing the minimal amount of iron.
If you are hitting the iron all the way through till the leather reaches the full distance of the teeth it will likely always stick to the leather.
You can use the same tools the toolmaker uses to sand the iron teeth down (rasp used for metal). Do know that this requires a expert touch so damaging your tool is a possibility. If you do decide to sand the teeth i would be interested in pictures.
-
Craft sha and siewa are japanese made not chinese made.
A cheap european made iron would be dixon. A 7 SPI, 8 prong iron cost me around 50-60 dollars at abbeyengland. They require a business id but they still sent it out without me having one.
Bob douglas versa groover to me looks like it is worth the money - sheridanleather.com made in USA. The design is different than the competition, having the cutting edge in the middle and the guides at the side. You can use if left hand, right hand and free hand where other groovers wont be able to do that. You would need 2 groovers, one for use with the edge guide and another for free handing, versa groover is all in one. For a cheap one a japanese made groover would be a good investment.
-
The writing on the web page is hard to follow. The info is in-depth right until the author writes about the construction where it is labelled 1-6, no pictures either. Im in the same boat as you, I'm figuring out how to construct a 2D pattern into a 3D pattern.
If I'm wrong someone correct me. I believe it is easier to stitch the main panels together into sections (gusset, front, back bottom).
Before that is to attach dee shields, handles (sometimes this is done as the very last steps), buckles, pockets onto the main panels - that way its less cumbersome having to stitch these parts when it is partially assembled.
Next step would be attaching the main pieces together and secure the remaining hardware like rivets or handles if that isn't already attached.
------------------------------
Im a beginner when it comes to making bags.. What I would do in this specific bag would be to find the hardest part of the bag and plan around how to make that easier to make. From low, medium to high difficulty most fall in the easy to medium difficulty (Not that any of it is easy some parts are more difficult than others) The side stitching is low difficulty, zipper pull is low difficulty. Stitching the side portion to the bottom part of the bag is medium difficulty and the tab is in that same area. Now, the hardest most difficult part is stitching the zipper to the bag because its makes it nearly impossible to stitch the zipper together once the bag is already assembled.
To make the bag having considered where the difficult portions of the bag to construct are the zipper stitching to the main panel and the tab that connects to both the zipper and gusset.
Since it is difficult to stitch the zipper after stitching the side panels (hard to get hands to grip needle in that small space), the best thing to do is to stitch the zipper first. Stitch the tab to the zipper and gusset, add the d ring. When the tab is secure, stitch the side panels together and assemble the strap and finish off the bottom stitching. Some parts may be changed around (it is only a educated guess), as the only way to tell if it will work is to try it, the only way to make it work better is to try multiple different ways multiple times until you settle on a method.
In conclusion.. construct in a way to make everything easy to assemble. Either plan it out before hand or jump into it and expect to get it down in the 2nd or third bag.
attach the most difficult parts first to get it out of the way if possible. Anything that can be stitched to the main panels should be done first. Connect the main panels together.
What Small Change(S) Helped Improve Your Leatherwork?
in Leatherwork Conversation
Posted · Report reply
The best tip that helped improve my stitching was sharpening the tip of the awl widening it slightly. Slightly widening the tip helps the awl align with the pricking iron tip the same angle, always in the middle, straightening the stitches.
With all the members on this forum it would be interesting to hear what tips really helped improve your leather work.