-
Posts
17 -
Joined
-
Last visited
About Deadlance
- Birthday 06/13/1981
Contact Methods
-
Website URL
http://www.facebook.com/deadlanceSteamworks
Profile Information
-
Gender
Male
-
Location
Oklahoma City
-
Interests
Steampunk Leatherworking
LW Info
-
Leatherwork Specialty
Steampunk
-
Interested in learning about
Everything
-
How did you find leatherworker.net?
Google
Recent Profile Visitors
1,782 profile views
Deadlance's Achievements

Member (2/4)
-

Looking For Help - Tippmann Boss Stitcher
Deadlance replied to Deadlance's topic in Leatherwork Conversation
Tippmann is saying that the take up arm is too tight, and pulling the thread up too snugly, which is why they want me to weaken the spring. It works if I use my hand to hold the arm down... so their theory makes sense, but they should send me a different spring, not have me tear one up.- 10 replies
-

Looking For Help - Tippmann Boss Stitcher
Deadlance replied to Deadlance's topic in Leatherwork Conversation
Yes. I used a tiny needle, pushing it through the boss needle, in order to align it properly. I've also tried twisting it slightly both forward and backwards. When I took the needle plate off, it looks like the shuttle just doesn't come close enough to the needle. The timing is correct. It passes the needle at the correct time... it's just not close enough.- 10 replies
-

Looking For Help - Tippmann Boss Stitcher
Deadlance replied to Deadlance's topic in Leatherwork Conversation
I'm using the needles that I purchase from Tippmann, directly on their website. They are marked with the '160' on the shaft.- 10 replies
-

Looking For Help - Tippmann Boss Stitcher
Deadlance replied to Deadlance's topic in Leatherwork Conversation
Yeah, I'll give them a call at lunch. That's the only time I think I am going to get the chance to do so. I wanted to go with smaller thread for wallets. I was thinking the thinner thread might allow for a less bulky wallet design... but I may just end up not being able to use smaller stuff.- 10 replies
-

Looking For Help - Tippmann Boss Stitcher
Deadlance replied to Deadlance's topic in Leatherwork Conversation
I did that same exact thing. I used another tiny needle to square up my boss needle. I went back to the original needle and thread, and it sews perfectly. I've switched back and forth 3-4 times now.- 10 replies
-
Ok, so, just a few months ago, November of 2013 to be exact, I bought a brand new, Tippmann Boss sewing machine. Straight out of the box, using a size 200 Needle, with 277 thread, it works perfectly. I purchased the flatbed accessory, the other presser feet, and size 160 needles and 138 thread just a couple weeks ago. Using the new size 160 needle and 138 thread, it no longer makes stitches. I checked the needle alignment - the scarf spot is going where it is supposed to go. I've tried turning it a few degrees either direction, several times. The thread tensions are set up according to instructions. It misses every single stitch. So, I live in central time zone, and I call customer service. They all leave at 3pm my time. I have a full time day job. Kinda tough to talk to someone.... So I email them... 3 days later, I get the response "One thing we can try is taking some pressure off of the take up arm spring.There is a spring in the back of your machine that lifts your take up arm up you can bend this spring out and take some pressure off of it." .... literally, that's it. So, it took 3 days to tell me that I need to bend a spring to fix my problem? That seems like terrible customer service. Since when did we start bending things and breaking precision equipment in order to fix it? At any rate, I tried this method. Didn't fix it. I took the needle plate off, and watched the needle enter the shuttle bay. The little finger that catches the loop of thread on the needle, misses it. It's as if the shuttle doesn't go close enough to the needle. Thoughts?
- 10 replies
-
nevermind, just found it... http://powermallet.com/
- 5 replies
-
- swivel knife
- hammer
-
(and 2 more)
Tagged with:
-
I am trying to figure out what tool I saw.... This thing looked like a rotozip or a large dremel, and hung from a pole about 3-4 feet tall. It had a cable attachment that hung down, similar to what the little asian manicure people use when they do fingernail stuff... and the guy could take a regular stamp, like a beveler or shader, and put a collet on it, and snap it into the end of the cable attachment, and when it was running, the tool would vibrate so that instead of hammering, the leatherworker just drug it along the leather.... Any ideas?
- 5 replies
-
- swivel knife
- hammer
-
(and 2 more)
Tagged with:
-
The only complaints I have about my boss are - Sometimes, you just need 2 hands on what you're sewing. I really wish the throat were much deeper. Otherwise, it's amazing. Especially for the money.
-
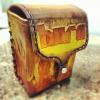
Haha yeah. The dye on the "burn" box is all done with eco-flo pro waterstain. I used red, yellow, and black to make various shades, and used my finger to apply all the color to the leather.
-
If you want more... here's a couple links to my junk... I post most of my work on Facebook. http://www.facebook.com/deadlancesteamworks I also sell what I make in an Etsy shop. http://www.etsy.com/shop/deadlance
-
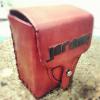
Here's more images. I've recently started making deckboxes for trading card games, as well as other art bits.
-
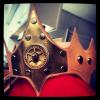
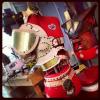
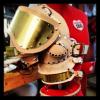
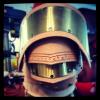
Since I'm new around here, I thought I'd post a few shots of the things I make. Critiques, comments, complaints... all welcome.... you won't hurt my feelings... I started leatherworking in May 2012. I have had absolutely no training other than what I have found in bits and pieces on youtube. Almost everything I do / know is self taught and just figured out the good ole' fashion hard way. I create my own patterns from scratch for everything I make. I use lots of pieces from thrift shops, craft stores, yard sales, etc. I go through a lot of brass and aluminum sheeting... I have used Arduino computer chips to control LED's and make things glow or change color (The alchemist bracer has an arduino) More shots... since the upload amount is limited...
-
I have a Tippmann Boss and I've thought about selling it a few times in order to upgrade to a motorized machine... but I'd be hard pressed to let it go for less than $1300. It's practically brand new and has extra bobbins, needles, and thread.
-
I recently built a table for my workshop... it's 4 foot by 8 foot... I used a 3/4" thick piece of oak plywood as the top. I built a frame out of 2"x6"s, the same way you would build a wall, and then attached the plywood to the top, making sure to countersink all the screws. Then, I cut a 6"x6" and made legs. The table is INSANELY sturdy and cost me around $150 after everything. I opted to put down a cutting mat instead of granite on top of my table, so that I could lay out large pieces of leather and not have to shift them around while cutting. I bought a 4 foot by 6 foot cutting mat from here - http://www.speedpress.com/products/2/1 - This mat was $120 after shipping. I have punched holes, large holes, strap ends, stitching holes... and it takes the damage extremely well. My workbench table is awesome. I could practically park a car on it. I'll have to try and remember to get pictures of it later this evening. On one end of the table, I have a 300 pound sheet metal press / roller / brake. It's about 2 foot by 4 foot... it takes up almost all the space that isn't covered by my cutting mat. On the opposite end of the table, I have a hand press mounted on one corner, and a tippman boss sewing machine mounted on the other corner.


