


Zilla
-
Content Count
74 -
Joined
-
Last visited
Posts posted by Zilla
-
-
We had a '65 Barracuda that was named Ruda. The shop vac we had at the movie theater I use to clean when I was in High School was also named R2D2. More common tools are the thingy ma jig or the doo wicky. LOL
-
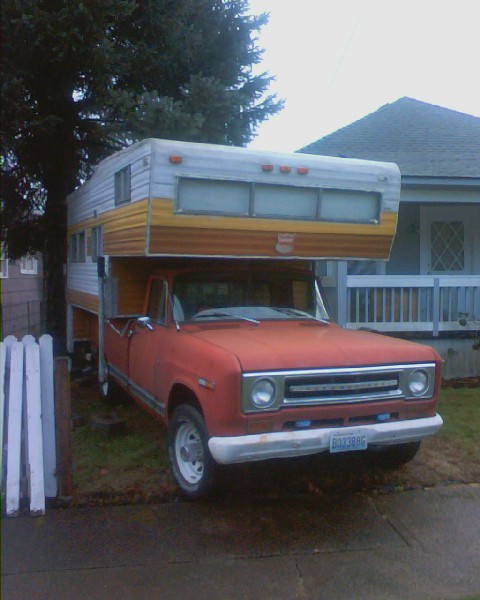
Hey Ray... here is my baby. Zilla is a 1969 International 1200D 1 ton. She only has 65,000 miles on her.
Kev

-
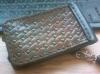
Is that from a tandy kit? I just got a touch and the tandy kit. I'm wondering how you like the case.Yes it is and it's ok. Theres no side hole for the side volume buttons but I use the screen most of the time anyways. It is a real fast lil kit to put together.
-
With the tax refund I got myself an iTouch. Of course I had to have a case for it.
Kev
-
I am just speechless at his work.
-
That is just totally awesome!!!!
I'm almost scared to ask how you did the "diamonds" but you know enquiring minds want to know!!
Kev
-
THOSE are like totally cool! I want to make one and I love that tri-weave border!!!
-

I've never thought about doing applique work like that. VERY AWESOME!!
KK
-
Need one of those as a sign for my roomies bathroom.... TFF!!! Love it.
Kev
-
Thats cool. You gonna stitch it too, or just glue it?KK
I was going to stitch it down but it grew while I was doing the basket weave on it...so now that it's glued down I think that's where it's going to end...LOL
KK too funny those are my initials too.
-
Well here it is...basket weave. It's not glued down yet.
-
Here's some things that I shared in the past (pre-crash) on an ergonomic sit/stand bench and tooling racks.Mobile_Ergonomic_Sit_Stand_Workbench.pdf Additional_Details_and_Notes_for_the_Mobile_Ergonomic_Sit_Stand_Leather_Tooling_Workbench.pdf A_Modification_of_Verlane_and_Dale_Tool_Racks.pdf
Regards,
Ben
All I can do is whine and snivel at that awesome work bench!! I want one. Wonder if Santa could bring me one this year. I mean heck he has 11 months to make it in! LOL
Kev
-
Well here it is after tooling some basket weave on it and playing with a new I tool for the border. Looks sorta like nail heads or rivet to me. Might have to paint them.
After it dries I'm going to get it glued down and might try my hand at some hand stitching since I picked up one of those awl things at the toy store yesterday (ie: TLF)

-
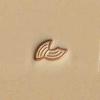
Hi everyone,I would like to ask if I can get advice on how to make Marilyn's eyes and eyebrows stand out. I was thinking of stamping them in but I just wanted some opinions on that option or if there was another alternative to explore what that was. The lips will be dyed red and I was toying with the options of dyeing the eyes and eyebrows black but that is still up in the air. Thanks for the help!
TinyL
Hey TinyL
Here is my idea... use a beveler and lightly tamp the lower inside edge and feather off as you get to the arch. Then from the top of the arch on the outside/top side. I don't think I would cut the line but just tamp it in with the beveler.
Trace one out on a scrap bit of leather and see if the effect gives you what ya want. A lil smooth pear shade'n on the inside corner of the eye by the nose up to the brow wouldn't hurt either.
Kev
-
That is awesome! thanks for the posting.
Kev
-
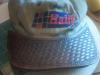
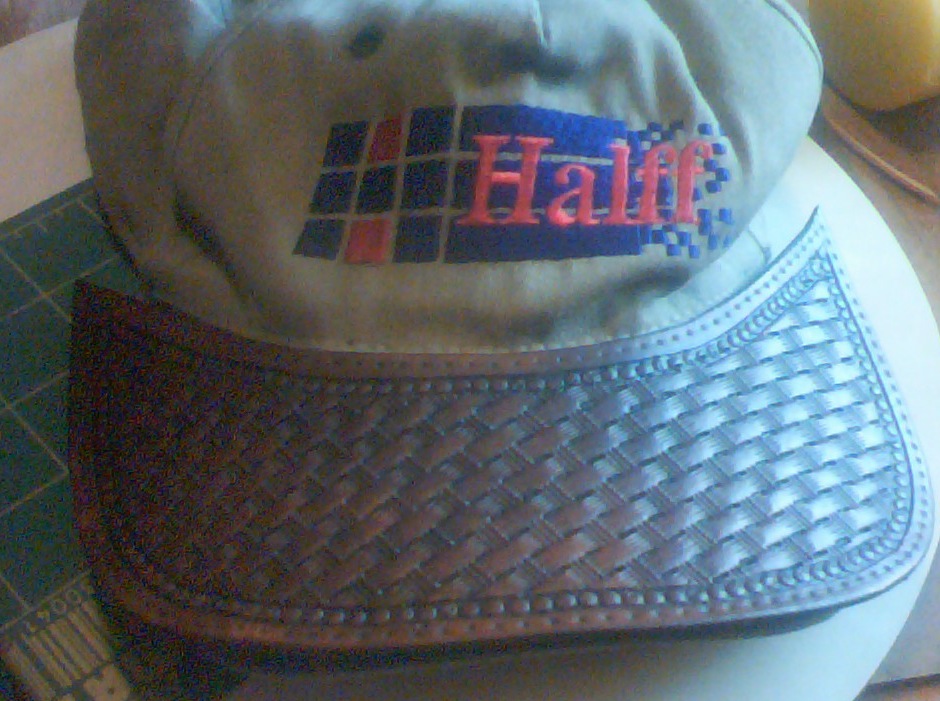
So for Christmas I got the DVD for the Ultimate ball cap from HideCrafters. Watched it several times and thought to myself, "self you can do this, it's easy enough". So I haul my butt thru snow and ice to my local Tandy store and got myself a "sheet" of leather. You know that 8.5x11 sheet that's thin but still toolable.
Since I had to day off today I did a real skippy job of trace'n around the bill of that cap. Did it all just like that nice man in the video said. I cut it out and remessured, twice even. Made my adjustments and fitted it on there 2,3, 4 maybe even 6 times before I put it to the leather. I carefuly traced my lines, even flaten'd out the bill of the cap over the leather just to make sure.
I took in a deep breath and made my first cut, holding it till it was done and not a single scallop from the shears left. Gingerly I slid it into place on my ball cap. Well there was an adjustment here, one there, WOW how did I get a full 1/2 inch off there? So I held my breath again, turning blue as I trimmed here and there. Undercutting the back curve so the seam wouldn't give me fits.
I had to call up 911 due to lack of air and almost passing out, (kidding of course) but the thought of spending a good 30 minutes checking my pattern over and over again and then to have this so far off did give me a bit of a shock.
(phone call and I had to go running into work because of drama)
I return to the work desk, (my lap with a clip board lazy susan that is just great for trace'n on. I put the leather back on and I sware to god it had grew by 3/4 of an inch. So I trimmed, trimmed a lil more. Someplace in the back of my head a little voice woe'd of "this was to be a fast and fun lil project, something I could do several of and make a few bucks doing it".
There must be a trick to this but it hasn't found me as of yet. I look at the floor and the many trimmings that now cover it.
As of now I'm about scared to death to wet it down and start my tooling. Yes I had to buy some of those new geometric sets while at TLF. I'm not big on the whole glue'n to poster board but the thoughts of tooling this now hours and hours worth of cutting and holding my breath and only to find it grew by an inch would put me over the edge and leather tools and DVD would go flying out the window into the street.
So to you masters of the craft...how does one do this with out the need for an O2 monitor?
I'm sure there will be more to come of this now day long project.
-
-
Hmmm and I did just get a new pyro tool for xmas and have yet to try it out.
-
AWESOME guys! thank you so very much! I'll be looking for those latches over the weekend.
-
Howdy y'all. I have a question for all you biker folks. My office xmas party is come'n up and I got my bosses name for our gift exchange. He is a biker and as far as I can tell he has all the bags n things on his harley. Yesterday he asked if I knew how to make the "whips". *Hello hairdresser here* Oh yeah I'm clueless. He said they are about 2-3feet long with the "dog leash" type clasp and you hang them off your handle bars. They are braided.
 is he talking about...cuase if I can make a pair for him for $20-30 I'd have his xmas gift.
Any help, ideas, pics or how to's would be GREAT!!!
Kev
-
Well I wasn't for sure where to post this after seeing the basketweave thread so I'm going to do it here.
I got the G878 stamp from TLF. The rope design and I am have'n a BUGGER of a time try'n to use it. I've done the whole line thing and at this point I'm getting on my hands and knees to line it up for each impression.
Any help or ideas?
Kev

-
Hope y'all have a wonderful and blessed holiday and have plenty to be thankful for this year like I do.
Kev
-
WOW that's all I can say WOW!!!!
-
very impressive work!!


Thank God & U-Haul
in All About Us and Off Topic
Posted · Report reply
Well thank God and U-Haul I made it back to Texas. My old truck decided she liked New Mexico and broke down there. Oil pump went out and she threw a rod. Thankfully a trucker from Las Vegas stopped and gave me a ride into Tucumari where I over nighted and thru the grace of god friends pooled money and got me a U-Haul for the rest of the trip into Dallas.
Sadly the job I moved for was frozen the night before I was to get my offer. LOL Just my luck, once again I'm in Texas jobless and with out a car/truck. Oh well that will pass too. I'll find something.
If y'all hear of anything let me know. LOL