


garypl
-
Content Count
1,642 -
Joined
-
Last visited
Posts posted by garypl
-
-
I use a small ball peen hammer to round the edge after cutting the rivet. Much quicker and easier than using the tool.
-
2 hours ago, 327fed said:Titebond lll was not good. Popped loose with the Ist stitches. Guess I will squirt Elmer’s in crevice after I get done.
never tried Titebond III, but Titebond II seems to work well and I haven't seen leather separating. I only use this type glue for oily leathers.
-
Thanks to everyone for your kind comments!
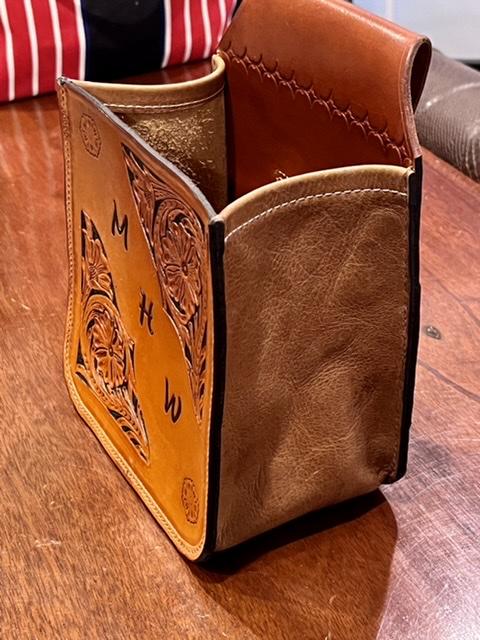
15 hours ago, PastorBob said:Great idea to use the bison as the gussets. It probably made it easier to sew / bend around. Very sharp. Well done on the lettering too. Very difficult to do and do right.
I used bison for this very reason - very strong leather, soft temper and easier to bend around curves.
14 hours ago, Tequila said:Looks really good! One question, how did you dye the black lettering and tooling background? When I dye lettering I can never get the edges so clean and sharp.
I use a very fine tipped artist’s brush and carefully dye all the black background and letters. Took a couple of hours to finish this one.
8 hours ago, Samalan said:That's a very nice job and design I did one similar and set it up for trap doubles
very nice work!
-
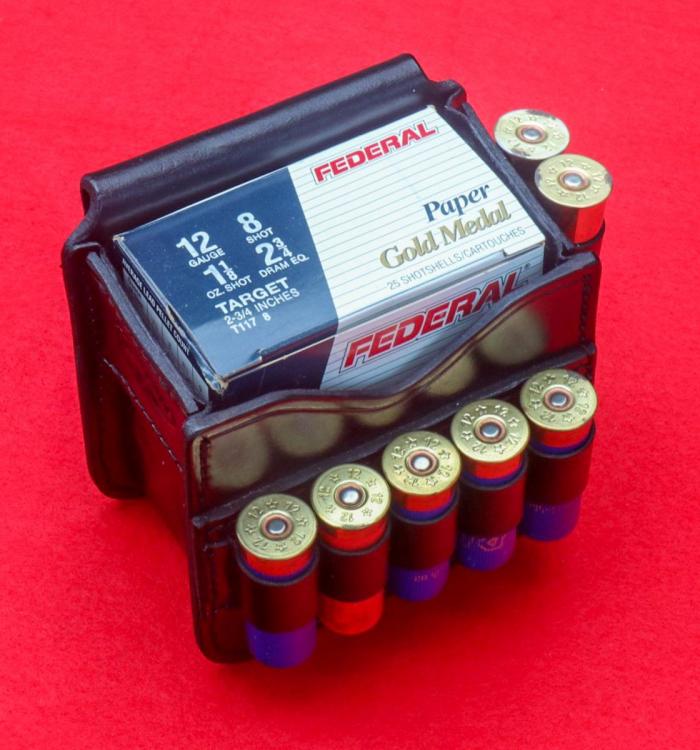
Friend asked me to make him a shot shell pouch when I had time. Finally found some free time to finish it. Front and back panels are HO 7-8 oz and gusset is 4-5 oz bison. Saddle stitch the gusset to the panels but used my machine to sew the back flap and gusset folds. He likes it
") . Now he wants a belt!
. Now he wants a belt!

-
I use Titebond II wood glue to glue oily leathers. Allows you to reposition the pieces and once you have them positioned correctly you can clamp them and allow to set - preferably overnight. Only glue that I found works with oily bison leather.
-
Beautiful job - you should be very proud of making something that will be a keepsake for him!
-
12 hours ago, sojourner999 said:I started the work on the 206RB-4. I took the upper tension assembly apart for cleaning. I found both tension discs has deep grooves where the thread goes through. I figure I would order the discs and a spring too.
i went to sewingpartsonline.com, they had discs and a spring, but are on back order. I did a search and could not find individual tension discs. I did find units on Amazon, but the bad reviews made me leery of ordering a complete unit.
Any recommendations on a vendor that has quality parts like tension discs and tension spring? Or is this something where I may have to order an entire unit? If so, where to get as close to OEM quality as possible?
Much appreciated.
Buy them on eBay - I bought a complete tensioner assembly for @$16 a year or so ago. Probably a bit more now due to inflation.
-
Called blocking or the easiest way to do this is to airbrush darker dye around the edges.
-
12 hours ago, chuck123wapati said:i just got this great idea!!! take the holster down to the gun store find a gun that fits it and buy it!

It does fit an N frame with the thick welt and I used it in a match this past weekend - carried a S&W 38/44 revolver just fine! I just wouldn't sell it to anyone! Going to start another holster and make my own pattern this time.
-
Put the handle in a vise or wood clamp outside that will hold it upright. Take an ingot and a propane torch and hold the ingot over the hole in the handle and start heating it and let the molten lead drip into the handle. I do this all the time when melting lead for bullets and the pieces are too big to fit in the pot. Easy to control and very little fumes.
-
Looking good! Sounds like it was an interesting project.
-
17 minutes ago, Lobo said:Another technique that can help is to wrap the unloaded pistol in Saran Wrap plastic film, rub the outside of the plastic with neutral shoe polish, in and out of the holster several times. The leather will take up the wax at contact points where it will act as a light film of lubricant.
This is a great idea!
-
You made a beautiful purse there!
-
I have a couple of knives from Terry Moore that are very nice and sharp. Very well made and good looking to boot. They are a little thicker than some of the other knives. Pricing is very reasonable as well.
https://leatherworker.net/forum/profile/1667-t-moore-medicine-hat-saddlery/
-
Nice job - he will love it!
-
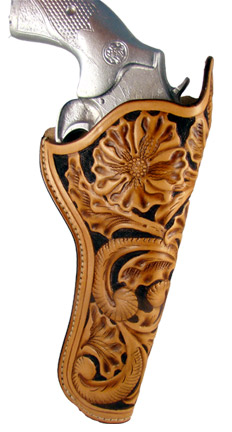
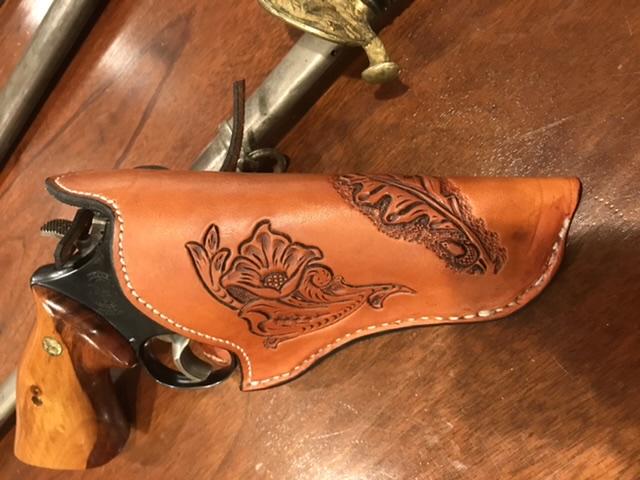
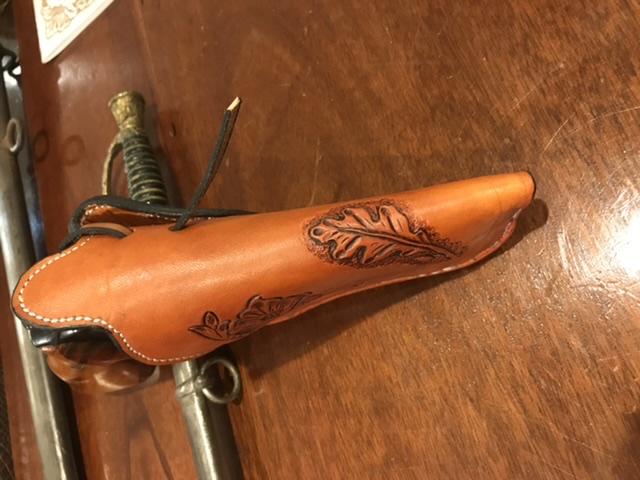
1 hour ago, alpha2 said:Shame, 'cause that is one nice holster!
Thank you - I think I will use the same design for the carving, just make the whole holster a bit larger.
-
10 hours ago, chuck123wapati said:Thats a club we are all in and a pile we all own. lol
I've used a couple of his also. The lesson i got out of my mistakes is to make a pattern from heavy weight card stock type paper then i can wrap it and test the fit before cutting leather.
Chuck - I did make a heavy paper pattern and thought it would fit easier but obviously I miscalculated! I am going to use a similar patter again but this time I will expand it another 3/4" around the edges and trim after I sew.
-
12 minutes ago, JLSleather said:Sewing on the 4500, you could try one or t'other...
either sew QUITE slow which allows time for the lower feed dog to get into position, or cut your pattern about half an inch WIDE on the BACK side, makes it easier to keep the holster level when sewing .... check out page FIVE of your STohlman book
")
I normally do go very slow but I think the main problem is sewing too close to the edge on this thick of leather. Next time I will leave the back piece wider to provide the extra support and hopefully will have a better result to post!
10 hours ago, TomE said:I know nothing about holsters, except that is pretty work. I've had problems with rolled straps rolling under the presser foot and causing needle strikes. I now leave about 3/4" of filler strip exposed and tack a leather piece under the exposed filler to shim it. After sewing, I trim the filler flush and finish shaping the piece in a rein rounder. Would it help to use a wider welt and trim it later?
Yes & Yes - need to make it wider for better support - made a mental note to myself about this, now if only I can remember it!
-
6 hours ago, Lobo said:You have a scrap pile? My dogs always had chew toys.
My dog is so small she would have a hard time fitting it in her mouth!
6 hours ago, AzShooter said:I like the holster. Tooling is very nice. Someday I'm going to try to tool one of my holsters.
Thanks, my scrap pile has a few tooled pieces to remind me how not to tool!
-
45 minutes ago, JLSleather said:I'm gonna GUESS that if you broke a needle that heavy, most likely the holster sewing area wasn't perpendicular to the travel of the needle bar. Meaning either not flat, or allowed to "rock" while sewing, causing it to come out different spot on teh back than on the front

But if that pattern is the one from the "how to make holsters" book, which it looks like, that holster is better suited to an L frame revolver (fits a 686 right nice)
I think both of your comments are right on. I was trying to keep the edge perpendicular but when the edge is that thick it doesn’t take much of an angle to end up coming out the edge! I did use the pattern from the How to Make Holsters book and I agree that it is a bit small for an N frame. A friend of mine suggested adding 3/4” to the pattern dimensions to allow for a thinner welt and to move the stitch line in a little more. Always learning something new…
-
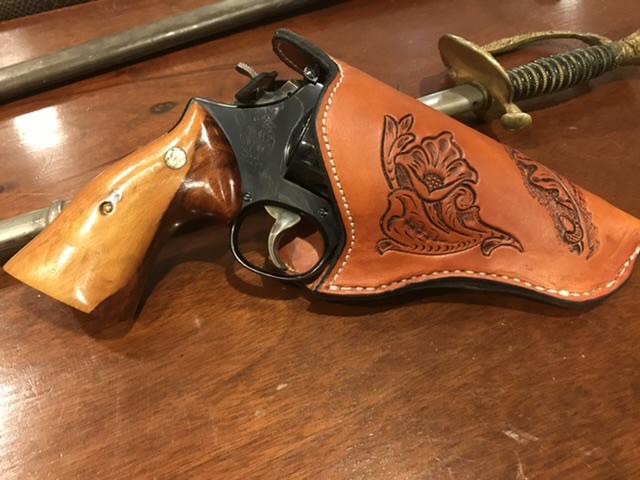
Well I was almost finished making a holster for a customer’s S&W M29 revolver and when I sewed the seam things went south quickly.
The thickness I was sewing was 3/4” with two layers of really hard temper veg tan for the welt. I was using 346 thread and #26 needle in CB4500. About 1” into the seam the needle deflected and came out the side, hit the needle plate and broke. Tried it again and deflected again - the leather was so hard the needle was bending. Finally gave up, removed all the thread and hand sewed it, but the damage was done, so I am keeping this to remind myself not to use such a thick welt.
I used a pattern from Stohlman’s book for a 357 revolver and I think it might have been for a K frame and not an N frame. This is why I added the thick welt so the N frame would go in far enough.
Lesson learned - I will make my own pattern for the second holster and add a little width to allow use of a thinner welt. Live and learn!
-
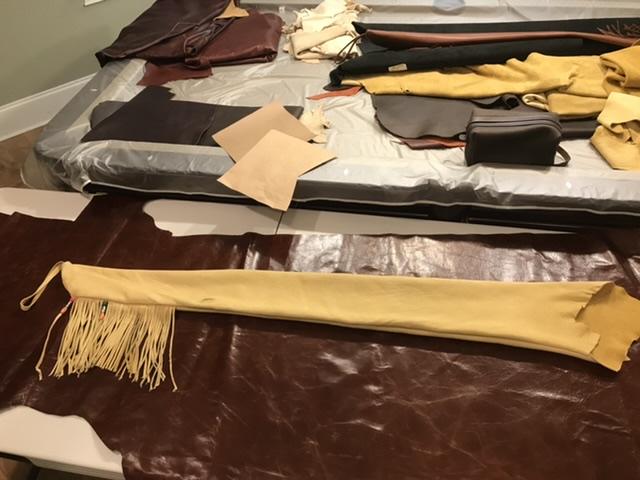
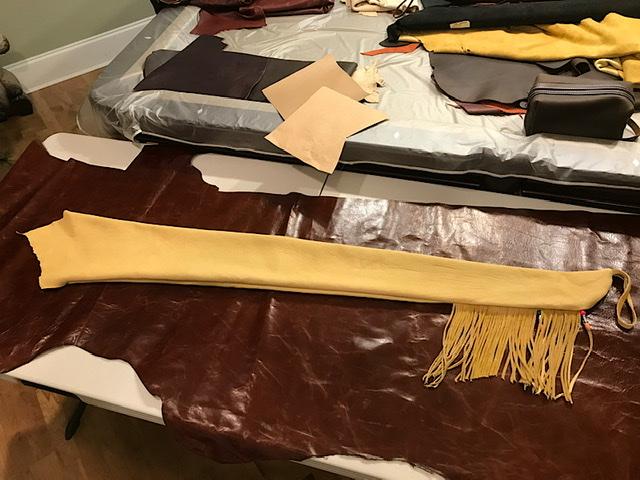
You made a nice case there! I like to make cases from soft temper leather - I like to use elk hide. Sew the case inside out and then pull it out so stitch line is inside. I double stitch using a machine but I think a single saddle stitched seam would be perfectly adequate.
Here is a pic of an elk hide case.
Gary
-
Do you bevel your edges before applying dye and what applicator are you using?
I find it easier to dye edges after I bevel them. I use a felt chalkboard eraser cut into small pieces and held in a spring clothespin to apply dye. Dip the piece of eraser lightly into dye and apply to edges. Don’t soak the eraser - just dip the tip and go slow and you should not see bleeding onto the back.
-
Nice job with the card! Good that the year is not on it so you can reuse it!


Springfield Gun Case
in How Do I Do That?
Posted · Edited by garypl · Report reply
Nice rifle! I would line your case with some canvas - shouldn’t cause any problems with the finish rusting.