


mrtreat32
-
Posts
222 -
Joined
-
Last visited
Content Type
Profiles
Forums
Events
Blogs
Gallery
Posts posted by mrtreat32
-
-
Those pricking irons look like they make pretty narrow slits. The ones I picked up make diamond holes, which unfortunately probably won't stitch as slanty as the pricking iron you have.
I haven't tried any other brand yet so I can't compare directly.
Yes the slits are thin but I use them to mark the spacing and punch most of the way through the leather. I than use the awl to open the hole so they are bigger once I do that. The other brands seem to make bigger marks but they probably are similar once the awl is done piercing through depending on what size awl blade you are using.
-
Yours are looking quite a bit nicer than mine. I need to work on getting the thread to sit in the top of the slits instead of sliding down towards the middle.
The leather I used for the pictures above was a 5/6 oz piece, quite a bit thicker than my earlier failures. I was actually able to repeat the stitch on another piece of 5/6 oz leather. It seems like with softer or thinner leather, the pattern doesn't want to hold and everything wants to fall completely to the middle. This may just have to be something I have to live with. What are you using to make the holes?
I think the change of leather may have been what helped youre stitching out. It doesnt necessarily need to be thick leather but if its thin it needs to have some firmness to it. I sewed a piece of scrap 2-3oz cheap veg tan the other day that is very soft and the stitching is all out of whack using the same method and thread etc.
Im using a vergez blanchard pricking iron for those ones in the picture.
-
`Nice! haha do you really not know if you did anything different?
Another small trick which seems to help a bit is when you tighten the threads to pull them in the direction of where you want them to end up. So instead of pulling both hands straight out from the project to tighten the stitch pull the left hand up and away from you a bit and the right hand down and towards your body( assuming you sew towards yourself) to direct them in the direction of the hole where you want them to end up.
Did you use the same type of leather and weight on that last one?
here is a pic of 3 lines I did the exact same way. The dark brown leather is a stiff leather someone gave me some scrap pieces of. You can see even though I stitched them the exact same way those stitches are much more slanted and look spaced out since the stiffness of that leather holds the threads tight in the opposite ends of the holes //// The other piece is some cheap veg tan that is a bit softer so the thread is sinking further in and touching more.
-
The only thing I have that's thinner is some nylon thread for sewing machines I more or less got the same results, though I will agree, the thinner stuff looks nicer. How are you punching your holes? Thanks for helping me, by the way. I actually stopped at a Tandy's leather store today and they couldn't get it any better than I did.
No problem. I actually like helping and hope you can figure it out. ..or get your stitching to looking the way you want.
Im pretty new to leatherwork and about a month back I was asking all kinds of questions about my stitching because I coudlnt get it right and people on here were mostly really helpful and answered a lot of my silly questions so I want to help out now if I can. Unioncraft and a few others had a stitching look I liked so I asked him and a few others questions and now Im happy with how it looks. Still trying to improve of course.
a few people told me it wasnt about the tools and type of thread etc.when I was asking questions.. while this is true that nice tools and thread size wont fix bad technique I can tell you from my short amount of time in Leather work that it can make a dramatic difference in the look of the stitches. The SPI to thread size and type of leather all play a factor.
Keep in mind there are different styles of stitching and looks to leather work. None of which are right or wrong. Most folks on here seem to be more into a Americana or Western look which I think is cool as well. But if you want your stitching to be slanted the process is a bit different.
I have been playing around with both types for different things Im making. I made some coasters which I grooved on both sides and sewed with a .8mm tiger thread and it looks cool but the stitches are straight as a arrow and recessed into the leather. When I want to make something look more modern or fashion forward I use a compass to scratch the line(no groove) and thinner thread to get the slanted Hermes and European look.
Im using a Vergez Blanchard pricking iron. I have only been doing leather work for a few months now but I have been reading whatever I can and practicing with any free time. Its getting a bit out of hand. haha
When I get involved in something I get a bit OCD and do a ton of research and want to learn everything I can.
I have also been trying every thread you can think of and have samples of a few more that arrived today. Originally I liked the Tiger thread because it felt easier to handle when sewing but now when I go back to trying it I find even the .6mm to seem a bit too thick because of the way it lays sideways. I really like the Fil Au Chinois but its very expensive and Im looking for a good alternative that comes in a variety of colors. The Barbour thread I got the other day is the closest so far and Im really liking it.
-
I know a lot of people will disagree but for a slanted stitch if you want a more designer look I think .8mm tiger thread is too thick.
I will sew a sample piece in a little bit the same exact way. One line with tiger thread and one with thinner thread at 9spi.
Tiger thread is nice but it lays more flat and even the .6mm that I have looks too thick for 9spi. At 6 or 7spi it looks nice but I currently dont have a pricking iron in that size.
Do you have any thinner thread to try out?
-
Yeah, I'm pretty certain that I'm following the instructions correctly. I'm wondering if the problem is one of hole size or thread size. Following the images, you pass the right needle over the left thread, and then cast the left thread over the right needle. So on the left side of the material, the left thread is over the right thread and on the right side of the material, the right thread is over the left thread. I believe this is what ensures that you get the zig-zag on both sides. But when I pull it tight, this configuration doesn't stay and the left thread ends up over top of the right thread on both sides, giving me a zig-zag only on the left side. It's like there's not enough thread thickness or too large of a hole to hold that swapped position above in place.
The thread you're using is definitely not too thin. The thinner the thread I use the more noticeable the slant from my experience.
I have used .8mm tiger thread at 9spi and after a lot of experimenting I found out my stitching didnt look slanted because the thread was filling the hole tightly and didnt have enough room to show it running from bottom to top corner. When I used that same thread at a bigger SPI (7spi or so) than it would slant again. I have been doing mostly 9spi which is pretty small so I started using thinner thread. Barbour and Fil Au Chinois 632. If I use .8mm or larger in that small of spacing its too chunky to see it running at a angle.
http://www.fineleatherworking.com/linen-thread/waxed-linen-thread-ecru
Here is a picture where you can see the thread on the right for example is starting to look less angled compared to the smaller ones on the left. The one on the far right almost looks straight in spots and would look even straighter if using thread around 1mm
Also how thick is the piece of leather you are using. If you have the time I would try it again with 2 scrap pieces stitched together.
I also notice the exact same sewing techniques create a different look depending on the firmness of the leather and a bunch of other factors.
Also you are not using a groover I assume? Sewing the exact same way as mentioned above in a groove will not give you a slanted look because the groove is holding it in a straight direction.
-
-
Thanks for the link. I tried it, and now the back is slanted and the front is a straight line :-)
Are you sure you are following the pictures exact? That is exactly how I do it and I have slanted stitches on both sides.
That is also how Peter Nitz stitches and Hermes. I have actually asked him and he told me how he does it..he said he casts the stitch most of the time but not always depending on the thickness of the leather and if the back will be showing.
https://www.facebook.com/video/video.php?v=10150131553076948
watch at 2:45
-
I have purchased one of the Chromexcel seconds in the past (not from Springfield). It is really nice leather but for my use (shoe making) there was too much waste. I swallowed hard and ordered from Tannery row (actually ordered 6 sides instead of the minimum 5 for the discount). The first quality sides are just amazing. It took quite a while to get the order filled but it was well worth the wait. The seconds do work great for smaller items like wallets, etc. and Maverick's delivery time is second to none.
Im gonna set up my website soon. Hopefully if I can sell a few items I will be able to justify a order directly from Tannery Row. I wouldn't mind 5 sides total but the fact that I can't get different colors or types is what doesn't work for me starting out.
I placed my order with Maverick and I should have my first hands on with chromexcel this week. The big downside to ordering horween from Maverick is they stock mostly 5-6oz leathers from Horween. If I was able to order from Tannery Row I could get lighter weights which I would prefer.
I have some samples coming from Tannery Row so Im excited about that. Looking forward to seeing the Cavalier in person which is basically chromexcel in brighter colors. I don't understand why it doesn't seem to be as popular. The lady I spoke with at Horween said she thinks the name isn't as out in the public because the big names like Alden etc all mention chromexcel so people think of that as the premiere leather from Horween. Well besides SHELL!
-
So I recently got a diamond pricking iron in order to get that nice zig-zag pattern in my hand stitching and I've watched this video
https://www.youtube.com/watch?v=Y0EL7K2NhYs
as well as the often-cited Nigel video on how to do saddle stitching but I have two problems to which I can't figure out the cause.
The first problem is that I'm only getting that nice zig-zag diamond pattern on one side of the leather (in my case the front side), while the other side is more or less a straight line (see attached photos). The other issue is that, on the back side, the first stitch is always dropped relative to the rest of the line. Something tells me that if I fix the first issue, the second one will take care of itself, but I can't seem to get it to work. Any help would be greatly appreciated.
If you want the back to be slanted as well you need to cast the stitch on the back. Some people call it throw the loop and Im sure there are other terms.
I was going to try to type it out but it didnt make sense. Here is a link I found that is pretty easy to follow this is exactly how I stitch if I want the back to also be slanted and it works great.
http://www.bowstock.co.uk/saddstit0.html
Its also the same way its done in "the leather working handbook" if you have that. Has nice easy to follow pictures as well.
The nigel video are great but aren't his slants of his pricking iron going the opposite direction in most videos instead of like this ///// they slant towards him. I could be mistaken.
Anyway please try that and let me know if that works
-
Im interested as well.
There is also another tool in this thread that I found searching this subject. One guy posted pictures and his results looked really nice but the thread seemed to just end without any further info.
here it is.
http://leatherworker.net/forum/index.php?showtopic=38750&page=6
http://www.woodcraft.com/product/2001813/2546/tool-kit-10-in-1.aspx#ProdInformationTab
this is the tool and comes with multiple attachments.
also on ebay I saw these which look interesting.. curious if anyone has used them. Look like the wooden dremel burnishers with different size grooves.
-
Is this used to burnish the edges or just to burn around the edges?
curious as well. If anyone has tried these out I would love your hear feedback
-
It's most likely not first grade; John from Horween replied in another thread to this question, and stated that Springfield has bought both grades in the past. I took that as a hint that they are now selling second grade. I would call and ask; curious what they would say.
thanks.
I remember reading something similar on here to what you just said but I can't find the thread now. Maybe I will call and ask them.
I have some stuff coming soon from Maverick so Im curious how that would compare to the Springfield stuff.
-
What is the deal with the chromexcel from Springfield?
Has anyone ordered this and does it look nice? Have you seen it compared to chromexcel from tannery row? It doesn't say if its 2nd quality or not.
I contacted Tannery row and they charge around $12sf and $8 and change a SF if you ordered 5 or more sides of a single color. Im curious if its the same stuff that Springfield leather is ordering and what to expect. You can order through Springfield for $10 a square foot which seems like a good compromise if you can't order 5+ sides direct from Horween.
Curious to hear anyones thoughts on this stuff.
thanks
-
I think I have seen mentioned on here before about fil au chinois on ebay and how the ones listed were different from the lin cable that is so expensive.
Are those other threads also suitable for sewing leather? I never hear anyone mention Sajous other threads being used. Seems like they have a whole line of product besides the Lin cable.
Anyway I was doing a search for Barbour thread and a book binding company near my house which I had no clue existed showed up so I went there to pick some up and they had a sample card with Irish linen thread on one side and French linen thread on the other.
I picked up a spool of the barbour(they only had unwaxed) and I decided to try the French as well which happens to be a Sajou product. Was wondering if anyone has used this before..dont think I have seen one with this packaging.
heres a pic
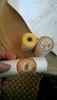
Its not the Lin cable but it was sold next to the barbours as a french alternative to that so dont see why It wont work.
-
I have one from him and use a heat gun to get mine to the point where is almost to hot to handle then press it using my arbor press, great results on chrome tan pull up. I have seen YouTube video of someone doing the same and using an infrared thermometer to get a consistent temp. Flame heating may result in soot being deposited on the stamp. YMMV heat and press time will affect the results
Jeremy
thank you.
and I take it you havent had any negative effects on the quality of the stamp?
The spirit lamp burns very clean and leaves very little residue on my creaser so I dont think the soot will be too much of a issue assuming whatever build up can be safely wiped off without softening the design.
-
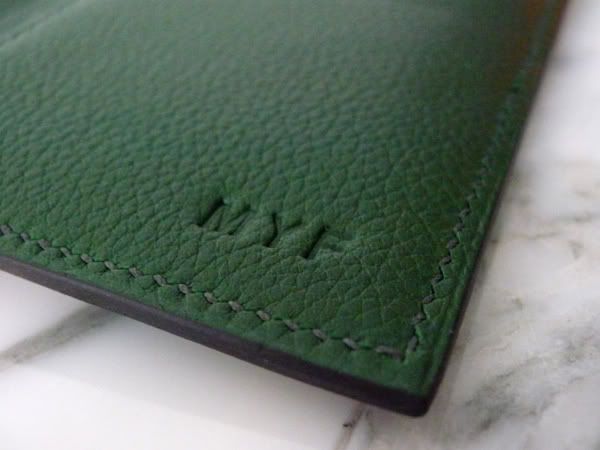
I ordered a makers stamp from LWleatherworks that is made of brass which works great so far on veg tan and not so much on other unidentified leather that someone gave me. Which I knew was the case ahead of time.
I plan on using a lot of chromexcel in the near future and I was wondering if this type of stamp can be safely heated (maybe over a spirit lamp I have). The maker of the stamp sells a electric heater which I may order down the line but could I heat this type of stamp in a flame without causing any type of damage to the integrity of the stamp. Not sure if the electric heater is better since there is no actual fire touching the stamp or maybe someone who knows more about metals can chime in and its fine to do
BTW. This is my first makers stamp but the shipping and service was very good and fast from LW if anyone is looking into having one made.
thanks
-
simon what types of linen thread are you using. I really like the fil au chinois I have and ordered a few samples of royalwood that should be here tomorrow but Im looking for other good alternatives since the filauchinois is so pricey.
its actually crawford linen I ordered not royalwood.
-
There's an American company called Ronso. They make a braided thread very similar to Tiger thread and just as good.
I can't remember where and when I bought it, but I have two large spools of it, so it must have been good.
I'm a linen addict so it's just taking up space in the drawer now
simon what types of linen thread are you using. I really like the fil au chinois I have and ordered a few samples of royalwood that should be here tomorrow but Im looking for other good alternatives since the filauchinois is so pricey.
-
I use veg tanned goat and calf split to 1.25oz to 1.75oz fir interiors. I airbrush on the dye and it seems to often soak through the thin leather. The goat is pretty firm even that thin and will be a lot stronger than calf of the same thickness. The calf, while soft, isn't like garment leather and can hold some stamping, makers mark, creasing, etc. I get the goat from a variety of places but have settled on waterhouse leather for the calf skin because they split it at no cost and the price is fair. Not only does this give me the perfect thickness for the wallets I am making, but it makes the flesh side nice and clean.
Thanks for the info. I was wondering if it was firm enough to form pockets and interiors with and it sounds by what youre saying that it is.
Where are some of the places you get the goat online?
-
Steven Segal has goat. It is used in bookbinding.
thank you. I couldnt find the site at first and kept getting results for steven segal( the martial arts guy) leather jackets.
Is this type of goat for bookbinding the same kind people use for wallets and leather goods or its treated in some other way? They are also very expensive..Since I dont know much about goat leather is this considered top of the line stuff. (the hermann oak of goat)!
I also came across this site just now and they offer much cheaper prices..closer to the kidskin prices. Are you familiar with any of these types of goat
It is Siegel leather if anyone else searches it btw
-
I have been making wallets using mostly veg tan and want to start doing the interiors in various colors.
A lot of leather craftsmen whos work I like seem to use Goat in various colors for the wallets interiors but I cant seem to find much in the US online. Hermes wallet linings use it as well for reference.
I have seen the kidskin on springfield leather and that comes in lots of colors but I had someone at the shop send me a cell phone pic of them and they appear to be very glossy almost look like patent leather. Wondering if anyone has used the kidskin from springfield..is it very glossy? Is it thin but firm enough to still cut for pockets etc while holding its shape? Any feedback appreciated.
Any suppliers of this type of goatskin or suggestions
Here are a few links of the stuff online I was looking at using goatskin and kidskin that looks more matte
this is one of peter nitz who uses goatskin on the interior of his alligator wallets in bright colors
http://i22.photobucket.com/albums/b328/mafoofan/titc/071611/hermes3s.jpg
http://en.lacontrie.com/leathers/kidskin
thanks
some more peter nitz. goat skin outside and inside
-
Just a general word of warning.
I see lots of posts (not just this thread) about buying VB & other expensive tools as cheap/mid price aren't any good.
VB, Dixons etc are not what they used to be.
They might still be good/ok but in all honesty they are no where near as their old ones, much cheaper steel & manufacturing techniques are used making new tools.
I'd always recommend trying to find a vintage tool first (only exception would be pricking irons & awls, you have to be very lucky to find an old pricking iron that isn't worn/damaged)
Ive compared (& bought) head knifes, skivers, creasers etc from VB, Dixons etc to their vintage equivalent, difference is night & day.
So I'd say do yourself a favour, get in touch with Bruce or search ebay etc for old tools first.
Agree that most old tools are probably of better quality. But like you said its hard to find certain types of older tools in good condition.
here in the US it seems if the style of leatherwork you are into is more towards european styled stuff there arent as many vintages tools that suit that style of work. Pricking irons are hard to find used and most of the nice older stuff seems to be more focused towards western saddle making (stitching wheels, groovers etc)
I have a Barry King awl haft that is beautiful and plan on ordering some edge tools of his as well but BK, Rons tools, and the other really nice modern tool makers in the US make the majority of tools for people interested in tooling and carving designs. If any of those makers made high end pricking irons and such I would purchase from them. Im sure the quality of these tools is better than modern VB in most catergories
Also owning a decent amount of VB tools so far it seems that some are still made very solid and some seem very average. Maybe they still make certain tools up to par of the older ones and have changed manufacturing of others. The pricking irons and compass I cant imagine being any more solid but a few others leave a bit to be desired. To me their stuff seems to be a step above most other large US made brands and goodsjapan( which people say is good for the price).
-
I happen to have both a screw adjustable creaser from Tandy, and a used Osborne #1, and find that they both have their uses.
The Osborne makes a very fine crease, and with too much pressure will actually cut into the leather. It has a guide "blade" ( for lack of a better word) which is longer than the other creasing "blade". That helps to prevent the tool from wandering as I push it with a very slight toe in angle to keep it tight against the leather edge. The fine crease that the Osborne leaves makes a very attractive decorative crease, but is much too fine for a stitching crease.
The adjustable is a much more blunt tool and requires a lot of pressure. It also leaves a much wider crease which is great for stitching. It wanders a bit more on me, probably because both "blades" are the same length which requires that it be both toed in AND tipped toward the edge of the leather. I have also noticed on mine that one "blade" is slightly thicker than the other, so I use that to advantage for a slightly different crease. I haven't looked at any others, so I do not know if that is by design, or a fluke.
On veg tan, heat only makes a slight difference which is more noticable with the adjustable. I prefer the look that heat gives.
Alcohol burners are the tool of choice because alcohol burn very cleanly. A butane lighter will leave a deposit of soot on your tool which then has to be wiped off, which is a pain. The same is true of at least most candles. And if you don't get all of the soot off, you have a blackened crease on your work for the first few inches. I put up with wiping my tools for awhile but recently bought one of these:
http://www.amazon.com/gp/product/B005QDP42K/ref=oh_details_o00_s01_i03?ie=UTF8&psc=1#
It has a wide heavy base to help prevent tipping, a thumbwheel to adjust the wick without snuffing it, a nifty little snuffer cap to snuff the flame and also slow the alocohol evaporation, and a cute little handle that is useful. I'm burning 90% rubbing alcohol which works fine, but denatured alcohol might be even better. I'm not so sure about 70% rubbing alcohol.
On awls, you are completely correct about blade length. It's good old geometry at work. The farther the tip of the blade is from your hand, the more it will move with every tiny movement of your hand. It's another thing that I put up with until I figured a few things out. My first awl was a Tandy multi-purpose with a wing awl blade, which was duller than the butter knives in my kitches. I used it because I did not know any better. It didn't take TOO long to realize that it had to be sharpened to be of much use. It took a little longer to figure out that the wing blade is a pain to use since it will always make a bigger hole on one side of the leather than on the other and consistent holes require very precise depth control. And finally longer still to figure out that it was too long. I now use awls with short straight sided blades that are sharpened and stropped to an almost mirror like finish and am MUCH happier, and my stitching is vastly improved. I'm sure that wing blades have their uses, but not for me.
I hope that helps more than it confuses!
Bill
That makes sense about the lighter leaving a deposit on the tool. Gonna order the burner you posted from the Amazon link.
thanks


Chromexcel From Springfield
in All About Leather
Posted
Yeah I don't have a splitter at the moment. If I start selling and making a bit of money I will invest in one and most likely some type of skiving machine.
I have never split leather. What does the grain side look like after splitting? Pretty much the same as the top? Also when you split leather with surface defects does the layer below tend to be in better condition?
thanks