rgerbitz
-
Posts
440 -
Joined
-
Last visited
Content Type
Profiles
Forums
Events
Blogs
Gallery
Store
Everything posted by rgerbitz
-
Thank you Bruce.
-
Good afternoon Folks, Curious to here what you all are using for tools to trim the fleece off of skirts after you have finished sewing. Thought I had seen some tools once that were specifically for that purpose but can't seem to find them anywhere. Thank you, Rob
-
Thank you all for your input!
-
Here is a photo of the last build. Looking for input to improve the overall lines of the saddle. Thank you in advance for any input. k Haven't been on here much lately, but would like to thank everyone who takes the time to contribute. Rob
-
Thank you Bruce!
-
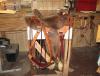
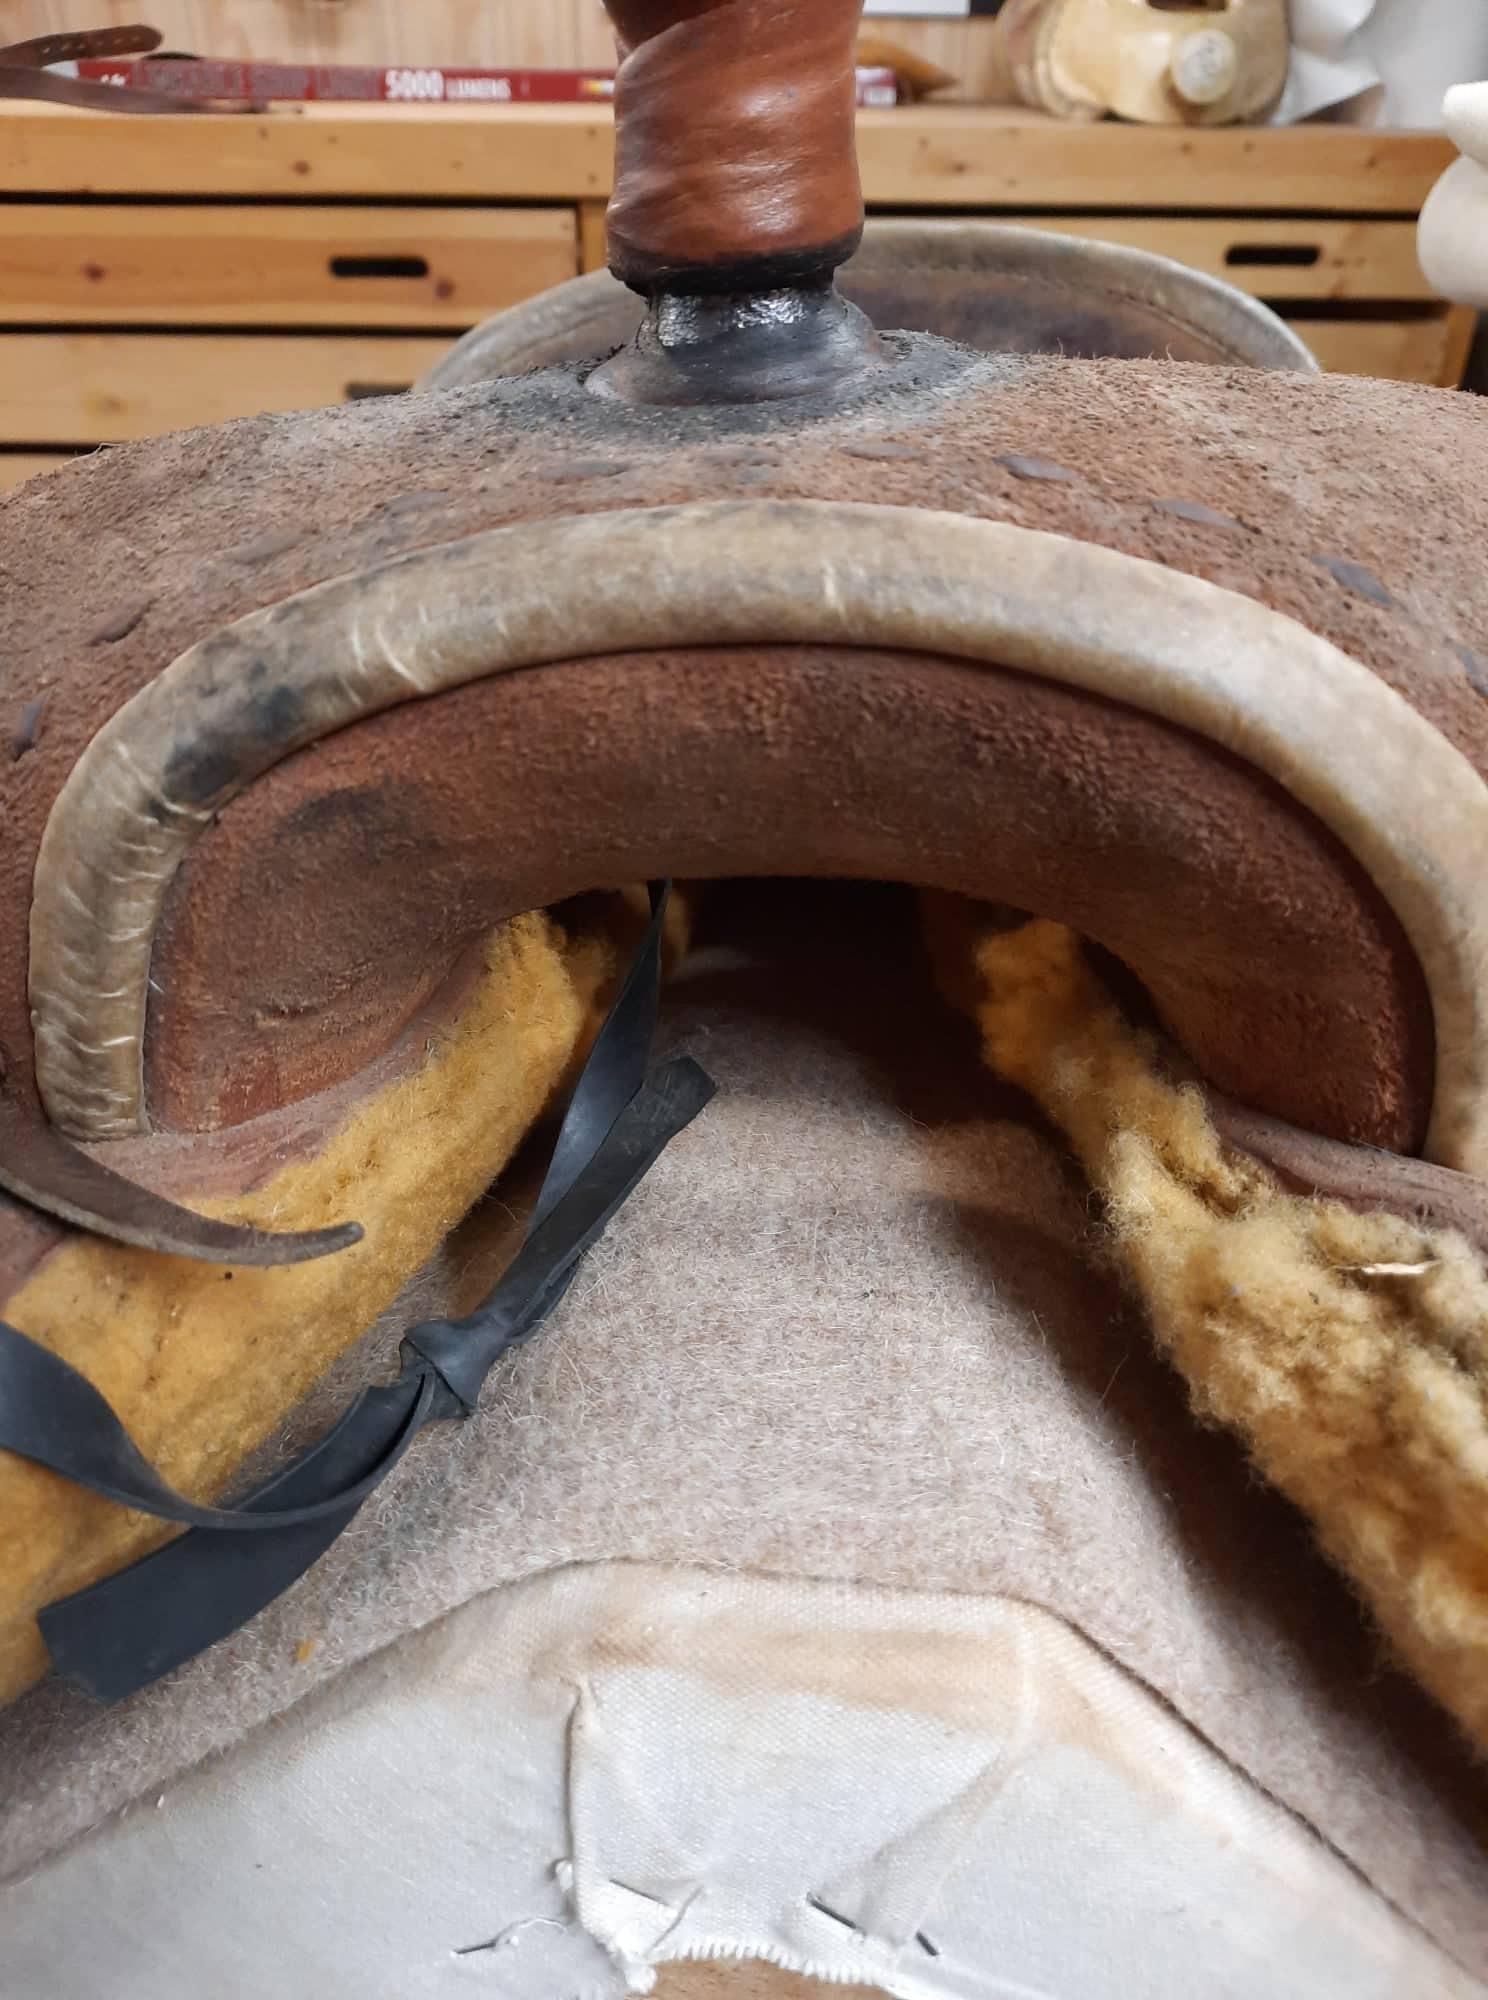
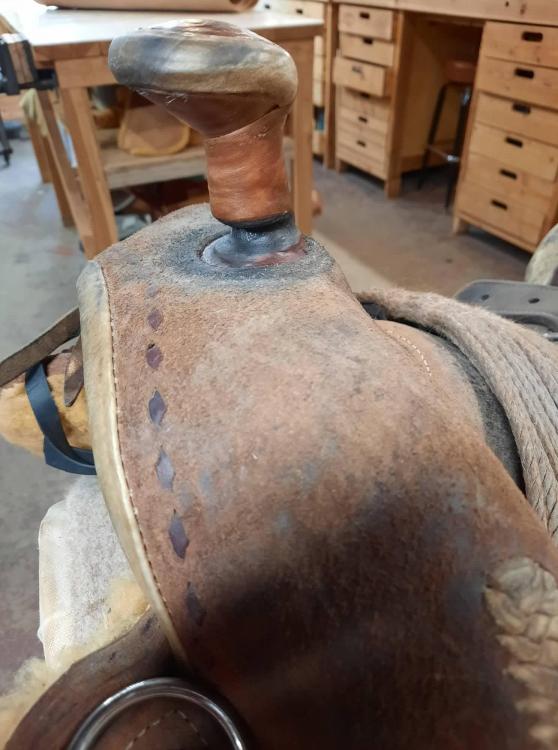
Good afternoon People, What are some options for repairing this horn, that do not include removing the swell cover? Thank you,

-
Thank you for the input Ron. The tree is a 16”timberline Wade.
-
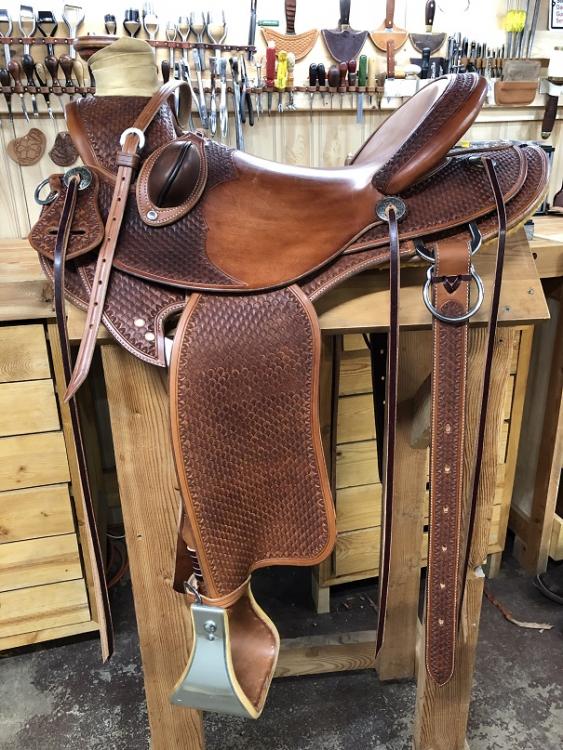
Good evening Folks, Finished this up a couple of weeks ago and looking for some feedback. Not on the tooling, which was provided by the customer who has an artist in the family. If you would be so kind as to give some uncensored suggestions as to how this saddle could be laid out better. I just have the one feeling and assure you it can't be hurt. I would like to continue making saddles and will only be able to do so if the overall look and feel suits the public. I know what I will do differently next time. If it was yours to build off of what would you like to see different? In advance, your feedback is genuinely appreciated. Rob Gerbitz
-
Much appreciated gentlemen.
-
Hello Folks, What are some methods you all use when making a dark oil saddle to achieve the shade of color you are going for? Thank you, Rob
-
Hello everyone, I am looking for names of people who do custom silver work for saddles. I have a lady that is looking to get a set of conchos and cantle plate made. Any suggestions would be greatly appreciated. Thank you, Rob
-
Ed, Don Gonzales has a nice tutorial on Youtube and provides the patterns for a shave kit.
-
Still bring green to saddle making I have a question about flat plate rigging attachment. I am working on re-fleecing a saddle that has a sewn on flat plate and am wondering what is the up-side to the time it takes to do that. Any thoughts would be welcome. Thank you.
-
I agree to all of the above. I am still in the learning process myself. I have worn out a DVD player walking through processes with Jeremiah and Shwartz. Jeremiah does well in teaching construction and some artistry where Shwartz is always aware of the artistry of the simple lines. Get all of them as you are able.
-
Ha! I think we may have been in the same class together Billy. And yes it was a very good class I am hoping to go again sometime. Thanks for the previous post. Real nice work.
-
Joining a braid. Braid as much as you can. Pull the short strand back out up the braid a little then weave in the new one to be used. Hide ends in the braid. No gluing or stitching required. Many braiders use this if they break a string while braiding. Another option would be to start your braid in the middle and hide all of your joints under the nose button. Beveling does a great deal to improve the look of a braid. A board, a nail, and a razor braid can be used to make an inexpensive beveling tool. Splitting the string down would be much desired. If you search this forum you will find a bunch of options for doing so.
-
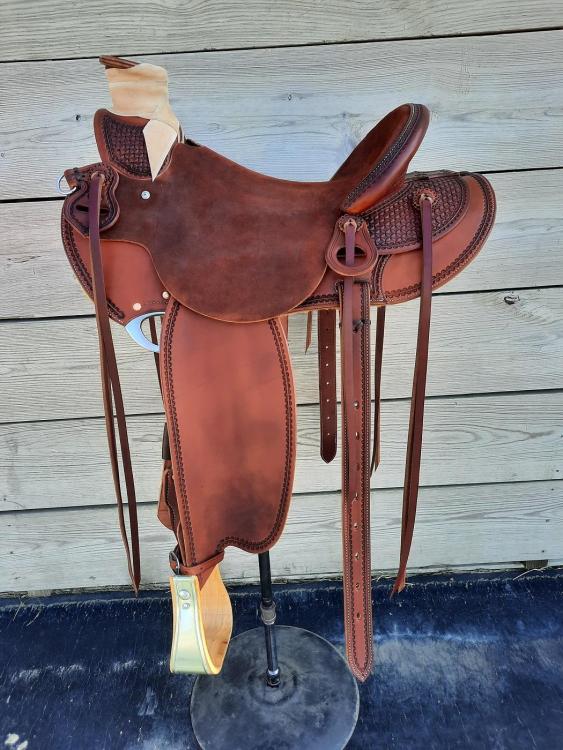
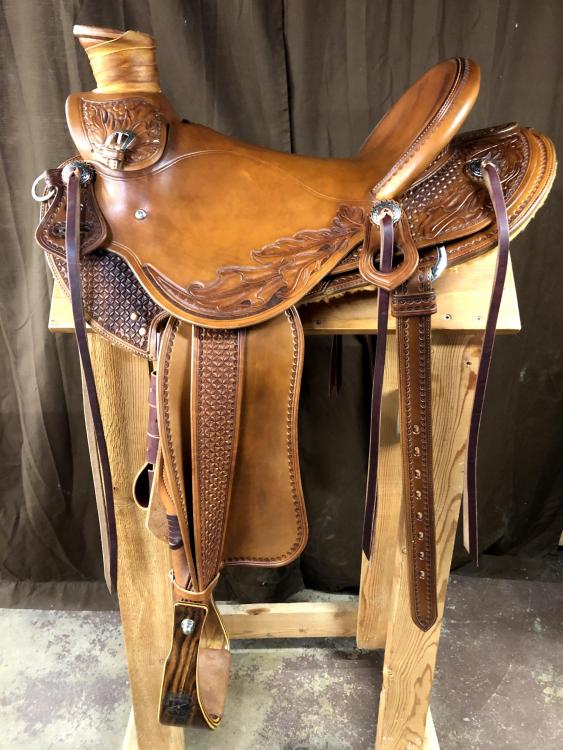
Great input gentlemen, very much appreciated. It is a challenge to balance out customer wants vs. what looks good. In this case the customer (my wife) wanted as shallow of skirts as possible and a heavy, easy to hold on to Cheyenne roll (it's her go to "OH !@%$" handle). I believe that a thinner and narrower roll with a steeper angle out the back may have helped the back end tie together a bit better. I am in the process of building another one with similar skirts and will be changing a few of these lines to see if I can improve the overall balance. Billy, I like and prefer the flat plate construction and in this saddle feel that it worked into the design as well as possible. Just saying that the additional lines that it adds to the saddle take some additional planning to make the finished appearance look planned and balanced. For instance I had made the flat plates prior to blocking the skirts. during the fit up the point where the flat plate leather meets the rear dee was hanging about a half inch below the skirts once they were blocked. Which took a bit of correcting on the plates before I could install them. Novice mistake. Tuition paid in full for that lesson. RDL, The color came from using Herman Oak's russet skirting and olive oil. Which prompted the purchase of a Cobra 14" splitter due to Weaver only selling 13/15 in the Russet. Bonus. Please don't shoot me for using olive oil. Not my preference, but in this case it produced the color Princess desired.
-
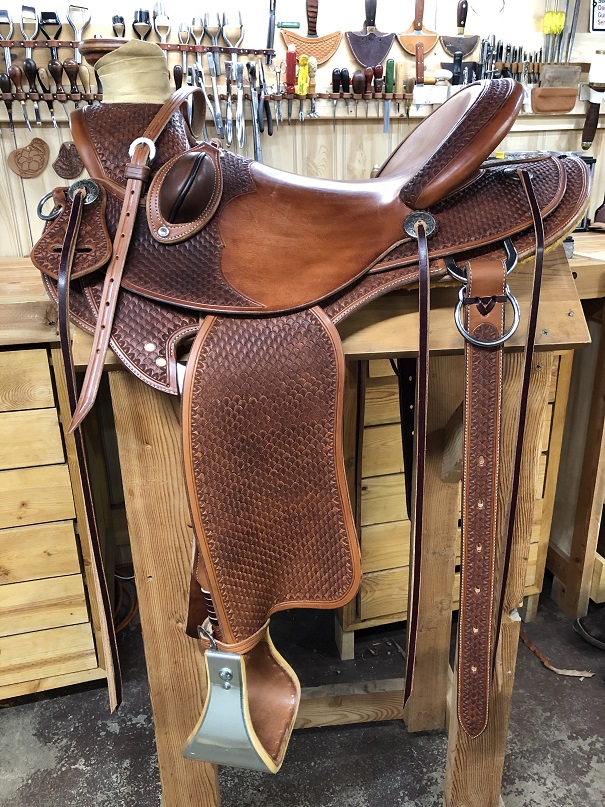
Hello Folks, Been a year or two since I've been around here. I am looking for some assistance with balance. I have a bunch to learn yet about construction. There are more pieces on this saddle that I did a few times and still didn't get them right, but got them close enough to live with. So here is my questions. Making a saddle that is built well and fits the horse and rider seems fairly straight forward. How do you make one line up to the eye to be appealing. I know what I like but is there has to be some rules of thumb to live by when cutting in the exterior lines that will make the front, back, top and bottom tie together well? With the pictured saddle we were trying to keep things as tight as possible without loosing the overall balance. I feel like the flat plate confounds things by adding an additional line to the overall view. I certainly prefer a flat plate, especially for this saddle which will be on a bunch of colts and likely roped out of some, just feel like there was a better way to cut the lines on it. How do you set the lines on a saddle? Thank you, Rob Gerbitz
-
Hello Folks, Been a year or two since I've been around here. I am looking for some assistance with balance. I have a bunch to learn yet about construction. There are more pieces on this saddle that I did a few times and still didn't get them right, but got them close enough to live with. So here is my questions. Making a saddle that is built well and fits the horse and rider seems fairly straight forward. How do you make one line up to the eye to be appealing. I know what I like but is there has to be some rules of thumb to live by when cutting in the exterior lines that will make the front, back, top and bottom tie together well? With the pictured saddle we were trying to keep things as tight as possible without loosing the overall balance. I feel like the flat plate confounds things by adding an additional line to the overall view. I certainly prefer a flat plate, especially for this saddle which will be on a bunch of colts and likely roped out of some, just feel like there was a better way to cut the lines on it. How do you set the lines on a saddle? Thank you, Rob Gerbitz

-
Look up the T-ll tennis awl made by Osborne. They are inexpensive and can be easily modified to suit your needs.
-
12 inch planner blades work well. Usually have to buy in sets of three, but they are made of good steel and 4 sides. once they are tuned up you can scrap one hide without having to stop and sharpen anything.
-
Been awhile since I've had a chance to get on here. Been even longer since I have had an oppurtunity to ruin a hide. I know I have thrown away more hides than I really care to admit to. Thanks to alot of people willing to suffer my ignorace I have picked up on some key peices of info. They are as follows: - The best rawhide comes from a skinny animal - Regardless of your method of dehairing and drying the more fat that is in/on the hide the more interference you will have to the process. - The chemist say that liming works from the flesh side. The lime penetrates through fat slowly, which if the fat and connective tissue isn't thouroughly removed will make for uneven hair removal. Or in some of my cases, a hide that was useless in some areas with hair firmly attached in others. - If using hides from feeder steers/heifers it is best to flesh as soon as possible. The more body heat in the hide the better. If using a old cow, not to big of deal. - If drying a hide to scrap the hair once dried the more even you can get the hide prior to complete dry down the better. Fleshing is important, some will take a sander to the hide before completely dry to thin down some of the thicker areas to get a more even drying process. You will find if to much fat. or if the hide is thicker, that if not dryed evenly the hide will dry with wrinkles in it making it very difficult to remove the hair without damaging the top grain of the hide. Winter hair on animals can be an issue if not clipped of prior to drying. - Sodium Sulfide will slip hair very effectively. It is a mess. It smells horrible. Your wife may make you sleep in the barn for a night or two till the smell wears off of you. But, In 30 minutes to an hour you can have a hide that is as slick as a babies back side. (Thank you Rod and Denise) - Red haired animals make the prettiest rawhide. Doesn't matter which method used. The farther away from black you can get the better looking the rawhide. - Chiggers suck. Nothing worse than spending a bunch of time fleshing, stirring, slipping (sleeping in the barn) streching a hide to find that bugs and barb wire have had their way with the best parts of your hide. - If dry scraping a hide a solid peice of iron with 4 perfectly square and sharp edges can mean the difference between being able to get out of bed the next day on your own or needing a crane to lift you out. Lay it over a barrel or post and sit on it. You can do it in the frame standing up but I'd rather sit and work whenever possible. - The first lesson to learn in making rawhide is how to get and maintain a sharp edge on any tool you will be using. That tution is best paid with books and videos, not scars and stiches. - The second lesson is temper. If it not tempered right don't work with it. To hard and blades will bend and break. To wet the hide will strech and look like crap once braided. Just right the heavens will open and Dorrance himself will sit by your side and tell you stories of days gone by as you effortlessly cut the perfect strands. Perfect temper takes feel, the only way to learn feel is to find out what feels bad and what feels good. If you are just getting started and have no one near by to learn from to feel what perfect is you are going to be throwing away some hide. It's OK there are thousands of feet of rawhide being born everyday. - Maintaining temper while working. Feel will tell you when you need to add water or let dry out a bit. You can't braid for 2 hours straight and not have a plan on how to maintain the perfect temper. Spray bottles, plastic bags, soaps, potions, barrels, damp towels, humidors every one has its place depending on the current humidity of the day. There are many more tips that can be added to this list and hopefully many of you will do so. If not for the advise I gleaned from those willing to share I would have given up on braiding altogether. I am a long way from being inducted into the TCAA, but some day I may get the perfect hide, not ruin it, have my tution payed in full, and be able to bring to bear the knowledge and skill of those willing to share and create something worthy of recognition by my peers. Best of luck, Rob
-
That's a nice second.
-
You all are awesome! Thank you for your input. I charged $500 plus shipping back to him. The seat was the only part that was rough out the rest of the saddle was smooth. I dic clean and lightly reoiled it. I was relucant to oil to much he must have recently oiled the leather, felt as though it had been. Thanks again for the input. Rob
-
Hello all, I just finished up rebuilding parts of a saddle for friend. I know what I am going to charge him for the work but am curious as to what some of you might charge him. Here is a list of the repairs. Refleeced with sheepskin from Weaver. Restringed and new leather conchos New flat plate rigging, reused hardware New rear, wider cinich. Reused hardware replace stirrup leathers with new blevens buckles. New latigo, hobble, and cinch keepers New rope strap buckle New latigos both sides I would appreciate any and all thoughts on the matter. Thank you, Rob