-
Posts
607 -
Joined
-
Last visited
Content Type
Profiles
Forums
Events
Blogs
Gallery
Store
Everything posted by BillB
-
Although the quality of the leather used is important, it is not the only factor involved. Tools, Time, Practice, Leaning and Talent are also involved. Even if someone bought me the same equipment that the top of the line professional baseball players use, I will still be a mediocre baseball player. Over time with lots of practice I might even be a good player and make it to a AAA / semi pro. My athletic abilities apply better to Cross Country and the Middle Distances in track. So being good and even great at something is also understanding what one is not good or great at. I do bifolds for 8.5" by 11" writing tablets and purses. I do not have the artistic abilities to do leather masks such as those done by Leatheroo. By concentrating on the things I am good at, some day I hope to reach the masters level. These are my thoughts on this matter.
-

Chevron Or Herringbone Lacing Pattern
BillB replied to pistol packin mama's topic in How Do I Do That?
Ramrod, Glad I could help. -

Chevron Or Herringbone Lacing Pattern
BillB replied to pistol packin mama's topic in How Do I Do That?
One way to create a herringbone pattern is to punch a series of three hole lines. (I will use numbers to represent the holes so I can then explain the lacing pattern. 1.........3......... 6.........9.........12 ...........4..........7.........10.......13.........15 2.........5..........8..........11......14 Starting with a loop of lacing and coming from the back of the belt through holes 1 & 2 and into 4. Then around the back to holes 3 & 5 back to the front and through hole 7. Repeat thus to the final hole which in this case is 15 and tie off in the back. The length of the pattern can be increased by adding more holes. The width and depth of the chevron or herringbone is adjusted by increasing the distance between the holes. Just keep the distances between the end holes and the center hole equal. My original post had spaces between the numbers which got compressed out when I posted. The periods just represent open space. I hope this helps. BillB -
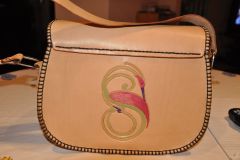
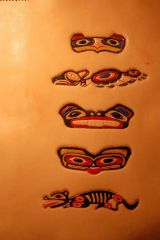
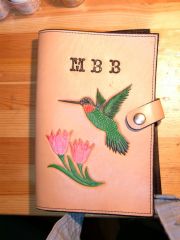
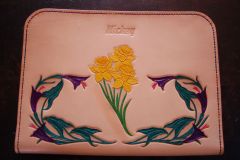
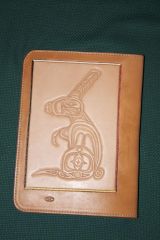
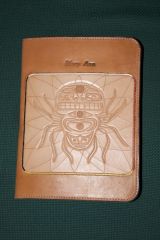
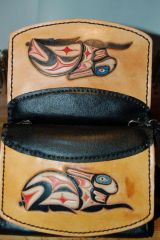
This is a collection of the work I have done over the last 3 years. It includes Native American Style, Celtic, Traditional, Military Art
-
From the album: Projects by BillB
© © leatherworker.net
-
From the album: Projects by BillB
© © leatherworker.net
-
From the album: Projects by BillB
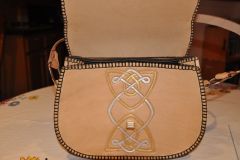
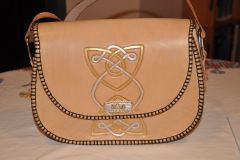
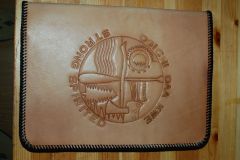
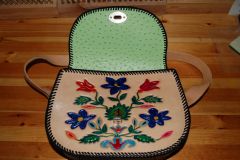
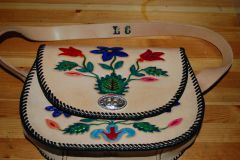
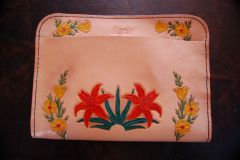
This is a celtic pattern on the Tandy Revival Handbag kit (#44373-00). On this project, I chose to sew the edges and seams using a two needle blanket stitch.© © leatherworker.net
-
From the album: Projects by BillB
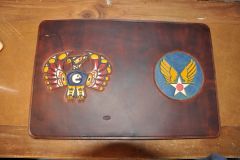
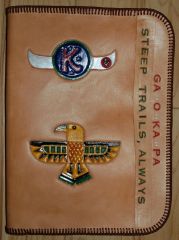
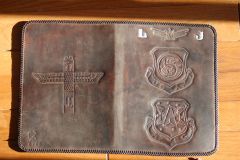
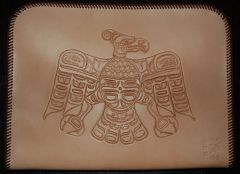
On the front of the bifold (right side of photo) is the Hap Arnold Wings from the USAF. On the back of the bifold (left side of photo) is a Thunderbird Totem (ruler of the sky).© © leatherworker.net
-
From the album: Projects by BillB
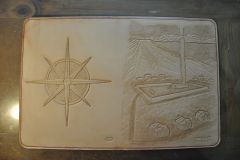
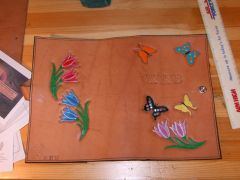
The front of the bifold (right hand side of picture) is my interpretation of the Lord's Tabernacle during the time of Moses. The back of the bifold (left side of photo) is a Compass Rose with the fish symbol (Christ) in the center.© © leatherworker.net
-

Quick Question About The Order You Do Things In...
BillB replied to Citrus's topic in How Do I Do That?
Hannah x, When I have done holsters, knife shealths, quivers, etc. I have always tooled on the flat and then done the forming. I do it this way since I can get good clean impressions with the tool on the flat where as trying to tool on the curve could yield lighter impressions on the edges of the tool pattern since the leather would be curving away. Or if you try to get the edges to impress you would run the risk of cutting through the leather with the center of the tool. The one trick of tooling first then forming second is to not get the leather wet, it should only be moist as in a good casing. If it is too wet, the impressions will come out when you form the leather. It does make forming the leather a slower process since you should do it in increments and not all in one shot. That is at least my experience. Others may have other solutions. I hope this helps. BillB -
You might want to try using a Dremel with a soft buffing tool. In this case you would get the buffing tool wet with solution, then at high RPM lightly go over the edge. You will be trading rotation speed for pressure to generate the heat for burnishing. BillB
-
I have a 1959 Triumph Roadster (TR3A) that I restored. The interior is all leather. The dashboard is very thin leather glued to the metal backing. The door panels, much like the ones described, i.e. vertical with only a hole for the door pull cable, is made out of thin leather, thin foam, and a particle board for backing. The problem I see with using leather only for the door panel is the effects weather will have on the leather. I think it will eventually begin to droop. I would go with a backing of some sort. It will also help with the vibration and flexing during turns. BillB
-
Mike, I understand. I am more familiar with the in-lay term used in wood working where various pieces and types of wood "lay in" between each other to make a deign or pattern. When finished, all the surfaces would be the same level. In filigree wood work, there would be a single piece of wood that would have piercings or cutouts and the remaining wood would be the pattern or the outline of the patterns. Some times another piece of wood of opposite color would be place behind that first piece. So maybe the two terms would be "in-lay" and "behind-lay". 8-) The example that someone gave of stained glass would actually be inlay since the pieces of glass lay in the frame of the lead foil which lays between the pieces. In either case, showing an example clear shows what one is trying to discuss regards of the terms each one is familiar with. Again. TKS BillB
-
I am also confused. In my experience that you are talking about two different designs: Filigree and Inlay. In Filigree, the upper layer is cut so that a lower layer shows through or you can see through it. In Inlay all the pieces fit together at the same level like a jigsaw puzzle. Here is the Wikipedia page on Filigree http://en.wikipedia.org/wiki/Filigree Here is the wikipedia page on Inlay http://en.wikipedia.org/wiki/Inlay I hope this helps. BillB
-

Where's The Quality In "custom" Gone
BillB replied to Chief31794's topic in Leatherwork Conversation
K-Man, There are two sides to the Quality question, at least in my experience in life both as a leathercrafts man and as a Scientist. The first side of Quality is that of the person producing something. Wether it be a piece of leather work or a scientific experiment or Theoretical paper. This Quality is based on the persons ethics and standards. The second side of Quality is that of the person or people receiving or purchasing the product. This has a lot to do with perception. There is rule from the Sword of Truth fantasy book series that comes to mind. It goes like this: "Anyone can be made to believe a lie, either because they want to believe it is true or they are afraid it is true. Even Wizards can be fooled." In the scientific world the last "great" example of this was the "Cold Fusion" issue from the 1990's. Everyone wanted to believe it was true since we were all trying to find alternate energy sources. In the end it was found to be a poorly run experiment and had not followed basic scientific principals dealing with quality control. You can see similar effects at any craft show where folks want to believe they are getting a "handcrafted" or "custom" made item. A Native American friend of mine had to break ties with a long time friend since that friend was selling "Hand Made Native American" items that had come from China and was telling the customers about it. In the end we have to live with ourselves and what we do and answer to our maker, Great Spirit, God ... for what we have done. I control my destiny. I can not control others. If someone brings an item to me and asks my opinion, I will provide it with constructive criticism, not destructive criticism on how the item could be better. That is the best I can do and I am willing to live with it. The above is my opinion and I hope you find it useful. BillB -
One trick we used at the Academy to keep the shine on the toe from getting buckled when you walked and to allow you to walk normally was to take a razor blade and very carefully cut a line from one side of the toe to the other side just in front of the buckling. This cut has to be deep enough to create a "fracture line" or "expansion joint" but not deep enough to penetrate the leather and ruin the shoe/boot. In some version of boots this cut line was not needed since the toe leather was a separate piece of leather sewn on and this seam created the expansion zone. BillB
-
Robin, You may want to post this request in the "Leatherwork.net > Fabrication > Leather Sewing Machines" section. Or the "Leatherworker.net > Marketplace > Wanted" section. BillB
-
AL, Most Dyes and Finishes of the ECOFLOW name are water base and you should be able to use water to thin and clean. Fiebings Leather Dye is alcohol base, where as the Institutional Leather Dye is water base. As for thinners and cleaners, I am pretty sure that the Oil Base and Alcohol base dyes can be thinned with the same thinner. If you are buying a locally supplied thinner, then do a small test by taking a small amount of thinner and and using an eye dropper, drop a single drop of dye into the small amount of thinner and watch to see how it dissolves. If it stays as a glob suspended in the thinner, it won't work. As for finishes, I prefer something like Mink Oil. My past experience with the "sheen" type finishes is that it leaves a plastic coating on the surface of the leather. This seals the leather and does not allow it to breath. For some applications this may be useful where as in others it can promote rotting from the inside out. Have you considered locally produced wood stains? Wood is closer to the structure of leather than material is and if it is a penetrating stain, it should work. Don't use any thing that is just a surface coating since it will not penetrate. In the old old days, Native Americans made their dies from flowers, fruits, etc. I don't know if there are any of those types of dyes available available in your local area. You might look to some of your local artisans that do wood working. Good Luck and let us all know how well it works out and what you finally use. And please continue learning and asking questions, it helps us grow. BillB
-
Also check automotive parts and accessories suppliers. There are kits to felt clove boxes and other storage areas on cars that originally have the bare plastic surface showing. As for pool table cloth, be careful on what you get. There are a variety of cloths now available to be used to cover pool tables and they are not all made of felt. I just finished recovering an antique table for my sister and the material they bought is a really nice tight weave with a very closely sheared playing surface. The last table I used Felt on we used a 20oz weight and that might work well for this purpose.
-
AL, The bases do make a difference at least in my experience. I have not tried fabric dyes like RIT on leather. Here are some things you should think about: 1. Leather is not a fabric. Leather is the skin of a animal that has been put through a preservation process called tanning. This process uses chemicals (natural in some process and man made in other) to achieve this function. Any chemical residue can have a reaction any dyes, preservatives or finishes. Fabric, on the other hand is woven (unless it is a felt like material) from threads. Each thread is a column or strand of fibers that have been twisted together in the spinning process. Why is this important? Each thread in a woven material can act as a wick to move the dye into the material.How it moves into the material will depend on the components of the thread and how they are woven together. Leather is a mesh of individual cells. How a liquid is wicked into the leather can, at times, appear to be random. 2. How thick is the leather I am going to dye. 3. How much penetration do I want on the dye, i.e. surface dye or all the way through or only part way through. If I am making a "work" holster that will get used and abused, then I want the dye to penetrate all the way through the leather so that when the leather gets scared. If I am doing something that needs to have a surface appearance of being painted (Like a service logo for the USAF) I will use an acrylic dye that behaves more like a surface paint. 4. How much control do I want on how the dye spreads through the leather. 5. Does the dye base match the intended use. For example if I am making something that is going to see a lot of outdoor use and be exposed to weather (rain, snow, mud, dirt) and will receive a lot of cleaning and oiling, then I will use an oil base or alcohol base dye since my experience is that these bases have the best penetration into the leather and lock the dye to the leather fibers (less chance of the dye running) Since I do one of a kind custom items, I keep a collection of dyes that I have found that work for me. These include some from all the different bases (oil alcohol, acrylic, water). Again. my suggestion for you is to buy a small bottle of the same color from each of the bases and do some testing to determine which types work best for your application. By the way, I will also use different dye bases on the same piece depending on the affect I am trying to achieve. I hope this helps. BillB
-
There is an old saying that goes: "If it ain't broke, don't fix it". BillB
-
Avid Learner, I have never tie dyed leather but I do dip dye things that I want a solid and penetrating dye applied to. The dye's I prefer to use are from Fiebing. You can research them by going to www.fiebing.com. Today there are a number of different bases that are used for dye's: oil, alcohol, acrylic and water. For my uses, the bases does make a difference. You may want to buy a sample from each in the same color and do some experimenting to determine which base works best. I have also found that some bases, such as water, require that you also put a finish on the leather to lock in the color so it does not bleed. BillB
-
LukeA, There are several ways to get started: 1. Do it yourself A. In the Leatherworker Board section titled "How do I do That?" there are a number of postings pinned at the very top that explain how to do things like: How to Case Leather which it the process of prepping leather for tooling; or how to make Chaps. B. There are also other postings in various section of the board that deal with specifics of that subject area. The section on "Getting Started" for example. C. Ask lots of questions here. D. Get a starter kit from Tandy and have at it. 2. Do it yourself with some teaching; If there is a Tandy shop near by, then you can go to them and get some lessons or go to www.TandyLeatherfactory.com and look through their kits, projects and at the bottom of the main page is a section on Leathercraft ABC and Videos. 3. Instruction - I have only seen a few courses on Leathercraft and only one of them started at the beginning. The others assumed some level of proficiency in leathercrafts. The beginners course was down in the Carolinas at one of the Art Schools in the mountains. You might be able to find a similar course in CA . You can also check this site in the Services forum or post that you are willing to pay for instruction under the Wanted forum. It all depends on: a. How do you want to learn and what is the best method for you to learn; b. how far can you travel; c. how much are you willing to spend. BillB
-
I used to do leather lacing and hand sewing on my stuff. Today I do machine sewing for most. Why, because years ago I broke my wrist in an accident and still have bone chips floating in the wrist. There are somethings that I just can not do anymore by hand and least not a lot of. I will still do some lacing, but only for special people. So don't forget about us folks that have a disability. BillB
-

Al Stohlman Brand Damascus Medium Round Knife
BillB replied to Phatdaddy's topic in Leatherwork Conversation
Phatdaddy, I think you did right by going and looking at the product. First off, I do not like product bashing. If it was not for Tandy we would never get new folks into leather crafts. Just like any product line, there are high end items and lower end items. Cost always has to come into the equation as to the value of an item. WyomingSlick did a good job on hitting on a number of topics one needs to consider when looking at a knife. One thing that was not touched on was the amount of usage the item would receive. I have been doing leather as a hobby for over 30 years and do not use the items like someone that is doing a business so my requirements are different than someone that is doing this for a lively hood. The best knife I have is one that was custom made for me 40 years ago out of Auto Suspension Spring Steel. The sharpest knife I ever used was a Gerber Stainless Steel Hunting knife which was hallow ground (concave bevel on both sides of the edge). It would hold an edge for a year, but had to go back to the factory for sharpening. In this case, it was as sharp as a razor since we did use it to shave with. So here is my two cents: Figure out what you need, what you can afford, and what you plan to use it for, then go shopping and find the knife that fits your needs and not someone else. BillB.


