BillB
-
Posts
607 -
Joined
-
Last visited
Content Type
Profiles
Forums
Events
Blogs
Gallery
Store
Everything posted by BillB
-
Welcome to the Forum. Since you have already found your way around, no need to explain. Glad you decided to introduce yourself. Do you plan to do leather craft as a Hobby or plan to go into it as a full time business or just not sure yet? What got you interested? BillB
-
Natalie, I have found that doing the foreground items first always works best. So on a celtic knot it would be the cords that go over the top. SInce they are always changing from one intersection to the next, I start with all the intersections rather than trying to follow one cord all the way around. Once I have done all the intersection, the runs are easy. BillB
-
Little Accident With Fiebings Leathercraft Cement
BillB replied to reddevil76's topic in How Do I Do That?
Did you try Fiebings deglazer or any of their other solvents? Worse case solution is to fill a small pan or bucket with Fiebings USMC Black and drop the whole thing into it and let the dye soak through. Now it is a black wallet rather than a brown. Once you buff the surfaces I don't think anyone but you will know what happened in that one spot. I stopped using the white leather cement and went back to plain old rubber cement due to some of the problems you are having. BillB -
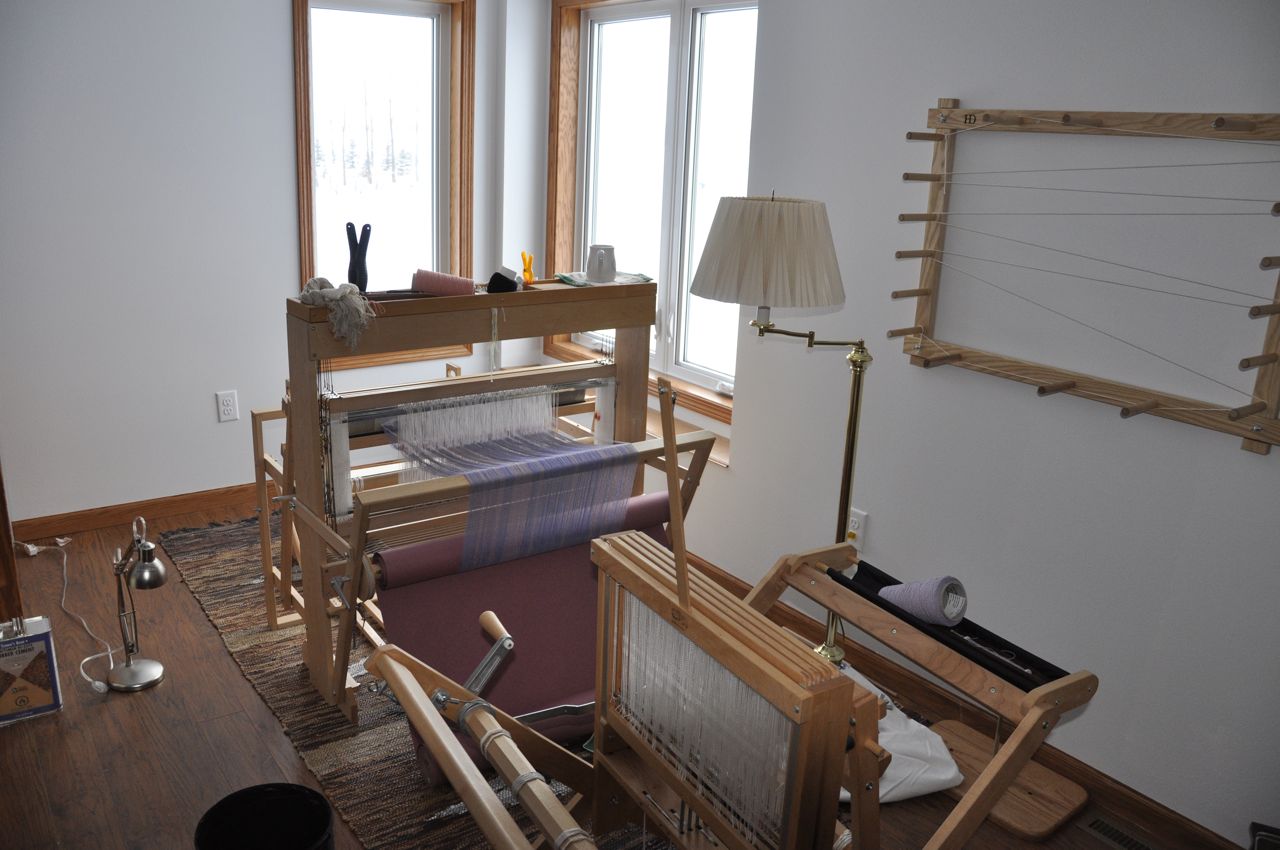
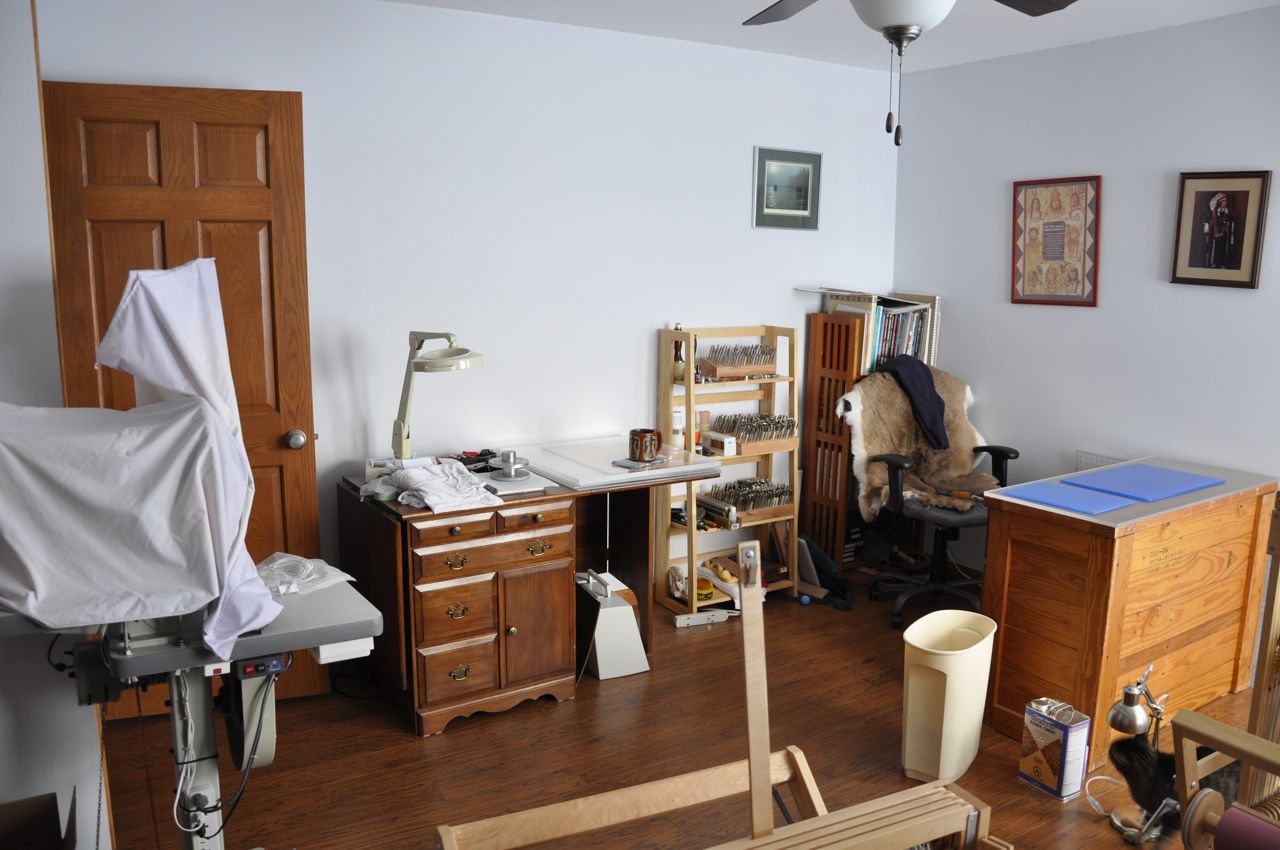
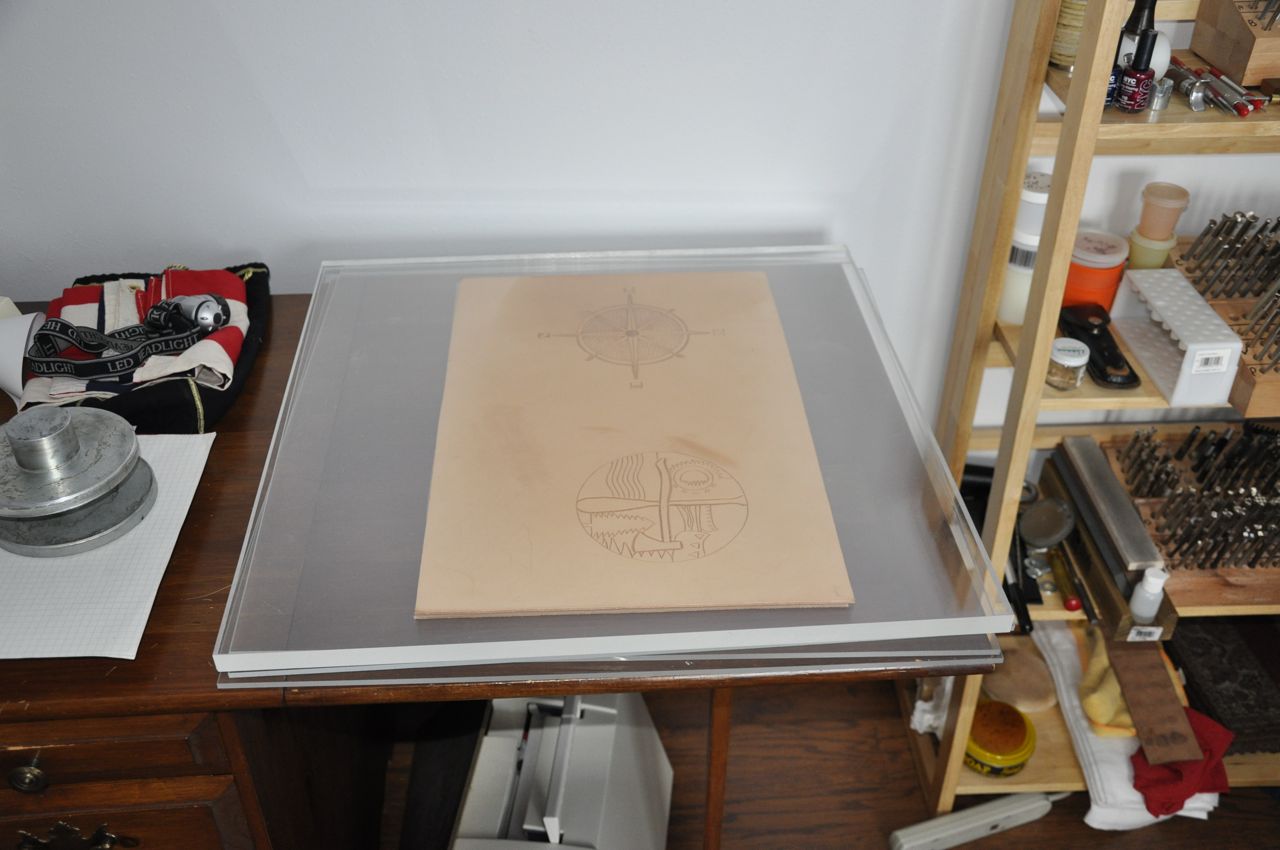
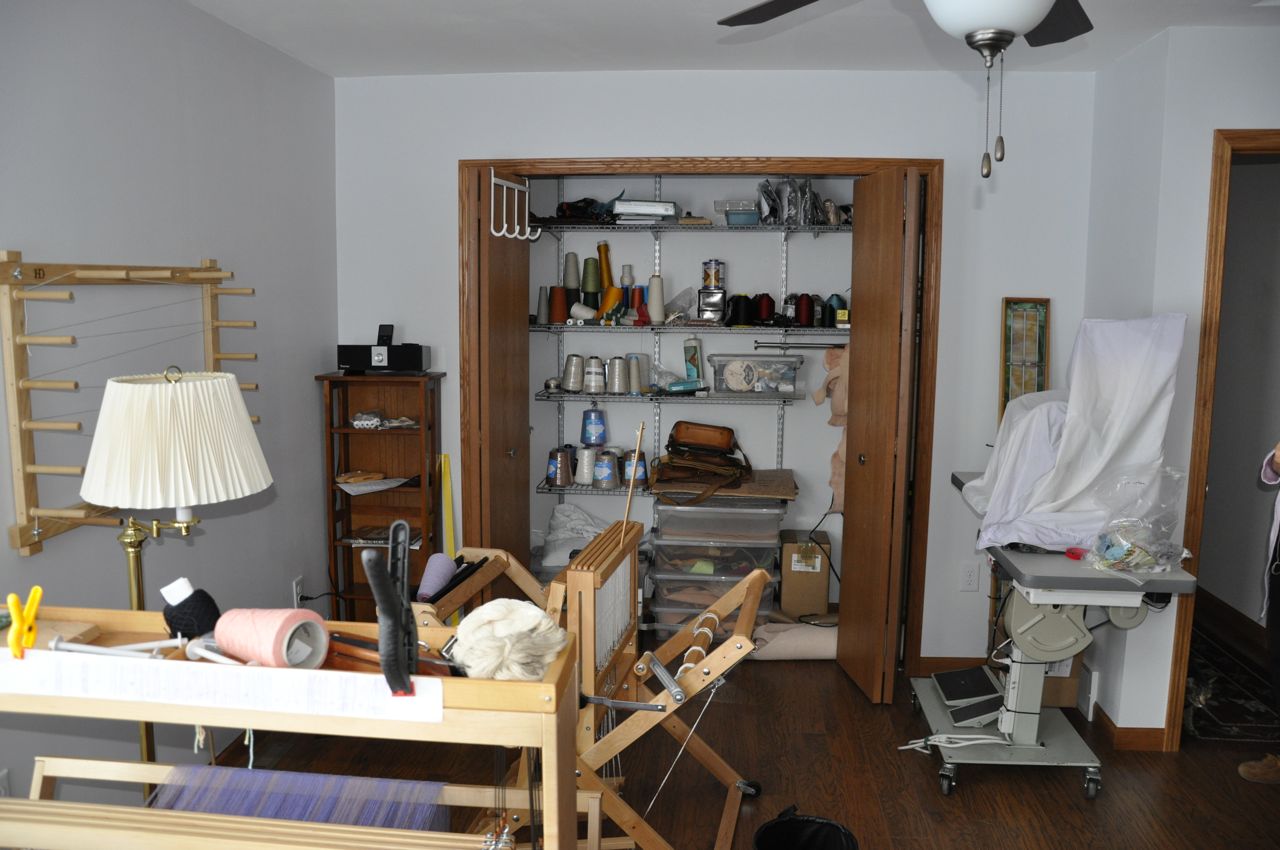
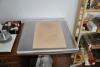
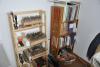
Here are pictures of the spare bedroom that my wife and I converted to our craft room. She does weaving and has two looms. The desk that I use was from Salvation Army for $25. The Plexiglass sheet for the top is from Professionalplastics.com and is 1/2" thick. Buy having it cover the whole surface of the desk, I get a nice work surface and it transmits all the force and noise to all the legs and to the floor. When I used pounding boards or rock smaller than the open space under the desk work area, it acted like the head of a drum and actually increased the noise. We took out the cloths hanging type shelving in the closet and replaced it with a modular storage system. Most of my bulk leather sides is hanging over the railing by the step leading to our lower level. I plan to build a hanging rack for the leather sides in the mechanical room for the house. I don't mind having my tools on the book case behind me and in the drawers of the desk since it gives my an open view out the windows of the room BillB


-
Ben, welcome to the Forum. Glad you have found the information quite useful. Although you have just started (we have all been there at least once) we would still like to see pictures of your work. I am on my second time through all the learning curves. I did leather back in the 70's with my grandfathers help. I left for 20 years and I am now back doing it primarily as a hobby in my retirement. I was amazed at the width and breadth of what is leather craft and leather art today as well as the number of suppliers. I know there are a number of members from down under on this forum and I am sure you will get to know them. Since you have been on the forum for a while, I don't need to tell you much about it. I look forward to seeing some of your work. BillB
-
Send me a message and we can exchange the appropriate information. Be happy to meet with you when you are in the area and the roads clear up a little bit. Do you use the Tandy Store in Fargo? BillB
-
Welcome to the forum. You may want to look under Fabrication and in the Patterns and Templates forum for suggestions and help on you drawing and patterns. Hope to see some of your work soon. BillB
-
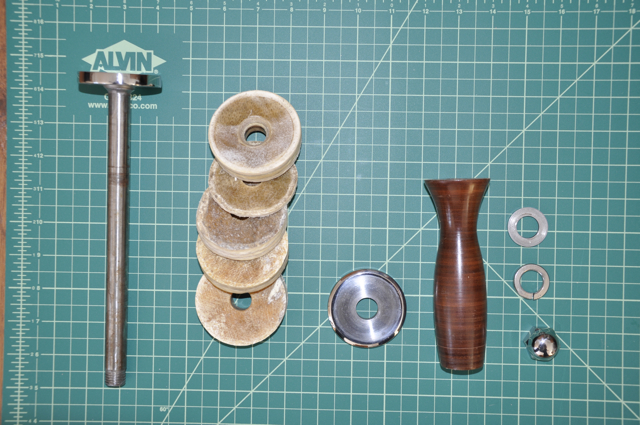
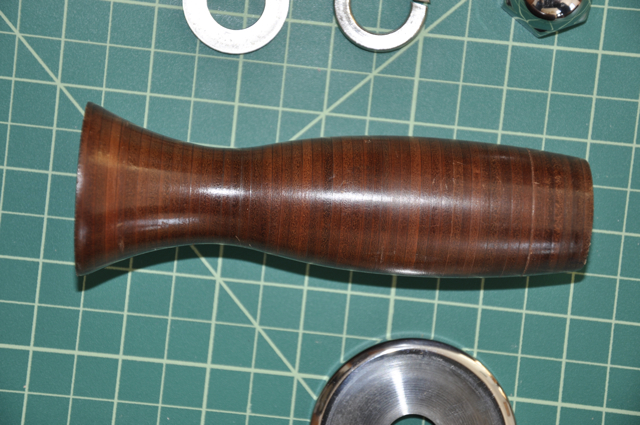
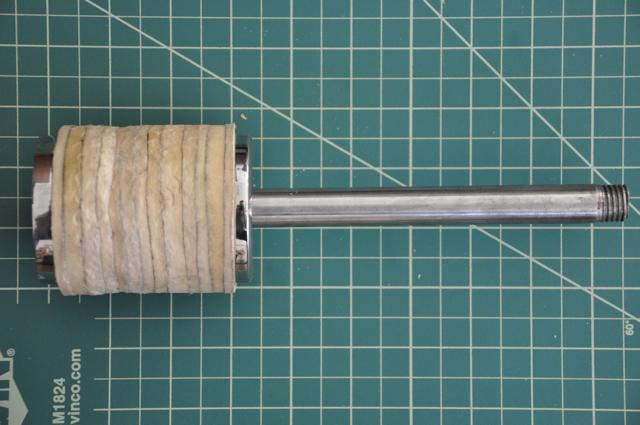
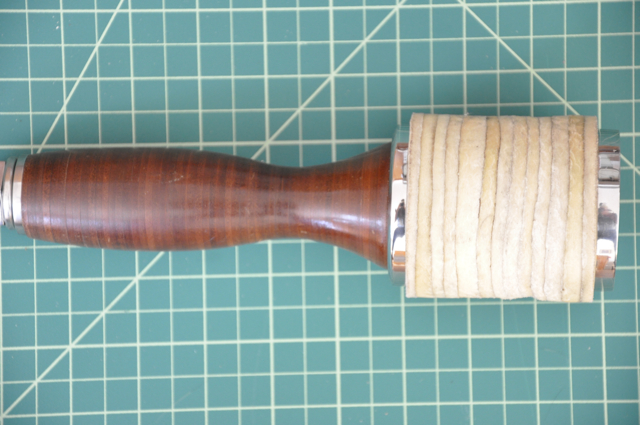
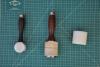
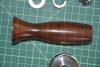
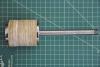
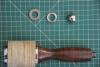
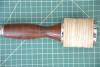
Here are the pictures I promised. Picture Name - Content Al Stohlman Mallet and Maul - The mallet is on the left, the maul with leather head is in the middle and the poly head for the maul is on the right. Both the Mallet and the Maul have leather handles not wood. Maul Siassembled - This shows the main components of the Maul. On the left is the main shaft with the top pressure plate welded to it and threads on the other end. Next are the raw hide discs, the second pressure plate, the leather handle also made from leather discs, the third pressure plate, lock nut and cap nut. Leather Handle - Close up of the leather handle so you can see the layering or rings of the leather discs. Reassembly 1, 2, 3, and 4 show the steps to reassemble the maul. In this case I did use the leather head or I could have used the poly head. I prefer the leather head. Things I like about the leather head are: 1. As it is used and the same location on the head is struck the leather compresses and makes a nice sweet spot; 2. If the leather compresses too much due to not enough pressure, I can disassemble the head, soak each of the leather discs, shape them back to their round shape, reassemble the head and make sure I have more pressure (tighten the nut more). If there are not enough threads, I can always added another leather disc. Things I don't like are: The finish on the leather handle. When the made these Al Stohlman Mallets and Maul they copied the way they looked after years of use and did not realize that the surface and coloring on the handle was done by hand oils, dirt and sweat. The finish is actually too smooth for my liking and I end up gripping the handle harder than I should need to. By taking sand paper and roughing it up, I get a much firmer grip with less hand pressure. This makes a difference when you are using a tool for a long time. I hope this helps. BillN


-
Maureen and Sean, Welcome to the forum. With your experience, I hope you will join in on the conversations and help extend the knowledge base that is here. Again, welcome to the forum. BillN
-
Chase73, Welcome to the forum. Looks like you have a great start. Yes, this is a hobby that will stick with you for a lifetime and in some cases it can become more than a hobby. Again, great start and welcome to the forum. BillB
-
Simran, Welcome to the forum from Western Minnesota (Fergus Falls area). Since you have already done some posting, I don't really need to tell you about the kindred spirits and friendly folks that spend their time here. Glad you decided to introduce yourself. Again welcome to the forum. BillB
-
JohnJ, You might want to consider posting this under the "Critique My Work" forum or the "How do I do That" forum. SInce it is here, here are my comments: Do you plan to use this for a storage bag at you house or on trips? Are you riding 2 Up? I road an FLTRI with bags and box and there is not a lot of storage on long trips. If I were making a bag for a removable wind shield and I planned to take it on trips for those times I wanted to ride without the wind shield, I would make it out of light leather so it could be rolled up into a small package for storage on the bike when not in use. And even then I would have to consider using something like soft buckskin so that the flesh side of the leather does not scuff or scratch the wind shield. Do you plan to line the case with a soft cloth to protect the windshield from scuffing and scratching? Just some things to think about. BillB
-
TomG, You have the concept correct. Do not use glue on the leather circles. The pressure from the two pressure plates (one on either end of the stack) should be sufficient to provide the pressure to keep the leather compressed enough to provide the proper striking force. Here are some things to consider: Do you use a Lag Bolt and bolt into the wooden handle or do you drill a hole through the handle and run the bolt all the way through? I would make and that would be to use a bolt long enough to run it through the wooden handle. That way you can achieve a greater compression force on the leather. Do you make the handle out of leather as well and then shape the stacked leather circles to fit you hand? This is the Al Stohlman style maul. Tandy used to sell this with both a leather head and a poly head. Now they only show the poly head. I will take a picture of mine and put it in my next post. BillN
-
Watersnake, Welcome to the forum. When did you start leather crafts? What type of leather crafts are you interested in? As you can see from this site, there are lots of paths to go down and lots of people to meet and conversations to have. Please walk around and sample as much as possible and find the areas of interest you like the most. Most importantly, join in on the conversations and show us some of your work, no matter how bad you might think it looks. We all started there at one time or another and some of us have been back to the beginning more than once. Coffee and donuts are down the hall and are free. By the way, there are several Aussies (sp?) on the site. Again, welcome to the forum. BillB
-
Scott, At one time there was a ruby blade being made. I think that is what you have with the steel and red blade. They were supposed to be better than the steel blades and were before ceramic blades. I don't know how you would sharpen it or what happens if the ruby gets chipped. I think they are man made rubies and not natural. BillN
-
Reddevil76 I would need to know more about the condition of the "new leather" and what you plan to do next. If you have finished all the tooling, staining and finishing, and you just want to clean the piece, then yes. I do not use Saddle Soap as a finish. I use it as a cleaner and conditioner. If you want to prep the leather for a finish, I would use a deglazer to remove any dirt and oils left on the surface by tools and hands. I would then do my staining and finishing. I prefer Fiebings products for Dyes and Stains. I use carnuaba creme for a finish or just plain non-coloring neatsfoot oil (depends on the item and how it will be used). I might then use saddle soap to take any residual finishing dyes and oils off the item and buff to a nice soft finish. I forgot to mention that I save all my old toothbrushes since they make wonderful scrub brushes for working the saddle soap into highly detailed carvings. I also use the very soft ones for removing the residual saddle soap as well as any other finishing product that leaves a residue. Just be careful to label the ones you use so that you don't cross over product lines, I hope this is helpful. Just remember that leather is the skin of a an animal and think of it like your skin. If you wash you skin with soap (ones with no oil or conditioning additives) then you put hand lotion on you hands after to keep the skin from drying out and cracking. The same is true with leather. Whether it be new or old as the leather gets worked and used the natural oils are taken out (the deglazer will remove not only oils left by my hands but the natural oils in the leather), Heavy usage will also affect the leather, such as a leather strap on Duluth pack will see lots of sun and rain, but not enough hand usage to have the hand oils replace the natural oils, so it is best to oil those straps at least once a season. The leather writing bi-folds that I make, on the other hand, we see constant hand usage and will get oiled from hands, but will also get dirty and would need to be cleaned with saddle soap on occasion. I hope this helps and not confuses you. BillB
-
I have used both yellow and white saddle soap. Saddle soap is used for cleaning and softening the leather. The yellow soap will add some color to the leather where as the white does not. I will use a damp sponge with the soap. I apply soap to the sponge by rubbing it on the soap, then I work the soap into the leather and the tooling I am cleaning. If the leather is old and dirty, yes I will rinse the leather, but then apply a second coat of soap. This second coat I will remove with a soft cloth and elbow grease. Once the soap is removed I will continue to buff to a soft shine. In some cases I will follow this with an application of an oil (neetsfoot or mink) to nourish the leather. Remember, leather is skin and needs to be cleaned and oil. Some may only need to be oiled to restore them to working condition. The coloring may be from all the human oils and sweat they have absorbed over the years. I have used this process to restore 30 year old projects to almost new condition. BillB.
-
Ellen, Let's analyze the problem. When making a bend in the leather we are asking the outer side of the leather to travel farther than the inner side. On bends with a very large radius, like the flap of a purse, that is no real problem. When the radius of the bend gets smaller then there is less leather involved and the fibers have to bend more. On toop of that, on very tight bends the leather on the inside of the curve actually puts force outwards onto the surface leather and actually pushes on the carving as well. In this case, one can remove some of the leather from the inside of the fold using a "V" gouge to do so. This will take practice so you don't remove so much leather that you cut into the bottoms of the carving, e.g. the cut lines that you made and then tooled and in some cases it can weaken the leather, so you don't want to do this on a fold that is also a stress point. Another way to reduce the problem is to use a lower weight leather depending on the project. A knife sheath does not have to be 8oz leather. I have made knife sheaths with just buckskin (@3-4oz) and I routinely tool 4 & 5 oz leather. In some cases, to add strength back to the leather, I will glue on a piece of pigskin as a liner, which creates a layering like plywood and adds strength, especially when I have made a mistake and actually driven the bevel through the leather. This can happen when using an undercut bevel. There are probably other ways and methods to solve the problem. This is the one I am most familiar with. I hope this helps. BillB
-
Welcome to the Forum from Northern Minnesota. Walk around, talk to folks and have some coffee and donuts, they are just down the hall. 8-) I think you will find a group kindred spirits here, all keeping the art of leather craft alive and well. BillB.
-
Scott, I have gone through 5 different swivel knife barrels and 5 different blades before I found the combination of barrel and blade that I like to use on a project. The size of the item to be carved will cause me to change the knife blade that I am using. For one the size you did, I would be using the Al Stohlman Brand HCS1055 1/4" Angle blade for larger jobs I would use the lager angle blade or the regular swivel knife blade. I use Tandy as a reference since they are on-line and easy to access. Similar blades are offered by a number of manufactures of fine tools. Make sure that the finger loop is at a comfortable height and you are holding the knife correctly. As for the tooling, I could see the lines caused by the edges of the bevel. This can be improved with practice and sliding the bevel along shorter distances for each strike of the mallet. Also, for figure carving, there is a whole different set of bevels designed just for figure carving. They are the F series and the bevels are F890, F891, F895, F896, F897. Their shape allows the tool to be held at different ables to allow for the various curves and features found in figure carving. For example, the tips can be used to bevel in the small "v" between the legs and the body or arms and the body. You can find helpful information in the books Figure Carving (#6045-00), Pictorial Carving (#66037-00), Figure Carving Finesse (#61951-00) and Pictorail Carving Finesse (#6195-00) As mentioned before, a properly cased piece of leather is the foundation needed to do good carving. There are a number of topics here that discuss the process of casing leather. Also a properly maintained edge on the knife is important for smooth, easy cuts. I hope this helps. Keep it up, it does look good. BillB
-
Tree Reaper, Since the Tree is in the foreground, you could also bevel the lines of the tree so that they pass over the lines of the moon. I would use a smooth beveler for around the tree and a beveler like Tandy's B204 or B199 for the Moon. The B204 and B199 have vertical lines and as it works it's way around the moon it would give the appearance of moon rays coming from the surface. I would then use a tool like Tandy's E294 series to give the moon a surface pattern. I would do the pattern lightly on the edges of the moon and deeper towards the center and the tree, similar to how one sees the moon's surface patterns better towards the center and less at the edges when it is a full moon. Think of it as four dimensional art (length and width of the piece, depth of carving and layering of the design for the 3rd dimension, and texture to give a fourth dimension. BillB.
-
Jeff, Welcome to the forum. Hopefully you are finding all the forums that have help teach about leather, especially Paul Burnett's forum. You might try contacting the closest Tandy store and see what contacts they may have. Again, welcome to the forum BillB
-
Welcome to the forum and glad you have come back to leather work. You will find a lot of kindred spirits here. Look around and join in on the conversations. Coffee and donuts are free. BillB
-
Conny, A belated "Welcome to the forum". As Johanna would say: "Walk around, join into the conversations that interest you, have some coffee and donuts. They are just down the hall way." 8-) BillB
-
Welcome to the forum. Walk around, join in to the conversations, have some coffee and donuts. BillB