-
Posts
34 -
Joined
-
Last visited
Content Type
Profiles
Forums
Events
Blogs
Gallery
Store
Everything posted by Topsnipe
-
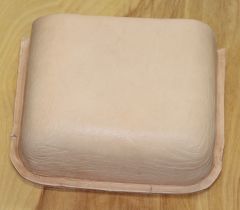
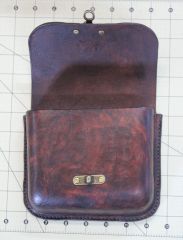
From the album: Tavern Wrench Pouch
Removed from the mold and all trimmed up.© ©2014 TopSnipe Leathers. All Rights Reserved.
-
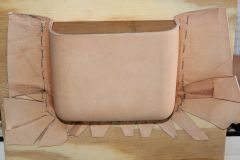
From the album: Tavern Wrench Pouch
First wet-molded leather project© ©2014 TopSnipe Leathers. All Rights Reserved.
-
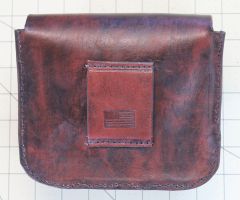
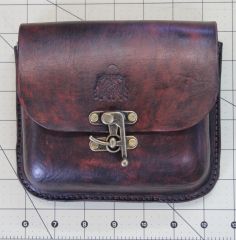
From the album: Tavern Wrench Pouch
I don't have a Maker's Mark stamp yet so used the only thing I had handy to show where this pouch was made!© ©2014 TopSnipe Leathers. All Rights Reserved.
-
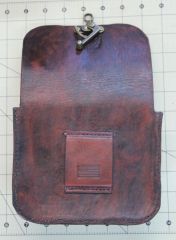
From the album: Tavern Wrench Pouch
© ©2014 TopSnipe Leathers. All Rights Reserved.
-
From the album: Tavern Wrench Pouch
© ©2014 TopSnipe Leathers. All Rights Reserved.
-
From the album: Tavern Wrench Pouch
© ©2014 TopSnipe Leathers. All Rights Reserved.
-
Good luck in the Nuke word! Pretty tough career field to play in, but keep your head down and maintain a steady strain and you'll have no problem though. I started my Navy life as an Aviation Machinist's Mate (AD) then cross-rated to the Gas Turbine Technician - Mechanical (GSM) rating when I was a third class. Retired with 21-Years as a GSCS (Gas Turbine Senior Chief Petty Officer). Here's wishing you "Fair winds and following seas" on your Navy journey.
-
First of all, thank you for choosing to Serve! Secondly, what rating are you going to A-school for? Are you going to be an Airdale ("Naval Aviator" {gratuitous TOPGUN quote!}), Blackshoe (Surface Sailor), or Bubblehead (Sub Sailor)? Based on which element of the Navy you're headed for, you could use the warfare designation design (google search for Navy Enlisted Warfare Pins) above your chosen rating badge with a fouled anchor in the background. You might even add you rating and name at the bottom; ADAN Heiney (Wingnut rating), GSMFN Heiney (Snipe rating) , etc. Hope this is helpful and thanks again for you service.
-
Makes me want to test my skills and make one too. Thanks for the inspiration. R/Derby (Topsnipe)
-
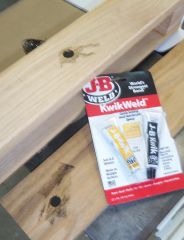
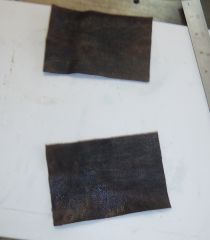
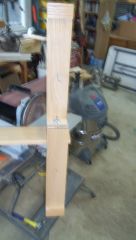
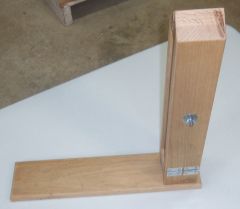
This is my first post on here as well as my first foray into leatherworking. A couple of weekends ago my daughter talked the wife and I into going to the Maryland Renaissance Faire with her. She likes to get dress in either period or fantasy costume on these expeditions and was resplendent as a "Tavern Wench" except that she had nowhere to hide/stash her modern necessities; cash, ID, smartphone, etc. Her mother ended up play the part of "pack mule" for the day. We had intended to pick up a small leather belt pouch or a possibles bag but were shocked at the prices being demanded. Being what I consider to be a fairly handy gent and loving father, I decided that I would make her a belt pouch before she headed out on her next grand adventure. With these thoughts in mind, I dug out the very small and basic (5 stamps & a wooden mallet) leather tools set that I've had floating around the shop for years and then proceeded to scour the inter-webs for ideas, tutorials, patterns, and plans! I found a boat-load of stuff! Besides realizing that I would eventually need a lot more in the way of tools, I found out that nearly everything is laced, stitched, or sewn and unless I was willing to plop a ton of cash down on the barrelhead up front for a machine, I'd be doing a lot of hand sewing. I looked at purchasing a stitching pony, but found that for nearly $100 + S/H, I could probably build one from the extensive scrap pile in the garage. So with an image plucked from the inter-webs... I headed out into the shop to see how high I could successfully stack sawdust! Digging through the scrap heap, I found I had all of the bits (in white oak) necessary to create my very own stitching clamp. Nearly all of the pieces were already sized too. The first piece I found was perfect for the seat board; 3/4" x 6" x 20". I drilled a 1/4" through hole with a 5/8" diameter x 3/8" deep counter bore to accept a 1/4-20 x 4" carriage bolt that the swivel block would ride on. The edges were eased with a 1/4" radius bit in a palm router. I thought about tapering the seating area but decided against it when I realized I need to get a new resaw blade for my bandsaw. I then went back to the scrap heap and found two pieces that were 3/4" x 3 1/2" wide. One piece was 18 1/2" and the other was 19". I glued a 2" x 3 1/2" piece to one end of each leg to build up the jaws of the clamp. Once the glue had dried, I cut the jaws at a 45° angle. I then formed up the swivel block by laminating three pieces of 3/4" x 2 1/4" x 3 1/2", gluing and pinning them together. When the glue dried, I sanded everything square and then glued and pinned the base of the hinged leg to the swivel block. I mitered the outside top edge of the leg base to accommodate the hinge barrels. Everything is held in place by the swivel block carriage bolt, a 1 1/4" fender washer, and a 1/4-20 wing nut. I attached both legs of the clamp to the swivel block. I glued and pinned the stationary leg to the block and then attached the hinged leg using two 3/4" x 1" hinges. I cut the end of the hinged leg at 3° to allow additional pressure to be applied at the jaws then mitered the lower outside edge of the leg at 45° to allow for the hinge barrels. Since I forgot to drill the tension bolt holes before I attached the clamp legs, I drilled a 1/4" through hole in the hinged leg then uses a transfer punch to mark where the hole would be on the stationary leg. I drilled a 1/16" pilot hole through the stationary leg to align the counter bore that accepts the 1/4-20 x 4" carriage bolt used to apply tension to the jaws. I then went back and elongated the hinged leg hole to make fully opening the hinge side easier. To ensure that the bolts don't end up spinning in their respective holes while trying to tighten things up, I epoxied the bolt heads into their counter bores with a little JB Weld. This is how things stood before I added a layer of leather (5/6 oz I think) to the jaw faces, to protect my future work pieces. If you've read this far down, I thank you for your diligence and patience. Please let me know what you think and suggest an improvements your experience tells you I should make. Thanks. R/Derby (Topsnipe)
-
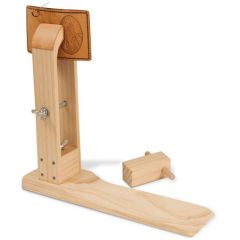
From the album: Stitching Pony
Inspiration! -
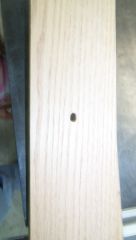
From the album: Stitching Pony
I elongated the bolthole in the hinged leg for the tension bolt -
From the album: Stitching Pony
Keeps the carriage bolts from rotating while tightening -
From the album: Stitching Pony
-
From the album: Stitching Pony
A 1/4-20 x 4" carriage bolt was used with a 1/4" x 1 1/4" fender washer and 1/4-20 wing nut to tighten the jaws of the clamp -
From the album: Stitching Pony
A counterbore was made in the outside of the stationary clamp leg to allow the carriage bolt to be epoxied in place. -
From the album: Stitching Pony
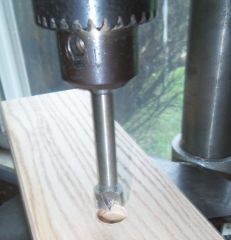
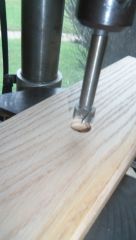
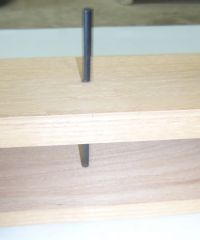
Since I forgot to drill the se bolthole before I attached the legs to the swivel block, I had to come up with a way to ensure the boltholes were aligned. I used a transfer punch the same diameter as the hole to dipple the inside of the stationary leg before drilling and counterboring. -
From the album: Stitching Pony
-
From the album: Stitching Pony
-
From the album: Stitching Pony
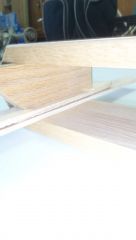
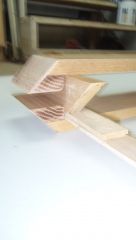
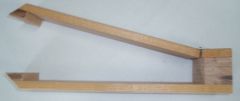
3/4" x 3 1/2" White Oak legs. A 3/4" x 3 1/2" x 2" block was glued to the inside top of each leg to provide additional material to form the clamp jaws. Once the glue dried, the jaws were cut to 45° angles.


