


dickf
-
Posts
442 -
Joined
-
Last visited
Content Type
Profiles
Forums
Events
Blogs
Gallery
Posts posted by dickf
-
-
Hi!
I think your second try looks very nice, especially considering your experience is limited. I would point out that I don't think that's 8/9oz leather - looks more like 6/7 or 7/8 at most. I'd also say that you are getting the leather much too wet and/or beginning to mold the holster too soon. You can easily clean up the slots with a 1/4" sanding drum on a dremel tool which will help a carry belt thread through them (the 1/4 tool will open the slots up a little more than 1/4" in ttl width). The pattern itself is solid, I think, and the only thing other than what I've already pointed out, is that you could stand to bring the stitch line in on front of the trigger guard as much as it is in the rear. Does that make sense?
Either way, you're clearly picking it up fast - good job!
Cheers!

-
You've definitely got a good start. I think you'll find that the stitch line will allow the holster to lose it's ability to retain the firearm over time because it doesn't follow the profile of the gun. You need to adjust it to come as close to the weapon as possible, while following the natural curves of the gun. Also, eliminate any angles and round everything off, especially the mag carrier, and I'd say you've got a nice looking pattern there.

-
Adam,
Have you never used paths in PS? Those are the fundamentals and each path, or 'line', can do exactly what you want. It's been this way since the beginning. Perhaps you should pick up a book - you might find it faster to work with than AutoCAD.
-
I see no reason to use Illustrator when your patterns aren't going to change size or be sent to a printhouse. I scan the gun/blue gun then use Photoshop to create the pattern. When printed, it's actual size and easy to reprint for a quick alteration or when the pattern gets too boogered up to use anymore. I've been using Photoshop since v4...I still have the disc! The Gimp is the open-source equivalent - if you don't have the funds for PS, get the Gimp and learn it.
-
Killzone2kX:
I'm parked in my RV for the summer just down I-65 from you at Mammoth Cave Nat'l Park. I'd be more than happy to show you how I do things in ways that might help you. You're more than welcome to come down. Give me a shout if you're interested.
If you haven't already, you should take advantage of this offer. Opportunities like this don't come around very often.
Very nice of you, Kevin!
-
I agree with Lobo, see my remarks.
The only thing he didn't touch on was the stitch line. I would bring it in significantly on the next one, and plan on not selling this one. Stitch line too far away from the gun = loose holster. There's no getting around that.
OK, since you have asked for comments I will make a couple.
1. The space forward of the front strap of the grip-frame needs to be as open as possible in order to permit a solid "shooting grip" on the weapon during the draw. Anything less leaves the user fumbling around and adjusting the weapon in his hand prior to engaging a target. Your design does not appear to provide sufficent space for the fingers of the gun hand to wrap securely around the pistol grip without interference from the aft belt attachment point.
Agreed
2. You have made an IWB-style holster of pancake-style construction. Pancake-style holsters can be expected to flex along the fore and aft stitch lines, especially when subjected to belt tensioning as expected with IWB-style holsters. The reinforcement piece you have added to the front panel serves no real purpose for reinforcement of the holster mouth, and actually serves only to add bulk to the "package" of the holstered handgun inside the trouser waistband.
I've experienced both, the piece assisting and the piece serving only as an extra layer of leather to try and hide.
3. Your slide shield does not appear to provide full coverage between the rear of the slide and the user's body.
I can't tell from the photo, but it looks to me like it actually overlaps the backstrap a good deal, which is more of a concern to me than not covering the slide 100%. Also, it could be potentially covering the mag release, which is a no-no in my book, as well.
4. Your belt loops appear to be rather large, suitable for a belt about 2" or more in width. Belt loops should be formed for the width of belt to be used so that the holster is secured against movement during use as the body moves and applies pressures to the "package" in the waistband.
Agreed
5. You have already mounted your hardware (snaps, etc), so dyeing at this point will result in unnecessary work cleaning up the hardware after dyes and finishes are applied.
Agreed. Lobo was talking about the snaps for than anything, I think, but if you're remaking the loops, then you can dye before setting the new ones anyway.
Overall, nice looking work. But a bit more thought to the design and functions might result in some improvement.
Best regards.
-
Very nice work. I really love the color. Which flavor did you end up using?
You should give credit where it is due, though, regarding the pattern. It's an Occidental Leather design by Tim Thurner.
http://www.bestbelt.com/product/gunleather/gun_holsters.html
-
I agree with Dwight that the mouthband should stop short of the trigger guard and follow the sweat shield up the back. I'm not a big fan of the color, but as stated, it's not your fault at all. That Eco Flow dye is garbage and I agree with katsass - it simply isn't capable of doing the job right. My advice would be to ditch it and get yourself some Angelus dyes next time. You can dip dye with them or shoot 'em from the airbrush.
I also agree that the grip clearance is tight and could use some relief. I don't agree, however, that molding the inside of the trigger guard is a bad idea. You'll get a lot of retention from the trigger guard on most guns, and yours looks good. If you start to see the trigger profile come through the leather, then it's too thin and becomes very dangerous. For most leather that's 7oz+, this is a non-issue. Finally, a personal preference would be to narrow the width of the loops to reduce their footprint.
Keep it up!
-
Sold!
Thanks.
-
I have for sale a Blue Guns Kahr P380 mold in excellent condition.
Asking $38 shipped.
PM if interested.
Thanks!

-
Hi all,
I'm selling an ASP red H&K P2000 mold. Asking $35 shipped. Mold was used exactly 1 time.
PM if interested.
Thanks!

-
-
The EMP line is bushingless and uses a bull barrel to lock up. You could be seeing the bbl protrude slightly more proud of the end of the slide on the Springer, but it's definitely not a bushing.
-
I don't actually see evidence of the leather being too wet. When it is, you'll typically see crinkled/wrinkled grain, tools that were dragging, and other malformation.
One thing that definitely stands out right away is that your stitch lines are way too far apart for the 1911. This gun is thin, and it requires the stitch lines to hug it's contour. This is absolutely paramount for retention and longevity in any holster.
To me, it looks like you aren't using a straightedge of any type to chase the slide lines, and perhaps you're not pressing the holster in between your hands hard or long enough. With the pocket oversized as it is, the gun isn't fitting tight to begin with which will make getting crispy lines a lot more difficult. I'd alter your stitch lines to come in at least ~1/2" (by estimate) and then try again. Press the hell out of the holster in between your hands and use your thumbs to bring the lines of the gun through. After you can see the outline of the gun in the leather, it's time to use the tools (remember the straightedge!).
Good luck!
-
Thanks guys. A pink snippy cup holster sounds like a good first rig!
Bitone, its Hermann Oak leather.
-
That super heavy stuff can require lube to run properly through some machines, FYI. I use 277 bonded poly top and bottom on my gear. I think it's heavy, strong, and looks good, too.
-
Like where are the powder burns? If you have ever discharged a firearm in a vehicle, nobody would say what was that, like it was a small pop, it is deafening.
Art
Agreed. Also, the fold in the holster is in an unnatural place and makes no sense. It looks intentional to me.
-
Hi fellas,
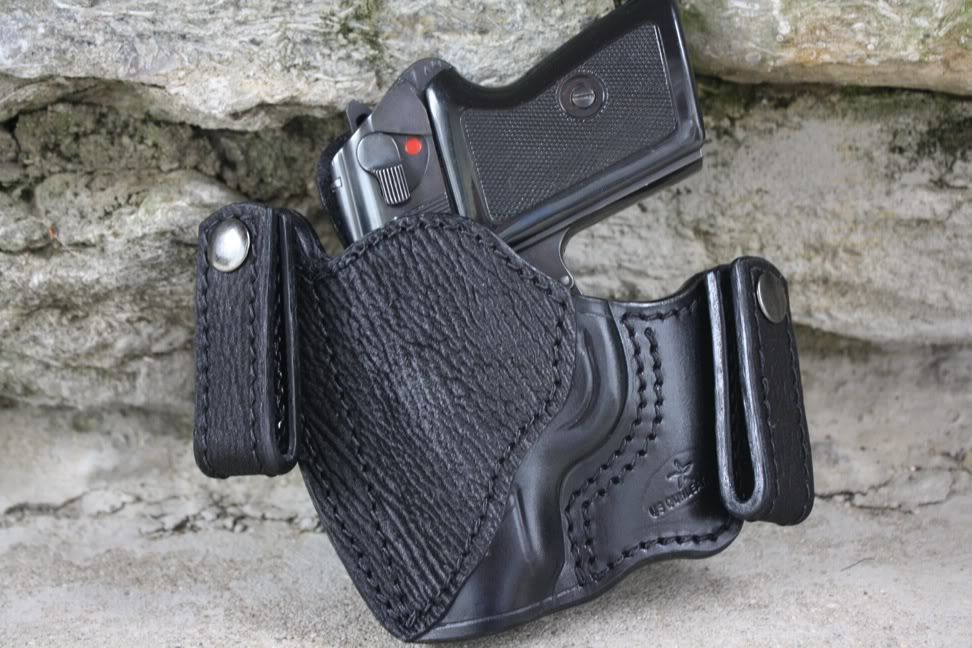
Figured I'd post a few of my last holsters I'll be making for a while due to my wife and I expecting a new baby girl very soon.
This is a black shark-trimmed holster for the P64.
Special thanks to Shooter for inspiring me to work with exotic leather - it's fun.
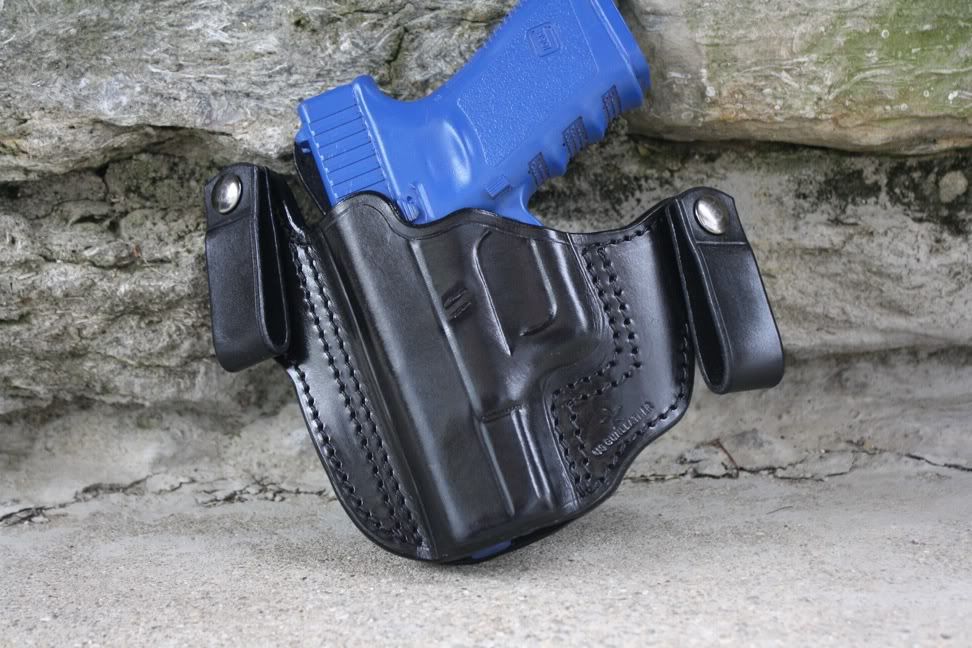
A G19 IWB for a lefty
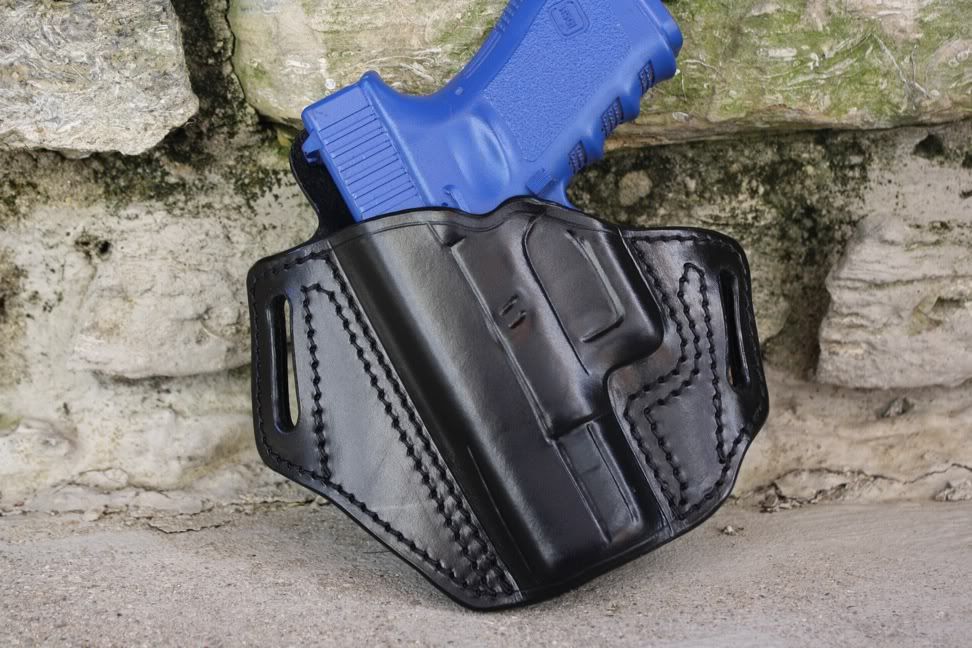
A G19 Pancake for the same lefty
Cordovan IWB for the P64
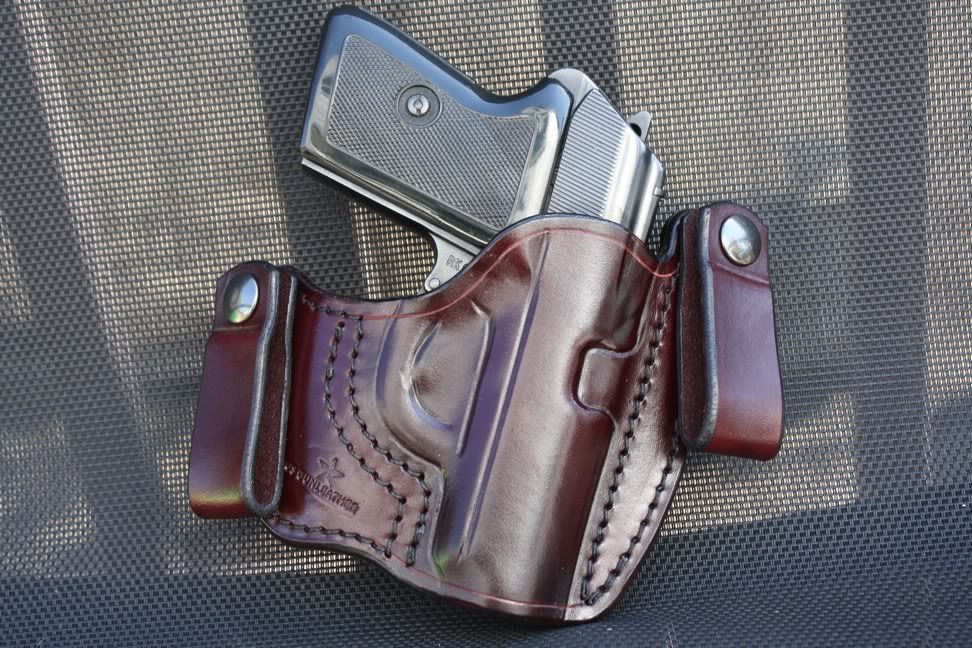
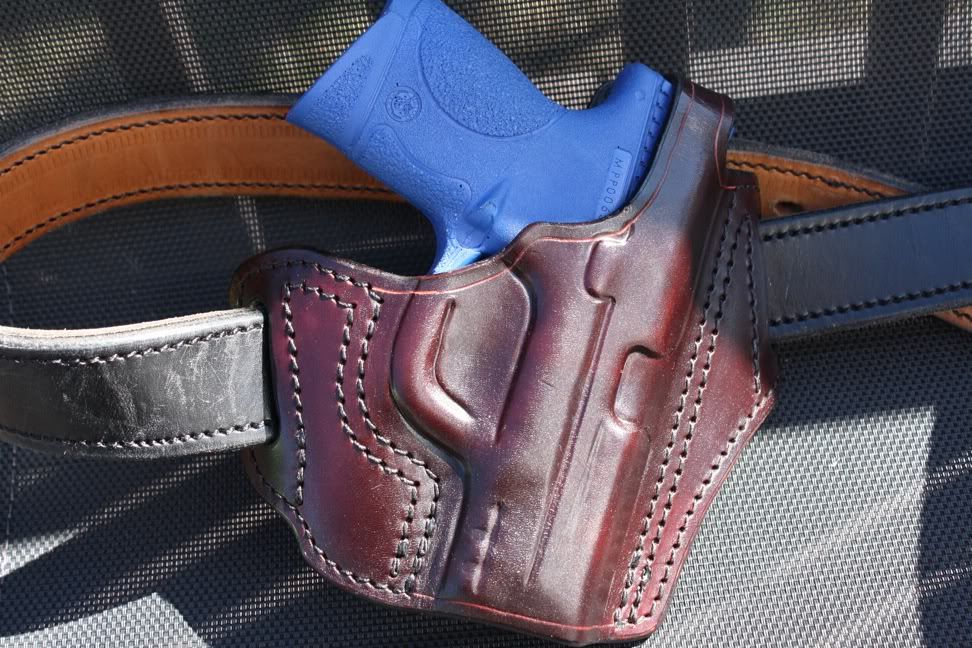
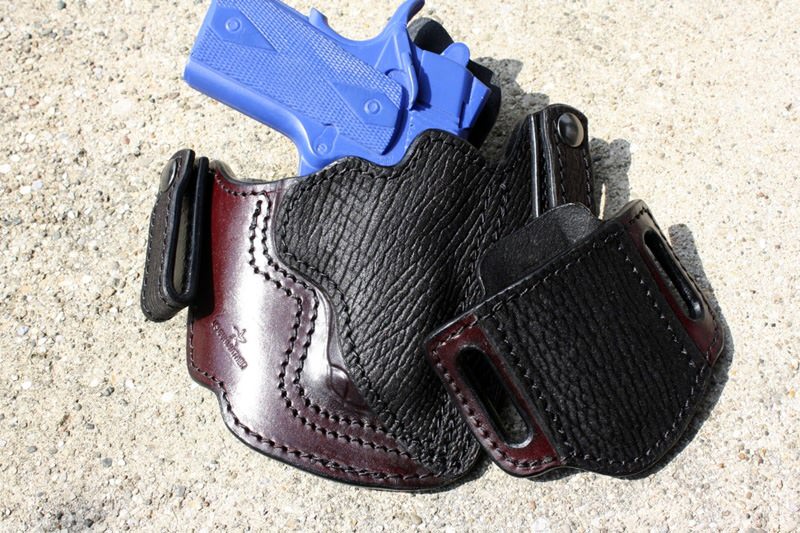
Shark trimmed set for a 3" EMP in cordovan

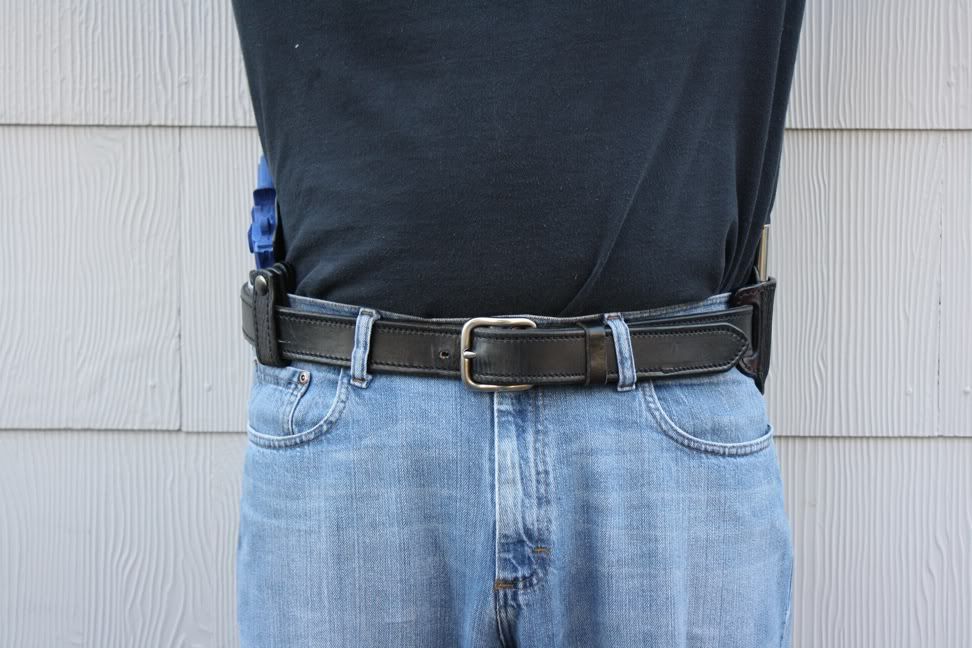
... wearing the set
Custom heavy muzzle rake with thumb break for an M&PC
That's all for now.
See ya around!
-
I dip dye my colors now and there is no comparison to using a dauber or airbrush. The dye penetrates to nearly half the thickness of a 7-8oz piece of leather. If the leather gets scuffed or scratched, the color will still remain. The airbrush can produce some of the best looking and more even shades of brown, but it comes at the price of having an easily scratched holster, which happens all the time. I've found that the Angelus line of dyes penetrate the deepest and are the most even colors. I use them exclusively and dip dye them all.
Here's one that was dip-dyed cordovan and the shark dip dyed black. The cordovan comes out even, deep, and rich looking. Pity I botched the photos with this direct sun

-
I used to airbrush my dye because it was the only way I could seem to get an even shade of brown, but realized that holsters that get used hard will show scratches and scuffs very easily. The dye just doesn't penetrate the leather far enough when applied by airbrush only. When making holsters, one should take into account that adequate R&D isn't just you wearing the holster prototype around the house for a week. There are people that depend on this gear every day and most of them don't go easy on it. The more rugged you can make the holster function and the more refined you can make it look or keep it looking, the better.
I think the airbrush has it's place in the shop, especially for spraying topcoats, but not for applying dye.
My 2¢.
-
Shooter, I'm using 7/8oz for mine and I really like it. The holster is rigid enough to stay open at the mouth without the need for any reinforcement piece, and thin enough to hide very well. I've tried 6/7 and 8/9 in the past, and the 7/8, I think, is the best.
-
No you're not - this has been discussed for a while now. I searched 'food saver' and came up with several results. 'vacuum' will return even more...
-
This is my opinion only, but the danger I see in it is that with an IWB, you have a cover garment on; whether it's a heavy coat, light jacket, or just a tee shirt, it's something you'll have to pull back or work around. Once you get to the grip of the gun, you'll need to navigate your thumb into the break and pop it open while drawing the weapon.
In a life and death scenerio, where the adrenaline is pumping and fractions of seconds count, the last step requires fine motor skills that require valuable time. It's not as fast, it's not as easy, and it adds one more obstacle between you and your weapon. Anyway, this is just how I see it.
-
It's possible he doesn't have a choice. I know of a couple of agencies around me that require all off duty holsters to have a thumb-break design.
I've encountered this, as well. In fact, I just got done making one for a repeat LEO customer - an IWB with thumb break for a G27 for use on-duty. His dept. won't allow any on-duty gear without a retention device. He chose a thumb break. He also understands the risks associated with carrying an IWB with an extra step.
With that said, my personal stance has been to deny making these types of items for the same reasons. If I know the person it's going to has training with this type of equipment, then I will sometimes make an exception. For the normal customer looking for a concealment rig, I do my best to inform them why the retention device on an iwb is not only unsafe, but unnecessary for them. They usually order a normal IWB and are very happy. If they insist on the IWB with break, then they go somewhere else.

New Elephant Holster - Dang You Kevin At Slc
in Gun Holsters, Rifle Slings and Knife Sheathes
Posted
I agree, and with holstermaking, that can be difficult sometimes. Still, I think you should consider making the stitch line follow the profile of the gun. Your holster, when put to hard use, will lose it's retention over time due to that stitch line. They all get worn and looser, which is a fact of life, but doing everything you can to limit that fact is in your best interest. Look at other makers, especially the pro's like Del Fatti and Kanely - there is a reason the line is close, and it's not simply because it looks nice.
We all have to start somewhere, and there's no shame in reevaluating a product to refine it. Your customers will benefit in the long run.
My 2 cents.
Good luck.