ArcherBen
-
Posts
79 -
Joined
-
Last visited
Content Type
Profiles
Forums
Events
Blogs
Gallery
Store
Everything posted by ArcherBen
-
I just received some shark and stingray that I'm going to use to build a checkbook cover out of. The shark is thiner than I had expected (probably 3ish oz) so I am considering lining it with a piece of 5-6 oz cowhide on the inside just to stiffen it up a little so that it will keep it's shape. Does anybody have any input as to whether this is a good idea, or should I just run with the shark skin and the basic interior of a wallet/checkbook?
-
I just got my material in yesterday to start a Valentines Day project for my fiance (Shark/Stingray checkbook cover). On a whim I decided to go ahead and make a matching key chain. I just finished it, so here it is. Comments, suggestion, and critique are of course welcome.
-
Thanks for the vote of confidence. This will be my first project working with a material other than veg tan, so we'll see how it goes. It will also be my first attempt at a rolled edge. I've looked at the Wallet Binding Tutorial by Kevin King and it looks pretty straight forward, but I'm sure it's going to be a lot more challenging than it looks. I've also been searching posts of stringray projects, and like you've stated, it sounds like it will be a challenge. I'm hoping that by using it in an inlay that I can easily hide any cutting imperfections and crushed pebbles from the sewing.
-
I'm thinking about building a checkbook cover for my fiance for Valentines Day and looking for some advice and critique of my design. The basic design is as follows: 1- The main body of the checkbook cover would be cut out of black sharkskin. 2- On the front of the checkbook, inlay in an oval shape a piece of green (her favorite color) stringray with the mother of pearl area in the center. 3- Line the inside and create the inside pockets out of 1.5-2 oz lining leather. 4- Hand stitch with black thread. Here's a simple mockup pic of what I envision the front to look like when the checkbook is folded closed: This is the color of stingray I would use: Comments and/or Suggestions? Also, I'm horrible at this Valentines Day stuff so any feedback from women on this site as to whether or not this is even a good idea for a gift would be very appreciated.
-
holsters with a thumb-brake
ArcherBen replied to Skipknives's topic in Gun Holsters, Rifle Slings and Knife Sheathes
I'm currently in design mode and nearing construction on a holster with a retention strap & thumb break. This will be the first holster I've put a thumb break on, so I could use some advice. The thumb break portion of my design will be built out of two layers of 7-8 oz leather. I had decided that was going to be stiff enough, but now you guys have got me wondering. Is the spring steel reinforcement absolutely necessary, or am I going to be okay without it where I've got the stiffness of tow layers of 7-8 oz? -
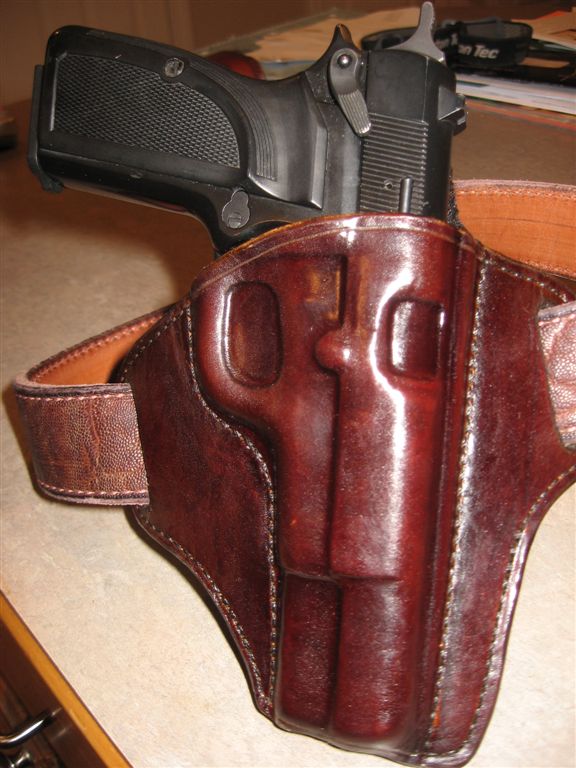
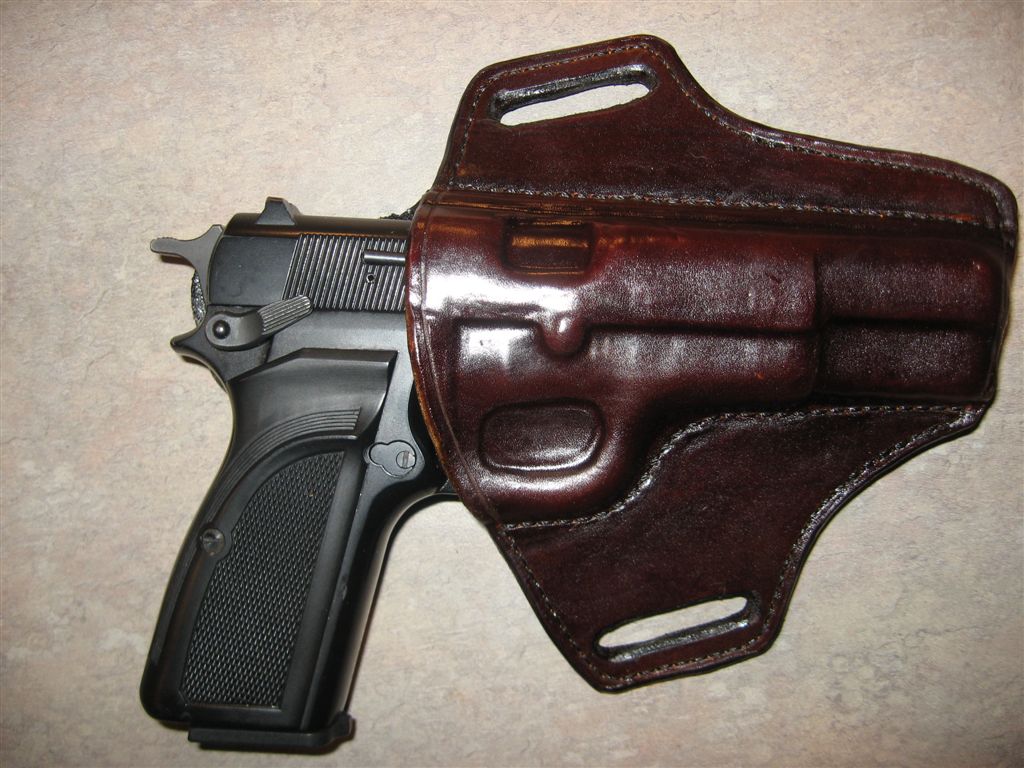
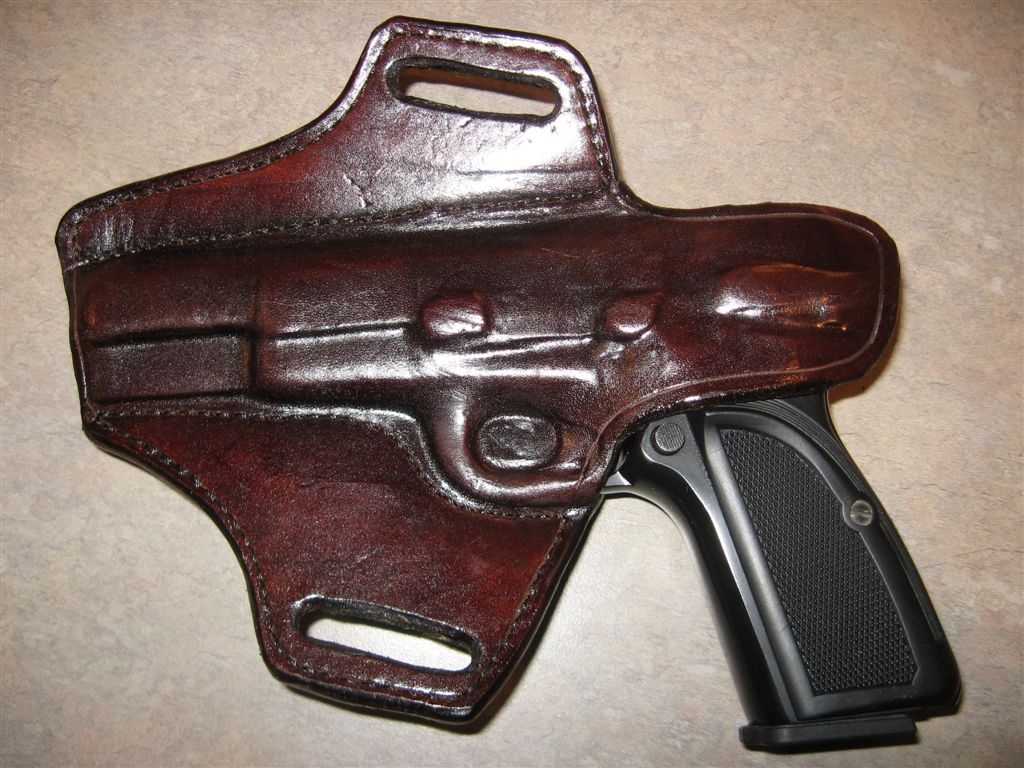
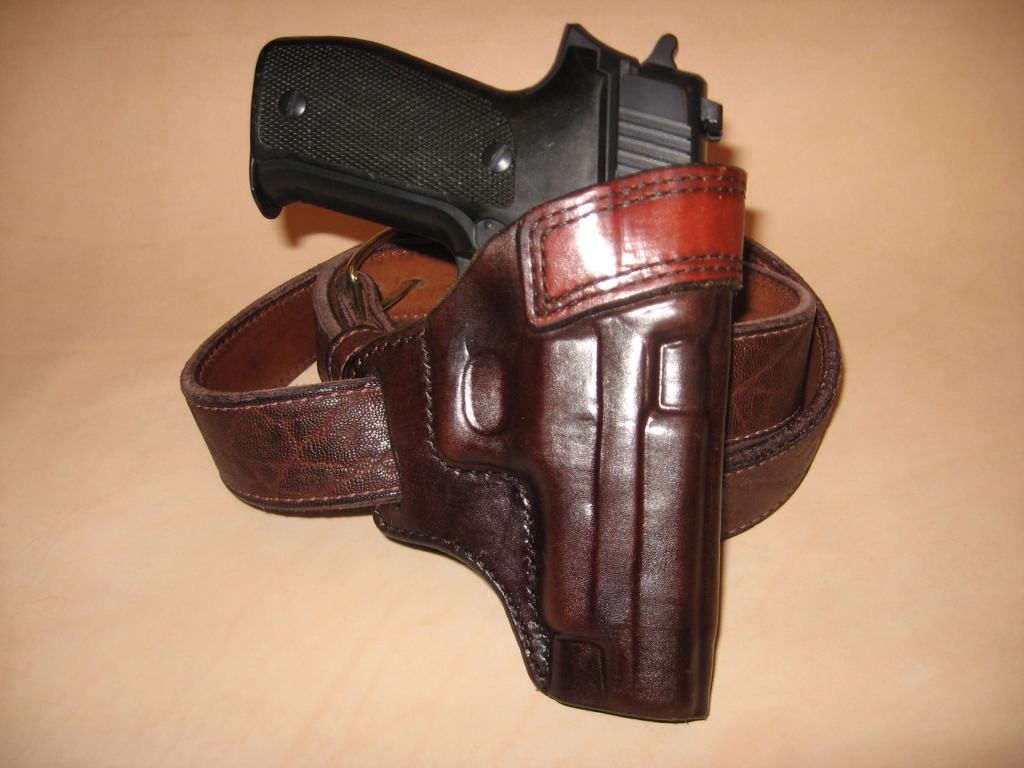
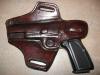
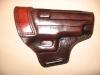
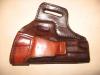
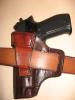
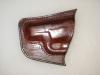
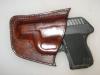
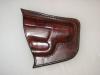
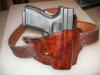
I had a friend proposition me for a hoslter last week. He has been having a hard time finding a quality holster for his Browning Hi Power, and after showing him a few pieces that I've done he asked me to build one for him. Here's the specs: Gun: Browning Hi Power 9mm Leather: 7-8 oz Color: Feibings Cordovan (applied with airbrush) Top Coat: Feibings Tan Kote (applied with airbrush) Stitching: Hand Stitched All comments, critiques, and suggestions are welcome.


-
I continue to have an internal struggle as to whether or not to dye the inside of my holsters. So far I have dyed four of them and left one natural on the inside (finished with a coat of TanKote) and have been pleased with both results from different respects. On one hand, it's nice to have the entire holster one color. However, it is then difficult to get all of the dye particles off of the flesh side (inside of the holster) before your final top coat. How do all of you approach this?
-
I have been struggling at getting an even application of dye when applying by hand, so after seeing results from an airbrush posted to this site I decided to go ahead and order one. Well I've now dyed a couple of projects with the airbrush and I am very pleased with the control that I have when applying the dye. I can get a very even application of dye without going really dark. My concern at this point is that the dye does not seem to penetrate very deep with this method of dye application. It doesn't take much of a scratch to penetrate to natural colored leather. Has anybody else that uses an airbrush noticed this as well?
-
New Holster - Askins Avenger Style
ArcherBen replied to ArcherBen's topic in Gun Holsters, Rifle Slings and Knife Sheathes
Thank you all for the comments/suggestions. I just found this sight a few months ago and I've learned an immense amount of information from all of you that has directly led to a quick and steep learning curve for me. I look forward to continuing to learn more as I know I've still got plenty to work on. MrTobes, I used 7-8 oz. leather on this holster. As far as molding, I just use a plastic boning folder and whatever else I have laying around that seems to be a good fit for whatever I'm molding. I think the quality of leather helps some also. BoomStickHolsters, Thank you for the advice/suggestions. I was hoping that you'd respond to this thread. I've been secretly admiring your work as I've seen it posted to the site. I never thought of adding a wing to the tunnel loop, but I can definitely see how that could make a difference. It seems like I did indeed design the shape around the mag release, but I think I may have just pushed the gun into the holster a little farther than I had originally planned at the time of molding. I also noticed that after I was done and agree that it should not be covered. I'll make sure to be more careful on my next one. -
I read about this in a couple of local articles yesterday. In addition to the lady with chest pains, the owner of the gun also received some shards of porcelain to the arm. One of the local articles stated that the gun is a Kahr P40. The local suspision is that the guy is not being honest about what happened and that it was simply a negligent discharge. Kahrs have a very solid reputation of being a quality, reliable, and safe handgun that I doubt would discharge upon dropping. Here's a link to the article: Man Hurt When Gun Blasts Toilet
-
New Holster - Askins Avenger Style
ArcherBen replied to ArcherBen's topic in Gun Holsters, Rifle Slings and Knife Sheathes
I think I'm sensing a little sarcasm there. That is the first gun belt I've ever had and it's pretty solid with a gun on it. Also, I forgot to mention, critique, comments, and suggestions are welcome. -
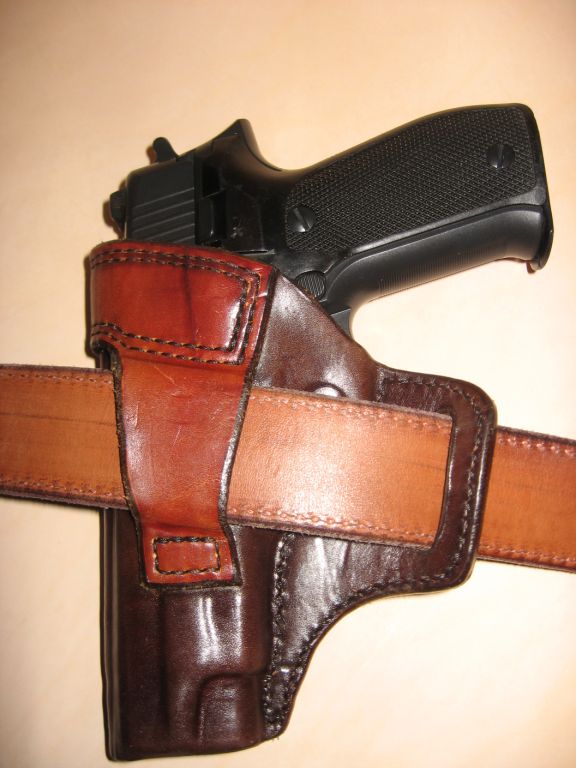
I just finished my first attempt at an Askins Avenger style holster last night. I found this design a lot more difficult than the few pancake styles that I've built. This was cut out of a new double shoulder that I bought in December from my local leather shop. I don't know what tannery it came from, but it sure seems to be of much better quality than the first piece I worked from. Also a first, I applied the dye and finish with my new airbrush. The main body was dyed with Feibings Cordovan. The throat band was initially dyed with Feibings Light Brown ut it looked really orange next to the cordovan so I darkened it up with a couple of coats of Medium Brown. I strapped this on for about an hour last night and found it to be comfortable, but to not conceal as well as my pancake style holsters. My pancake holsters tend to pull the whole gun close into my body, whereas this holster seems to pull the butt of the gun in close, but not the top of the slide. For those who have made this design, do you find that this is the nature of the design, or do I need to change something?

-
two glock 19 holsters
ArcherBen replied to brinyar's topic in Gun Holsters, Rifle Slings and Knife Sheathes
Great looking holsters. May I ask how you liked working with the W&C leather for building your holsters? Does it keep it's shape well? I'm thinking of ordering a side from W&C for belts and holsters. -
Quality Sides for Belts????
ArcherBen replied to ABC3's topic in Purses, Wallets, Belts and Miscellaneous Pocket Items
Can you dye bridle leather, or are you stuck with the color that you purchase? Also, can bridle leather be wet formed? -
Kate, Thanks for the excellent response. I don't necessarily plan on doing a lot of fine detail work, mostly just applying a uniform dye and some occasional fading/blending of dyes. I've spent some more time reading reviews of the BCS (which is a bottom/siphon feed) and haven't read a single negative thing about it, so I think I'm going to go ahead with that one. If in the future I find the need for fine detail work I can always purchase a second brush. Again, thanks for the great information.
-
After seeing excelent results from several on this forum I have decided to purchase an airbrush for dyeing and finishing my leather projects. I've done a fair amount of research and have pretty well settled on an Iwata Eclipse BCS for it's versatility. Now I'm wondering if the Siphon Feed is the right way to go. For those that have experience with airbrushes, what type of feed action do you prefer for working with leather? Thanks in advance, Ben
-
Holsters #2 & #3
ArcherBen replied to ArcherBen's topic in Gun Holsters, Rifle Slings and Knife Sheathes
I think I misunderstood your question initially. I thought you were asking how to form the pocket out of the outer panel while leaving the back panel flat. Now I believe you are asking how I formed the shape of the holster to curve with the hip. Is this correct? If so, I just kinda molded that curve into it during the second molding. -
Shorts, Thanks for the advice. When I get around to making a belt (I've got a few other projects I want to get knocked out first) I plan on cutting two straps and then reversing them just like you are doing. In fact, I just cut two straps for a dog collar which I am doing that with also. As far splitting the leather, I've decided to order a side from W&C and have them split it to a uniform 7 oz. I just need to come up with a little bit of cash flow to get it coming. I've been impressed with the holsters that I've seen you produce and can only hope to achieve that quality in my own work one day. So far I've just been working from an innexpensive double shoulder that I picked up from the local leather shop. My next holster will be an Askins Avenger style cut from a new double shoulder I picked up a few weeks ago. I'm not sure of the tannery it came from, but I paid almost double for it and it looks like a lot nicer piece of leather. I'm looking forward to cutting into that piece of leather over the new year.
-
My next holster is going to be an Askins Avenger style for my Sig P226. This will be my first attempt at this type of holster. In looking at some of the different versions out there I have noticed that some makers sew in a sight rail. My question, are they just sewing a small strip of leather into that portion of the holster to form sight rail?
-
Holsters #2 & #3
ArcherBen replied to ArcherBen's topic in Gun Holsters, Rifle Slings and Knife Sheathes
The owner/operator of my local leather shop taught me how to do this. Here's the process I used on this holster: 1- Design pattern around the gun. 2- Cut out the front panel. 3- Case the front panel and nail it to a wooden table. 4- Insert the gun between the table and the leather where you want to form the pouch. 5- Proceed with wet molding and boning. 6- Design pattern for the back panel based on the formed front panel. 7- Cut out back panel and proceed with assembly. 8- After front and back panels have been stitched together, case and mold again. The purpose of the second molding is to mold in the sight rail, as I wasn't able to mold this part while the front panel was nailed to the table. Hope this helps. -
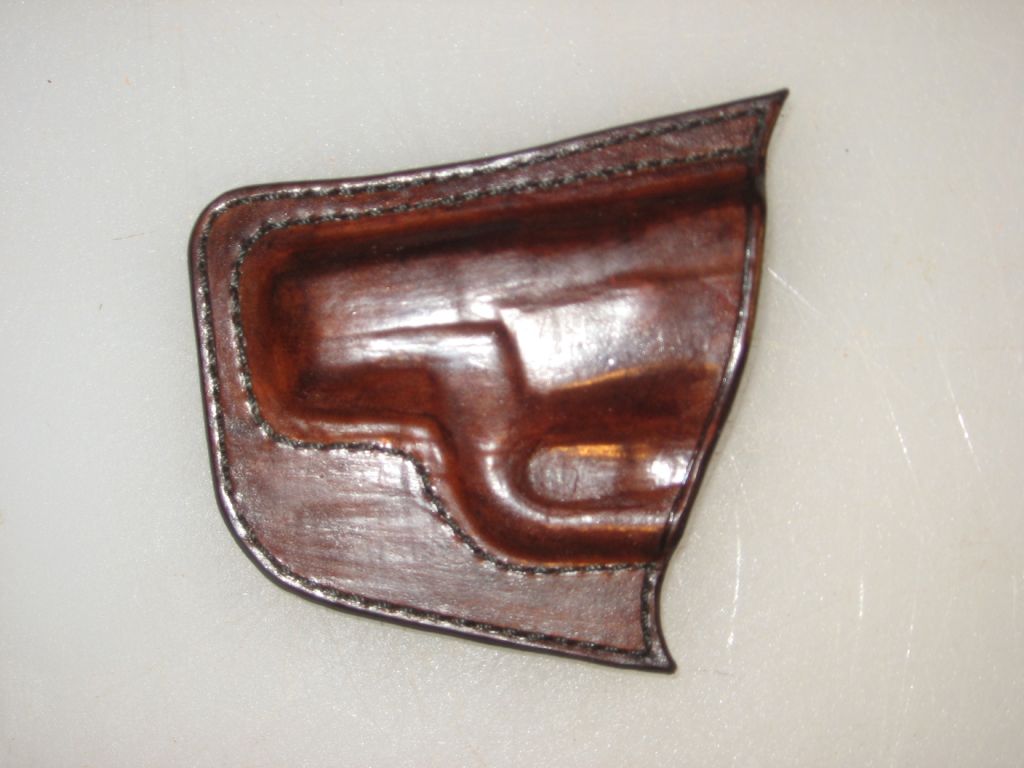
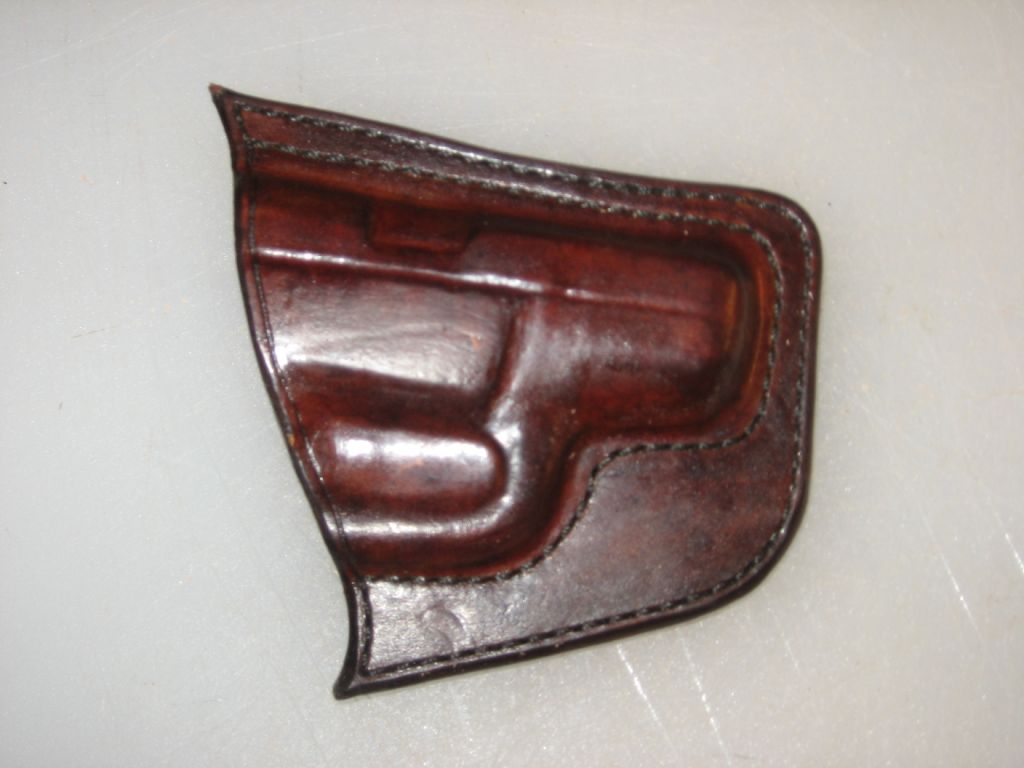
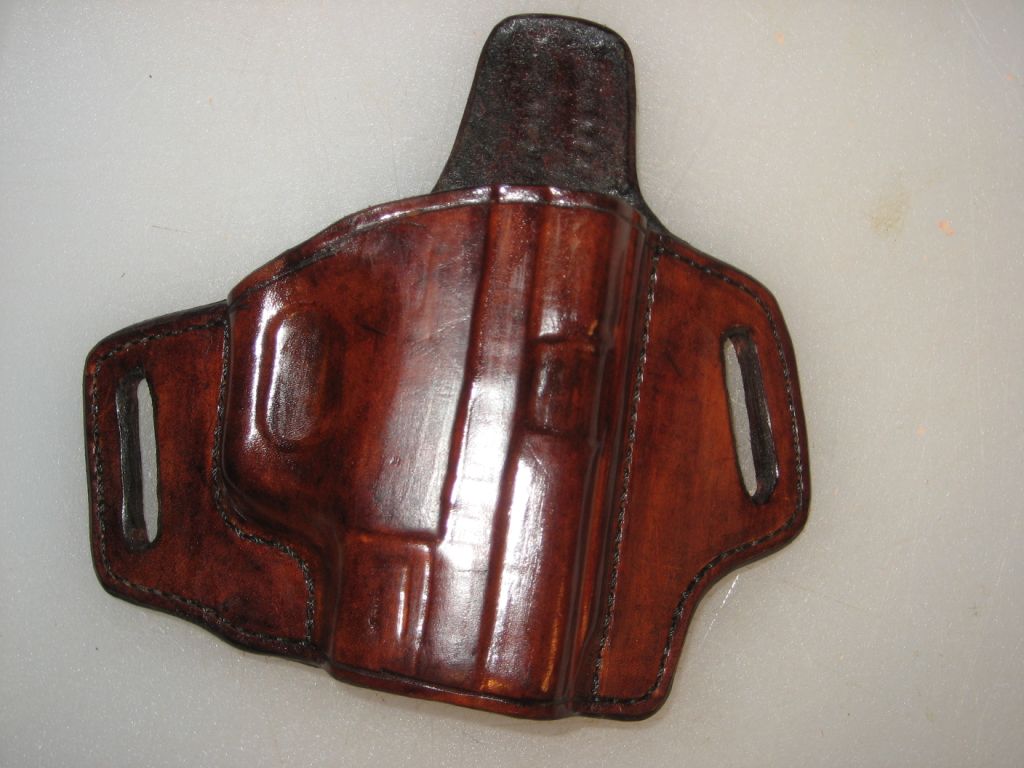
Here are a couple of holsters I've finished in the last week. The pocket and the pancake holsters are the 2nd and 3rd holsters I've built. The pocket on the pancake holster is completely formed from the front panel, while the rear panel is flat. This was kind of a tricky design to work out, but I was able to get a nice tight stitch line and a snug fit by doing so. All comments, critique, and suggestions welcome. Keltec P3AT Pocket Holster: Springfield XD9SC Pancake Holster:


-
Thanks for the replys and suggestions. I've looked at the Wickett & Craig website and seen that they will split a side of 8/10 oz Veg Tanned for no extra charge. It seems like Wickett & Craig is a common name on this site and that most people have said they produce some pretty nice leather. I'm going to give them a call and see what I can work out with them.
-
I guess I'm not familiar with the art of splitting them. What is splitting and how is it achieved?
-
I'm thinking about building a 1 1/2" double thickness gun belt out of 6/7oz leather. When looking at sides the other day at my local supplier, he pointed out that the leather is thicker on end than on the other. As I recall, side was about thicker near the rump end and tapered down to the front shoulder. I've considered cutting two straps from one of these sides and reversing one of them when I put the two together to compensate for the thickness issue and so that it is put together with the grain of each piece opposite of the other. Is this typical of a side of leather, and would that approach be a typical approach, or should I look for a more consistent side or bend to build from?
-
Wet molding and Boning a holster
ArcherBen replied to jlopez's topic in Gun Holsters, Rifle Slings and Knife Sheathes
For my edges I simply put a 1/2" dowel in my drill press, wet the edges of the leather, and go to burnishing. I've found it to work really well and give very nice edges, IMHO, based on my limited experience. If you want to see an example of an edge finished this way, take a look at my post in the Critque my Work section.