JRB
-
Posts
107 -
Joined
-
Last visited
Content Type
Profiles
Forums
Events
Blogs
Gallery
Store
Everything posted by JRB
-
Methods for Attaching Loops
JRB replied to JRB's topic in Gun Holsters, Rifle Slings and Knife Sheathes
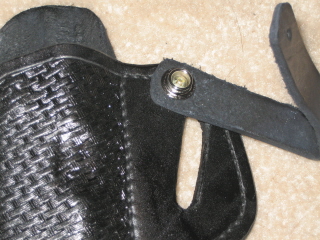
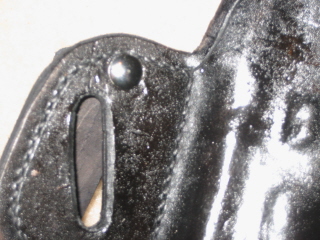
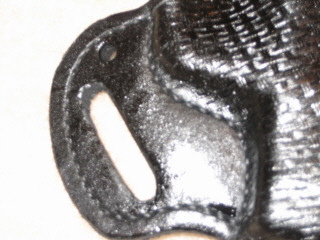
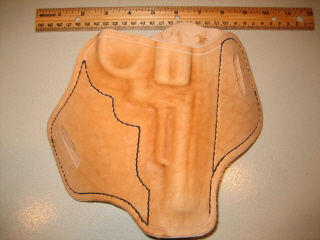
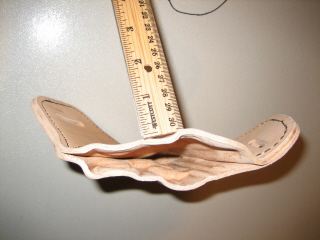
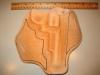
So you're putting the rivet post thru the front side of the snap stud rather than from the back side of the holster. I'll give this a try. Here are a few pics of what I'm working on. A few thing to change include moving the stiching out a little (it's a bit snug) and making ea. side a little bigger and to come up to a point at ea. top corner. I'm thinking that will allow a better attachment point for the loops to get the holster to tuck deeper.
-
Methods for Attaching Loops
JRB replied to JRB's topic in Gun Holsters, Rifle Slings and Knife Sheathes
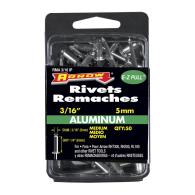
I'm not opposed to using rivets for the holsters that won't be IWB/OWB. But, when I tried to use my rivet posts w/my snap studs I could get it to work. Then I tried traditional 1/8" aluminum rivets like shown below and couldn't get them to work either. Where is a good place to get the T nuts? I'm currently playing w/the Chicago screws but I'm not sure about them yet. I think I need a little longer screw to go thru the snap stud cause I don't feel like I have enough thread in the post to have any strength. I think on the next one that will serve as IWB only I'll attach the loops on the front piece before I glue & stitch the front & back together. That will help w/the thickness issue. Maybe I won't have to worry about after you guys educate me! Thanks for your help guys!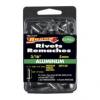
-
Gavingear gave me some info on this in a post of his but rather than completely hi-jacking his post I thought I start one. I'm trying to figure out the best way to attach loops on an IWB holster. I'm going thru about 1/2" of leather (maybe more if I use an additional spacer). I would like the attachment point of the holster & loop to be the snap stud. So far have not been able to find snap post long enough. Id doesn't have to be a rivet because the ability to remove it would be handy for future ideas. Any thoughts?
-
Kel-Tec PF-9 IWB Holster Done!
JRB replied to gavingear's topic in Gun Holsters, Rifle Slings and Knife Sheathes
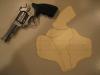
So rather than use the post that came w/the snap you're using a rivet post? http://www.lowes.com/lowes/lkn?action=prod...&lpage=none What size snaps and rivets are you using? Where did you get them? I measured I my total thickness (w/o a spacer) is about 1/2". -
Kel-Tec PF-9 IWB Holster Done!
JRB replied to gavingear's topic in Gun Holsters, Rifle Slings and Knife Sheathes
I guess my issue is that the post for my stud is too short to go thru the 2 layers of holster and then single layer of loop (or additional layer of spacer in your case). These were the biggest snaps they stocked at Tandy??? I was going to try to rivet the loop on and have a separate attachment point for the snap but I'm having a hard time working this out in my head as to how well it'll work. -
Kel-Tec PF-9 IWB Holster Done!
JRB replied to gavingear's topic in Gun Holsters, Rifle Slings and Knife Sheathes
Can you explain the attachment of the loops in more detail? I'm working on my 1st IWB and can't picture a good way to attach the loops at or near the same spot I have the snaps. -
If I do another for a full size gun like the K frame I will do the support band around the mouth. Thanks guys!
-
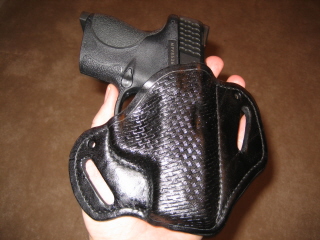
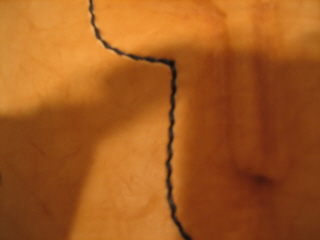
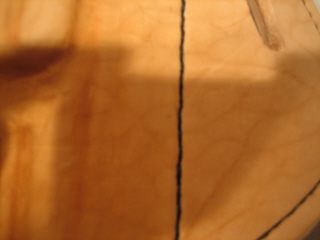
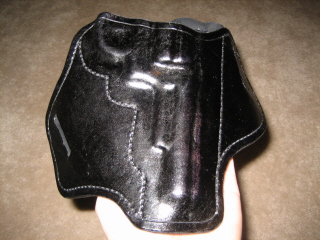
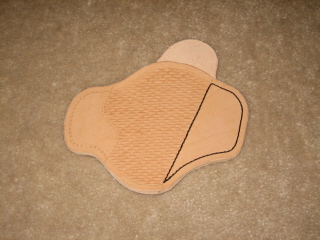
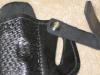
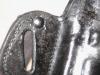
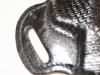
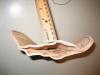
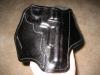
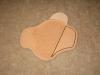
Well, here is my first feeble attempt. It's OWB for a K frame revolver. I was able to get it tight enough pass the test of holding the gun updide down. I was pretty happy w/that considering the weight of a full size revolver. Lessons learned: 1) Don't let someone else "show" you how to stitch on your project w/o having the explain first. In otherwords, hand sewing w/an awl is better than w/a thonging chisel. The 1st close up of the stitching is w/a thonging chisel and the 2nd w/an awl. 2) The leather is like clay when it gets wet and it molds & holds the shape better when not completely saturated. 3) Use more thread than you think you'll need. 4) Don't let the dog near the holster. I've already modified my pattern. Modifications include making the back wing a little smaller and the front wing a little bigger. I did not pay attention to making it uniform on both sides. I'm also not going to drop the wings down as far. I have started my 2nd which will also be a pancake style but for an M&P Compact. I decided to play a little w/a basket weave pattern. Not sure how it will do once molded but we'll see. If I can figure it out I would like to make this one a convertible IWB/OWB. Any suggestions are welcome.

-
When you guys are laying out your patterns do you prefer to have the grain run in a certain direction (up & down or left & right) or do you not consider it? I wonder if you have better strength or rigidity if you have the grain run a certain direction.
-
So you're adding the arched contour after you've molded around the gun...Sort of a 2nd molding?
-
How do you guys get the body contour like in ArcherBen's last pic.
-
practice holster making
JRB replied to Scary Leatherworks's topic in Gun Holsters, Rifle Slings and Knife Sheathes
Like the carving. Did you freehand or is there a pattern? -
I saw that but couldn't figure out what size awl came w/the kit???
-
OK...So I got some bad advise today (Not from here...At a local store ). so my 1st holster is not going turn out to be exactly what I'd hoped. The stitching is going to be horrible (at least part of it). I need to figure out what size diamond shaped awl and what size needles I should be using. I guess to go w/it I should also get the correct size thread. Any help w/this will turn the other half of the holster into practicing the proper stitching. I've also learned that the Pro Leather kit from Tandy has a lot of stuff I don't need for holsters and not a lot of stuff I do need. Oh well, live & learn. Maybe I'll grow into it!
-
Got it. Now it makes since. I'm going to my local Tandy Factory today. They are offering tutorials from now til Christmas. While I'm there I'll see about the Stohlman book. Otherwise, maybe I'll hit the library (haven't been in there for awhile!). Thanks guys!
-
So does the width of awl/haft go w/the seam or against the seam? I also don't follow the angle. I read that most say to make the hole at a 90 degree but a few say 45 degree angle???
-
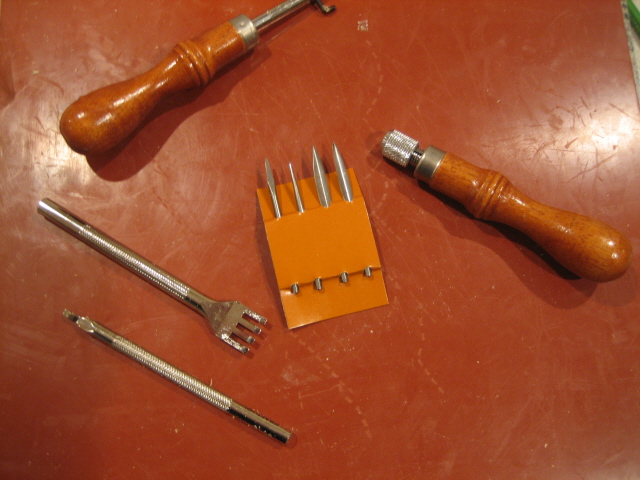
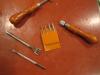
So the 2 larger on the right are for lacing? The one 2nd from the left is an awl (round) and the 1 on the far left is diamond shape. I thought I read that it was better to have a diamond shaped hole???
-
I guess what I have is not a sewing awl though. They are sewing hafts & blades. What are these used for?
-
Can someone explain using thonging chisles vs. sewing hafts & blades?
-
I guess my biggest question is the difference between using the thonging chisles and the sewing awl.
-
Gotta newbie question on stitching when making your holes. The drilling method is pretty straight foward. What size bit is preferred? However, if you're not going to drill and use tools, which tools are for making the holes? From left to right can someone tell me what's for what? Will the thonging chisles go thru both layers front & back? I know the top left is the stitch groover. I don't have a freehand groover. Will it work to use the edge groover for all grooves?
-
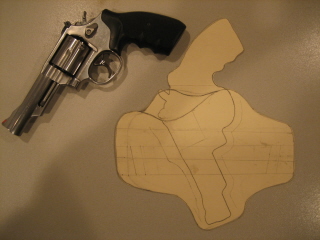
Here's the start to my pattern. I wanted to get the cylinder above the belt, but that makes it ride way to high. I'm still not sure it wont' be too high but don't thinki I can move the belt loops up too much. Maybe I'll start a new thread when I get farther along. Any suggestions are welcome!
-
I went w/the Pro Leather Kit from Tandy. It had about everything I'll need except needles, waxed thread & cement. I plan to make some additional boning tools and may eventually pick up some carving stuff. But keepin' it simple for now!
-
I've only been here a short time but have learned that the preferred method is making your own pattern. I'm working on one now for a K frame revolver. Next will be an M&P Compact or Walther PPK. I looked around at many designs and used that as a guide. I have sketched out on a folder and starting to cut it out. I think I'll even cut the belt holes and feed it thru a belt to see how it feels/fits.
-
Is there a recommendation for how far you stitch lines should be from edges? Re-read the pinned How To and see that I missed the line is 1/8" from edge. Do you guys use double stitching (2 needles) or single stitching (1 needle). Seems the double is better.