JoeS
-
Posts
54 -
Joined
-
Last visited
Content Type
Profiles
Forums
Events
Blogs
Gallery
Store
Everything posted by JoeS
-
Well, I've updated Flash Player and read what I could find about uploading and even replied to my own post in the hope some other options might be available but no go. I clicked on the Try Switching To Our Basic Uploader link but it just leads me to my manage attachments area of my options with nothing I could find to get pics to it. The thing that gets me is I've been able to upload in other posts and I can't figure out if it's me or not. Anyone else have this problem? I hope I'm not missing something simple. joe
-
Hi, I must have some setting or something wrong, or maybe it's firefox, but when I click the attach button below to upload pics, it acts like a dead link....nothing happens. I'm running win98 with a cable connection. Any suggestions? thanks, joe
-
Hi TwinOaks, Thanks for the link, the pattern there is very close to what I'm trying to copy. Thanks for the search tip too. Every time I search I end up with a lot of unrelated results and thought the parenthesis were all I needed. joe
-
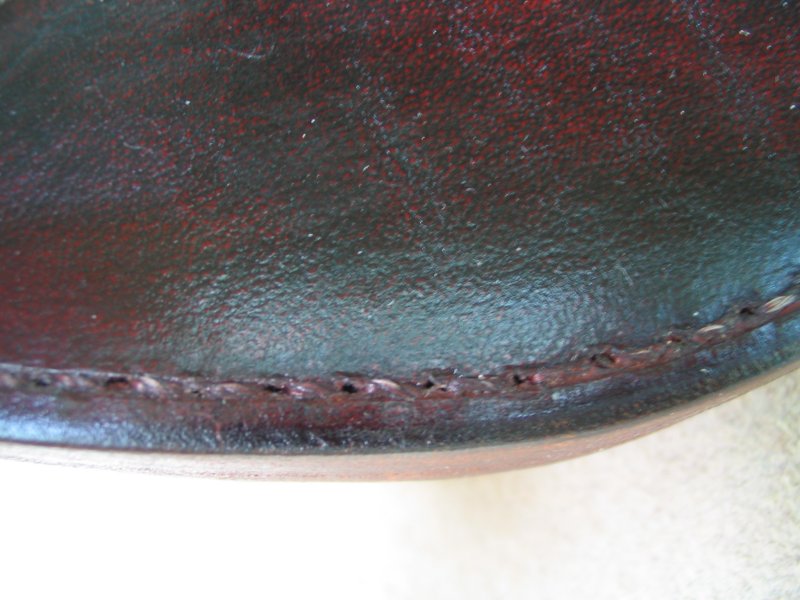
badLoveLeather, I have the old, well worn, stapled together wallet and was given permission to take it apart to make patterns from. My problem is guessing what it was made of and how thick. The edges aren't rolled so I assumed it was handmade from something vegtanned. It's soft but doesn't have the little pin marks that I've seen on pig so I went to Tandy and picked up a vegtan kip skin 2.5-3oz. thinking that when it's used it will break in and become soft like the old one, but now I'm wondering if it might be goat or something else. Do you mostly use chrome tanned for your wallets? I have to get a better handle on using vegtan before I try skiving/rolling edges with chrome tanned. I've got a month to do it so I have time to get some ideas together but I do wish I had picked up something thinner to work with. I'll make one out of the kip and see how it goes and if I learn of something better I'll make another. Thanks for the boost and I'll try to keep in mind the fun part. If nothing else I'll have a free pattern. joe
-
wallet leather weight
JoeS replied to dscott's topic in Purses, Wallets, Belts and Miscellaneous Pocket Items
Nice wallet MADMAX22. I'm definately gonna look for pig on the next one. Got my vinagroon out and I'm jumping in. -
wallet leather weight
JoeS replied to dscott's topic in Purses, Wallets, Belts and Miscellaneous Pocket Items
MADMAX22, It helps a lot to hear what others have done and what worked for them. I wish I had the money to pick up a side in every size but I don't and have to guess and by golly until I get more experience. It sounds like your wallets folded would be close to what I'm trying to do, so I might just get lucky. Thanks, joe -
wallet leather weight
JoeS replied to dscott's topic in Purses, Wallets, Belts and Miscellaneous Pocket Items
Hi AAron, I ended up taking a ride to tandy and bought a 2.5-3 oz. vegtan kip skin. I'm still a little worried about it ending up too bulky with 6 layers but I'm going with it. I wish I had thought to ask about the pig, but for some reason I didn't think they carried vegtan pig. I almost went with some soft chrome tan but it seemed like it wouldn't be so good for the pockets inside and I have no idea how to deal with edges on that stuff. So, off I go to learn a new lesson and hope for the best. Thanks for the reply, joe -
wallet leather weight
JoeS replied to dscott's topic in Purses, Wallets, Belts and Miscellaneous Pocket Items
I hope it's cool to jump into older posts, but I have a similar question about biker wallets. The one I'm copying has 6 layers with a zippered pocket inside, unlined with a flap/snap closer. I called Tandy and it was suggested to use 4-6oz outside and 2-3 inside using the veg tan kip they have on sale right now. I'd like to get a second opinion on the advice I got and any suggestions for other leather suppliers that might be better. I'm not far from Tandy and I think I'll bring the wallet in to see what they'll show me, but I'd like to have some info to mix with theirs. Thanks, Joe -
Hi, I'm going to try my hand at copying an old biker type wallet with a lot of little pockets stacked together with a fold over flap and snap. I called Tandy today to get an idea of leather weights and he suggested 4-5oz. outside and 2.5-3oz. vegtan kip they have on sale in their latest brochure for the inside. My question is whether the kip will be too stretchy and soft to hold up to wear and tear and whether you folks who make a lot of wallets use a certain weight and type of leather as a general rule of thumb. I know there must be many situations where it depends on the item being made but I'm looking for a ballpark estimate so I have a logical starting point. Thanks, and the site is looking great! joe
-
Just my opinion but, for what I paid for a years worth of constantly changing information of this kind beats any book or library I've ever seen. I certainly couldn't put together a site like this and keep everyone happy.... thanks, and hats off to the ladies.... joe
-
ah, here we go....i think i got the pics to upload....
-
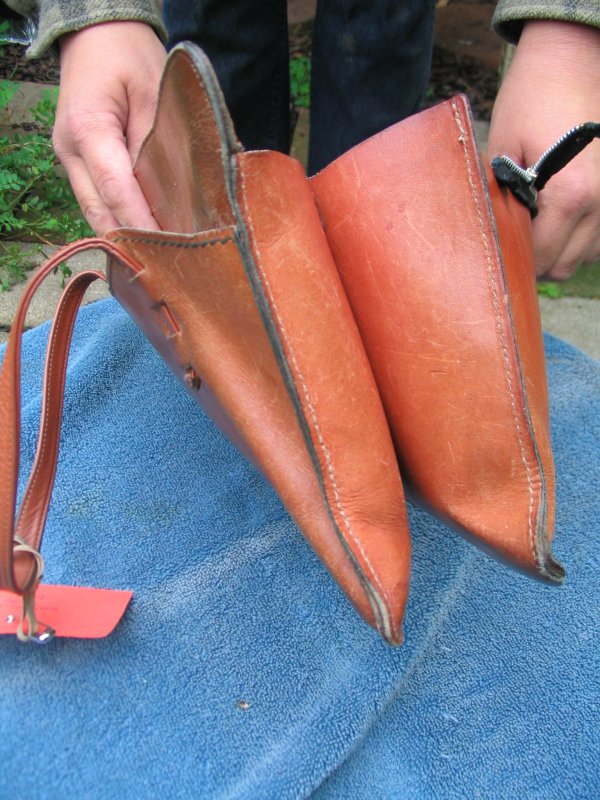
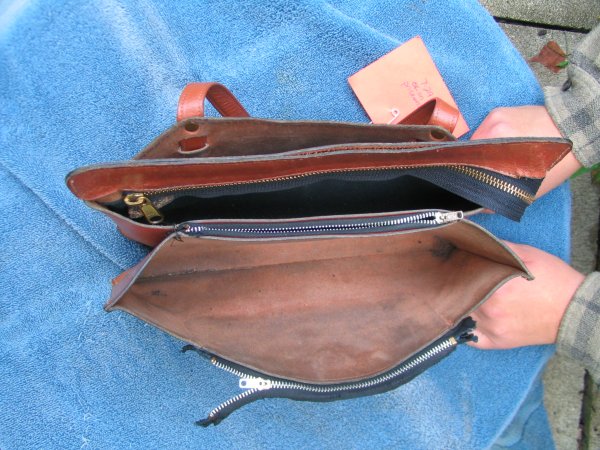
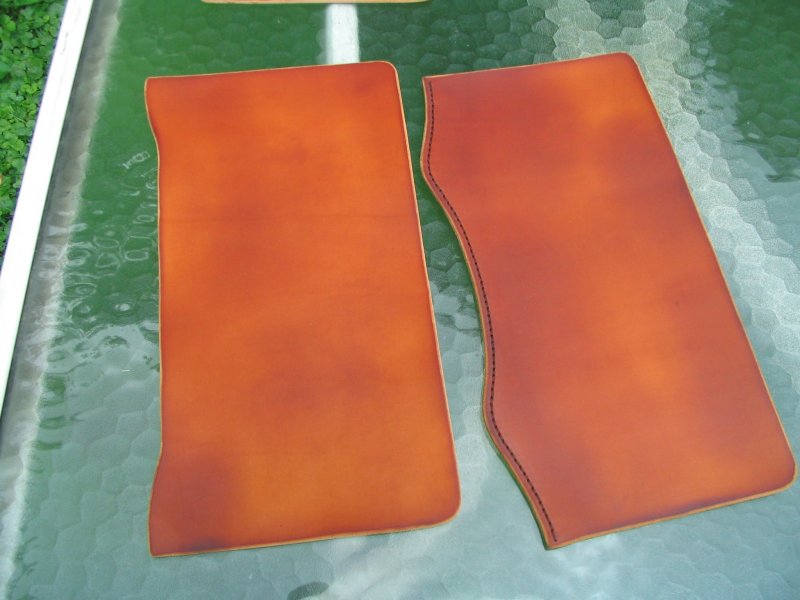
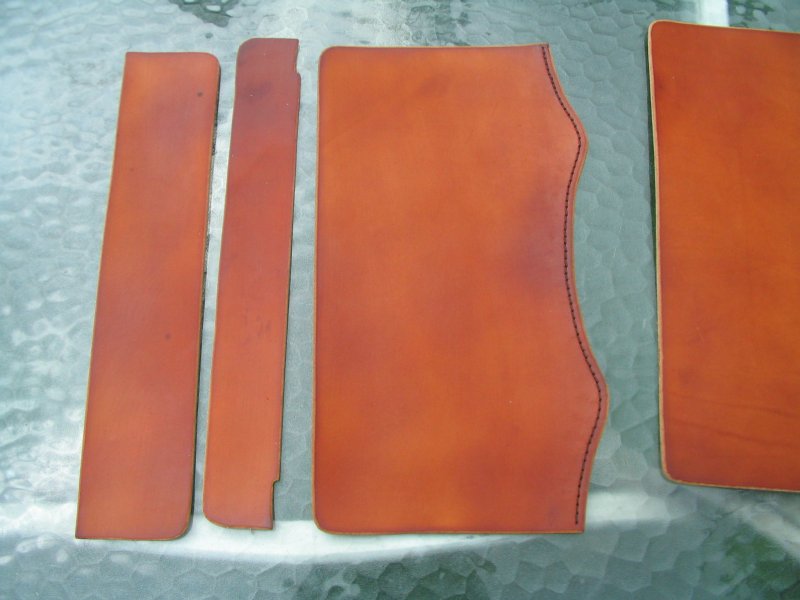
Hi, I've been asked to copy an old purse and was wondering if anyone couldoffer a way that they would go about it or to give me some advice ongetting all of these panels to line up nicely. I have 3/4 oz side fromW & C, took half of the purse apart (the other half is the same),made tracings of the pieces on file folders and I'm ready to transfermy patterns to the leather. I had posted a question about oiling mylast try on 5/6 oz and was told to cut it, case it, slick the pieces,oil with neatsfoot and then lexol. The lady wants it plain, no toolingor lining and I thought I could get that color close just by oiling.So, I'm wondering if this time I should rough cut the pieces, case andslick them, trace the patterns with a stylus like a pattern for carving( I found out on the last try what happens to pen marks when pieces arestacked on top of each other wet), finish the edges that are buried,oil, sew it and then finish the edges that are sewed together? Itlooked simple enough when I said yes but now I'm confused as to theorder in which I should put this thing together. The original looks tobe double stitched with something around #69 or #46 thread so I wasthinking of just using #93 on my flatbed 31-15 or Tippmann if I haveto, but the needle holes seem way too big. I'm determined to end upwith something reasonable, and if I get nothing else than some experience and agood lesson, I'll be happy. As always, any and all ideas orcomments would be greatly appreciated. I have pics but can't get the uploader to work with firefox. Is it me or the board update? Thanks for looking, joe
-
neatsfoot
JoeS replied to JoeS's topic in Dyes, Antiques, Stains, Glues, Waxes, Finishes and Conditioners.
ok, cool....seems like a waste to lose all that leather for a thinner piece....lol....one bad thing about this site is that there is so many ways to do something, it gets confusing, and it's nice to get a good solid starting point. thanks, joe -
neatsfoot
JoeS replied to JoeS's topic in Dyes, Antiques, Stains, Glues, Waxes, Finishes and Conditioners.
Thanks MADMAX22, I guess I had it back***wards....I did have a test piece that I cased and slicked after I oiled, etc. to scribe a stitch groove and it actually does look better, even done backwards. I think I'll try it on the whole mess to see if I can save the project and do as you suggest from here on out. One more question I have is whether it's the right thing to have W & C split out weights from their 8/10 oz sides to say 2/3 oz for belt liners and such or is there another way to go that would be better? joe -
Hi....I'm attempting to copy a purse for a lady with Wicket & Craig 5/6 oz. utility grade or whatever their cheapest sides are called. I put a light coat of neatsfoot on the cut pieces to color it some to match the original purse and it looks like I spilled it on the leather and it soaked in leaving blotches, even after 3 days. This morning I put another light coat on and put them outside in the sun and it doesn't look much better. This is my first side of W & C and since I've read so much here praising their leather, I have to be doing something wrong. The last side I worked with was an old piece I got free and it oiled beautifully....nice and even. This W & C side seems much stiffer and dry in comparison and doesn't take up the oil very evenly. I put lexol on the pieces first, cut them out and wiped them with denatured alcohol, then the neatsfoot. Would wetting the pieces before oiling help spread it more evenly? I'm stumped....any suggestions? Thanks, joe

-
Singer 111w155 or the Consew 225 clone
JoeS replied to unclebubba's topic in Leather Sewing Machines
Uncle Bubba, From a new guys perspective, if you have some patience you can pick up old machines on craigs list much cheaper. I picked up a 111-154, 2 31-15s and a patcher with tables and motors each for under $100. The down side is they probably have been laying somewhere and need a lot of cleaning and tuning up. I learned a lot from www.needlebar.org forum and you can get many of the old singer manuals online as well. The 111-154 I have is identical to the juki 563 we have at work except for the reverse lever. The thing rips so fast I can't use it but the seamstress at work loves it. A treadle is my top speed now, but I haven't put years in on them yet. Happy Hunting, joe -
machine sewing sheaths
JoeS replied to JoeS's topic in Gun Holsters, Rifle Slings and Knife Sheathes
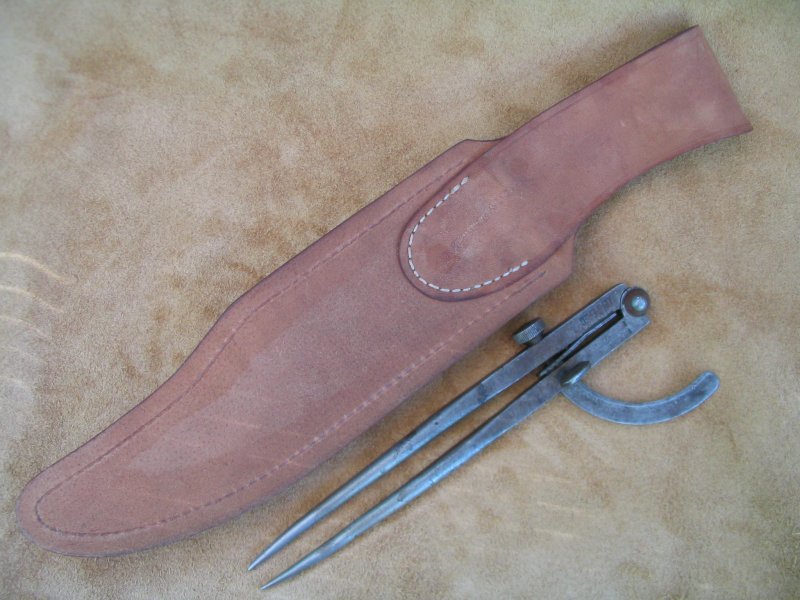
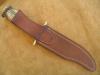
Thanks pancho47....I did get a retainer strap on it but forgot to take a pic -
machine sewing sheaths
JoeS replied to JoeS's topic in Gun Holsters, Rifle Slings and Knife Sheathes
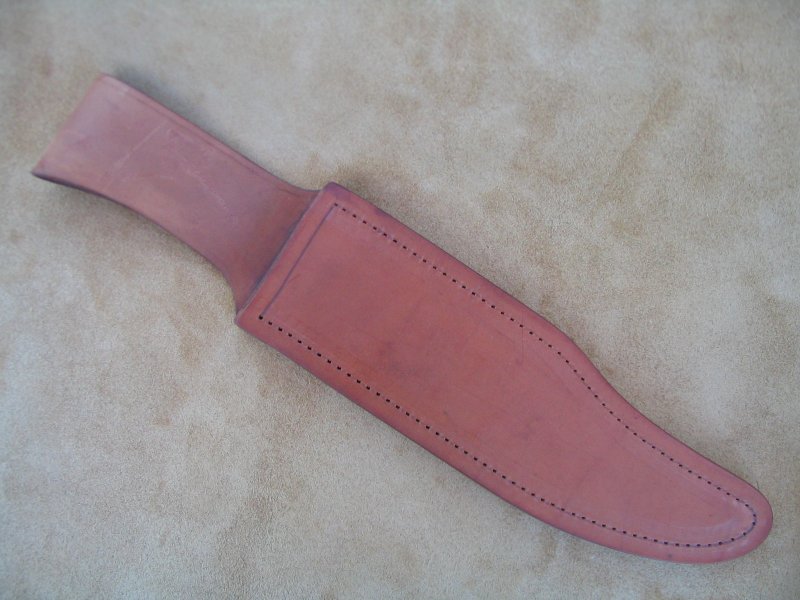
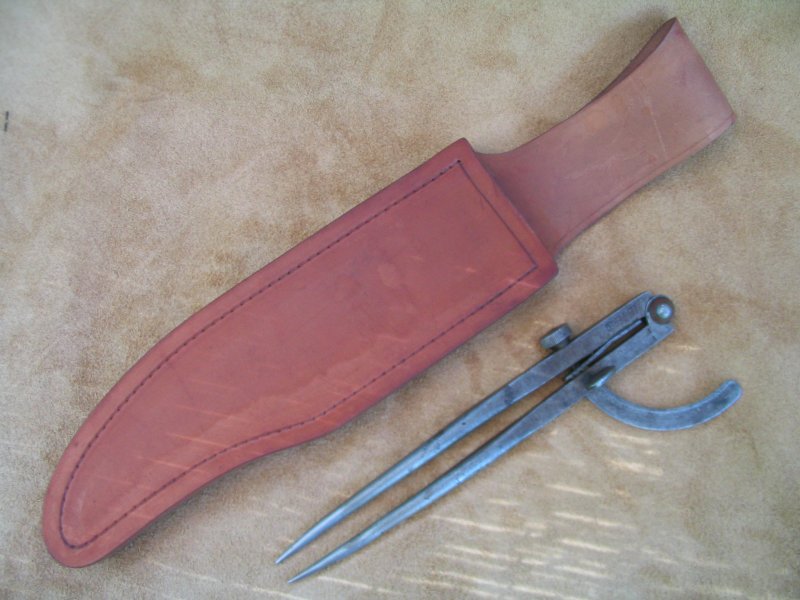
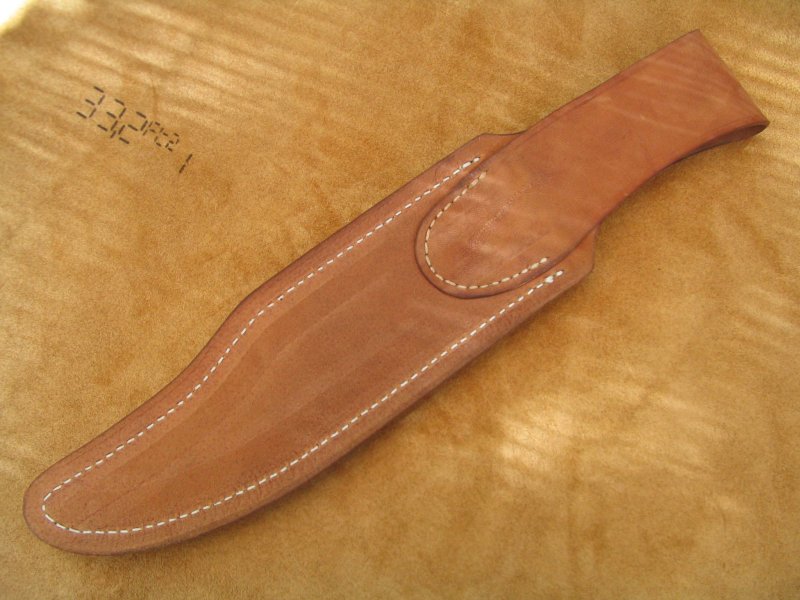
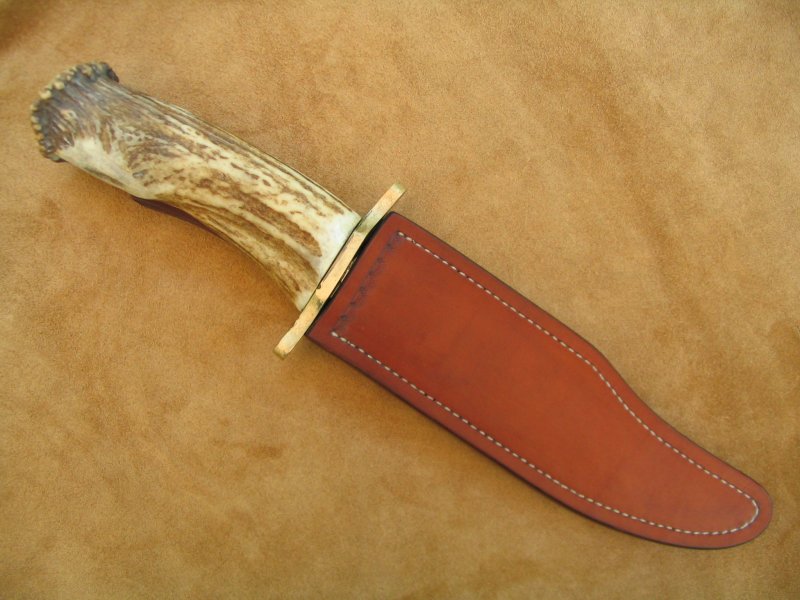
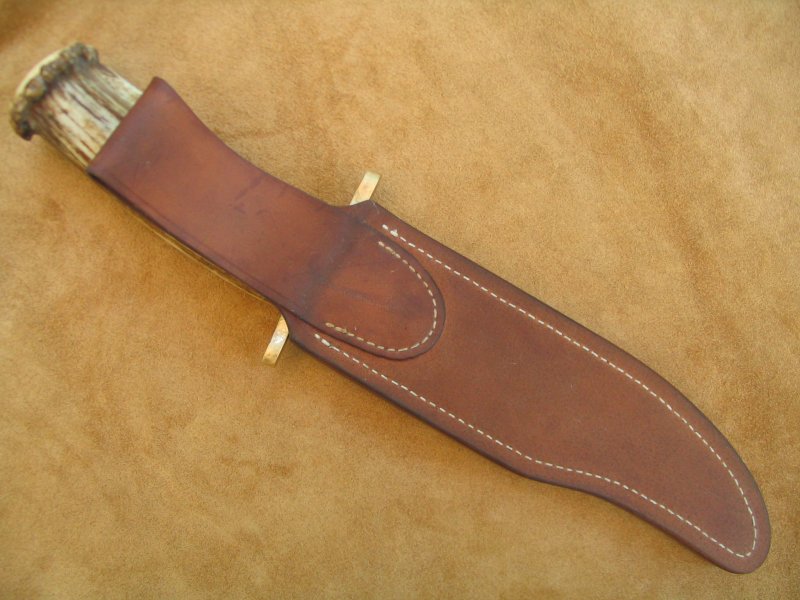
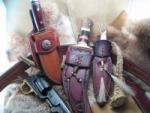
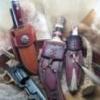
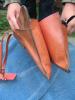
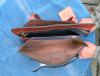
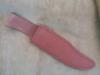
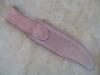
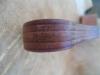
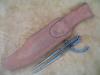
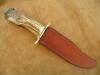
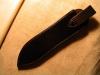
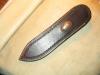
Hi again everyone, A guy came into the shop recently looking for a simple sheath for a knife he made and though he didn't want to spend much, I thought it would give me the opportunity to get some practice in on a paying job and to try the techniques Dwight explained. I used an old skin I have which I'm guesing is around 10 oz. for the body and some horse hide for the back panel/belt loop. I hope I'm in the right place being that I'm continuing Dwight's reply but I'm also looking for some hard critiques of my methods. So, here it is glued up with a line scribed on the front only with my dividers as Dwight suggested . Next I punched holes with an unthreaded needle so I could see step by step what's going on with my stitching. I didn't scribe a line on the back until I punched the holes so I could make sure they lined up ok. So after they were punched I ran the dividers over the holes again front and back to see if it would smooth them out some. stitched burnished damp, oiled with neatsfoot and then aussie wax One thing I left out was that before I glued it up I put a couple coats of satin sheen on the inside to seal it like I've read here, but either I didn't let it dry long enough or it's the wrong stuff to use because it or something was coming off onto the knife blade. Today I stuffed some aussie wax down in there and it seems better. I'm kind of putting myself on the spot before I'm ready to take in work, but I figured what the heck, I have to start somewhere, so I would really appreciate any comments so I won't have to sweat the next one out as much. Thanks for looking, joe


-
machine sewing sheaths
JoeS replied to JoeS's topic in Gun Holsters, Rifle Slings and Knife Sheathes
sorry about duplicating Dwight's answer. I haven't figured out yet how to strip it out to just leave my reply. joe -
machine sewing sheaths
JoeS replied to JoeS's topic in Gun Holsters, Rifle Slings and Knife Sheathes
Dwight, Thanks for taking the time to explain your techniques, it's just what I'm looking for. I really enjoy hearing about and learning how others go about their work. I do have a nice old pair of dividers that I've smoothed and use to mark guide lines for stamping and I'll definately give it a try. I've been wanting a good creaser as well and I'm thinking I could use those dividers for that too. I'm assuming you run the dividers on both sides before you stitch? I do use leather needles but have not tried wetting the stitch lines and burnishing with steel or brass. I have tried bone burnishers left over from my graphic art days but I did it dry. Left a nice sheen on the leather but didn't do much for the stitches. I'll have to hunt down some brass to compare with the bone....any excuse for a new tool is good for me. I also like the idea of not cutting a groove thru the grain, so as soon as my edge guide gets here I'll be giving it all a try. have a good one, joe -
machine sewing sheaths
JoeS replied to JoeS's topic in Gun Holsters, Rifle Slings and Knife Sheathes
Hi Charlie, I had a feeling I was missing something simple. I had put that material guide out of my mind when I bought the Tippmann and it looks like that's where it stayed. I'll pick one up this week. Thanks, joe -
Hi everyone, I'm fairly new to sheath making and still wrestling with good sound construction methods and design. None of what I have made so far can touch what I see here but I'm chipping away at it one problem at a time thanks to all of you who share your ideas and methods here. My question has to do with machine sewing. I use a Tippmann and thought if I built a flat bed for it a lot of my troubles with stitches staying straight on back would be improved. I make sure to get my edges as square as I can, cut a top groove, run a stitch marker and pre-punch the holes unthreaded, cut a groove on the back and stitch it around. ( I started doing that to improve the leather tearout on the back and it's better but not great) If I use a flat bed I think I'll be making more trouble for myself because of the belt loop being sewn on first. So, is it a matter of skill that I lack in just eyeballing it around freehand or am I missing something? I'd like to be able to do the separate belt loop types as well as the mexican loop, drop loop and the loop type that folds back into the sheath under the welt where sewing on a bed isn't as much an issue. I would like to avoid hand stitching and have seen some fine sheaths here done by machine and I'm hoping to get some tips from those more experienced to point me in a direction I can work towards improving my work. thanks, joe
-
Hi tomcat....thanks for your reply. I have seen the Tippmann video and maybe I'm wrong, but I thought I had the tensions adjusted decent. I just don't like the way the needle punches out the leather on the bottom side. Sorry for the bad pics and I wish I had taken the back pics before I tried to "help" the look by dyeing over the thread line. Maybe I need to cut the stitch groove deeper or fool with the tensions more. I thought I might try punching the holes from the back with an unthreaded needle and then stitch from the top, but it seems like the long way around. thanks for looking, joe

-
Hi everyone, I have a Boss stitcher that has me stumped as how to get the bottom stitches looking better. I'm using 207 thread on top and bottom with a 180 794s needle. I dropped down from the 200 794s and 277 thread it came with and it doesn't seem much different in 3 or 4 layers of 8/10 oz. Wicket and Craig or on old pieces of leather I have. I have some experience in tension adjustment with smaller old singer industrials and the mckay stitcher at work but I can't seem to find a way to make a knife sheath look decent on the bottom side with this one. I've seen here how nice some machine sewing can be on both sides and am hoping there is something I can do to improve that blowout look, starting with operator error or any other suggestions anyone might have. thanks, joe
-
Hi everyone, I've been reading, reading and reading since I joined around last Christmas and thought I had better be polite and say hey before I post any questions. I currently work at a shoe/leather repair shop in the west suburbs here and have had an active interest in leather working since a long camping/road trip in the early 90's landed me near a saddle shop where I was fortunate enough to meet some nice, patient folks that allowed me to hang out around their shop long enough to learn a little braiding and catch the bug. A big thanks to everyone here as well, for such a wide range of study material. I hope to contribute something worthwhile in return. joe