


Loudcherokee
-
Posts
97 -
Joined
-
Last visited
Content Type
Profiles
Forums
Events
Blogs
Gallery
Everything posted by Loudcherokee
-
I may relegate this thing to smaller jobs, and figure something else out for belts and holsters. It seems rather limiting. Still useful to save some time from saddle stitching though. LC
-
Yes that is the one. Not as nice as that singer posted above. LC
-
I've seen 138 mentioned as well for this machine. I wonder if the bobbin will hold enough of it to do a belt of say 46 inches. LC
-
Hey everybody, Was browsing around on YouTube and keep seeing these things pop up, and was wondering what ya'll think about them? I'm happy saddle stitching my smaller projects by hand, but I do want to do belts and I cant imagine how long a belt would take to saddle stitch. Will these machines do belts? I keep seeing mention that the bobbin doesn't hold much thread, or you're limited to smaller thread and needles. I keep seeing #69 thread mentioned. Is that even appropriate thread for a belt? Specifically a rigid gun belt meant for every day carry? I did see one comment on YouTube that a guy is using a size 22 needle with 207 but there are no more details. LC
-
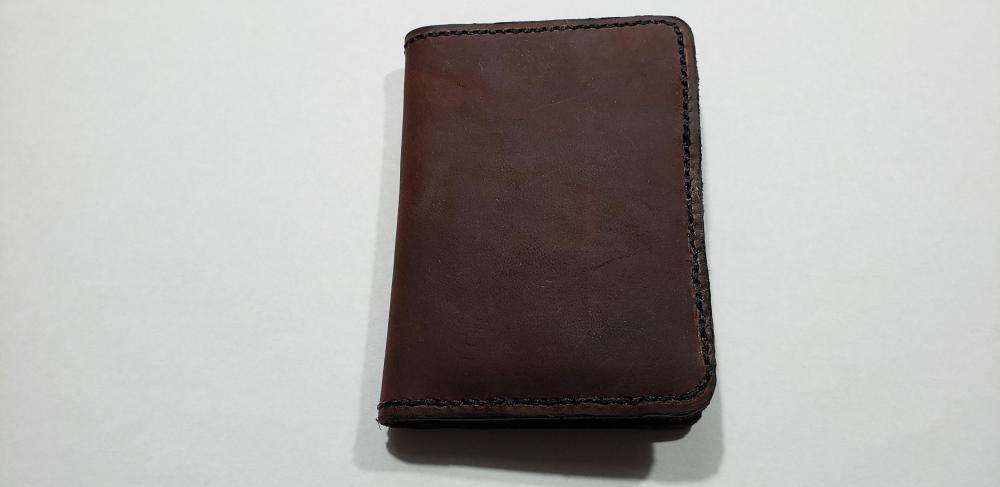
My very first project
Loudcherokee replied to Loudcherokee's topic in Purses, Wallets, Belts and Miscellaneous Pocket Items
Funny you mention that, as I ordered 2 of their $30 sides just the other night! LC -
My very first project
Loudcherokee replied to Loudcherokee's topic in Purses, Wallets, Belts and Miscellaneous Pocket Items
Good to know about the cutting mat and round knife. I will keep that in mind. I do have a 24"x36" black cutting mat on order, but it has not yet arrived. I will look up those threads you mentioned. But a question, is there no standard for size on this stuff? It seems like each brand has a different way of listing their size. Ive seen the actual diameter listed, ie .6mm, 1mm, etc. Then I've seen a 3 digit number, such as 207, 277, 138, then one with a T, ie T70, also one with a D, 150D, and now you throw out simple numbers at me like #5. This part i find very confusing. I went with the Ritza because it is listed under supplies on a few of the videos I've watched of projects id like to do. Wallets, laptop bags, satchels, etc. I chose the 1mm for holsters and knife sheaths. I do also have a set of 4mm pricking irons. I will ditch the stitch groover for these projects, and stick to the wing divider for them. I will try the stitch groover again on some veg tanned, which arrived today. I just want to see if its the groover or my technique or this leather. I would like to use it for holsters and sheaths though. I found some flexible glue spreaders. I will purchase them as I really like the idea of having a precision way to apply my glue. I like the idea of punching from the inside, but I've definitely got to get my cuts straightened up or I'll just have awful stitch lines on the outside of my projects. My straight edges arrived today id been using a clear acrylic ruler and even with that was having difficulty cutting straight, I believe due to being able to see the line through the ruler and not having it lined up correctly. Im at the age where some reading glasses may find their way into my tool box, unfortunately. The Japanese skiving knife im referring to is this one, yes from Amazon. https://www.amazon.com/BANYOUR-Leather-Cutting-Working-Leathercraft/dp/B07LD4PC2D/ref=mp_s_a_1_4?dchild=1&keywords=leather+skiving+knife&qid=1609805246&sprefix=leather+skiv&sr=8-4 It actually worked really well at first, but dulled very quickly. I was honestly surprised at how easy it was to thin down an edge, but then once the fresh razor edge was gone it started taking chunks out. I will look for a higher quality knife, and also look up how to strop and sharpen my tools. As for burnishing, my second project turned out MUCH better. I don't have any pictures at the moment but I think what I did wrong on the first one was rush through it. I let the glue set up only about 5 minutes before joining the two pieces, and after hammering the glue i immediately went out to the shop and hit all my edges with a sanding drum on my dremel to level them. I then used a wool dobber to apply fiebings pro chocolate dye on the edges, and only let this dry about 8 minutes before hitting it with bees wax to try and burnish. The glue became separated and my layers turned to mush at the edges, and look like they do in the pictures. On my second wallet, I used the sanding drum, then beveled the edges with a #2, applied bees wax, and then burnished with my hand slicker. It came out so much better. I have a nice, rounded, smooth edge that looks like one layer. I did not use any die this time. LC -
My very first project
Loudcherokee replied to Loudcherokee's topic in Purses, Wallets, Belts and Miscellaneous Pocket Items
Thank you for the tips! Let me see if I can answer your questions. The leather is from upon and is 3-4 ounce. I got it from Amazon cheap because I didn't want to get higher quality leather while just learning. I believe its oil tanned? Here is a link. https://uponleather.com/pull-up-leather-2-3-sq-feet/ Yes, I've realized my cuts are wonky. I'm trying to learn how to use a round knife and I'm figuring out it takes some skill for sure. I made a second wallet today that turned out much better in some ways, as I used a straight edge and exacto blade to cut those pieces. The thread im using is some of unknown variety that came with my stitching pony. It is waxed thread. I've ordered some ritza tiger thread in .6mm and 1mm, and also some 207. It just hasn't gotten here yet so while I was messing around I used what I had available. The stitch groover worked better the second time around, but I've also ordered a wing divider that should be here tomorrow. I will be using that going forward. I will look for a glue paddle as the brush in the contact cement jar wants to put way too much glue down, and the acid brushes i bought are way to stiff to apply correctly. My wife suggested using craft sticks or orange sticks. I'm using stitching chisels and the size used on this wallet was 3mm, and I'm punching from the outside of the wallet. I do realize my thread was too big for this wallet but it is what I had on hand and I was anxious to try and make something. I burnished with bees wax, as my tokonole, gum trag, and saddle soap are also in the mail. Im using a hand burnisher that is either rosewood or cocobolo i cant remember. I also used a Japanese skiving knife on the slot tabs. Man that thing will take some practice to master. Thats what happened to that slot on the top right side of the wallet. Hope that covers most of it. LC -
My very first project
Loudcherokee replied to Loudcherokee's topic in Purses, Wallets, Belts and Miscellaneous Pocket Items
Ok try this - My first project https://imgur.com/a/IcW9fvD LC -
Hello all! This is my first dive into leather. I printed the template from here for a basic wallet. This was interesting, and I definitely learned some things along the way. I found saddle stitching to be quite relaxing once I got onto a rhythm. Please critique my work and point out anything I need to improve on. A few things I struggled with - I need to let my glue set up longer before burnishing and stitching. My stitching groover may possibly be junk. I could not get it to cut. But, it may also be this leather. I had a hard time with my beveling tools also getting a good bite. The leather wanted to wrinkle and fold, and kind of "push out of the way" instead of the beveler taking bite. I've no idea how to burnish such thin leather as seen in the slots. When lining up the tabs for the card slots, do they need to overlap or do they rest right under the first tab? Neats foot kind of ruined the pull-up look of the exterior. It did look like the inside pockets. Thats just a few things I learned for my next project. Please point out any other areas for improvement and don't hold back! My skin is a good 14/15 ounce thick! Haha. LC Well, I have more pictures but can't seem to figure out how to upload them. I keep getting hit with a 1.46mb upload message. LC
-
Thanks! I will give that a try! Now that I think of it, I wonder if glove conditioner for baseball gloves would also work. LC
-
Thanks for the replies everybody. Yes, the weight would be a concern for sure. I normally carry IWB, but was looking for a paddle option just for the quick convenience and not necessarily for deep concealment. I do have a smaller 1911, a compact model. Perhaps the paddle may be better suited for that. What about softening leather like I mentioned above? Is there a type of oil or something that would make it more supple? Say for a strap or closure? LC
-
Hey guys, planning a project or 2 and have a question about changing the stiffness of the leather. Is this called the "hand"? I think i read that somewhere. Anyways, one of my projects is a journal cover for my wife. I have some nice brown pull up in 4-5 ounce to do this with, and had the idea to add a strip of natural veg tan 8/9 ounce around the middle, and this will be my strap for closure with a buckle. I would sew the strap onto the 4-5 ounce after finishing the edges and oiling with neatsfoot. What I'm wondering, is how to soften the end of the strap part that will go into the buckle so it is more supple and pliable. Flimsy, if you will. Is there a chemical that will do this or would I need to skive it down to make it thinner? As far as stiffening, how would I go about the opposite? Another project I would like to try is a paddle holster. I seem to recall seeing a leather paddle holster with an actual leather paddle. There would need to be a slight curve to the paddle and it would need to retain this shape, while also being stiff enough to not let a full size 1911 flop around. Is there a thin type of metal or something to sandwich between two pieces of 10 ounce leather maybe? Same question would apply to stiffening a leather gun belt. Ive seen people mention a "liner" of metal in between two layers of leather. What type of metal is used here? LC
-
I've always just used denatured alcohol in my airbrushes for other stuff, but haven't sprayed any dye through it yet. Keep an eye on your o rings as alcohol may have a tendency to dry them out. LC
-
I just ordered 800 yards of 207 bonded nylon thread per your suggestion. I think the roll of ritza i ordered was only 80 feet or so. I also found a decent priced belt template from Makers? Threw one of those on my order as well. LC
-
Thanks for the replies so far everybody. I updated my profile, im in Tennessee, USA. I'll give a list of the stuff I've accumulated: Scratch awl Diamond awl French skiving knife Round knife Mallets- one round, one mallet shaped Burnishiers - rosewood kit that came with a standard size, a small tiny one, and a square block which i don't know what is for. Stitching irons 3mm, 4mm Bone folders Hole punch kit Exacto set Stitching pony Edge beveler - sizes 2 - 5 Stitching groover Tracing stylus Swivel knife 20pc stamping tools Poundo board Thread zapper Strap cutter Green stropping compound 7 piece cocobolo burnisher bit for dremel Divider wing compass Wool daubers, foam brushes, acid brushes, portion cups, fiebings pro dyes chocolate and black, john james needles size 004 and 002, ritza tiger thread size .6mm and 1mm, gum trag, weldwood contact cement, saddle soap, resololene, neatsfoot oil Self healing cutting mat Plastic cutting/stamping board Various rulers and measuring tools 6 square foot craftsman grade springfield veg tanned leather 7-9 ounce Approx 5 sq ft 4oz pull up leather in bourbon brown 2 72" long 8/9 ounce 1.5" strips Various snaps, rivets, Chicago screws, buckles, etc That about covers it for what I have either on hand or in transit. LC
-
I did order some gum trag, saddle soap, and the two waxes to start off with. The tokonole is pricey and I've only seen one guy using it. Ive also looked into edge coat but didn't order any this time around. LC
-
Yes! Those are the right clasps. Thank you for that. I couldn't find anything like it on Amazon. That is another thing that confuses me, is the size designations between different manufactures. Where one thread company will have a numerical size like you listed, and another will have a size in mm. Same with other tools, like a #2 punch but the punches i got have measurements in inches, ie 5/8th, 1/4, etc. The thread i ordered for the holsters is ritza tiger 1.0mm. Im not sure how this measures against the 207 you mentioned. Im also seeing sizes of 150d or something like that. I got a stitching pony and harness needles, and plan on hand stitching for a LONG time. No way I can justify a sewing machine, not even that little manual shoe cobblers machine that seems to be so popular. LC
-
Hello all! Been lurking here for awhile and finally decided to join up. I've been interested in leatherworking for a few months, and just recently decided to buy some supplies to get my foot in the door and try some things. It started with Googling "how to make a leather holster" and after watching one video I was already hooked. I would like to learn to make holsters, sheaths, belts, wallets, messenger bags/laptop bags, journal covers, etc. After literal hours and hours of watching YouTube and lurking here, making lists and notes, tool and supply shopping lists, I think I'm ready to start. I do have a few questions though that I didn't get clear notes on or was confused about. Stitching and thread selection - so far I'm going with John James needles, and I have size 004 with .6mm thread for wallets, journal covers, smaller items, and a size 002 with 1mm thread for holsters and belts. I have 3mm pricking irons for the .6mm thread, and 4mm pricking irons for the 1mm thread. Does this sound right? Edge burnishing - out of all the burnishing agents, gum trag, tokonole, saddle soap, 50/50 beeswax/parafin, when do you use which item? Like, what material or situation calls for one over the other? I've seen the same makers use different ones, with no explanation as to why, other than one video stated that using saddle soap allows dye penetration on the edges after burnishing where as gum trag will not. Belt hole spacing- ive read alot about this, and have decided on spacing for the belt holes, but what I cant seem to find is the measurement for the spacing of the holes at the buckle end. How far apart should the screw holes be, and how long is the slot for the buckle notch supposed to be, and how far away from the screw holes to start the slot? I know there are available templates, but I would like to create my own but can't find these measurements. Latches - I'm able to locate buckles and such, but there is a latch i have in mind for a project but I don't know what its called and my searches aren't finding what I'm looking for. Its a latch that would go on the end of a strap, and often is spear head shaped, with a small spring loaded button on top of the latch. This slides into the receiving part of the latch and the button pops up to latch it under a bar. I cant figure out what this is called. Makers mark - while I don't immediately plan to go into business, if I find that I enjoy this craft and want to start selling things, how do I make a stamp for my logo or makers mark? I already have some things in mind for this actually so if I start giving my projects away as gifts or whatever, I would still like to have a mark on it showing that I made it. Looking forward to learning alot and sharing my experiences along the way! LC
