


MikeCahill
-
Posts
117 -
Joined
-
Last visited
Content Type
Profiles
Forums
Events
Blogs
Gallery
Posts posted by MikeCahill
-
-
I am more into form and function rather than decoration, They look "right", great bit of craftsmanship
-
cover the belt buckle with gaffa tape, trim the excess tape all round the edge with a sharp knife, peel the tape off and stick it on a piece of paper, bob's your uncle, fanny's your aunt, that is your pattern the lace holes are round the edge of the gaffa tape, add 1/4" all round, for material thickness to lace over. Works with any shape or size of buckle. This style of pattern is called a sloaper, the name comes from dressmaking
Just noticed that the buckle has holes all round it for lacing, forget what I said about adding a 1/4" round the outside, just trim it to size, rub the gaffa tape with your thumb before peeling it off the buckle, it will leave indentations where the holes are, then go round with a pencil and puncture the tape where each hole is, the holes will close up when you stick it to the paper, but you will still be able to see where they are. Providing you are gentle, and don't stretch the tape when peeling it off, you will have 100% accuracy
-
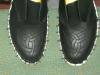
Hi everyone.I have large and small buckle blanks and would like to get a pattern for the covers as I want to make a set up for a belt.Same as the ones pictured here:
Thanks!
cover the belt buckle with gaffa tape, trim the excess tape all round the edge with a sharp knife, peel the tape off and stick it on a piece of paper, bob's your uncle, fanny's your aunt, that is your pattern the lace holes are round the edge of the gaffa tape, add 1/4" all round, for material thickness to lace over. Works with any shape or size of buckle. This style of pattern is called a sloaper, the name comes from dressmaking
-
I'm lazy. This color scheme goes from "photocarve" to tracing pattern with about 6 "clicks"....
I can see some some fantastic applications for this technique, but there are some limitations, a stylised carved rose works because people see the pattern, and the mind accepts it as a representation of a rose, but life isn't like that, most flowers are asymmetrical, the eye might have a problem picking out what it is looking at, think of those drawings where you have a sketch of a beautiful young girl, which when you look deeper you have a picture of an old crone. It should work ok with animals and landscapes, and as an aid to composition, and scale.
cheers
Mike
-
The boot and shoe guys mix it up various formulas and ratios of waxes and rosin. I have heard it referred to as coad. It helps to lock and seal stitches. It almost approaches doctrine with formulas and types of wax and rosin to use, and then how it is worked. www.thehcc.org has info in the archives. Rosin is available with many rodeo equipment suppliers in black and white rosin, depending on remaining pitch or terpenes or some other chemical I never really undertstood. Roughstock riders use it to tack up gear and gloves. It is almost doctrine with them too about whether black or whote rosin is better. **Big hint** Don't let your girlfriend try to clean out your gearbag. Rosin socks play hell on a load of wash and the machine too.
Over here (UK), this is known as cobblers heel ball, and is available from shoe repair suppliers, a mix of rosin, beeswax and natural turpintine, I however can't use it because I am allergic to rosin, and If I use it my hands swell up, and I get a really bad itchy rash, I just use bee's wax, not as good, but it works!
cheers Mike
-
spot on storm, by the way I was brought up to call the beam compass a trammel bar (Two peoples divided by a common language and all that)
Beam or trammel, Potatoe or potahtoe, tomatoe or tomahtoe....HA! Although a length of string, a sharp lead pencil and a push pin or thumb tack(English translation inserted here please) should work quite well as a field expeient. Oh lord how luddite of me. LOL!!! I will PM you a funny true story.
Storm
Drawing Pin!!
-
Before anyone has to shovel out their shop or warm up their ale....
 I have come up with a visual aid which might do the trick. This does not preclude the idea Mike can stand a pint or two at the pub or Ray can fill us in on the Shropshire Slasher. Gin and lime for me thanks! LOL! All kidding aside I thought this might help. Hope its self explanitory enough.
Cheers,
Storm
PS: If anyone has a problem downloading this the PM me with your private Email and we will do it that way.
spot on storm, by the way I was brought up to call the beam compass a trammel bar (Two peoples divided by a common language and all that)
-
I thoroughly enjoyed this thread despite not understanding a word! I'll thank you for a lesson over a pint sometime, Mike.
Ray
It's not rocket science, I did this for my 11+ exam, the other one was calculating the volume of a cylinder, I can't remember that one probably because I've never had to use it, perhaps the problem is the quality of my explanation. I can see a mental image of it as I write this. by the way, the answer to your PM is sure, any time, give me a bit of warning, and I'll spend a couple of days digging some of the rubbish out of my workshop so you will be able to get into it
-
I just got through making one from scratch so here was my approach. I used some heavy brown craft paper from Walmart. I also got a reasonably priced adjustable curve from Staples a Staedtler 971 60-18. First I measured the wrist diameter second I used a ruler to see hoe far up the arm I would go and at the top I took anther measurement around my forearm. I also added another inch and a half for an overlap. On the craft paper draw a center line that is the length from wrist up the forearm
and using that as your center measure half the distance to the right and half the distance of the wrist to the left. Repeat at the top. Use the large flexible curve by using its center on the center line and draw connesting the right and left sides at the top and bottom. You may have to do it a couple of times but from the paper pattern you can generate a pattern on matte board or plastic. Then cookie cutter both the left and right sides using one pattern.
Hope that this help a bit.
Storm
Building on Storm's solution, continue the line from the elbow mark, through the wrist mark, through to where it crosses the centre line, that is the centre of the radius, pencil and string from that point and you have perfect arc's
Cheers
Mike
-
Mike, I'm a little slow, so bear with me. I'm drawing a line from the mid point on the left edge to the lower right hand corner to get a diagonal line?
Drawing the first line like that was just so you wouldn't run out of paper when you started constructing your drawing. your wrist is narrower than the flesh of your arm near your elbow, line up the outside of your fore arm with the first line with your hand pointing to the start of the line. Now mark how wide your wrist is on the paper at the inside of your wrist, and mark how wide your forearm is at the point where the bracer will end. Move your arm, and you have two marks on the paper. use a long straight edge, and draw through the forearm mark, through the wrist mark, and keep going until the line crosses the first line you drew.
Still with me? Now using a big pair of compasses, or a piece of string, pencil and nail, so you can draw curves fasten the nail, (or put the point of the compasses) where your second line crosses the first, and use the pencil and string to scribe two lines from the first line, one at the wrist mark and one at the fore arm (elbow mark). measure around the wrist and mark that length on the wrist arc from the first line. put one end of the straight edge against the nail, and draw a line through the wrist marks, and on through the forearm arc. The shape you have just drawn is like a paper cone with the top cut off and then cut along its length and opened up.
It's not an easy thing to explain, hope you understand, pm me if you want me to send some pictures, can do that tomorrow
-
Does anyone know how to figure the top and bottom radius for a wrist bracer? Also, is the radius different for different lengths?
[/quot
get an old piece of wall paper left over from when you last decorated, about 3 ft. long at the left hand end draw a line from the middle of the paper to the edge at the other end, you now have a line that runs the length of the paper diagonally from the middle at the left end, to the edge at the right hand end. now lay your arm along side the line at the right hand end and mark a point on that line at your wrist, and another up where you want the bracer to end, near your elbow. Now with a pencil held vertically draw a line along the other side of your fore arm use a straight edge to continue that line until it intersects the first line this is where you get the arc from. Use a pencil and piece of string to strike two arc's one at your wrist point, and the other at the elbow point . measure around your wrist, transfer this measurement to the wrist arc, strike a line from where you started the arc's through the wrist arc, to the elbow arc. You now have "A development of a Truncated Cone" as my tech. drawing teacher would have called it, cut it out, wrap it around your fore arm, and play about with the shape until you are happy with it, thats your pattern. you can now make them any size
,
-
Are you using your race freehand, Mike? I find it very hard to cut precisely where I want the groove and have to use a straight edge to run the tool along to get a neat line - going round corners, let alone doing a Celtic design - is a very slow careful business. Kara Ginther's stuff is excellent, Claire. I hadn't seen any before and was thoroughly impressed. Painstaking work and incredibly neat. Even if you are not interested in chip carving take a look at www.karaginther.com as it is well worth the effort. Ray
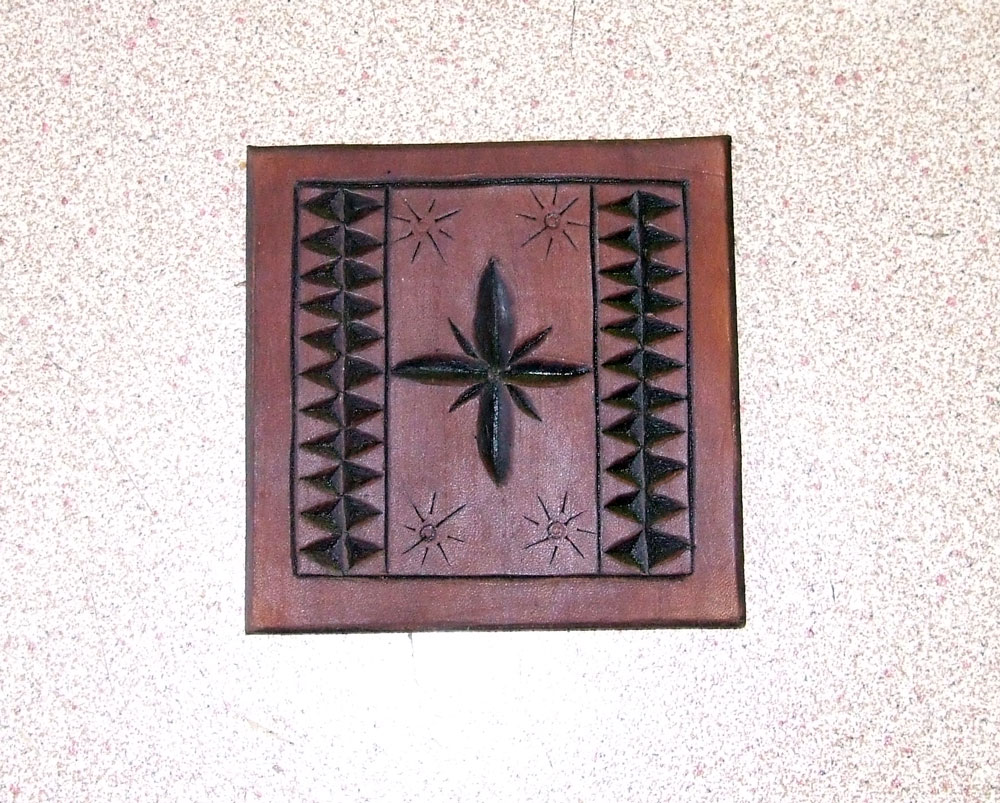
usually I trace the design into dampened leather surface, so that it leaves the faintest of impressions, then holding the race like a pen I cut freehand rotating the leather so that I am always pulling towards myself, I try and plan short cuts so I can use the heel of my hand for support. the particular design I posted, I pricked the leather at the intersections of the lines, and traced a couple of arc's on some thin scrap ply, cut them out, polished up the arc's with a bit of parafin wax and use the race pressed against them. I do the carving before any sewing so if I make a mess of it it's just one piece of leather scrapped.
-
I have a picture of races like those you are talking about, Mike - see below: I use mine to cut stitching grooves. I find they work well on thicker leather but tend to drag on thin stuff. I'd like to find a really good American style groover but don't know where to start looking. Anyone got any ideas? Ray
Mine is like the one on the right, double headed, one narrow groove, one slightly wider, I wouldn't use it on leather less than 2mm thick, it would weaken the leather too much, to work well it has to be fearsome sharp, or it drags the leather and makes a ragged cut. the cut can be improved by waxing the leather, and putting it in the fridge for a few minutes. I also have a groover with a ring end like slicks, the working end is replaceable because they wear out, that gives a very fine groove and I use that for detail, although I have found that bold designs work best and I don't have much of an artistic flair.
cheers
Mike
-
i have often admired chip carved woodwork and wondered if it could be applied to leather....so i bought a chip carving knife this morning, watched a few youtube videos and set knife to leather.... i think the results maybe worth exploring a bit more...and a lot more practice!!
this is what i produced one hour later.... i really wanted to burnish the little triangles but couldnt work out how to do it....anyway just a quick practice piece.
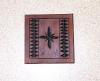

Although it isn't the same as chip carving, the traditional way of decorating the dancing clogs of Yorkshire and Lancashire (England) was to carve a design into the leather of the upper before forming the upper on a last .Designs were often flowers or geometric shapes and patterns no attempt (as far as I am aware) was ever made at making the design stand out by hammering backgrounds and if it had, a lot of the effect would have been lost when the leather was stretched over the Last, but I have seen whitening rubbed into the grooves to make the design stand out. (Lets see if I can add a photo!) The tool used is called a race, not an American Racer which is a push tool but an English race. which is a pull tool held like a pen
-
Mike, it would be a very good idea if you were to read ALL of his other comments.
I've looked at a random selection of his past posts, and It seems to me that he can be a bit of a Grumpy B******* and calls a spade a spade without thinking if the way he's phrased something could be upsetting, or rude, but there doesn't seem to be any malice. He also looks to have a lot of experience in leatherwork, and has a lot to offer the rest of us, tact is not one of them, but however rude his posts are it still doesn't justify a personal attack.
cheers
mike
end of topic for me, I've had my tupenceworth
-
Ok so here it is. I used the Alcohol 50/50 with water and about a teaspoon of White Vinegar. I submerged the leather in water then using a med bristol scrub brush applied the the solution. Let dry overnight after cleaning and cased the leather and this is the result. I used Black dye cause there were still a few minor imperfections.
looks good to me, it's the "imperfections" in leather that make it so good to work with, and to own, if you want perfect, use plastic, You will always be your own worst critic, as you know the problems that particular piece of leather had, your customer doesn't know how you have had to beat that mold into submission, and doesn't care, like I said, it looks a fine bit of leatherwork to me, and I'm sure it will to him/her
cheers
Mike
-
Slick, do you ever get as tired of hearing what youve got to say as the rest of us do????????????
by starting the thread Roo was inviting comment, Slick made his comments and is entitled to his opinion. His comments didn't seem to be a personal attack on Roo to me, abrupt maybe but he wasn't getting at her, I haven't read any of his other posts, so I don't know if there is a back story, and I don't know if his comments will deter other people from posting, but some of the responses are rude to the point of bullying. in a flame war everybody loses. I would like to think that I could give an honest opinion without facing the sort of attack that he has been subjected to.
cheers
Mike
-
Hello,
What is the best backing surface for punching holes, poly board or a poundo board.
Do you use a scrap piece of leather below the piece or is it OK to let the punch penetrate the board?
Thanks
Jim
end grain of a hardwood (beech) log, every now and then I run an electric planer over it a couple of times, I think it should take about 80 years before I need to get a new log
Cheers
Mike
-
Howdy all
This my first post and the forum heading said "got a question and don't know where to post, start here" so here I am. I am a horseman, not a leather artisan but I have lots of saddles, buy and sell saddles and tack and there is one particular problem/question that perhaps one of you might know the answer to or know a link that can give me an answer. I've always used Neats Foot Oil ( pure) to oil my saddles and tack, works fine for me but one problem is the hand tooling on some saddles will turn darker than I would like. I have heard that acetone can remove some of the darkerness from the tooling areas but I am not about try anything till I hear from some experts like ya'll. Also, how good is Lexol compared to NFO ? I get some pretty rough saddles and tack and NFO really works great for me down here in Texas. Any input, ideas, links etc would be greatly appreciated.
David
Hi David, over here (Yorkshire England) I use a lot of raw neats foot oil, Neats is the viking word for cattle and it is boiled out of the ankles and knees of slaughtered beasts, cows have poor blood circulation in their legs, so the oils lubricating their leg joints have a low freezing point. I get it from a local tripe shop, Tripe is boiled cows stomach, it is considered to be a delicacy, eaten cold with salt, black pepper and vinegar. I've never tried it myself!! Anyway, Neats foot oil does darken the leather, but as it is absorbed it lightens up again over a week or so, but never back to as light as it was. I would have thought that the tooled areas are sealed with a water (and Oil) proof finish, any absorbsion will be in the recesses of the tooling, I would think that could look blotchy at first, but again over a week or two it will come back to almost it's original colour People have told me that raw neats foot oil will go rancid, I've never found that but it does make stitching tasty to mice!
-
I just found out I'm going to finally be a Grandpa - my first grandbaby!! So, my wife and daughters are busily knitting and crocheting blankets and stuff, I thought it'd be fun if I could make something too. Problem is, I don't know what. Right now, most of my leatherwork is in holsters for pistols, and I'm sure it's too soon for that.
So, I'll ask the forum - does anyone have any good patterns for anything baby related? Moccasins or shoes or something? Any and all ideas would be great!
Woo hoooo!!

Have a look at this site, well worth what he charges for the patterns
http://www.bighousedaddy.com/making_a_pair_of_baby_booties.htm
-
welcome to the group, I'm from just down the A1, Castleford, south of York, nice bag, look forward to seeing more pictures,
cheers
Mike
-
You might like to look at the the link below. He develops patterns and then sells them, I've got this pattern download, it is inspirational, well worth the cost, It unlocks your mind, and you can see dozens of ways of using his method for all sorts of things, he also does lots of other patterns
http://www.bighousedaddy.com/camping_boot_patterns.htm
Cheers
Mike
-
I was hoping someone might have a scrapper machine or a second hand one knocking around for a couple of quid rather than paying new price, it is for a "project" that I will get rid of once it's complete and working. I am a Lancastrian living in Yorkshire, some of their meanness has rubbed off.
cheers
Mike
Shake a bridle over a Yorkshireman's grave, and he'll get up and steal the horse (old Lancastrian saying)
-
does anyone have a spare foot for a patcher? fair price paid, and postage refunded. I'm in the UK, but it wouldn't be expensive to ship from overseas.
Cheers
Mike


Scorpio
in Floral and Sheridan Carving
Posted
nice attitude storm, shows a generous spirit, some people are too protective of their work, there can be lots of different interpritations of an idea without it being copying
Cheers
Mike