


BlackDragon
-
Content Count
136 -
Joined
-
Last visited
Posts posted by BlackDragon
-
-
For me it depends on the thickness and length of the cut.
For thick leathers where I have a long run and am just getting the leather down to manageable size I go with the electric rotary (I rarely use this)
For leathers above 5oz and precise cuts I generally go with a utility knife
Thin leathers I go with manual rotary or exacto blade
Scissors I use to trim off edges of lining
The round knife I'm still getting use to

-
39 minutes ago, Sheilajeanne said:Okay, pet peeve time... we work with dye when colouring leather. That means we are DYEING it. The other spelling (dying) means you're about to leave this world!
")
When dyeing I die a little on the inside so dying is applicable

-
I love it when I cut each side to 9" then realize I actually cut one side to 8".

-
If I dont have a funnel I'll cut off the bottom of a soda bottle, 20oz or 2L.
-
17 minutes ago, purplefox66 said:I do not small leather
*smell
I blame the tiny buttons on my phone

-
You know, I didnt realize I dont small leather any more. Now I'm sad
-
I used blue tape and never have a issue with it not sticking. I put it on before casing the leather.
-
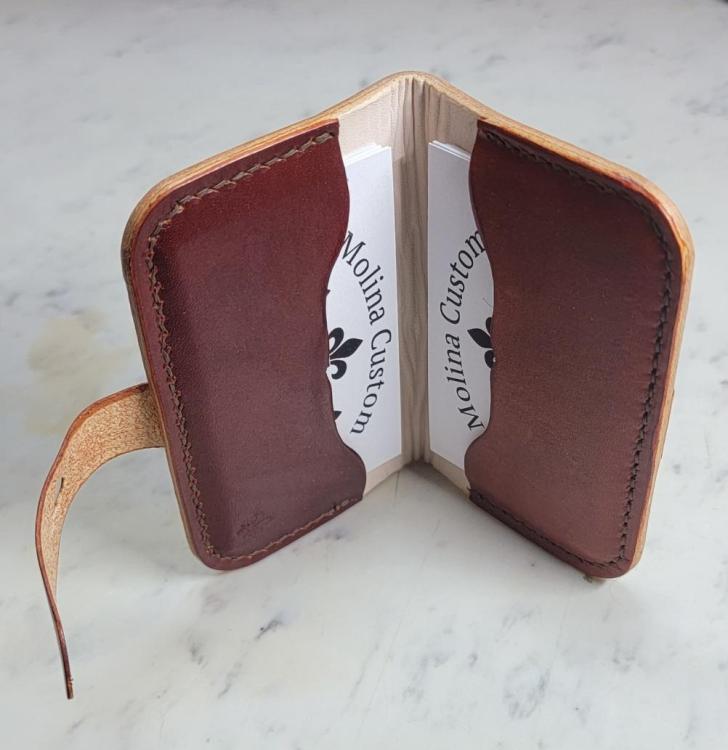
3 hours ago, Tugadude said:The stitching looks nice and even and I like the colors you chose. I do agree with the statement about terminating the stitching too soon. Yes, go ahead and extend it next time and compare the results.
The overall thickness is more than I would typically aim for. But that's a personal preference, not anything right or wrong. It seems like that card holder would be best carried in a purse or briefcase, and in that situation, thickness really doesn't matter. But if I wanted to pocket that, then I'd want it to be thinner.
Good stuff.
I worried about the thickness when I was designing it then I remembered it was going into a purse or handbag so I wasn't to worried about it.
My sister gave it to her coworker at her goodbye party and she loved it. I left a couple business cards inside and a few of the ladies wanted my information to commission purses.
Hopefully those will pan out
-
12 hours ago, HandyDave said:Nice job im sure it will be enjoyed. If you dont mind just a touch of constructive criticism if you pre bend the outside and glue the liner piece to it on a bend youll get rid of atleast most of that creasing on the inside at fold. And id run the stitching all the way around it adds to the finished look and makes sure that little area in the middle at top and bottom doesnt pucker or delaminate. Still a great piece love the paw print and the 2 tone
Great advice, I really appreciate the feedback.
-
Nice!
-
Wellwood and Barge both work great. Amazon sells both for about a dollar difference for a quart.
Use both in a well ventilated area
-
10 hours ago, Burkhardt said:Looks nice, is the paw stamp from OKA?
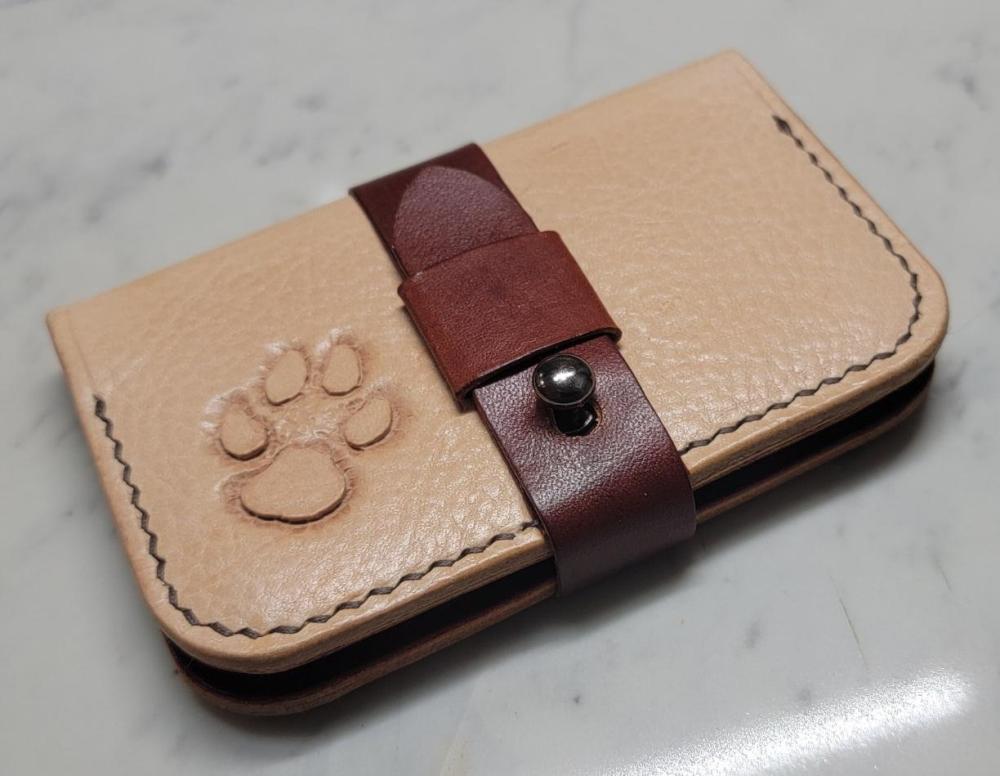
Nope, I tooled it.
-
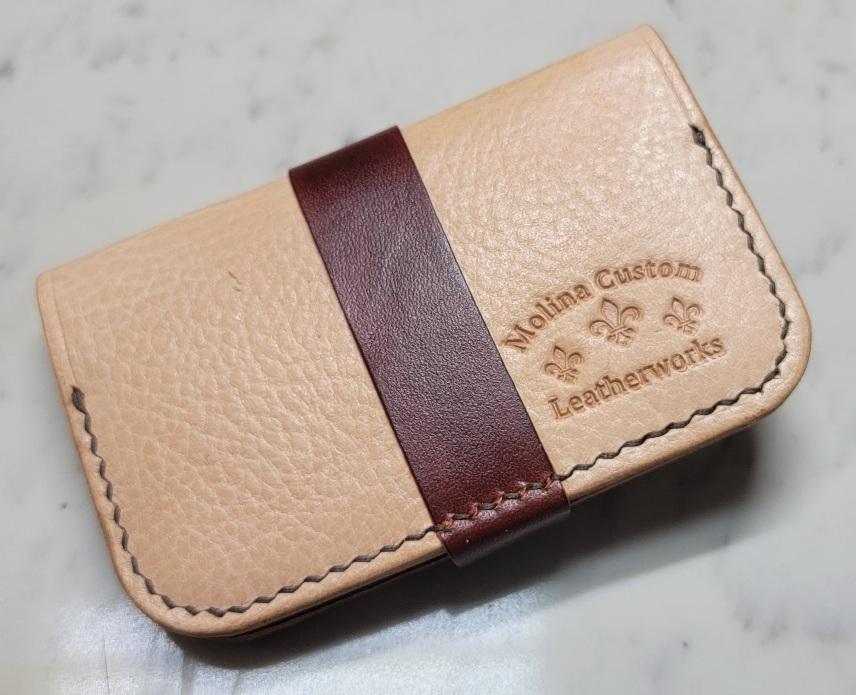
I made a business card holder for my sister's coworker. The coworker is leaving to continue her career with another company.
I used 5oz vegtan with olive oil for the cover. 2oz vegtan for the lining (no die), pockets and strap (Fiebings Russel brown). Ritza Tiger thread 0.6mm mid brown.
-
Can you make a wooden skeleton for the interior then wrap it with leather?
A wooden ring on the top and bottom with two pieces of wood to create the dividers
-
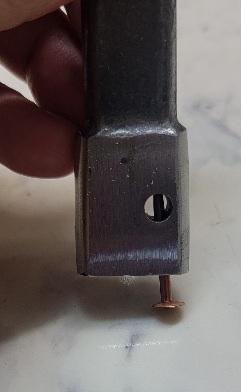
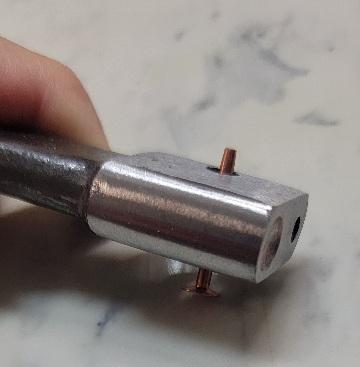
The hole next to the dome I use for setting the burr on short rivets and the hole on the side I use for longer rivets. I don't know if it's the correct way but it works for me.
Edit: Now that I think about it more I could just use the front hole to start the burr then cut it down the rivet so I can drive the burr further.
-
I didn't even think about stretching thanks for mentioning it. I'll keep an eye on it.
-
I leave near Camp Lajeune
-
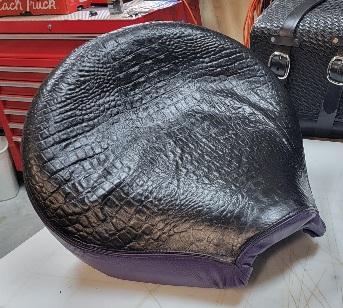
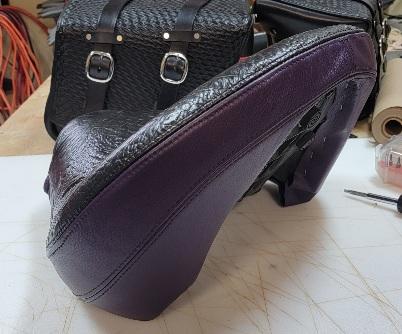
I had a spare seat for my bike sitting around. I also have some brown embossed alligator chrometan and purple vegtan that I acquired a few months back. So I wanted to see what I could create and came up with this.
-
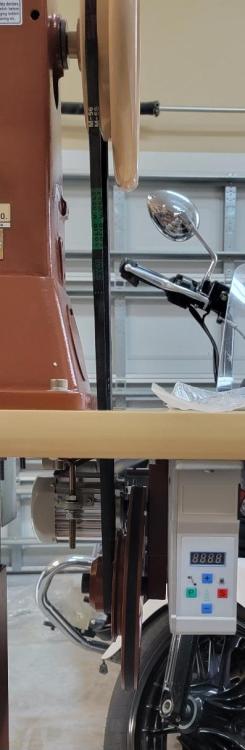
Ok the issue wasnt the bottom pulley after all.
When I was putting the machine together the youtube video I was watching had the pulley backwards like in the top picture. Watching the video that came with the machine (which I've seen on youtube before) had the pulley flipped around.
I put the bottom pulley back where the manufacturer set it. Now everything looks like it's running as it should.
-
Thanks! I appreciate the help.
I'll get everything aligned tomorrow and give it a go.
-
It's been 2 months and I finally brought home my Class 4 from Zack White's.
I'm in the midst of setting it up but I noticed that the bottom pulley is at a slight angle. Is this normal or should I adjust the pulley height?
-
Wow looks good.

Looks similar to one I'm making for my sister's MIL.
-
There a LOT of types of leather. It's like asking how many types of cars are there.
Best thing to do is start with finding out what you would like to make out of leather and we can go from there.
-
At the 5 min mark he's using the "poly stripe" as an extention for the card pockets. Just extend the leather instead of creating a glued failure point.


Don't You Hate It When.....
in Leatherwork Conversation
Posted · Report reply
Remember to keep those finger tips away from the rulers edge. I dodged a bullet