DavidK
-
Posts
17 -
Joined
-
Last visited
DavidK's Achievements
Member (2/4)
-
Hi all, Im starting to get the hang of making pieces with a single type of pro dye, finish, antique, etc - but I dont feel like Ive found good material on how to dye a piece with multiple colors of dye? I assume you use a brush and brush on the dye, but how do you maintain a good color lightness without being blotchy? TLDR, looking for pointers to guides for applying different color dyes, what type of equipment to use, how to keep it even and make colors pop. THanks! Reference for type of colors I'm referring to:

-
Thank you Northmount! Will try this today and update with results - I used your bristle brush technique for the original applications as well and it was really successful.
-
@Dwight Tagging you in case you have any advice, you've given me nothing but good advice thus far!
-
I dont think I can reasonably redye - as the whole piece is treated with resolene and wont take the dye, and ill end up with just dark spots instead. Any products or processes youd reccomend otherwise? Infinite buffing with a wet cloth maybe?
-
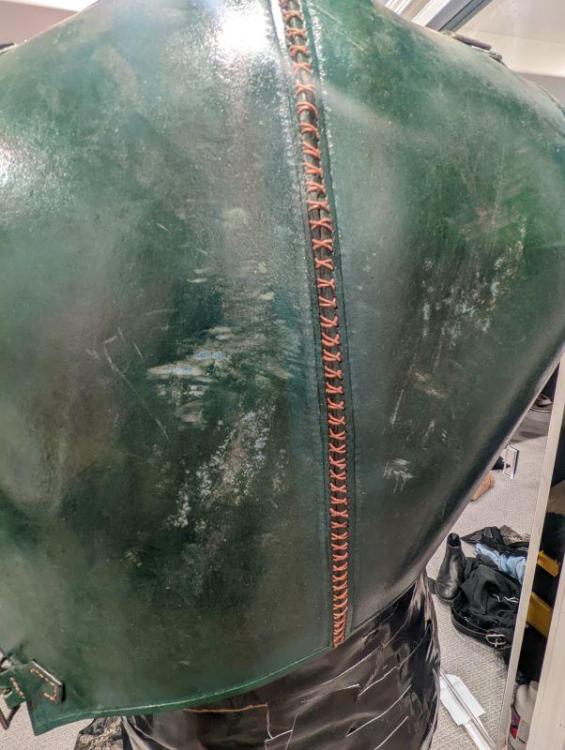
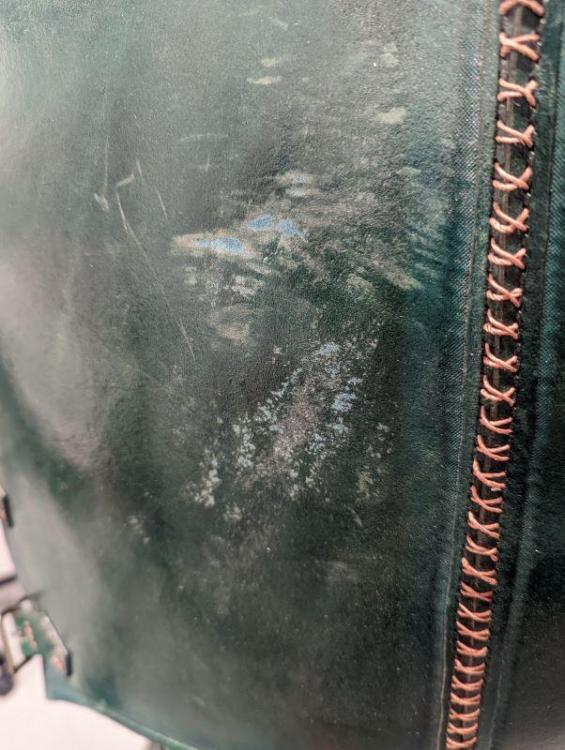
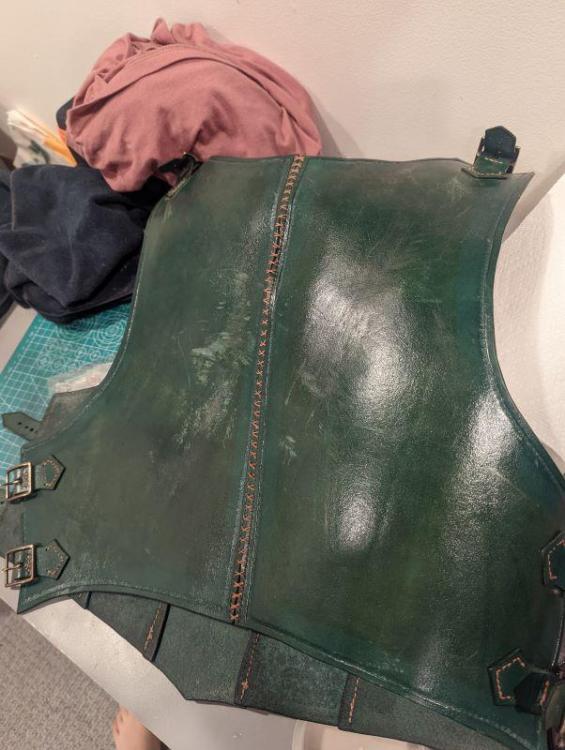
Hi! I have a green leather chest piece that I rubbed raw wearing with another piece I made. I've attached some photos of where It really got rubbed up. The piece is veg tanned, dyed with pro dye, buffed, finished with leather balm, then 5 or 6 coats of resolene. What process or products would people recommend to repair it (not bring it back to perfect, but blend the colors and smooth out the rough spots)?
-
Thanks Bruce for the advice! I definitely need a better peening tool, mine was pretty poor in its performance for sure. Bumping thread for additional solutions outside of peening better, and to clarify the concern - this is the rivet scratching the leather of another piece when rubbed.
-
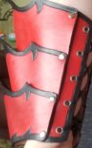
Hi all, I have a quiver im working (will eventually finish lol, soon) and I am using copper rivets on the straps. I plan eventually to wear it on top of a leather armor piece I have as well, but i do expect the copper to potentially scratch the leather where the rivets make contact with the vest. Any solutions to really make sure the copper doesnt do so? Maybe using a product on top of the leather just to provide a smoother surface? Im not great at doming, so that could be partially me there too. But even with a smooth dome I would like to negate all chance of the copper scratching the finish. Ive considered silicone adhesive strips cut into small circles, or a dab of clear hot glue. Maybe just some acrylic resolene on the copper rivet? lol. Thanks! -David
-
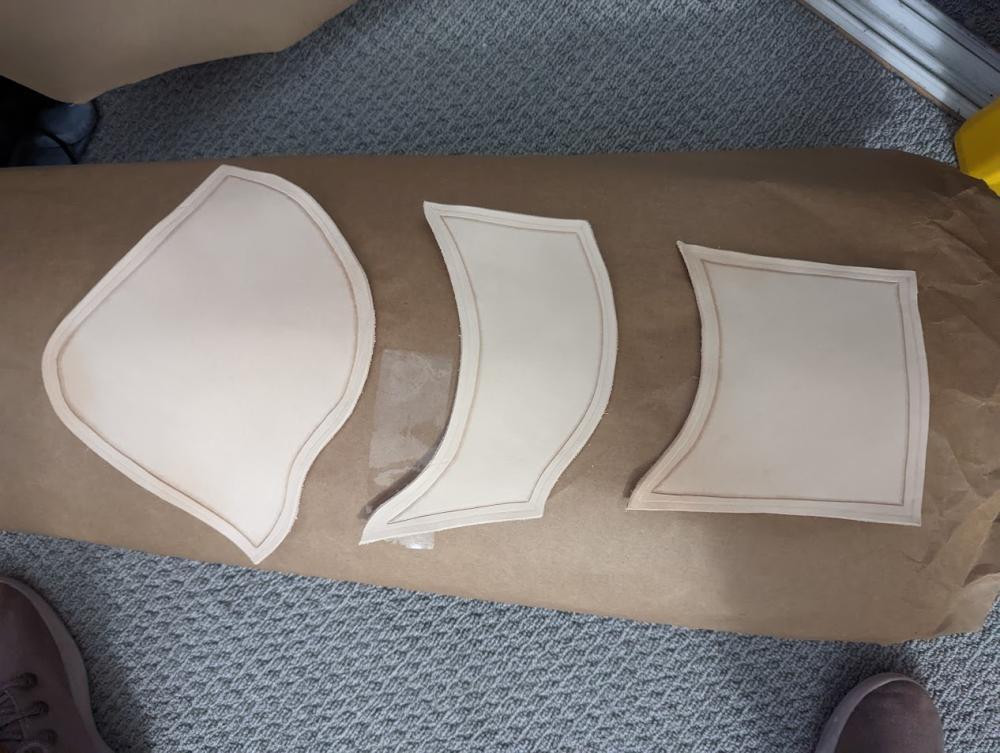
Yes and no... I ended up remaking it twice. I took the first one, splotchy pictured above, and re-dyed it. That eliminated the splotch factor but then made the color WAY darker, and not desirable. I then did 2 things - i sudo-cased the leather until it was pretty moist, and also set up a dip dye rig that allowed me to, in one motion, dip the large piece and immediately wipe off the excess dye with some sheep wool taped to a cardboard box. The first time, it almost worked but i made a mistake and accidently dabbed it back onto the soaked wool - which left some streaks (the middle image). I did it a third time, and got a very nice even dye (though a couple dark spots where my fingers held the leather - its good enough for me and i can do better next time with hand placement) See image below, chronological from left to right. Right is the final one I'm walking with. The dip dye setup, with the wool for wiping on the left of the tray:
-
Thanks for the tip! Was thinking about doing this or hitting it with some NF first then trying. Ill see what other folks suggest before committing to that, since it will definitely darken the color substantially.
-
Hi all, Dip dyed this 8oz piece in pro dye 50/50 dye/99% isopropyl, not sure why it dried so splotchy? Any advice on how to potentially salvage, or is it done? Ive seen folks talk about NF to help with these type of problems, or other solutions. Any thoughts welcome, thanks! Best, David Other piece in same batch: O
-
Need Problem Solving - Bending Decorative layer on Quiver
DavidK replied to DavidK's topic in How Do I Do That?
Ok, just to clarify, you are suggesting: Tool, Stamp, Punch holes on decorative panels, Form?, Dye, cement, stitch Thanks again! David -
Need Problem Solving - Bending Decorative layer on Quiver
DavidK replied to DavidK's topic in How Do I Do That?
Thanks for the suggestions! I unfortunately dont have a machine so that is out of the question for me, but besides that I intend to dye, finish and seal these pieces before sewing. I think that would present problems for wetting, since once the piece is sealed it wont accept the water, and the water could affect the final coloring. Any thoughts on changing process to maybe make this work? Currently I: Cut Tool/Stamp (I am here now) Dye Finish Seal Stitch Was not counting on wet forming at all here since its a pretty simple shape and i think the main quiver body will be fine to bend in half without wetting. BUT wetting the panels makes sense to introduce flexibility. Any suggestions? -
Need Problem Solving - Bending Decorative layer on Quiver
DavidK posted a topic in How Do I Do That?
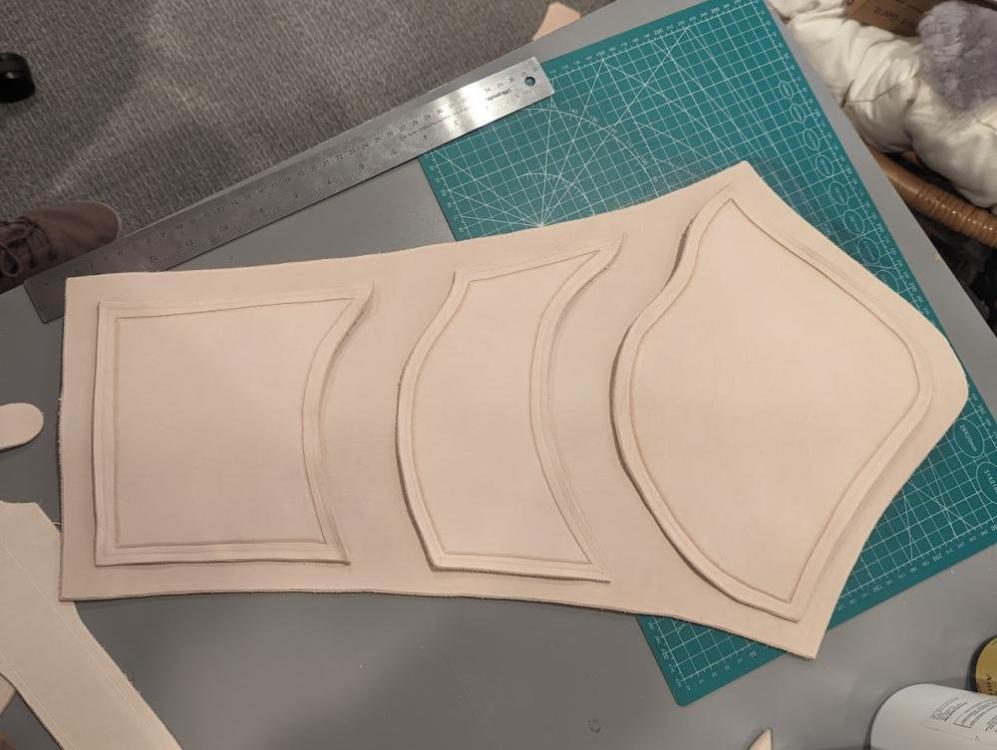
Hello, As an experiment im making an archery back quiver, and anticipating a problem. The pictures hopefully will make it more clear. I plan to attach these 3 5oz decorative panels to this 8oz quiver, the quiver will then fold in half and be stitched on the long side into a quiver shape. The anticipated problem will be that after stitching the panels on while the quiver is flat, the panels wont allow the quiver to then fold into the taco and stitch into final shape. Any suggestions here on how best to attach the panels, or if a product like shoe stretch leather could help (after attaching, maybe leaving a section unstitched to stick a dauber into the back of the panels and work it into the flesh side? Any suggestions appreciated, big, small, or project breaking Thanks! David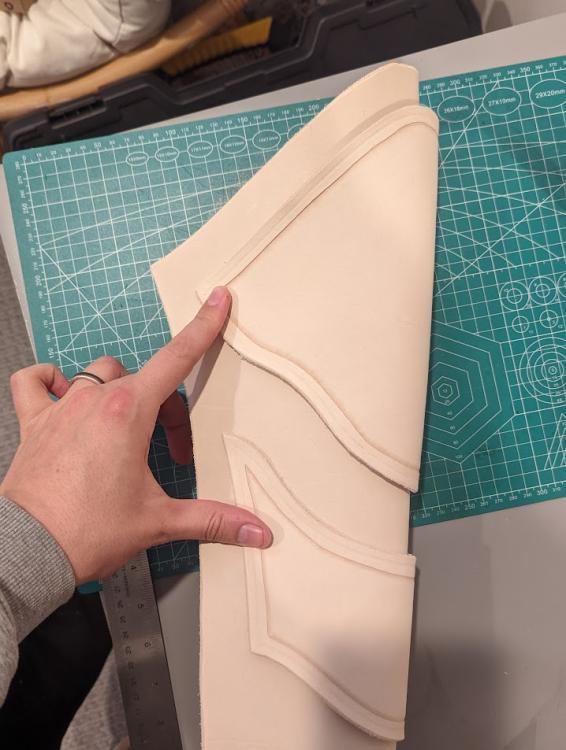

-
Leather Armor - Advice on Scratch Resistance?
DavidK replied to DavidK's topic in Leatherwork Conversation
More coats? More resolene? When ive done 3+ coats in the past i can end up with this awful streaking that doesnt buff out. Not sure how to avoid that? -
Hello! I made this leather chest piece for myself and hoped for advice on making it more resistant to scratches and knicks. Maybe this is normal, maybe this could be avoided with a better leather or treatment process? Any thoughts or advice is appreciated. Process and pictures below: Cut Shapes 5-6oz leather, shoulders Case Done pretty quickly with just sponge, wetting areas to a mild dampness before working, ill case it better next time Carve Just swivel knife on edges before beveling Stamp Checkered Bevel and Pattern Stamping NF Oil lightly applied, wasn't super uniform Dye Fiebings Pro Dye 50/50 Isopropyl Dip Dye Followed with Buffing Burnished Edges, Tokonole Acrylic Resolene on grain side Two coats Buffed vigorously between coats Tokonole on flesh side I hoped the resolene would provide a bit more protection - I can scratch it with a fingernail pretty easily. Any advice to make future builds more resilient? https://ibb.co/P4VqqkF https://ibb.co/DpYjdpb https://ibb.co/6gHD5cm Thank you!