Search the Community
Showing results for tags 'hema'.
-
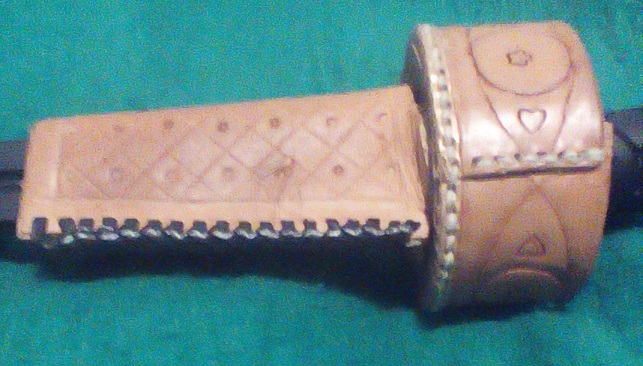
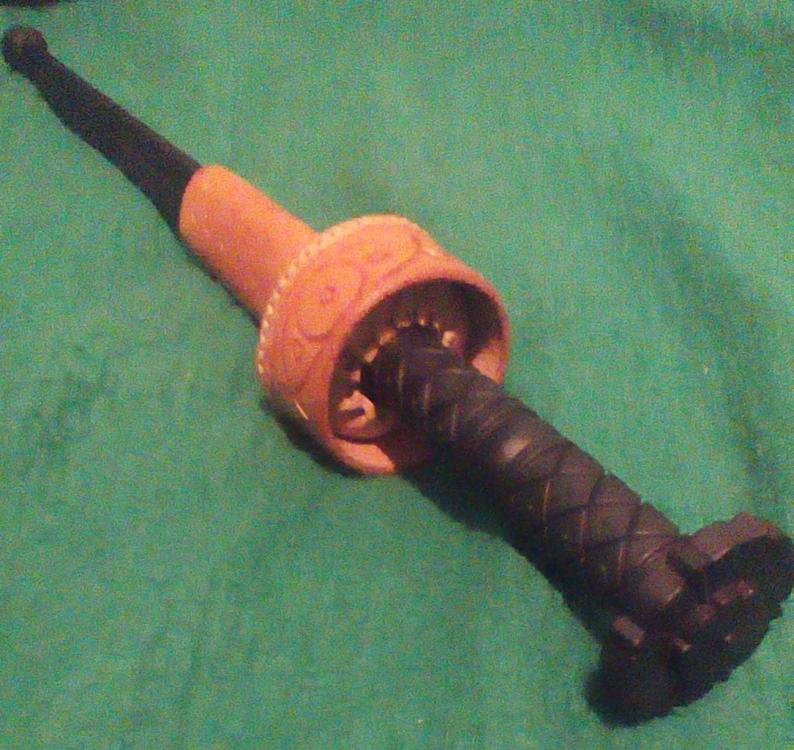
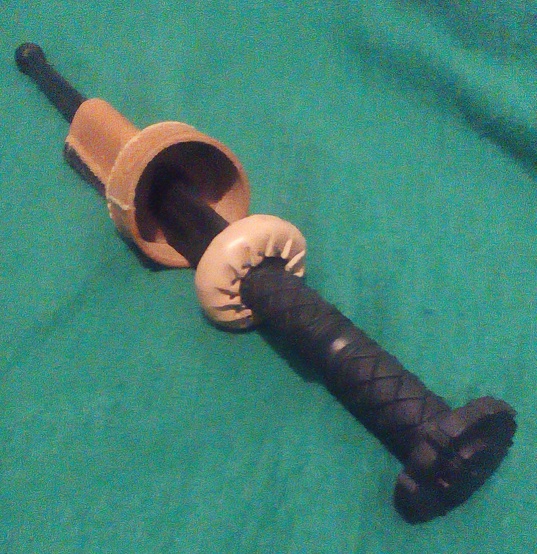
I recently was gifted a rondel dagger simulator (Cold Steel model) in my longsword class. This particular dagger design has a pretty, floral/star design on the rondels, which actually are rather jagged and pointy (as you will see below). Those rondels can scratch and scrape a bare arm. I read that some people modify these by taking them to a belt sander and grinding off those tips, but I decided to do it differently. I wrapped the lower rondel (the one most likely to scrape a person's arm) with a leather "boot", kind of like a steering wheel wrap. Then, I thought that I should make a sheath for it, so that I could actually carry it and even use it during longsword practice (as a secondary, backup weapon). But this dagger is triangular in cross section, and those rondels don't lie flat, so what kind of sheath would work? Also, the balance point (where the knife will hang blade-down correctly) is actually on the rondel itself, so any working sheath will have to go past that. But the rondel is round... so...what to do? My brain said, "It's got to go into a little cup, kind of like an inverted ice cream cone (the cake kind, not the conical sugar cone kind.)" A bit of research later on confirmed that this "cup" method is actually shown in medieval art, which made me pleased. And of course I have to break out my tools, to make it look nice: I decided to lace up the triangular portion (since it will likely see some wear), and I actually used my filigree punches for decoration here. The color is a British Tan antique paste, from Tandy, which I have had for...hmm...many years now! I am pleased with the barrel stitching (the round bottom of the cup)-- I have nearly got it figured out! The triangular part (to the left) is not yet riveted to the cup (on the right) in this photo. Here is another shot of the dagger, resting in the cup: And now for a shot of the "boot" around the rondel: The boot also creates a nice friction fit against the sides of the cup. The last thing to do will be to create the hanging loops -- I'm thinking of some way to do a dual system, so I can hang it vertically or horizontally.
-
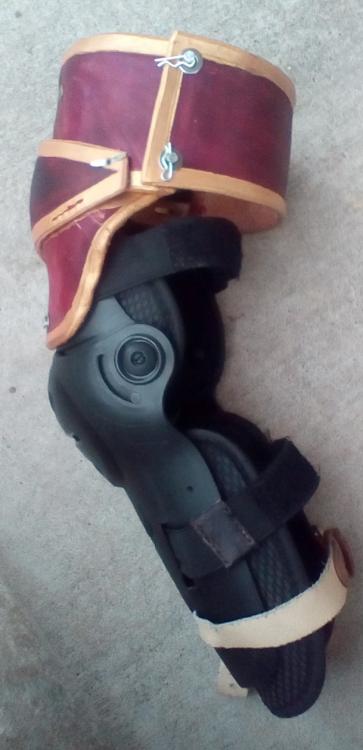
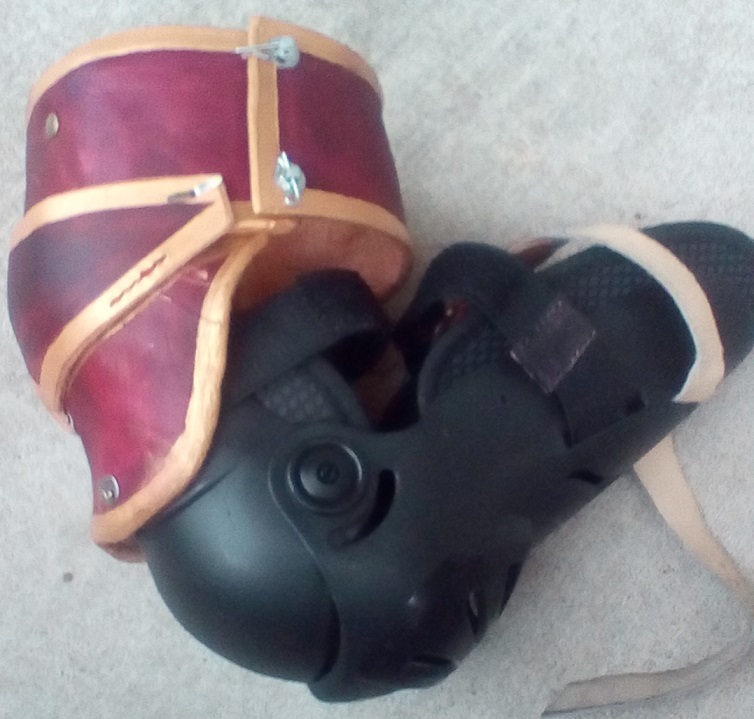
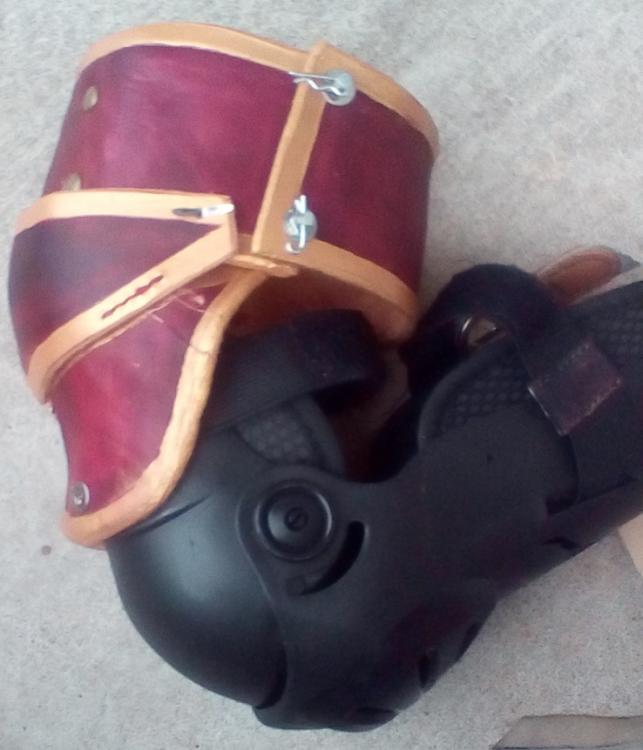
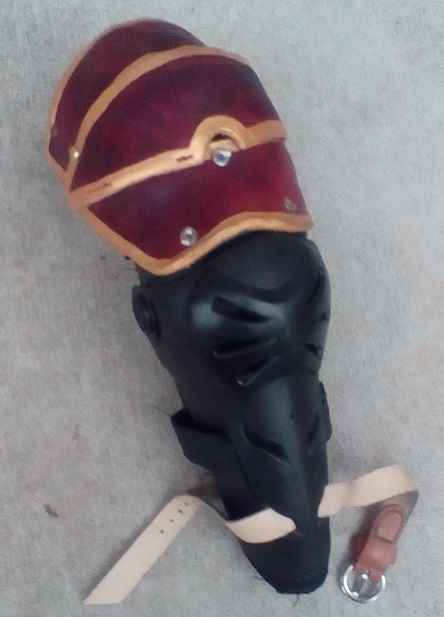
I've been working on augmenting my existing arm protection, which is adequate for nylon sword simulators, but I want more for steel. Plus, armor is cool! This is the whole shebang together: Leather: unknown source -- I have a variety of veg-tan leather, and these pieces are from the bellies I got last year. Dye: Angelus Burgundy, and gold Acrylic paint. The arm guard is meant for motorcyle use, but it covers all the bone points of the elbow and has a nice 90 degree articulation. But that 90 degree caused problems in this design -- originally there was just one piece riveted to the plastic plate. But I found that I need the arm to close to a more acute angle than 90 (30 or 40 degrees), so the elbow kept popping open and locking. Oops... So this is my solution-- I cut the piece in half, and added an articulating lame at the back. So now I get this: Note the lugs just under the circular pivot joint -- those are meant to only go 90 degrees, yet they can pop out under stress. The articulated lame lets the arm bend more: You can see the cracks in the cuir boulli leather -- there are just so many variables that make it a risky proposition. The surface here is rigid, but the leather underneath is not. The lame is water hardened a different way-- I got it wet, shaped it and dished it (onto the plastic here) and then let it dry in the sun. I am lot more satisfied with that method (I've used a wall heater in the winter to do the same thing). I used split rivets to fasten the lower leather piece to the plastic (easier to remove them in the future) after drilling three holes in the plastic. The rerebrace is closed using cotter pins -- eventually I may have additional holes so that I can close it tighter if I want. And inside, held on by the bronze covered rivets, is a Kydex plate (.080 thickness), heated into a nice U shape with a heat gun, adding a layer of plastic rigidity to the leather. Here's a shot of the backside: The cutout over the split rivet will make removal a lot easier. The articulating lame is sewn to the lower plate, and riveted to the upper plate. After I put the articulating rivets in, I'll test this Wednesday night and see how it goes. I may also take the heat gun to the plastic "dish" pieces and flare them out so they'll "catch" on each other, preventing any pop-open.
-
From the album: DJole -- Completed Work
Here are the two panels sewn together, with the center strip, in place on a mask. The antique black of the swordsmen really makes a nice touch here! -
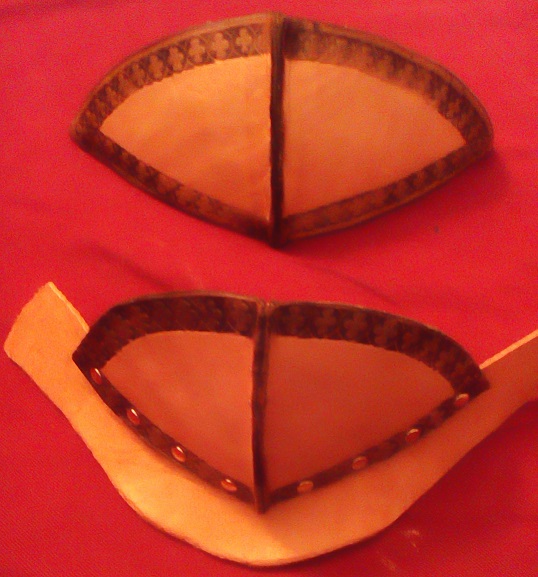
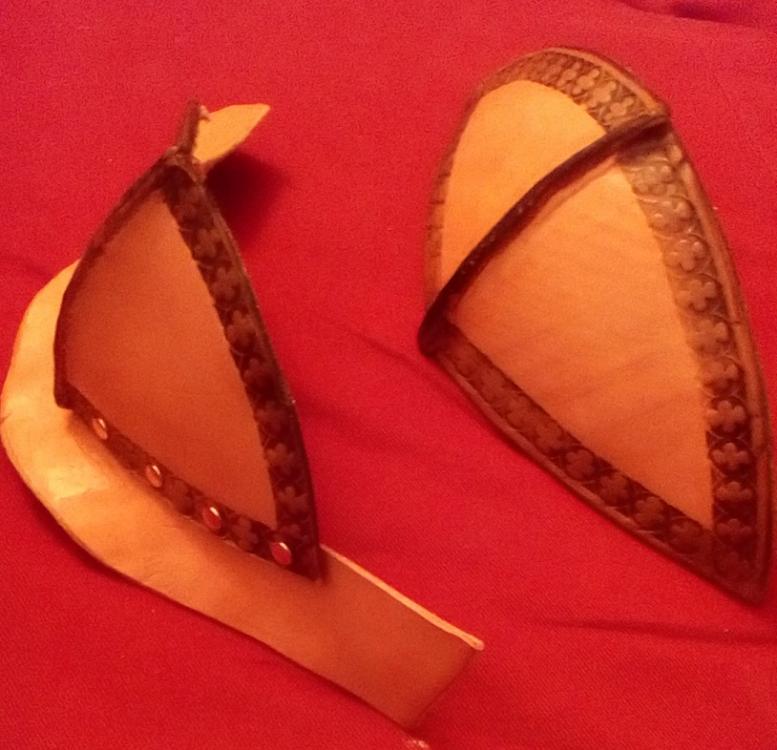
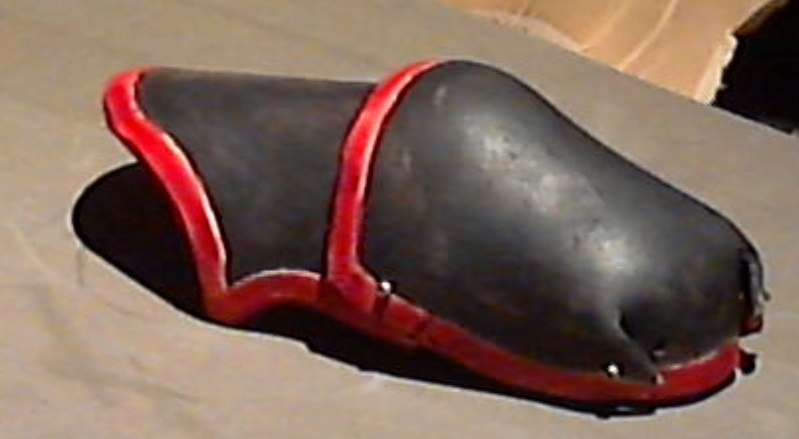
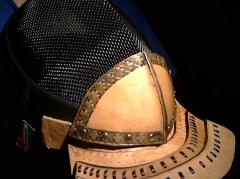
Another work in progress For doing HEMA (Historical European Martial Arts), a basic fencing mask is a good start, but they're not really enough protection for using steel in tournaments. Thus, there are mask overlays on the market, which add padding and protection to your head (a good thing to do!). I decided that I could make my own custom overlay, using leather to add the rigid or semi-rigid "plating" to the mask. These are the first two pieces. (I'll add others as I complete them.) The larger one goes on the forehead, a place which sees a lot of sword strikes. It will get some foam padding underneath it later on. The smaller one goes under the chin, and it will hold an additional throat protector that goes over the mask bib. That protector bit will be riveted to the strip of leather Using a fencing mask, I made a pattern from paper to get the curves right, then cut them out of leather. The border is done with a Tandy stamp, a Christmas gift (Craftool Pro Stamp-Border D2171) from their recent sale. I sewed both pieces together using my new stitching pony (brought back from Korea). The seam is left standing up, for more reinforcement. I got them nice and wet, then molded them to the fencing mask itself, strapping them down to hold shape as they dried. I used a block-out resist for the big inside panels, and a Tandy Antique Black for the border itself. The edges were burnished with water. I may use an edge paint, but I haven't decided yet. I left the leather a natural color-- it's a nice contrast. I then riveted the strip to the chin piece, and wet-molded that to shape. I have the patterns for the throat plate, but I haven't completed that part yet. I'm really pleased with the way they look so far (and they're really nice on the mask itself-- but no pictures of that yet!) to be completed: 1) Create and attach throat plates (probably leather articulation). 2) Finish design for sides and top of mask, create the same. 3) mount all pieces so they strap tightly on. 4) add foam padding 5) make back of head panel.
-
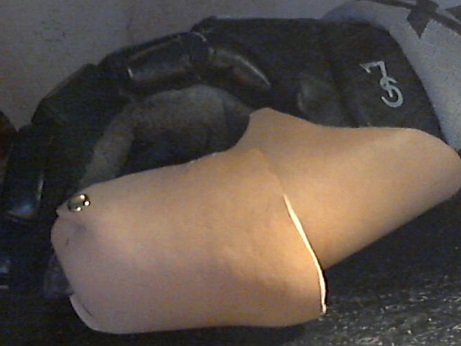
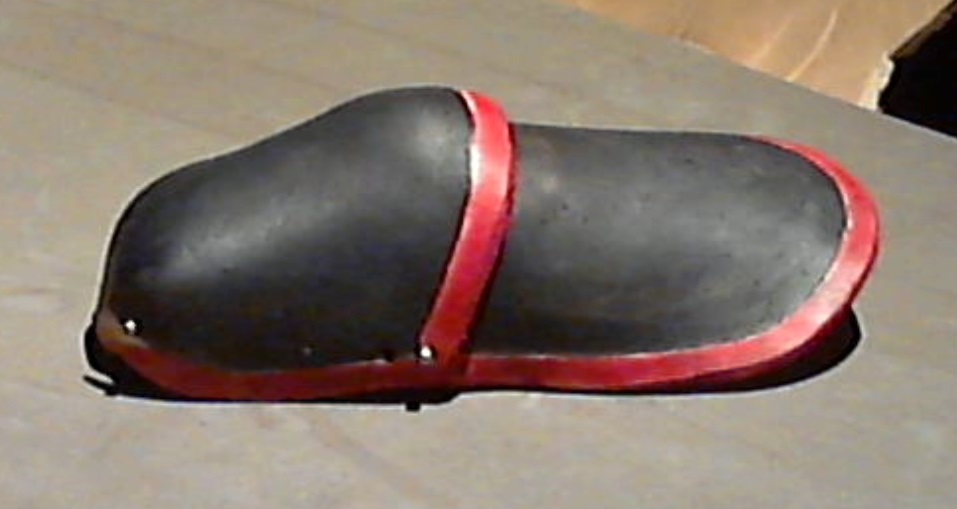
Here's my project for today-- I am making a heavy leather over-glove to go over some lighter hockey gloves that a couple people in my longsword class use. Hockey gloves aren't the best protection, so if they take a good strike to the hand it HURTS. And if you are worrying about hurting your hand all the time, it's hard to fight well. So I offered to help protect their hands better, and they thought that was a great idea! Here's the project so far: This is the thumb, two pieces wet molded onto the hockey glove and then hardened by hot air blowing over them. (I set them next to the electric wall heater nearby -- not too close, but enough so an hour or so dries the leather). Next step: Got the articulation point in the middle, and a nice curved dish shape, too. Here's a better view of the thumb tip: It curves around the thumb tip very nicely! Details: 8 to 10 oz veg tan, cut from tooling belly (I got them for a great sale price, so I don't feel bad about having to throw away a prototype that doesn't work). Dyes are Fiebing USMC black and Fiebing red. This is the right thumb -- the left thumb is drying off to my left a ways. Next step is riveting, and then on to the fingers.
-

Fencing mask overlay (chin with throat plate)
DJole posted a gallery image in Gallery- Our Leatherwork
From the album: Works in Progress
The bottom plates are cuir boulli, stacked up and laced together.© Douglas Jole -- 2018
-
Hello, I'm looking for a leatherworker based in the UK or who can ship to the UK, to provide an order of all leather bucklers, at least two in the first instance and possibly more. Purple Heart Armoury used to produce an all leather buckler, but have since discontinued them. My club used these for HEMA training, but all of our kit has gone missing and we're now looking to resupply, and Purple Heart Armoury was the only supplier I am aware of, so now we're looking to commission some. A buckler is appromixately 15" diameter circle, with an outward facing "boss" as shown in the image, which covers a hand grip hole in the main face of the shield across which a grip is attached. In the pieces we had from PHA this was entirely made of leather, including the grip, but was solid and sturdy (we used them for sparring and they held up perfectly well to solid strikes from wooden training weapons) The leather construction was perfect for us as it allowed for controlled contact in our sparring, which is not very practical with the more readily available wood and steel or hard plastic varieties. So, what we're looking for is basically a 15" disc with a central cutout, boss and grip, for training purposes. The leather must be stiff and solid enough for moderate contact martial arts practice. The grip doesn't have to be leather but it seemed to work well on the ones we had. From memory there was stitching around the rim so I assume the main shield portion was constructed of layers of leather. The key is that the central convex boss section was solid but not hard, so the buckler could be used to strike at the head and body so long as the strikes are pulled, without the risk of serious injury as would be the case with wood or steel. If anybody thinks they could produce these for us, or if you have any further questions, please contact me - alchemicalsolution at yahoo.com
-
- sports
- historical
-
(and 5 more)
Tagged with:


