Search the Community
Showing results for tags 'hotstamping'.
Found 9 results
-
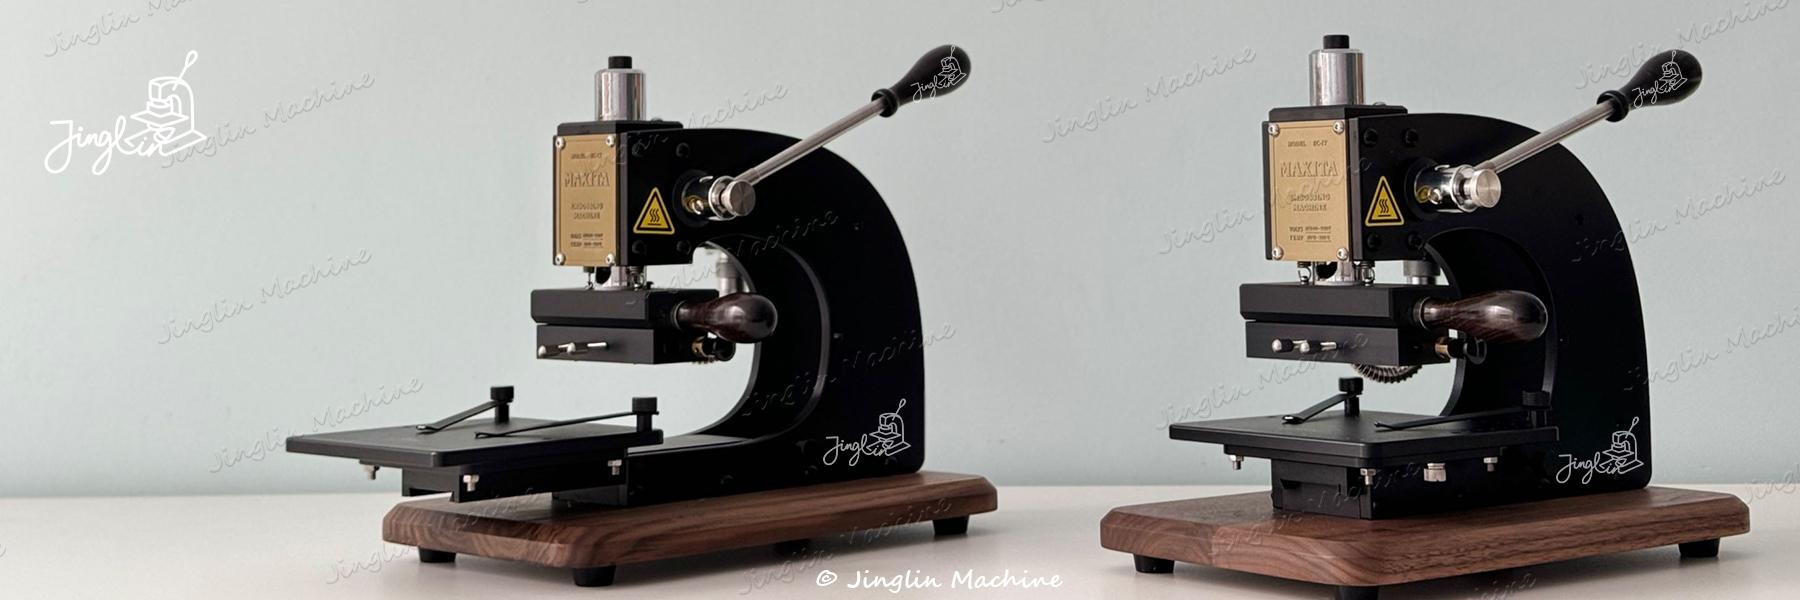
 Foil stamping has taken the design world by storm. Whether it’s elegant wedding invitations, high-end packaging, or custom leather goods, the shiny metallic allure of foil stamping instantly elevates the look and feel of your work. But achieving flawless foil stamping isn’t always easy. If you’ve ever wondered: Why do my foil-stamped edges look smudged or uneven? How can I achieve a foil design that’s sharp, consistent, and has real depth? Why do some stamped fonts appear flat while others seem to melt into the surface? You’re not alone. These questions trouble designers, hobbyists, and professionals alike. In this article, we’ll dive into why these issues occur—and more importantly, how you can overcome them. Let’s break it all down. 1.Understanding the Foil Stamping Process and Common Issues Foil stamping is a printing technique that uses heat and pressure to apply metallic or pigmented foil onto surfaces such as paper, leather, or fabric. When done right, the results are shiny, bold, and eye-catching. Why do foil edges smudge or look uneven? Common causes include: Temperature control: Too low, and the foil won’t stick properly; too high, and it melts or blurs. Pressure: Uneven or excessive pressure can cause oversaturation or poor transfer. Material compatibility: Different materials absorb heat and bond with foil in different ways. Getting these elements dialed in is key to achieving a perfect, sharp foil effect. 2.Foil Stamping Temperature Testing: Finding the Perfect Temperature To explore how temperature affects foil stamping results, I tested the Maxita hot foil machine using Gold Foil on 1mm thick vegetable-tanned leather at three temperatures: 110°C, 120°C, and 130°C. Here’s what I found: 110°C: The foil stamp was clear and sharp with clean, crisp edges, but the overall effect looked flat, lacking gloss and depth. 120°C: Depth and gloss improved significantly; the design appeared vivid with relatively clear edges, although slight edge blurring was visible under close inspection. 130°C: The foil was thick and rich, but edges became smudged and showed signs of bleeding due to overheating. In summary, 110°C is ideal for precise, crisp results, while 120°C strikes the best balance between depth and clarity. Depending on the material, intermediate temperatures like 115°C are also worth trying. 3.The Science Behind Foil Stamping Why temperature matters Low temperature = weak bond, flat effect. High temperature = overactive adhesive, causing smudging. The ideal range is 110°C to 120°C to activate the adhesive just enough for a strong, clean bond. The role of pressure Too little pressure = patchy, incomplete design. Too much pressure = bleeding or distortion. Material selection Different materials react differently to heat. For example, bull leather retains heat differently than paper. 4.Tips for Getting the Best Foil Stamping Results Control temperature: Stay between 110°C and 120°C. Adjust pressure: Ensure it’s even and appropriate. Use high-quality foil: Match foil type with your surface material. Always test: Run trials on scrap material before full production. Summary: Successful foil stamping relies on precise control of temperature, pressure, and material compatibility. Too low a temperature results in poor adhesion and flat designs, while too high a temperature causes smudging and blurred edges. Pressure must be even and appropriate to ensure clean, complete foil transfer. Different materials respond differently, so thorough testing is essential to find the optimal settings.
 -
Hi everyone, I'm currently gathering information on common problems encountered in the hot stamping process and would love to hear about your experiences. Whether you're working with leather, paper, plastic, or other materials, feel free to share any issues you've faced—like temperature control, misalignment, unclear stamping, foil not sticking properly, or even mold design challenges. Let's use this thread to learn from each other and find solutions together to achieve more consistent and high-quality stamping results!
-
Gave hand embossing a shot today! Looks kinda like hot stamping, but hot stamping is way easier. Still, doing it by hand was super fun.
-
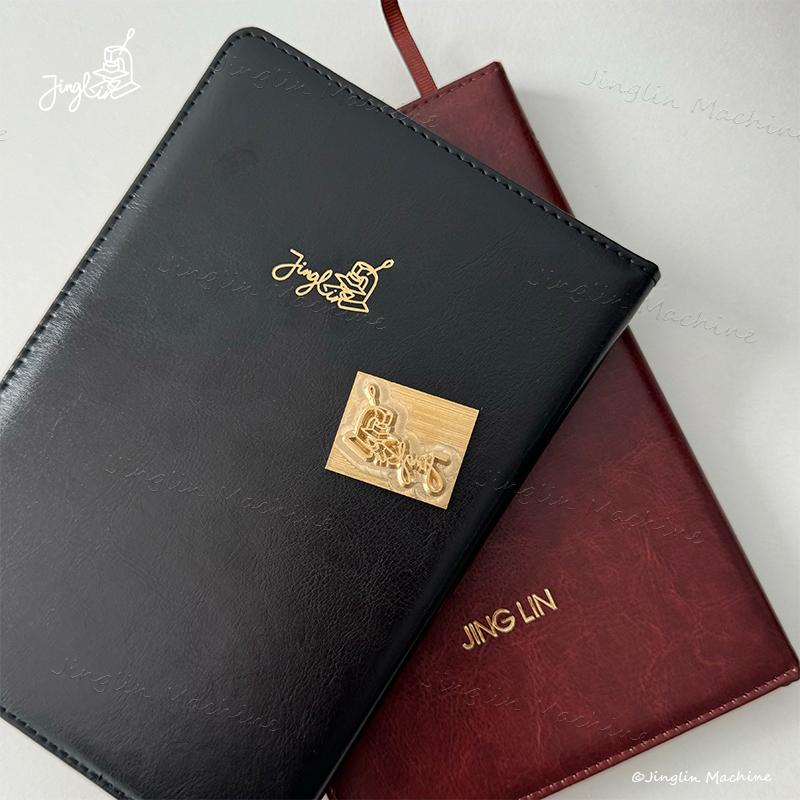
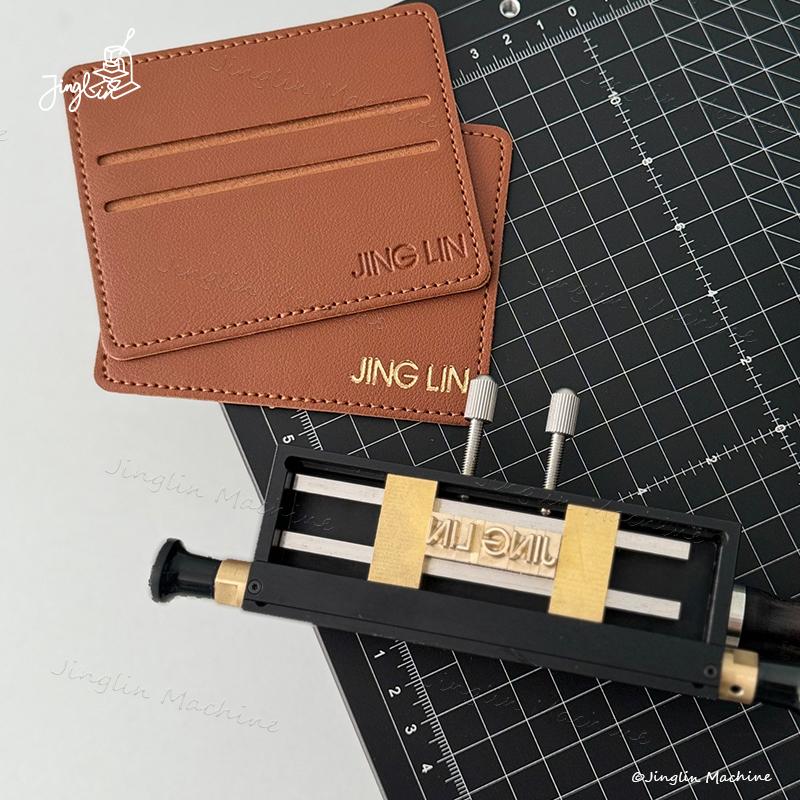
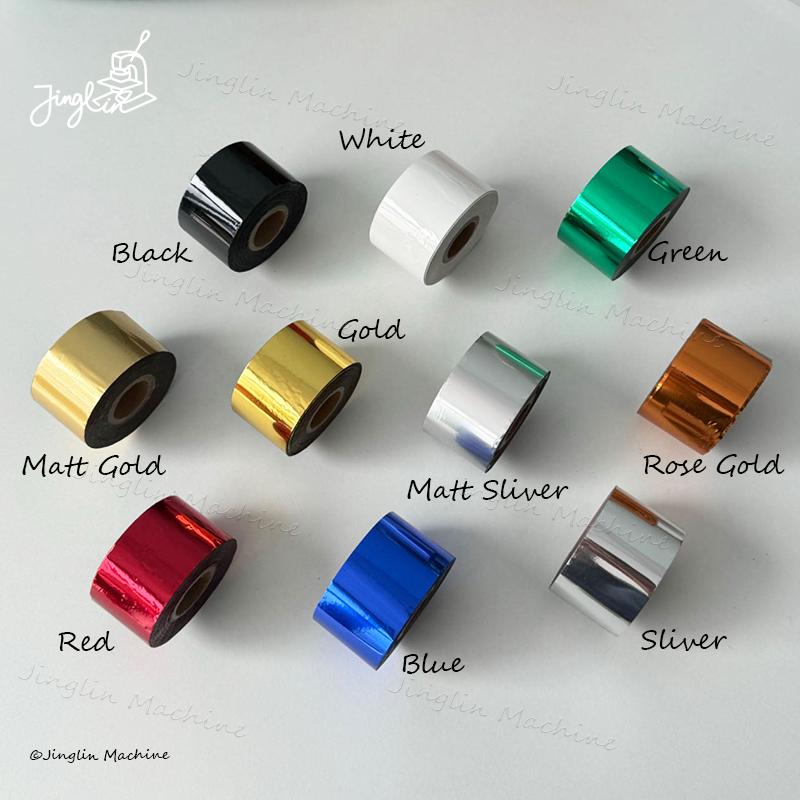
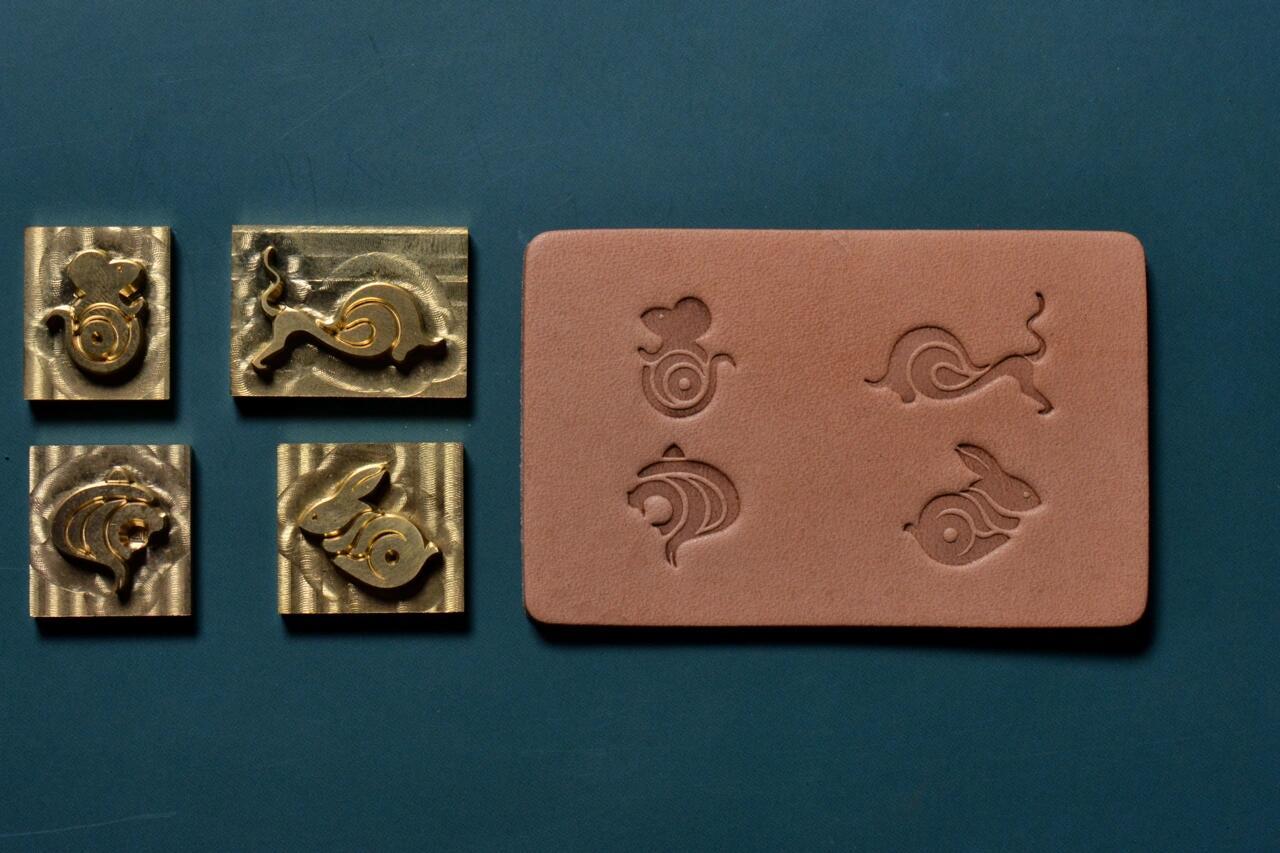
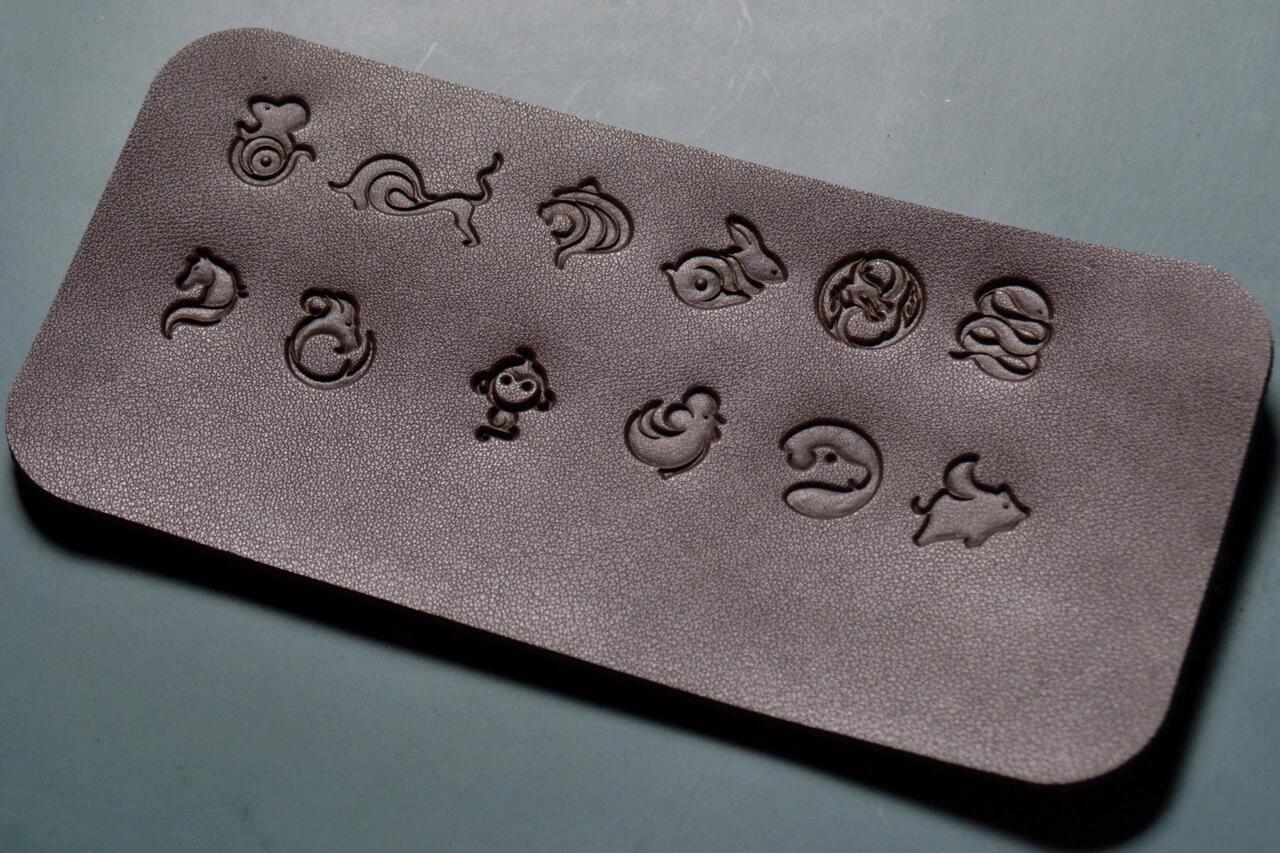
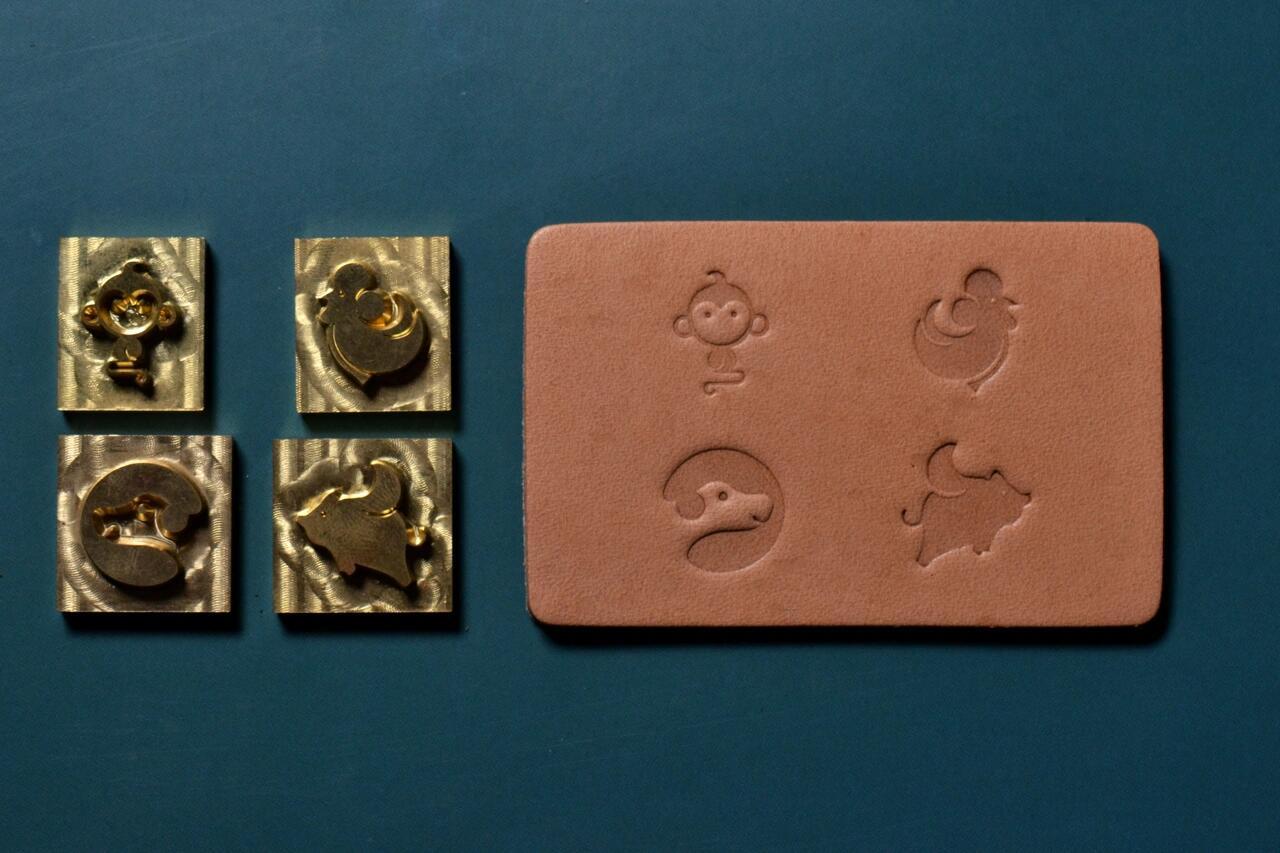
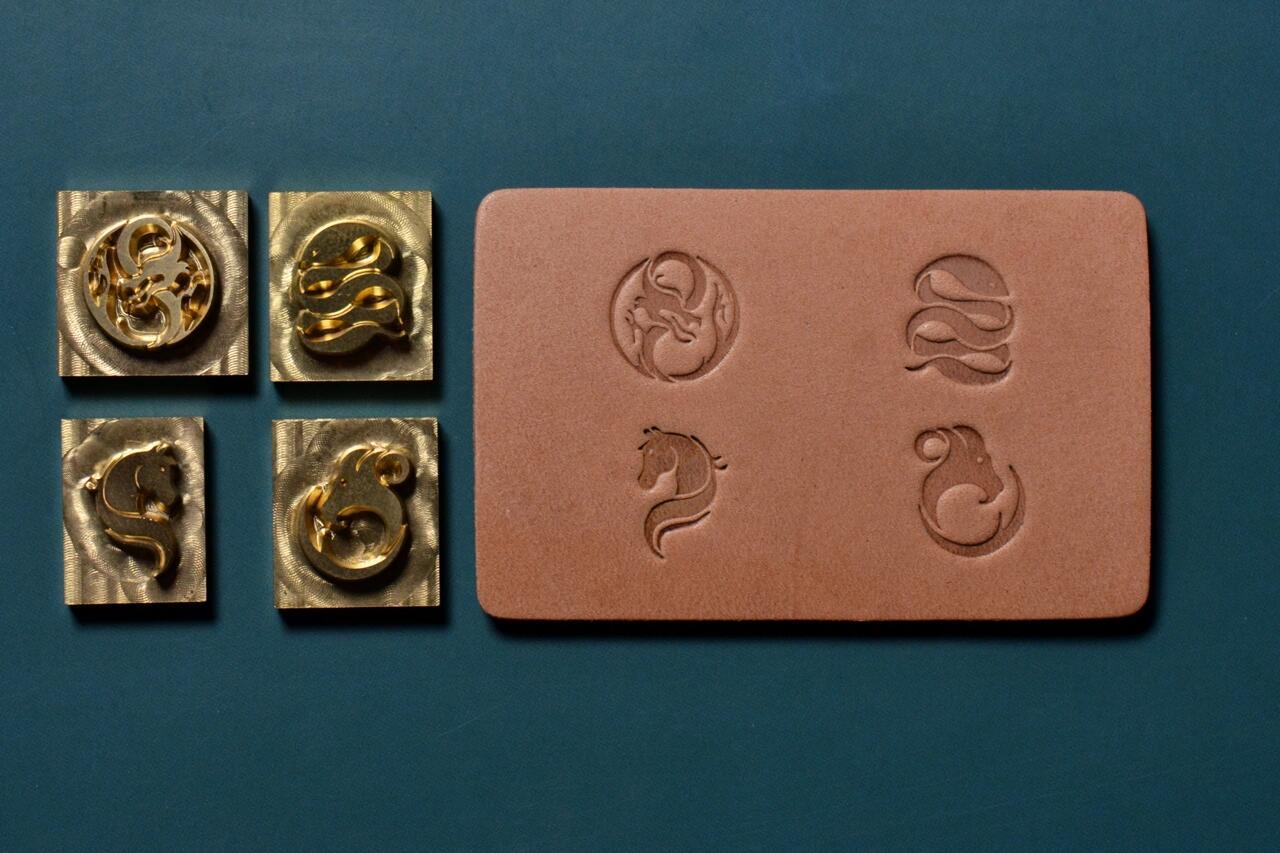
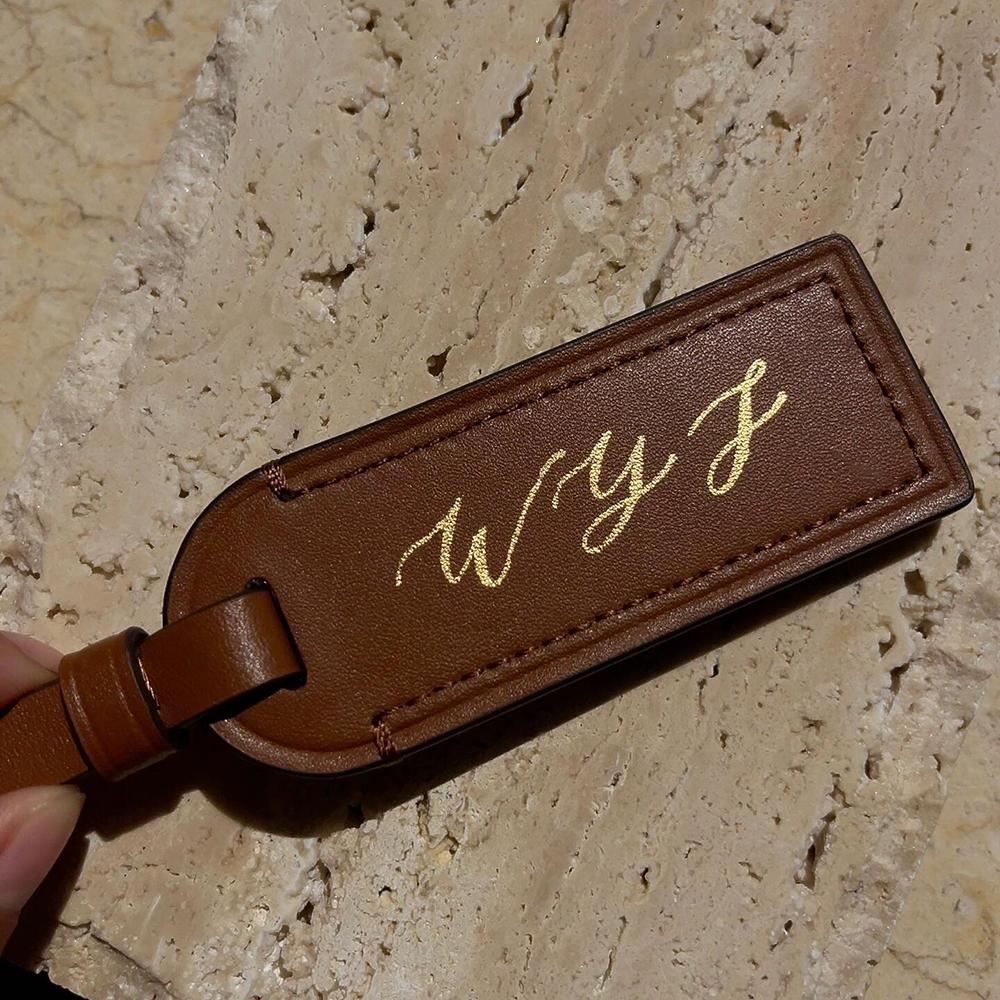
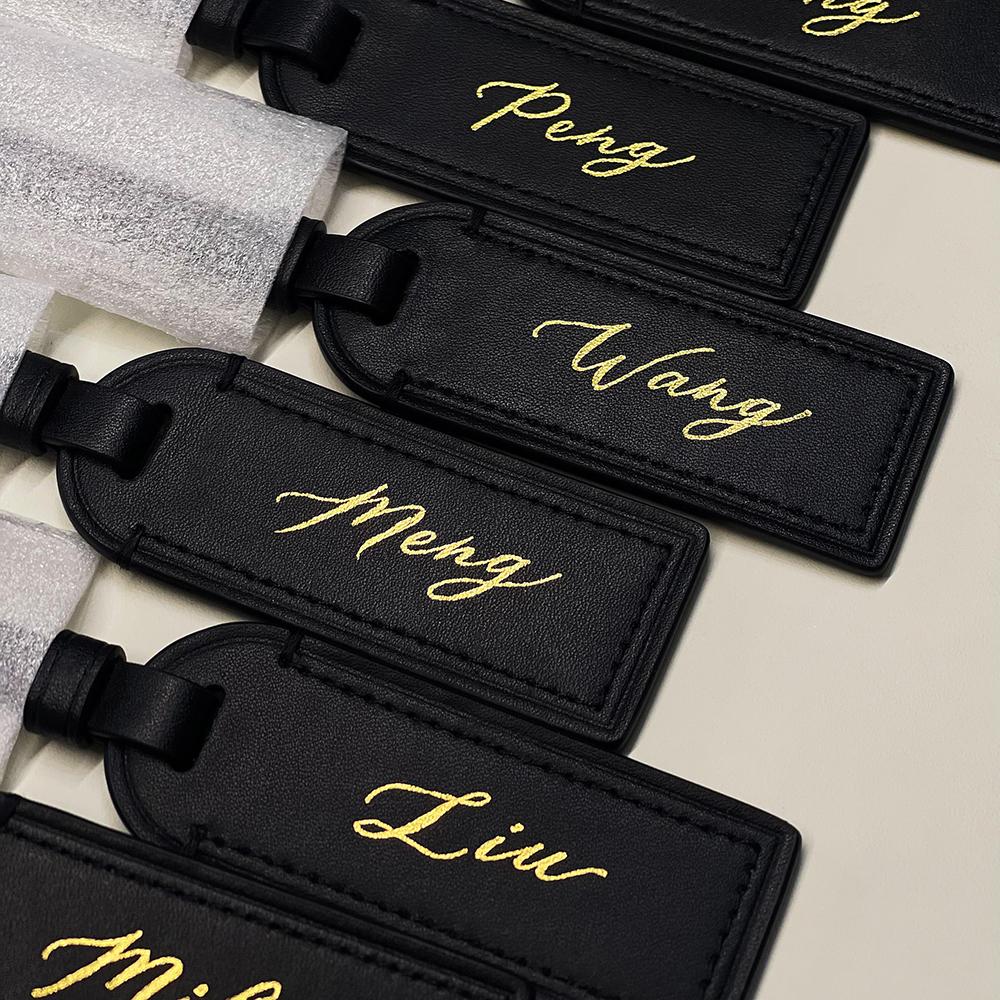
Lately, I've received some questions about how to achieve the high-end gold lettering effect on leather tags—like the ones shown in the photos—with names or initials stamped in gold. So today, I’m sharing a simple step-by-step guide on the process and tips for getting the best results. If you’re in leather customization, gift making, or just starting your own business, this might help! 🔧 Step 1: Prepare the Stamp Mold Use laser engraving or etching to create a custom brass plate. For text, choose fonts with medium-width strokes and smooth curves—super thin lines may not stamp clearly. ⚙️ Step 2: Adjust the Hot Stamping Machine Settings Temperature: 110°C to 130°C (adjust based on the type of leather) Pressure: Moderate – enough to leave a clear impression without over-compressing the leather Time: 0.8 to 1.2 seconds is usually sufficient 📐 Step 3: Align and Stamp Place the foil over the leather, align your mold carefully, then press down. Always test on scrap pieces first to fine-tune the settings before starting a full batch. 👀 Step 4: Check the Result A perfect stamp should have clear lines, full color coverage, a metallic shine, and strong adhesion that won’t rub off easily. 📎 Tips & Tricks: Gold foil stands out best on dark leather; for light leather, try silver or rose gold. Different foil brands may respond differently to heat—test before mass production. Brass molds are reusable and great for small-batch or bulk production.
-
Hot stamping tips | A professional guide to improving your hot stamping results Use High-Quality Foil – Enhances shine and adhesion for a professional finish. Test on Scrap Material First – Adjust temperature and pressure before stamping the final product. Adjust Settings for Different Materials – Example: Leather: 100-130°C, Paper: 80-100°C, Wood: 120-150°C. Regular Machine Maintenance – Clean stamps and heating plates to ensure long-term performance. Need specific stamping settings for leather, paper, wood, or plastic? I have organized them in the table below!!! Recommended Hot Foil Stamping Temperatures for Different Materials Material Recommended Temperature (°C) Notes Leather 100-130°C Excessive heat may scorch leather. Test first; vegetable-tanned leather can handle higher heat, while coated leather requires lower temperatures. PU / Synthetic Leather 90-110°C High temperatures may melt the surface. Use lower heat and shorter dwell time for best results. Paper 80-110°C Laminated paper (e.g., business cards) may need higher temperatures, while standard paper requires lower heat to prevent scorching. Wood 120-150°C Hardwood requires higher temperatures, while softwood needs lower settings. Light-colored wood may show scorch marks. Plastic (PVC, ABS, etc.) 80-130°C Different plastics have varying heat resistance. PVC is prone to deformation, so use lower temperatures and short stamping times. Fabric / Textile 110-150°C Requires specialized foil. High heat may damage fibers, so adjust pressure accordingly. Acrylic 110-140°C Excessive heat may cause warping. Use short stamping durations and multiple light passes. Silicone 150-180°C Needs special silicone foil. Increase pressure for better adhesion. Glass 200-250°C Requires high-temperature foil. Ensure the glass surface is clean for even stamping. Metal 200-300°C Suitable for anodized aluminum and similar materials. Preheating the surface improves adhesion. Painted Surfaces 100-140°C Lower heat is recommended to avoid damaging the paint layer. Need specific recommendations for stamping on leather, paper, wood, or plastic? Let me know, and I’ll provide tailored guidelines!


-
The Maxita Hot Stamping Machine is designed for professional leather crafting, featuring infrared positioning, a push-pull worktable, and a detachable worktable for precise and stable embossing. If you want to imprint logos, initials, or unique patterns onto leather goods such as wallets, belts, cardholders, luggage tags, and bookmarks, this step-by-step guide will help you achieve the best results. Step 1: Gather Materials & Equipment Before you start, ensure you have the following: Maxita Stamping Machine (with industrial-grade temperature control) Leather items (vegetable-tanned leather, PU leather, textured leather, etc.) Hot stamping foil (choose the right foil for your leather type) Custom brass stamping mold (for logos, initials, or patterns) Heat-resistant tape (to keep the foil in place) Step 2: Set Up the Hot Stamping Machine The Maxita hot stamping machine offers precise temperature control, and the recommended temperatures for different leather types are: Leather Type Recommended Temperature (°C) Notes Vegetable-Tanned Leather 100-130°C Use lower temperatures for light-colored leather to prevent scorching PU / Synthetic Leather 90-110°C High temperatures may cause melting; test before stamping Textured / Coated Leather 100-120°C Moderate temperature ensures proper foil adhesion Infrared Positioning: Adjust to ensure accurate alignment Pressure Setting: Moderate pressure ensures strong adhesion without over-embossing Time Control: Typically 2-5 seconds; too short may cause weak adhesion, too long may overheat the material Step 3: Start the Leather Stamping Process 1. Attach the Brass Mold Secure the custom brass stamping mold onto the Maxita hot stamping machine and align it with your leather piece. 2. Preheat the Machine Set the appropriate temperature and wait for the machine to reach the set level (usually 1-2 minutes). 3. Position the Leather & Foil The push-pull worktable makes it easy to position leather items Place the hot stamping foil over the leather and secure it with heat-resistant tape 4. Perform the Stamping Gently press down, ensuring full contact between the stamping mold and the leather. Hold for 2-5 seconds, then release. 5. Peel Off the Foil Once the leather cools, carefully remove the foil to reveal the embossed design. Step 4: Pro Tips for Better Hot Stamping Results Use high-quality foil to enhance durability and shine Test different temperature and pressure settings to achieve the best results Regularly clean the brass mold to prevent residue buildup and ensure crisp embossing Final Thoughts Using the Maxita Stamping Machine for leather embossing allows you to create professional, high-end finishes for custom branding and personalized designs. Whether you're making bespoke leather goods or branding products for your business, this machine helps you achieve consistent and elegant results. Have you tried hot stamping on leather? Share your experiences and questions in the comments. WELCOME TO SHARE YOUR STAMPING DETAILS
-
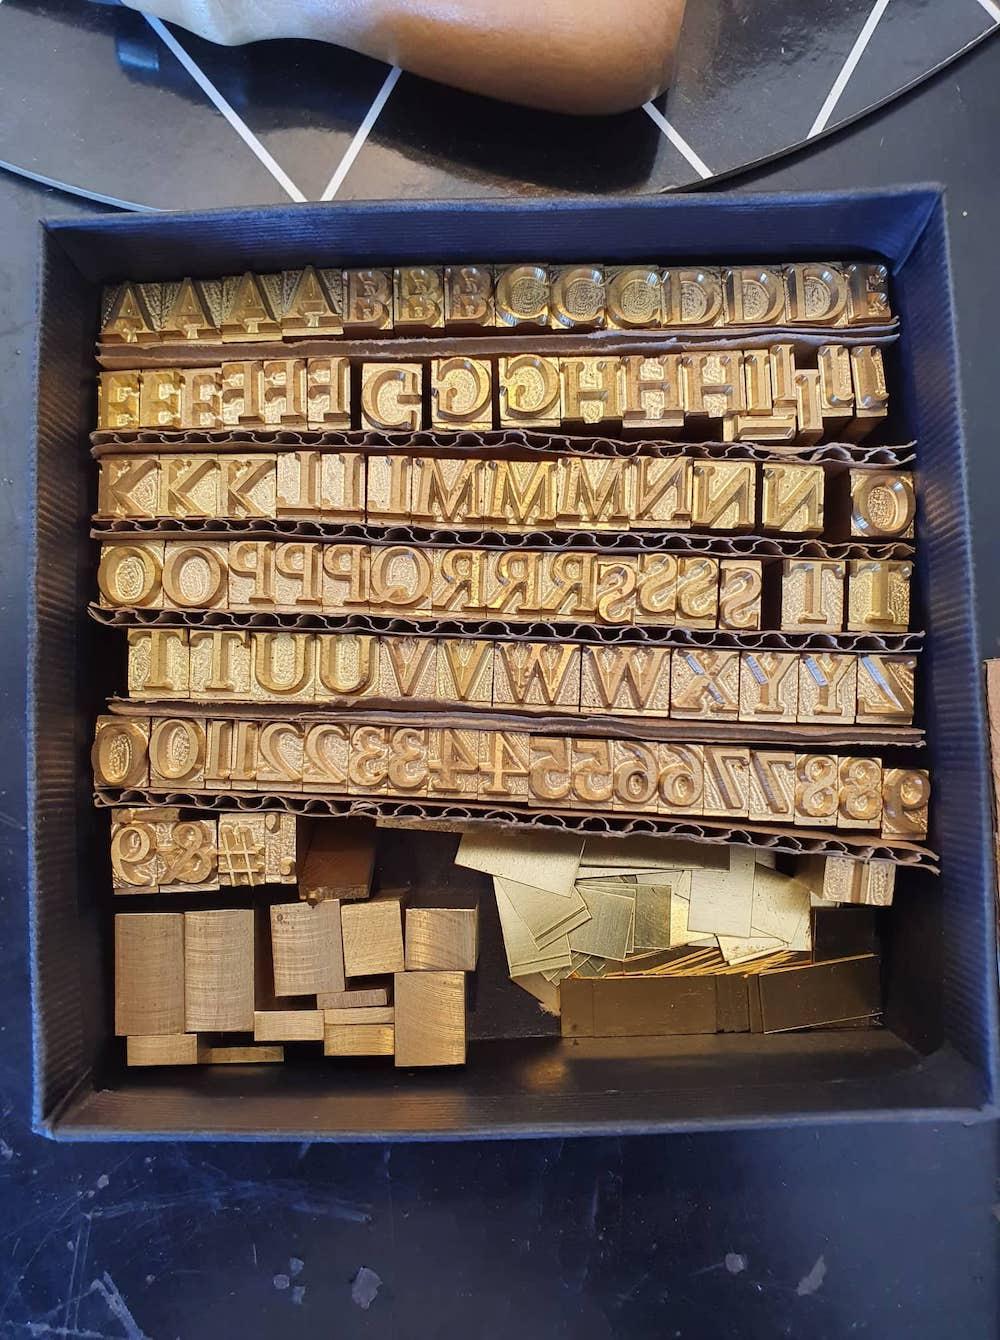
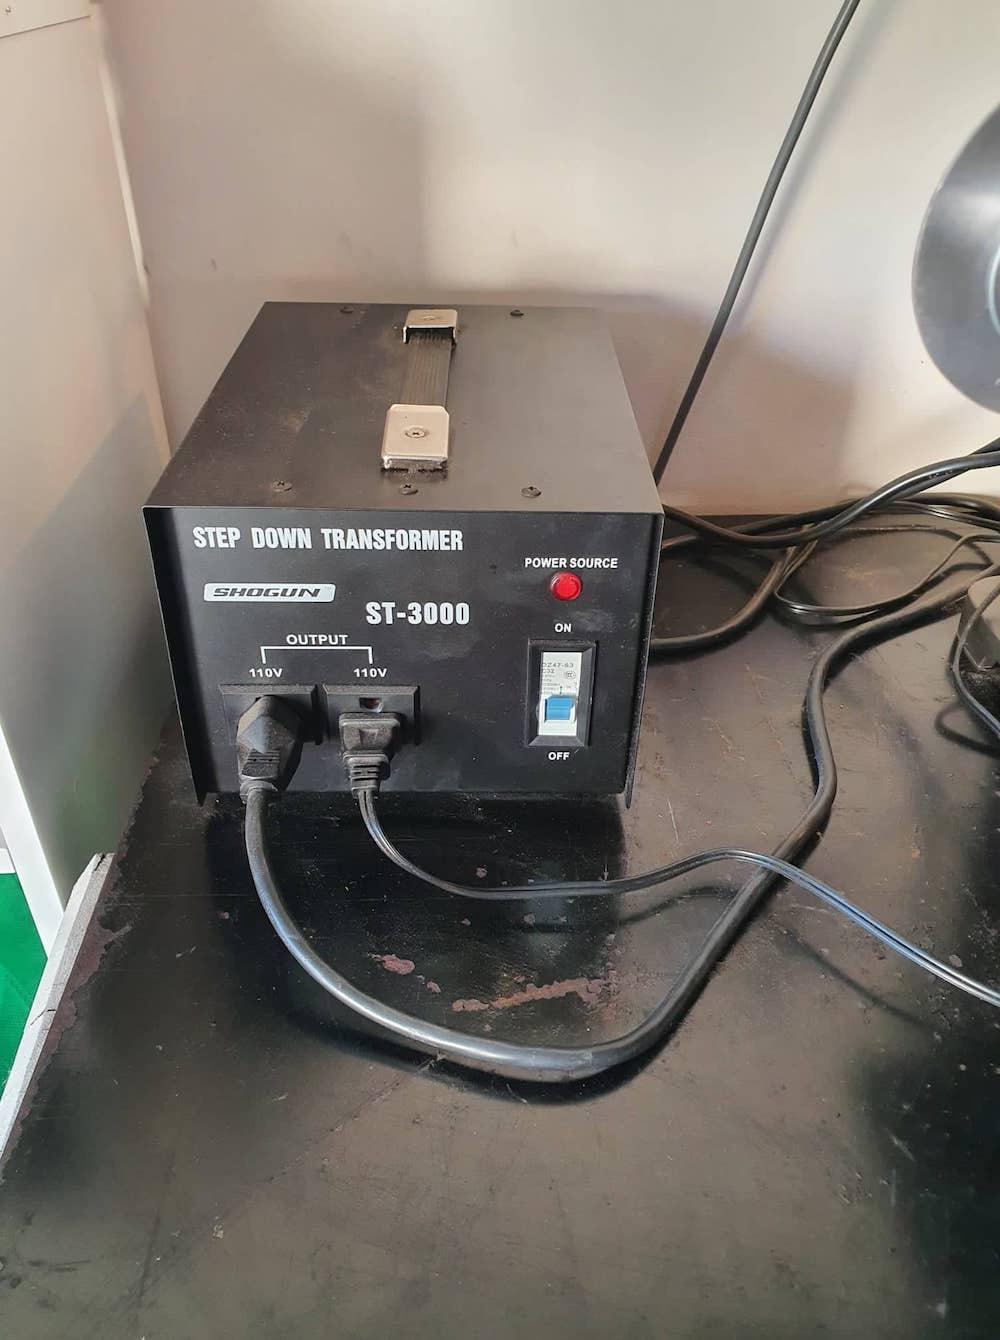
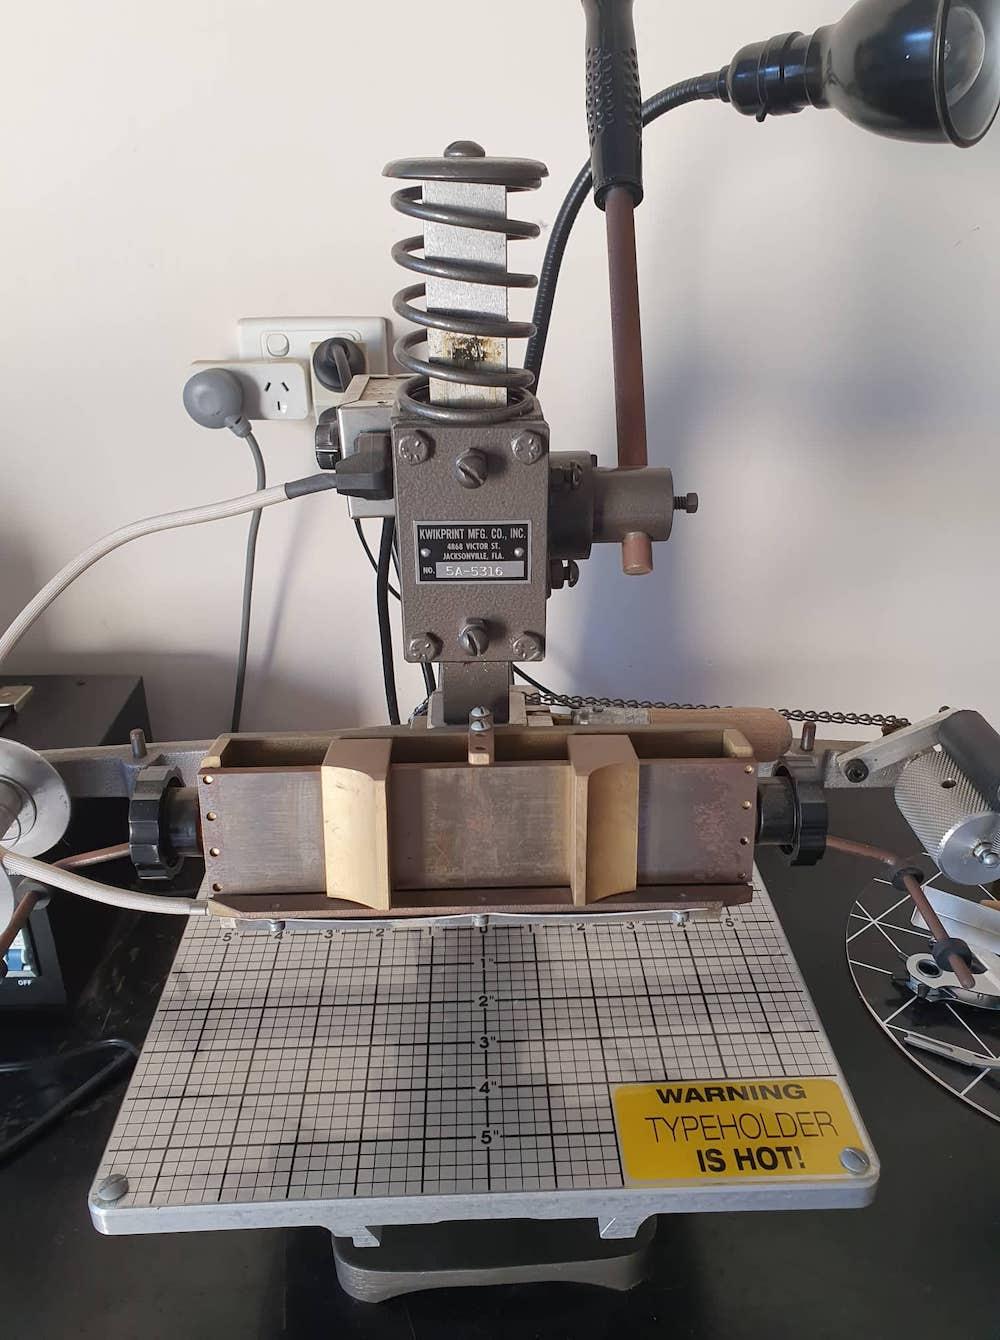
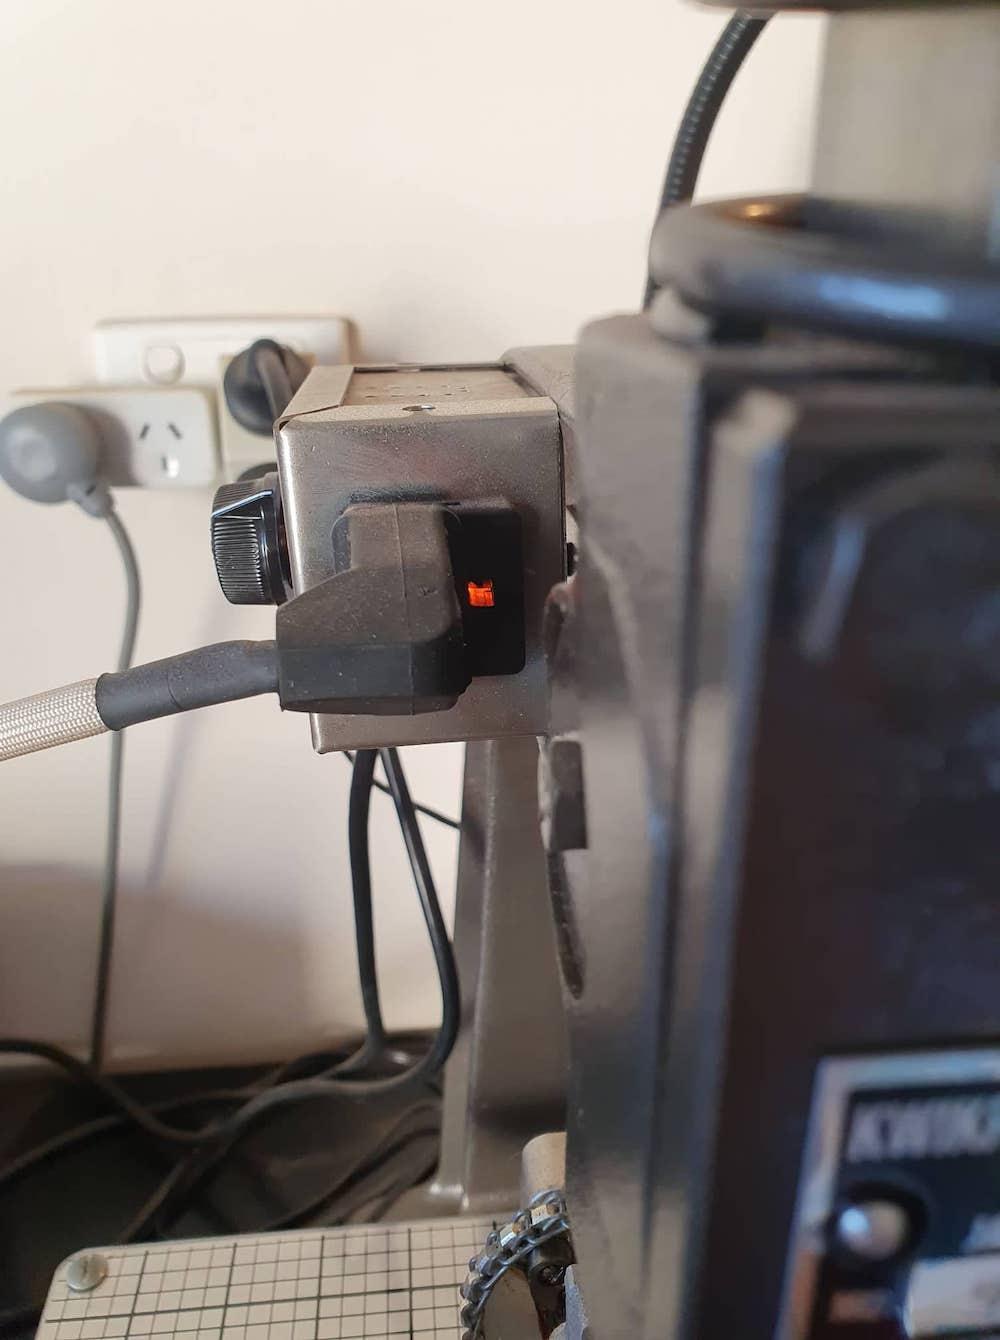
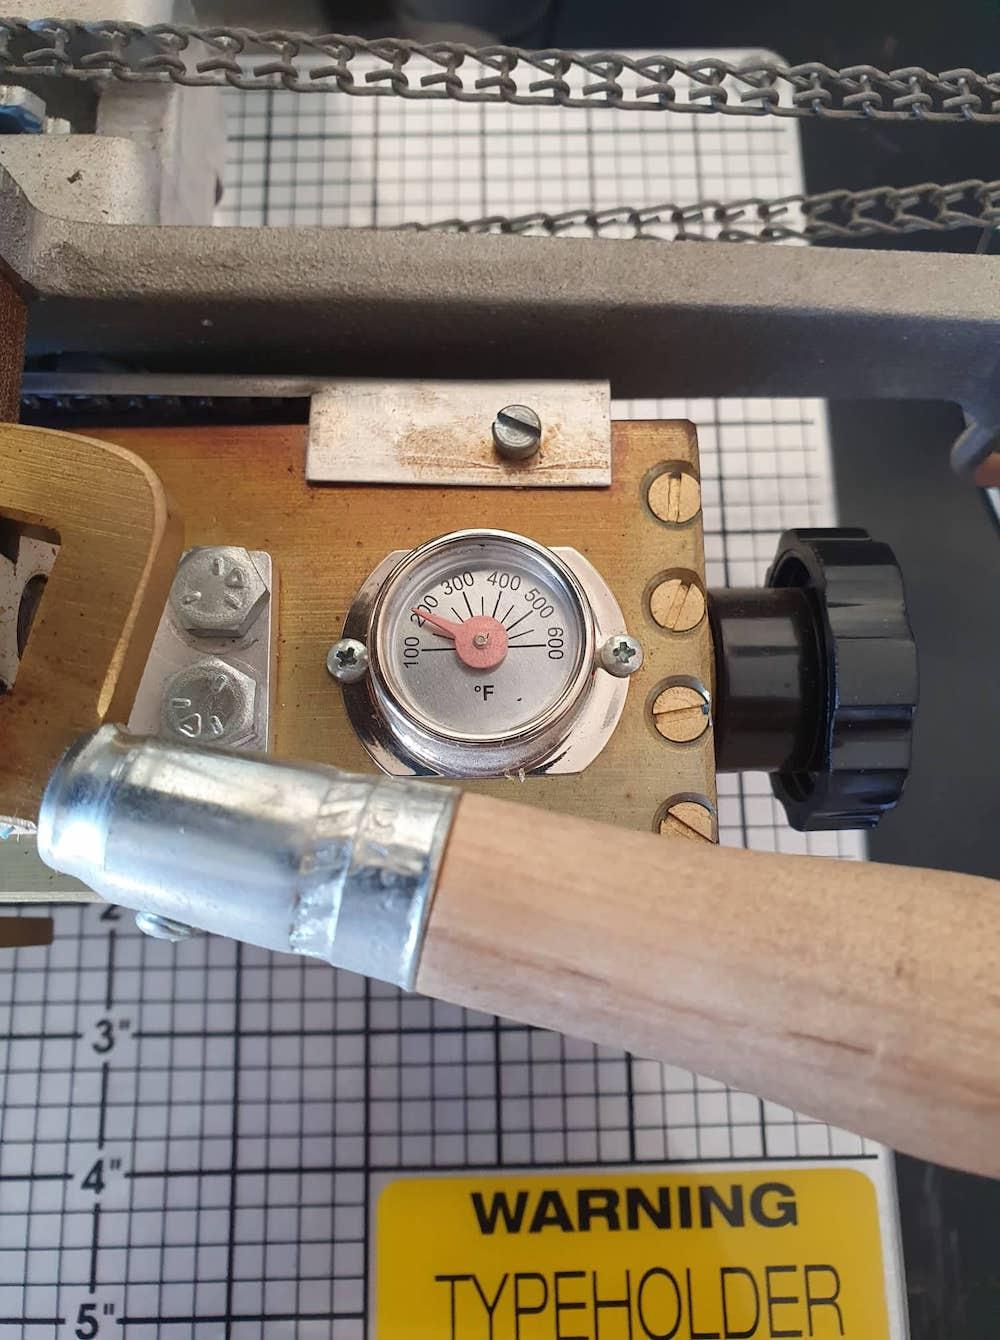
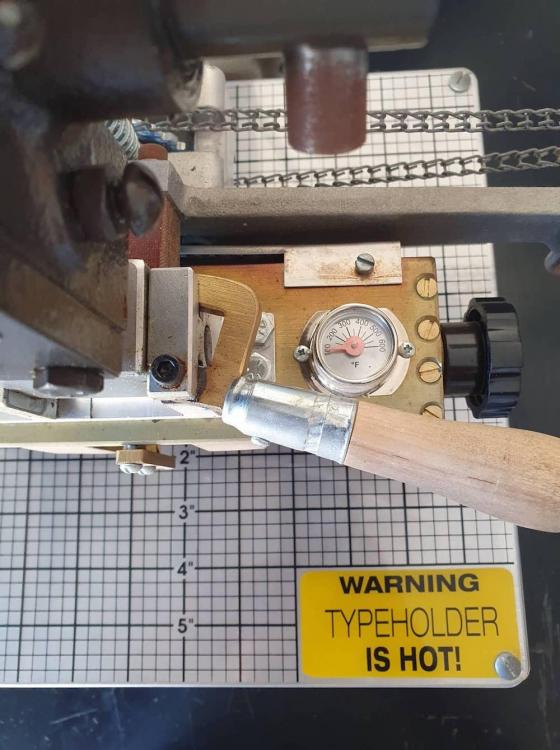
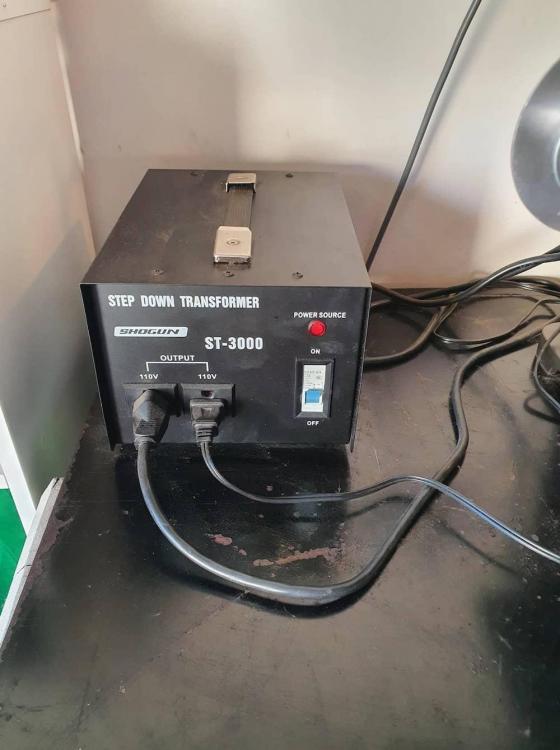
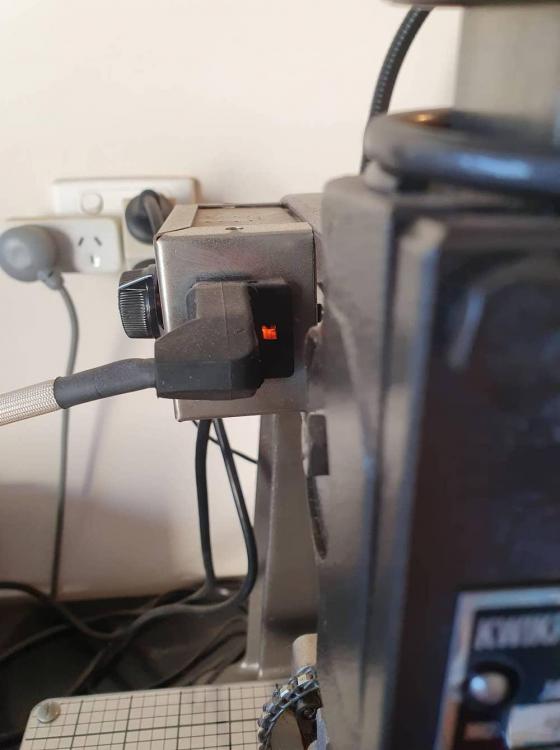
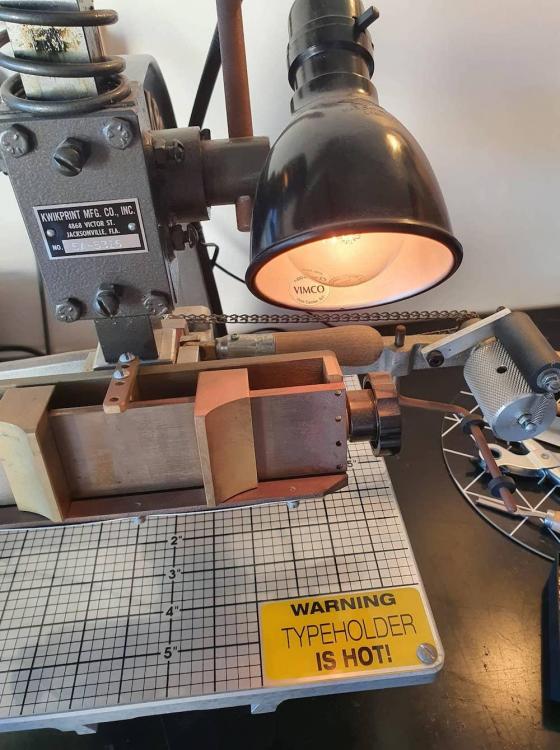
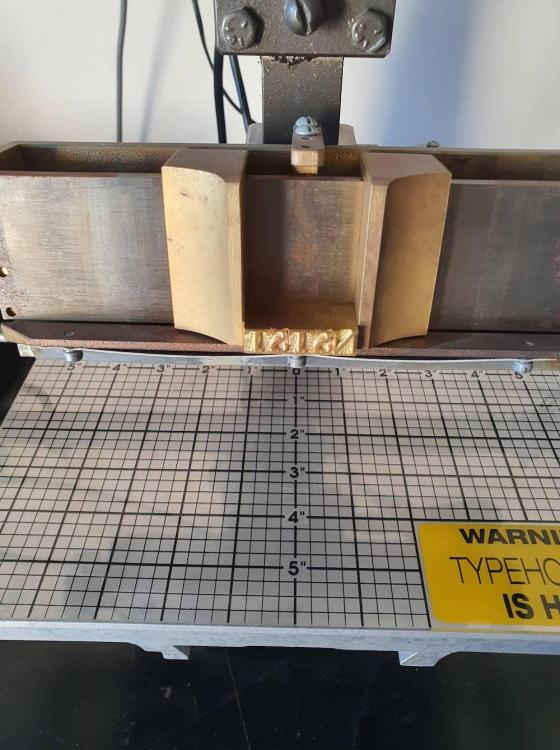
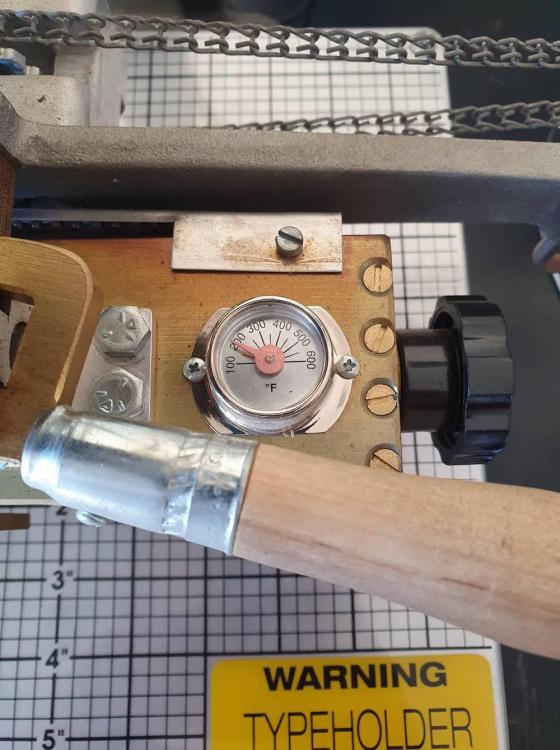
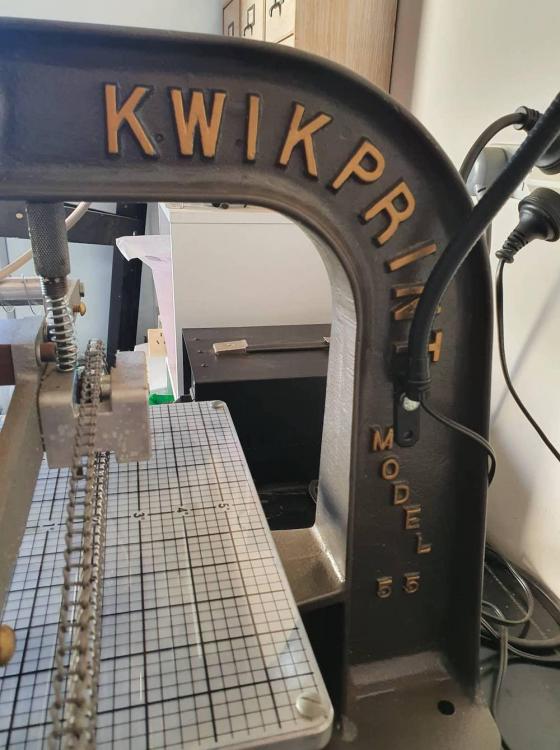
 KWIKPRINT Model 55, Hot Foil Leather Stamping Machine, Excellent Working Condition - meticulously stored and cared for. A regrettable sale, however, between work + young kids, I don't have time to use the machine like it deserves. Its had minimal use and is in near perfect condition. Included with the machine, are all parts and accessories as shown in the pictures, including step down transformer, basic leather crafting tools + spare foil and some leather off-cuts. Has original instruction manual. Photos show the indicator light for heating in progress and the temperature gauge from 0°F to 200°F. *** A 104 piece custom made font set can be sold individually, however, I'd prefer to sell as a package. The font set is brass in York Font 24pt. I had this custom made in the UK and cost over $1,000 *** I will sell as a package for $3,199 which is excellent value as I'm in the process of moving house and would like a quick sale, therefore, price accordingly. I'm also willing to throw in the workbench at no additional cost (for local pickup only). Dimensions of the machine are 52cm x 52cm x 60cm. Weight approx. 20-25kgs. Those who have a passion for leather work will know how rare these machines are to come by in Australia. Pick up from Broadview, SA. Prefer to sell locally, however, will ship interstate or overseas at the purchaser's expense. Feel free to message me if you require any further information.
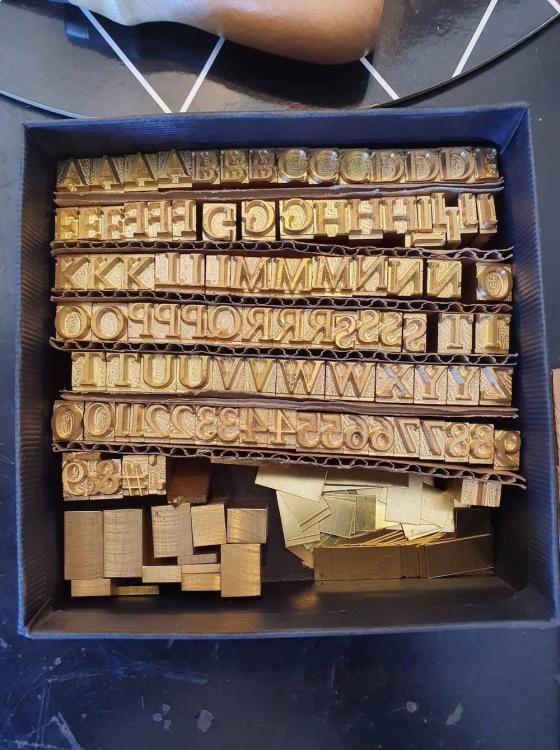


-
 We offer full service cut and sew of a variety of soft-goods and leather-goods. We also offer individual services like clicking, skiving, hot-stamping, debossing and scissor and knife sharpening. Our batch sizes started pretty small and we have competitive rates on these services to ensure they are accessible to small-scale businesses and even hobbyists. If you'd like to find out more about us or get a quote on a project, email Hannah at: info@davis-peterson.com Visit our website to see more of what we do: www.davis-peterson.com
 -
Any users use a Kingsley hot stamping machine for leather? Figured we could start a thread sharing helpful tips. Nothing is too basic to share