triage1998 Report post Posted December 22, 2011 I have been searching the forums for a step by step process on making a dyed double layered gun belt and can't seem to find one. Anyone want to share there process on making a double layered belt? I am not sure of the order in the belt making process such as when to dye when to burnish when to bevel when to stitch etc. etc. This is pretty much my first leather making project. I figured I would start with a gun belt to hone my hand stitching skills. Quote Share this post Link to post Share on other sites
JLSleather Report post Posted December 22, 2011 Is the inside tooled at all? If the inside "layer" is smooth, I just: tool and dye the belt as normal. Cut the back a little wider (doesn't matter, just saves time not having to fit the thing down the length). Trim the back to the front. Groove and stitch. Bevel edges and burnish. One line makes this look faster than it really is, of course, but I think you'll find that's pretty standard order of events. One difference you may see is that I dye the edge of the finished project AFTER burnishing - some fellas may not. Quote Share this post Link to post Share on other sites
triage1998 Report post Posted December 22, 2011 Is the inside tooled at all? If the inside "layer" is smooth, I just: tool and dye the belt as normal. Cut the back a little wider (doesn't matter, just saves time not having to fit the thing down the length). Trim the back to the front. Groove and stitch. Bevel edges and burnish. One line makes this look faster than it really is, of course, but I think you'll find that's pretty standard order of events. One difference you may see is that I dye the edge of the finished project AFTER burnishing - some fellas may not. No tooling at all. The inside layer will be natural the outside layer will be dyed. Just a basic gunbelt. Quote Share this post Link to post Share on other sites
Denster Report post Posted December 22, 2011 I have been searching the forums for a step by step process on making a dyed double layered gun belt and can't seem to find one. Anyone want to share there process on making a double layered belt? I am not sure of the order in the belt making process such as when to dye when to burnish when to bevel when to stitch etc. etc. This is pretty much my first leather making project. I figured I would start with a gun belt to hone my hand stitching skills. Hand stitch a belt! That will hone your skills allright. This is not the only way to do it it's just the way I do it. First I skive the buckle end of the outer piece. Next I die the outside layer I don't dye the liner. I cut the liner about 3/8in wider than the outer layer and glue the two together. Next I use my roundknife to trim the excess. Next I case the outer layer and impress my stitchine. Then I sew it up. Next is edging and edge finishing and punching the holes and slots. Last is to apply choice of finish and assemble. Quote Share this post Link to post Share on other sites
Dwight Report post Posted December 23, 2011 Pretty much the same, . . . Cut both blanks, . . . outside is 9 inches longer than the measured length, . . . liner is 4 inches longer. Both blanks cut with same strap cutter, . . . one after the other. Fix up both ends, . . . tongue and buckle Glue both together, . . . I use Weldwood contact Cement Sand edges to make sides really straight and smooth, . . . using a 1 inch wide belt sander Edge, burnish, and stitch gouge, . . . sew it together Dip Dye the whole thing Add buckle, . . . punch tongue holes Send to customer, . . . spend check. May God bless, Dwight Quote Share this post Link to post Share on other sites
Shooter McGavin Report post Posted December 23, 2011 I've got some belts on order if you want to come build them for me. I'll tell you how and you can do the work Quote Share this post Link to post Share on other sites
Kcinnick Report post Posted December 23, 2011 Pretty much the same, . . . Cut both blanks, . . . outside is 9 inches longer than the measured length, . . . liner is 4 inches longer. Both blanks cut with same strap cutter, . . . one after the other. Fix up both ends, . . . tongue and buckle Glue both together, . . . I use Weldwood contact Cement Sand edges to make sides really straight and smooth, . . . using a 1 inch wide belt sander Edge, burnish, and stitch gouge, . . . sew it together Dip Dye the whole thing Add buckle, . . . punch tongue holes Send to customer, . . . spend check. May God bless, Dwight Same here, I give myself 9.5 and 4.5" though instead of 9" and 4", I bet we end up with the same size belt when cut though. Quote Share this post Link to post Share on other sites
Shooter McGavin Report post Posted December 23, 2011 1: Cut blanks. top is 9" longer than measurement, liner is 5.25" longer than measurement. 2: Cut 5 inches off of drop off, split in half lengthwise for keeper(s). 3: Dye top layer to color. Hit edges as well. Dye keeper at same time. 4: Glue together. 5: Layout all holes. 6: Contour belt edges at fold-over. ( I step in about 1/8: on the inside of the fold over ). Touch up dye 7: Let glue and dye dry, usually overnight. 8: Quick run through warm water tub. 9: Strap punch billet end. 10: Sand edges on belt sander. 11. Creaser tool for stitch line. 12: Size 4 rounded edge beveler inside and out. 13: Sew. 14: Burnish edges. 15: Dye edges. 16: Punch all holes. 17: Sew belt keeper. 18: Reburnish edges if needed. 19: Wait till dry. 20: Neatsfoot oil inside and out. 21: Wait 24 hours or so for oil to abnsorb 22: Rub down all surfaces with wool shearling. 23: Wax edges. 24: Apply sealant inside and out. Dont forget the keeper! 24: Wait till dry. 25: Attach buckle and hardware. Quote Share this post Link to post Share on other sites
triage1998 Report post Posted December 23, 2011 (edited) Thanks for the help gentlemen! Shooter McGavin, I will text you soon so I can hopefully get out to your place and maybe learn something Thanks bro! Edited December 23, 2011 by triage1998 Quote Share this post Link to post Share on other sites
katsass Report post Posted December 23, 2011 This is pretty much my first leather making project. I figured I would start with a gun belt to hone my hand stitching skills. From the old grump; triage, not trying to dissuade you in any way, but, it's going to take a person not as well versed in hand stitching as I am to put something like this hand stitched rig together without getting a bit frustrated ---- maybe a lot frustrated. . You might try to perfect your stitching on a few smaller projects first. JMHO. Mike Quote Share this post Link to post Share on other sites
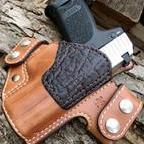
MadMorbius Report post Posted December 23, 2011 I just finished this gun belt, which was my first attempt at a Buscadero rig. The belt was hand stitched. When the skin grows back on my fingers I might do the proper holster for this belt Quote Share this post Link to post Share on other sites
triage1998 Report post Posted December 24, 2011 (edited) Katsass and Madmorbius both those rigs are beautiful and a bit ambitious for me. My plan is to start a basic CCW belt after Christmas and see how that goes. Edited December 24, 2011 by triage1998 Quote Share this post Link to post Share on other sites
Ethan Report post Posted December 28, 2011 This has been educational, but I have one more question. Lots of discussion on these forums about curving a double-layer belt, so that it naturally makes a circle. http://leatherworker.net/forum/index.php?showtopic=24982&hl=%20glue%20%20liner%20%20belt&st=0 http://leatherworker.net/forum/index.php?showtopic=30809&st=0&p=194088&hl=+glue%20+liner%20+belt&fromsearch=1entry194088 http://leatherworker.net/forum/index.php?showtopic=13867&st=15&p=84254&hl=+glue%20+liner%20+belt&fromsearch=1entry84254 Some have suggested pre-curving the belt during gluing--i.e. gluing the two pieces together around a curved form or mold. Others suggest gluing the pieces together flat (much easier in my mind), then casing the nearly-finished belt to produce the proper curvature. Are either of these necessary? Do you prefer one or the other, or some other method? Thanks Quote Share this post Link to post Share on other sites
mlapaglia Report post Posted December 30, 2011 (edited) There are 2 schools of thought regarding the belt curve. I suggest you make one of each and decide on its merits. You have hit the middle of a long running discussion between leather workers. At this point you need to decide which is best for you. Michael Edited December 30, 2011 by mlapaglia Quote Share this post Link to post Share on other sites