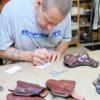
George B Report post Posted March 6, 2014 Not really sure anyone will have the time to give advice, but figured I'de ask. I have been doing gun shows for the last 3 or so months and came to a sad realization. I cannot make replacement inventory as fast I am selling it no matter how many hours a day I work. As an example, I have been making 20 to 25 a week and I am still behind. I could raise my prices, but in my mind that would be a huge step backward as I would rather increase production. Everything I have done to increase my production has worked well. Such as a 12 ton press, oscillating belt sander, drum dyed leather, convection oven and such. But I find my biggest eater of production time is in the cutting out leather using patterns and edge work. I am considering using clicker dies instead of hand cutting but feel the need to be able to make the die myself and eventually have one for every holster in my line up. Is this a stupid idea? I can get the flat metal bender and make room in the shop for it but cannot find the pre-sharpened steel ruler stock on line or locally. I now use a pro edge dressing for my holsters, unless a customer requests otherwise, but applying it with a q-tip is time consuming and wasteful at best. In a nutshell I guess I am asking if there is anyone here with a small, one man, production shop that has the time to correspond with me about the process and items I would need to do this. I have currently had to shut down to custom orders to catch up with regular line and gun show sales so any help would be appreciated. Thanks, George Quote Share this post Link to post Share on other sites
marine mp Report post Posted March 6, 2014 George, a few suggestions, take them for what they're worth.......on edgeing, I use water and a deer antler and just rub it smooth, then rub some glycerin saddle soap on it and quickly rub that in to seal it. The edge is usually dyed the color of the holster when it is dyed. I know you talked about not raising your prices, but do a study to see how much you are paying yourself, plus supplies, and the sech and figure how much profit you want to make. You may be selling yourself way short. Also, I still cut patterns and sew by hand so the clicker-intel is out of my league. JMHO. Semper-fi Mike Quote Share this post Link to post Share on other sites
camano ridge Report post Posted March 6, 2014 (edited) You might get a hold of Lobo, he went from a one man shop to having help. He may be able to give you some insight. lobogunleather.com he is also on these forums although I have not seen him on here for a while. As to making your own clicker dies, you might figure how long it would take you in man hours to make one dye (during which time you could be making a holster) add the material costs then call Texas Die company and compare their price to what it would cost you to make your own.. Also figure in the time you will spend locating and rounding up materials and tools you would need to make the die. Tandy has an edge dressing aplicator that actually works pretty well (at least for me). I m some what headed in the same direction you are. Edited March 6, 2014 by camano ridge Quote Share this post Link to post Share on other sites
knazim Report post Posted March 6, 2014 Not really sure anyone will have the time to give advice, but figured I'de ask. I have been doing gun shows for the last 3 or so months and came to a sad realization. I cannot make replacement inventory as fast I am selling it no matter how many hours a day I work. As an example, I have been making 20 to 25 a week and I am still behind. I could raise my prices, but in my mind that would be a huge step backward as I would rather increase production. Everything I have done to increase my production has worked well. Such as a 12 ton press, oscillating belt sander, drum dyed leather, convection oven and such. But I find my biggest eater of production time is in the cutting out leather using patterns and edge work. I am considering using clicker dies instead of hand cutting but feel the need to be able to make the die myself and eventually have one for every holster in my line up. Is this a stupid idea? I can get the flat metal bender and make room in the shop for it but cannot find the pre-sharpened steel ruler stock on line or locally. I now use a pro edge dressing for my holsters, unless a customer requests otherwise, but applying it with a q-tip is time consuming and wasteful at best. In a nutshell I guess I am asking if there is anyone here with a small, one man, production shop that has the time to correspond with me about the process and items I would need to do this. I have currently had to shut down to custom orders to catch up with regular line and gun show sales so any help would be appreciated. Thanks, George I can suggest a crazy solution: Buy a laser cutter! I use it everday and its fantastic tool to have. KN Quote Share this post Link to post Share on other sites
Josh Ashman Report post Posted March 6, 2014 George, I don't know that you'd want to but you could sub out your clicker work. I picked up a sewing machine from SLC a few months back and their machine sales man wasn't in so they had me talk to one of their guys in the back. I was surprised to find several sewing stations and a large clicking machine that run non-stop. They make parts as well as finished products for various "makers" all day everyday. I know Weaver will also clicker cut parts. Good luck whichever way you go, it's good to be busy! Best regards, Josh Quote Share this post Link to post Share on other sites
Steven Kelley Report post Posted March 6, 2014 Clicker dies are one of the best think I ever invested in. They run from $50 - $75 each and really make quick work of cutting leather. Another good thing is the pieces are all exactly the same size, so sanding and finishing the edges is much faster as well. Making them yourself is a waste of time. Cut out a pattern from thick paper and send it to a pro, such as Texas Custom Dies. I have quite a few from them and they are all perfect. You can have a die for each patter/gun combo, or you can have one pattern that will work for several. For instance, I'm only making holsters for 1911's at the moment. I have one die to fit each of my holster models. If I'm making the holster for a 4.25" 1911, I just trim the die cut pieces of leather to the correct length. I waste a little leather to not buy a bunch of dies, basically. So you might be able to get by with less dies than you think. At a minimum, buy a few dies for you highest volume models as a start. Once you start using them, you'll have a hard time cutting leather by hand again. On edging, I do a "pre-burnishing/forming" step during the molding process. I have a multi grooved burnishing tool that fits in a drill press. After dipping the holster in water, and before molding, I run the edges along the burnishing tool. This is just to smooth out the fibers and give the edges a nice round shape. Since the leather is soaked, it is extremely easy and fast. Then I mold and dry. When I get to the edge finishing step, the edges just need a quick final burnish and wax, and they are done. If I didn't do that initial pre-burnish/forming step, it would take a lot longer to get the edges finished. How do you dye? Dipping is about as fast as it gets. I generally dip dye after molding. If a customer wants a certain color stitching, or something else that prevents that, I'll dye the piece before molding. I have gallon buckets of each dye color and just do a quick dip as soon as the molded holster comes out of the hot box, while it's still warm. They go on a drying rack overnight, then straight into an acrylic bucket the next morning. Dipping everything saves a lot of time, if that fits your needs. Pricing. If you are doing this as a business, do what benefits your business. If competitors are selling similar holsters for twice as much as you are, then you need to get more competitive on pricing. I'm not talking about gouging your customers, but as a "business", you need to find out what the market will support and get your prices in line with that. Starting out with low pricing is a great way to get your name out there and get the business started. Once you get overloaded, you can gradually increase your prices to get more in line with the segment of the market you want to compete in. Hire an apprentice. Let them do some of the grunt work (so to speak). If you can increase your volume and not have to work more hours yourself, that can lead to more income. A lot of people start holster making as a hobby, and turn it into a business, but don't change their "hobby" mentality. They want to do everything for everybody and charge way less than what their time/product is worth. You can have a "business" mentality and still offer a great product at a fair price, along with great customer service. Quote Share this post Link to post Share on other sites
electrathon Report post Posted March 6, 2014 Hire an apprentice. Let them do some of the grunt work (so to speak). If you can increase your volume and not have to work more hours yourself, that can lead to more income. Everything in this post was great info but I have a specific suggestion along the lines of this one. Find a mom nearby whose kids are in school and hire her for a few hours a day to assist you. No leather knowledge needed, just have her do what you tell her to do, dying, burnishing etc. I know a guy that ran a machine shop this way. He was a very skilled machinist. He set the machines up and told the moms to hit the stop control, turn lever and repeat. Ran a large shop this way for years. Quote Share this post Link to post Share on other sites
troop Report post Posted March 8, 2014 I have been thinking that a laser cutter was the way to go as well. I've been hoping the technology comes soon to harbor freight. can I ask what model cutter you have? Tony Quote Share this post Link to post Share on other sites
paprhangr Report post Posted March 8, 2014 check out Billy, he is a one man holster shop mccabescustomleather.com Quote Share this post Link to post Share on other sites
triage1998 Report post Posted March 10, 2014 Great advice here. For those with clickers. What machine are you all using? I am ready to step up to a clicker real soon. I spend one whole day a week just cutting leather and I really need to streamline that. It is probably the most time consuming part of my business. Quote Share this post Link to post Share on other sites
Rayban Report post Posted March 12, 2014 I had designs of doing the knife/gun show route but came to the realization that I couldn't keep up with the inventory either. The other makers I see at the shows have at least 100 items on display to sell....no way can I do that. So I'm content in doing the work per order...and I'm as busy as I want to be. 25 holsters a week??!!sheesh...that 's too much like work to me. Quote Share this post Link to post Share on other sites
Steven Kelley Report post Posted March 17, 2014 Great advice here. For those with clickers. What machine are you all using? I am ready to step up to a clicker real soon. I spend one whole day a week just cutting leather and I really need to streamline that. It is probably the most time consuming part of my business. I use a 20 ton shop press from harbor freight.....http://www.harborfreight.com/20-ton-shop-press-32879.html#.Uybu1c62yE8 and replaced the hand operated bottle jack with an air over hydraulic model.......http://www.harborfreight.com/20-ton-air-over-hydraulic-jack-95553.html#.UybvUM62yE8 Just plug the jack into an air compressor and it cuts like a dream. Quote Share this post Link to post Share on other sites
George B Report post Posted March 17, 2014 Thanks to everyone who took the time to give suggestions. They all had value and I will be incorporating some of them when things slow down after the gun show season. Not exactly sure how I am going to do it yet, but changes will have to made soon. Thanks again, George Quote Share this post Link to post Share on other sites
triage1998 Report post Posted March 17, 2014 (edited) I use a 20 ton shop press from harbor freight.....http://www.harborfreight.com/20-ton-shop-press-32879.html#.Uybu1c62yE8 and replaced the hand operated bottle jack with an air over hydraulic model.......http://www.harborfreight.com/20-ton-air-over-hydraulic-jack-95553.html#.UybvUM62yE8 Just plug the jack into an air compressor and it cuts like a dream. Thank you Steven for the links. What size plates did you use and did you weld them to the press yourself? May see a picture of your setup? I have been in contact with Heather Kinnick of Texas Custom Dies the last week in regards to there air run 12 ton clicker press. they want $650.00 for it. That is without the compressor. I really would like a 20 ton and Heather said they can build one and the pricing would be significantly more. I am trying to figure out if I can find someone to weld the plates on for me. I just need to find out what size and thickness I will need for the plates with the 20 ton press. Edited March 17, 2014 by triage1998 Quote Share this post Link to post Share on other sites
Steven Kelley Report post Posted March 18, 2014 Thank you Steven for the links. What size plates did you use and did you weld them to the press yourself? May see a picture of your setup? I have been in contact with Heather Kinnick of Texas Custom Dies the last week in regards to there air run 12 ton clicker press. they want $650.00 for it. That is without the compressor. I really would like a 20 ton and Heather said they can build one and the pricing would be significantly more. I am trying to figure out if I can find someone to weld the plates on for me. I just need to find out what size and thickness I will need for the plates with the 20 ton press. I use a 12x12x1/2" steel plate on the bottom. It isn't welded to the frame. I lay a plastic cutting board on top of that. Another steel plate on top of the die. The shop press comes with a couple of plates which would also work as the top plate above the die. I used one of those for quite a while until I found an 8x12x1/2" plate. I used a 20% coupon for Harbor Freight and ended up paying less than $300 for the press and air/hydraulic jack. I've used it for about 2 years and have never had an issue. The opening in the frame is a bit narrow, so you can just roll out a side and feed it in. You'll have to cut the leather into strips so they will fit in the press, which can cause a little bit of leather waste. With the room I had available, and the money I wanted to spend, it's perfect. I've purchased all my dies from Heather at Texas Custom Dies and they are great to work with. Quote Share this post Link to post Share on other sites
triage1998 Report post Posted March 18, 2014 You have been a tremendous help Steven. I appreciate it. Quote Share this post Link to post Share on other sites
Catchndreams Report post Posted March 19, 2014 (edited) Thank you Steven for the links. What size plates did you use and did you weld them to the press yourself? May see a picture of your setup? I have been in contact with Heather Kinnick of Texas Custom Dies the last week in regards to there air run 12 ton clicker press. they want $650.00 for it. That is without the compressor. I really would like a 20 ton and Heather said they can build one and the pricing would be significantly more. I am trying to figure out if I can find someone to weld the plates on for me. I just need to find out what size and thickness I will need for the plates with the 20 ton press. send me your email and I will send you pics of our 20 ton air. Invested $350 leather@durango.net Edited March 19, 2014 by Catchndreams Quote Share this post Link to post Share on other sites
triage1998 Report post Posted March 19, 2014 Thanks for the pictures Dennis. Excellent work! Quote Share this post Link to post Share on other sites
Bob Keyes Report post Posted August 29, 2014 One thing I learned as a blacksmith was there have only been 2 blacksmiths go to hell, one hit cold metal and the other one didn't charge enough. Remember that when pricing your work and don't take risks. Another thing I learned on pricing was if something didn't sell for shows raise the price it will sell. Quote Share this post Link to post Share on other sites
Lobo Report post Posted August 31, 2014 We are now offering 12 holster designs, with or without 4 common options, in 4 finish colors, left-hand and right-hand, for 145 different handguns. This results in about 70,000 possible variations. I have not counted the patterns that I now have in file, but I estimate about 10,000, and new patterns are still being created every week. I have two more new designs ready for the market, but haven't found the time to put up new webpages, photos, etc, and I know that each will result in the need for 20-plus hours of work to generate all the patterns necessary for production. We are completing about 2,000 orders per year for customers in all 50 US states and 33 other countries so far. So, at the current rate of production it would take about 35 years to make one of everything to have in-stock inventory, and then only if we sold nothing for 35 years. Everything produced is to fill an order that has been confirmed and paid for before leather is cut. All orders are taken via e-mail, providing a written record (I spend an average of about 4 hours throughout the course of each day reading and responding to e-mails, acknowledging orders, answering questions, updating the website, etc). I do not take telephone orders or inquiries. No walk-in customers. While in the shop we are working, and interuptions eat time that can never be replaced. Average price per item produced is about $78. Average cost per piece (materials, supplies, hardware, packaging, shipping) is about $12. My prices are not at the top of the market, nor at the bottom. Cowhide is all Hermann Oak, horsehide is all Horween's, and I don't think there is any better. We average one completed product for every 47 minutes spent in production work, so about 31 man-hours per week. Since I also spent 30-plus hours doing admin functions that means a typical work week of 60-plus hours. How are we doing this? 1. We work in batches of similar items, usually 10 to 15 pieces at a time at each stage. Each order proceeds in a plastic tray (restaurant type, just like they serve sandwiches and fries in). There are typically 3 production batches per week. Dyeing, burnishing, finishing, hardware, and packaging are done once per week. 2. Everything is cut by hand using heavy duty scissors. Average time per piece is about 7 minutes. (NOTE: with average production of 40 pieces per week this amounts to 4 hours 40 minutes spent in cutting. This is the maximum possible time savings possible with press and clicker dies). 3. Everything is assembled by hand, cemented and clamped. Average time per piece is about 5 minutes. (NOTE: as a practical matter we usually cut, assemble, cement, and clamp before proceeding to the next piece. This minimizes fatigue and allows plenty of time for cement to set up before proceeding to stitching). 4. Everything is stitched on a powered stitcher (Leather Machine Company Cobra Class 4). Average time per piece is about 5 minutes. Belts take more time, especially those with fancy stitch patterns, while pouches and other smaller items take very little time. Overall, a single production batch of a dozen or so pieces will be stitched up in an hour. 5. After stitching each piece has the edges dressed off using drum sanders mounted in a benchtop drill press. Depending on the contours we use sanding drums of 3/4", 2", and 3" diameter. Then the edges are beveled. Average time per piece is about 2 minutes. 6. Dye stations are set up for each color and all dyeing is done at this point using both brush and spray application. Average time per piece is about 3 minutes. All dyed pieces are allowed to sit overnight or longer prior to forming, allowing the dyes to set up. 7. We set up for forming holsters, bring the oven to temperature (120-130F) and the drying hot box (104-108F). Forming and boning are done sequentially, usually in 3 cycles of forming/boning with about 8 to 10 minutes at a time in the oven between, then into the drying hot box when ready. Average time per piece is about 10 minutes (actual labor, drying time not included, and everything will remain in the hot box for about 3 to 5 hours after each batch is done). 30 to 40 pieces take a day's work to complete, although I frequently do half one day and half the next. Once they are in the hot box I can do other production work while they finish drying, and they can stay in the hot box for many hours if I am doing other things. 8. First step in finishing is a modest application of neatsfoot oil, done with a brush and rags. Average time per piece is about 1 minute, 30 to 40 minutes for a week's production. 9. Edges are then burnished. We use a 50-50 mixture of beeswax and paraffin wax rubbed liberally on all edges, then burnish using a hard felt polishing wheel running on a benchmount drill press (1700RPM). Average time per piece is about 3 minutes, 1.5 to 2 hours for a week's production. 10. Acrylic sealant is applied using both swab and spray application. Average time per piece is about 1 minute, 30 to 40 minutes for a week's production. 11. Final finish is applied using both swab and spray application. Average time per piece is about 3 minutes, 1.5 to 2 hours for a week's production. 12. Hardware (snaps, buckles, etc) are installed using hand tools. Hardware tested for proper function. Average time per piece is about 2 minutes, 1 to 1.5 hours for a week's production. 13. Products are packaged for delivery. This includes a product identification card with instructions & warranty information, plastic bag, padded mailers with mailing labels. Average time per piece is about 5 minutes, 2.5 to 3 hours for a week's production. As can be seen the only power equipment we use is the stitcher and benchtop drill press. Changing over to clicker dies and press for cutting would cost me about $500,000 to $600,000, or about 3 to 4 times gross annual sales. Assuming that this would reduce my cutting time by half, the savings would be about 3.5 minutes per piece produced. At 2,000 products annually this would amount to 116 hours 40 minutes annual time savings in return for a half-million dollar investment. At a labor cost of $30 per hour it would take about 142 years to ammortize the investment, assuming there will never be a need for additional clicker dies, or for repair/replacement of the press. Please note that all of this applies only to my little operation. Another maker, perhaps producing 100 different products might get into press and clicker die cutting for much less investment, say $8,000 to $10,000. Adding another single product or variation would require only $60 or $80 for a new clicker die. In my opinion there is much to be gained by breaking the work down to stages and performing each stage with multiple pieces. This minimizes the time spent setting up equipment and workspaces for each project, and breaking down after each, again and again. Cement takes an hour to set up. Dyes take 12 to 24 hours to set up. Finishes take 12 to 24 hours to set up. Working in batches allows plenty of time for these processes to take place while we are being productive doing other things. I know that if we worked on only one order at a time, from start to finish, we would never get 40 per week out the door. There are other things that can be done to keep things moving along. About 20% of my business is belts, and I know that we will always need 10 to 20 straps (two-layer belts) of various lengths every week. So every time I receive a shipment of leather one of the first things I do is to lay out each side and cut 6 or 8 straps, diagonally from back to belly, in target lengths of 50" and 60". With natural variations in the hides this usually yields straps of 46" to 54" and from 56" to 64" or so, allowing belts to be put together quickly and with minimal waste. The resulting pieces are a little less than half-sides, which are much easier and handier to lay out for cutting holster and pouch patterns later. Once a side is laid out for cutting it takes only a few minutes more to cut 6 or 8 straps than it takes to cut 1 or 2 for a single belt. I usually order 8 to 10 sides at a time due to storage space limitations, and we use about 60 sides per year, so I will spend a couple of hours cutting belt straps once every 6 to 8 weeks rather than wrestling with a side to cut a strap or two every day. Hardware, thread, and other supplies are purchased in quantities to last 6 months to a year. This avoids time lost when we run out of something and have to wait for a delivery (ever notice that your supplier tends to backorder only when you REALLY NEED something?). I keep a running inventory of everything we use, and when anything gets down to a 2 or 3 months supply I know that it is time to reorder. Dyes and finishes are purchased by the gallons, much less expensive than smaller quantities. Snaps, T-nuts, screws, Chicago screws, etc, are purchased by the thousands. Belt buckles are purchased by the hundreds. Packaging and mailing supplies are purchased by the thousands (and cost MUCH less than going to an office supply store). We have 5 permanent work stations set up for cutting, assembly, stitching, edging, etc. These are used every day. We usually dye, seal, finish, install hardware, package and ship only once per week so those functions are done on temporary work stations that include the work benches and folding tables that can be out of the way the rest of the time. Finishing and hardware take up 3 to 4 hours one day, then everything sits overnight to cure out, and the following morning everything can be packaged and ready to deliver in a couple of hours or so. Keeping tools and equipment organized and ready to use at each stage of production saves untold amounts of time searching for this or that, trying to remember where it was last used, etc. My assistant and I each have a full set of all basic tools so we never have to borrow from each other or hunt around. Emptying trash cans before they are overflowing avoids interuptions of the work while trying to find someplace to throw the scrap from the bench. Over and above everything else that can be done, it is my opinion that nothing is more efficient than eliminating interuptions while we work. No TV in the shop (radio in the background is OK, I prefer Limbaugh or Hannity but Mindy likes country western).Telephone calls or people walking in with questions (or just to chit-chat) and other distractions will eat up more time than any kind of automation or machinery can make up for. Best regards. Quote Share this post Link to post Share on other sites
lws380 Report post Posted August 31, 2014 Very helpful information from Lobo. Thanks for your feed back. I'm a one man shop and have resisted hiring help, which I'm sure I could use. I've invested in several machines that help me be a little more efficient. For instance, I use both white and black thread. I got tired of changing the thread for the various options, so I bought a second Cobra Class 4 and set up white on one and black on the other. Another reason I wanted a second machine, was for a back up. My Cobra 4's have never had any problems, but if I only had one and it went down for some reason, I'd be screwed for a few weeks until it could be fixed. If you have a production shop and only one sewing machine, you better have a plan of some sort, in case it goes down. I've also added a Cobra 18 for thin leather work. I bought a Cobra 10 ton clicker a year or two ago and I'm glad I did. It is a good time saver. I buy dyes from Kirk and Heather at Texas Custom Dyes. Great people and great products, IMO. I generally buy dyes for guns that are very popular and still hand cut ones that are not as popular. For instance, when the Ruger LCP came out, I immediately got a dye made for that gun, as it was a very hot seller. With the clicker and dyes, I can stamp out 10+ patterns in the same time it would take me to trace a pattern and cut one by hand. I can also pre-cut patterns and have them prepped for orders. I also added the Cobra 14 splitter which has been a nice addition to my shop. I'll be picking up a Cobra strap cutter in a few weeks at the Boot and Saddle Makers Trade Show in Wichita Falls, TX. I'm semi-retired and had a long career (38+ years) in the financial services industry. Started making holsters 8 years ago and just love making them and doing leather work. I've about run out of machines to buy, but have a couple more in my my sights for the future. Best of luck for you! Quote Share this post Link to post Share on other sites
cjmt Report post Posted August 31, 2014 We are now offering 12 holster designs, with or without 4 common options, in 4 finish colors, left-hand and right-hand, for 145 different handguns. This results in about 70,000 possible variations. I have not counted the patterns that I now have in file, but I estimate about 10,000, and new patterns are still being created every week. I have two more new designs ready for the market, but haven't found the time to put up new webpages, photos, etc, and I know that each will result in the need for 20-plus hours of work to generate all the patterns necessary for production. We are completing about 2,000 orders per year for customers in all 50 US states and 33 other countries so far. So, at the current rate of production it would take about 35 years to make one of everything to have in-stock inventory, and then only if we sold nothing for 35 years. Everything produced is to fill an order that has been confirmed and paid for before leather is cut. All orders are taken via e-mail, providing a written record (I spend an average of about 4 hours throughout the course of each day reading and responding to e-mails, acknowledging orders, answering questions, updating the website, etc). I do not take telephone orders or inquiries. No walk-in customers. While in the shop we are working, and interuptions eat time that can never be replaced. Average price per item produced is about $78. Average cost per piece (materials, supplies, hardware, packaging, shipping) is about $12. My prices are not at the top of the market, nor at the bottom. Cowhide is all Hermann Oak, horsehide is all Horween's, and I don't think there is any better. We average one completed product for every 47 minutes spent in production work, so about 31 man-hours per week. Since I also spent 30-plus hours doing admin functions that means a typical work week of 60-plus hours. How are we doing this? 1. We work in batches of similar items, usually 10 to 15 pieces at a time at each stage. Each order proceeds in a plastic tray (restaurant type, just like they serve sandwiches and fries in). There are typically 3 production batches per week. Dyeing, burnishing, finishing, hardware, and packaging are done once per week. 2. Everything is cut by hand using heavy duty scissors. Average time per piece is about 7 minutes. (NOTE: with average production of 40 pieces per week this amounts to 4 hours 40 minutes spent in cutting. This is the maximum possible time savings possible with press and clicker dies). 3. Everything is assembled by hand, cemented and clamped. Average time per piece is about 5 minutes. (NOTE: as a practical matter we usually cut, assemble, cement, and clamp before proceeding to the next piece. This minimizes fatigue and allows plenty of time for cement to set up before proceeding to stitching). 4. Everything is stitched on a powered stitcher (Leather Machine Company Cobra Class 4). Average time per piece is about 5 minutes. Belts take more time, especially those with fancy stitch patterns, while pouches and other smaller items take very little time. Overall, a single production batch of a dozen or so pieces will be stitched up in an hour. 5. After stitching each piece has the edges dressed off using drum sanders mounted in a benchtop drill press. Depending on the contours we use sanding drums of 3/4", 2", and 3" diameter. Then the edges are beveled. Average time per piece is about 2 minutes. 6. Dye stations are set up for each color and all dyeing is done at this point using both brush and spray application. Average time per piece is about 3 minutes. All dyed pieces are allowed to sit overnight or longer prior to forming, allowing the dyes to set up. 7. We set up for forming holsters, bring the oven to temperature (120-130F) and the drying hot box (104-108F). Forming and boning are done sequentially, usually in 3 cycles of forming/boning with about 8 to 10 minutes at a time in the oven between, then into the drying hot box when ready. Average time per piece is about 10 minutes (actual labor, drying time not included, and everything will remain in the hot box for about 3 to 5 hours after each batch is done). 30 to 40 pieces take a day's work to complete, although I frequently do half one day and half the next. Once they are in the hot box I can do other production work while they finish drying, and they can stay in the hot box for many hours if I am doing other things. 8. First step in finishing is a modest application of neatsfoot oil, done with a brush and rags. Average time per piece is about 1 minute, 30 to 40 minutes for a week's production. 9. Edges are then burnished. We use a 50-50 mixture of beeswax and paraffin wax rubbed liberally on all edges, then burnish using a hard felt polishing wheel running on a benchmount drill press (1700RPM). Average time per piece is about 3 minutes, 1.5 to 2 hours for a week's production. 10. Acrylic sealant is applied using both swab and spray application. Average time per piece is about 1 minute, 30 to 40 minutes for a week's production. 11. Final finish is applied using both swab and spray application. Average time per piece is about 3 minutes, 1.5 to 2 hours for a week's production. 12. Hardware (snaps, buckles, etc) are installed using hand tools. Hardware tested for proper function. Average time per piece is about 2 minutes, 1 to 1.5 hours for a week's production. 13. Products are packaged for delivery. This includes a product identification card with instructions & warranty information, plastic bag, padded mailers with mailing labels. Average time per piece is about 5 minutes, 2.5 to 3 hours for a week's production. As can be seen the only power equipment we use is the stitcher and benchtop drill press. Changing over to clicker dies and press for cutting would cost me about $500,000 to $600,000, or about 3 to 4 times gross annual sales. Assuming that this would reduce my cutting time by half, the savings would be about 3.5 minutes per piece produced. At 2,000 products annually this would amount to 116 hours 40 minutes annual time savings in return for a half-million dollar investment. At a labor cost of $30 per hour it would take about 142 years to ammortize the investment, assuming there will never be a need for additional clicker dies, or for repair/replacement of the press. Please note that all of this applies only to my little operation. Another maker, perhaps producing 100 different products might get into press and clicker die cutting for much less investment, say $8,000 to $10,000. Adding another single product or variation would require only $60 or $80 for a new clicker die. In my opinion there is much to be gained by breaking the work down to stages and performing each stage with multiple pieces. This minimizes the time spent setting up equipment and workspaces for each project, and breaking down after each, again and again. Cement takes an hour to set up. Dyes take 12 to 24 hours to set up. Finishes take 12 to 24 hours to set up. Working in batches allows plenty of time for these processes to take place while we are being productive doing other things. I know that if we worked on only one order at a time, from start to finish, we would never get 40 per week out the door. There are other things that can be done to keep things moving along. About 20% of my business is belts, and I know that we will always need 10 to 20 straps (two-layer belts) of various lengths every week. So every time I receive a shipment of leather one of the first things I do is to lay out each side and cut 6 or 8 straps, diagonally from back to belly, in target lengths of 50" and 60". With natural variations in the hides this usually yields straps of 46" to 54" and from 56" to 64" or so, allowing belts to be put together quickly and with minimal waste. The resulting pieces are a little less than half-sides, which are much easier and handier to lay out for cutting holster and pouch patterns later. Once a side is laid out for cutting it takes only a few minutes more to cut 6 or 8 straps than it takes to cut 1 or 2 for a single belt. I usually order 8 to 10 sides at a time due to storage space limitations, and we use about 60 sides per year, so I will spend a couple of hours cutting belt straps once every 6 to 8 weeks rather than wrestling with a side to cut a strap or two every day. Hardware, thread, and other supplies are purchased in quantities to last 6 months to a year. This avoids time lost when we run out of something and have to wait for a delivery (ever notice that your supplier tends to backorder only when you REALLY NEED something?). I keep a running inventory of everything we use, and when anything gets down to a 2 or 3 months supply I know that it is time to reorder. Dyes and finishes are purchased by the gallons, much less expensive than smaller quantities. Snaps, T-nuts, screws, Chicago screws, etc, are purchased by the thousands. Belt buckles are purchased by the hundreds. Packaging and mailing supplies are purchased by the thousands (and cost MUCH less than going to an office supply store). We have 5 permanent work stations set up for cutting, assembly, stitching, edging, etc. These are used every day. We usually dye, seal, finish, install hardware, package and ship only once per week so those functions are done on temporary work stations that include the work benches and folding tables that can be out of the way the rest of the time. Finishing and hardware take up 3 to 4 hours one day, then everything sits overnight to cure out, and the following morning everything can be packaged and ready to deliver in a couple of hours or so. Keeping tools and equipment organized and ready to use at each stage of production saves untold amounts of time searching for this or that, trying to remember where it was last used, etc. My assistant and I each have a full set of all basic tools so we never have to borrow from each other or hunt around. Emptying trash cans before they are overflowing avoids interuptions of the work while trying to find someplace to throw the scrap from the bench. Over and above everything else that can be done, it is my opinion that nothing is more efficient than eliminating interuptions while we work. No TV in the shop (radio in the background is OK, I prefer Limbaugh or Hannity but Mindy likes country western).Telephone calls or people walking in with questions (or just to chit-chat) and other distractions will eat up more time than any kind of automation or machinery can make up for. Best regards. Very interesting post - excellent insight into your business Charlie Quote Share this post Link to post Share on other sites