Josh Ashman
-
Posts
1,183 -
Joined
-
Last visited
3 Followers
Recent Profile Visitors


Josh Ashman's Achievements
Leatherworker.net Regular (4/4)
-
A little something for a 1911.
Josh Ashman replied to MattW's topic in Gun Holsters, Rifle Slings and Knife Sheathes
Outstanding work! Thanks for sharing! -
Edge on holster opening
Josh Ashman replied to Davm's topic in Gun Holsters, Rifle Slings and Knife Sheathes
I used to layout the spacing for double border type stamps as you have described above. I stopped and just started "eyeballing" the spacing as it's tenuously quicker and actually works out better for going around curves. Start in the corners and go out in both directions and skip tot he end and work backwards for a while so you have space to put any odd spaces in the middle of a run where they are less noticeable. Also, plus 1 on stabbing your holes through the complete seam once it's all stitched up. It's just so much more simple to stab your holes through the whole thing than to try and fuss around getting holes that were pre stabbed/punched in different layers lined up. All the best, Josh -
Edge on holster opening
Josh Ashman replied to Davm's topic in Gun Holsters, Rifle Slings and Knife Sheathes
Totally understand now! I basically do your second option. Glue it then make the holes and stitch it. Granted, you're now going through what amounts to 24 oz. of leather or about 3/8" or more if you use a welt. The process I described in my first post is how I go about it and it works well for me. Good luck! -
Edge on holster opening
Josh Ashman replied to Davm's topic in Gun Holsters, Rifle Slings and Knife Sheathes
RAH! -
Edge on holster opening
Josh Ashman replied to Davm's topic in Gun Holsters, Rifle Slings and Knife Sheathes
I think I'm following what is being asked and the process but I have no idea why the edges being glued with Barge are coming apart. It sounds like you're making "western" type holsters where you have 1 piece of leather folded over on itself with a main seam. You are also using a liner so at your main seam you have 4 layers of leather. I'm going to assume that the total thickness of your leather(outer and liner) is 12 oz. or less before you fold it over to make the pouch of the holster. I do this a lot and use Barge to hold it all together without issue. My process sounds a lot like yours, any grain to grain side gluing gets the glued area roughened up. I apply the glue to both sides and let it sit for a few minutes. then I press the glued edges together. Here I get a lot simpler than what you are describing. Once the glued surfaces are pressed together by hand I tap them down on my tooling block with a smooth face hammer. I "tap" hard enough to make my wife mad if she's in the house but not so hard as to leave a noticeable impression on the finished surface. At this point pulling the seam apart tends to separate the leather rather than the glued seam. From there I sand, stitch gouge and sew. When I hand sew I use an awl to make the holes but instead of stabbing them horizontally when I have the item clamped in my stitching horse I stab them straight down with the item on one of those hard rubber pads over the top of a cutting board. Going straight down helps me to keep the back looking tidy and uniform. When hand sewing I have to wear light leather gloves with the just the tips of the fingers cut off. Otherwise I cut my pinky fingers to ribbons as I pull the thread tight until my hand slips on it, which makes the cuts. I saddle stich with 2 needles, right needle goes through to the left, then left to the right, then with the needles between thumbs and index fingers my hands go around the thread and I pull the stitch tight until the thread slips where it runs through the bottom of my hands, AKA the pinky finger cutting operation. If machine stitching I'll just go to the machine after gouging. No clamps, boards or 24 dry times unless it just happens that I leave something that long between gluing and sewing. And, I've never had a problem with a glued and sewn seam coming apart after the fact. Maybe try more glue? -
Cheyenne type gun rig
Josh Ashman replied to WyattEarp's topic in Gun Holsters, Rifle Slings and Knife Sheathes
Excellent work Jesse! Thanks for sharing! -
Colt Commander OWB
Josh Ashman replied to OldNSlowMarine's topic in Gun Holsters, Rifle Slings and Knife Sheathes
Very nice, thanks for sharing! Rah! -
Thanks Jesse & Red Bear! Have a great day everybody! All the best, Josh
-
Thanks Viking, that's kind of you to say! I'm a fan of the Buffalo Brothers grips, hopefully the ones for your Ruger will be great! Thanks AZ shooter! Lots of years ago I worked on a road job on Hwy 60 near Grand Ave. I think that's right around your stomping grounds! Thanks Noob! I appreciate the kind words Chris! And, I'm happy the ride along was worth the time! All the best folks, Josh
-
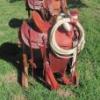
shooter saddlebag
Josh Ashman replied to WyattEarp's topic in Gun Holsters, Rifle Slings and Knife Sheathes
That's a great job building Will Ghormley's pattern and outstanding update to the tooling design! Great work Jesse! I built this same pattern a while back and just used the tooling patterns supplied. Your design is much nicer! All the best, Josh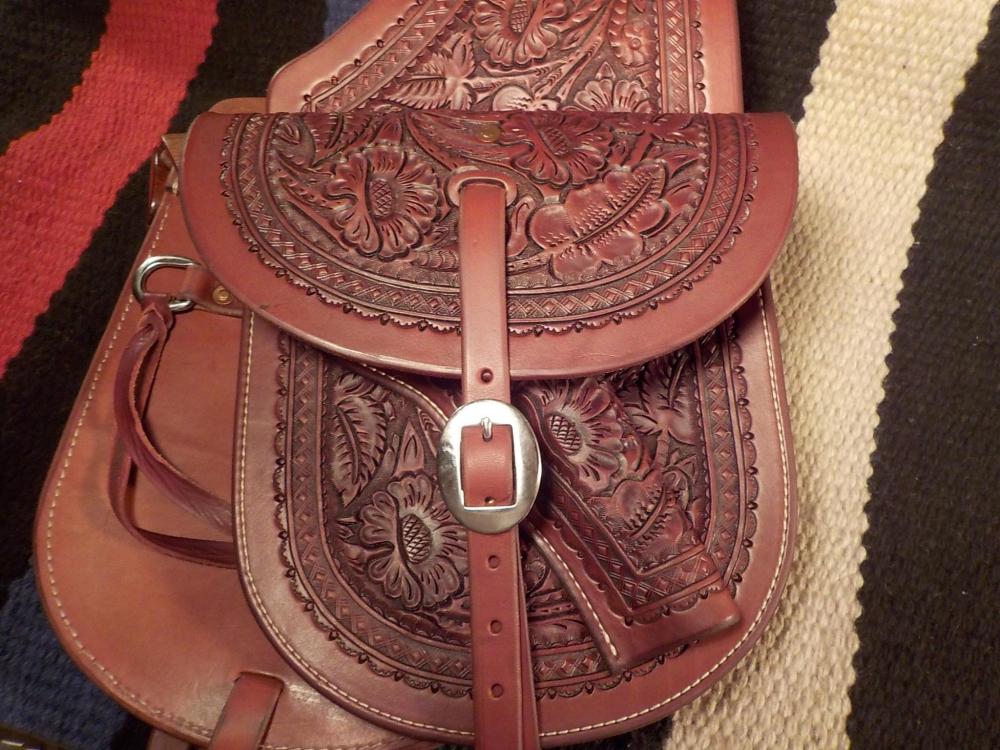
-
Good luck on your stamping Gary! Thanks JWheeler! You're welcome Tom! Have a great day everybody!
-
Mexican loop question
Josh Ashman replied to dikman's topic in Gun Holsters, Rifle Slings and Knife Sheathes
Hey Steve, man it's been a while since I saw those pictures! The rig on the top went to my dad so I occasionally see it, it's almost black with time and wear now ! I don't know what they actually call that style of lacing, but it's what Stohlman shows in his "holster making" book as close as I can copy it. He goes over awl stabbing technique, lace prep, the whole deal. I think the only thing I did that I'm not sure if he mentions is once I have the lace all done I wet it down with a sponge then smack it with a smooth face hammer on my tooling block to get it all evened out. I also use oil tan chap leather to cut the lace, or at least that's what I did on that rig. Sometimes I'll use latigo if I have it and it's about the right weight. All the best, Josh -
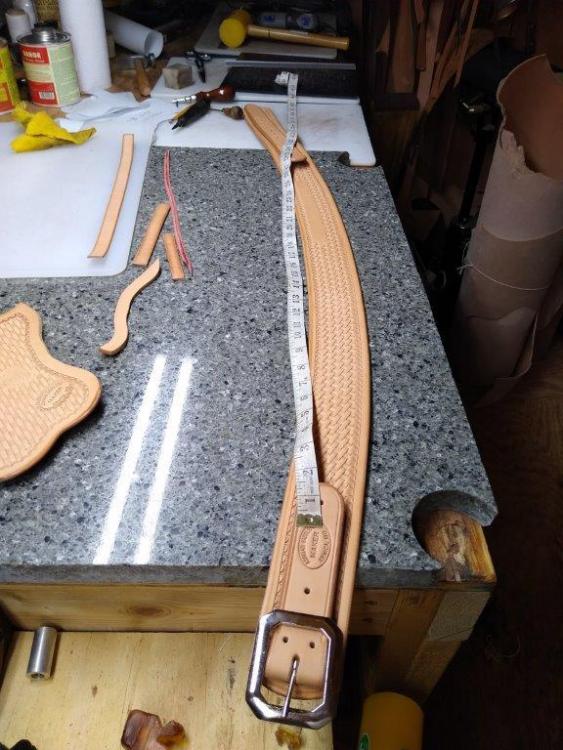
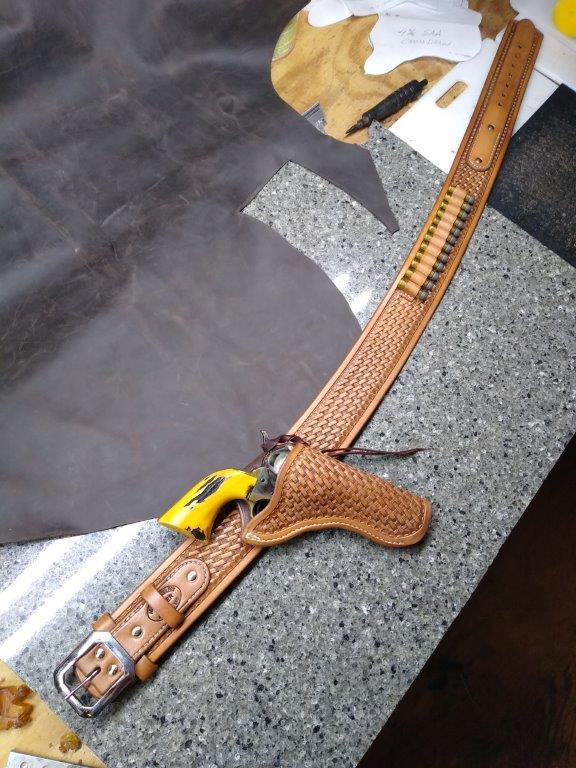
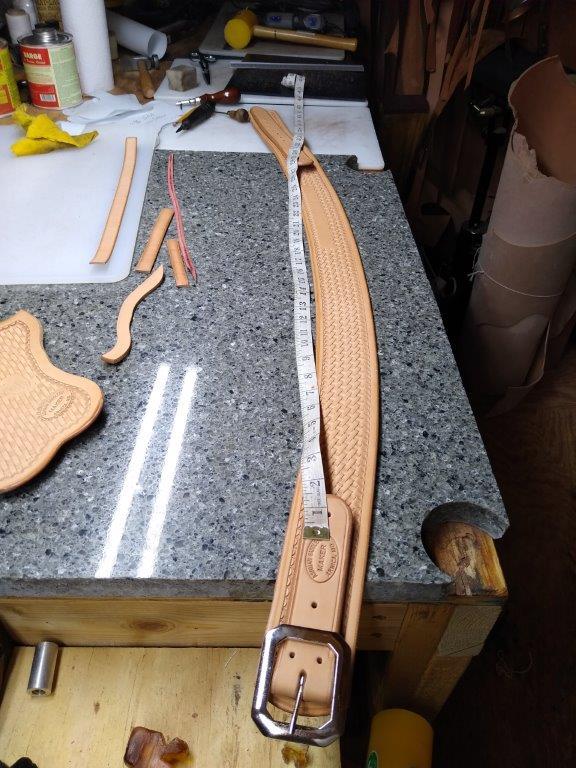
Good morning folks! I appreciate the kind words about this rig! Gary, 2 hours is about right for the time spent basket stamping that belt. I don't keep very close track of my time but I do work about 2 hours at my leather bench a morning before I head out to do other things. As I recall I stamped the holster body and did the1st row down the belt one morning then finished the belt the next day. A good quality stamp is really nice. I have several basket stamps and ALWAYS use the same one, the others never get used as I don't think they're as nice. The one I use is a Craftool from Tandy, but i was purchased in the 80's and I think they were a little better made then. I like this one because the size is perfect for what I find appealing, it has the vertical center lines and if I do my part right it leaves a crisp clear impression. I've done more than a little basket stamping and much of it has been bad The more you do it the better you get, at least that's my experience. I will say that a belt is almost easier to me than something that is wider where it's easier to get your lines off. The BEST tip I have is to give yourself a layout line that runs straight down the center of what you're stamping (or offset from center to make your spacing work, but straight is the key). Then you'll use that to make your first run of stamps which will all be diagonal on your layout line. Go all the way down through then start at the same end you started before and do the next run, Once you have half down flip it around and do the other half. This way your "weave" is square with your project and doesn't continually run off. Hopefully this is helpful! Dikman, I really like those grips as well! I picked them up from "Buffalo Brothers", you can find them online by searching Buffalo Brothers Cowboy Store. They're based out of Arizona and as it happens my dad knows the owners of the company. For whatever it's worth he says they're nice people . Regardless of that they have cool SAA and 1911 grips in a mind blowing number of options for reasonable prices. Tom, yes I did put a welt in that holster. I always do for this type of holster. they probably don't need it, I just like the way they look with a welt better. The welt on this one was also cut from 10/11 but sometimes I'll use a thicker welt cut from left over skirting if I have some handy. I do try to use stiff leather from high up on the hide for welts. There's probably no "real" reason for this, just what I do. As for measuring belt length, I do both . The initial length is determined by measuring it straight down the center on a straight cut blank. I figure from the tip of where the buckle will be to the 3rd hole of the 7 hole billet end and try to have the billet overhang the main belt blank about 1/2" or so. I've played around with that and had it overhang more or have the billet set farter back and it really just comes down to what you think looks good as long as you don't go to short or long to where it wont' actually work right. Then when I lay out the main belt I just lightly mark where the rivets will hold the billet in place with an awl. This is again measured straight down the center on the straight cut blank. Then I'll do any tooling/stamping if it gets it and then form the belt into a curve. At this point I'll re measure to find the billet rivet holes and I measure down the center of the blank and around the curve. I use a cloth sewing tape and just do little segments to get it close. I mark the holes again and punch them based on this final measurement. A few interesting things to note, the final marks are almost always dang close to the initial marks, like less than 1/4" apart. A basket stamped belt "grows" a lot due to the stamping, same for anything that gets a lot of stamping like the "San Carlos" double border I often do. but, if you let them dry completely they usually shrink back down substantially. The "growing" and "shrinking" from tooling can be a lot, less than 1" but more than 1/2". Because of this I try to make sure I do my layout on leather that's dried so the shrink is out of it. that said, realistically I don't think that even 1" one way or the other makes that much difference but still, you try to get something "just right" then it doesn't work out and it's irritating Thanks again and have a great day everybody!
-
Thanks Jeff, Dwight and Wolftever!
-
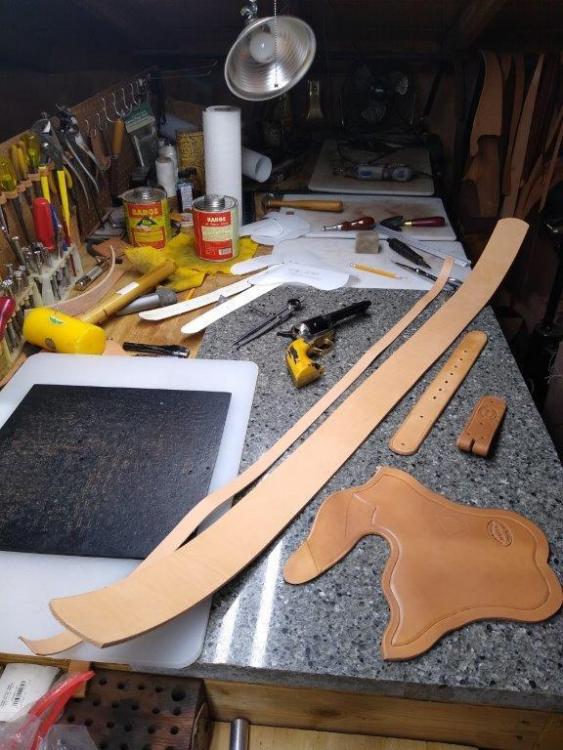
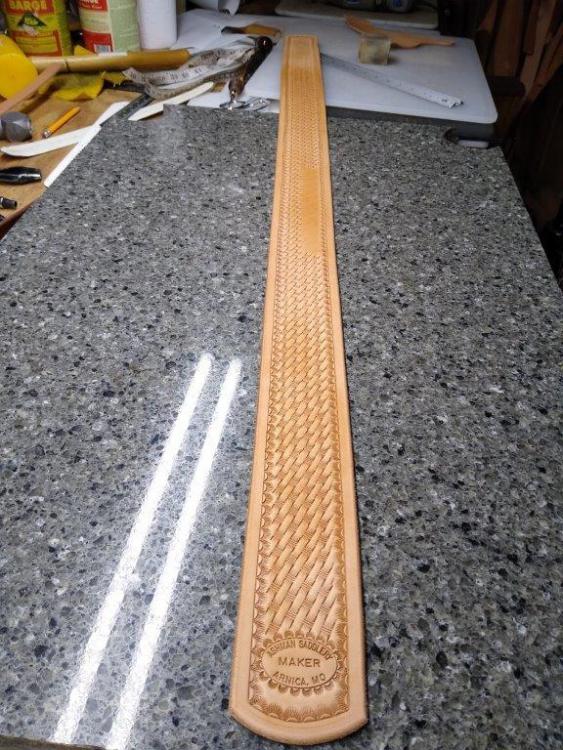
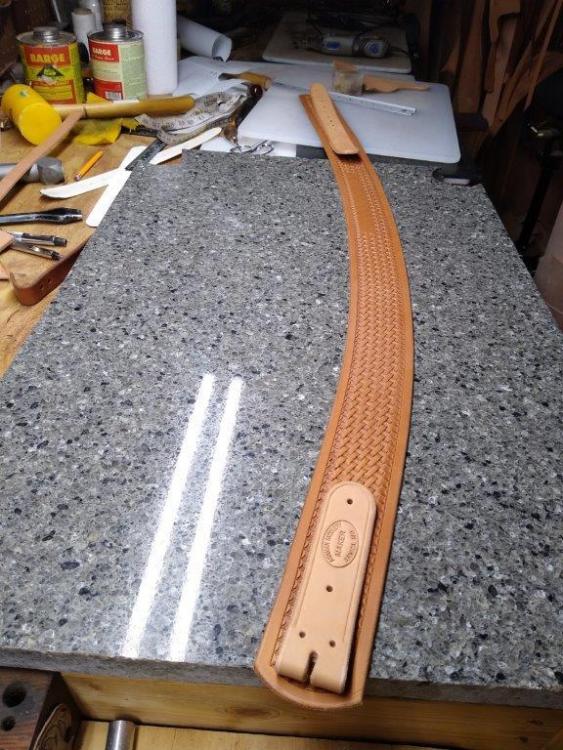
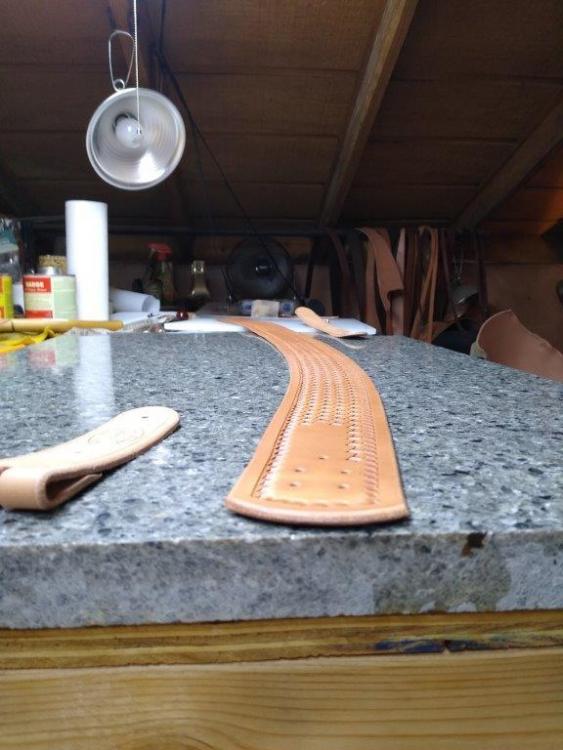
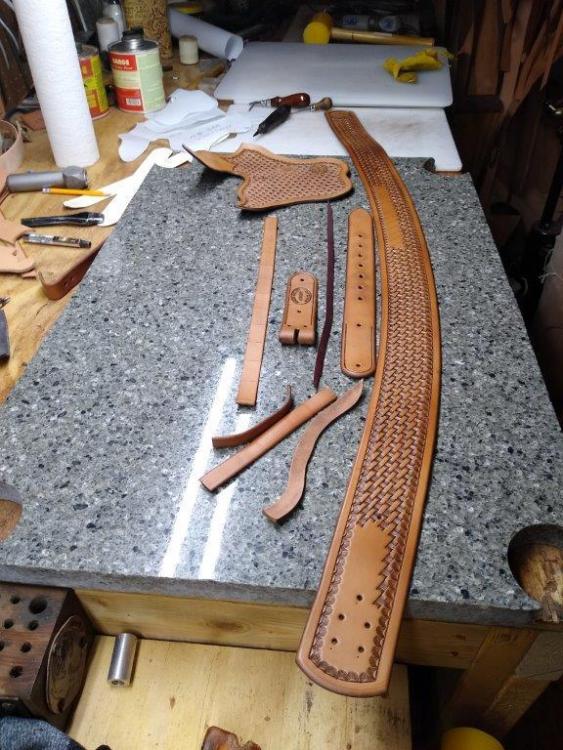
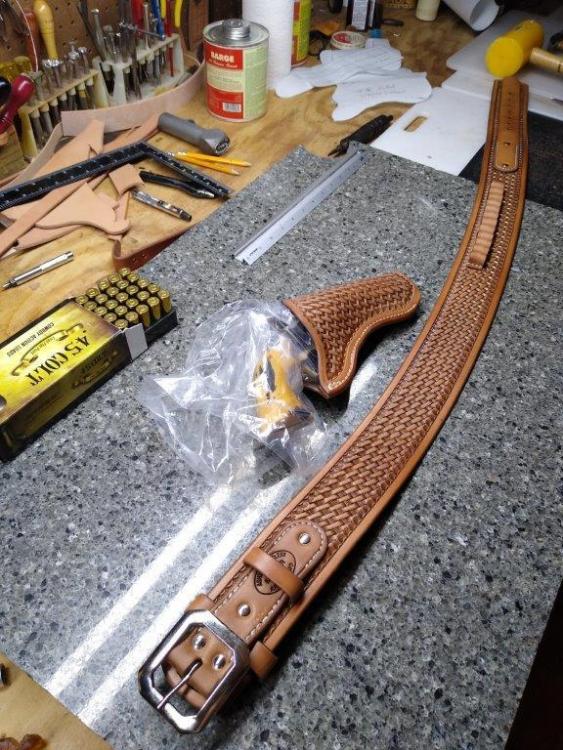
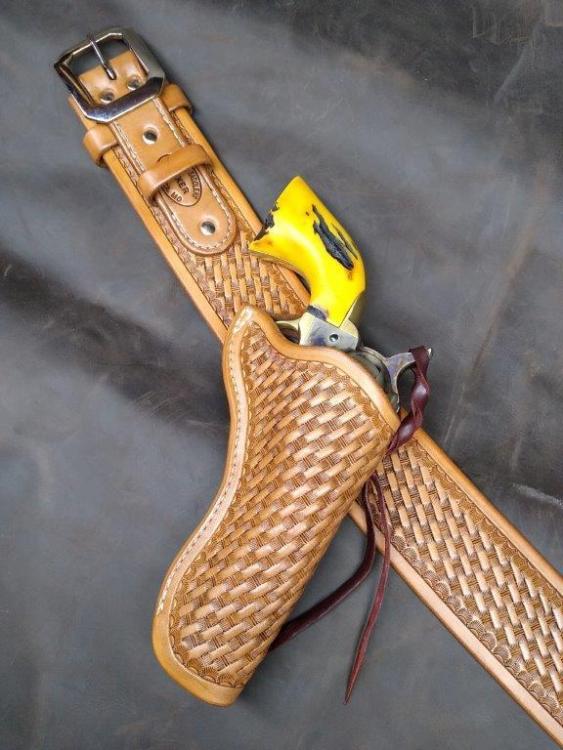
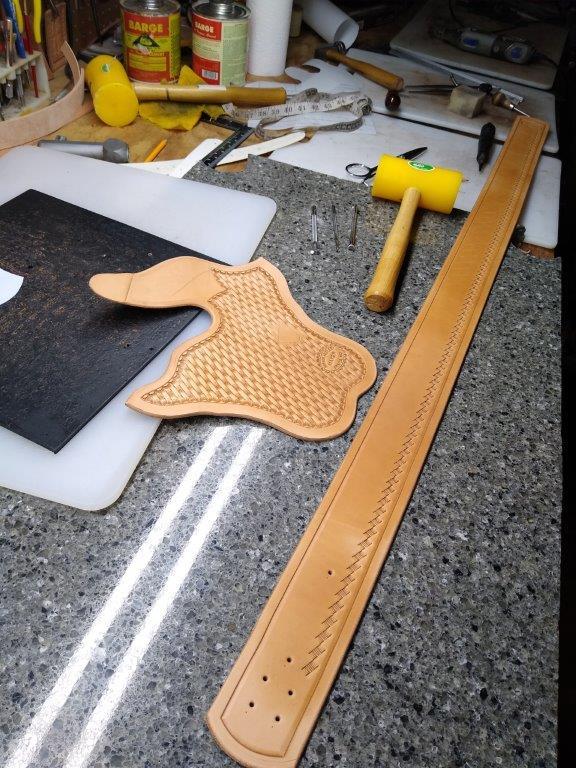
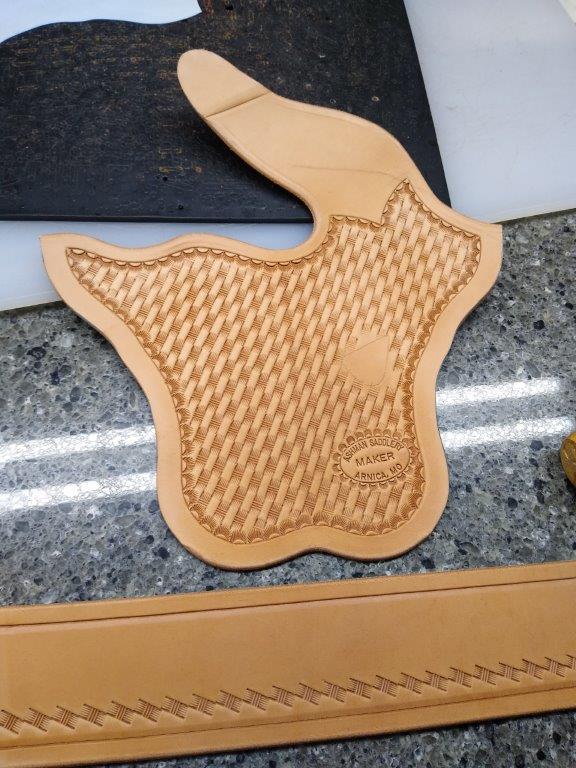
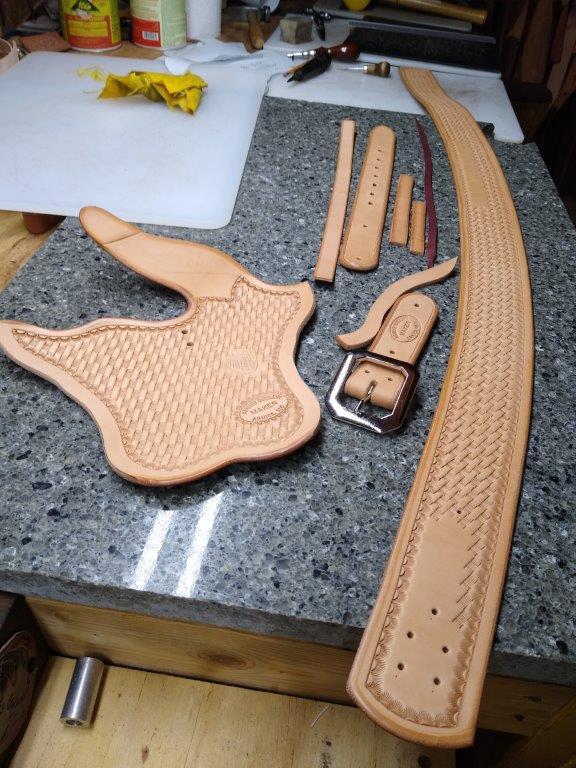
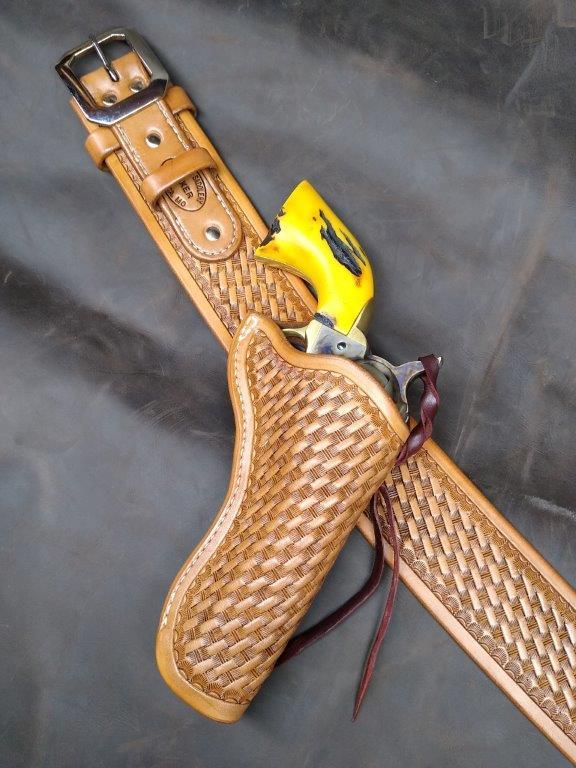
Hey folks, I just finished this simple basket weave cross draw "western" rig. There have been a few conversations lately about cartridge belt curve and bullet loops and since this has both I figured I'd share how I address them. The holster, main belt and belt ends are all built from 10/11 HO. The belt keepers are 8 oz HO. The bullet loops are 4/5 HO and the tie down is 4/5 latigo. Finish is Fiebings Hi Liter over a heavy coat of NF oil with a top coat of 50/50 mop & glo/water. I'll start by saying there are any number of ways to do something. My way is what works for me. I change it up from time to time for any number of reasons, boredom with my old way often being a main driver. I'm generally happy with my processes and results but my work is often flawed and I know for a fact there are different and better ways to do any particular thing. I'm just sharing for fun. If your way is better for you, that's awesome. With that out of the way here's some pictures and commentary; 1) Main parts all cut and holster cased for stamping. 2) Holster basket stamp done and belt started. 3) Belt basket weave complete. The straight cut belt is nice for a lot of reasons in my opinion. Good for ease of cutting and having less waste and certainly much more fun to put a basket stamp on. 4) Formed curve into main belt piece to better contour whoever wears it. Simple enough to do with the leather cased and a little pushing. 5) Here the belt is dry and you can see how much curve it has. FYI, the belt width is 2-1/2" overall so the curve "dip" at center is about 1-1/2". 6) Pieces and parts before and after oil and dye. I let the oil sit for a day or so then apply the Hi Liter. I put it on with a scrap of shearling then wipe it off with a damp paper towel. 7) Assembly done. I don't "form" this type of holster like I would a carry holster but I do dunk them then put the pistol in place for a while. I'll turn it this way and that a little and roll out the mouth of the holster to make sure it's about as "tight" as I want it to be. I'll also stick rounds in the cartridge loops to ensure they'll good to go. I mostly do stitched loops these days but for years I used to do "laced" loops in and out through the same slot. And for a good long time before that I did "laced" loops though a slot on each side of the cartridge. Each way has pro's and con's, or maybe better said, things I personally like and things I personally don't like. I don't think any way is "right" or any way is "wrong". 8) Finished! This has been dipped in my top coat and given a little saddle soap wipe down. I'm sure I've forgotten to mention stuff, but hopefully the pictures help fill in the blanks. Anyway, thanks for looking and hopefully this is helpful to somebody All the best, Josh