DaveJohnson
-
Posts
62 -
Joined
-
Last visited
Content Type
Profiles
Forums
Events
Blogs
Gallery
Store
Everything posted by DaveJohnson
-

How Do I Get Started Making Bags?
DaveJohnson replied to particle's topic in Satchels, Luggage and Briefcases
Best Way ----- Buy one of Mr Santoro's bags and take it apart for the pattern and construction Sorry but that's what just shot through my mind -
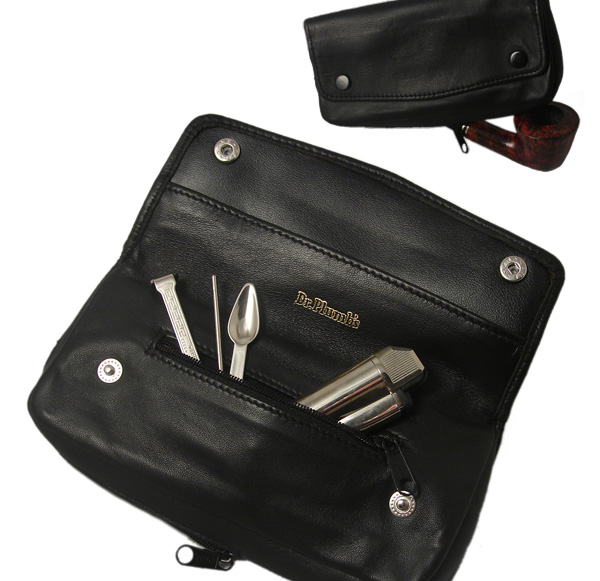
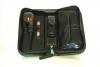
Hi Tal Never made any myself but have come across these pictures for ideas - hope they of some use. Dave
-
My Step By Step Failure. Can You Help Please?
DaveJohnson replied to NewYorkerInSydney's topic in How Do I Do That?
Hi Sydney Girl It's always good to include a photo of the project for us to see - often the visual triggers something that we have seen (in our own work). Dying and finishing leather projects is an art / science in itself and I think I speak for all leatherworkers when I say we have all had Issues in this area at some time or the other. One Golden Rule : when using a new source of leather, dye, finish etc.. ALWAYS try it out on a scrap or sample before applying to a finished project that has hours of work in it already !! Regarding the stiffness of the leather after dying and drying, this is not uncommon and should soften and take on the "leather look and feel" with use - that's one of the beauties of leather, it looks better the more it is used. Regarding the splotchy look, this could be due to a few things : 1. The leather may have been exposed to water, other liquids etc before and dried - this changes the absorbancy to dyes and finishes in those patches when they are applied later and could give a splotchy / patchy look - what is often best is to wet the entire surface of the project with water before working on it - this can serve two purposes - wet the whole surface and therefore should make it equally absorbant when dyed and finished and if there are any "bad areas" these will be highlighted now and you can try work around them (or include them in your design - brands and other markings look quite cool if incorporated correctly). 2. The method of applying dyes and finishes can also create a splotchy look if not done correctly - leather should be slightly damp when applying dyes (your spray method is a great way to apply dyes - just watch for being too heavy and getting runs or puddles). When applying the finish, like footoil, again this must be applied using a very light coat with a good sheepskin applicator and extreme caution taken to avoid streaking with light and heavy coated areas. Unfortunately footoil does darken the leather significantly (try on sample before project) - normally you need to dye the project severals shades lighter than you think you want it to be finally and then apply the finish to get the final shade - trial and error on scraps. You could try a bee's wax based finish, which does not darken it as much. Good Luck Dave -
Hi AmandaM It would depend on the design and complexity of the wet form mould, but remember that wet forming a carved piece will result in a loss of much of the definition as it is stretched over the mold - it is also difficult to get a straight edge or confine the carving to the desired area on the form when stretching it. The ALS Book on Cases Vol 3 showns the procdure by which the leather is formed over a wooden blank and then carved using the blank as support - the harder the wood the better support. Good Luck Dave
-
Hi Kanga Round the corner from where we stay in France, there is a artisanal factory which still produces whips and quirts etc using Nettle Tree Wood (Micocoulier) - they split the logs, remove the bark and carve the three "prongs" into a conical shape before steaming them and twisting them - the twist is then allowed to dry and then the leather braing etc is added. Not sure how good your French is, but here is the website and some pictures = http://pagesperso-orange.fr/catlesmicocouliers/ Good Luck Dave
-
Hi Blade This is what it looks like and according the ALS, you fold the leather over and then sew together using a "hidden" stiching groove, which is a slit in the leather as apposed to the normal gouged stiching groove. If necessary, you can fill the hollow with a filler (leather or cord) before sewing. Then wet and pull through the rounder - using smaller and smaller hole until you get a round final product - dry, dye and finish - sounds simple - let us know how it goes - post a tutorial !!
-
Hey Bru It's great quality workmanship - well done !! How do you get all the materials in Iraq - take it all out there with you ?? Guess nothing is weird when it comes to us South Africans - we pop up all over the show Cheers Dave (SA guy in the South of France)
-
Cool Helmet - but after watching the videos, I'd put a lot more padding into it !!! Cheers Dave
-
 Hi There The tooling is looking great - look forward to seeinf the finished product. Did you ever post the finished Spiderman Case ?? Cheers Dave
 -
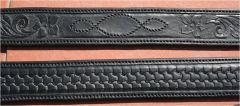
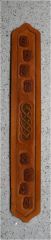
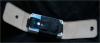
From the album: Black Veg Tan Belts
The leather carves and stamps like normal veg tan -- NO MESSY DYING -- BIG BONUS !!!© © leatherworker.net
-
Black Veg Tan Belts
Images added to a gallery album owned by DaveJohnson in Our Leatherwork Galleries
First time I tried pre-dyed black veg tan - LOVE IT !! No messing dying after !!!!!!!!! -
-

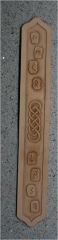
From the album: Black Veg Tan Belts
This was the first time I have tried using pre-dyed black veg tan leather - it worked just like normal veg tan -- one slight hitch, is you need Excellent lighting while you work else things get lost in the shadows.© © leatherworker.net
-
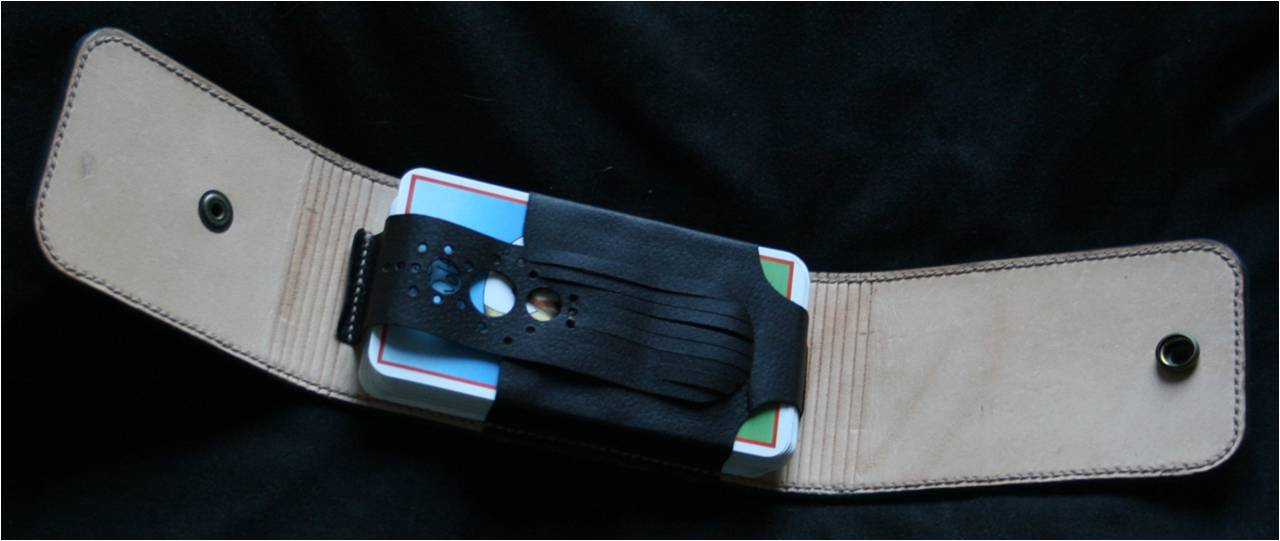
My old rune bag fell apart and so I needed to make a new home for them.
-
-
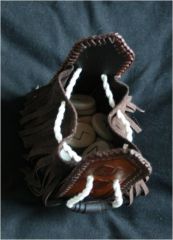
From the album: Runes Bag
© © leatherworker.net
-
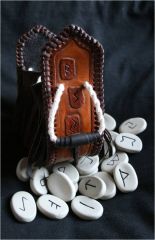
From the album: Runes Bag
© © leatherworker.net
-
From the album: Runes Bag
© © leatherworker.net
-
-
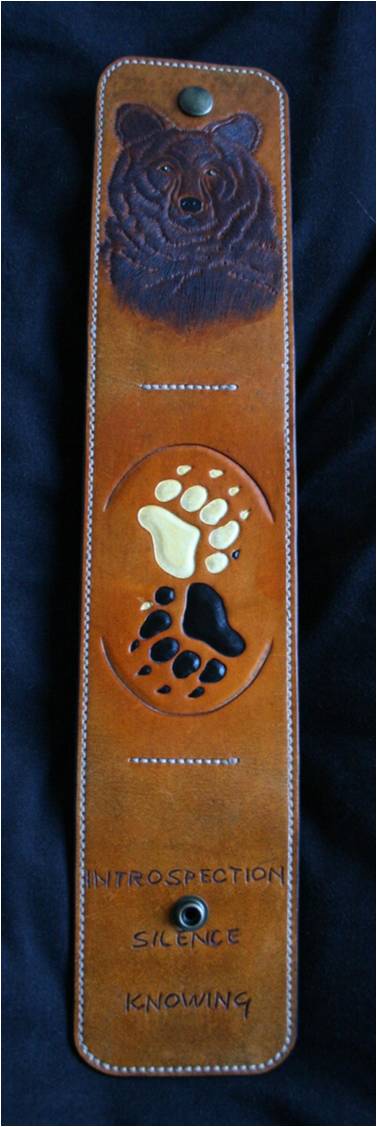
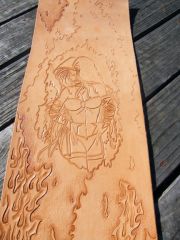
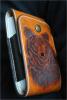
Well I managed to get it finished today and am pleased - notebook has a few comments on things I would do different next time and possible improvements. Clay I nearly plucked up the courage to try highlights with a lighter colour, but decided to let well enough alone at this stage - but I found a tutorial by Silva Fox on dying a Labrador, which looks just right for the next time the bear crops up !! Here is the finished pouch : Cheers Dave
-
Cool sheath Crowdog - like the braided patch. Have you lined that area to stop the knife catching it ? What knife sleeps there ? Cheers Dave
-
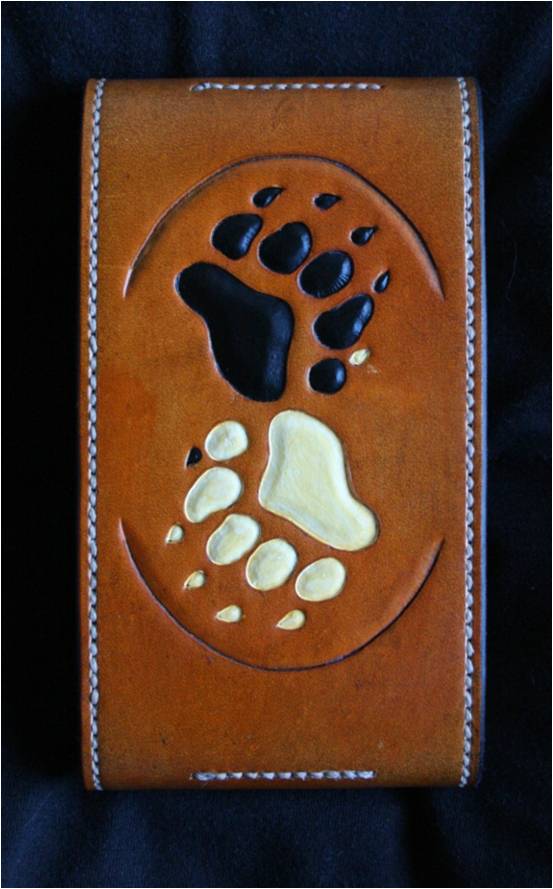
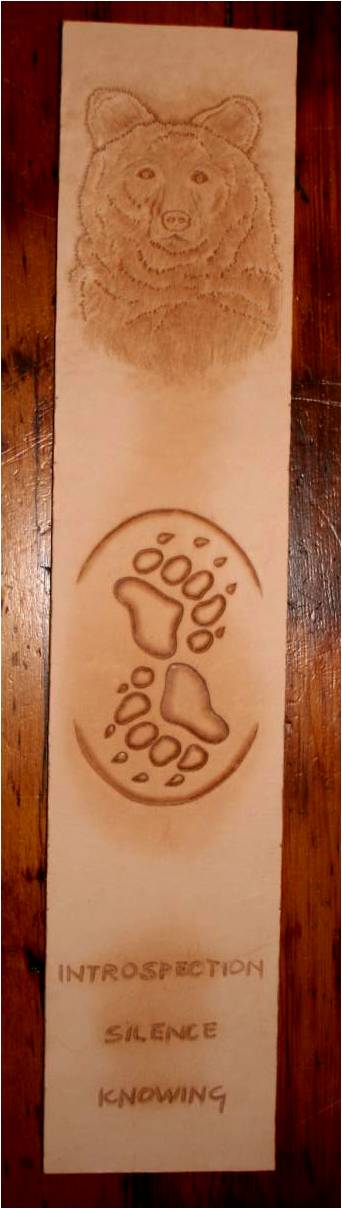
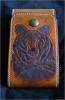
Thanks Joet - coloring is something most of us battle with and probably 20% is mental and 80% is being in to much of a hurry - I remember from when I was doing leatherwork before, that its allways good to have a few projects going, so that you can leave things to dry properly, while you carry on with something else - otherwise the temptation is too great to carry on when the piece isn't ready yet. I used Ecoflo Dye for the the bear - Timber Brown diluted 1: 3 as base color and then middlelights with full strength. Then highlights with Bison Brown and eyes with Dark Coco Brown with a spot of white Cova Acrylic. The prints are done with black and white cova - I put a coat of Eco-Flo Blockout on the white (think it should have been 2 coats and left to dry longer, as the final antique coat colored it yellowish) Finally I went over the rest with an Eco Flo Gel Antique - Tan - That's were I messed up the bear - thought I would go over him too and that made him another shade darker - oh well "education" doesn't come cheap !! Cheers Dave
-
Thanks for all the encouragment guys - JLS your story did give a cold shiver and I was watching the dye bottles closley for one that decided to jump up a spill over Clay coloring more terrifies than intimidates me -- anyway went ahead and these are the results - the bear came out a little too dark and the eyes need some work - but ingeneral I'm happy (for now). Harvey - Medicine Cards are a set of Totem Cards based on animals totems, which are used for "readings" which are used to focus your thoughts on your goals http://www.medicinecards.com/ They came in a cardboard box, which is now falling apart, so hence the case / pouch. Once again - thanks guys Next-up the construction - hope to finsh this tomorrow. Cheers Dave


-
Hello everyone - I jioned a few weeks back and have been looking at the work being posted - WOW - there is such a range of experience and talent here and as for pushing the envelop - hey I think the envelop was left behind long way back - there are just some awesome works here. I'm just glad to be doing some work again after so many heres and here is a piece I finished carving today (although the Bears snout needs a tweek - Clay's Bear' s very small brother ) But now comes the time to color it - hmm - not my strong point BUT I have the books and will press on bravely - off course I have a test piece - but still ....... The piece will eventually be a cover / pouch for a set of Medicine Cards. Wish me luck Dave